
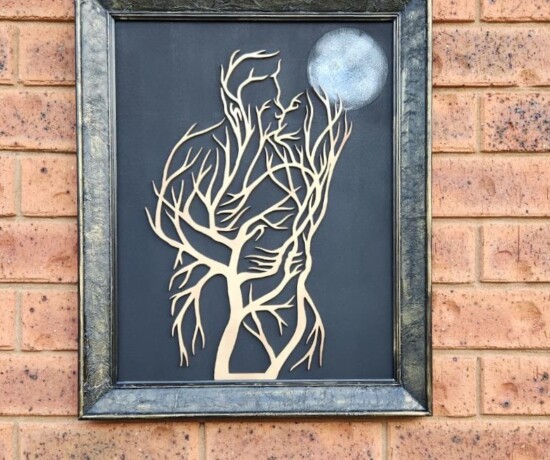
I have had some wood slices sitting behind my shed for years now waiting for the perfect project to come along, and it finally did. I wanted to try and create an African bush themed wooden suncatcher. The idea was to have the background look like an African sunset, with a silhouette of the African bush. Depending on the light, the colours in the wooden suncatcher will look different from every angle.
")
Even though I live in Australia, I was actually born in South African. There is an old saying, you can take the girl out of the bush, but not the bush out of the girl. I have so many fond memories of visiting all the local game parks and driving around for hours looking at all the amazing animals. So those amazing experiences were the inspiration for this project.

It is also that time again for our next International Blogger Club (IBC) challenge. This month the theme is “Resin”. We have to create a project using resin in any way, shape or form. More about IBC at the end of this post.
How to make a wooden slice suncatcher
*This post may contain affiliate links. Which means I earn a small commission on links used at no extra cost to you. Please see my disclosure policy for more information.**
Prepare the surface
A few years back I made another wooden suncatcher which was the inspiration for this project. But instead of having lots of small circles of coloured resin, I would have one large one. If your slice is coming away from the sides like mine you can remove the loose areas with a hammer and chisel. (I do use some power tools in this project but they are not needed, it is just easier and quicker. You can do it all with a sander.)

While making the last suncatcher I came across a few issues which I was prepared for on this project. The first one was to prepare the surface correctly. Your surface needs to be smooth so the resin does not seep out into the grooves and run out. I used an electric planer 

Next, I used a grinder 


Tape up the hole
Two issues I had on the last project, was that the tape left a sticky residue on the resin. And that regular duct tape did not work for me, the resin leaked straight through. To prevent the tape residue staying behind on the resin, I added a layer a thin plastic film. It was an offcut of window film I had leftover from a jewellery box I created. I taped the film in place I did add some hot glue on the inside. But in hindsight, the hot glue was a waste of time and cause another issue later down the line.

With the last project, I tried a few different types of tape and this foil tape

Adding the coloured resin
All resins are different so you should mix your resin 

I used some cheap resin pigments I bought from China years ago and to be honest they were crap. The colours had gone off and were no longer the correct colours. I would highly recommend good quality resin pigments.

Pouring the resin
The idea I had in my head was to try and recreate an African sunset with all the beautiful colours running across the sky. I poured the coloured resin horizontally across the surface, alternating the colours. I used a stir stick to slightly blend some of the colours. After a few minutes, you will see some bubbles on the surface. To remove these you need some sort of flame. I use a creme Brule torch 

Unfortunately, I still had some leakage because my surface was not perfectly flat so the weight of the resin did let some ooze out. So it is a good idea to make sure your wood slice is level. But I had no sticky residue so that was a win.

In hindsight I would not have added the hot glue, I believe this was a contributor to the leakage. And a note to self, do not use black hot glue as it is too hard to disguise with the resin.
Creating the design
All the images you see on the wooden suncatcher are vinyl decals that I made using my Cricut vinyl cutter.


The software is so easy to use, you can move and resize the images in seconds. Keep moving the images around until you are happy with the design. Once you are happy with the design you push the select all button then group the design as one image. Because there are a few images in the design you have to push the weld button to create one solid image. If you don’t weld the machine will cut each image as an individual image.

You can add the images 2 ways. The first way is to add the images directly onto the top of the resin. If you use a permanent vinyl such as Oracle 651

At this stage, it is a good idea to see if the design fits correctly. Mine was too big and the tree blocked out the sun so the monkeys and the birds had to go. I cut a circle in yellow vinyl and stuck it on the backside of the log. This will be my “sun” which will show up great from the front with all the resin colours in front of it. I added a thin coat of clear resin to seal the vinyl inside. I forgot to take a photo here, but there is one further down showing you the back.

Sanding the surface
I had to remove the black hot glue because it spoilt the look. If it was a nice clean circle it would have looked great, but mine was a mess.

Next, I used an orbital sander and 120 grit sandpaper

Adding the vinyl decals
This was my first attempt at adding the decal, but the tree blocked out too much of the sun which spoilt the effect. I had to cut a second decal which I moved up higher. Using the transfer tape to transfer the design. It is as simple as rubbing the transfer tape with a scrapper and removing the transfer tape.

This is how the design looked before I added the resin.

It is now time to add the resin to seal the decal. It is a good idea to make sure your surface is level to prevent the resin from running off.

Adding the resin seal coat
Here was my next mistake, but this happens when you make your projects up as you go. I poured a coat of resin to seal in the decal but straight away the resin started to bubble as it filled up all the tiny holes in the wood.

If I was to do this project again I would seal the wood surface first with 2 coats of clear polyurethane. This will fill in many of the tiny holes and prevent bubbles in the resin coat. I did use the flame to remove the bubbles but they kept forming long after I was able to use the flame. After a while, you can no longer use the flame or you will cause the resin the burn or move which will spoil the surface. I did have to lightly sand the surface after 24 hours and apply another thin coat of resin using a foam sponge.

Once the front was dry, I added I thin coat of resin to the back. This coat is not poured on or the resin will flow through the cracks to the front, ruining the surface.
Taking the photos for this project was a nightmare, it was like I was photographing a mirror. When I was able to get a good picture it was always ruined by the reflection of the grass on the resin surface.


Alternatively, you can add some LED lights to the back and it can be used as a lamp.

This is the view from the back of the suncatcher, so you can only use it the one way.

More about IBC
If you follow my blog you will know I am part of IBC (International Bloggers Club) which is a group of talented bloggers from around the world. We have members from Spain, South Africa, Australia, the United States, and Canada. Each month we come together and create a project in a common theme.
If you missed last month’s “Christmas ” theme here is the link to my Unique Steampunk Christmas tree The contributions from my fellow bloggers for this months challenge are listed below, please feel free to jump over and give them some love.
Projects
- A Crafty Mix|Spring heart wreath
- Interior Frugalista|Resin Coasters DIY for beginners
- Raggedy bits |Thrifted wooden valentines paint pour heart
- Meegan Makes|How to make simple resin tags


If you are looking for any of the items used in this project, please consider using our links. By clicking on the links we will earn a small commission at no extra cost to you. Which helps us come up with new and exciting ideas to share with you. Please feel free to share or leave a comment we would love to hear your thoughts.


51 Comments
Deana Landers
January 19, 2021 at 1:43 amAnita, this is beautiful! It is definitely a work of art. You are so creative and talented. My dad worked with wood and I love it.
Anita Holland
January 19, 2021 at 9:04 amThank you so much for the special comment I really do appreciate it.
Michelle Leslie
January 19, 2021 at 2:00 amOh gosh Anita, I don’t think I’ll ever have the right words to tell you how much I love what you did. It’s so incredibly beautiful and makes me wish that we could jump in the car right now and go and see some sunsets in one of our game parks. Great tutorial too. You explain things so well. I can’t wait to try to make something similar for my Dad. He will love it.
Anita Holland
January 19, 2021 at 9:53 amThank you so much Michelle. We have so many great memories of going to the Kruger Park and going on private game drives in the Sabi Sands. I really do miss it. If you do decide to make one and need a scene let me know and I will create one for you and post it.
Meegan
January 19, 2021 at 2:14 amWhen I visit your blog, I am continually inspired with your imagination. I think this time you have completely outdone yourself. This is absolutely incredible, Anita. The sunset and silhouette are absolutely stunning, my friend. Beautiful work and a wonderful tutorial.
Anita Holland
January 19, 2021 at 9:55 amThank you Meegan that is really a great compliment. I do have some strange ideas and I had no idea if this one would work but it turned out great in the end. I am just not sure if I want to leave it outside in the elements. lol
CraftAtticResources
January 19, 2021 at 3:04 amThis is art. What an amazing piece. We need more beauty in the world and you just added to it.
Anita Holland
January 19, 2021 at 9:56 amAWW thank you that is really an amazing comment that has made my day.
Marie B.
January 19, 2021 at 4:05 amWow Anita, this is incredible and such an amazing work of art! You ALWAYS create such unique and interesting projects for our challenges each month but this has to be my favorite. Girl, you rocked this challenge once again!
Anita Holland
January 19, 2021 at 10:00 amThank you Marie, It does help that I have all the tools to make it easy to make, not sure I would have tackled it if I had to do it by hand. I had to laugh or cry as it nearly was. When I took the photos and saw the mess in the black, I thought it was a flaw in my resin and sanded it off and did it again. I was not amused when it happened again and my husband said it was just the reflection of the grass. lol
Maria
January 19, 2021 at 7:28 amThis is gorgeous! What a great imagination you have!
Anita Holland
January 19, 2021 at 10:01 amThank you so much Maria, I find it such a challenge to try and create something that has not been done before. It makes my hobby so much more fun.
Nancy Sargent
January 19, 2021 at 9:52 amThis is amazing! You are so creative and talented. I would have never thought to make a suncatcher from a slice of wood!
Anita Holland
January 23, 2021 at 4:57 pmThank you so much Nancy, it was just something I tried and it worked lol
Kim Purvis
January 20, 2021 at 6:17 amWhat an amazing project! You are so talented. Such a unique piece.
Kim
Anita Holland
January 23, 2021 at 4:49 pmThank you Kim, it was one of my ideas that I have wanted to try for a while.
Libbie@alifeunfolding
January 20, 2021 at 3:15 pmYour projects blow me away! Love this one. xx
Anita Holland
January 23, 2021 at 4:50 pmThank you Libbie that is such a great compliment.
Katrina | ChatterFox
January 20, 2021 at 7:14 pmWow! This is absolutely incredible, you are so talented!
Katrina x
#AnythingGoes
Anita Holland
January 23, 2021 at 4:50 pmThank you Katrina, for your lovely words. They really do mean a lot.
Helen
January 21, 2021 at 8:54 pmI am very impressed at your creative and technical skills! What a gorgeous piece of art with so much cultural significance. Well done!
Anita Holland
January 23, 2021 at 4:54 pmThank you so much Helen.
Ann
January 22, 2021 at 11:27 amWhat an amazing project, Anita and I love how you experiment to make things work. Thank you for sharing at Party In Your PJ’s!
Anita Holland
January 23, 2021 at 4:56 pmThank you so much Ann. Most of my projects are trial and error in some way or another. Some work some need to be redone a few times. lol
Marielle
January 22, 2021 at 11:59 amWhat an incredible project! I love the theme and that it comes from your homeland. The colors and the whole look together is amazing. Thank you for sharing this tutorial! Have a great weekend Anita!
Anita Holland
January 23, 2021 at 4:56 pmThank you so much for the great comment. You are very welcome and I hope the tutorial helps.
Dixie
January 22, 2021 at 1:59 pmWhat an amazing project. I love it.
Anita Holland
January 23, 2021 at 4:48 pmThank you so much for the awesome compliment.
Anita Holland
January 23, 2021 at 4:57 pmThank you so much.
Shannon
January 22, 2021 at 6:42 pmOh my goodness!!! That is one of the most beautiful things I’ve ever seen!! Thank you so much for sharing it, and how you did it. I’ve recently become interested in starting to do resin crafts, although, not nearly on the scale of this piece! LOL I love the little embedded pendants and “shakers”! I can only aspire to become as good as you are at it!
I found you on a Wordless Wednesday! And I’m adding you to my Blogroll! Have a great weekend!
Anita Holland
January 23, 2021 at 4:47 pmThank you so much Shannon for the very kind words and great compliments. I am so glad by tutorial has been able to help you.
Cecilia
January 25, 2021 at 9:10 amWow! I haven’t seen anything like this before, Anita! Thanks for sharing at Vintage Charm!
Anita Holland
January 25, 2021 at 11:29 amThank you Cecilia. It was all trial and error because I had nothing to copy from so I had to learn from my own mistakes.
kristie
January 25, 2021 at 12:18 pmYour suncatcher is amazing. You need an Etsy store. You’re being featured on the Little Cottage Link Party tomorrow!
Anita Holland
January 27, 2021 at 11:47 amThank you so much Kristie, I am in the process of starting one. That is very kind of you to say.
Naush Samama
January 25, 2021 at 8:35 pmoH MY !!! How do you come up with such inspirational pieces of art, Anita ?!! Simply Spectacular !
Thank you for sharing your ideas with us at Meraki Link Party.
Have a wonderful week
Naush
Anita Holland
January 27, 2021 at 11:51 amThank you, I wonder myself sometimes. I see them in my head and true and recreate them.
Michele Michael
January 26, 2021 at 11:33 amSooooo great!!!
Anita Holland
January 27, 2021 at 11:58 amThank you so much.
Michelle
January 26, 2021 at 1:06 pmAbsolutely beautiful! I cannot imagine the joy of seeing all of those beautiful African animals in their natural habitat. What wonderful memories!
Michelle
https://mybijoulifeonline.com
Anita Holland
January 27, 2021 at 12:00 pmThanks Michelle. I was one of the best experience of my life. It is such an amazing country.
Dee | Grammy's Grid
January 26, 2021 at 8:44 pmOh, I like it. You are so creative!! Thanks so much for linking up with me at the #UnlimitedMonthlyLinkParty 21, open until February 26. Shared on social media.
Kimberly
January 28, 2021 at 5:06 amThank you for sharing this on Traffic Jam Weekend, Anita! It has been chosen as a fave feature for this week’s party that goes live on Thursday at 5:00 pm CST.
Anita Holland
January 28, 2021 at 10:40 amThank you so much for the feature I really do appreciate it.
Barbara Chapman
January 28, 2021 at 2:05 pmWow, Anita!!! Awesome project! I think you created a masterpiece and figured out all the kinks for the next time you create a resin wood cut… You could sell these for hundreds of dollars! Thank you for taking the time to link up at Share Your Style #289 last week; I am happy to feature your post at SYS #290 this week. <3
I love that you were born and grew up in South Africa! When I lived on Oahu, Hawaii, as a young girl (1970-1974), two cousins came to visit us who had just spent 6 months in Africa. They had so many stories to tell, which were eaten up by this National Geographic-loving girl! 🙂 On my bucket list of places to visit!!! I'm glad the IBC is still going strong. That's how I met Mary who used to live in Greece and now is in New York. We chat through IG now. Another place I hope to visit someday. <3
Enjoy your weekend,
Hugs,
Barb 🙂
Anita Holland
February 9, 2021 at 1:47 pmThank you so much for the amazing compliment and the feature. I do agree that you meet some great people in these groups.
Debbie de la Cruz
April 16, 2021 at 2:46 pmI have seen a lot of amazing resin pieces but this takes the cake. Your piece should win a prize somewhere. Thank you for sharing your talent and the mistakes you made. You made someone else’s project a success
Anita Holland
April 16, 2021 at 9:24 pmThank you so much Debbie that is am amazing compliment, and to say you made my day would be an understatment. XX
Gail
September 3, 2022 at 8:31 amBeautiful job, I’m also working with resin and wood. I just tried using a silicone sheets and tyvek sheathing tape and it works great! Hopefully it will work for you.
Anita Holland
September 3, 2022 at 2:59 pmThank you Gail, I will check them out.
Little Cottage Link Party #87 - lovemycottage
October 16, 2022 at 5:14 pm[…] Wooden Suncatcher from Unique Creations by Anita […]