
While scrolling through my local buy/sell site, I spotted a charming old desk for just $20. I imagined restoring it and giving it a new lease of life. But when I arrived to collect it, I was disappointed. Someone had already taken to it with an extreme shabby chic makeover, deep distressing and layers of chalk paint. Restoring it would have taken hours of sanding.
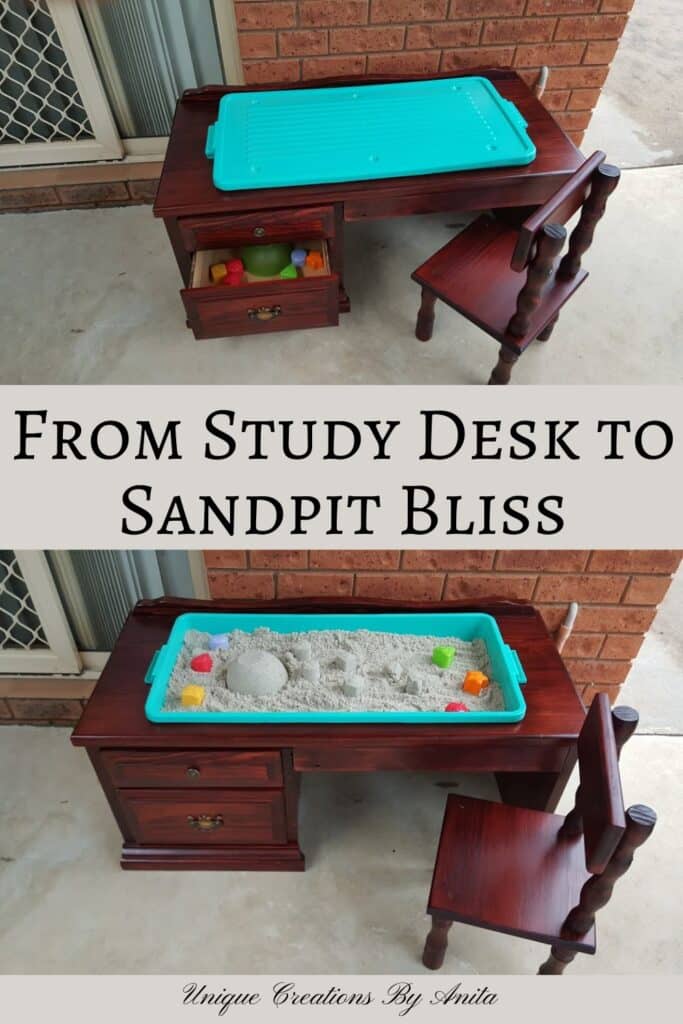
So I pivoted. Instead of restoring it, I repurposed it into something practical and fun. My great-niece visits often and loves playing in the sand, but dislikes sitting in the sandpit because sand sneaks into her nappy. That’s when the idea struck: a stand-up sandpit table made from a vintage desk.

Before we dive into this tutorial, be sure to subscribe to my bimonthly newsletter to be the first to see my latest projects. You can also follow me on Pinterest and Facebook where I also include my unique mixed-media art projects.
How to make a sandpit table
**This post may contain affiliate links. This means I earn a small commission on links used at no extra cost to you. Please see my disclosure policy for more information.**
Materials Needed
- Old wooden study desk
- 35L plastic container with a lip and lid
- Sandpit play sand (50kg approx.)
- Outdoor wood stain (dark mahogany)
- Exterior varnish
- Pocket hole jig and screws
- Square ruler and measuring tape
- Circular saw or jigsaw
- Drill and a large drill bit
- Scrap wood
- Wood glue
- Wood filler (optional)
- Sandpaper and a sanding block
- Wood router and round-over bit
Step 1: Choose the Right Desk
A small vintage study desk with drawers is perfect. The drawers are handy for storing toys, keeping your outdoor area tidy after playtime.

Step 2: Select Your Container
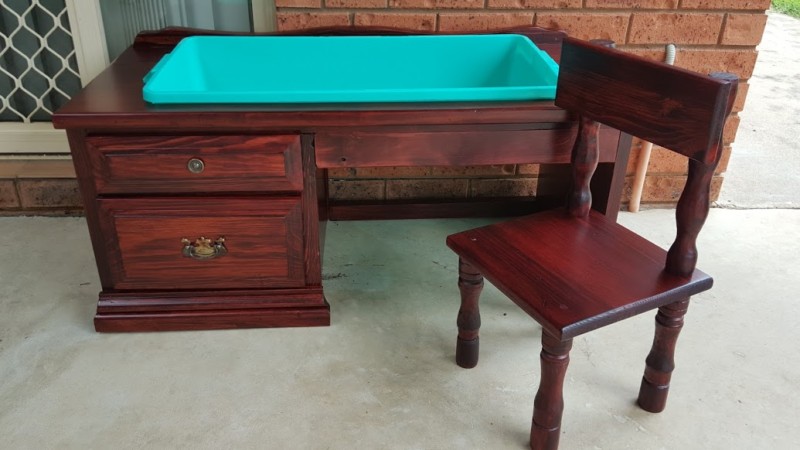
Choose a container with a sturdy lip so it doesn’t fall through the hole you’ll cut. Make sure it has a tight-fitting lid to prevent curious cats from turning it into a litter tray. I used a 35L light blue container, which contrasted beautifully with the dark wood stain.
Measure under the lip of the container. That measurement will guide the hole size you cut into the desktop.

Step 3: Cut the Sandpit Opening
Drill a hole in each corner of your measured rectangle to fit your jigsaw blade through. Use the jigsaw to cut out the section. Test-fit the container to ensure a snug fit. I had to file down a few plastic edges for it to sit properly.

Cutting the hole
Note: The container will occupy the space for the top drawer. There’s no workaround unless you use a smaller tub.

Step 4: Adjust the Desk Height
Standard desks are too tall for toddlers. I measured a child-friendly height of 45cm and marked my cut lines with a square ruler. A circular saw made quick work of shortening the legs. A jigsaw would also work here.

Step 5: Reinforce the Structure
Cutting the bottom section removed the support beam, so I reused it. I drilled pocket holes into the beam and screwed it back into place under the desk for strength and stability.


Step 6: Cover the Gaps
You’ll notice the container’s base is visible from underneath. I used scrap wood to cover this cosmetic gap, attaching it with pocket holes and screws.
As the container blocks the top drawer from sliding back in, I removed the drawer front and glued it into place for a seamless look. The lower drawer remained usable for toy storage.
Step 7: Smooth and Stain
The desk had rough, distressed edges, so I sanded everything smooth. I used a router with a round-over bit to remove sharp corners; this is important for toddler safety.
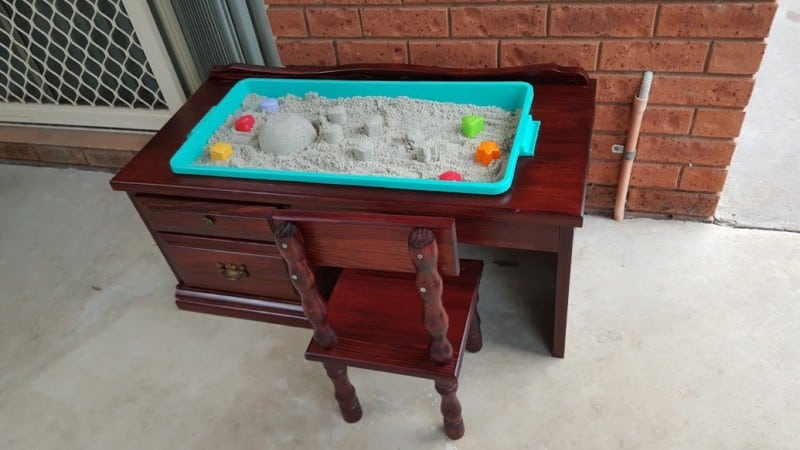
I stained the desk in a rich, dark mahogany to match my outdoor décor. Once dry, I sealed it with two coats of outdoor varnish for weather protection.
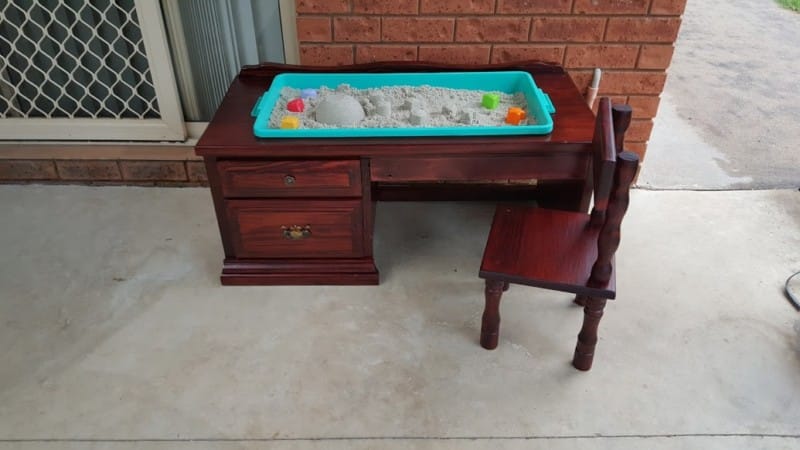

She loves her new sandpit desk and plays with it every time she visits. To make it even more fun, I added a second container for water play during summer. When the weather warms up, I simply remove the sand-filled container and swap it for one filled with water, turning the sandpit into a water play table in seconds.
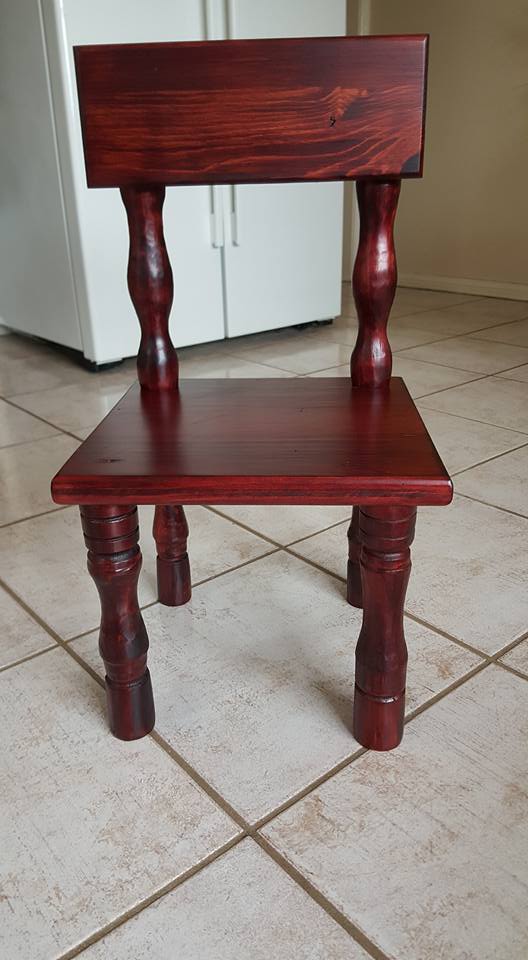
Bonus: Matching Chair from Offcuts
I used the cut-off section from shortening the desk to make a toddler-sized matching chair. Waste not, want not!
Inspired to Create More
She loved the sandpit desk so much, it inspired me to find another desk and turn it into a LEGO activity table for my niece. I used the same basic process, cutting into the desktop, adding storage, and finishing it to suit her play space. These upcycled desks are such a fun and affordable way to create custom furniture for kids.


If you’d like to find any of the items used in this project, we’d greatly appreciate it if you used our affiliate links. These links provide us with a small commission at no extra cost to you, allowing us to continue creating and sharing more inspiring projects. We’d also love to hear your thoughts—feel free to leave a comment or share this post!


33 Comments
GERT
August 3, 2017 at 1:45 pmnow aren’t you the smart one, I have never seen anything that cute and clever, you’re a great aunt.
Anita Holland
August 4, 2017 at 2:20 amThank you Gert, It did make me very popular and she loves it.
Ama Ama
August 3, 2017 at 7:03 pmThis is Awesome‼️Love the chair too 🙂
Anita Holland
August 4, 2017 at 2:19 amThank you, It is great to make something new out of recycled furniture.
Lanny Biggs
March 21, 2023 at 2:25 pmAn FYI caution. I spoke with a guy a few years ago who built a sandbox for his kids. In order to cut costs he used sand from a local concrete company. The problem is that the white sand you can purchase unbagged is stored in the open. Stray cats like to use the sand as a toilet. The bagged sand you can buy, especially sand that is sold as sandbox sand, is sterilized. The guy I talked to said that all his kids had to be treated for ringworm after playing in the “cheap sand” Also keep a sandbox covered when not using it.
Anita Holland
March 22, 2023 at 5:35 pmThanks for sharing your info. I do have the proper sand as I agree there are so many germs in the other sand. I have a lid for this sandpit which is covered up while not in use. We have so many cats around here you can’t be too careful.
chris tucker
August 3, 2017 at 11:01 pmthat is awesome and so practical too xx
Anita Holland
August 4, 2017 at 2:18 amThank you Chris!
melanie
November 10, 2017 at 8:01 pmOh this is so cool!! love it Anita!!
Anita Holland
November 11, 2017 at 2:55 amThank you, was pretty unique and my niece loves it.
Bright
July 12, 2018 at 2:43 amReally cool diy makeover! Every kid loves a sensory bin.
Anita Holland
July 17, 2018 at 1:07 amThank you she does love it, and she likes the idea that she does not have to sit in the sand to play.
Marie
July 17, 2019 at 12:59 pmThis is my first visit to your blog. I saw your link at the Waste Not Wednesday party and had to pop over to take a closer look. Wow, I LOVE your work! This sandpit desk is such a clever idea and your tutorial is wonderful too. My grandson would love something like this!
Anita Holland
July 18, 2019 at 3:15 amThank you so much, Marie, I made it because my niece did not like sitting in the sand because it got in her nappy. She loves it.
Marie
August 9, 2019 at 4:37 pmAnita, so glad to see you shared this awesome sand table at our Talk Of The Town Party last week. You will be my feature next week!
Anita Holland
August 10, 2019 at 12:23 amThank you so much for the lovely comments and the feature, greatly appreciated.
Michelle
August 5, 2019 at 12:27 amWhat a wonderful idea! Awesome!
Anita Holland
August 5, 2019 at 3:17 amThank you, it was one of the first projects I made. It went viral and got me hooked on blogging.lol
Anita Holland
August 5, 2019 at 3:24 amThank you so much, Your comments are all greatly appreciated.
Cecilia
August 12, 2019 at 7:00 pmWhat a cute idea! Thanks for sharing at Vintage Charm!
Anita Holland
August 13, 2019 at 12:43 pmThank you so much.
Veronica Lee
August 13, 2019 at 12:32 pmThis is super cool! What a marvelous idea!
Anita Holland
August 13, 2019 at 12:45 pmThank you, Veronica!
Monika Ohson | TravelerInMe
August 14, 2019 at 5:47 amWow! That’s such a cool conversion. Am sure the kid loves it. Thanks for sharing Anita 🙂
Anita Holland
August 14, 2019 at 7:09 amThank you so much, she loves it.
KitsyKeelSmith
August 15, 2019 at 3:18 amLove this idea. I am expecting my sixth grandchild in October and will be looking for a desk to turn into a sand table for her. The other five are to old for this activity. I have plenty of time to look for a desk because she won’t be using it for a while. Thanks for sharing.
Anita Holland
August 15, 2019 at 4:34 amThank you, it was so easy to make and any child would love it.
Sylvia | Grace for a Gypsy
August 17, 2019 at 6:17 pmWhat a great idea for a sandbox!
Anita Holland
August 17, 2019 at 10:27 pmThank you so much, She loves it.
Lisa L Lombardo
August 20, 2019 at 1:47 pmHow cute! Thank you for sharing your unique creations on Farm Fresh Tuesdays! I hope to see more of your fun ideas this week. 🙂
Anita Holland
August 22, 2019 at 11:32 amThank you Lisa.
Linda at Mixed Kreations
March 2, 2020 at 1:08 amBrilliant idea! My grandkids would love this. Even a place to toy there sand toys.
Anita Holland
March 3, 2020 at 11:21 amThank you Linda, I made this a few years back and she still plays with it every time she comes for a visit.