
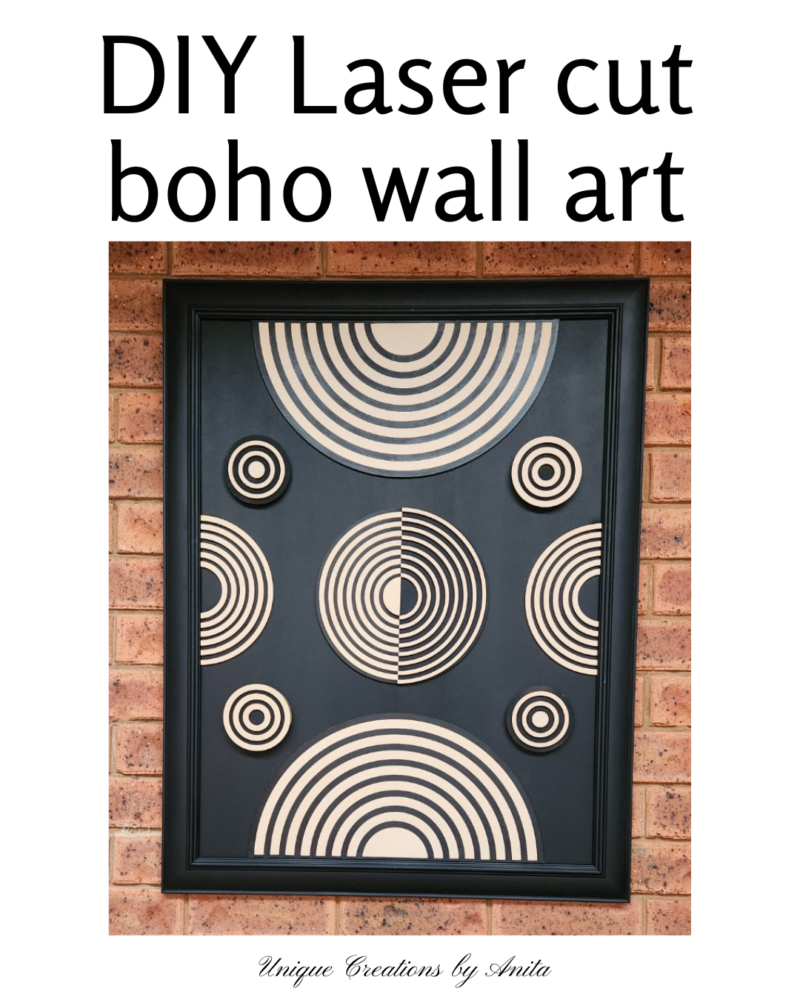
If you have been looking for ways to add a touch of modern charm to your living space without spending a lot of money, then you are in the right place. In this blog post, we will explore crafting stunning large wall art using geometric shapes, made possible with the incredible precision of the xTool P2 laser cutting machine.Our focus will be on embracing the beauty of circles and half circles to craft boho-inspired, modern wall art that not only captivates the eye but also fits snugly into your budget. Get ready to unleash your artistic spirit and transform your space with unique, with this DIY laser cut Boho wall art.
The xTool P2 CO2 laser cutting machine is a game-changer for DIY enthusiasts and artists alike, offering unparalleled precision and ease of use. This remarkable tool excels in transforming mundane materials like MDF (Medium-Density Fiberboard) into intricate geometric shapes, opening up endless possibilities for creative expression. With a splash of paint, these MDF cutouts can be transformed into captivating statement pieces that seamlessly blend boho aesthetics with modern flair. The xTool P2 CO2 laser empowers you to bring your artistic visions to life, turning your space into a gallery of personalised, eye-catching boho wall art.
Before we dive into this tutorial, be sure to subscribe to my bimonthly newsletter to be the first to see my latest projects. You can also follow me on Pinterest and Facebook, where I also include my unique mixed-media art projects
DIY Laser-cut Boho wall art
**This post may contain affiliate links. This means I earn a small commission on links used at no extra cost to you. Please see my disclosure policy for more information.**
Materials Needed
- xTool P2 CO2 laser cutting machine
- Medium-density fiberboard (MDF) sheets
- Acrylic paint in desired colours
- Wood glue
- Large picture frame (Recycled)
- Black spray paint
- foam paint roller
- Safety gear (gloves, safety glasses)
Prepare your frame
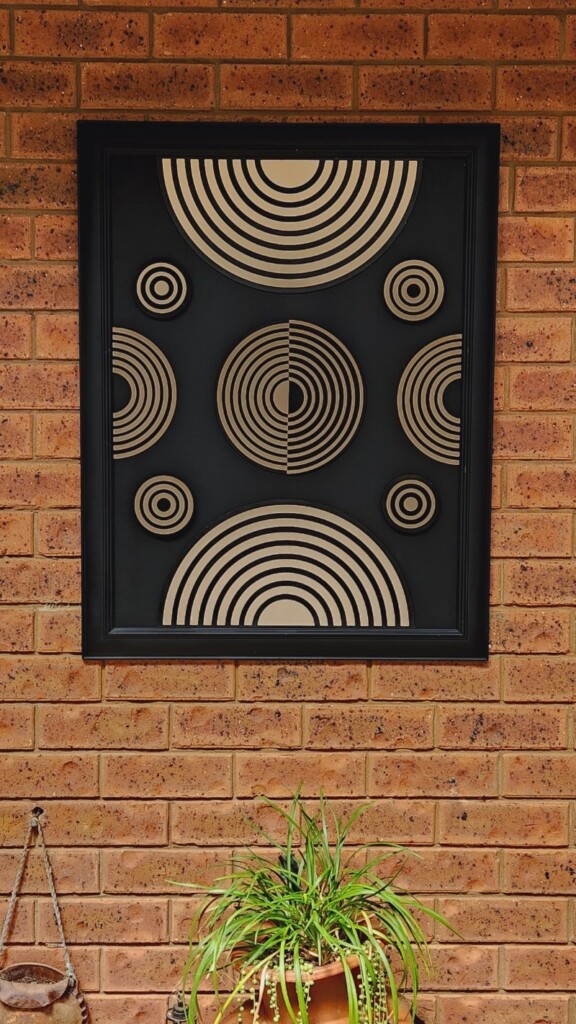
To save on costs, I visited a charity shop and purchased a large picture frame measuring 900mm x 700mm for just $8. Once I got home, I removed the glass and picture from the frame and discovered that the board behind the picture was in good enough condition to use as the backing for my wall art.
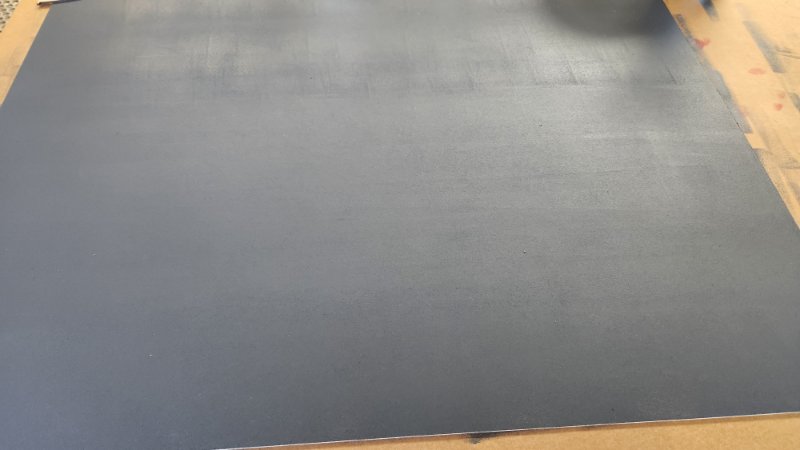
I used black acrylic paint and applied 2 coats using a foam roller. For the frame, I opted to use black spray paint to avoid any brush marks on the painted surface.
Creating the boho-inspired design
Start by opening XCS Creative Space, which is XTool’s design software, and select a new project.
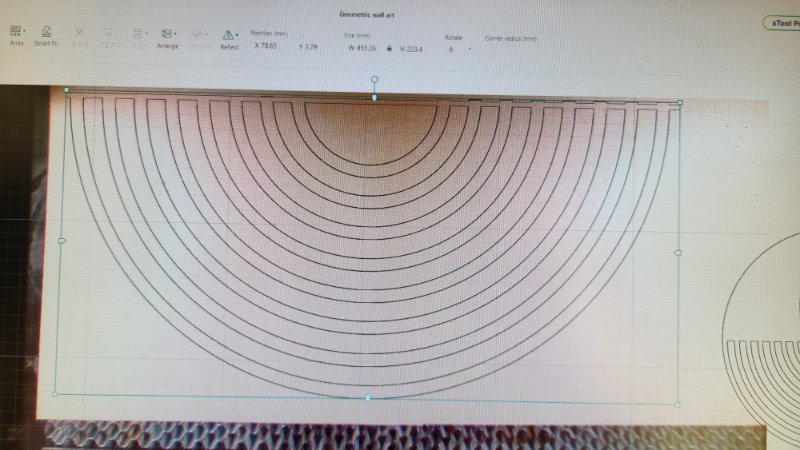
To create a design, you can use the shapes available in the shapes tab located on the left-hand side of the screen. In my case, I purchased a geometric shapes bundle from Etsy and used the circle and half-circle SVG files to create my design.
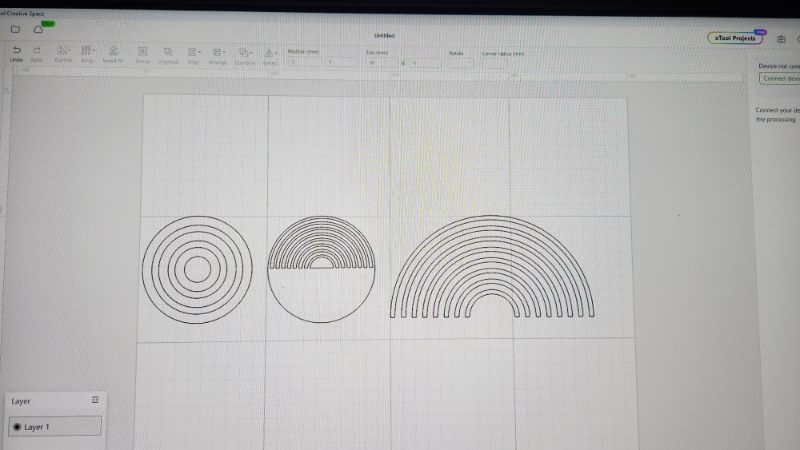
The half-circle layers in this bundle are all separate images. When you cut them, it might not be easy to get the correct spacing between the half-circles. To save time, you can create them as one image. Here’s how:
Add a rectangle, then click the padlock icon at the top to unlock the shape. Stretch the rectangle across the bottom of the half-circles. In the top toolbar, open the dropdown next to “Combine” and choose “Unite” to merge all the half-circles into one piece. You now have a single image with one cut path to work with.
Laser cutting the boho designs
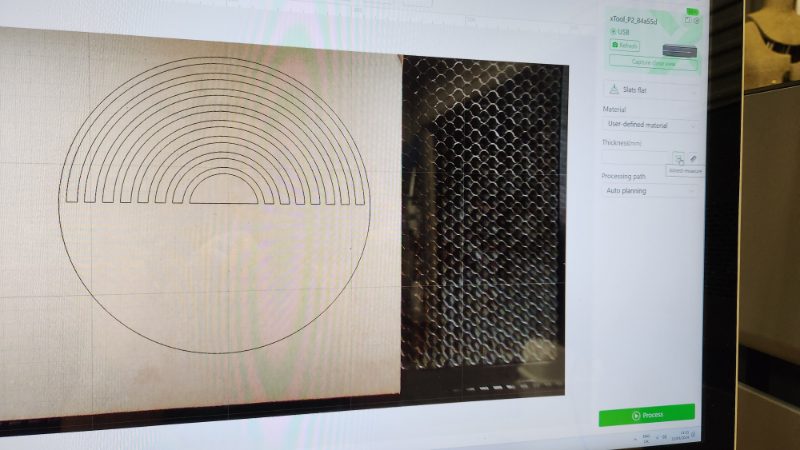
To create large laser-cut wall art, you would typically need a riser base and an xTool conveyor. However, I don’t have enough space in my workshop at the moment to set up the conveyor so I will be creating my wall art as individual pieces. I placed a piece of MDF into the xTool P2 and clicked the ‘refresh’ button at the top of the screen.
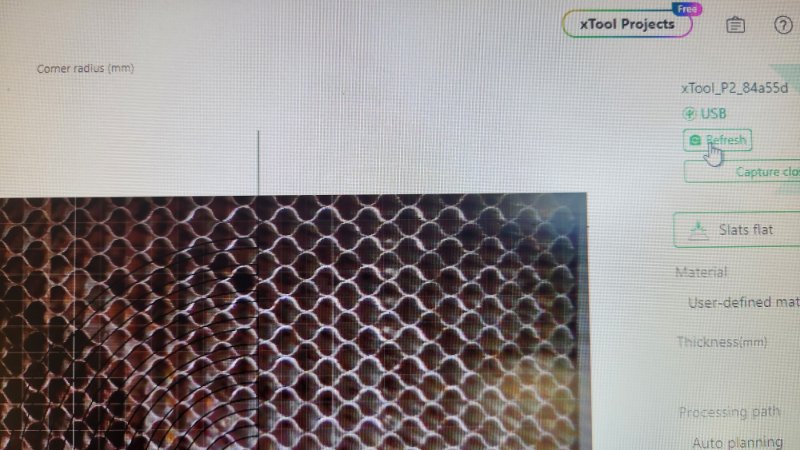
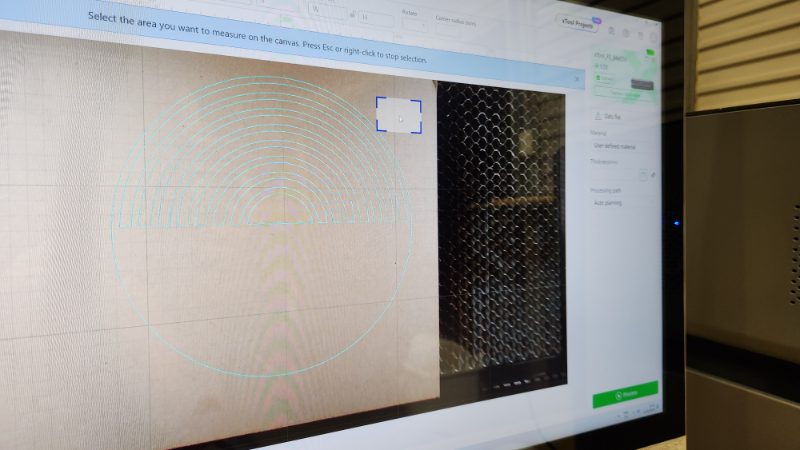
This will give you an accurate camera view of the material inside the laser. Next, resize your image to fit onto the MDF.
Select your laser settings
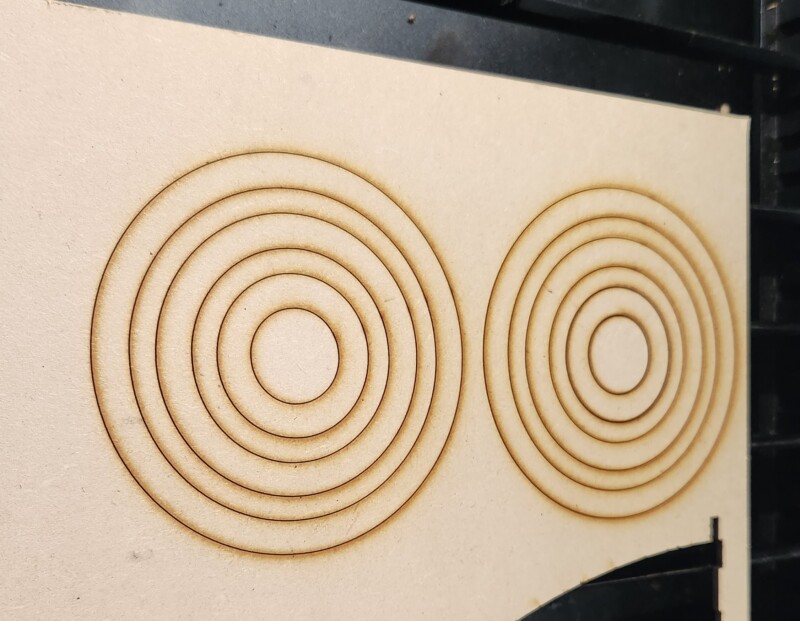
The best way to work out what setting to use is by making material test cards. These will save you lots of time and keep material wastage down. xTool has a free material test card design, which can be found in the array tab at the top of the screen.
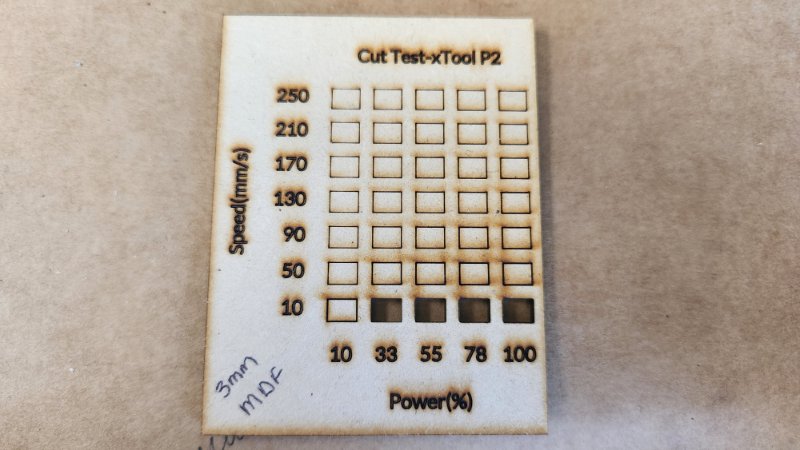
Then select “slats flat” on the right, then choose your material type from the drop-down menu. If you don’t see your material in the menu, don’t stress, you can select the auto-measure button on the right.
Next, click anywhere on your material, and the laser will measure the thickness for you. I must mention that this method is not always 100% accurate. I know my MDF is 3mm, but the auto measure said 3.7, but I did not find it made much difference to the cut.
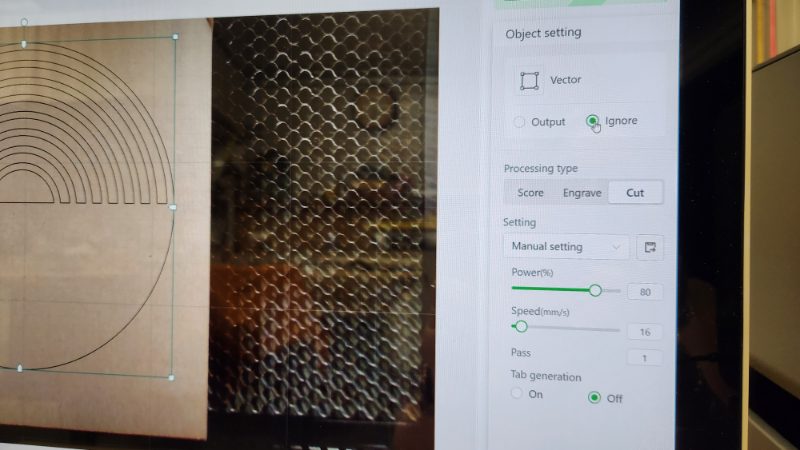
If you have more than one image on your screen, be sure to select the one you want to cut first by clicking on the image and selecting “output” on the right. Next, click on the “cut” button and set your power and speed settings according to your test card results.
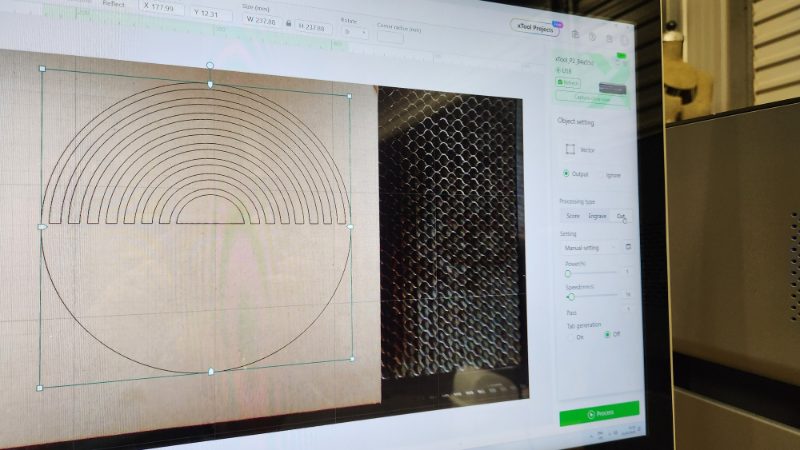
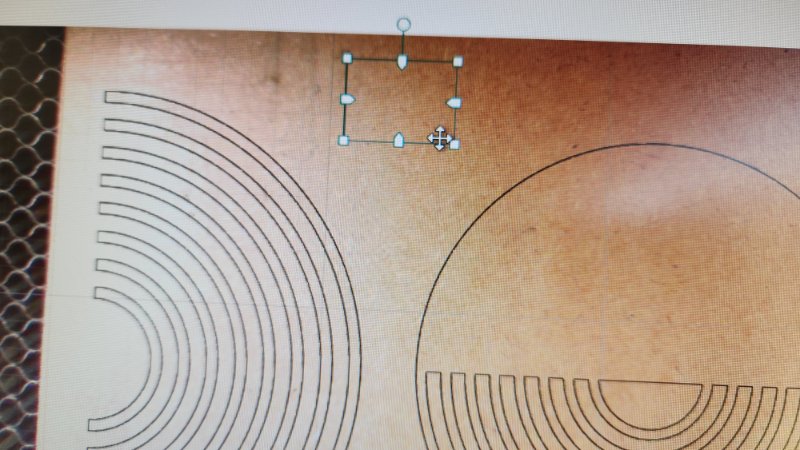
I am cutting large images, so I am unable to cut them all at once. If you are doing the same, be sure to select all the other images and click ignore.
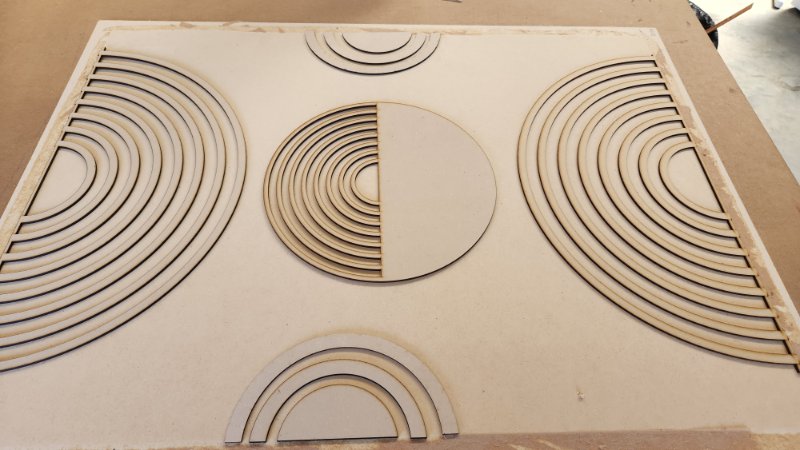
You can now select to process and push start on the laser machine. I repeated the steps above for all the designs. I have not shown every shape I cut out, or we will be here all day.
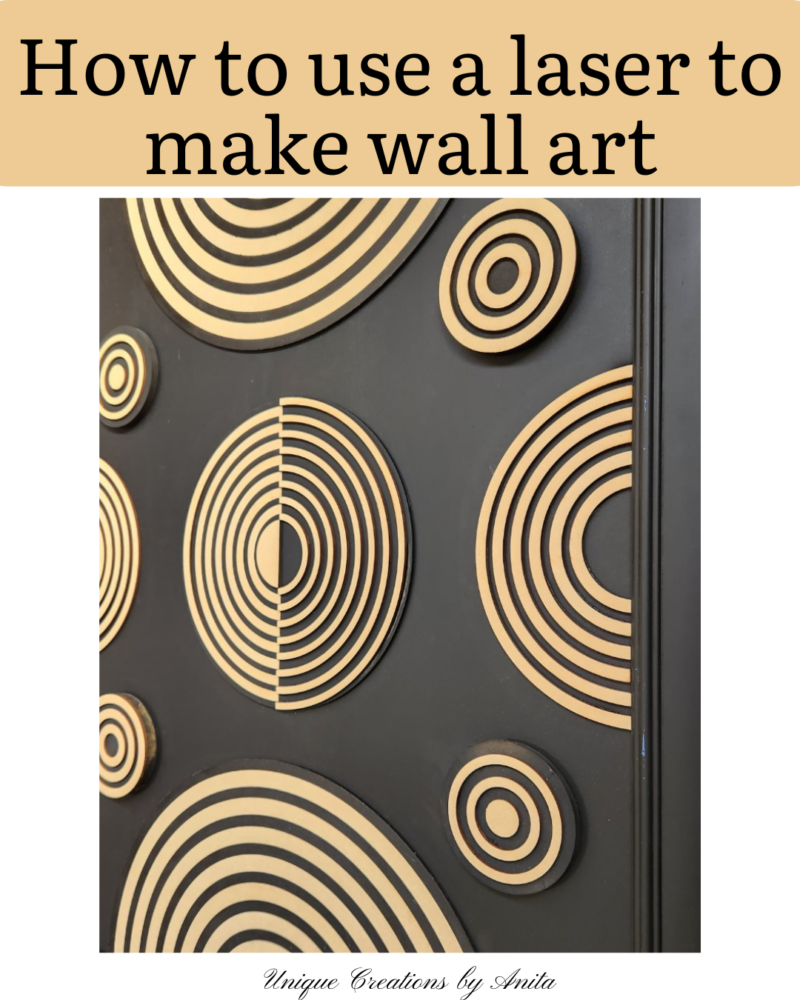
When the machine finishes, simply lift out the laser-cut piece. The cut is so clean that the main panel lifts off, leaving the cut-outs behind. I like to save those cut-outs for future projects.
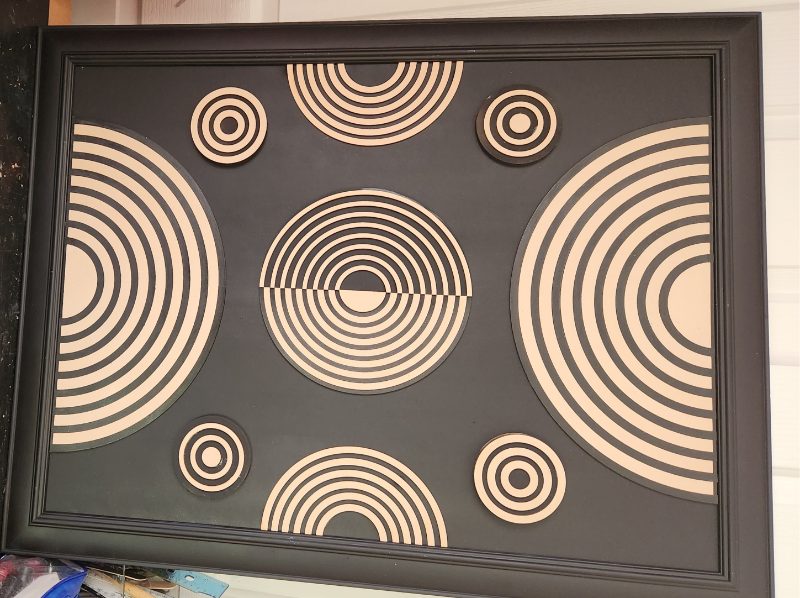
Planning your layout
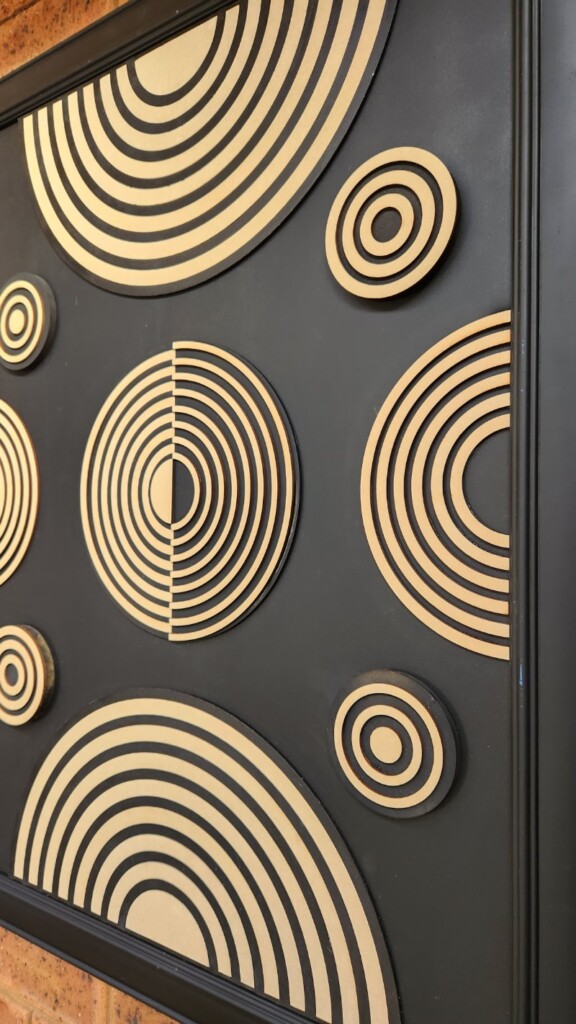
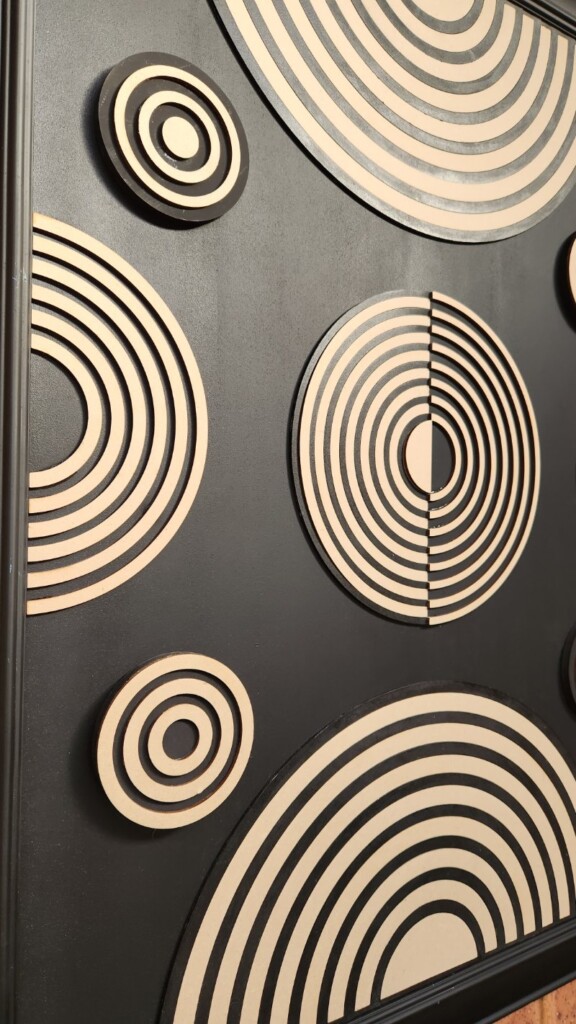
I had a basic idea of what I wanted my boho wall art to look like before I started. Boho seems to have lots of “rainbow” shapes in the design. It is at this stage that you can move things around and add new items.
Painting the MDF
I kept moving all the pieces around until I was happy with the design. For added effect, you can also layer some of the pieces to create a 3-dimensional effect like mine.
The image below was the final design that I came up with. To glue the pieces of wood to the base, you can use some wood glue. It is also a good idea to add some weight while the glue dries.
If you are looking for more laser project ideas, be sure to check out my multilayered wall art tutorial.
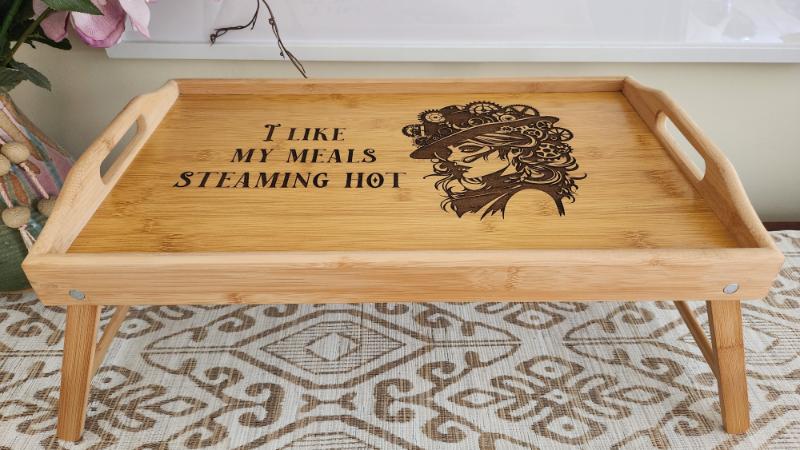
I also created this stunning steampunk-themed dinner tray that I engraved using the xTool P2 laser.

If you’re interested in any of the items used in this project, we’d appreciate it if you used our affiliate links. Clicking these links earns us a small commission at no extra cost to you, helping us create more inspiring and exciting projects to share. We’d also love to hear your thoughts—feel free to leave a comment or share this post!
1 Comment
Michelle Leslie
March 20, 2024 at 3:20 amOh my goodness, be still my boho beating heart. Stunning, Anita. When I finally save enough for this fancy machine, I’m coming back to read through your tutorials again. They’re so detailed and well-written. Love your work.