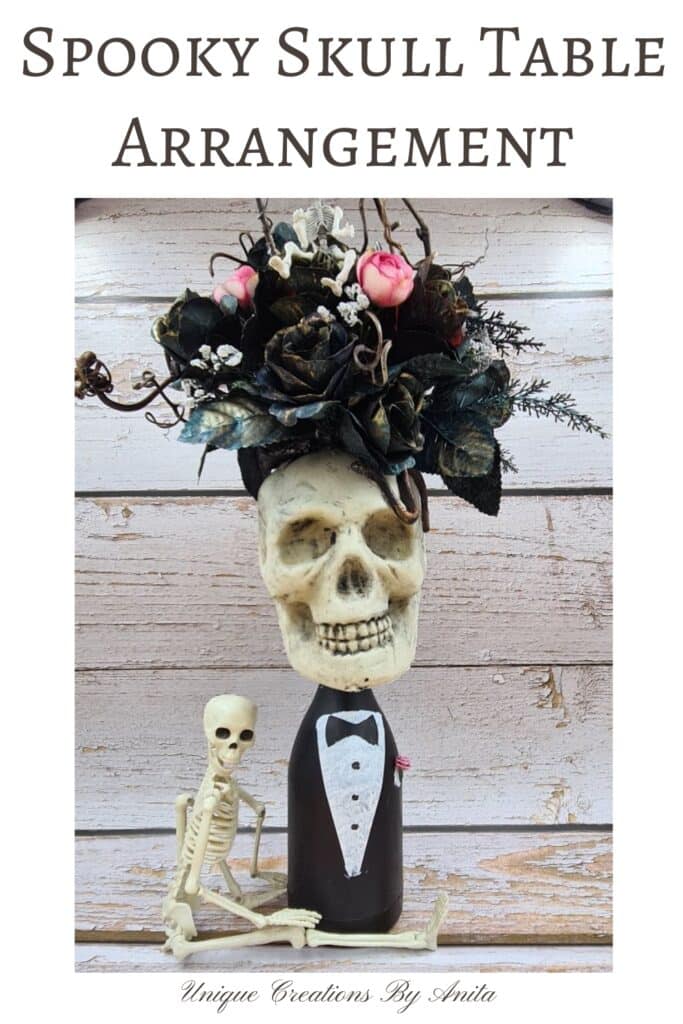
YAY, it’s nearly Halloween and my favourite time of year for crafting: the Spooky Skull Halloween Table Flower Arrangement Tutorial shows you how to create a hauntingly stunning centrepiece that will wow your guests. I love Halloween because it’s the one time of year you can let your creepy side out to play—perfect for adding a dash of eerie elegance to your party décor.
Halloween isn’t extremely popular in Australia, but it’s gaining momentum each year. Here’s a little secret: we’re that house you can’t see on Halloween night because we sit at the back door avoiding trick‑or‑treaters—though I still put out a bowl of treats with a cheeky “Trick or treat yourself” sign.
We don’t have little ghosts at home anymore, but I still relish every spooky project. Plus, it’s time for our next International Bloggers Club (IBC) challenge—this month’s theme is “Halloween,” so naturally I’m compelled to conjure up something sinister. More on IBC at the bottom of this post.

Before we dive into this tutorial, be sure to subscribe to my bimonthly newsletter to be the first to see my latest projects. You can also follow me on Pinterest and Facebook, where I also include my unique mixed-media art projects.
Spooky Skull Halloween Table Flower Arrangement Tutorial
**This post may contain affiliate links. This means I earn a small commission on links used at no extra cost to you. Please see my disclosure policy for more information.**
Materials Needed
- Empty plastic or wine bottle
- Fine sand or pebbles
- Black and white gesso (or acrylic paint)
- Paintbrushes (various sizes)
- Silk roses (budget‑store style)
- Shimmer spray
- Gold wax paste
- Floral foam brick or styrofoam packing
- Hot glue gun and glue sticks
- Craft knife
- Small grapevine offcuts or twigs
- Poseable skeleton or Halloween figurines (optional)
- Large skull
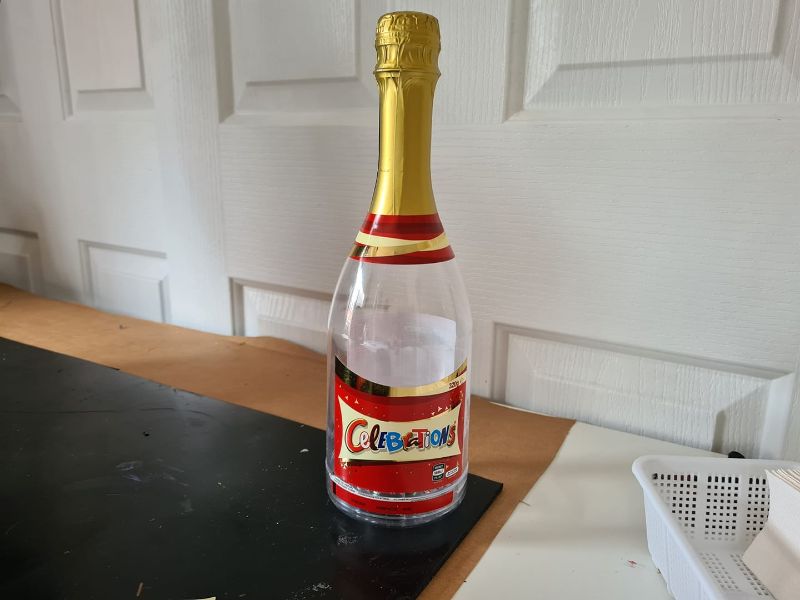
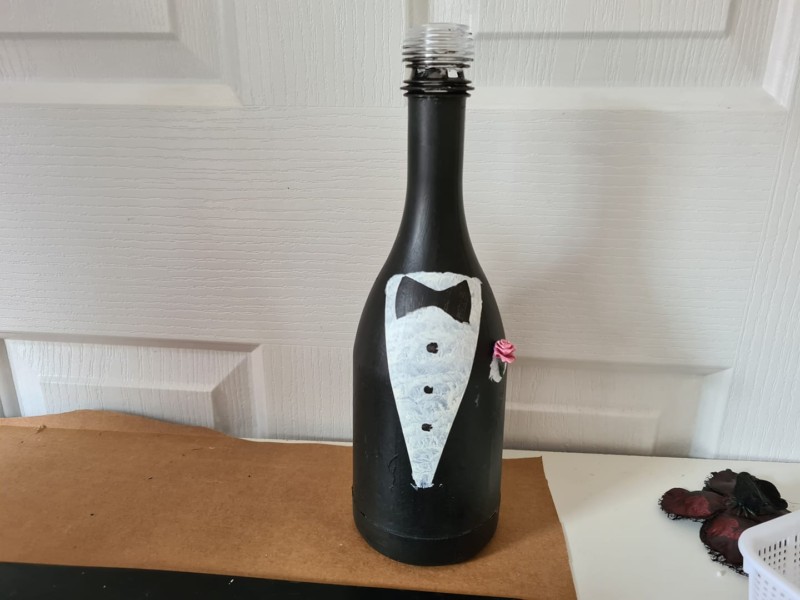
Step 1: Prepare the Base
Begin by weighting your chosen bottle—whether it’s an upcycled chocolate‑filled plastic bottle or a recycled wine bottle—with fine sand or pebbles so it won’t topple once the flowers are in place.
Once your bottle is stable, apply a coat of black gesso all over and let it dry.
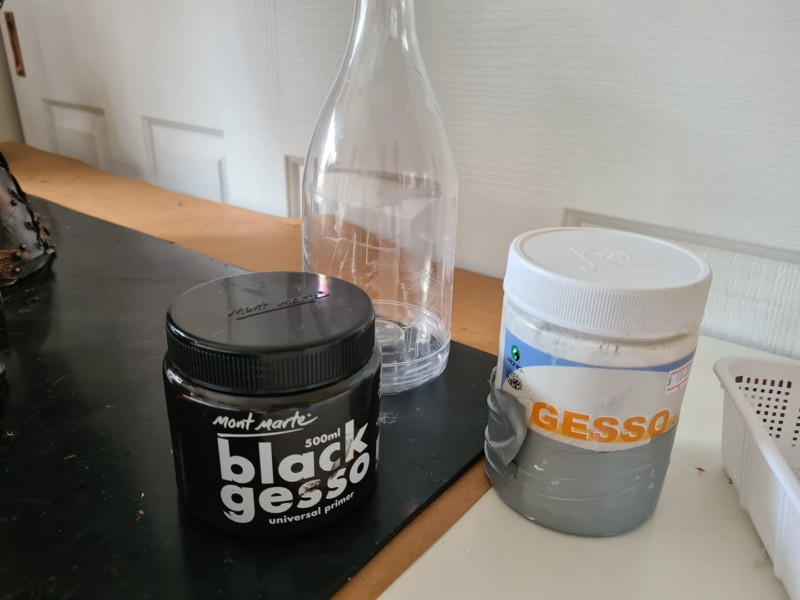
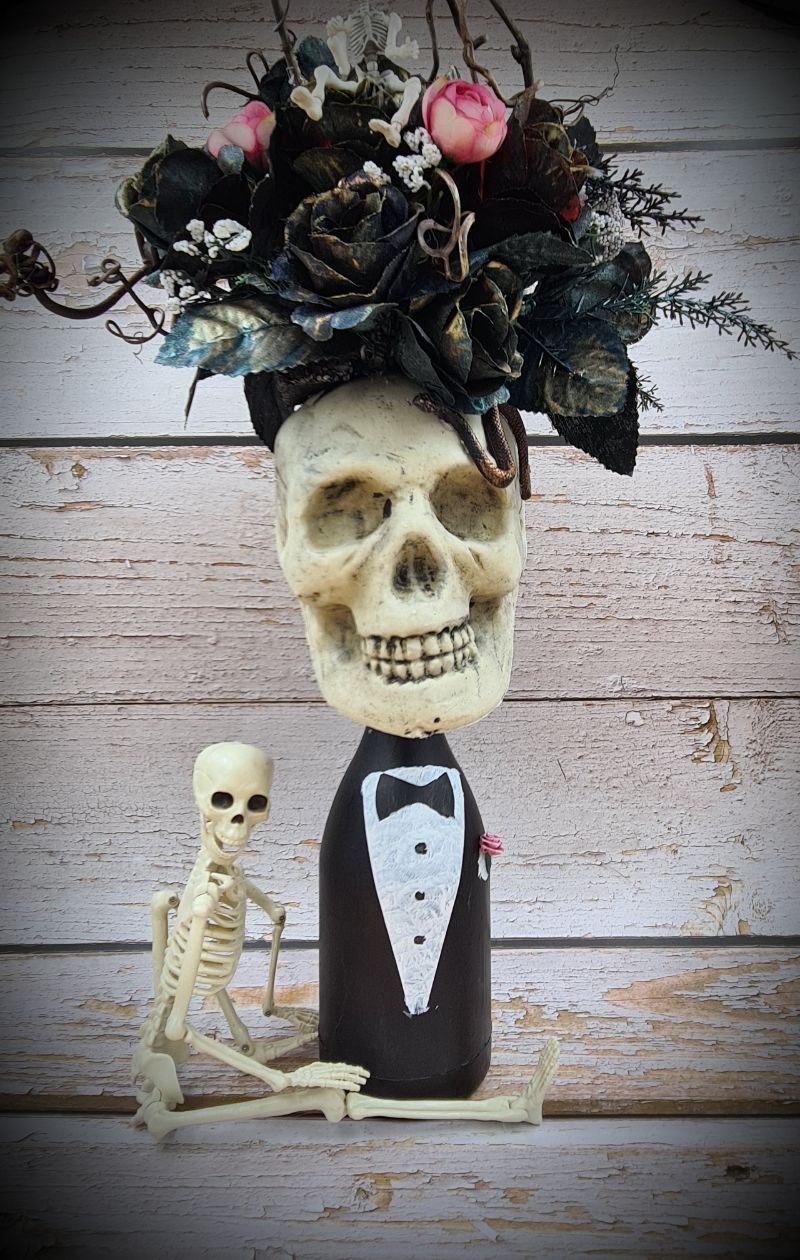
Then use white gesso to paint on a shirt front and pocket, mimicking a tuxedo; you can even tuck a tiny silk flower into the pocket for a playful flourish.
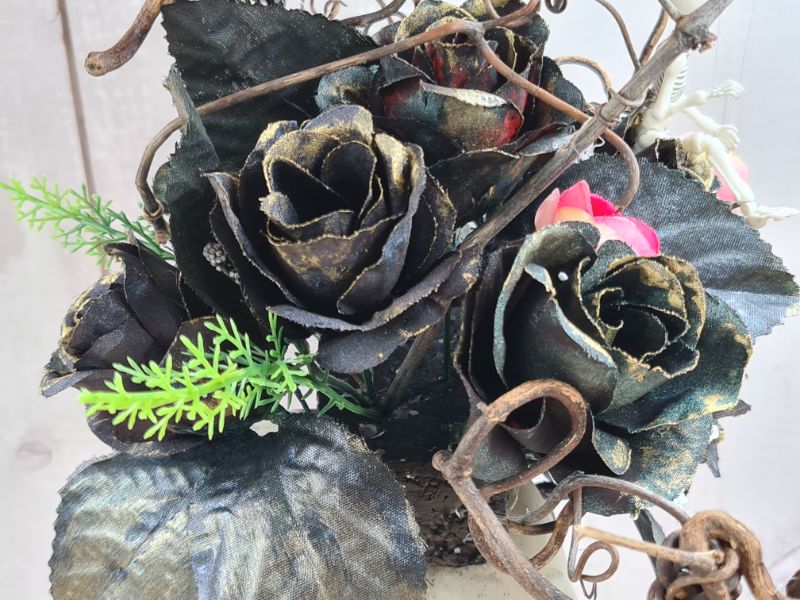
Step 2: Create the Flowers
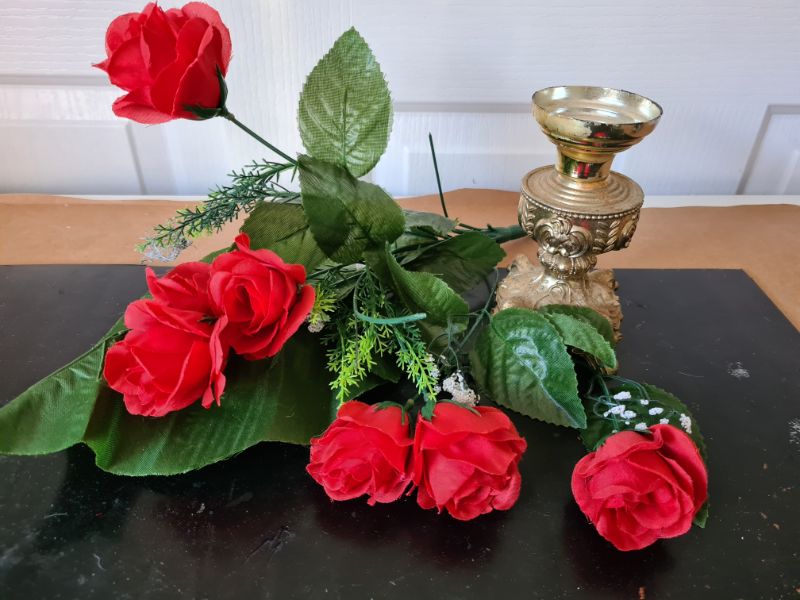
To transform the red silk roses into creepy Halloween blooms, coat each rose in black gesso or acrylic paint and allow them to dry completely. Leaving some colour to show through will add to the effect.
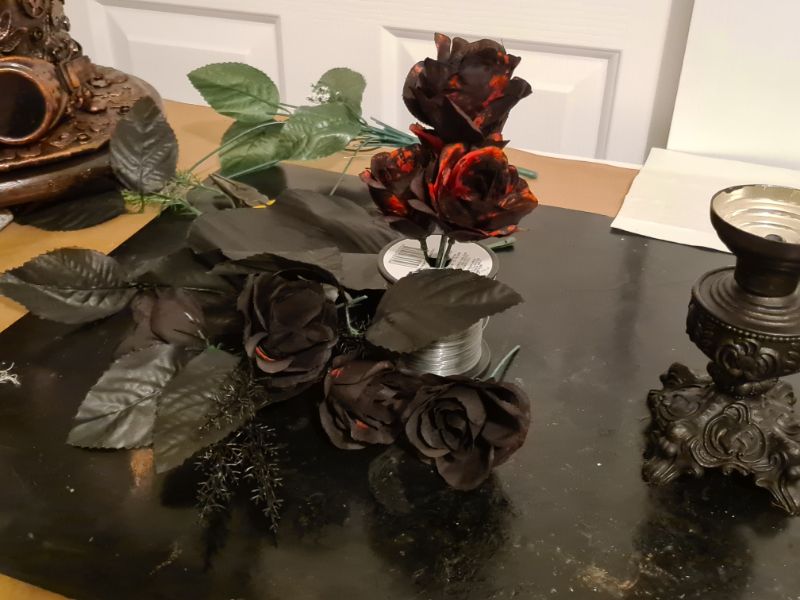
After they’re dry, give them a light mist of shimmer spray—this catches the light beautifully in person—even though it may not show up strongly in photos. If you don’t have shimmer spray on hand, you can easily whip up your own using basic craft supplies you already have at home.
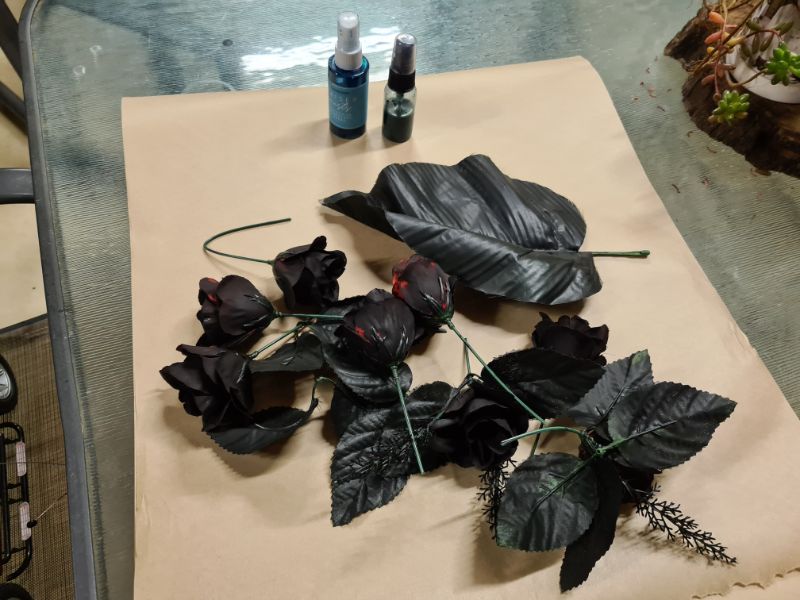
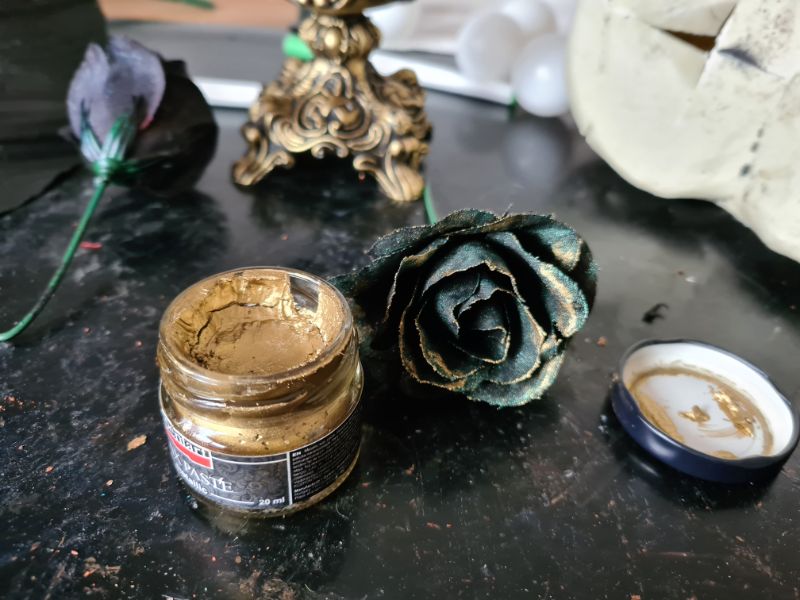
Finally, gently rub gold wax paste onto the tips of the petals and leaves to add a haunting metallic sheen.
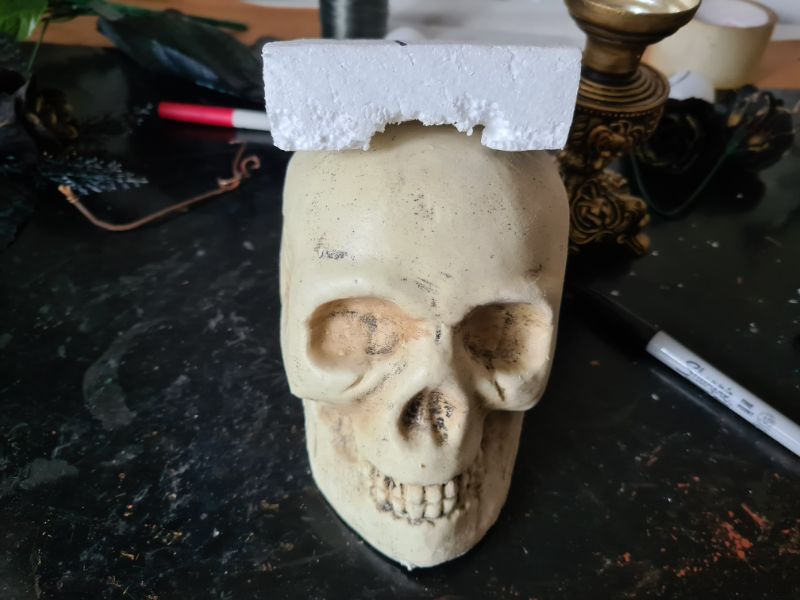
Step 3: Attach the Flowers
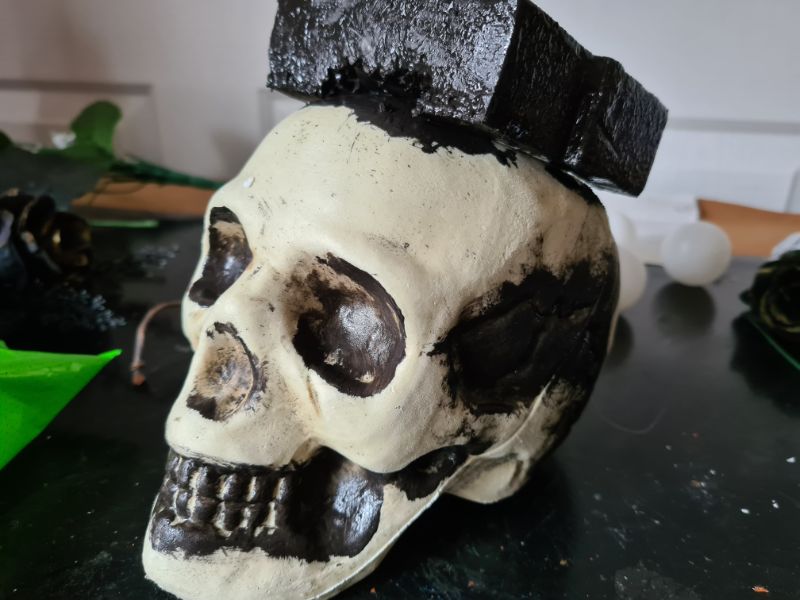
Trim a block of floral foam or a piece of repurposed styrofoam packing so it fits snugly inside your skull’s cavity. Secure it in place with hot‑glue, making sure it’s level. Once the glue has cooled, paint the exposed foam with black gesso so it blends seamlessly into the skull, hiding any obvious edges.
Step 4: Paint the Skull
Enhance the skull’s texture by brushing black gesso into all its grooves and crevices. Before the gesso dries fully, wipe away the excess with a slightly damp cloth—this leaves pigment in the recesses and creates the effect of aged bone, rotten teeth and weathered dirt.
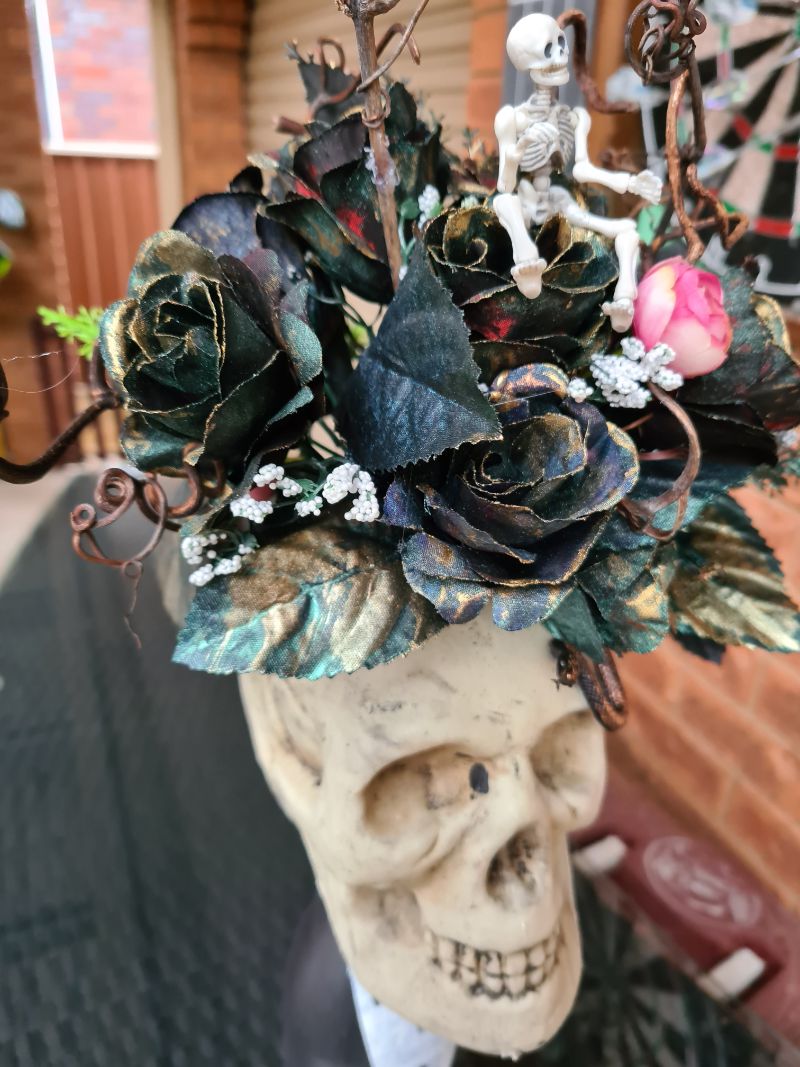
Step 5: Arrange the Flowers
Push your painted roses into the foam, rotating and repositioning them until you’re happy with the balance and silhouette. Tuck in offcuts of grapevine or small twigs for natural texture.
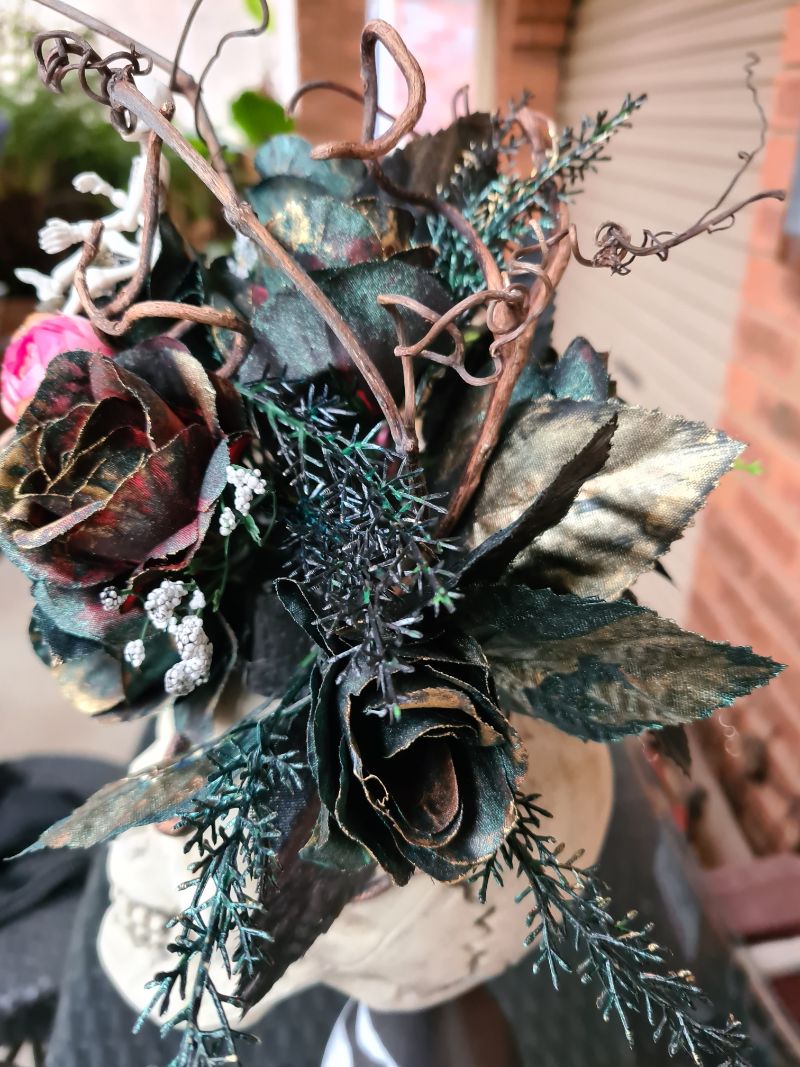
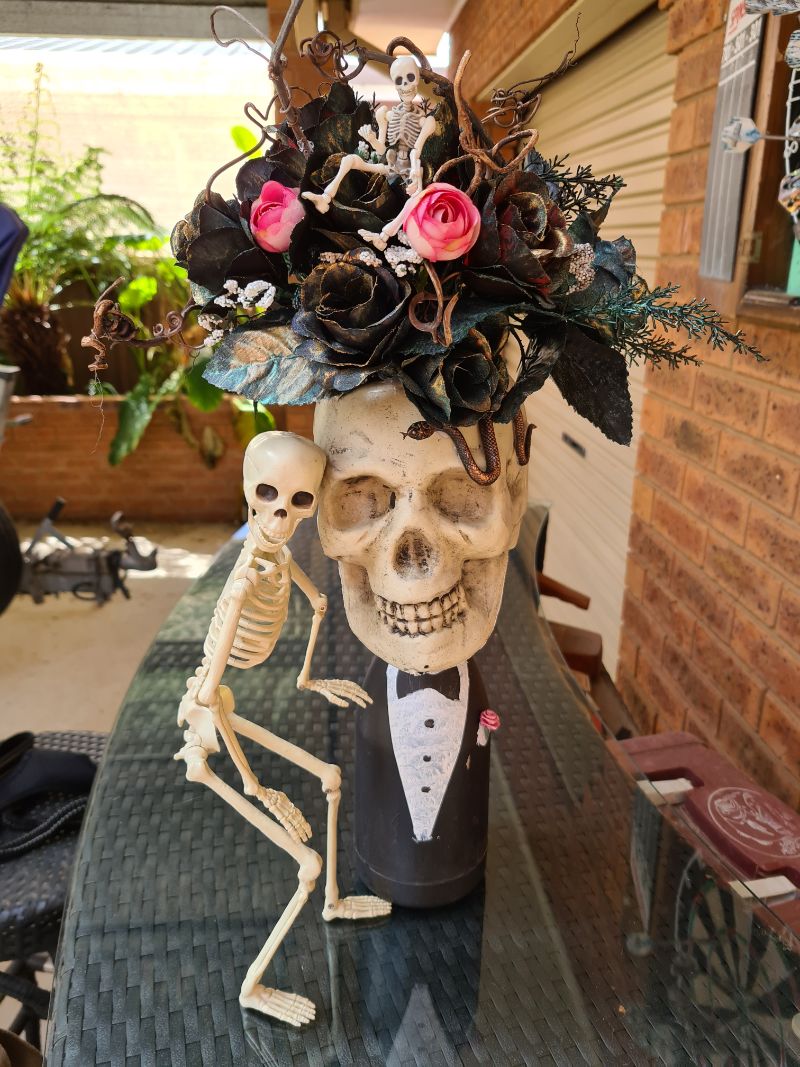
For extra spookiness, weave in a miniature poseable skeleton, plastic spiders or a faux snake. I even added a couple of pink blooms for a surprising pop of colour.
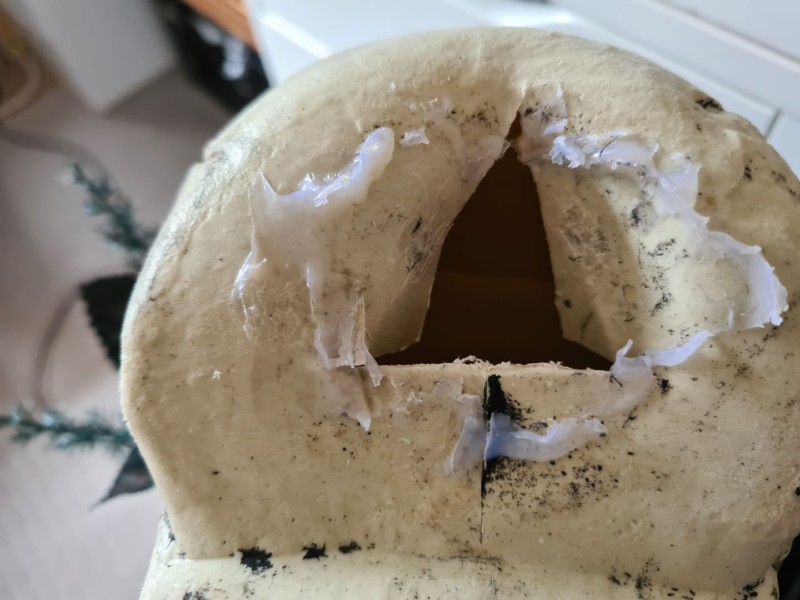
Step 6: Secure the Skull to the Bottle
Use a craft knife to cut an X into the base of the skull, just wide enough to slip over the bottle neck. Press the X‑shaped opening firmly onto the bottle; the tension and underlying foam will hold the skull securely without needing extra glue.
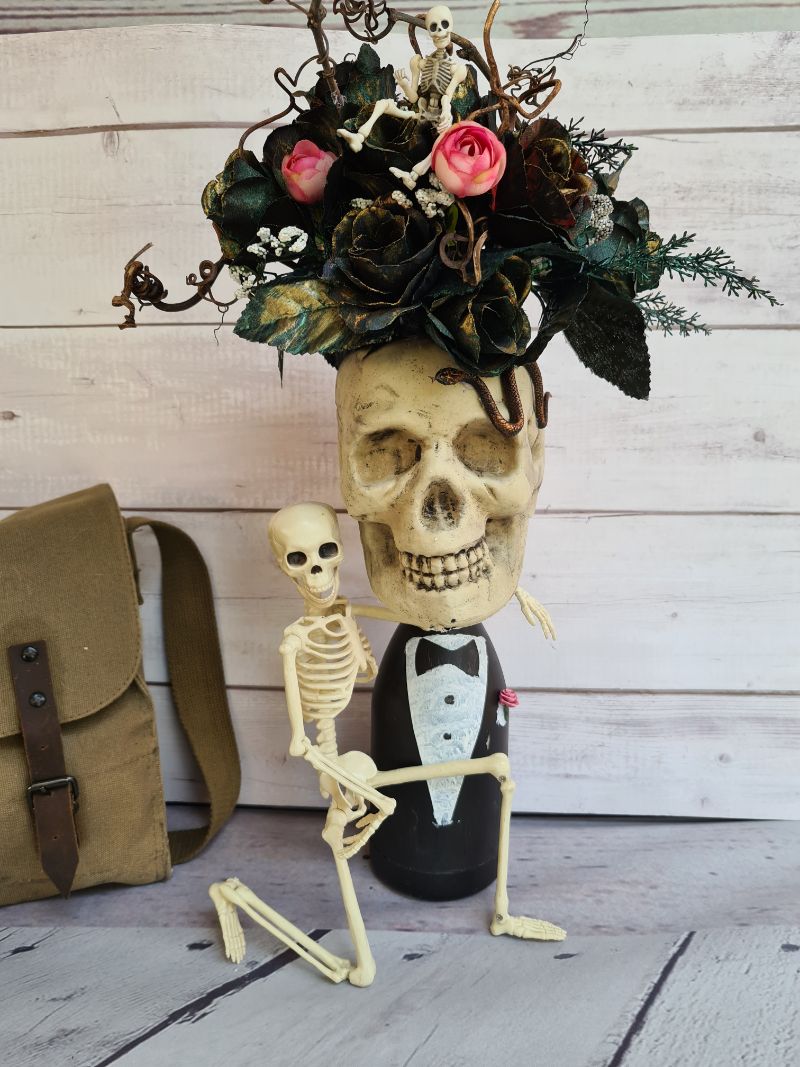
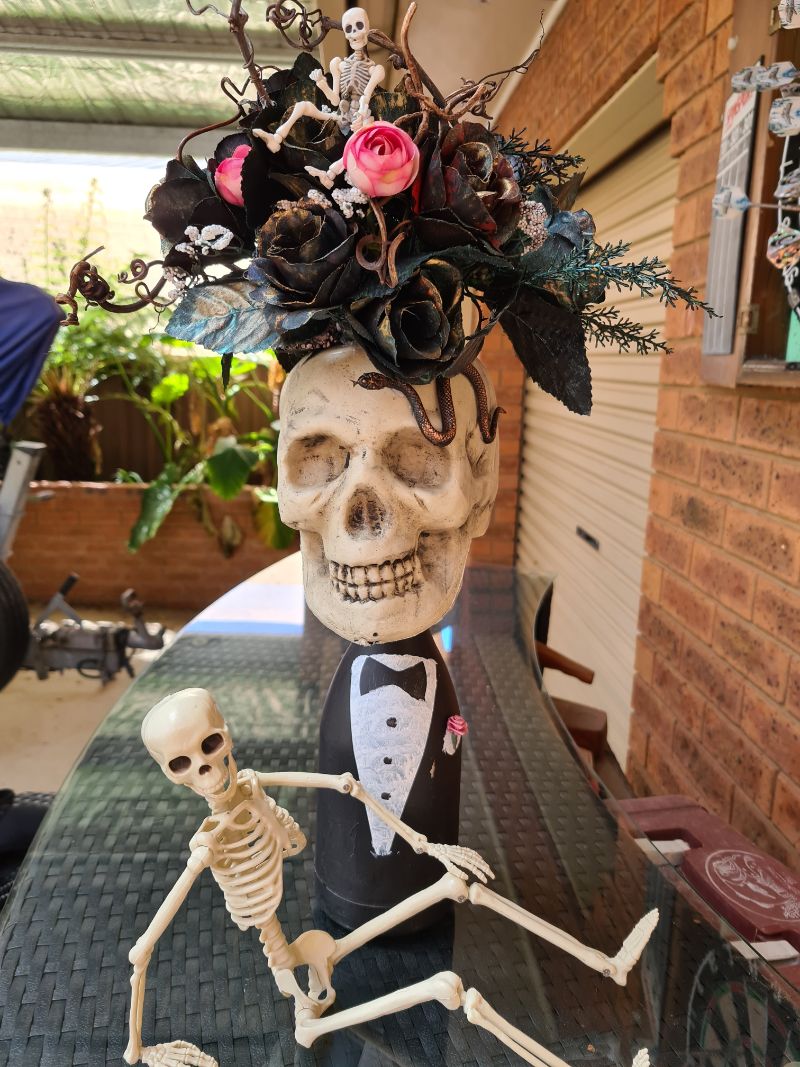
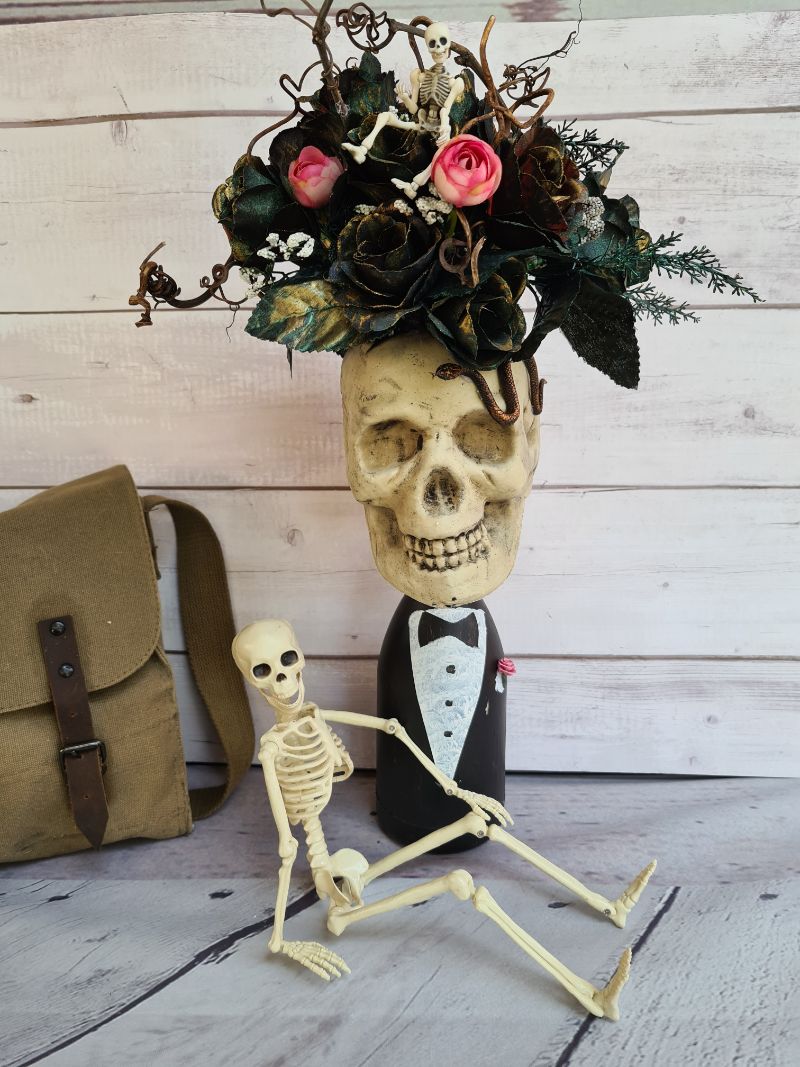
Completed Halloween flower arrangement
I had some fun taking the photos by using a poseable skeleton.
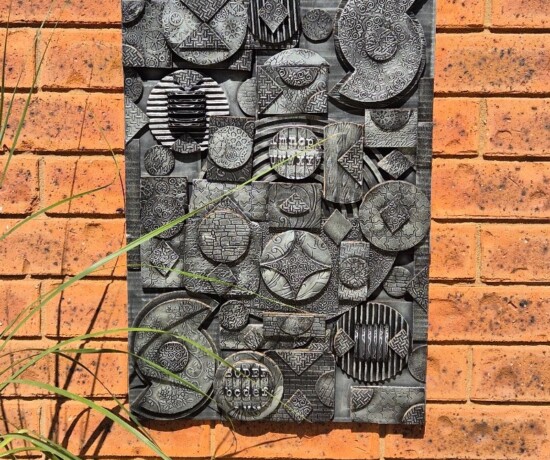
More Halloween project ideas
These Halloween bottles were made from recycled wine bottles. They were decorated in a mixed media style.

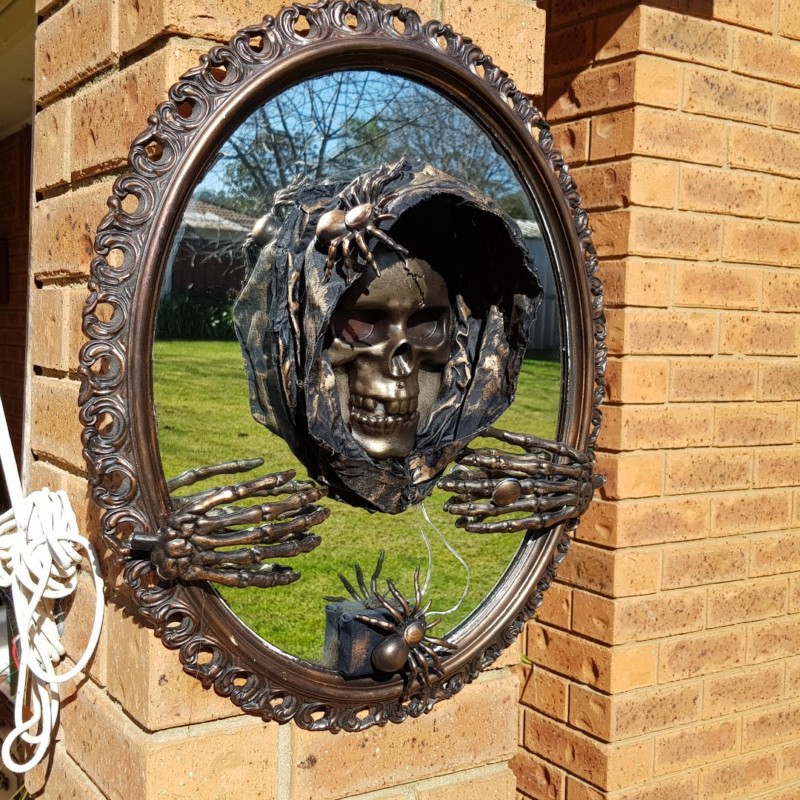
How about a creepy 3D Halloween mirror that lights up.
About IBC (International Bloggers Club)
If you follow my blog, you will know I am part of IBC (International Bloggers Club), which is a group of talented bloggers from around the world. We have members from Spain, South Africa, Australia, the United States, and Canada. Each month we come together and create a project in a common theme.
If you missed last month’s “Local Love” theme, here is the link to my Australian patriotic cushion. The contributions from my fellow bloggers for this month’s challenge are listed below. Please feel free to jump over and give them some love.
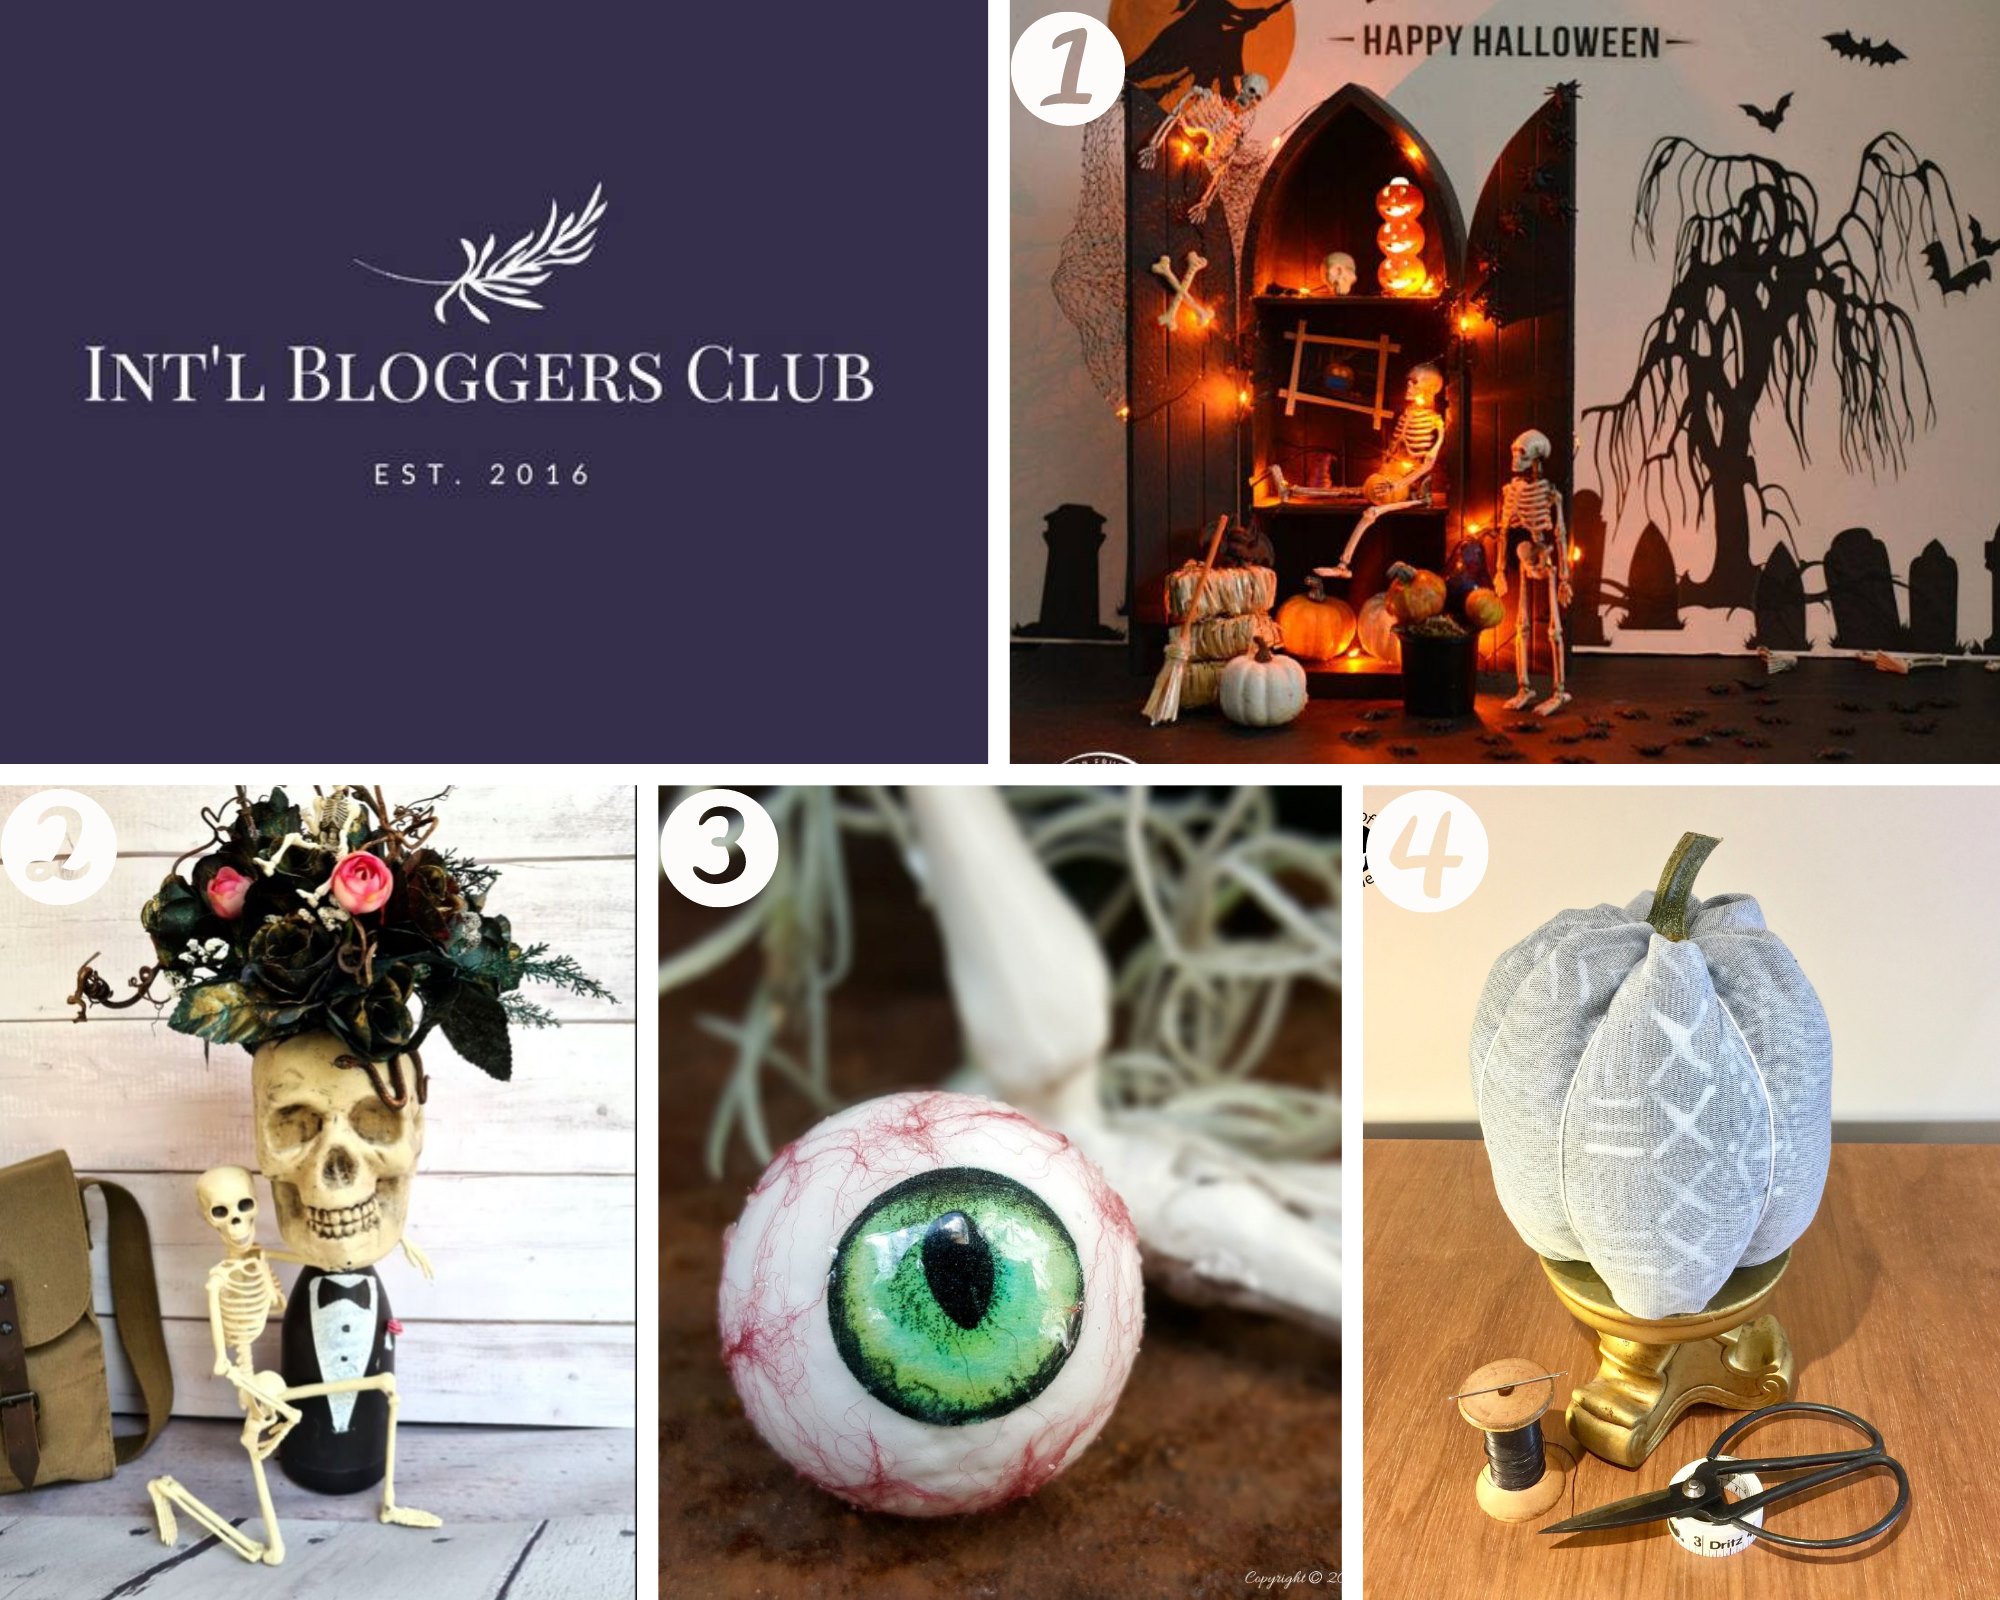
- 1. Interior Frugalista| Spooktacular upcycled Halloween diorama box
- Me |Unique Creations by Anita
- A Crafty Mix|Easy realistic- eyeballs
- Birdz of a feather|Diy pincushion.

If you’d like to find any of the items used in this project, we’d greatly appreciate it if you used our affiliate links. These links provide us with a small commission at no extra cost to you, allowing us to continue creating and sharing more inspiring projects. We’d also love to hear your thoughts—feel free to leave a comment or share this post!

27 Comments
Michelle Leslie
October 20, 2020 at 12:48 amHow do you always manage to come up with something that’s so different to everything else out there Anita? What a novel idea to make a Halloween bouquet and I love the way you created a whole story with the little skeleton hugging his bigger and oh so dapper brother.
Anita Holland
October 20, 2020 at 11:18 pmThank you so much, Michelle. I put a lot of work into trying to come up with unique ideas. Thanks to my friends tell me to call my website Unique creations. lol
Marie-Interior Frugalista
October 20, 2020 at 1:33 amWhat a fantastically creative idea for Halloween, Anita! Classy and creepy at the same time and I love the tuxedo base too. That posable skeleton cracked me up!
Anita Holland
October 20, 2020 at 11:19 pmAww, Thanks Marie. I will have to admit I had more fun taking the photos and pose my boney friend. lol
Sara
October 20, 2020 at 2:10 amThis is brilliant Anita! We are that house that sits in darkness too. I probably won’t turn the lights on anytime soon, but I think you’ve inspired me to let me creepy side come out – next year :). We’ll see.
Anita Holland
October 20, 2020 at 11:20 pmThanks Sara, why not just make the projects. They are so much fun.
Maria Brittis
October 20, 2020 at 9:25 pmYou are so talented , these halloween DIY are great,
Anita Holland
October 20, 2020 at 11:29 pmThank Maria, I find Halloween so much fun to craft for.
Lori Nell
October 21, 2020 at 2:16 amAnita, This is just amazing! I can’t believe the twisted creativity in your brain! So original with your DIYs!! I’m thinking you worked in theater!!
Anita Holland
October 23, 2020 at 10:13 pmThank you so much Lori, sorry no theatre in my background. I just seem to have a knack for thinking up strange ideas lol. I was never the cleverest pupil in the class and can’t cook to save my life, so I had to be given something. lol
Kim Purvis
October 22, 2020 at 9:20 amI love all of the pieces for Halloween! The flowers are so pretty with the different colors too. Halloween is my fav holiday too!
Anita Holland
October 23, 2020 at 10:14 pmThank you Kim, us adults should be allowed to have fun too on Halloween. lol
Meegan
October 22, 2020 at 11:56 amI love this idea for Halloween! All the details are so fun for any party. Definitely gets my creative juices going!
Anita Holland
October 23, 2020 at 10:15 pmThank you so much Meegan, my creepy side snuck out on this one. lol
Marie Moody aka XmasDolly
October 28, 2020 at 4:59 pmGreat job, but I’m really not that into Halloween anymore. Oh, when my kids were little I was of course, but they’re all grown up and have little ones of their own, and I live far from them and they really don’t come over that much with their mom anymore because of this Covid crap! Happy Halloween to you & yours!
Anita Holland
October 31, 2020 at 12:56 pmThank you so much, I just love making the Halloween projects.
Monika Ohson | TravelerInMe
October 29, 2020 at 4:11 amSpooky beauty! The flower arrangement is fantastic, just perfect for the occasion. Loved your creativity.
Have a creative week ahead Anita!
Anita Holland
October 31, 2020 at 12:56 pmThank you for the awesome comment.
Portia Oalughlin
October 30, 2020 at 1:19 amSuch a great idea, that would be a great addition to my table! I love the tuxedo painted bottle.
Anita Holland
October 31, 2020 at 12:57 pmThank you so much Portia.
Lydia C. Lee
October 30, 2020 at 1:01 pmThat’s really fantastic!!
Anita Holland
October 31, 2020 at 12:59 pmThank you so much Lydia.
Anita Holland
October 31, 2020 at 12:58 pmThank you Marilyn. xx
Naush Samama
October 31, 2020 at 5:48 pmSkeleton in a tuxe !! Now thats a first for me 🙂 The part where you open his skull to fill the flowers is actually hilarious. I love what you come up with.
Thank you so much for joining us at Meraki Link Party.
Much love
Naush
Anita Holland
November 1, 2020 at 4:20 pmThank you so much Naush, I am actually sad Halloween is over. Now I have to make grown-up projects again. lol
Southern Crush Collective (Halloween Edition) - Southern Crush at Home
November 28, 2021 at 5:02 am[…] Credit: Unique Creations by Anita […]
A Crafty Mix | DIY Easy Realistic Eyeballs for Halloween - A Crafty Mix
October 1, 2022 at 10:00 pm[…] Creeptastic flower arrangement from Unique Creations by Anita […]