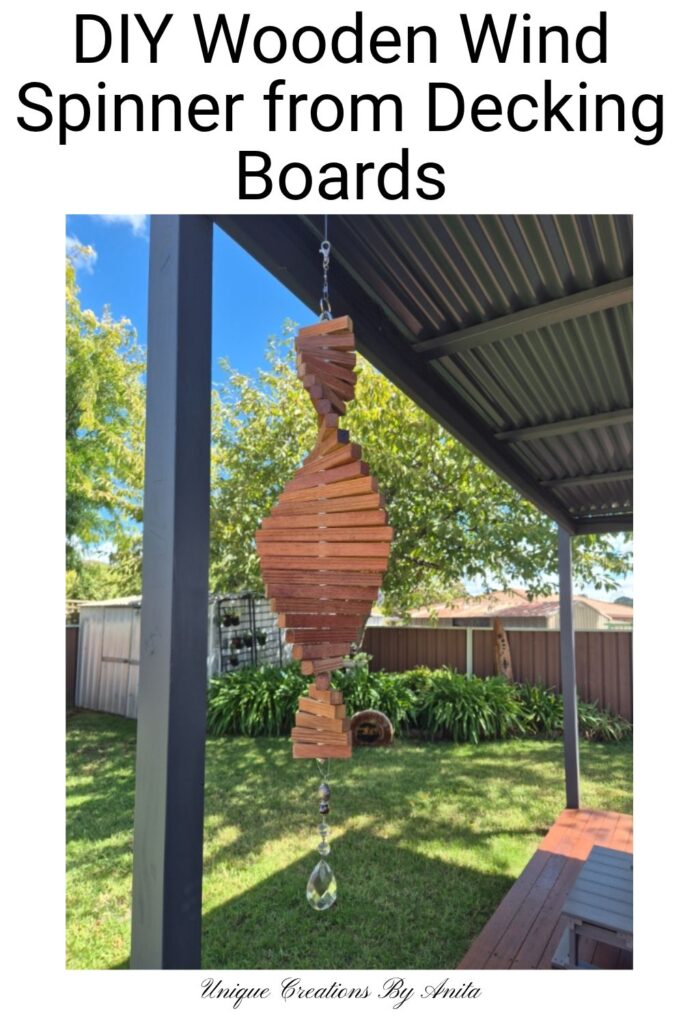
A wooden wind spinner is a striking way to add movement to the garden. This project uses leftover decking boards and simple cuts to create a spiral spinner that turns beautifully in the breeze. The design looks complex but is surprisingly easy to build.
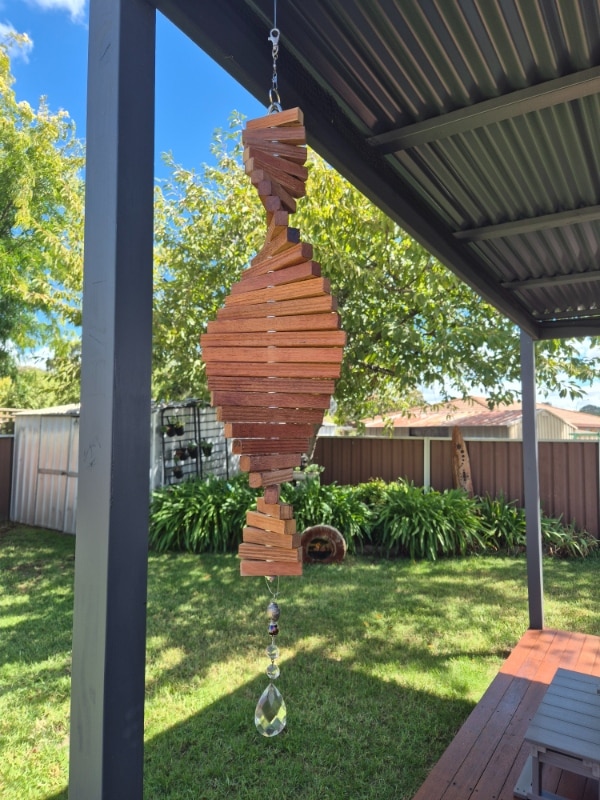
I love projects that use scrap timber, and decking boards are perfect for outdoor decor. They are durable, weather-resistant, and already designed for outdoor conditions. With a few careful cuts and some spacing between the pieces, the wood naturally forms a twisting spiral that spins smoothly in the wind. This tutorial shows you how to turn merbau decking offcuts into a garden spinner that looks impressive hanging from a tree, pergola, or verandah.
This project is part of the Do It Over Designers blog hop, where a talented group of bloggers breathe new life into old or unloved items. Be sure to check out all the creative upcycles linked at the bottom of this post!
Before we dive into this tutorial, be sure to subscribe to my bimonthly newsletter to be the first to see my latest projects. You can also follow me on Pinterest and Facebook, where I also include my unique mixed-media art projects.
How to Make a Wooden Wind Spinner
**This post may contain affiliate links. This means I earn a small commission on links used at no extra cost to you. Please see my disclosure policy for more information.**
Materials
- Decking board timber (offcuts)
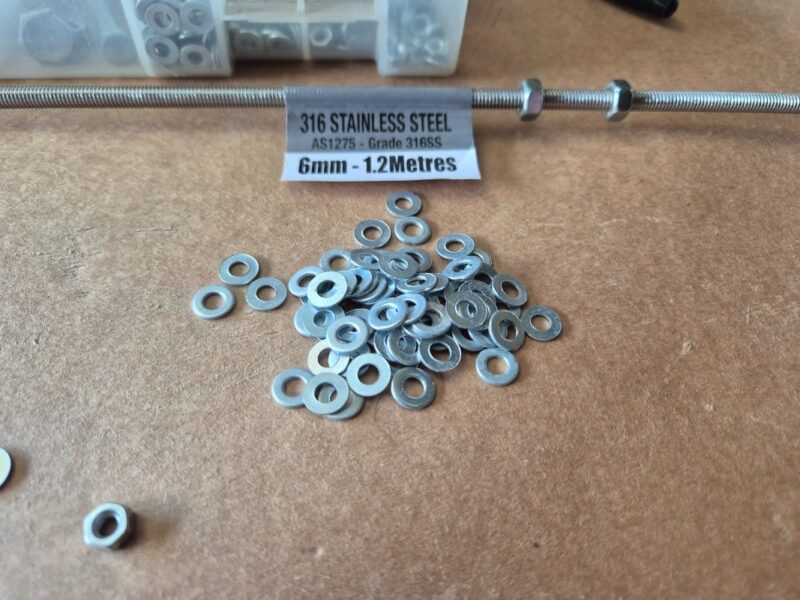
- 6 mm threaded rod or long bolt (approx. 75 cm)
- 6 mm nuts
- 6 mm washers
- Wire eye strap
- Hook for hanging
- Exterior wood stain or paint (optional)
Tools
- Saw (drop saw, table saw, or hand saw)
- Drill with a 6 mm drill bit
- Measuring tape
- Pencil
- Sandpaper or sander
- Spanner or wrench
Cutting the wood pieces
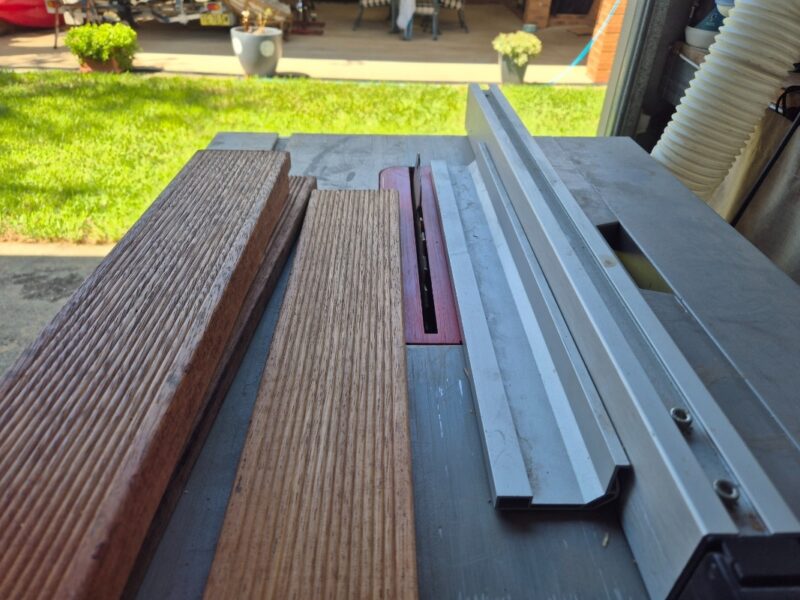
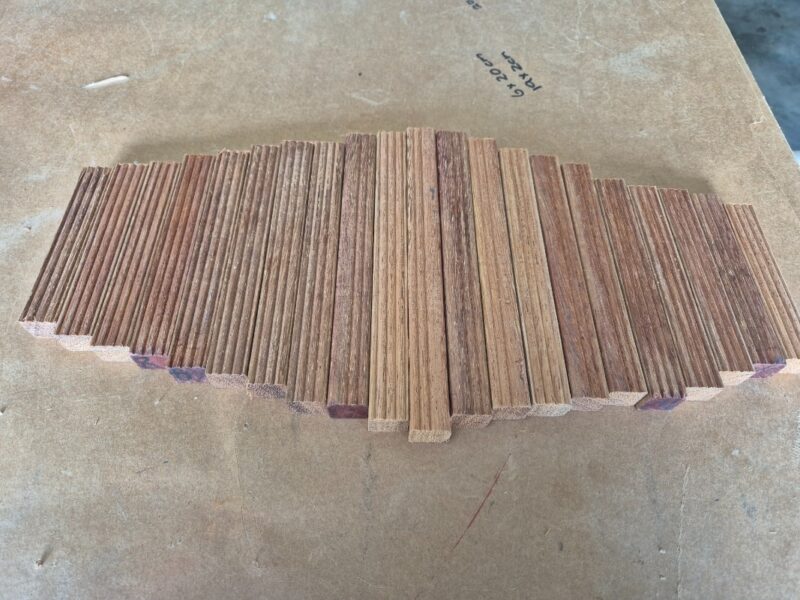
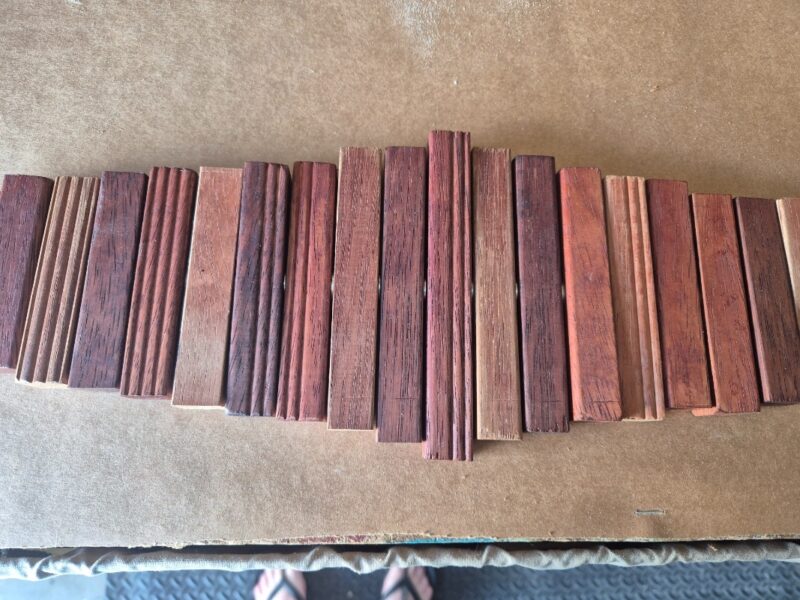
I started by cutting the decking boards into strips measuring 19 mm × 10 mm × 210 mm. I made them slightly longer than needed so I’d have enough material to work with, and planned to use the offcuts to make a smaller wooden wind spinner.
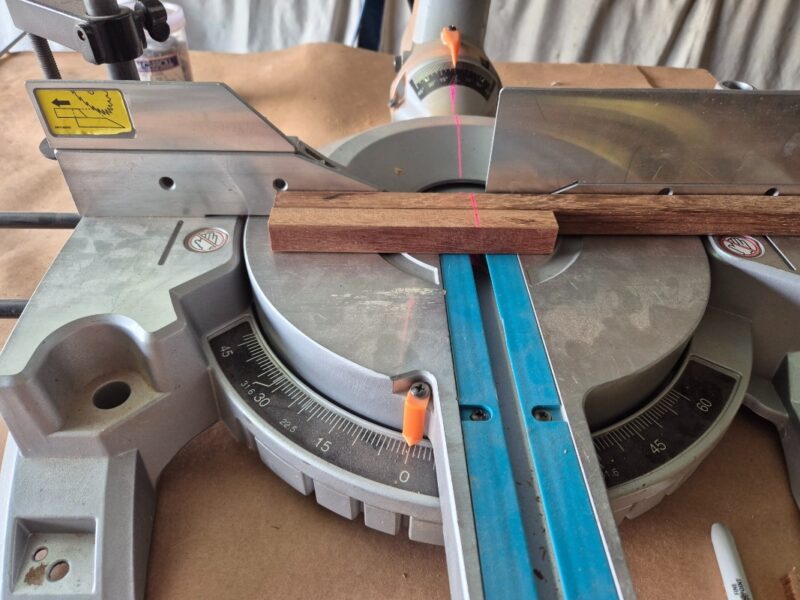
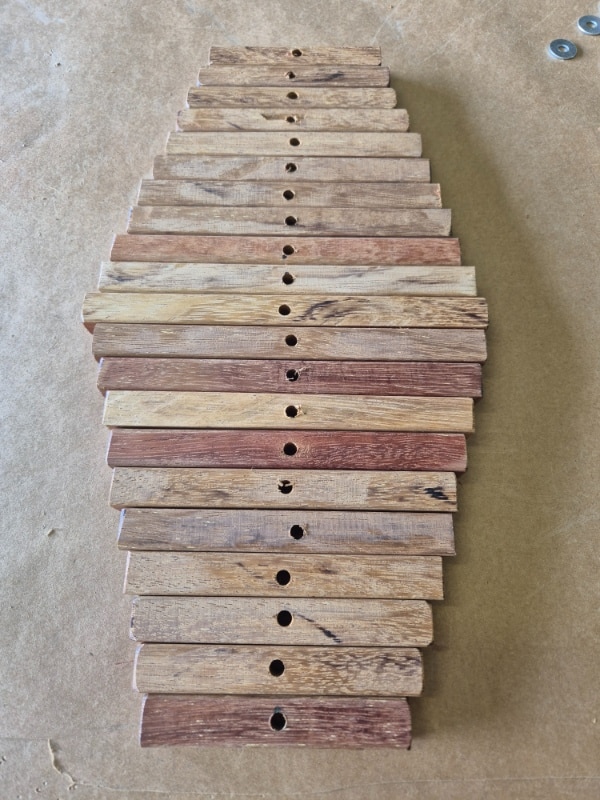
Cut one centre piece at 21 cm, then cut matching pairs for each size on either side, reducing each pair by 0.5 cm as you work outward. This means you will need two pieces at 20.5 cm, two at 20 cm, two at 19.5 cm, and continue in the same pattern, decreasing by 0.5 cm each time, until you reach the final pair at 8.5 cm. Both pieces on either side of the centre are identical in length, creating a balanced, symmetrical wind spinner.
These pieces will form the layers of the wind spinner, so try to keep the cuts consistent to help the spinner balance evenly when it rotates. I used merbau decking, and the natural grooves in the timber add a nice decorative detail, giving the finished spinner extra texture and visual interest as it spins.
Sanding the wood
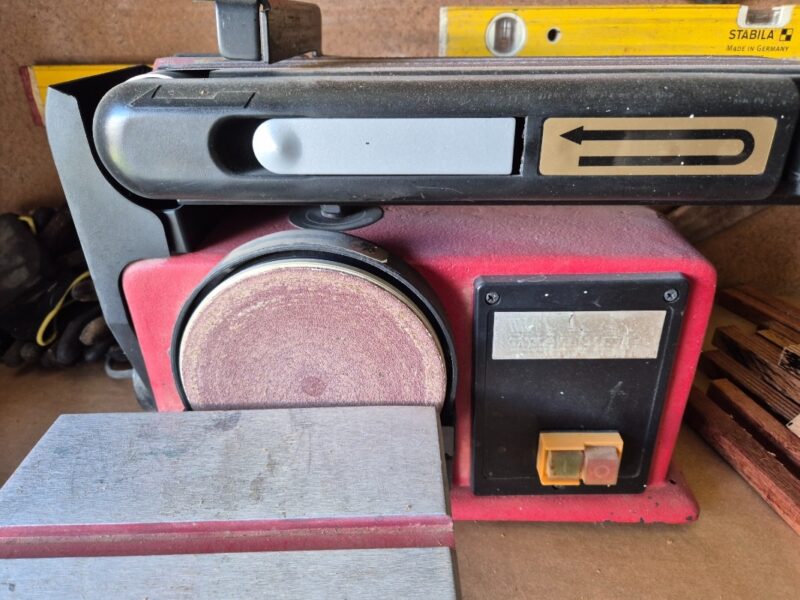
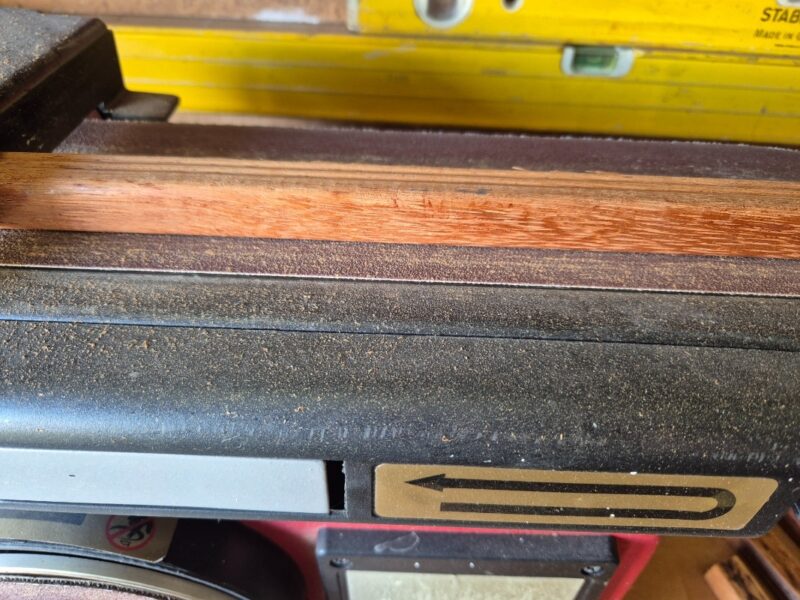
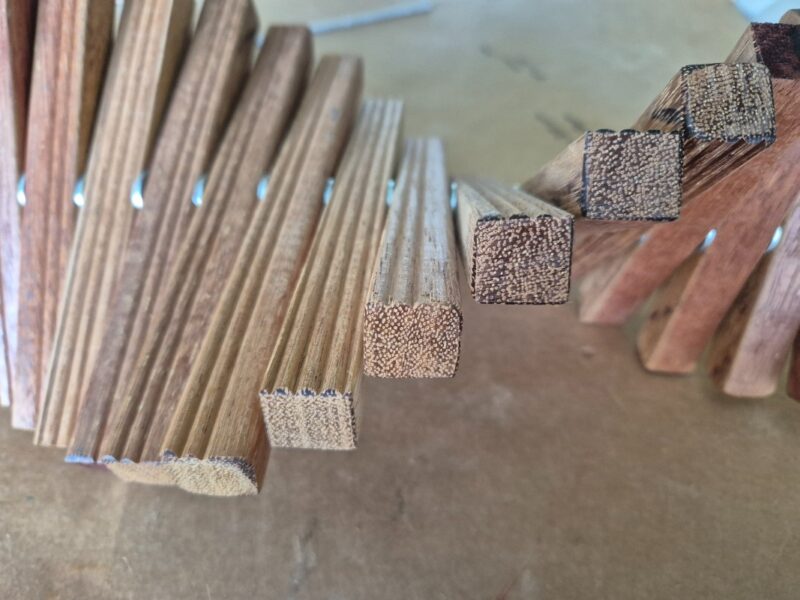
I lightly sanded each piece on a benchtop sander to soften the sharp edges and smooth the timber. Removing the hard edges helps the pieces look more finished and also reduces the chance of splinters when handling or assembling the spinner. I found the benchtop sander to be a quick and easy way to sand the pieces evenly, but any sander will work just as well. A handheld sander or even sanding by hand will achieve the same smooth result; it may just take a little longer.
Mark the Centre
Measure the centre point on each timber piece and mark it with a pencil or marker.
Drill the holes
I used a drill press to drill the centre holes so they were perfectly straight and uniform. This also made the process much quicker since there were 31 pieces to dril. A drill press helps keep every hole aligned, which makes assembling the spinner easier and helps it spin smoothly.
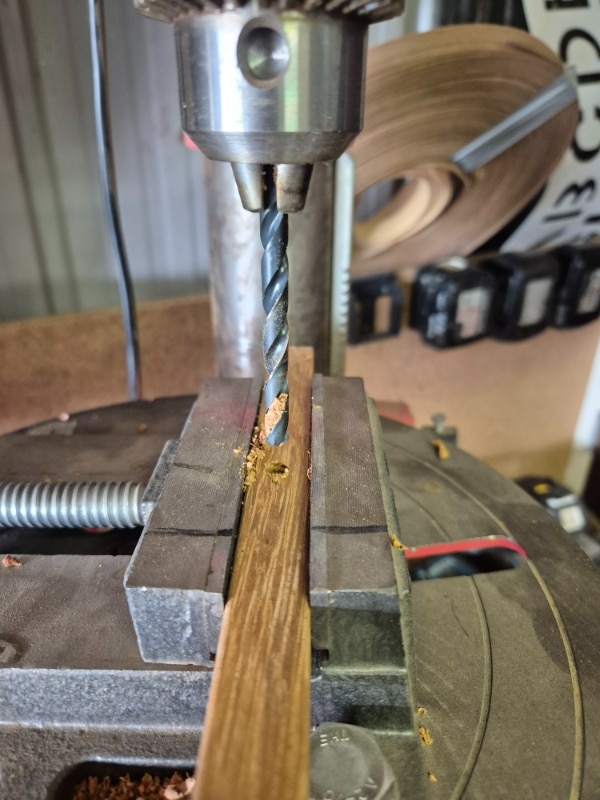
However, you can drill the holes with a handheld drill. Just take a little care to mark the centre accurately and keep the drill as straight as possible.
Create the Spacing
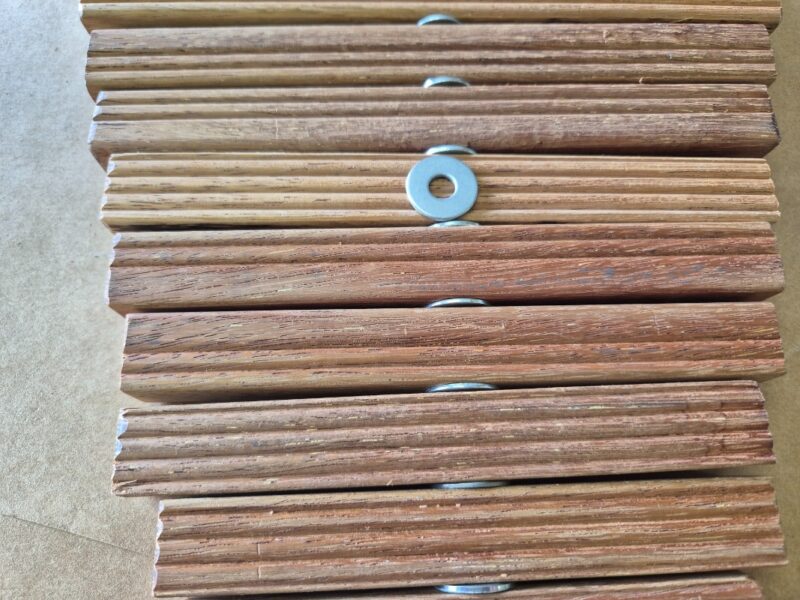
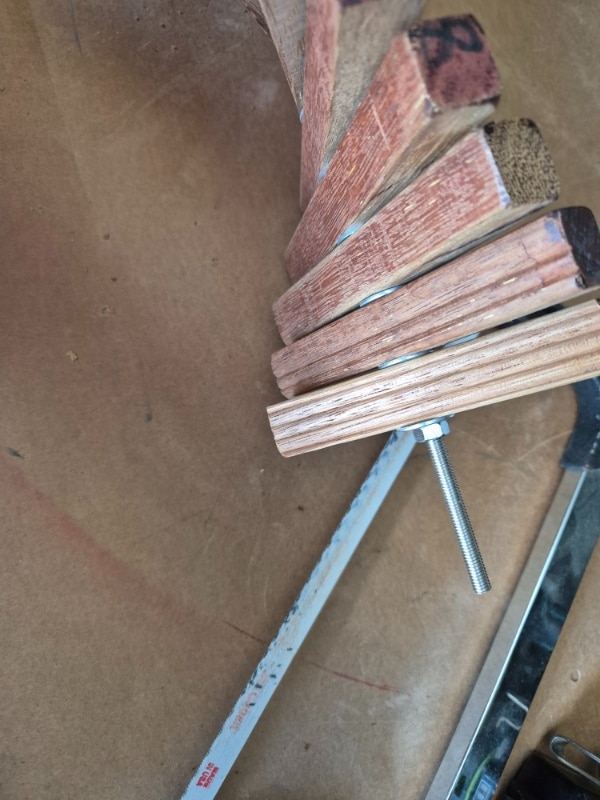
Using spacers between the timber pieces allows air to flow through the spinner rather than pushing against a solid block of wood. Without spacers, the pieces sit tightly together and the wind struggles to move them, which makes the spinner heavy and less responsive. I would recommend cutting the rod to size once the wood and spacers have been added.
The washers create small gaps between each piece, reducing friction and allowing each layer to twist slightly. This spacing helps the wind catch the edges more easily, so the spinner turns smoothly and consistently even in a light breeze.
Assemble the Wind Spinner
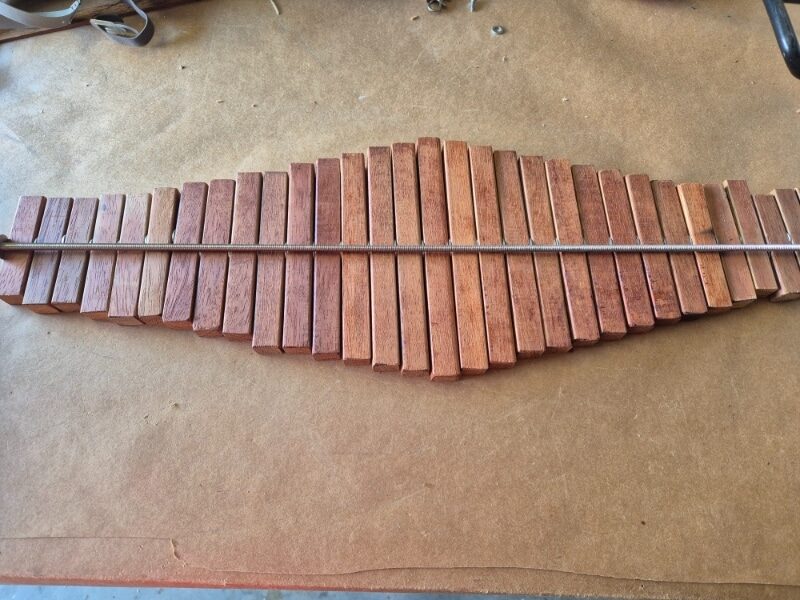
I bought the threaded rod from my local hardware store because it was the only place I could find it in a longer length. Start by sliding a nut and washer onto the threaded rod to create a sturdy base.
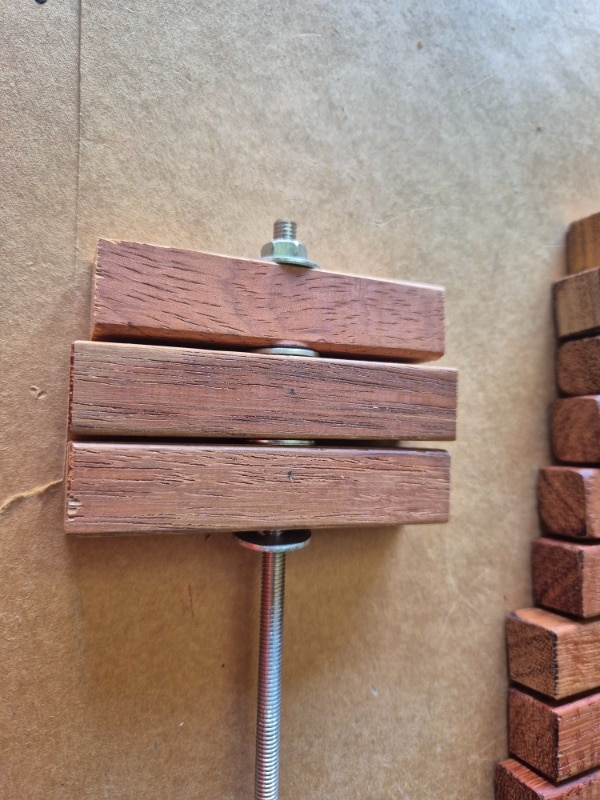
Next, add the first timber piece, then place another washer on top before adding the next piece. Continue stacking the timber pieces in the same way, placing a washer between each one to act as a spacer.
Once all the timber pieces are threaded onto the rod, finish with a washer and a nut at the top. Tighten the nuts just enough to hold everything securely while still allowing the timber pieces to rotate slightly. This small amount of movement helps the wind spinner twist and catch the breeze. Cut away any excess threaded rod with a hacksaw.
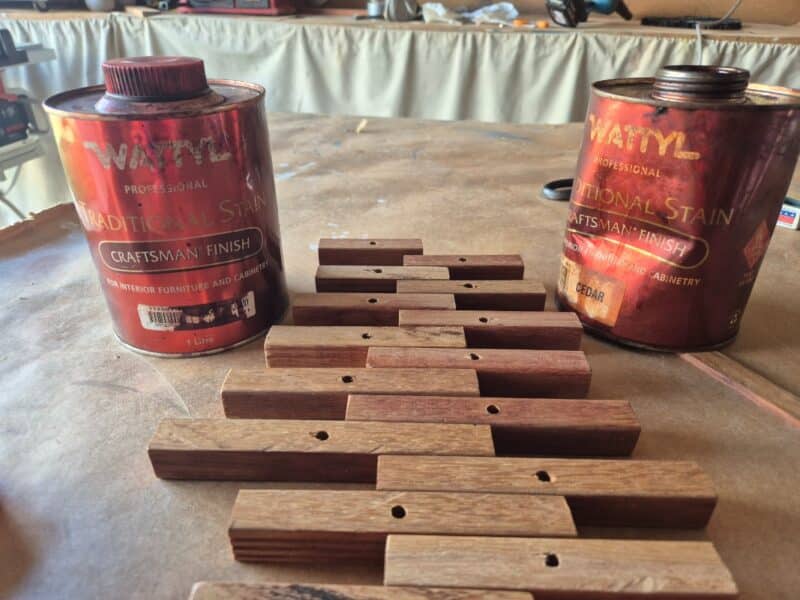
Finish the Timber
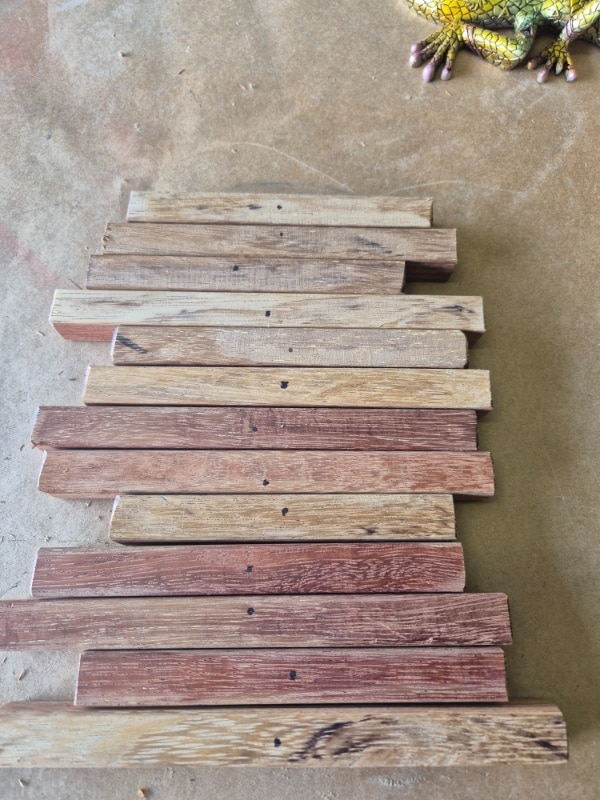
You can leave the timber natural or apply an exterior wood stain, paint, or clear sealer. Outdoor finishes will help protect the timber and keep the spinner looking great in the garden. Allow the finish to dry completely before hanging. I stained the wood on the wind spinner I made with all the offcuts for a different look.
Twist the Spinner
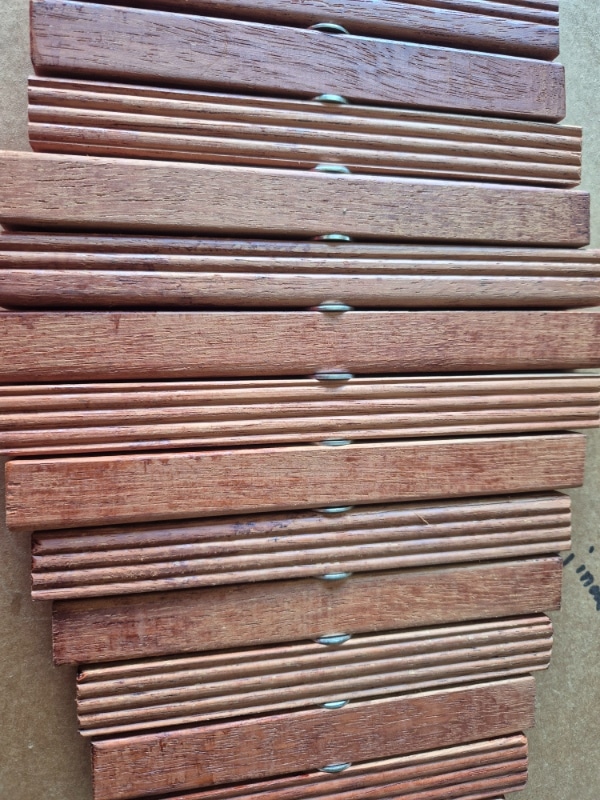
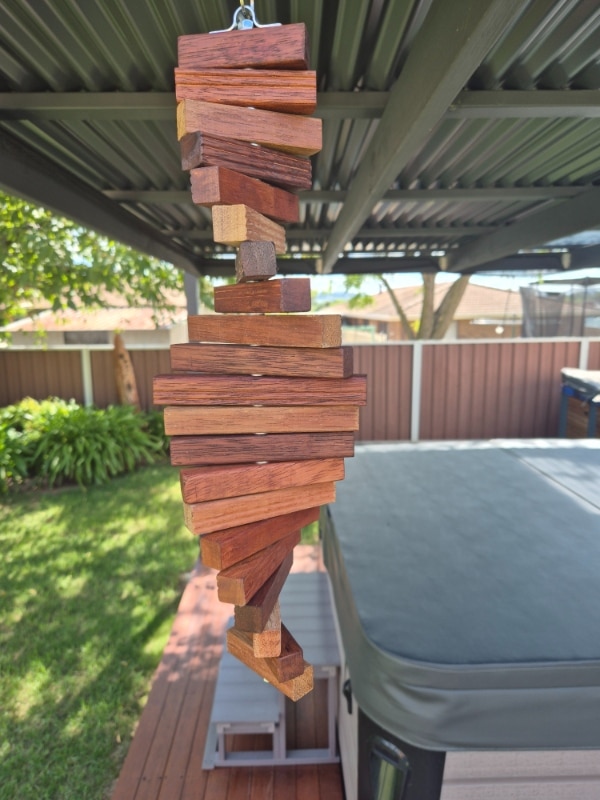
Gently twist each timber piece slightly to create and enhance the spiral pattern. Because the pieces gradually decrease in length toward each end, the slight twisting helps emphasise the tapered spiral shape. Adjust each piece a little at a time until the spiral looks even.
The washers between the timber pieces create small gaps that allow the wind to pass through, helping the spinner rotate freely rather than resisting the airflow.
Hang the Spinner
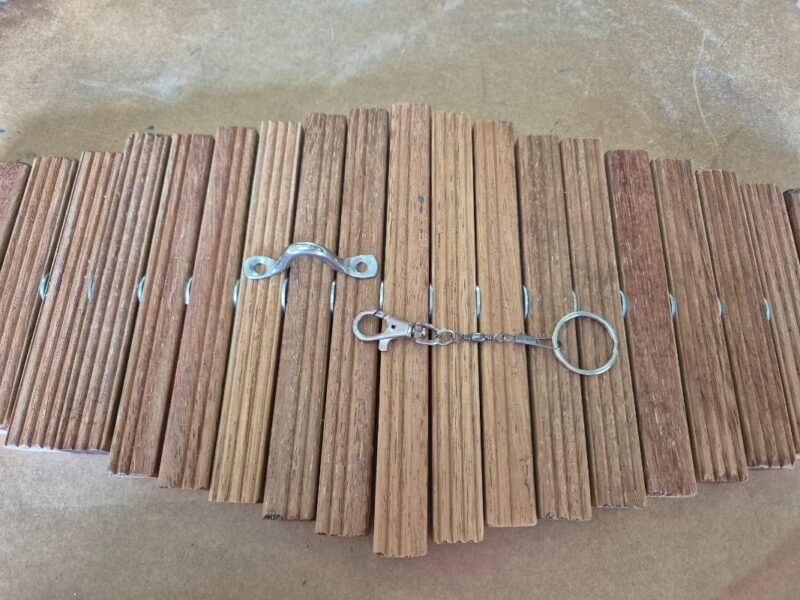
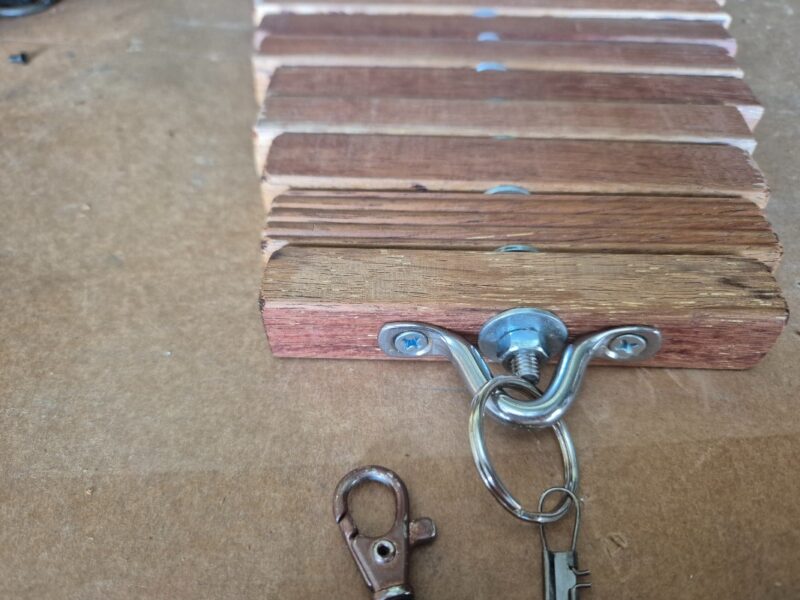
Our hardware store had nothing suitable for hanging my windspinner so I improvised and used a wire eye strap that I screwed into the top and used a recycled keychain with a fishing swivel.
Add a Decorative feature
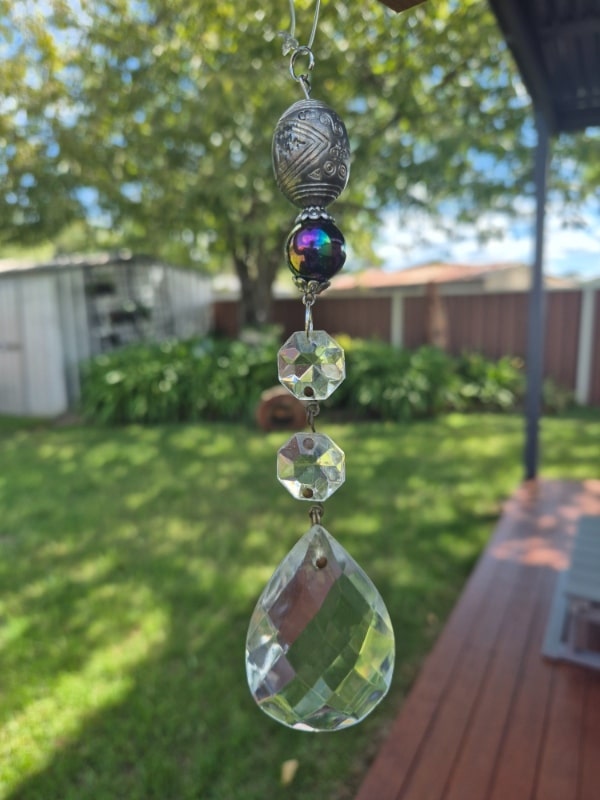
To add a decorative touch to the bottom of my wooden wind spinner, I used a large glass bead that I salvaged from an old chandelier. The weight of the glass bead is perfect because it helps stabilise the spinner, keeping it balanced and encouraging smooth, steady rotation in the wind. At the same time, the bead adds a bit of sparkle and visual interest, giving the spinner a charming, eye-catching finish that complements the natural timber.
Tip: I found the wooden wind spinner performs much better when it’s hung from a loop of fishing line rather than attached directly to a hook on the pergola. In the wind, both will spin, but once the breeze drops, the one fixed to a hook stops almost straight away. The fishing line version keeps spinning for longer because the line twists and slowly untwists, allowing the spinner to continue moving even after the wind has eased.
More Garden Project Ideas
Beaded garden stakes are a vibrant and charming way to add colour and decorative flair to your garden planters.

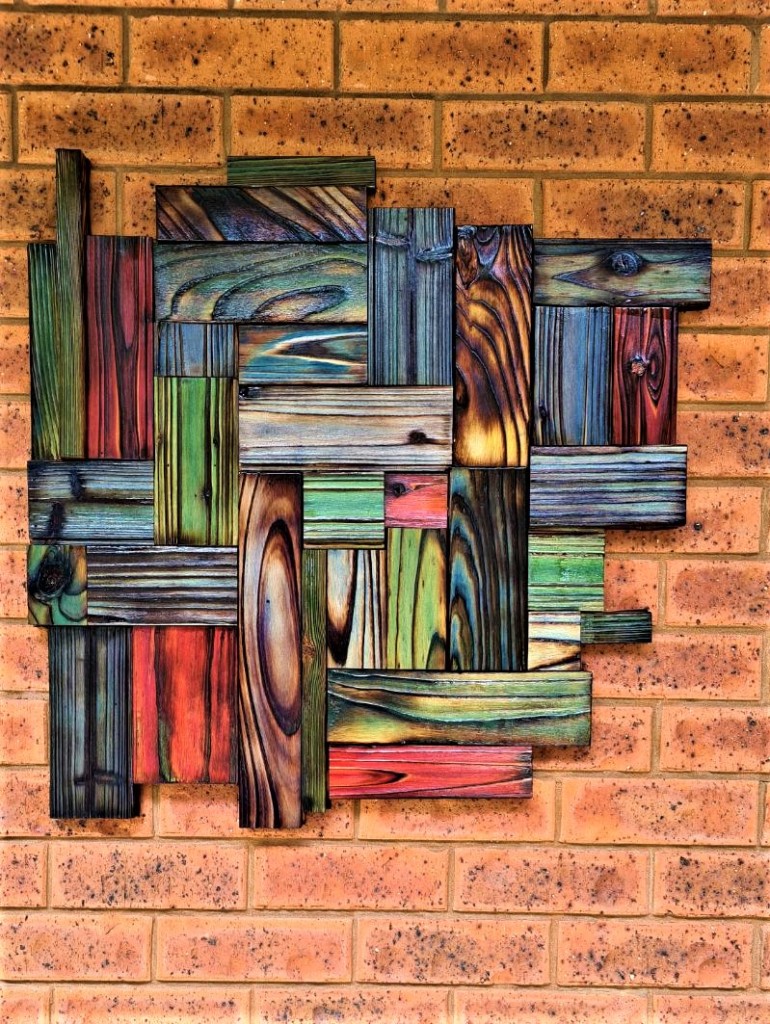
Created from recycled pallet wood, this Shou Sugi Ban wall art features a colourful finish that beautifully contrasts with the rich, charred grain of the timber.
Do it over designers blog hop

The Do It Over Designers are a group of creative bloggers who love giving old, forgotten, or thrifted items a brand-new purpose. Hosted by Ann of The Apple Street Cottage, this monthly blog hop showcases inspiring upcycle projects to spark your own DIY creativity.

If you’d like to find any of the items used in this project, we’d greatly appreciate it if you used our affiliate links. These links provide us with a small commission at no extra cost to you, allowing us to continue creating and sharing more inspiring projects. We’d also love to hear your thoughts—feel free to leave a comment or share this post!


16 Comments
sara allen
March 28, 2026 at 10:37 pmYou are the queen of scrap wood upcycles Anita; your spinner is so fabulous! And I love your improvisation of the hardware; it couldn’t be better! So glad you joined the hop this month :).
Anita Holland
March 29, 2026 at 1:39 pmThank you Sara, I have missed getting into my shed. Life just gets in the way. Lol
Ann
March 28, 2026 at 11:26 pmThis project brings back memories for me. I had a friend who had these spinners in her yard and I loved them. Great tutorial and the tip about using fishing line! Now I have to see what I have in my scrap wood pile….
Anita Holland
March 29, 2026 at 1:38 pmThank you Ann, they are so easy to make. The fishing line was a great add for gentle wind, but it does go wild in strong wind.
Kim
March 29, 2026 at 12:03 amYou’re a true artist, Anita, and one with some mad skills! I’m always so impressed with your power tool prowess. It makes me want to grab a saw and get started creating my own versions of your crafts. Maybe one day I’ll find the nerve. In the meantime, I’ll be sharing this one with my DIY guy. Lovely!
Anita Holland
March 29, 2026 at 1:36 pmThanks Kim, I am so comfortable using most power tools it opens the door to different types of projects.
Gail @Purple Hues and Me
March 29, 2026 at 12:37 amThis is absolutely spectacular, Anita! And using decking board is genius! Your beautiful spinner adds such a great focal point to your garden!
Anita Holland
March 29, 2026 at 1:35 pmThanks Gail, I had a few boards left over after finishing the decking so it seemed a waste not to use them.
Patti @ Pandora's Box
March 29, 2026 at 12:48 amYour spinner is outstanding! You are one clever gal with your power tools and imagination! What a great way to add interest to your garden and yard
Anita Holland
March 29, 2026 at 1:34 pmThanks Patti, power tools are my happy place. I am on a mission to build more decorative projects for my garden.
Tania
March 29, 2026 at 12:55 amWhat a great idea to use the leftover decking boards, the spinner turned out so nice, I bet it’s pretty to watch.
Anita Holland
March 29, 2026 at 1:33 pmThanks Tania, it is great to watch, it goes a bit crazy in the strong winds. Lol
Cara
March 29, 2026 at 3:19 amI love this spinner Anita! So unique, and I have a feeling I could get lost for the better part of an afternoon being mesmerized by it. I am checking out the beads, I have been wanting to do something in our backyard to liven things up back there – all of that color would be fabulous! You are always so creative.
Anita Holland
March 29, 2026 at 1:32 pmThank you Cara, I have it over my spa, and it is so relaxing to watch.
Donna @ Modern on Monticello
April 2, 2026 at 2:11 amWell done! And your tutorial is perfect to follow when you want to repeat something similar. I needed a good idea for what to do with our leftover deck boards!
Anita Holland
April 6, 2026 at 3:38 pmThanks so much Donna.