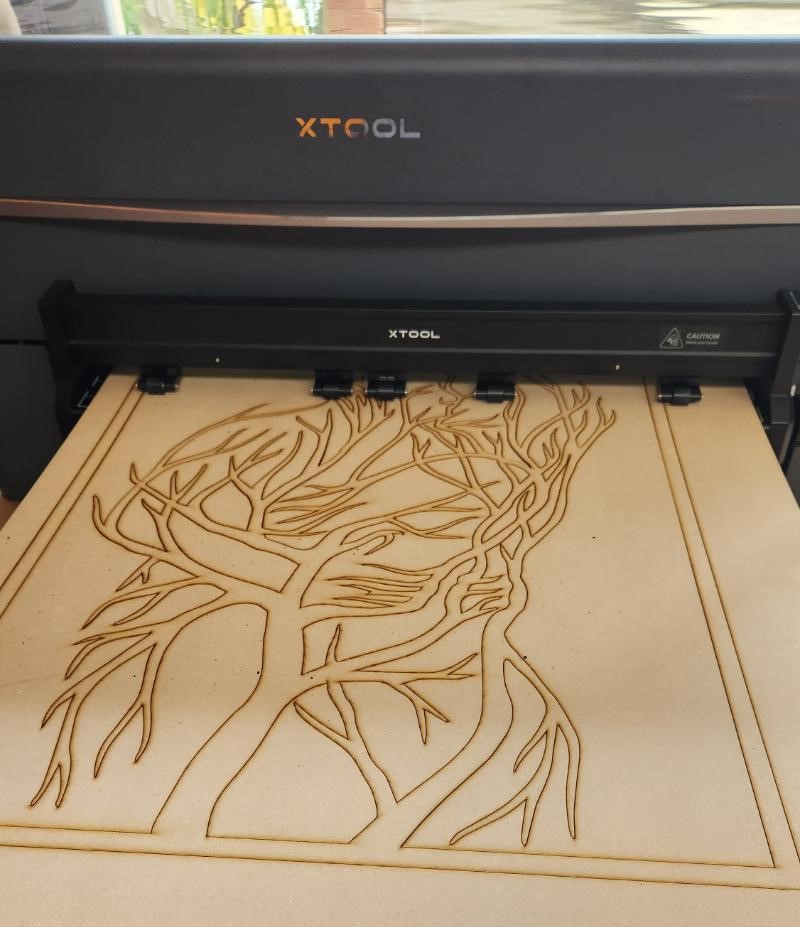
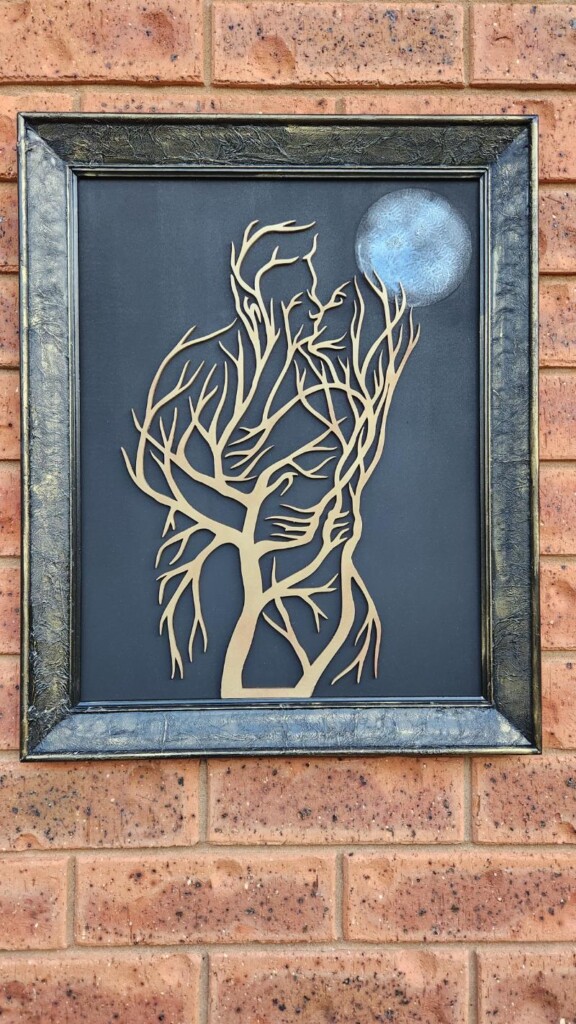
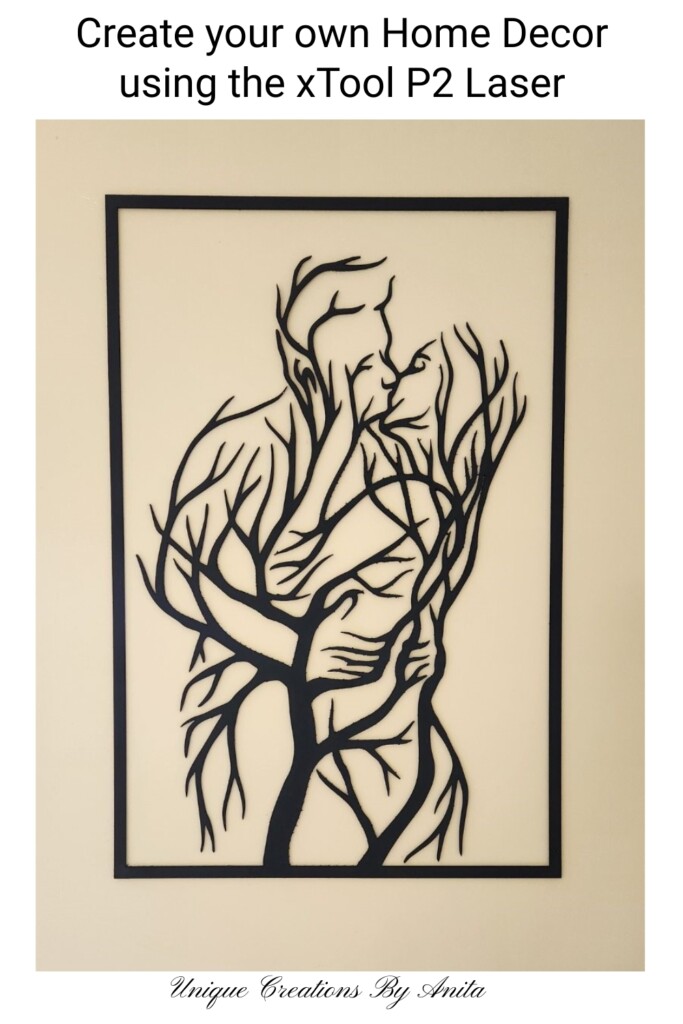
I created this xTool P2 conveyor ‘Tree Lovers’ silhouette wall art because I wanted a bold, modern piece without a fussy cut that would take ages. I’d had the xTool P2, Riser Base and Conveyor Feeder for about three months (for review), and I was itching to push the conveyor to its limits on a long panel—up to 3 metres. It took six tries (keeping it real!), plenty of problem-solving, and a final pivot that delivered a wall-worthy result. In this tutorial, I’ll show exactly what worked, what didn’t, and how to set your tab settings so you don’t repeat my mistakes.
Before we dive into this tutorial, be sure to subscribe to my bimonthly newsletter to be the first to see my latest projects. You can also follow me on Pinterest and Facebook, where I also include my unique mixed-media art projects.
xTool P2 Conveyor: Laser-Cut ‘Tree Lovers’ Silhouette Wall Art
**This post may contain affiliate links. This means I earn a small commission on links used at no extra cost to you. Please see my disclosure policy for more information.**
Materials needed
- xTool P2 Co2 laser
- Baser Riser
- Conveyer system
- Double-sided tape
- 3mm plywood/ MDF
- Black spray paint
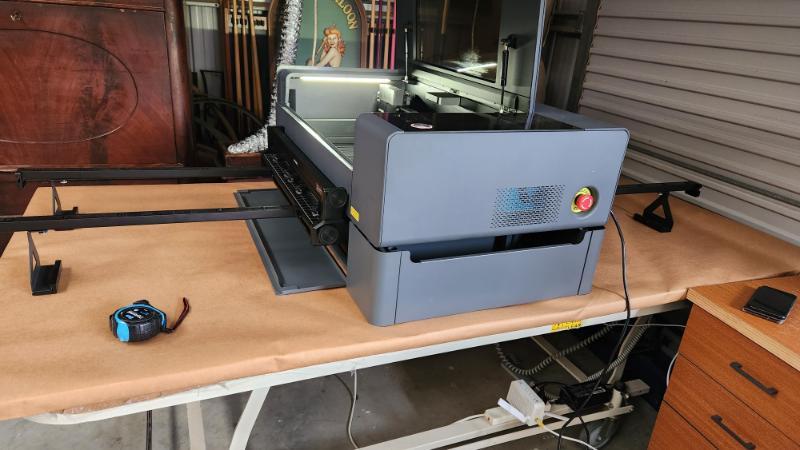
Setting up your material in the laser
This post isn’t about the setup of the conveyor system – that part was a breeze. I’m more of a visual learner, so I hopped onto YouTube and found a helpful video tutorial. Watching someone do it made it way easier than slogging through the instruction manual, which, to be fair, was pretty straightforward too.
I wasn’t too confident about doing this project perfectly on the first go, so I decided to play it safe and use some 3mm MDF. It’s much cheaper than other types of wood, so I figured it’d soften the blow if things didn’t quite pan out.
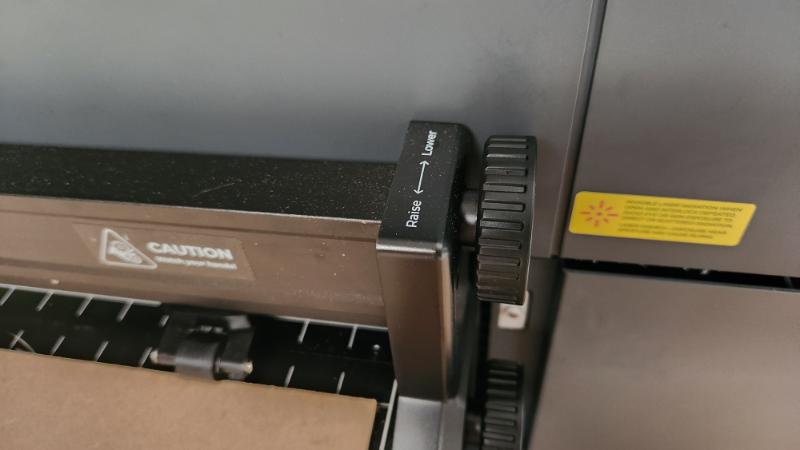
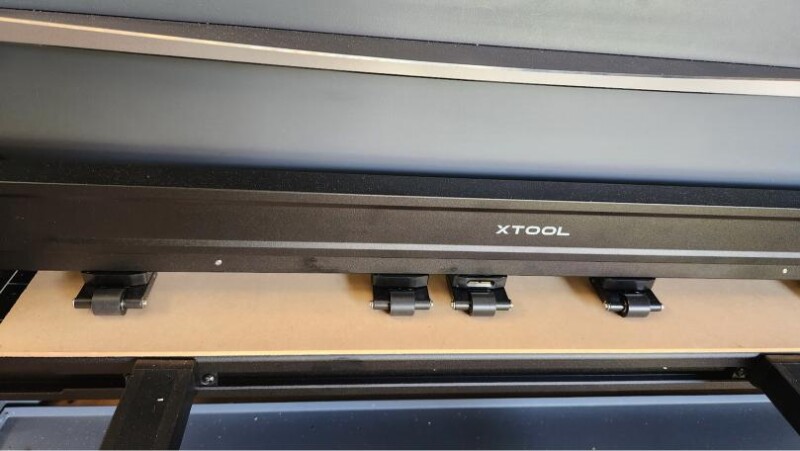
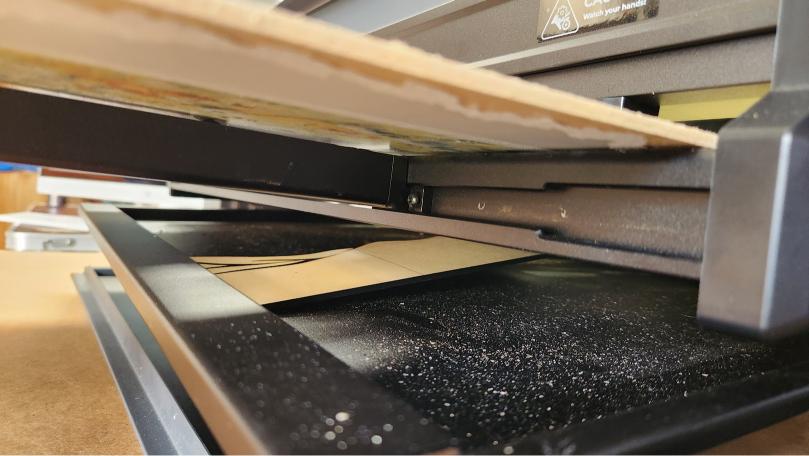
Start by lining up your MDF with the rollers on the front of the laser. Next, use the knob on the side and feed your material into the laser.
Having that line grid on the inside is so handy that it makes it a breeze to keep the MDF aligned perfectly straight.
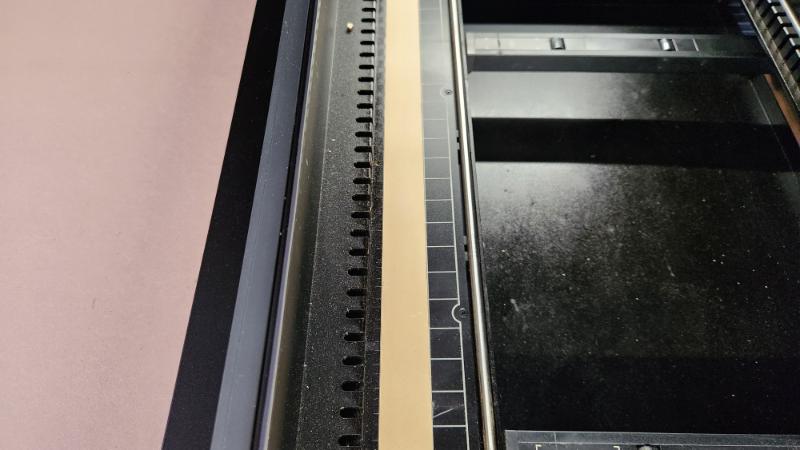
In the back of your instruction manual, you will find the pressure guide, which tells you what colour your pressure guide should be based on the material you are using.

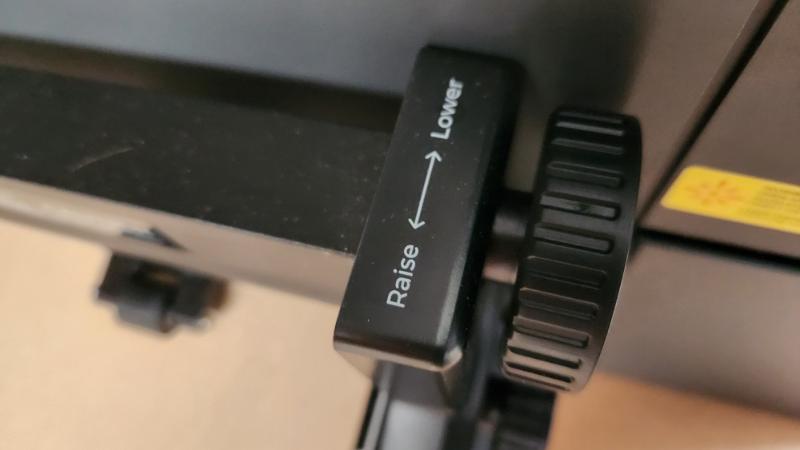
Next, keep turning the dial to lower the wheels onto your MDF until the pressure gauge turns completely yellow.
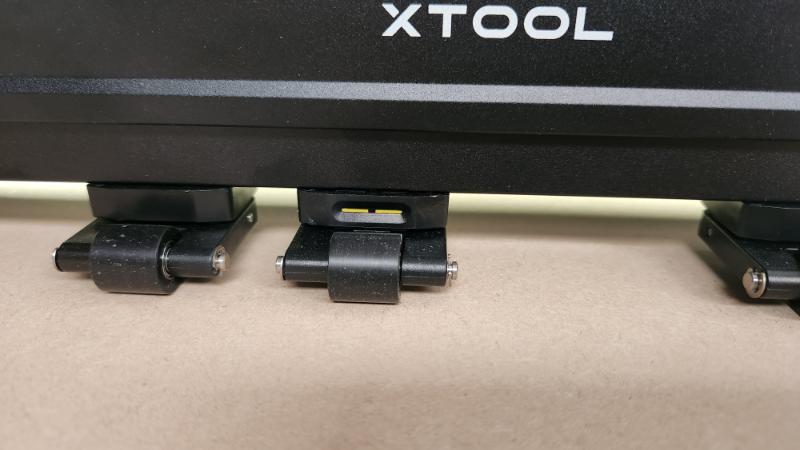
The pressure guide can be found on one of the centre wheels in front of your laser.
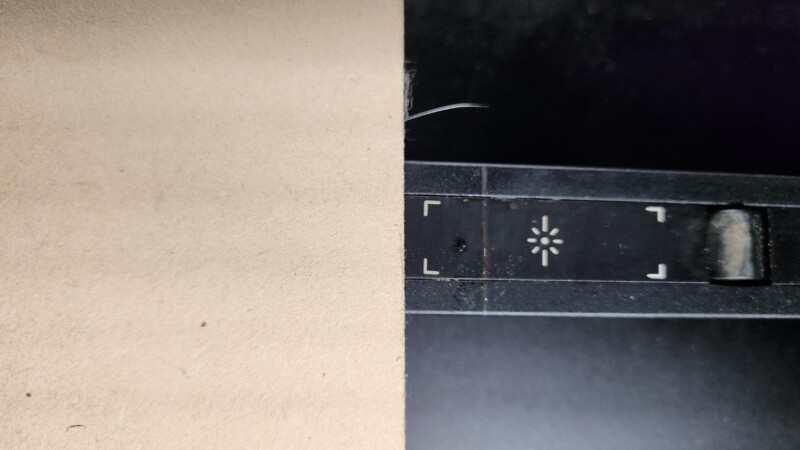
To position your material in the laser’s working area, turn the dial until you reach the desired location. It should be inside the area where you see the “eye”. If you are using the conveyor system, the laser head moves only back and forth on the x-axis, while the material moves in and out. You will notice after a while that the laser will leave a mark on the surface. I used this as my guide.
Set up your laser design
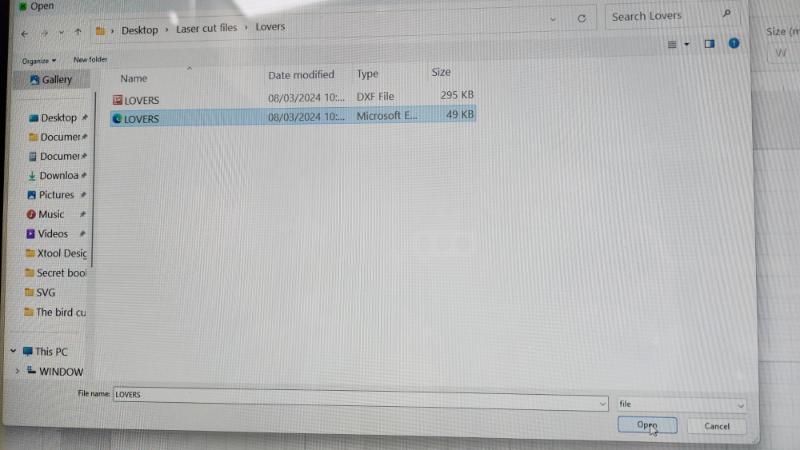
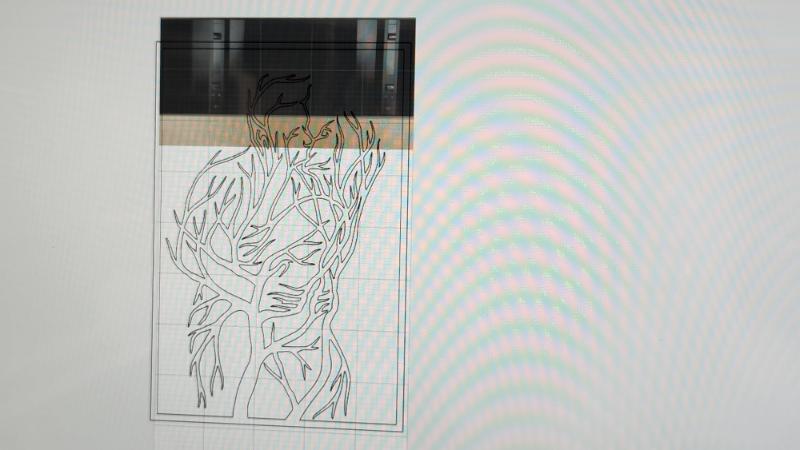
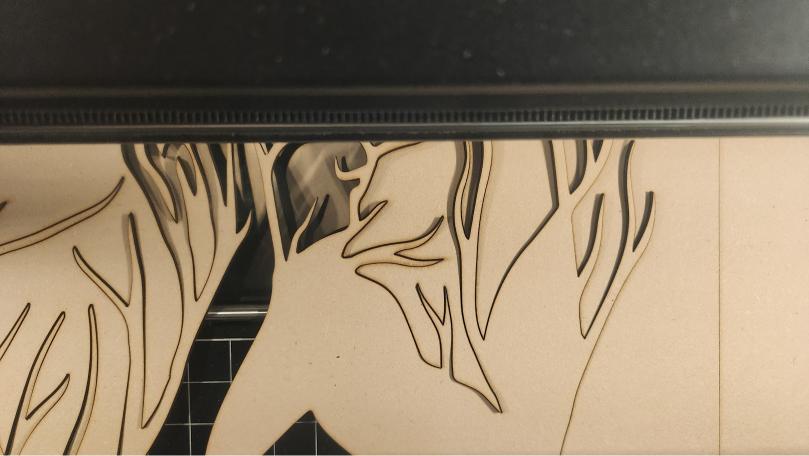
Open xTool’s creative space, select a new project, and add your design. The design I am using for this project was an SVG file I purchased from Etsy.
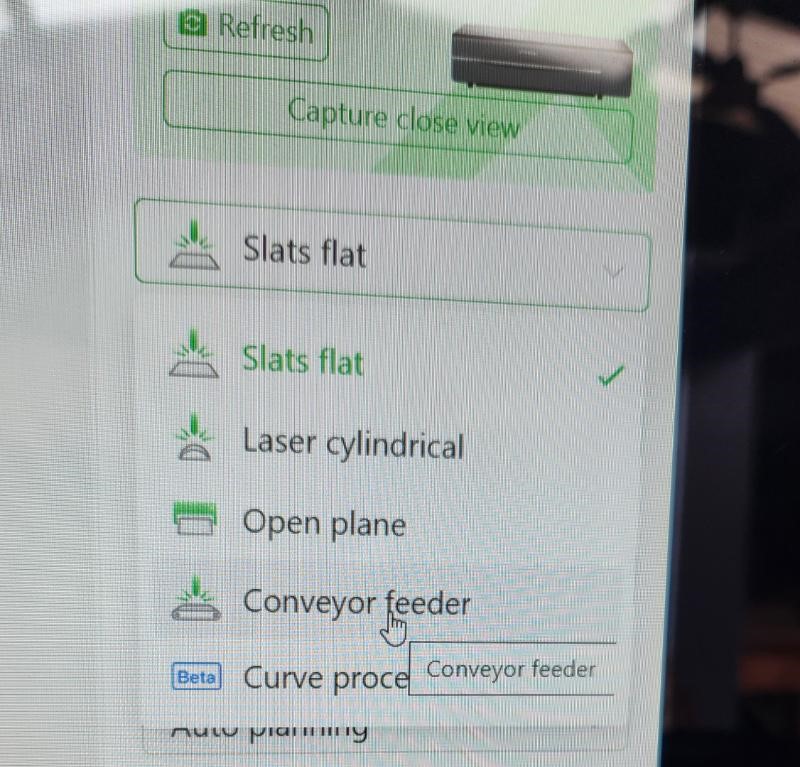
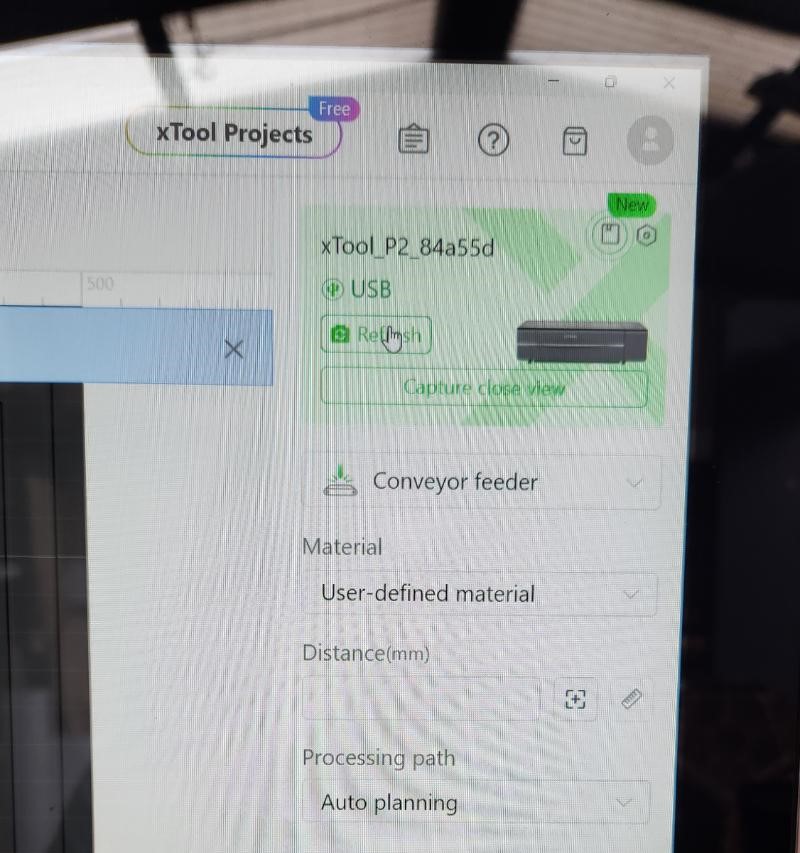
On the right-hand side of your screen, select conveyor feeder from the drop-down menu.
To stretch your design and fill your material, you can unlock the aspect ratio by clicking on the padlock icon. However, it’s important to note that even though the machine can accommodate MDF up to 600mm wide, the maximum width it can cut is 497mm.
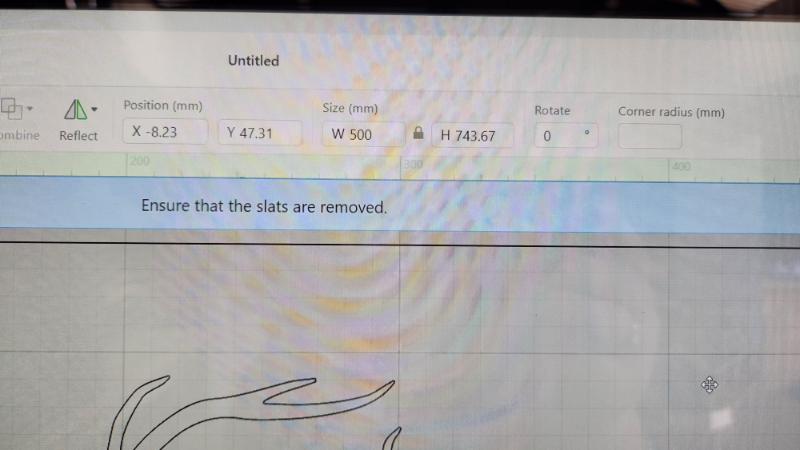
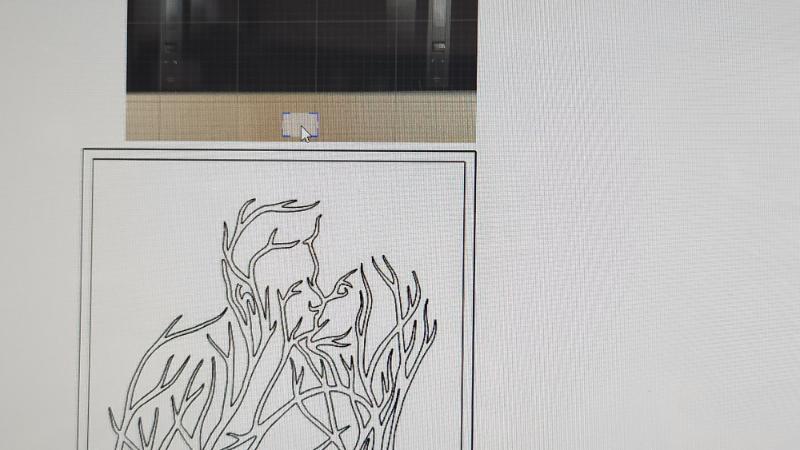
By clicking the refresh button, you will get a more accurate view to line up your design with your material.
The image below shows the material, move your design to start about 1cm down from the top of the brown line.
Add your laser settings
Next, you need to measure the distance to your material so the laser knows where to burn. On the right-hand side of your screen click on the cross button.
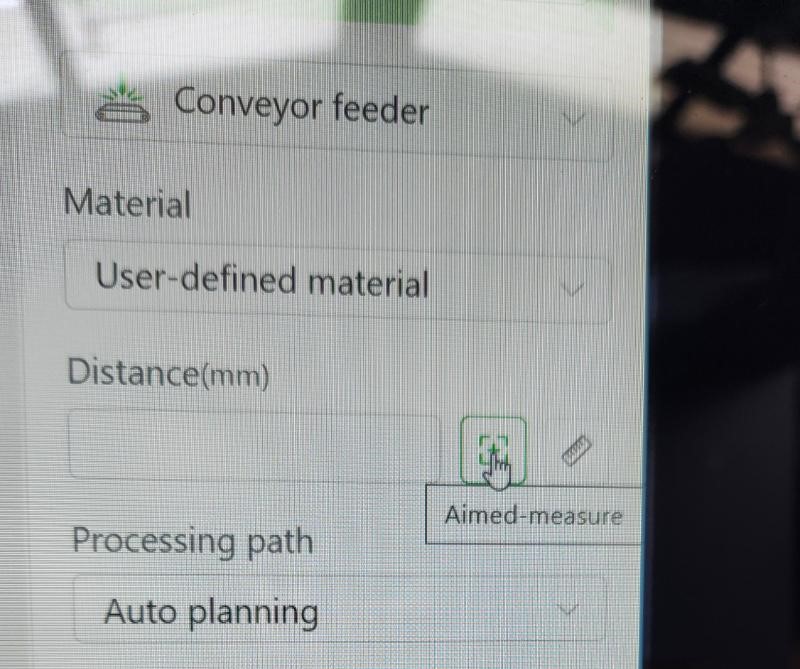
Move your mouse across to the material and click on the area you want to measure. The auto-measure will measure the distance for you.
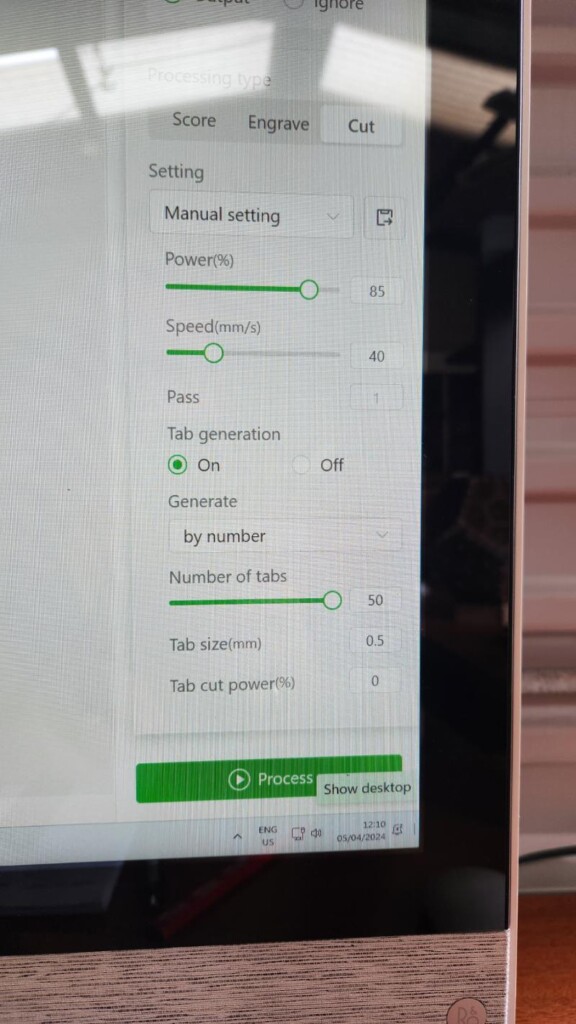
Next, adjust your settings according to your material test cards. I know from past projects that this power and speed work well on this MDF. Select your tab setting, press process on the screen and push the start button on the laser.
I was ecstatic when things finally fell into place, but that happiness was short-lived. Turns out, I went a bit overboard with the tabs in the design, making it hard for the pieces to pop out smoothly. After six attempts, I decided to throw in the towel on this project. But fear not, I’ll walk you through exactly why things went south.
Setting the tabs
It was mainly the “tab settings” that caused my project to fail. Without the slats or a honeycomb below to hold the design in place, you need to have tabs to prevent the pieces from falling out and getting jammed as the material moves in and out of the laser. Tabs are just small areas of material where the laser does not cut. I tried a range of different settings based on recommendations from other people, but sadly, none of them were perfect.
Setting tabs for a laser cutter involves careful consideration of several factors to ensure precise and clean cuts. Here are some key factors to consider:
- Material Type and Thickness: Different materials require different tab configurations
- Design Complexity: Intricate designs may require more tabs to prevent pieces from moving during cutting.
- Cutting Speed and Power: Adjust the cutting speed and power settings based on the material and design complexity.
- Tab Size and Placement: They should also be strategically placed to minimise post-processing efforts.
- Tab Thickness and Material Compatibility: Heavier materials require more tabs or thicker tabs.
- Tab Removal Method: The perfect tab would allow you to pop out the design with little trace of the tab.
Here are the reasons for my failures
Attempt 1.
I did get an error, but I could not find out what it meant, so I ran the project anyway because it was my day off, and I did not want to waste it.
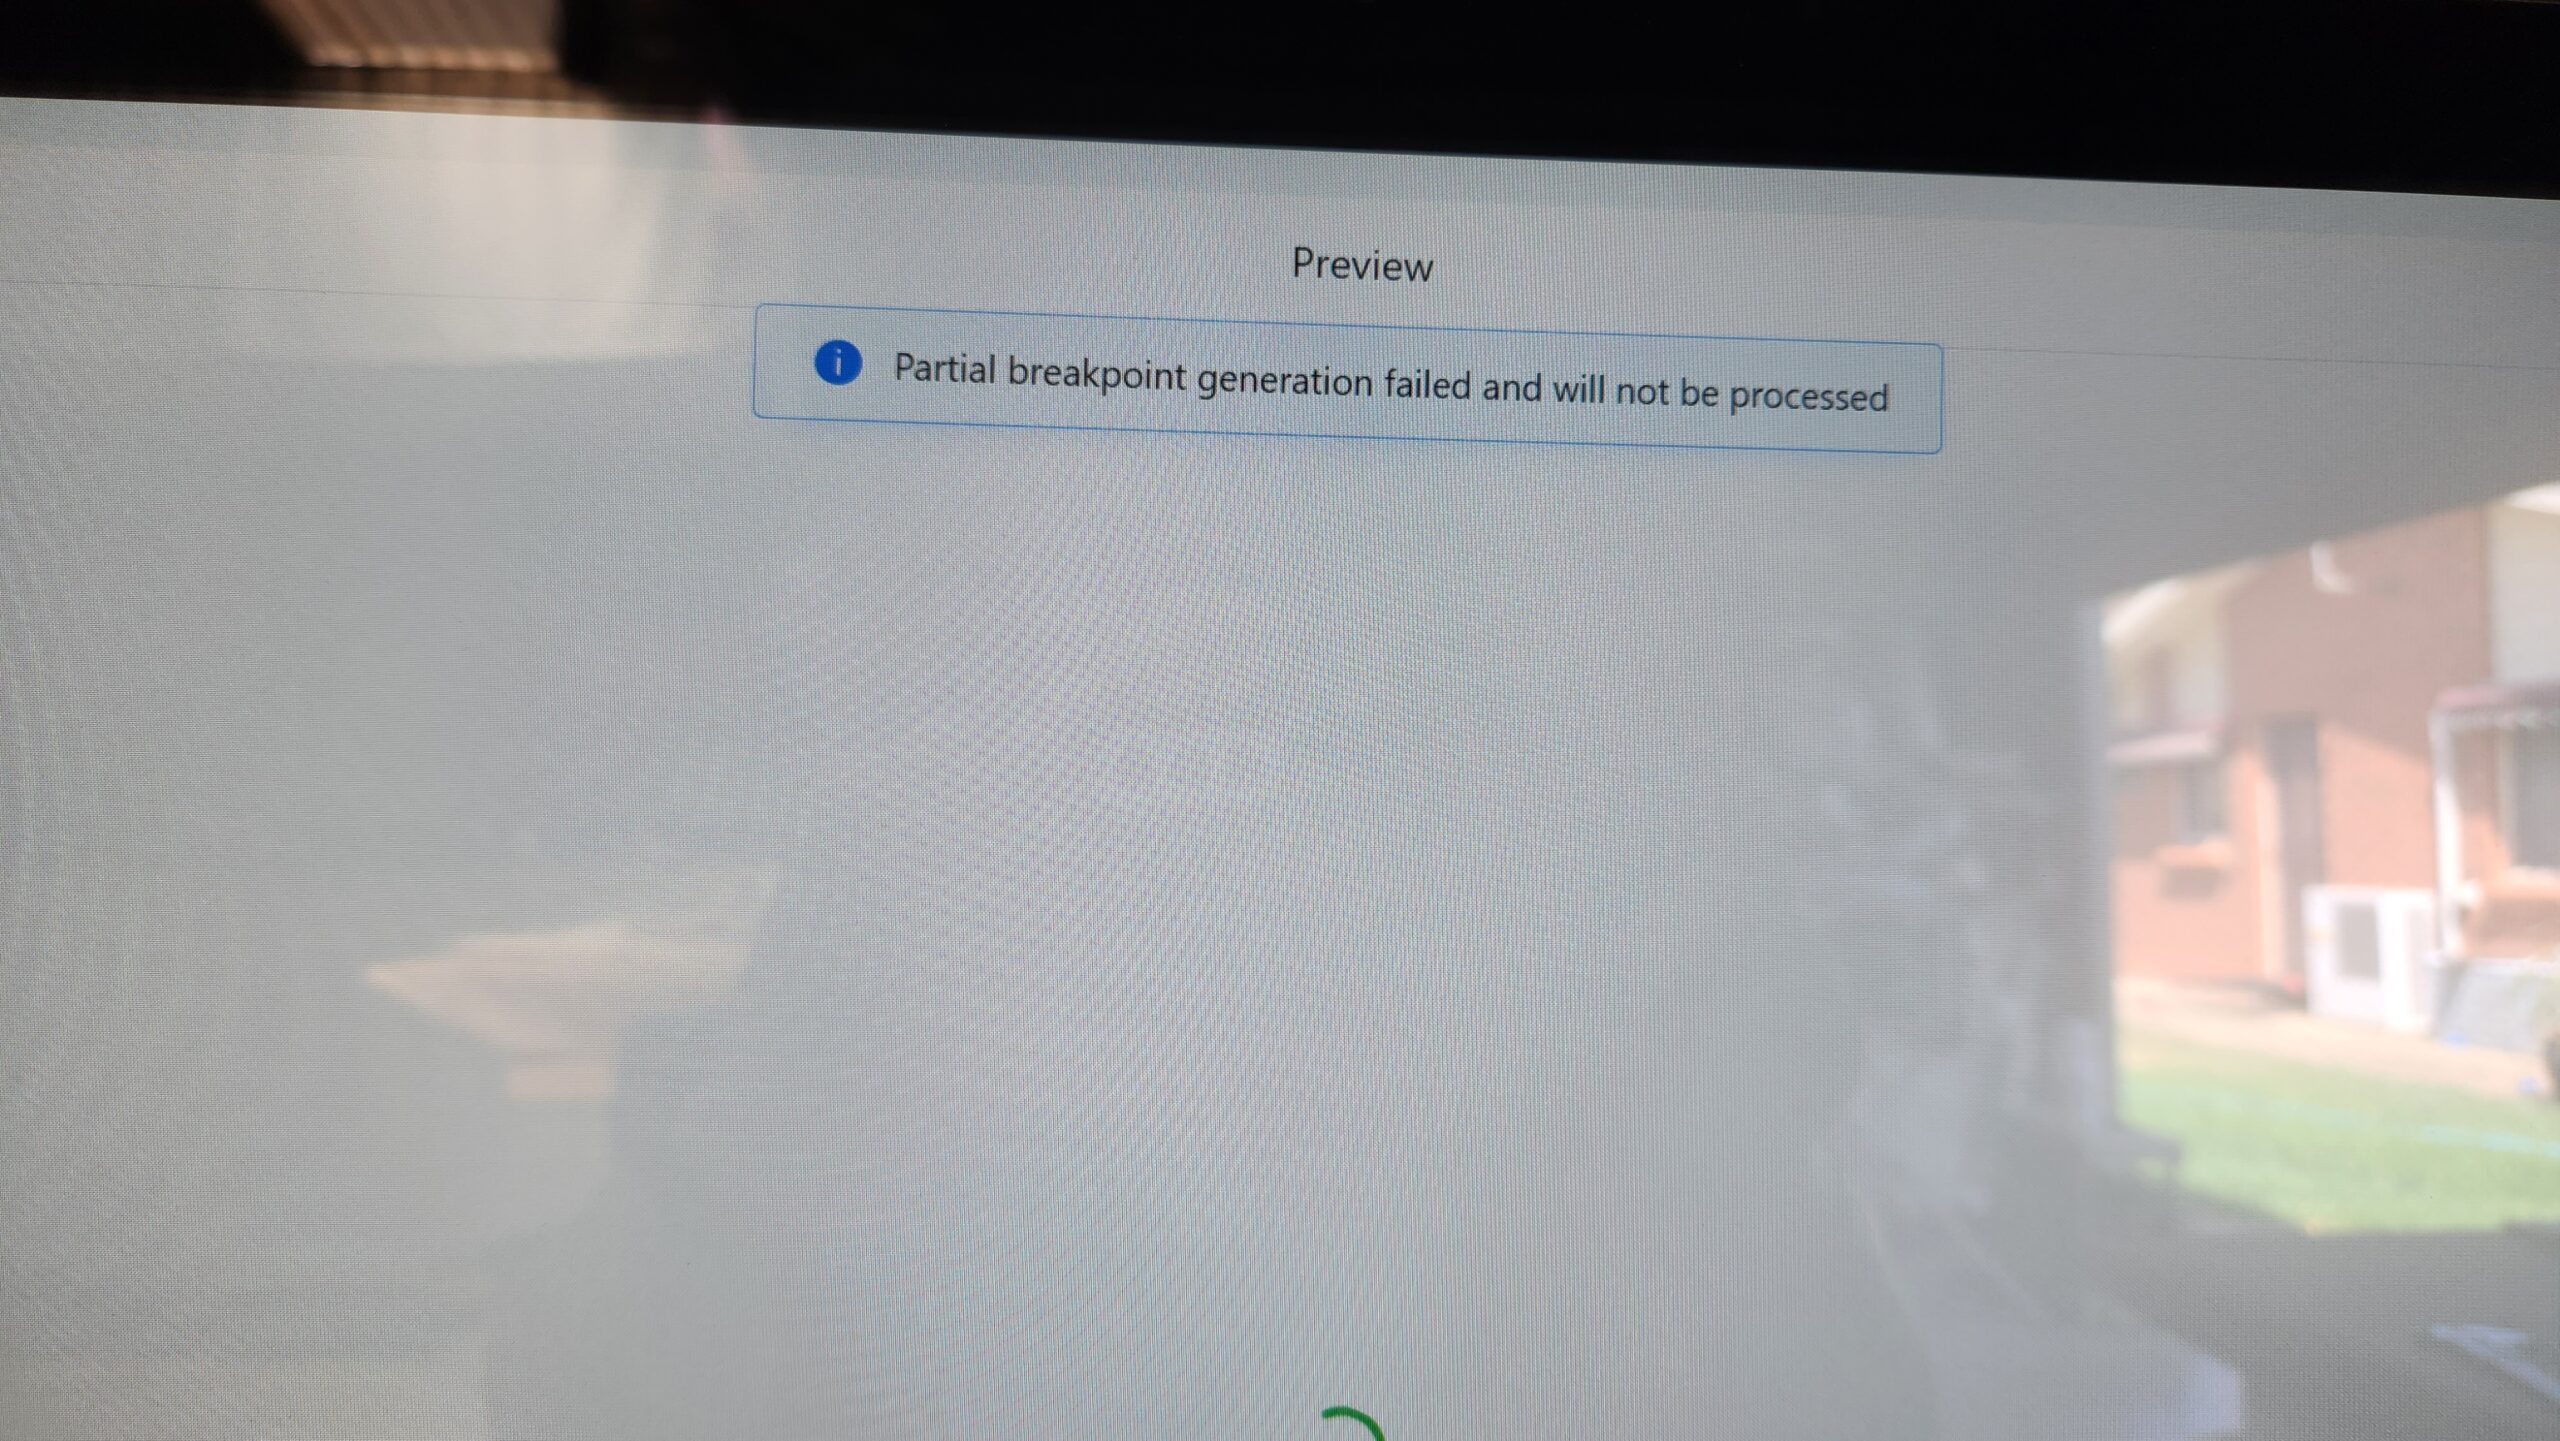
The issue arose due to two main factors: firstly, there were too many tabs (40 in total), resulting in none being added. Secondly, there weren’t enough extensions on the conveyor to match the length of my material. Consequently, when the material reentered the machine, the frame dropped and became stuck on the conveyor.
Attempt 2.
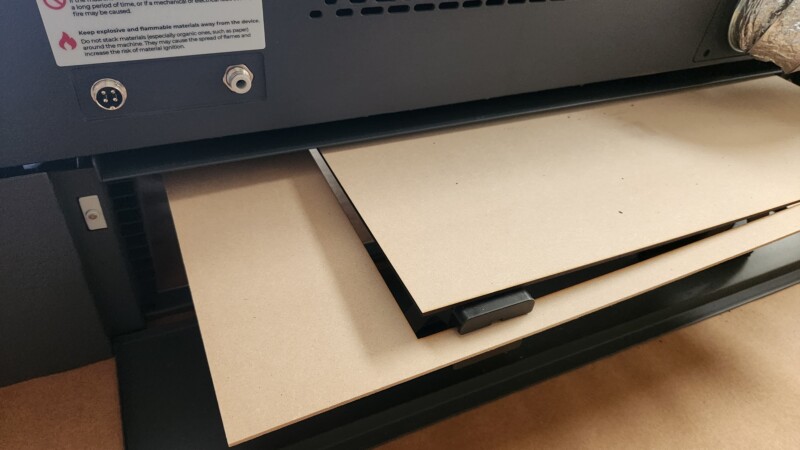
I repurposed an old backing board from a picture I had at home to minimize waste. However, I overlooked adjusting the size of my design to fit the board properly. This became problematic when using the conveyor, as I failed to leave at least 10 inches of extra material at the end of my project. Without this allowance, the material popped out from under the wheels, ultimately ruining my project
Attempt 3
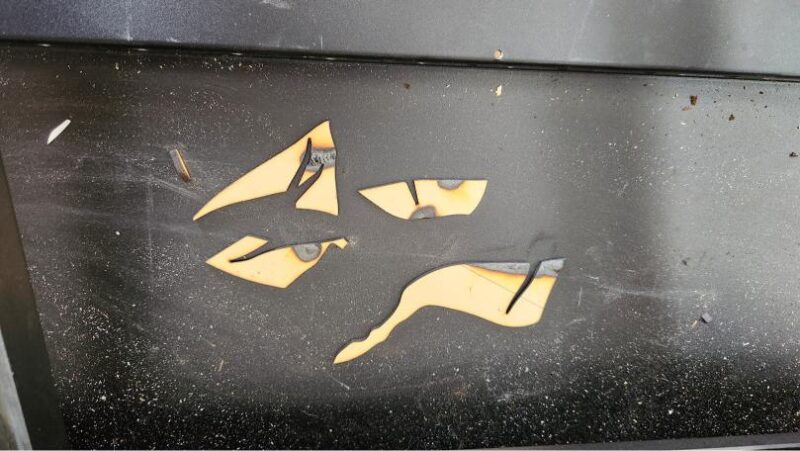
Another tab-related problem occurred when I added 20 tabs along with 0.5mm at 40 power settings. It seems the power was too high, causing the tabs to burn through. Consequently, the material dropped once again and became jammed in the base plate, pushing it out from the laser. This serves as a clear example of why it’s crucial to never leave a laser unattended while in use.
Attempt 4
Once again, I encountered a tab issue. I’m struggling to determine the optimal number of tabs. This time, I set the tabs to spacing and added one. In my mind, this would equate to one tab per section. However, this approach failed as well, and the pieces ended up falling out.
In an attempt to salvage my project, I frequently paused the machine and removed the larger piece to prevent it from getting stuck. However, I made the mistake of leaving the smaller pieces inside the laser on the base plate. This turned out to be a poor decision because the laser head moved back and forth during the operation, causing the pieces that fell through to be repeatedly hit by the laser, eventually catching fire.
Attempt 5
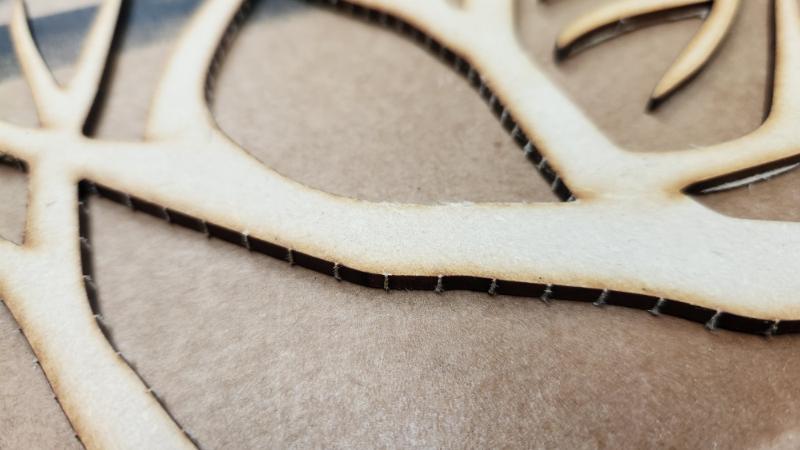
At this point, I was feeling incredibly frustrated and on the verge of giving up. Nevertheless, I decided to give it one final attempt. I added 50 tabs, each at 0.5mm, and was overjoyed when I completed the project without any pieces falling out. However, my excitement soon turned to dismay as I realised my mistake. I had added so many tabs that I couldn’t remove the design from the board easily. While the larger areas popped out smoothly, the smaller ones were overloaded with tabs, making them difficult to push out. In the end, I had to resort to using an Xacto knife, which took me an hour to painstakingly cut through each tab.
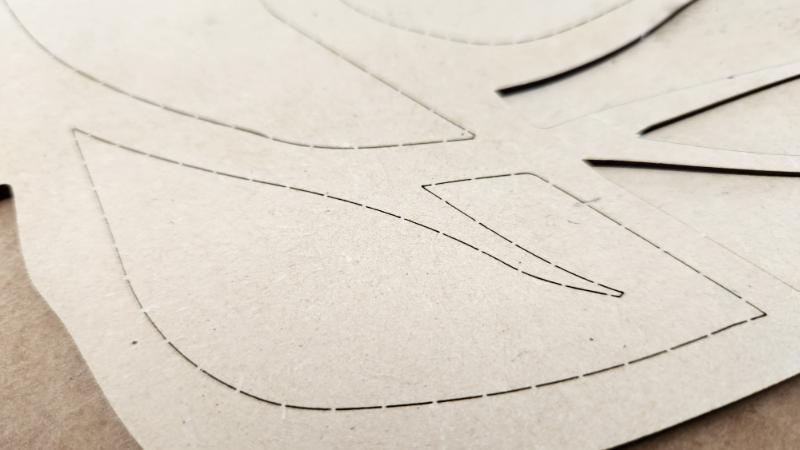
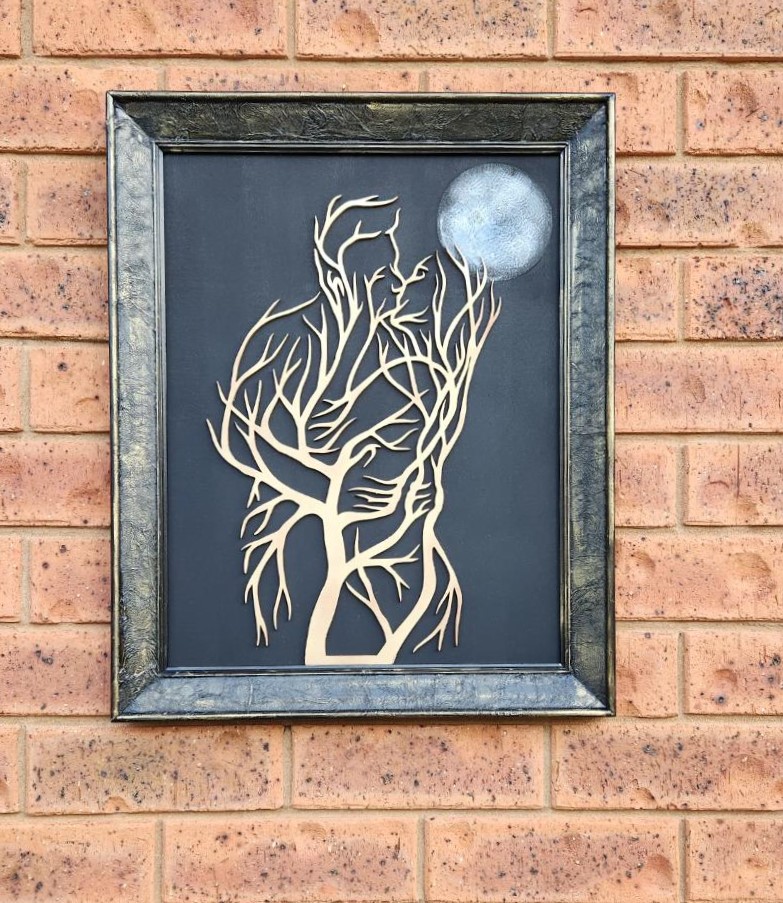
By the time I finally got all the pieces out, I was left with these unsightly tab marks.
I deemed the project passable from a distance, so I proceeded to spray-paint it black and hung it on my wall

Attempt 6
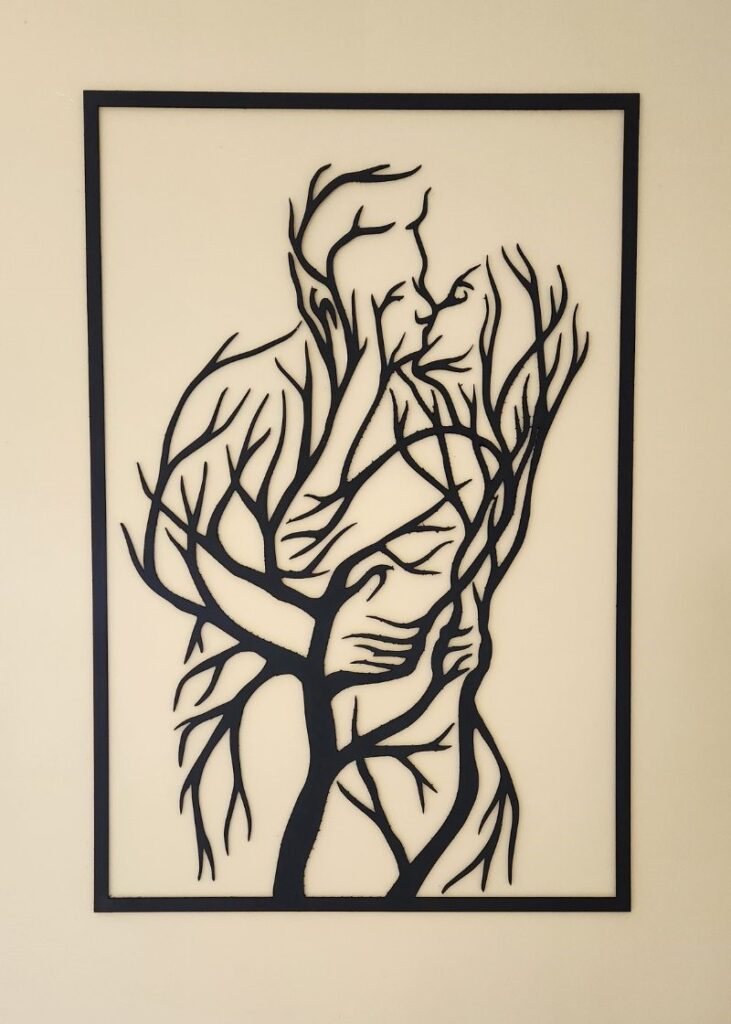
I was so determined to have this design, so I took off the conveyor system and made it as big as I could using just the laser and the honeycomb. And it worked perfectly the first time.
In Conclusion
I find the xTool P2 laser to be truly remarkable, and I have no complaints about the machine itself or its accompanying accessories. However, while I am intrigued by the conveyor’s potential for handling larger projects, I am currently withholding judgment. I believe my uncertainty may stem from not fully understanding how to properly utilise the tabs. Once I gather more information on this aspect, I’ll be in a better position to evaluate the conveyor system. I have done other projects using the laser, which worked perfectly; you can view them here.
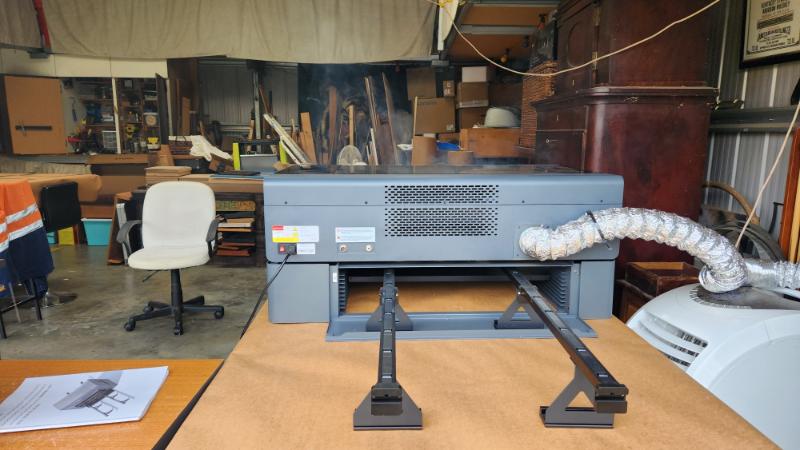
One drawback I observed with the conveyor system is that my workshop filled up with smoke. The open base allows smoke to escape, which became a noticeable issue. For future conveyor projects, I have ordered the inline fan.
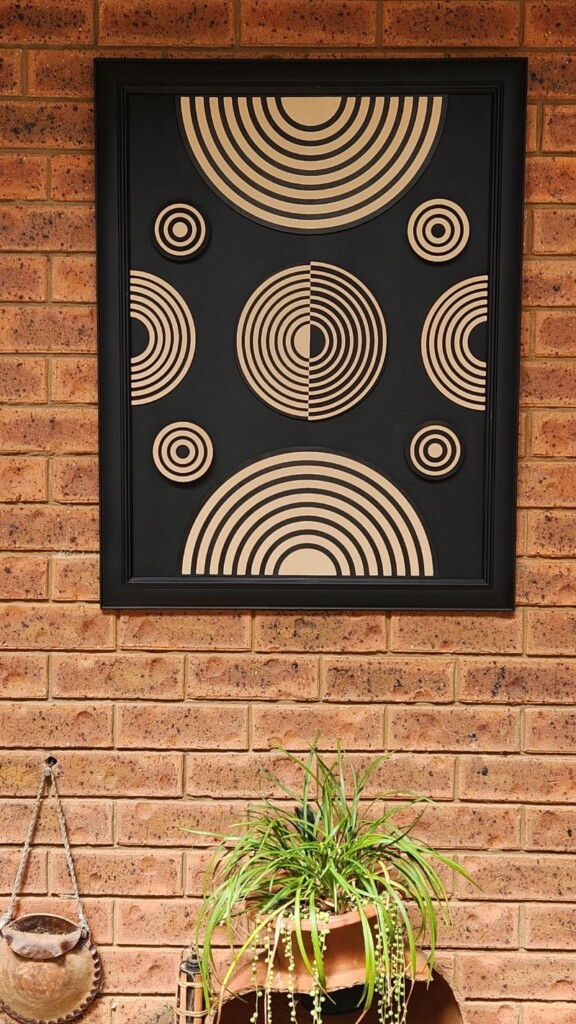
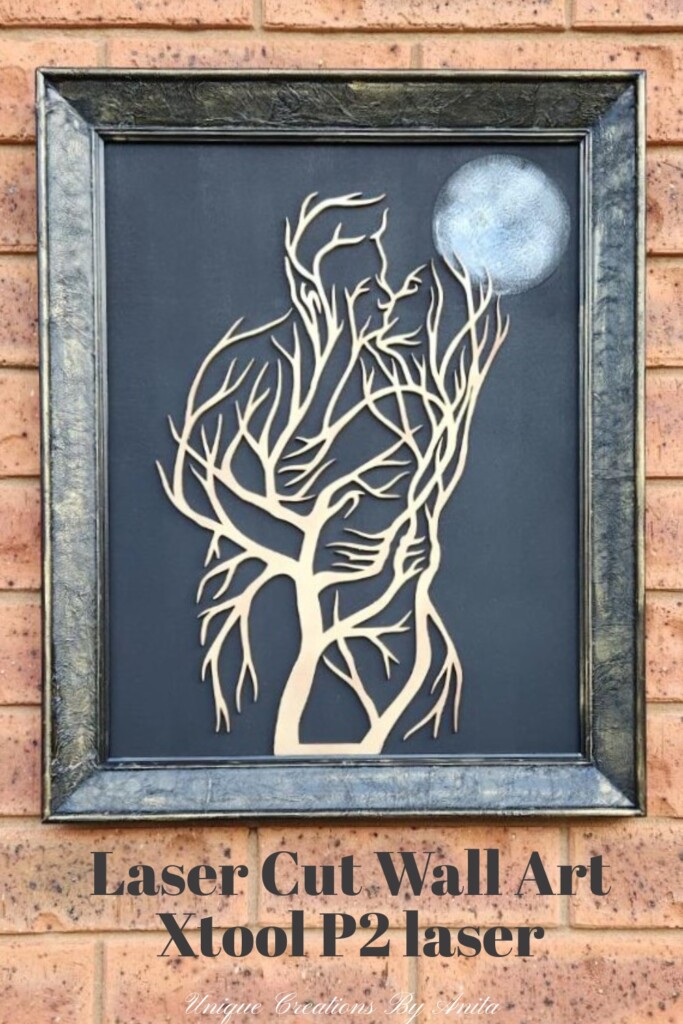
If you want to make large laser-cut wall art, build it up from separate pieces and mount them on a single canvas—just like I did with this boho wall art.

If you’d like to find any of the items used in this project, we’d greatly appreciate it if you used our affiliate links. These links provide us with a small commission at no extra cost to you, allowing us to continue creating and sharing more inspiring projects. We’d also love to hear your thoughts—feel free to leave a comment or share this post!

2 Comments
Michelle Leslie
April 22, 2024 at 12:26 amEvery time I see one of your laser cut works of art I’m blown away…….. but this one. THIS ONE!!!! OMW. I’m sorry you had lots of failed attempts, but soooo very glad you stuck it out. 10/10, Anita. It’s beautiful.
Anita Holland
April 22, 2024 at 4:34 pmThanks Michelle, xtool will help me sort out the issues.