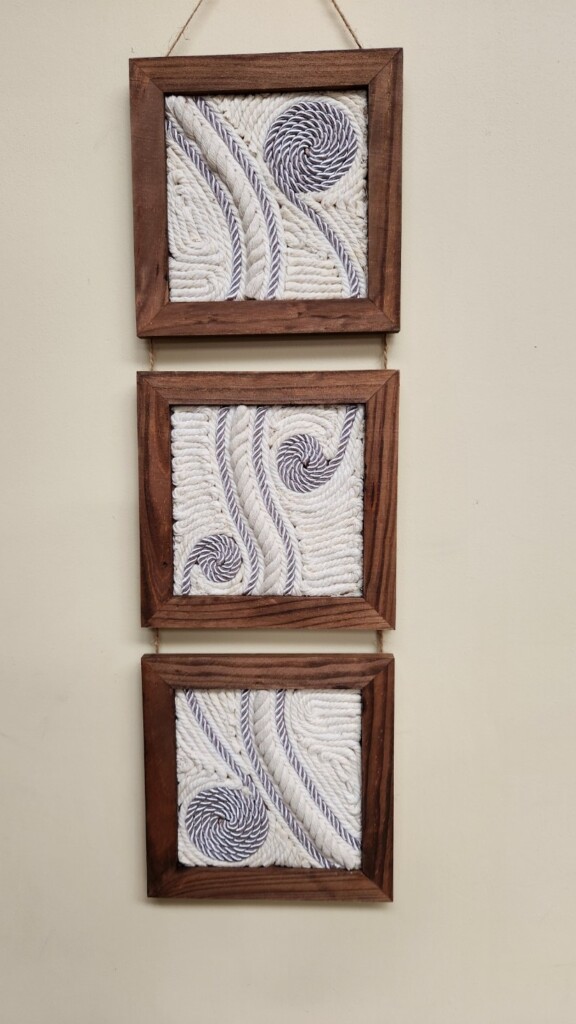
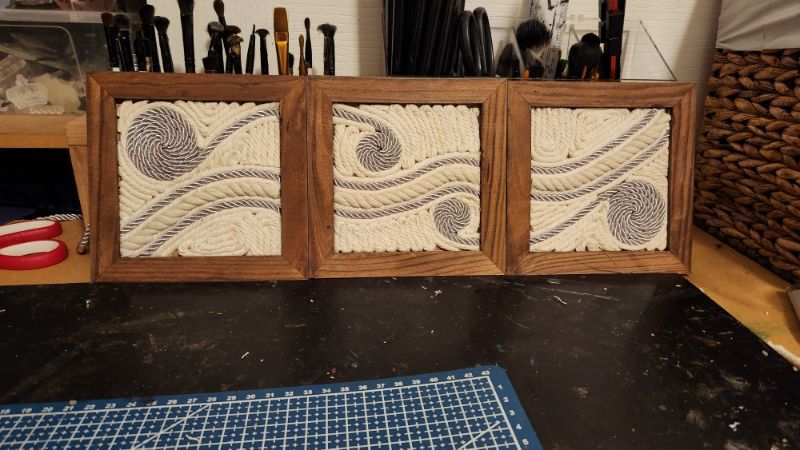
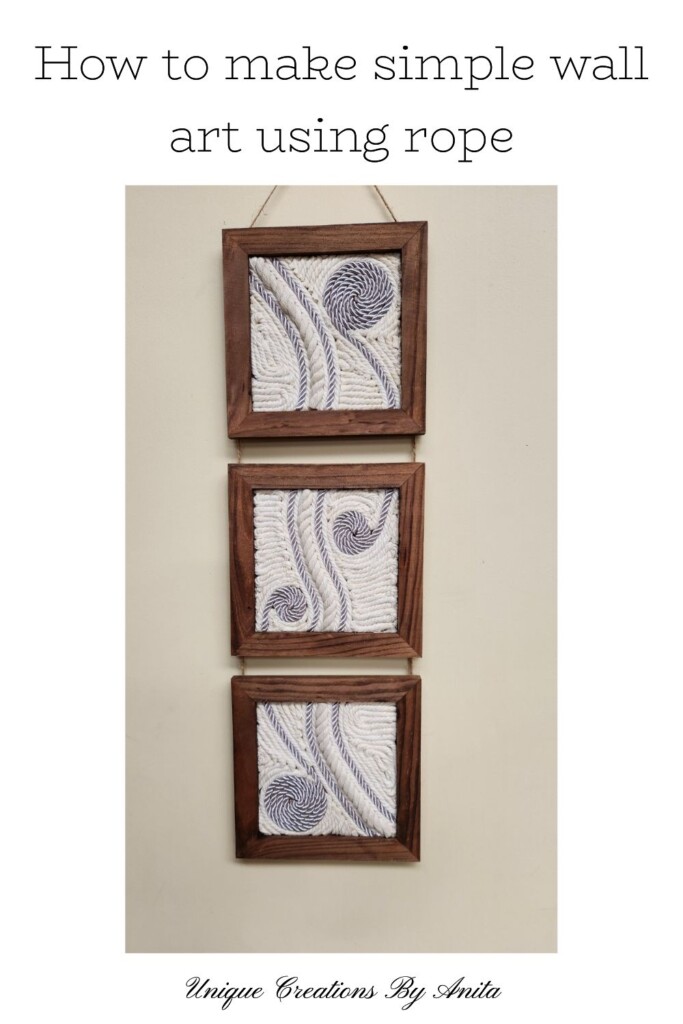
When the International Bloggers Club set the theme “Rugged Ropes & Twisted Twine,” I knew I wanted a project that anyone could make in an afternoon. Rugged Ropes & Twisted Twine: Easy Rope Wall Art in Frames turns simple macramé rope and thrifted frames into calming, textural wall décor. I trialled the idea on three small frames to let a single flowing pattern travel from one frame to the next—but truthfully, this technique is even easier on a larger canvas. If you love neutral, organic décor (and budget-friendly crafts), this one’s for you.
Before we dive into this tutorial, be sure to subscribe to my bimonthly newsletter to be the first to see my latest projects. You can also follow me on Pinterest and Facebook, where I also include my unique mixed-media art projects
Rugged Ropes & Twisted Twine: Easy Rope Wall Art in Frames
**This post may contain affiliate links. This means I earn a small commission on links used at no extra cost to you. Please see my disclosure policy for more information.**
Materials needed
- Repurposed picture frames (sturdy, with removable backs)
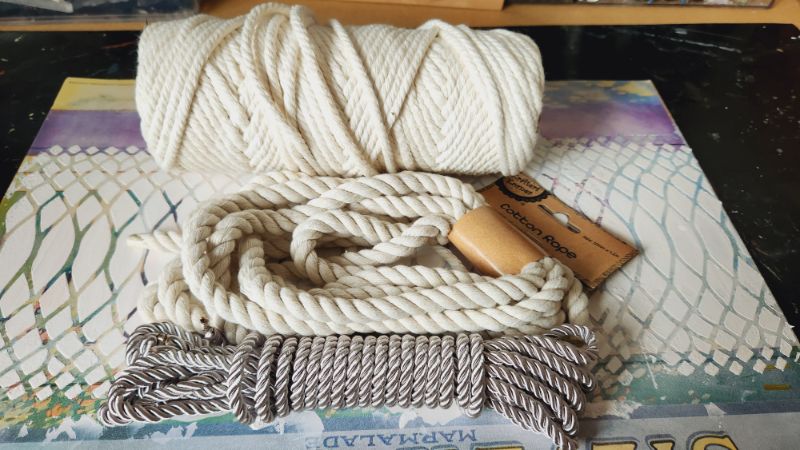
- Macramé rope/cord in mixed thicknesses (I used 5 mm and 10 mm)
- Extra cords for contrast (sisal, jute, cotton, nylon, coloured craft cord)
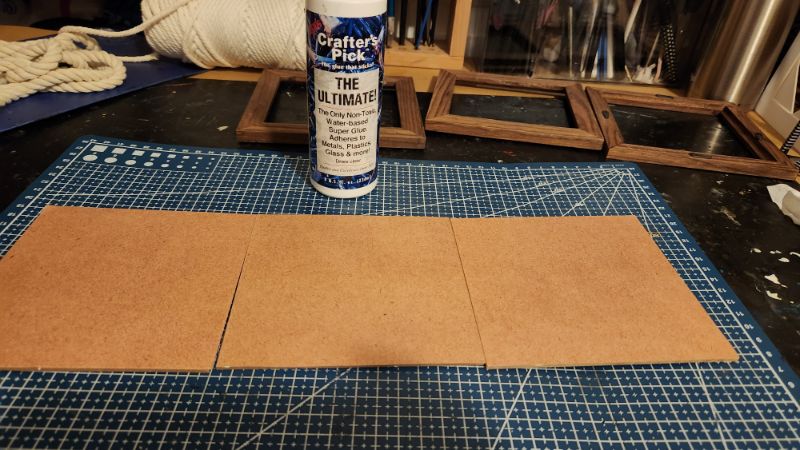
- Strong craft glue with “grab” (I used Crafter’s Pick – The Ultimate)
- tape or masking tape
- Scissors and craft knife
- Pencil and ruler
- Optional: hot-glue gun (for tacking only), silicone finger protectors
Prepare the frames
Remove the glass, backing, and any existing artwork or photographs from the picture frames. Clean the frames to remove any dust or dirt. You can paint the frames to match your décor; I kept mine dark so the rope would stand out more.

Next, refit the backing into the frame and trace a pencil line around the inner edge. This guide shows where to stop glueing the rope so the backing will fit back in at the end.
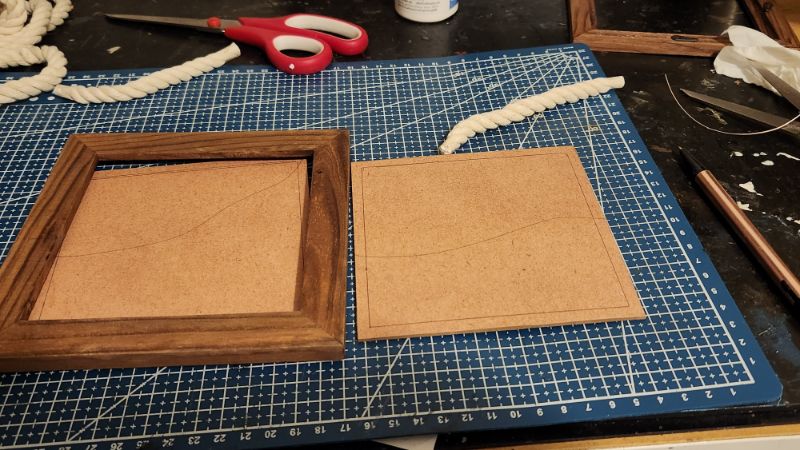
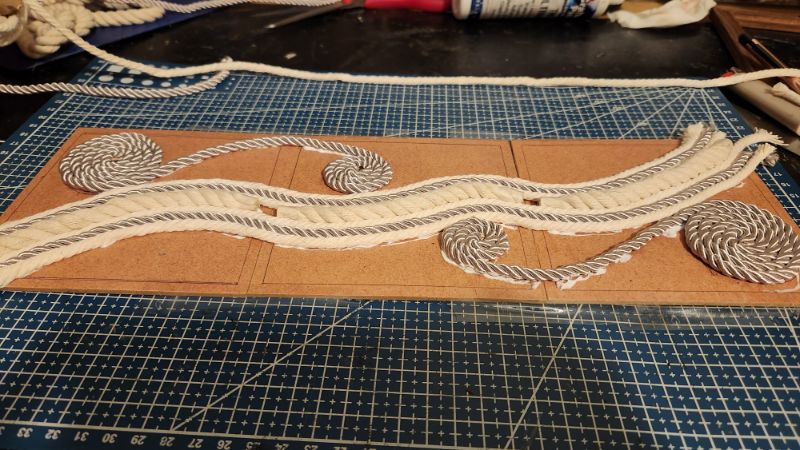
My plan was to create a flowing pattern across the three frames, so I taped them together to keep them aligned and in place.
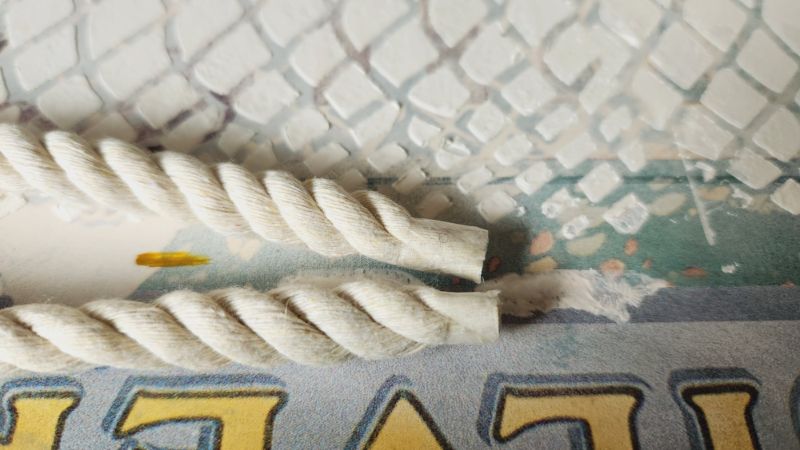
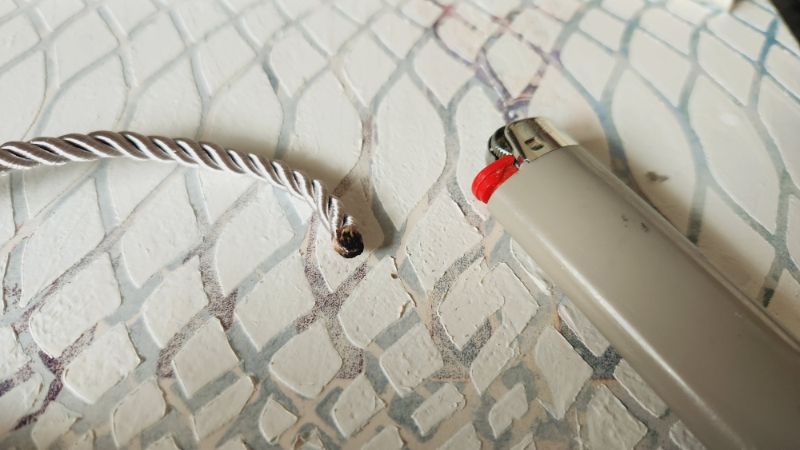
Stop the rope from unravelling
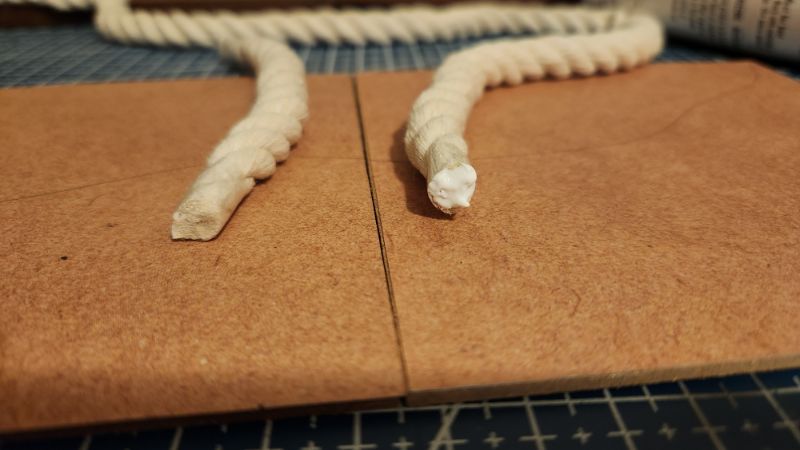
Macramé rope loves to fray. Wrap the ends tightly with tape, trim for a clean edge, then seal:
- Cotton/macramé cord: Rub a small dab of glue into the cut end and twist. Leave the tape on while you work so you can continue without interruption.
- Nylon/synthetic: Carefully melt the end with a lighter and press it smooth (silicone finger caps help). Work in a ventilated area and take care—melted nylon is hot.
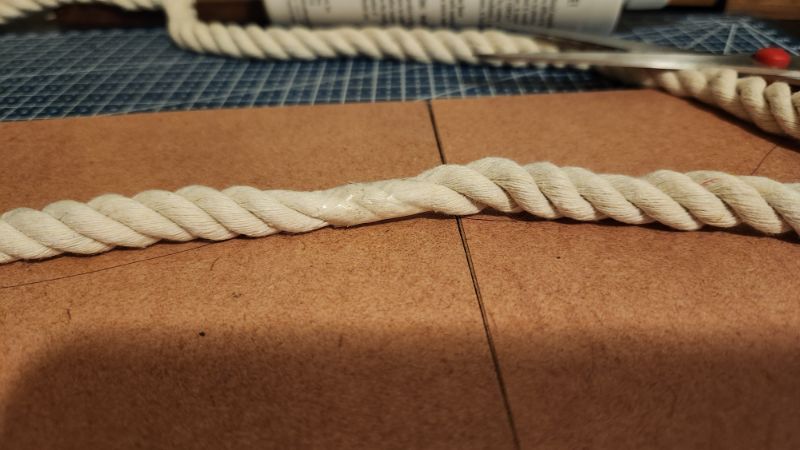
Glue the flowing design
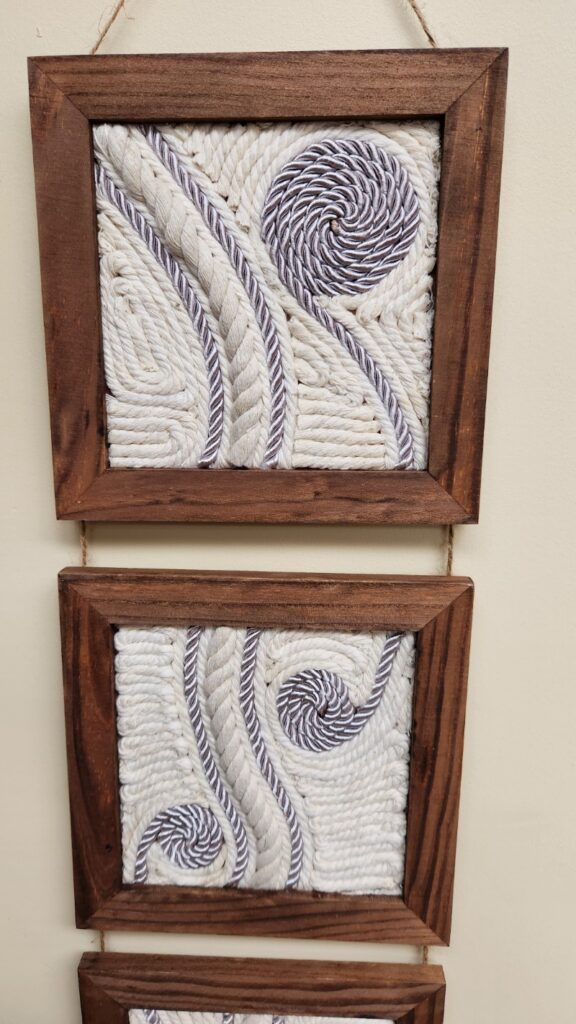
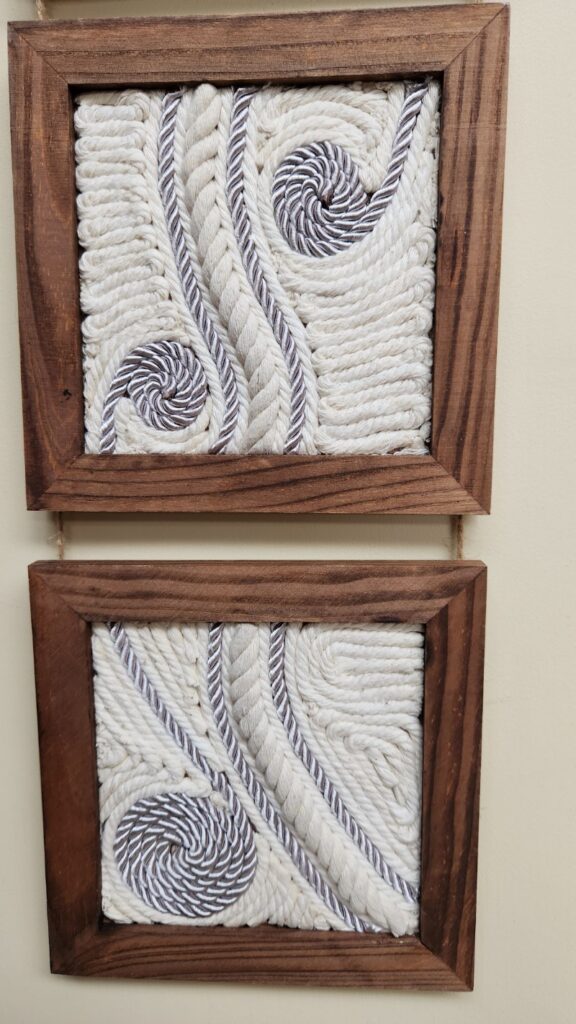
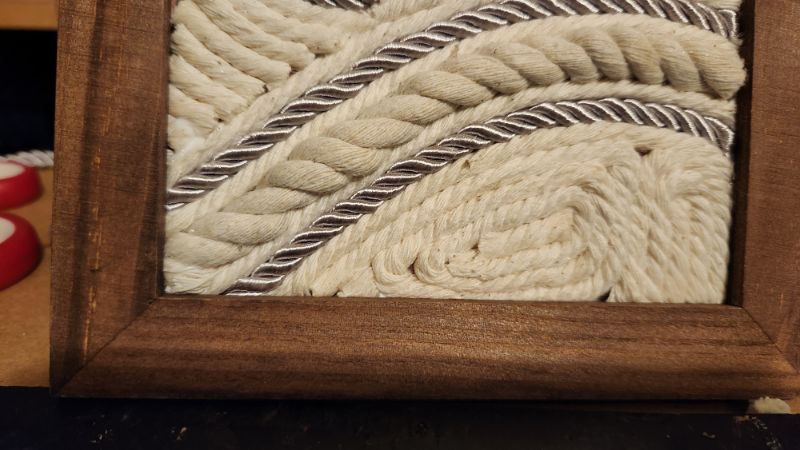
For a simple, modern look, start with the thickest rope. Add a bead of craft glue and lay the rope in a relaxed wave that travels through all three frames. A tack of hot glue can hold tricky curves, but rely on the thicker craft glue to prevent seep-through (hot glue can show on lighter cords).
When you like the first wave, mirror its movement on either side with more lines, changing rope thickness and colour to add depth. Keep the curves gentle—think shoreline, not zigzag—so the eye follows the flow across all three frames.
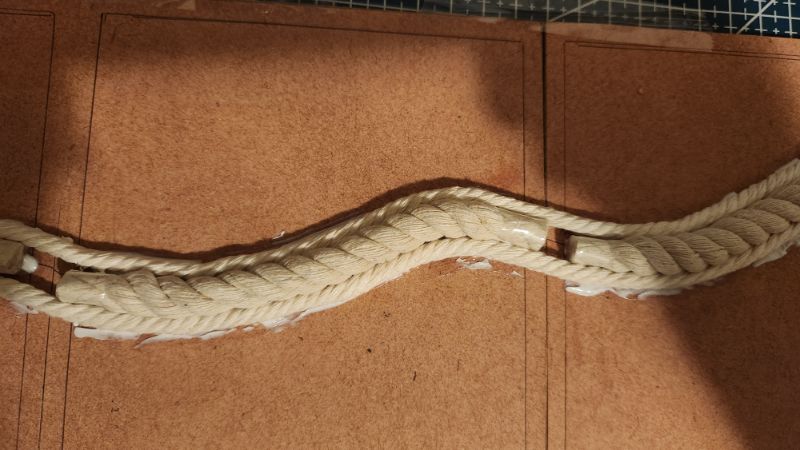
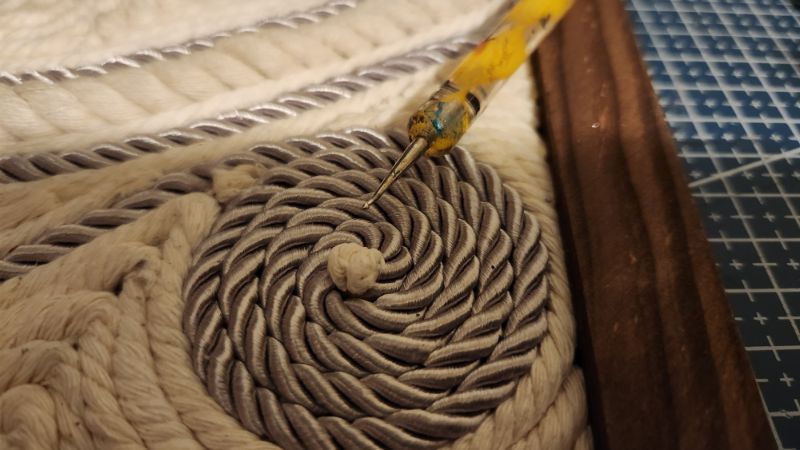
Swirls & circles: To make a swirl, lay a small puddle of glue and spiral the rope inwards, nudging the coil tight as you go.
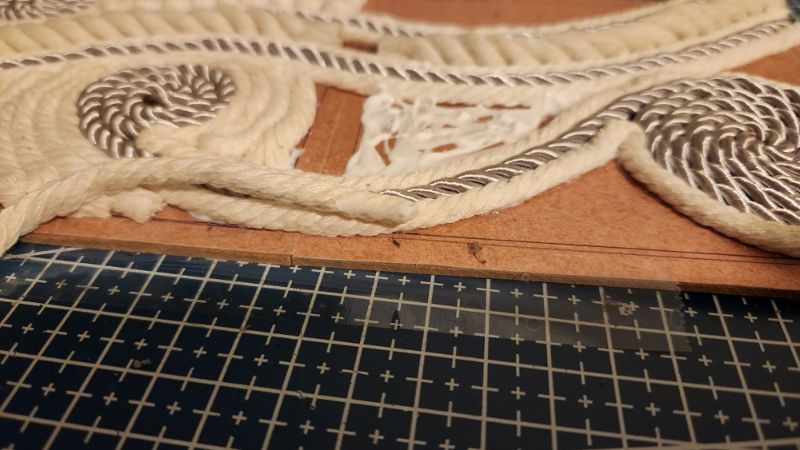
Fill the gaps neatly
Once the main lines are in, you’ll see small pockets between cords. You’ve got options:
- Zigzag infill: Run a fine line of glue and feed thinner rope in a soft zigzag.
- Rainbow arcs: Curve short lengths into shallow arches for a “rainbow” effect.
- Straight runs: Place short straight pieces with ends sealed and twisted.
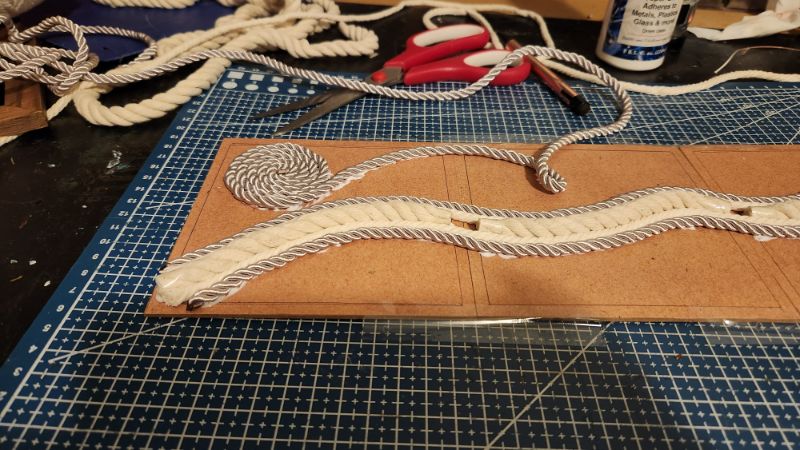
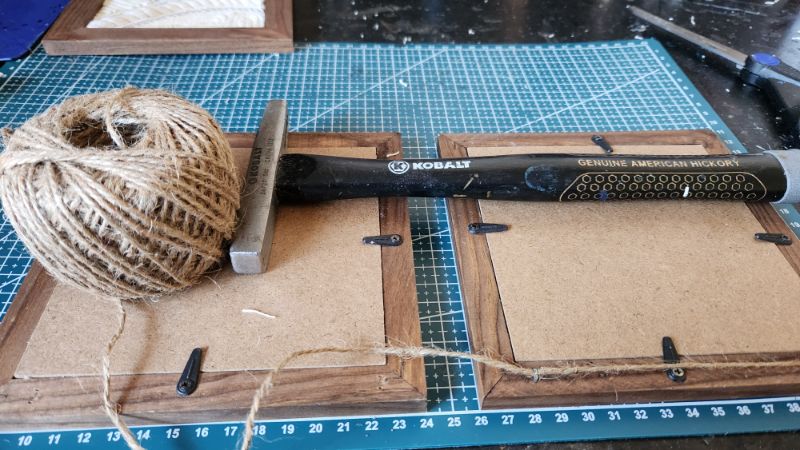
Trim, separate and re-frame
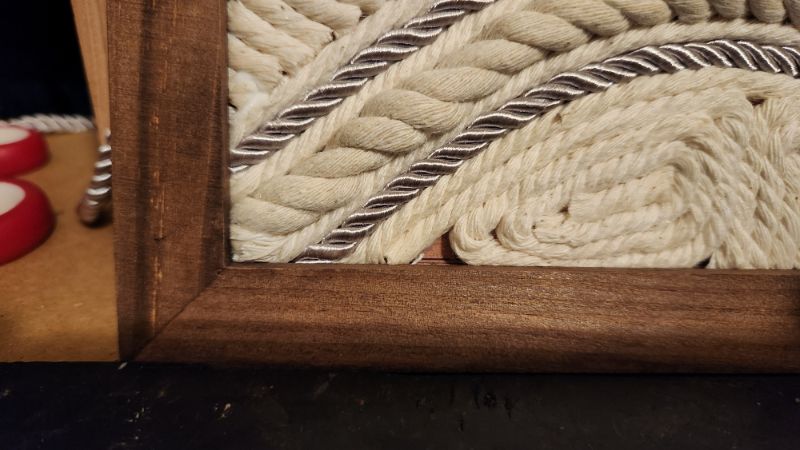
When the glue has set, flip the taped trio over and cut along the frame joins with a sharp craft knife to separate the panels. Pop each section into its frame, staying inside your pencil guide so the backing fits. Press the backings in place.
If small gaps remain, roll tiny rope balls: dab glue on your palm, roll a snippet of rope into a bead, and push it into the hole with a dotting tool. It disappears seamlessly and looks polished.
Hang and style
I used sisal rope hangers to keep the natural look. Staple or screw hanging hardware to the back and adjust the lengths so the trio hangs evenly. Style against a painted feature wall, above a console, or as a textural anchor in a gallery wall.
More rope project ideas
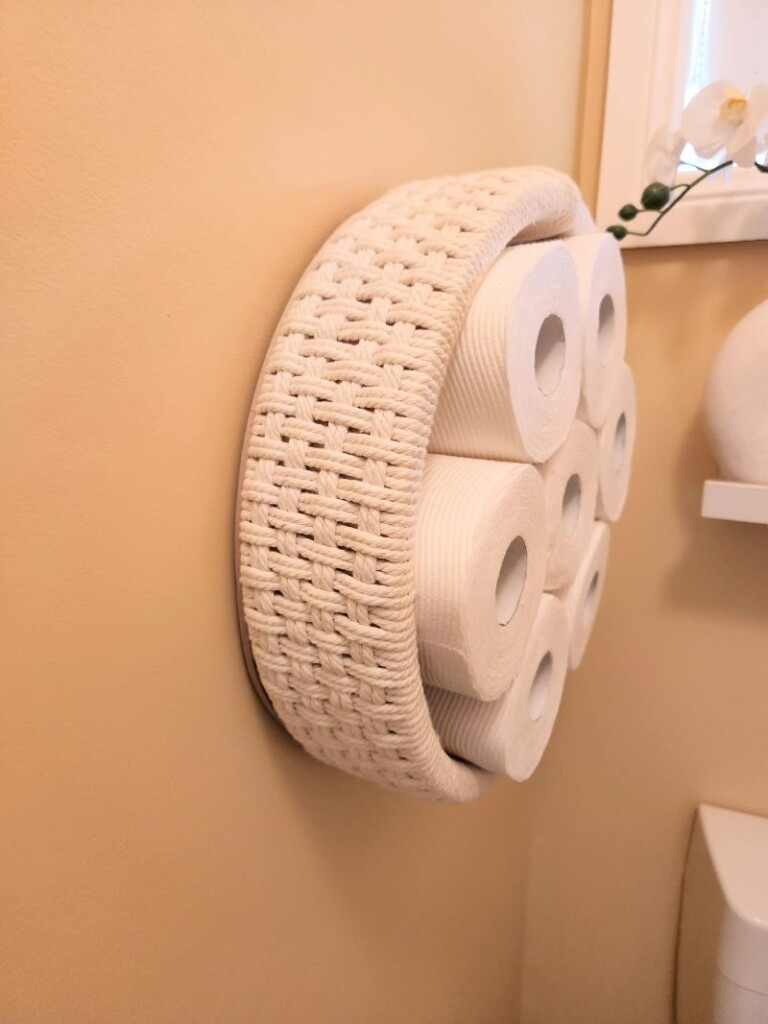
Here are two other projects you can make using macrame rope. I repurpose a bamboo steamer into a wall-mounted toilet roll holder.
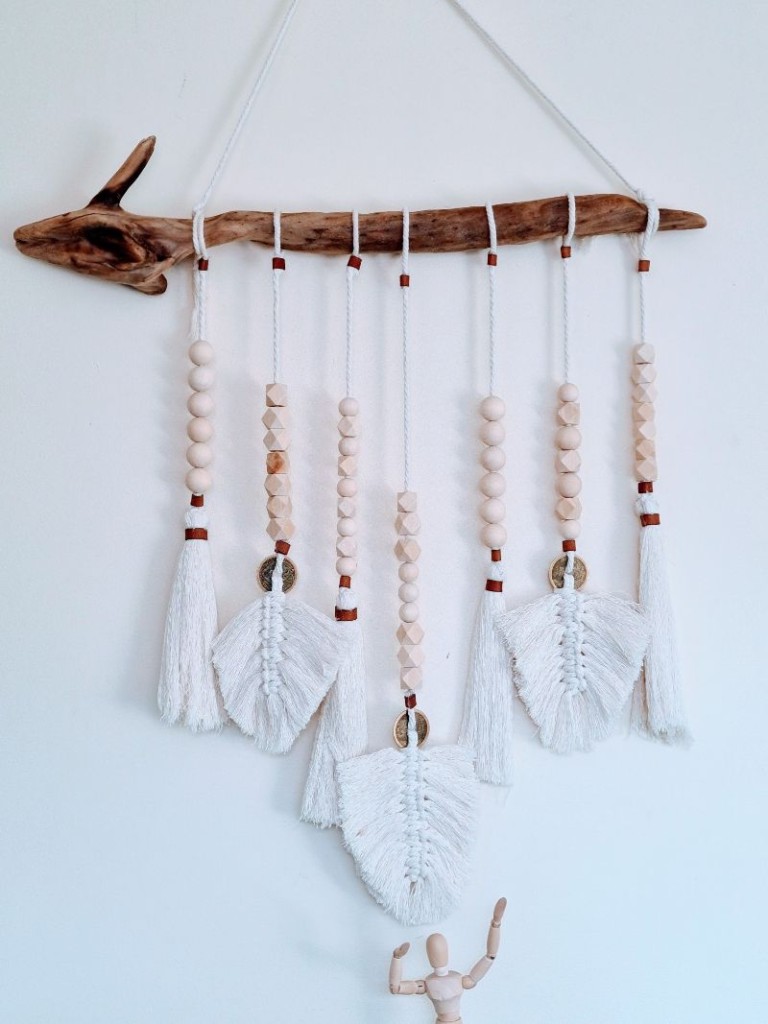
You can make a beaded wall hanging.
More about IBC

If you follow my blog, you will know I am part of the IBC (International Bloggers Club), which is a group of talented bloggers from around the world. We have members from Spain, South Africa, Australia, the United States, and Canada. Each month, we come together and create a project with a common theme.
To see the “Rugged Ropes and Twisted Twine ” contributions from my fellow bloggers joining us this month, keep scrolling. Please feel free to jump over and give them some love.
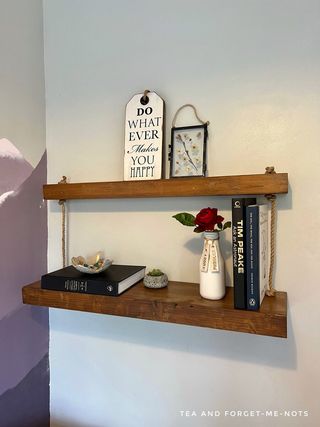
Rachel from Tea and Forget me not is sharing this rope-floating shelf
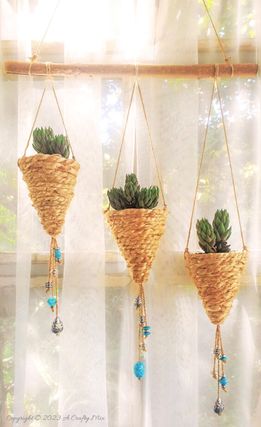
Michelle from Acraftymix shared these unique rope planters

If you’re interested in any of the items used in this project, we’d appreciate it if you used our affiliate links. Clicking these links earns us a small commission at no extra cost to you, helping us create more inspiring and exciting projects to share. We’d also love to hear your thoughts—feel free to leave a comment or share this post!
9 Comments
Michelle Leslie
July 25, 2023 at 2:21 amHow lovely. This is taking string art to a whole new level. I would never have thought that different ropes (size and colour) could make such a dramatic statement. It’s really cool what you did, Anita.
Anita Holland
July 25, 2023 at 3:29 pmThanks Michelle, I will be having another try on a larger canvas next time.
Rachel - Tea and Forget-me-nots
July 25, 2023 at 7:24 pmWow, these are so impressive. Love the patterns and the varied sizes that you used. So unique!
Anita Holland
July 28, 2023 at 11:28 pmThanks Rachel. 😍
Ann
August 2, 2023 at 10:23 amI love the design you created, Anita and the different types of rope really add contrast and texture. Beautiful!
Lynette
September 24, 2023 at 5:32 amReminds me of sea waves, or wind; it’s lovely
Anita Holland
September 24, 2023 at 3:34 pmThank you so much, I do agree they look like waves.
Lynette
September 24, 2023 at 5:32 amReminds me of sea waves, or wind; it’s lovely
Easy Recycled Soda Can Rope Planters - A Crafty Mix
November 18, 2024 at 5:30 am[…] I promised earlier to share a few more rope ideas, so here goes. Anita used all kinds of rope to create art. I think this is such a clever way to reuse small offcuts and create something unique for your home. […]