
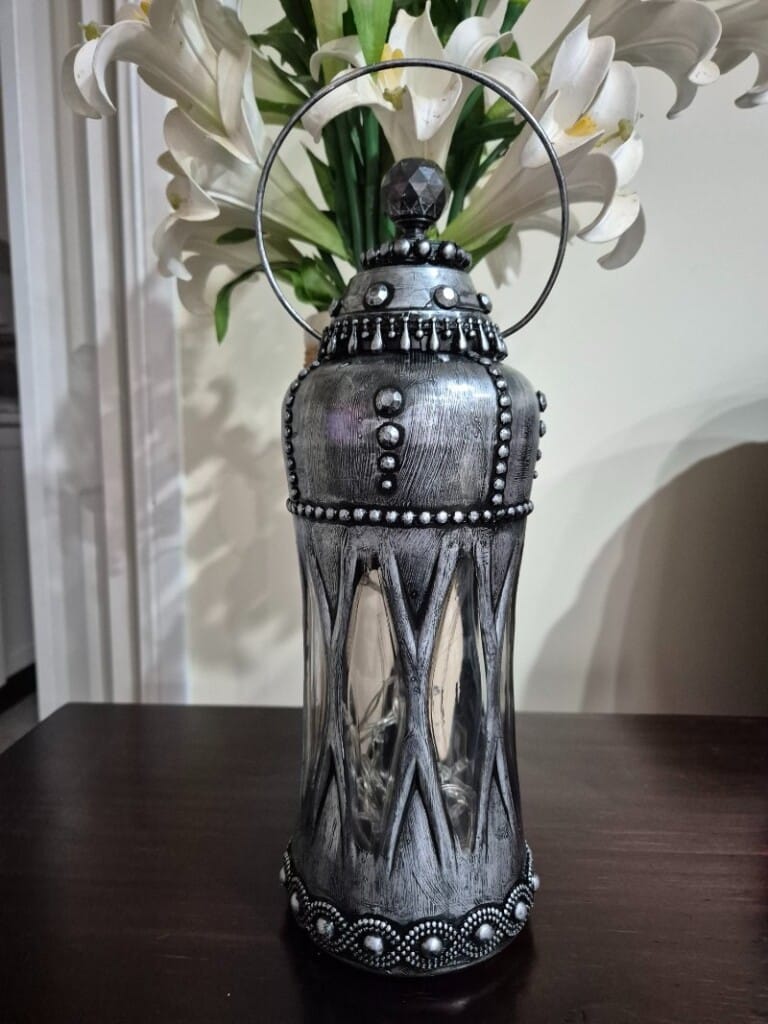
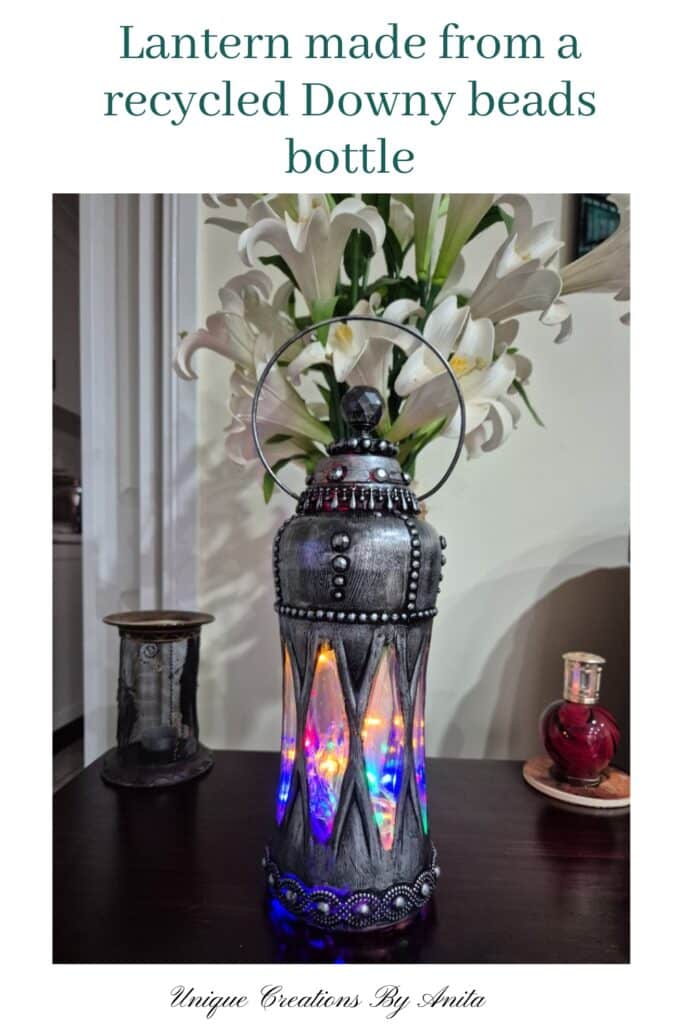
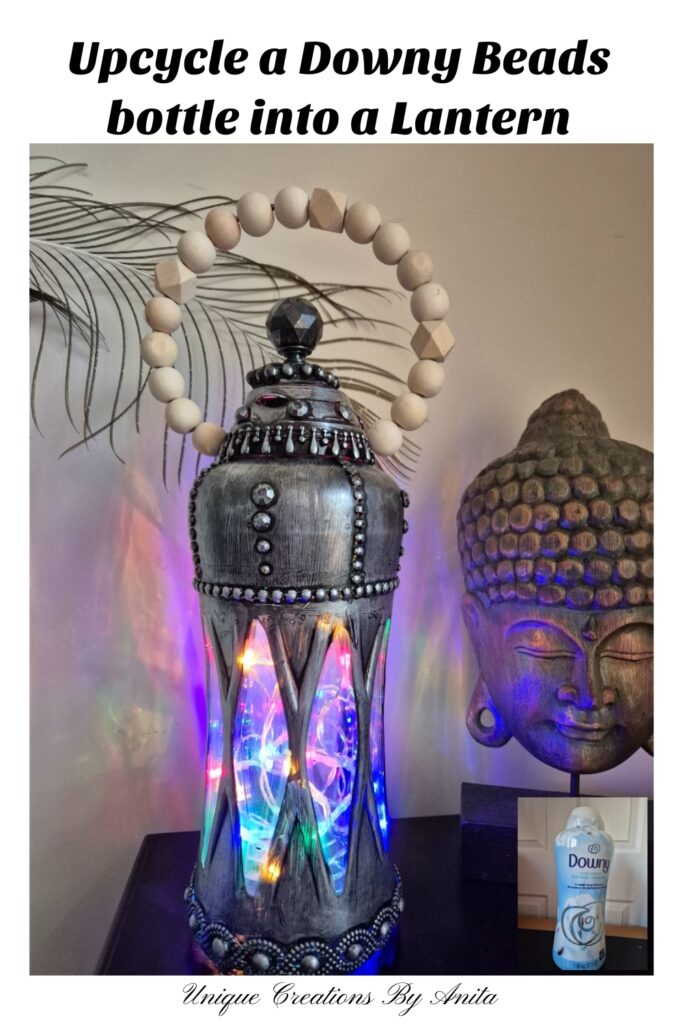
I’m thrilled to be part of this month’s “Do It Over Designers” Blog Hop, and this time the theme is lighting! For my upcycled lighting project, I transformed a recycled Downy Beads bottle into a stunning DIY mixed-media art Lantern. This unique lantern not only saves plastic from landfill but also becomes a charming centrepiece for your dinner table or shelf.
Whether you add warm white or colourful fairy lights, this lantern creates a soft ambient glow that enhances your décor. Best of all, it’s made entirely from items I had on hand—perfect for crafters who love budget-friendly DIYs.
Before we dive into this tutorial, be sure to subscribe to my bimonthly newsletter to be the first to see my latest projects. You can also follow me on Pinterest and Facebook, where I also include my unique mixed-media art projects

DIY Mixed Media Art Lantern from a Recycled Downy Bottle
**This post may contain affiliate links. This means I earn a small commission on links used at no extra cost to you. Please see my disclosure policy for more information.**
Materials Needed
- Recycled Downy Beads bottle
- Metal hoop
- Box cutter
- String beads
- Flat half beads
- Glass Drawer knob
- Craft glue, the ultimate or tacky glue
- Hot glue gun and glue sticks
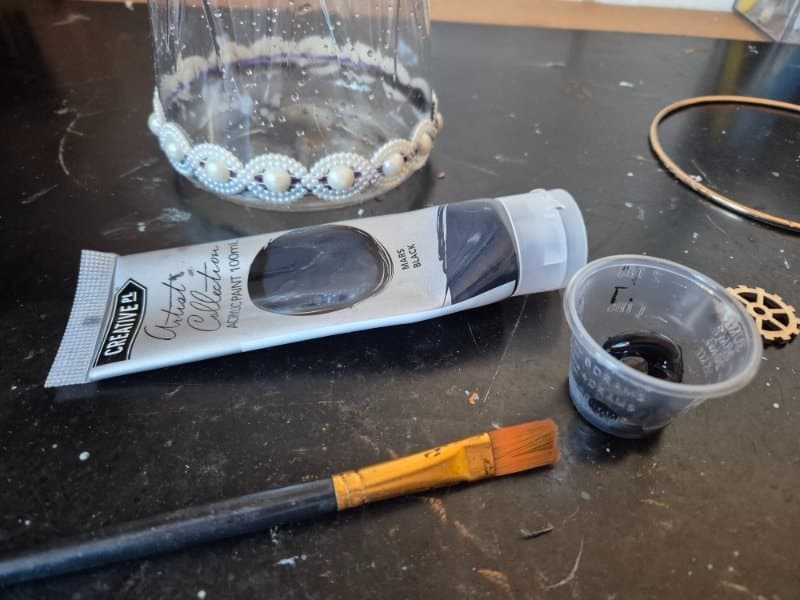
- Black acrylic paint
- Silver wax paste
- Drill
- String beads
Prepping the Lantern Bottle
Start by thoroughly cleaning your Downy bottle to remove any residue. These bottles have such a lovely shape, I’ve been saving them for the perfect upcycle—and this lantern was it!

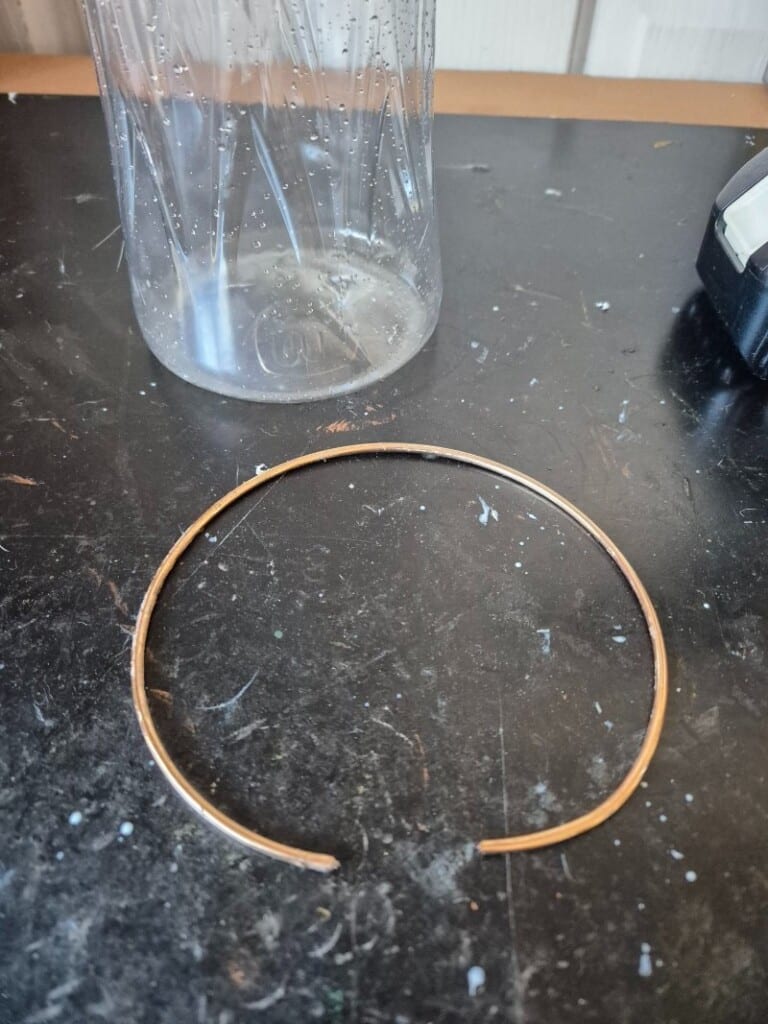
To add the handle, I used a leftover metal hoop from a past wind spinner project. Drill a hole into each side of the bottle lid, just large enough to slide the hoop through. Cut it to size and insert it to form a sturdy handle.

Decorating the Bottle
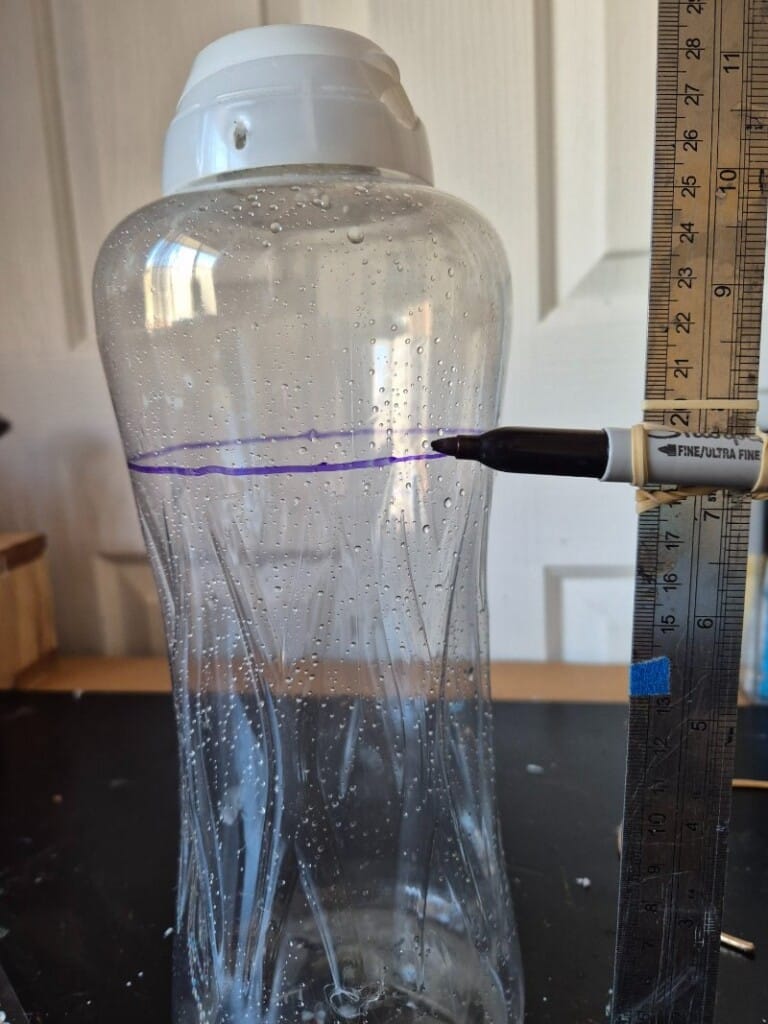
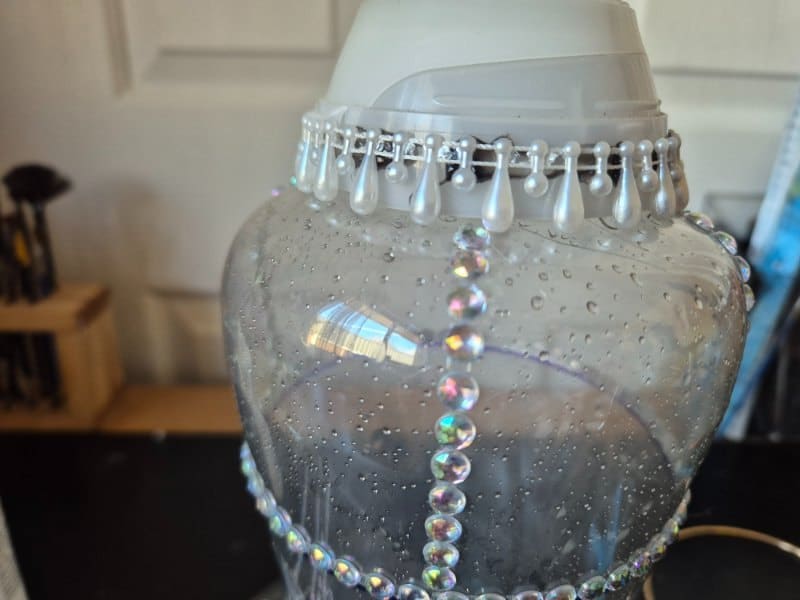
I wanted this piece to feel like a miniature tower. For a neat design line, I used a simple trick: attach a marker to a ruler at the desired height and rotate the bottle around it to draw a straight guide.
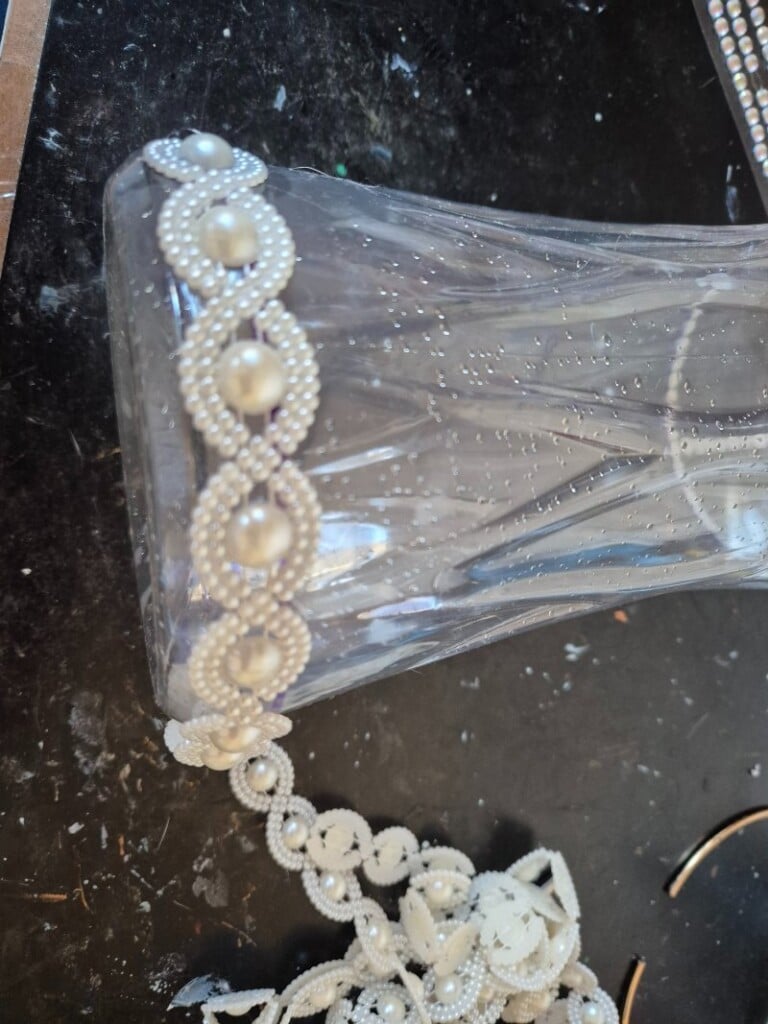
I applied a strand of large string beads around the base and flat-backed adhesive beads around the top. For curved areas where regular glue struggled to hold, I switched to hot glue. Even if the colours don’t match, it won’t matter once everything is painted.

I used a large strand of beads to decorate the bottom edge, securing them in place with glue. For this project, I used string beads sourced from Temu in China.
To make it easier for you to recreate, I’ll do my best to find comparable products available on Amazon.
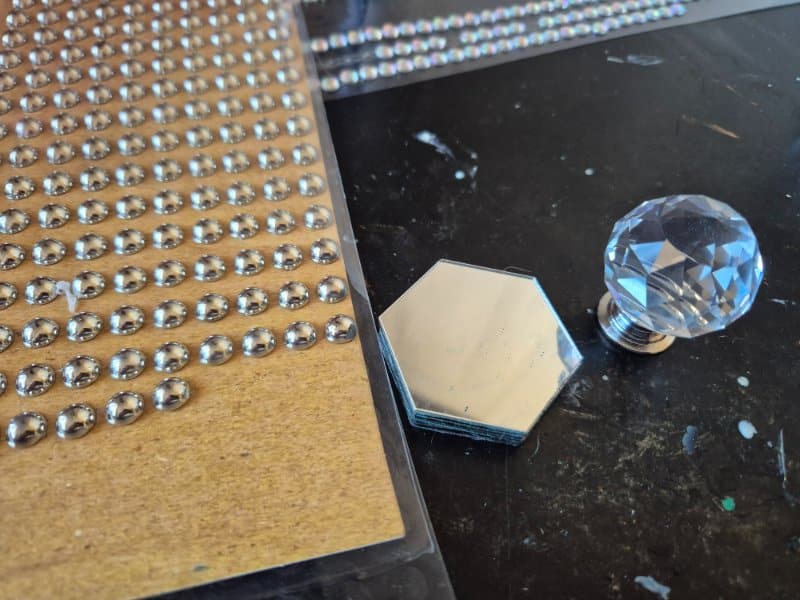
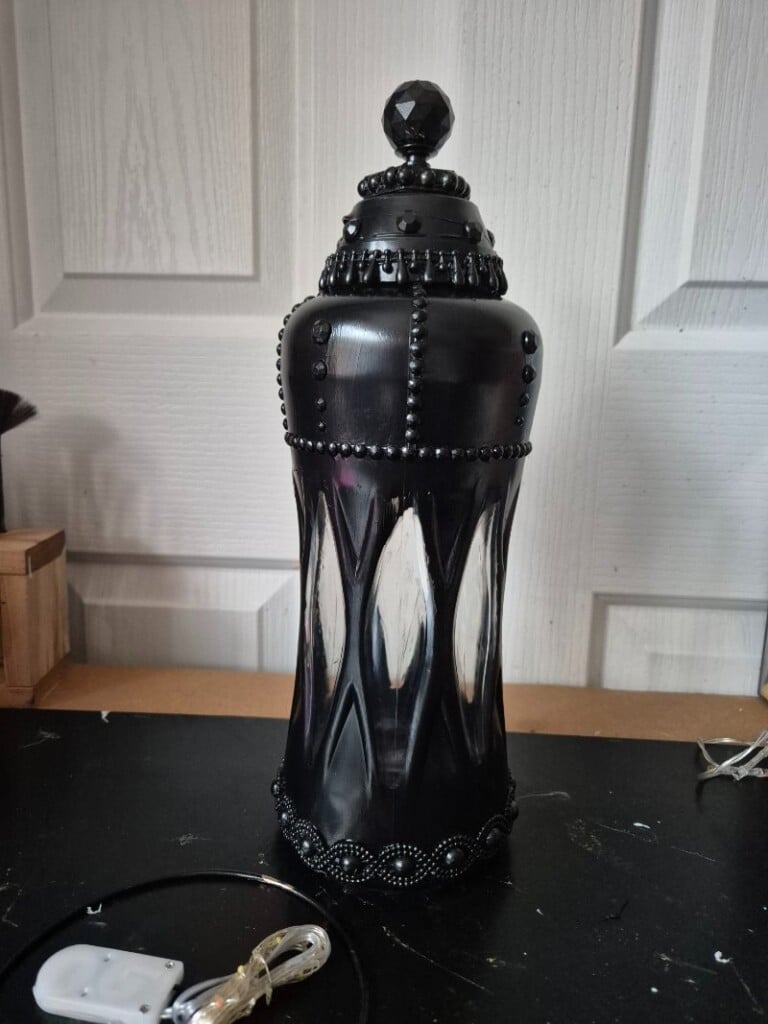
Creating the Steeple Top
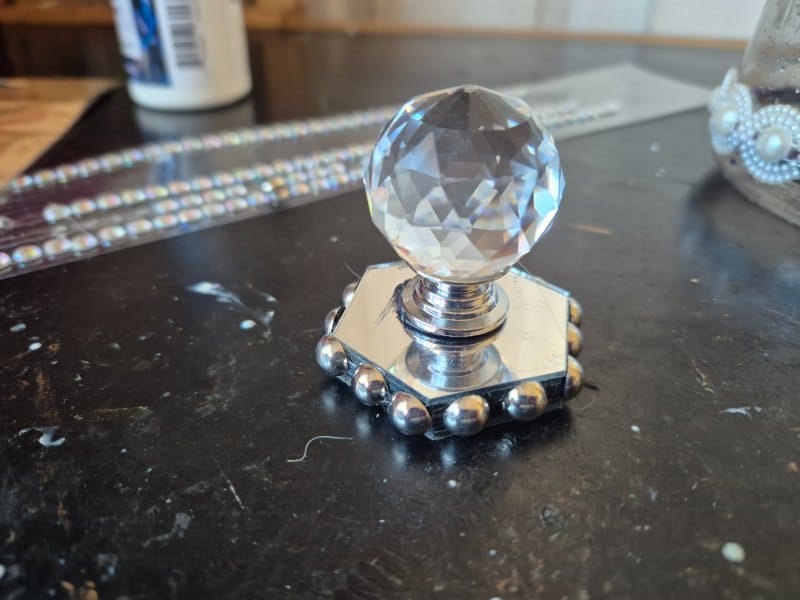
To mimic a steeple, I layered a few hexagon mirrors and topped them with a glass drawer knob.
Flat beads were added around the base to hide any exposed mirror edges. If you don’t have mirrors, cardboard would work just as well. I added some more beads around the top to add more texture and detail, and use hot glue to add the steeple.
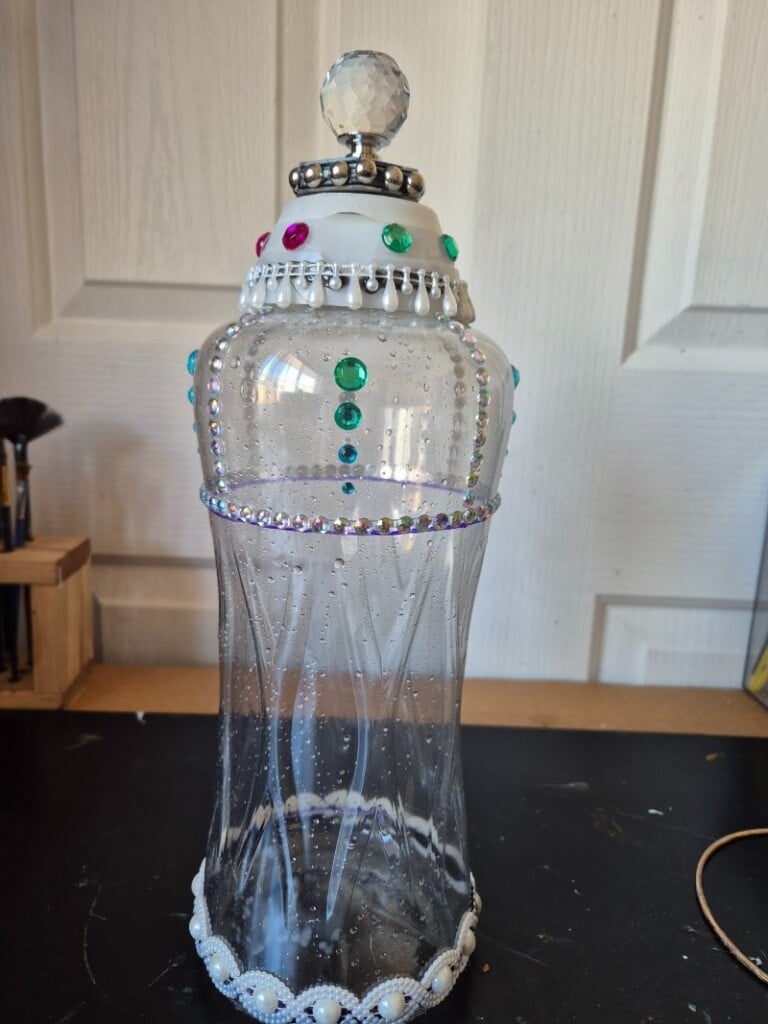
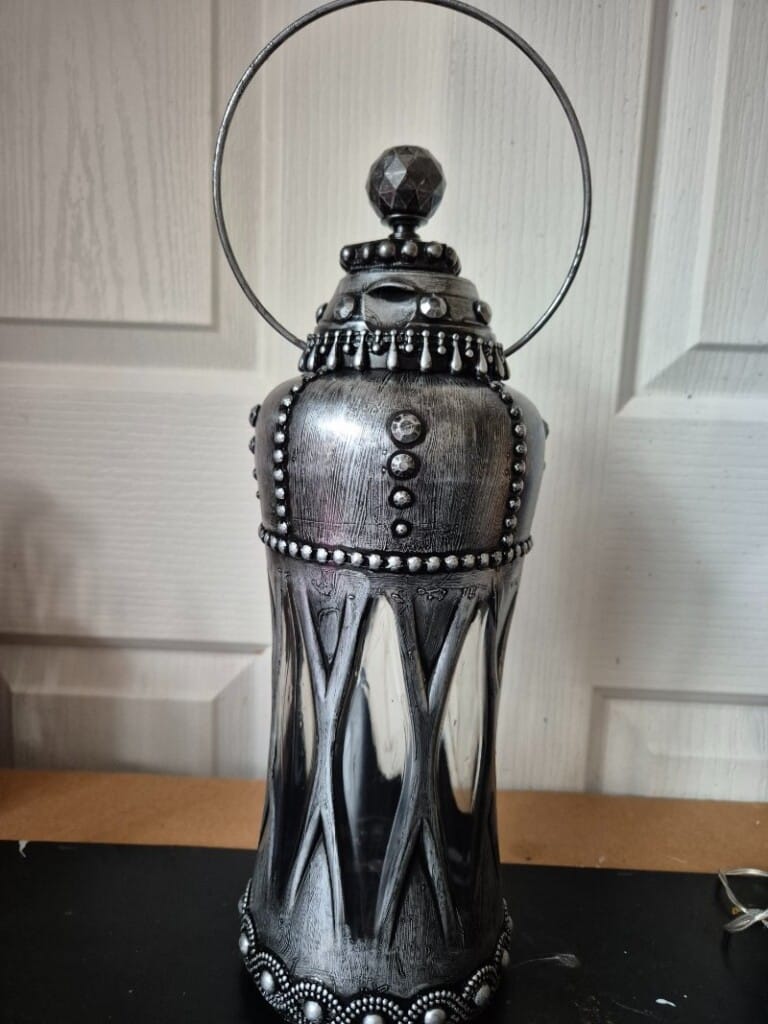
This photo shows the lantern before painting. If you want more tips and tricks for adding embellishments to mixed media assemblage art, this post has it all.
Painting the Lantern
Paint the lantern with two coats of black acrylic paint. Be sure to avoid the window areas to let the light shine through.
After drying, clean any smudges from the clear parts using a baby wipe for a neat finish.
Adding the Aged Metallic Finish
You can dry-brush silver paint for an aged look, but I prefer silver wax paste.
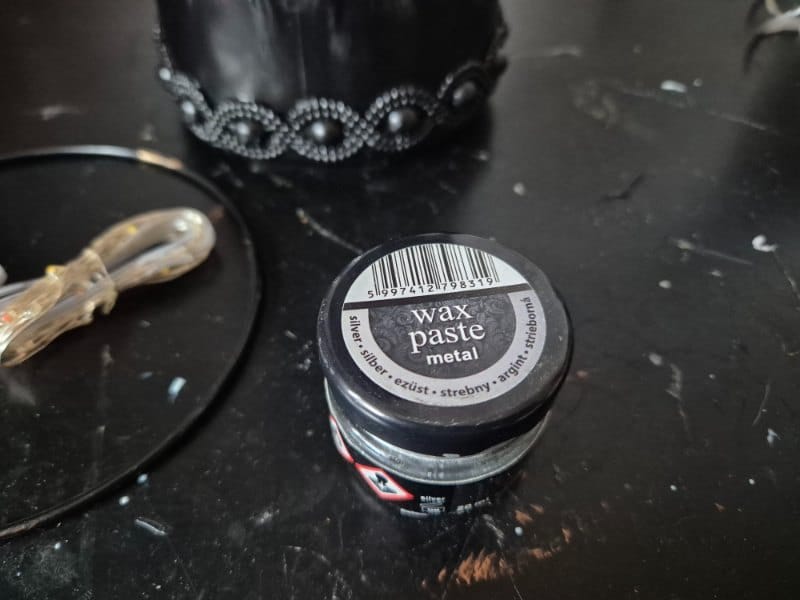
Gently rub it on with your fingers to highlight textures and give the lantern a vintage metallic effect.
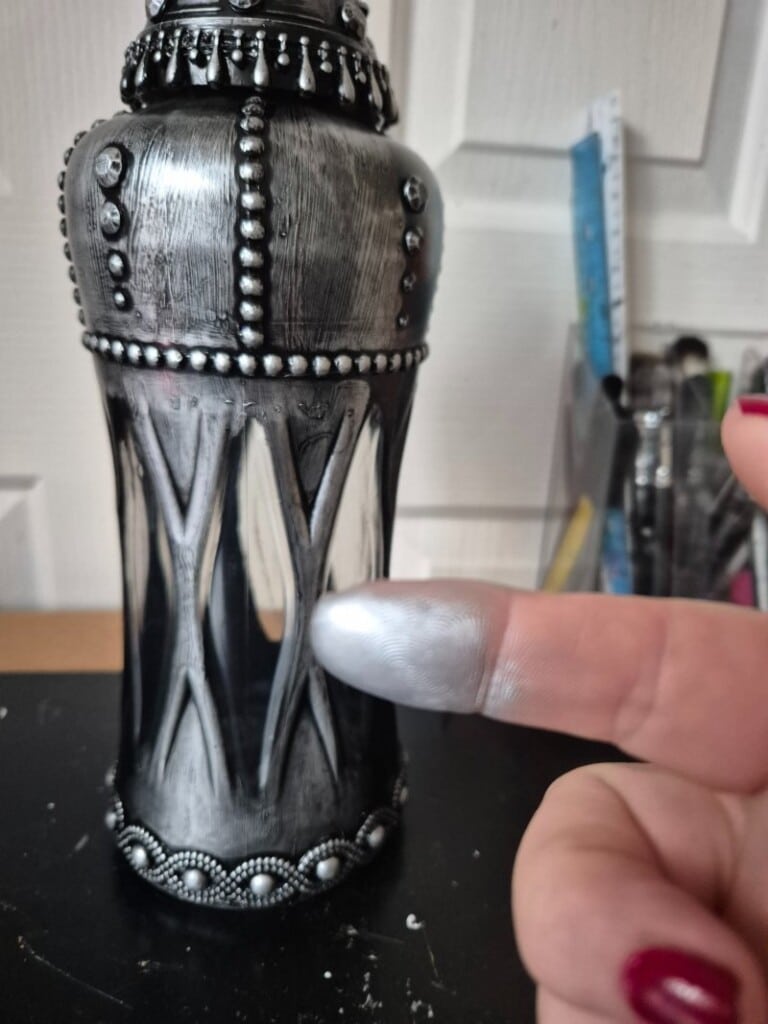
The black base peeking through creates beautiful depth.
Installing the Lights
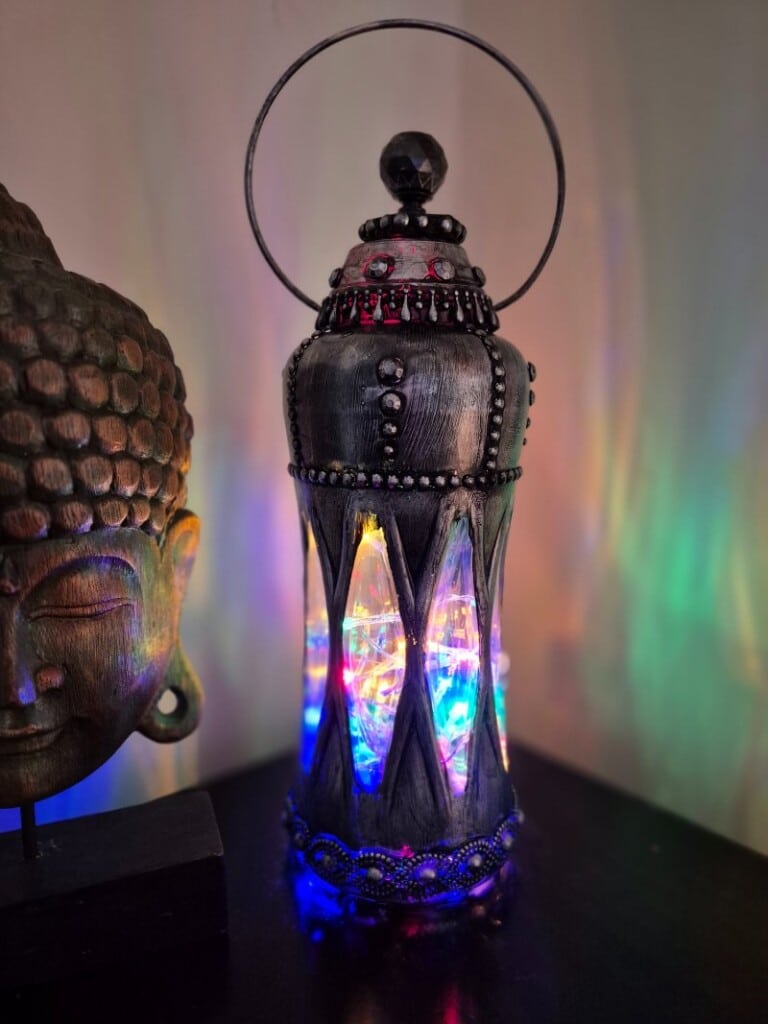
Choose your favourite battery-operated lights—fairy lights, tea lights, or coloured string lights. I used coloured lights for their beautiful soft glow.
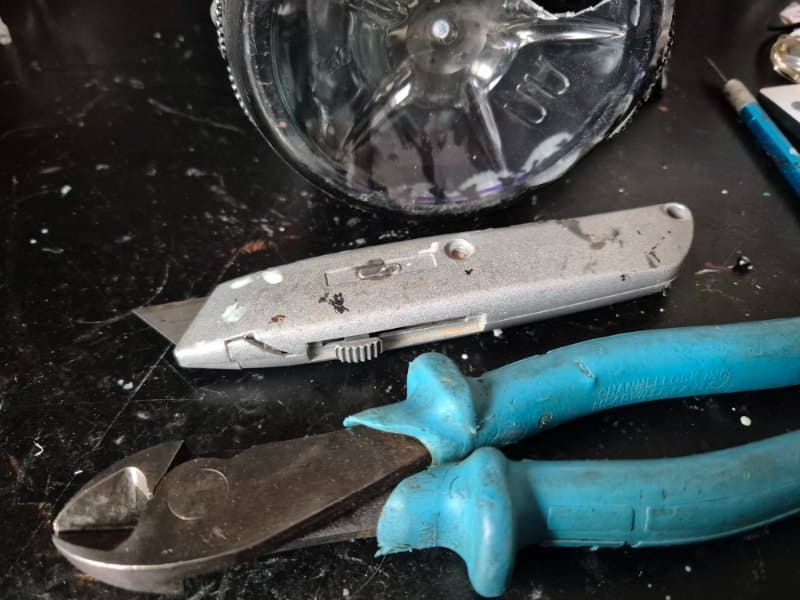
To install them, I cut away half the base of the bottle using a box cutter and side cutters. I glued the first light near the bottle neck and secured the battery pack inside the remaining base. This keeps everything neatly in place.
Optional Handle Embellishment
The top still felt a bit plain, so I added simple wooden beads to the handle for contrast. I’m still undecided whether I prefer it with or without, so feel free to personalise yours.
The image below shows the lantern lit with a standard battery-operated tealight candle. While it provided a gentle glow, I felt the overall effect was a bit too plain for the look I was aiming to achieve. If you would like to see more of my unique mixed-media art projects, you can find them HERE.

Do over the designers’ blog hop
As I mentioned, this is the ‘Do It Over’ Designers Blog Hop, and there are some great projects to explore! Be sure to check out the links below for some inspiring ideas.

If you’re interested in any of the items used in this project, we’d appreciate it if you used our affiliate links. Clicking these links earns us a small commission at no extra cost to you, helping us create more inspiring and exciting projects to share. We’d also love to hear your thoughts—feel free to leave a comment or share this post!

19 Comments
Gail @Purple Hues and Me
July 26, 2025 at 9:42 pmWOW, Anita! Your creativity is amazing! What a gorgeous lantern and a work of art!!!! I would have never thought it is an upcycled Downy bottle! What a transformation!
Anita Holland
July 27, 2025 at 10:22 amThanks Gail, I thought it was a bit fancy for laundry detergent and had to make something with it.
sara allen
July 26, 2025 at 9:49 pmWow – doing laundry never looked so good! I don’t know if we have those same bottles here, but I’d never guess that the bottle is so potentially pretty underneath the label. Amazing work Anita!
Anita Holland
July 27, 2025 at 10:23 amThank you Sara, they are really fancy and deserve a makeover lol.
Ann
July 26, 2025 at 10:05 pmHow beautiful! The black with silver wax paste make it look just like metal and you’d never guess this was a Downy bottle. Fantastic!
Anita Holland
July 27, 2025 at 10:24 amThank you Ann, wax pastes are my go to product when ever I am suck with a project. And that bottle was screaming to become something pretty.
Cara
July 26, 2025 at 10:13 pmThis is stunning Anita, I would have never figured out that this was a plastic Downey bottle! I love the handle either way, this sure is putting your thinking cap on and getting creative. I have several plastic bottles I have been holding onto, but this would have never entered my mind to try. Great job!
Anita Holland
July 27, 2025 at 10:26 amThanks Cara, So glad I could offer some inspiration for your bottles.
Kim
July 26, 2025 at 10:27 pmAnita, never in a million years would I have guessed that your lovely lantern was made out of a plastic bottle. Wow! That is truly an amazing upcycle. Just lovely…
Anita Holland
July 27, 2025 at 10:27 amThank you Kim, I really appreciate your comment. There was not a lot of work that went into it bet the results were great.
Patti @ Pandora's Box
July 26, 2025 at 11:32 pmThis surprised me and certainly did not look like a Downey bottle – how unique!! The finish you created is amazing and you would never know its plastic – WELL DONE!!
Anita Holland
July 27, 2025 at 10:28 amThank Patti, There are some many pretty bottles out there, this is a quick and easy way to give them a makeover.
Michelle Leslie
July 27, 2025 at 2:32 amWait…. What!!! I never would have guessed the lantern started as a plastic bottle. It’s absooooolutely stunning, Anita. And adding the steeple top and decorative beads was genius. It changes the whole look.
Anita Holland
July 27, 2025 at 10:30 amThank you Michelle, I think this was my quickest project ever I loved the outcome.
Julie
July 27, 2025 at 11:09 pmOh my goodness, this is insanely good! What a completely next level transformation!
Anita Holland
July 28, 2025 at 9:18 pmThanks so much Julie, I have hung on to these bottles for year waiting for a project. 🤣🤣
Linda Primmer
August 7, 2025 at 3:03 amWow Anita, this is so beautiful. Your talent always amazes me. Such a grand transformation .
Anita Holland
August 7, 2025 at 7:49 pmThank you so much Linda for the lovely compliment. 😃
Tuula @ Color Me Thrifty
August 16, 2025 at 1:34 amWow! Your lantern turned out so amazing. I would have never guessed it was a Downy bottle. Love how the colored lights shine though. So pretty!