
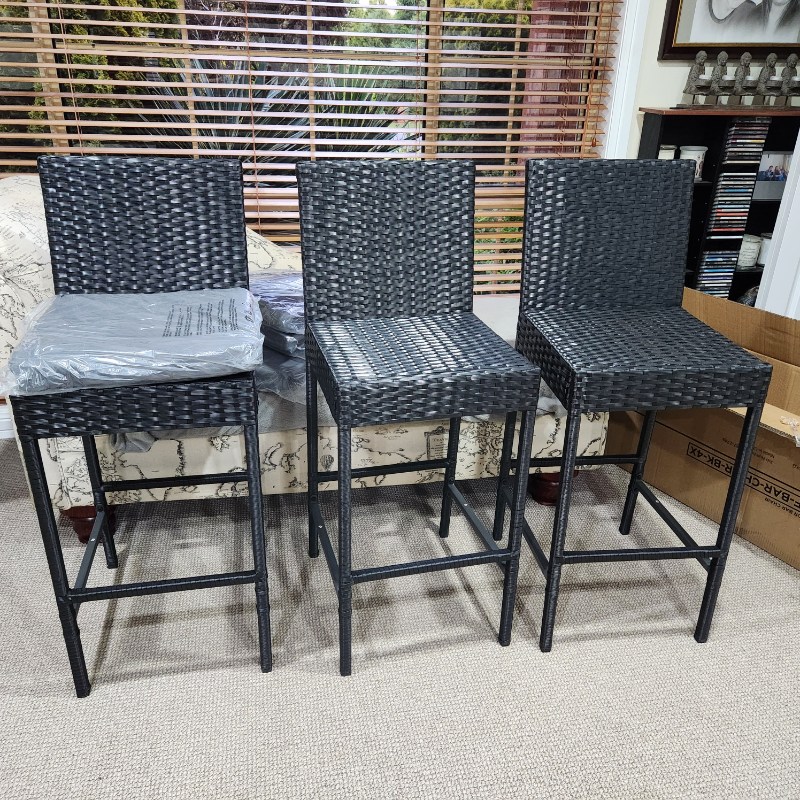
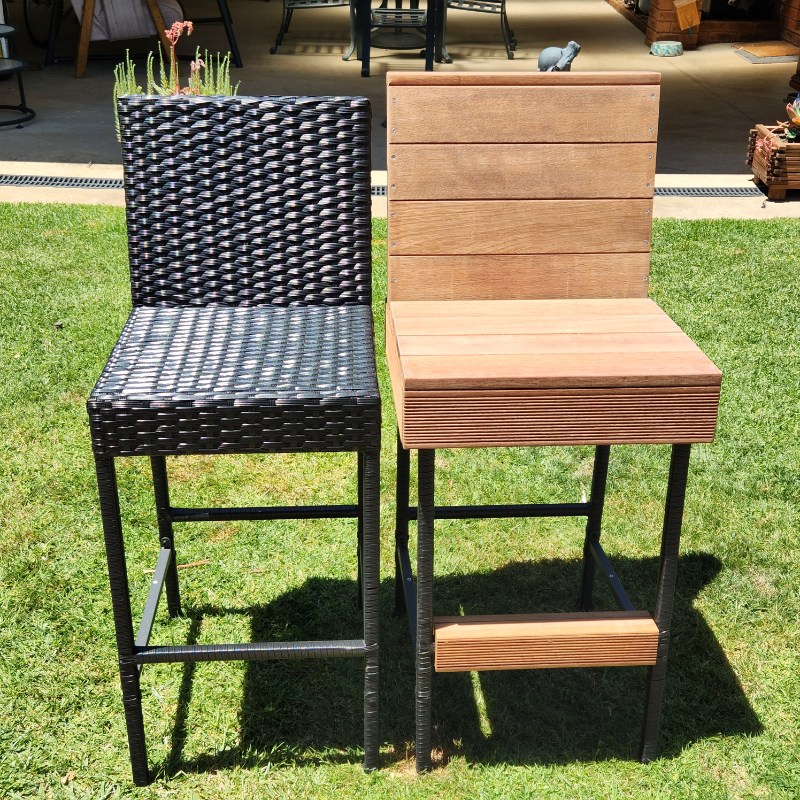
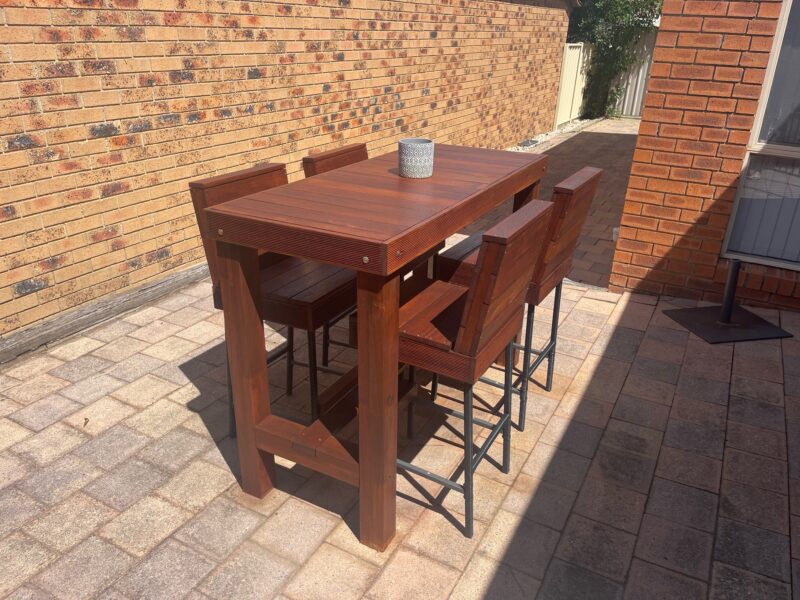
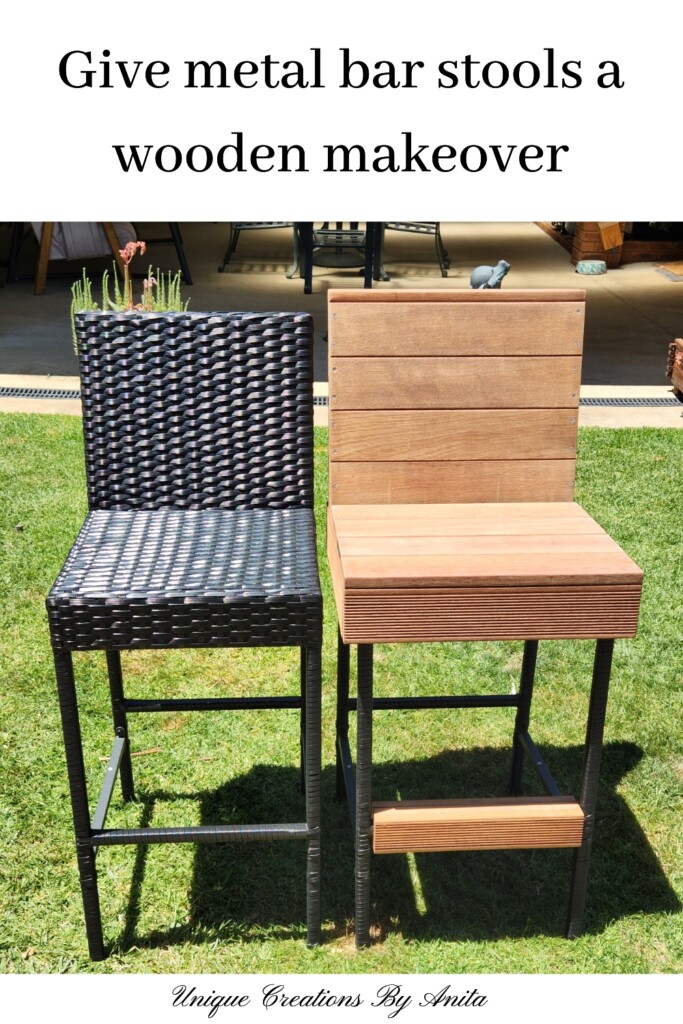
Have you ever regretted a purchase the moment you saw it in place? That’s exactly what happened to me with these barstools. A few months ago, I built my son a rustic outdoor bar table using recycled decking planks and fencing posts. It turned out beautifully, but I didn’t have enough wood left for stools. Wanting to complete the set, I bought four metal bar stools online for $400. Once assembled, they looked completely wrong next to the table—cheap, mismatched, and disappointing. Returning them wasn’t an option with postage costs sky-high, so I did the next best thing: I gave them a complete makeover.
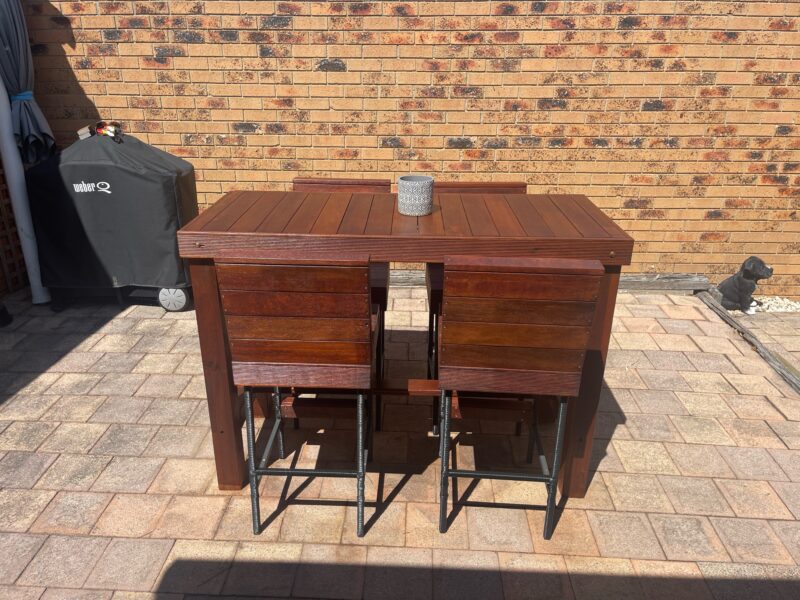
The idea was simple—cover the metal stools with recycled decking planks so they matched the outdoor bar table. The challenge was finding a way to attach wood to a metal frame without the screws pulling loose or splitting. After a bit of trial and error, I came up with the perfect solution: removable wooden covers that slide neatly over the top and base of the stools. They’re secure when in use, but can also be lifted off for storage or maintenance.
Do It Over Designers
Today we’re taking part in the Do It Over Designers Blog Hop hosted by Ann at The Apple Street Cottage.
We’re a group of bloggers who take something old and/or unused and ‘do it over’ into something new. These items can be found in closets, barns, garages, yard sales, thrift stores, you name it! Check out the other projects at the very bottom of this post.
Before we dive into this tutorial, be sure to subscribe to my bimonthly newsletter to be the first to see my latest projects. You can also follow me on Pinterest and Facebook, where I also include my unique mixed-media art projects
DIY Bar Stool Makeover with Recycled Decking Wood
**This post may contain affiliate links. This means I earn a small commission on links used at no extra cost to you. Please see my disclosure policy for more information.**
Materials Needed
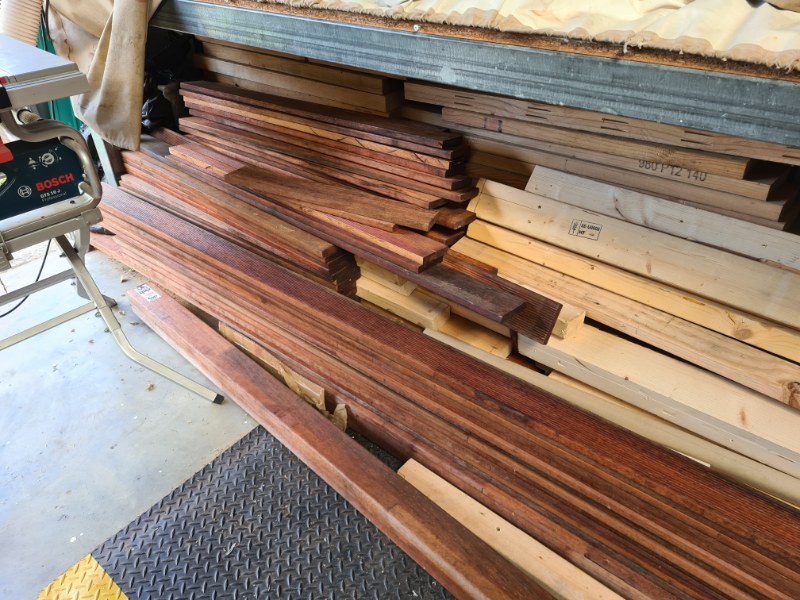
- Recycled decking planks or pine timber
- Mitre saw (or any saw)
- Drill and drill bits
- Wood screws
- Countersink drill bit
- Orbital sander and discs
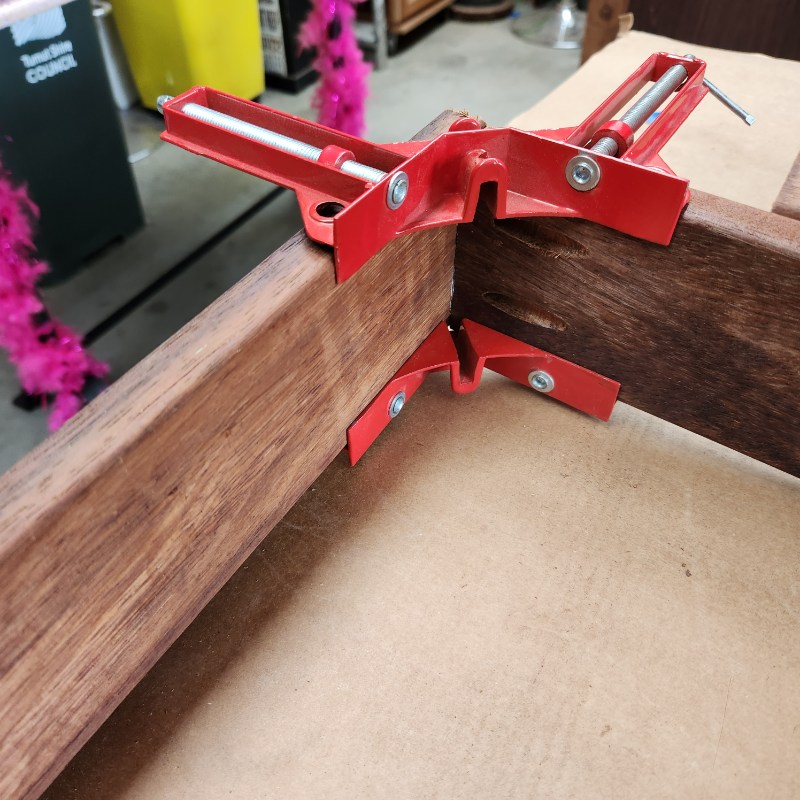
- Wood clamps and corner clamps
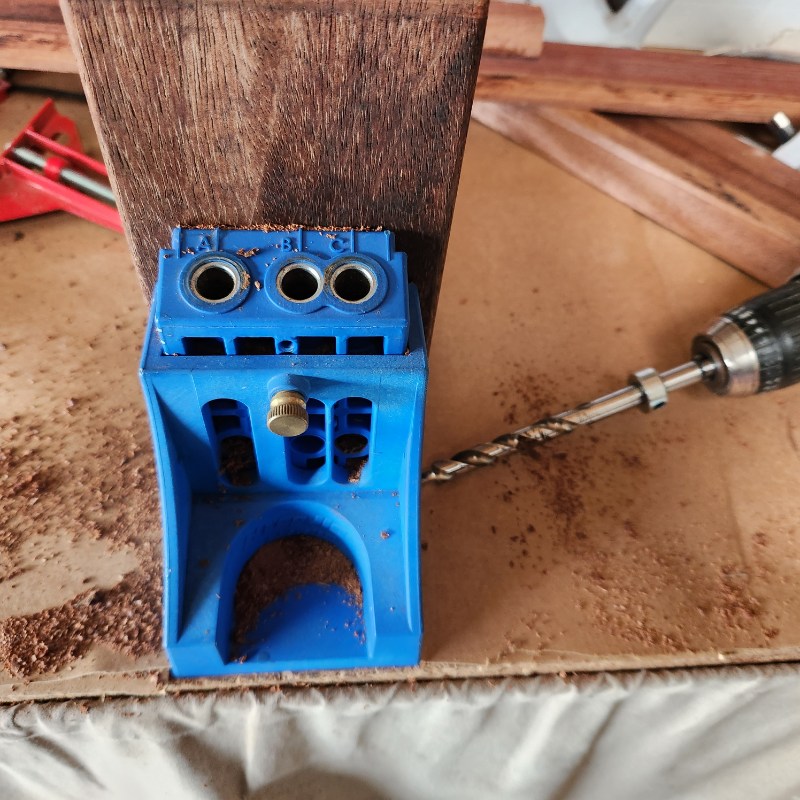
- Pocket hole jig
- Wood glue
- Timber oil or outdoor sealant
Making the base for the seat
I began by measuring the outside dimensions of the seat to create the frame. I measured from the front of the stool to the back of the backrest, leaving a small gap so the wooden cover could slide neatly over the backrest. This stopped the seat cover from slipping forward when someone sat down.
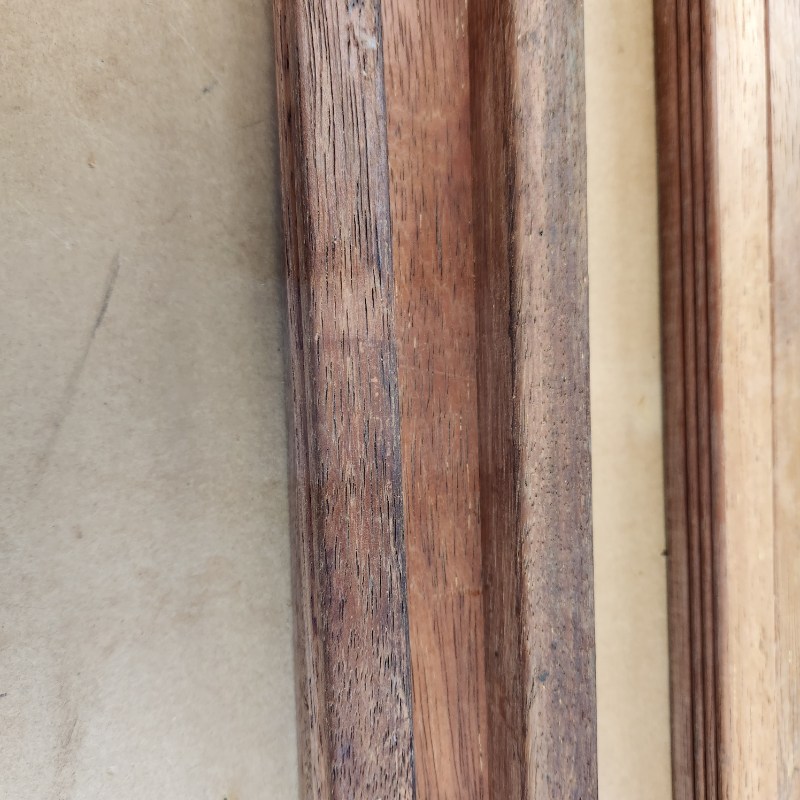
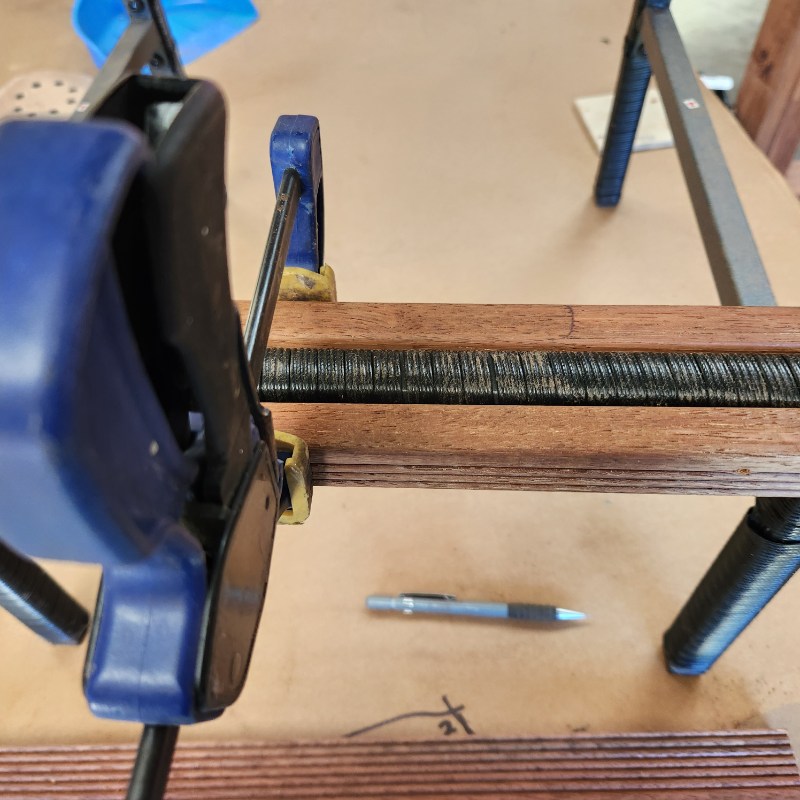
Using a pocket hole jig, I drilled two holes on each end of the side pieces. Since decking planks have ridges on one side, I drilled into the flat side for a stronger joint while leaving the ridged side exposed as a design feature.
I added wood glue, clamped everything in place, and secured the joints with screws.
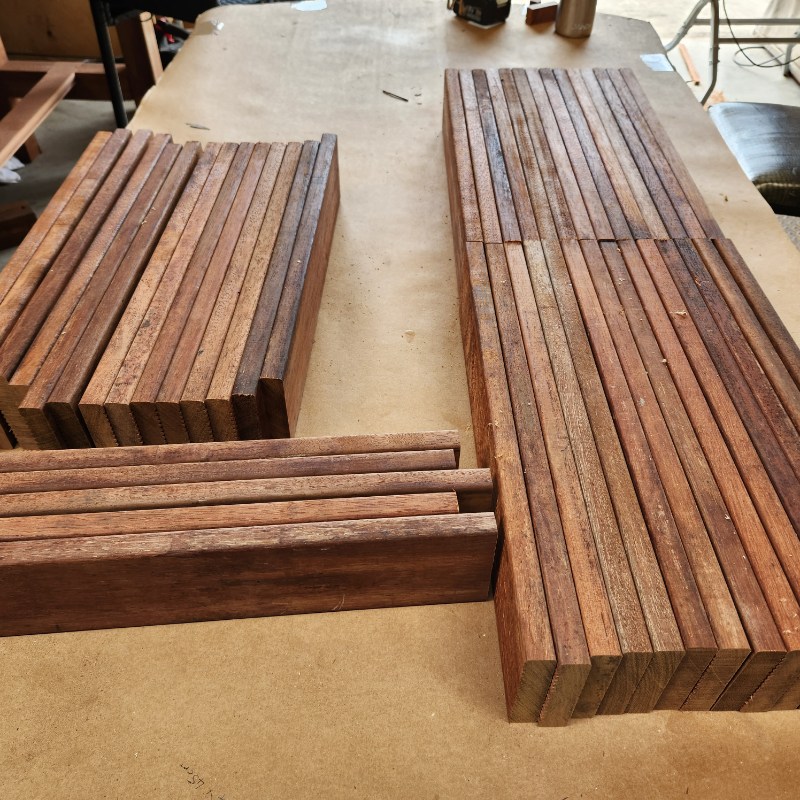
Cutting the wood
Before cutting all the wood for the crosspieces, first check that the frame fits securely over the bar stool. Then measure from one side of the frame to the other to get the correct width. I needed around 50 pieces in total for the four barstools, including a few shorter ones for the tops and sides.
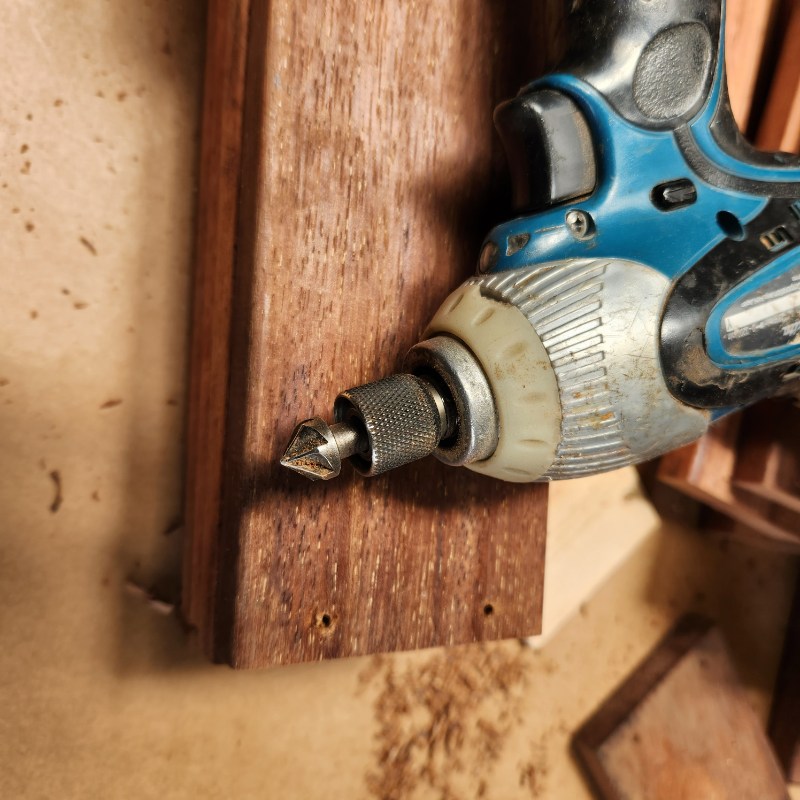
Drill the holes
I wanted the screws to line up evenly on each piece of wood for a cleaner look. The idea of measuring every single slat, though, felt like a nightmare. To make the job quicker and easier, I used a scrap piece of wood to create a template for the screw holes.
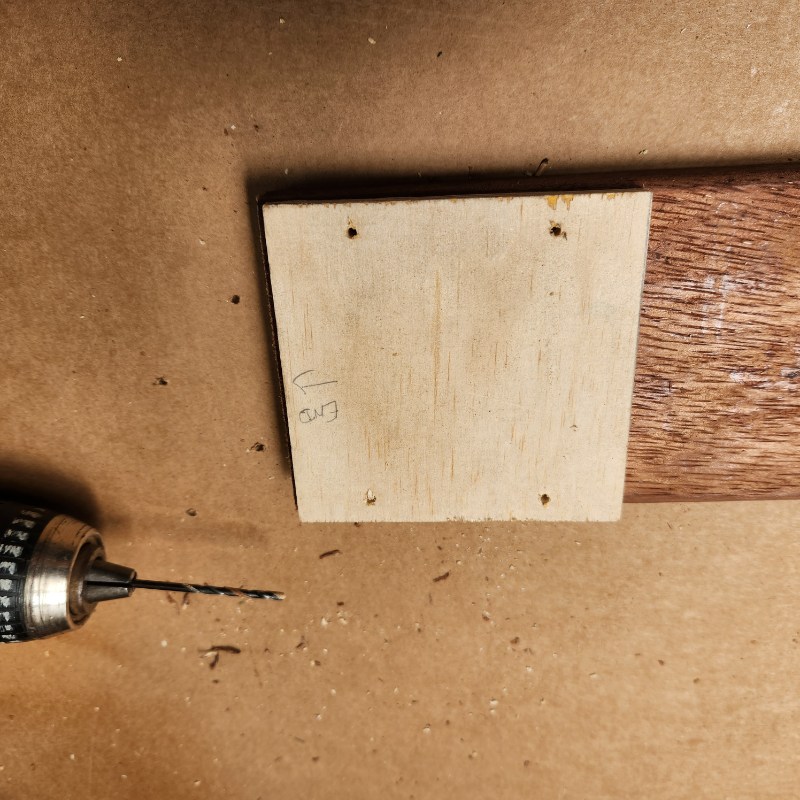
To prevent the screw heads from catching on clothes or causing injury, I countersunk all the holes so the screws sat flush with the wood.
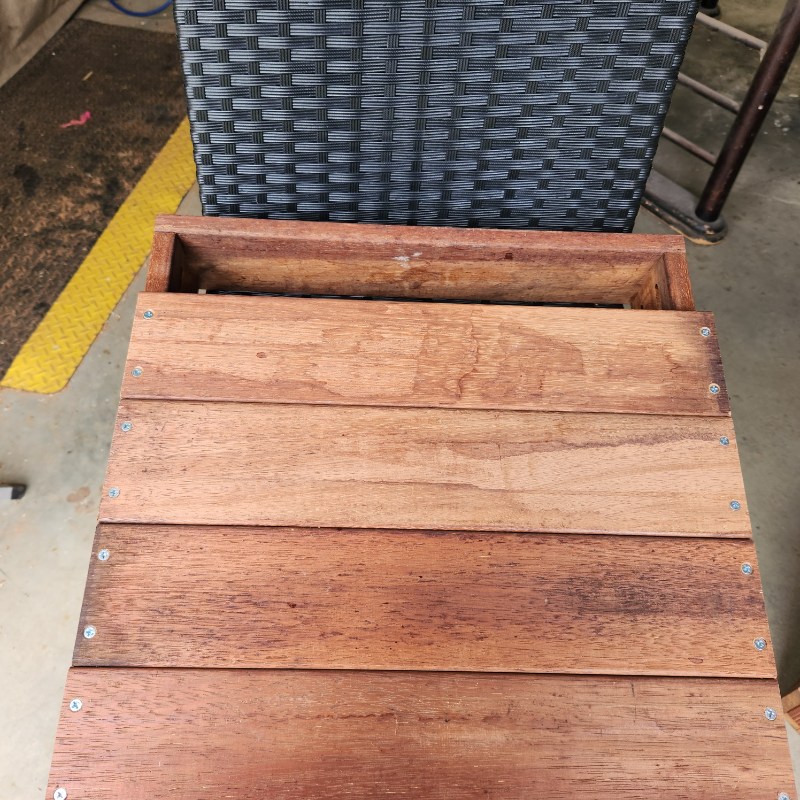
You can now attach the slats to the sides of the bar stool frame. The photo below shows how the finished seat base should look.
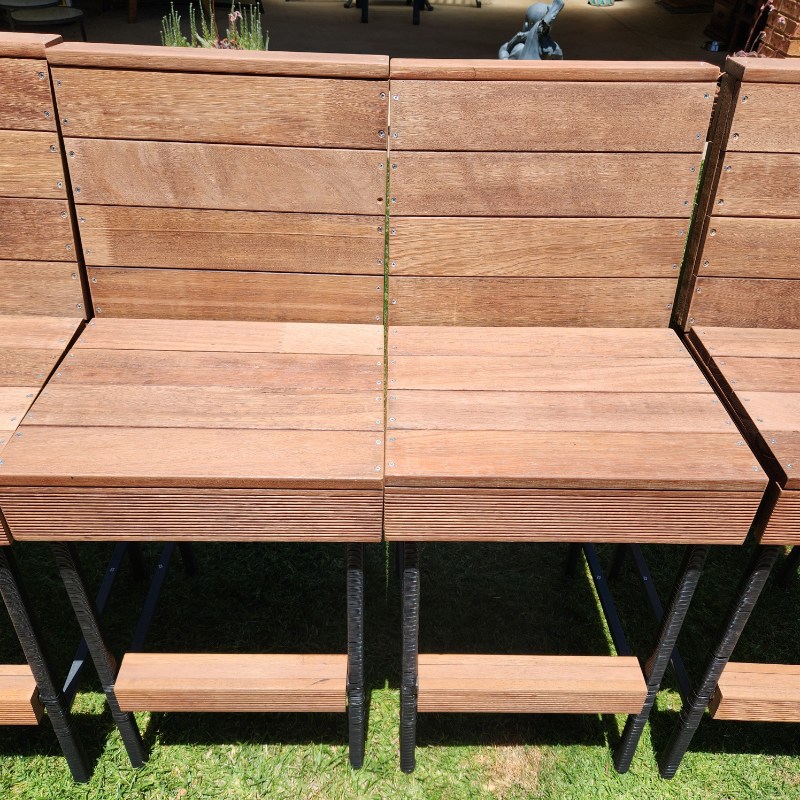
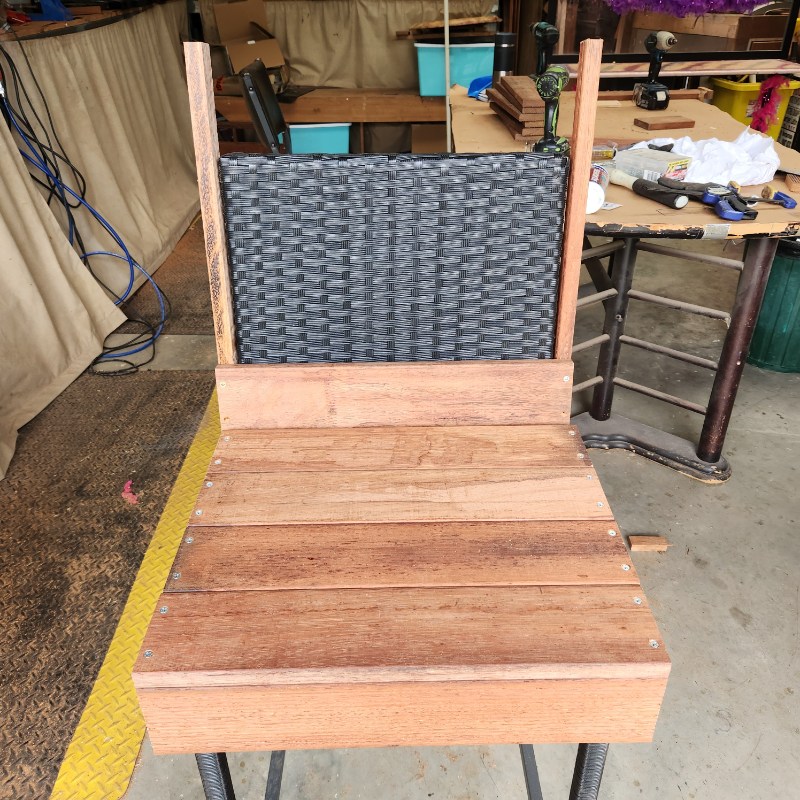
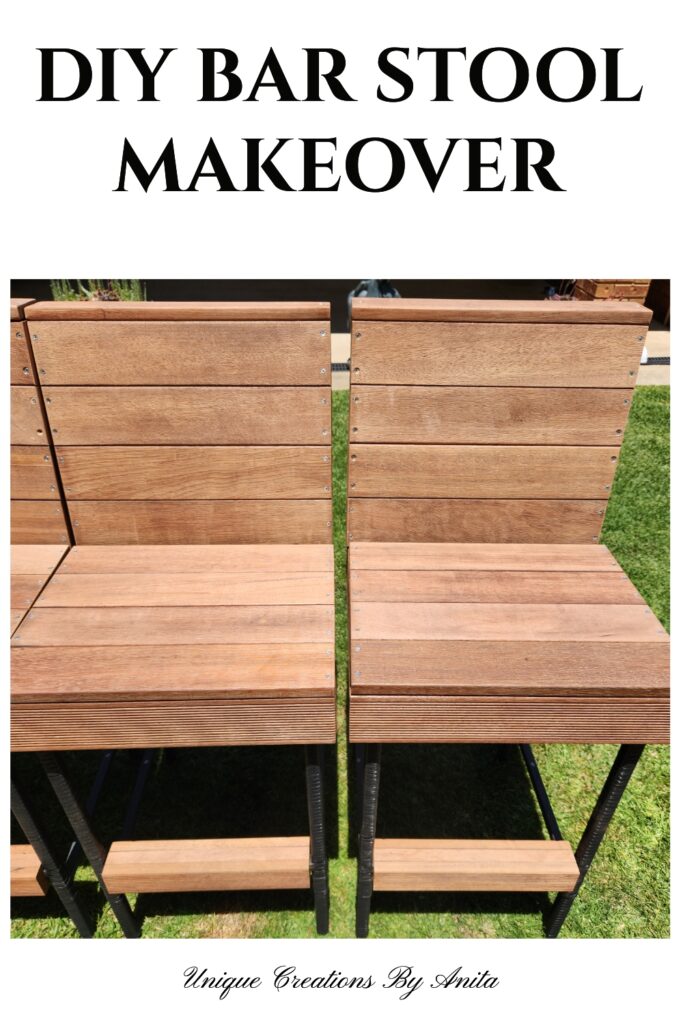
Making the backrest for the barstools
Keep the base in place while building the backrest so you know exactly where to start adding the slats. I began by attaching one piece across the front to hold the sides steady. This made it easier to measure the height and width of the side panels accurately.
I marked the measurements with a pencil, adding an extra 1 cm to the depth of the sides to allow for any inconsistencies in the plastic covering already on the chair. After cutting the sides to size, I attached the front and back panels the same way I did for the seat. Once both sides were covered, I finished by screwing a final piece across the top.
Making footrests for the barstools
To balance out the wood colour, I added wooden footrests by boxing in the metal frame. I cut the planks to the size of the footrest and screwed them together.
Next, I clamped the wood in place and flipped over the bar stool and screwed in the final piece of wood.
Before and After
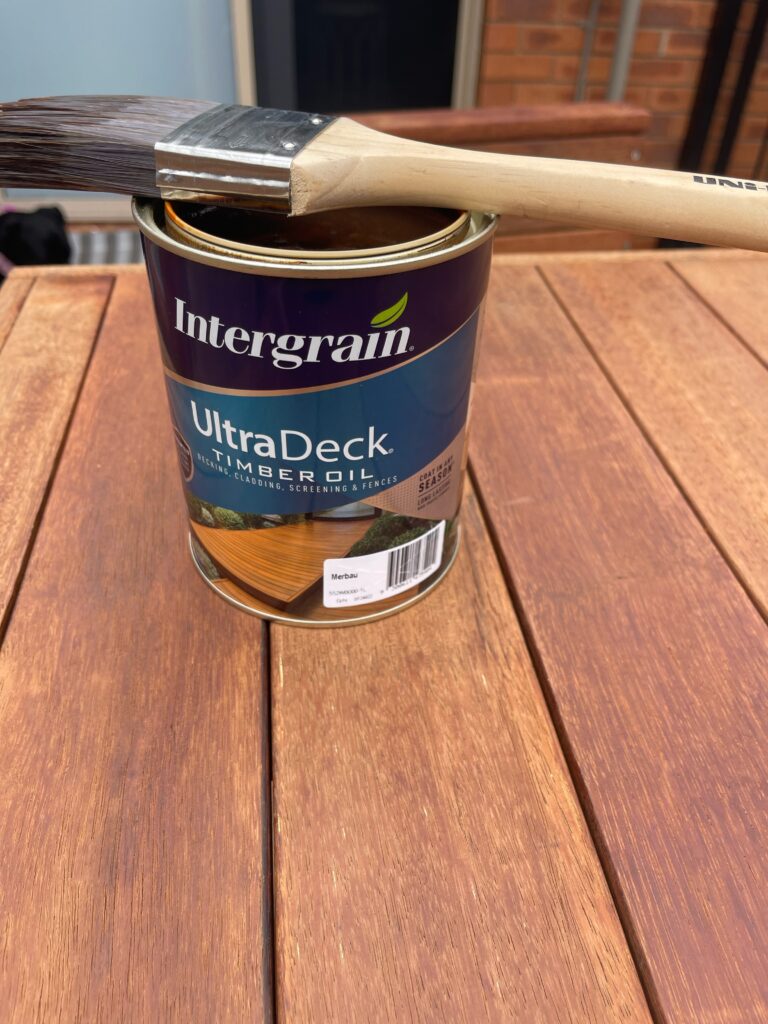
Sealing the wood
Finally, I sanded away the rough edges and removed the watermarks with an orbital sander. Then I applied two coats of timber oil, and the makeover was complete.
You can find the tutorial on how I made the outdoor bar table here.
More outdoor entertaining ideas
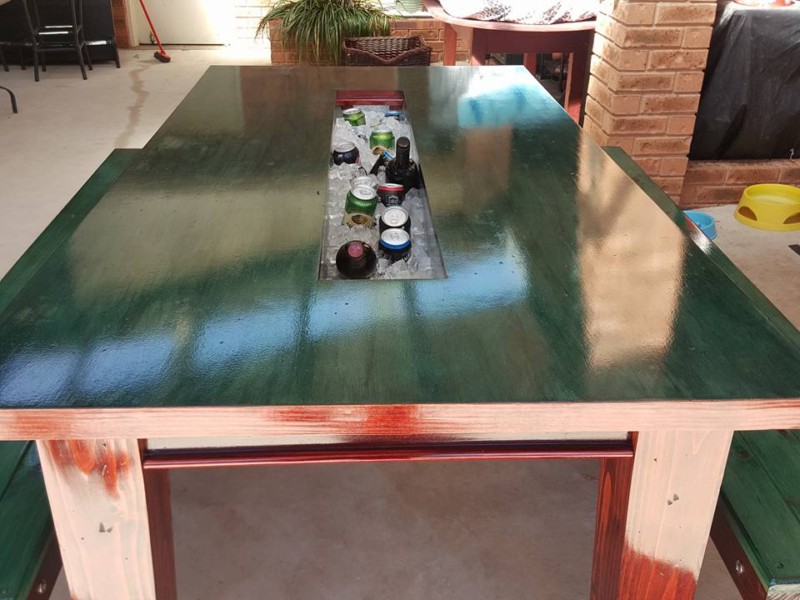
With a table that has a built-in ice trough, you can keep your drinks cold and spend more time with your guests instead of running back and forth to the fridge.
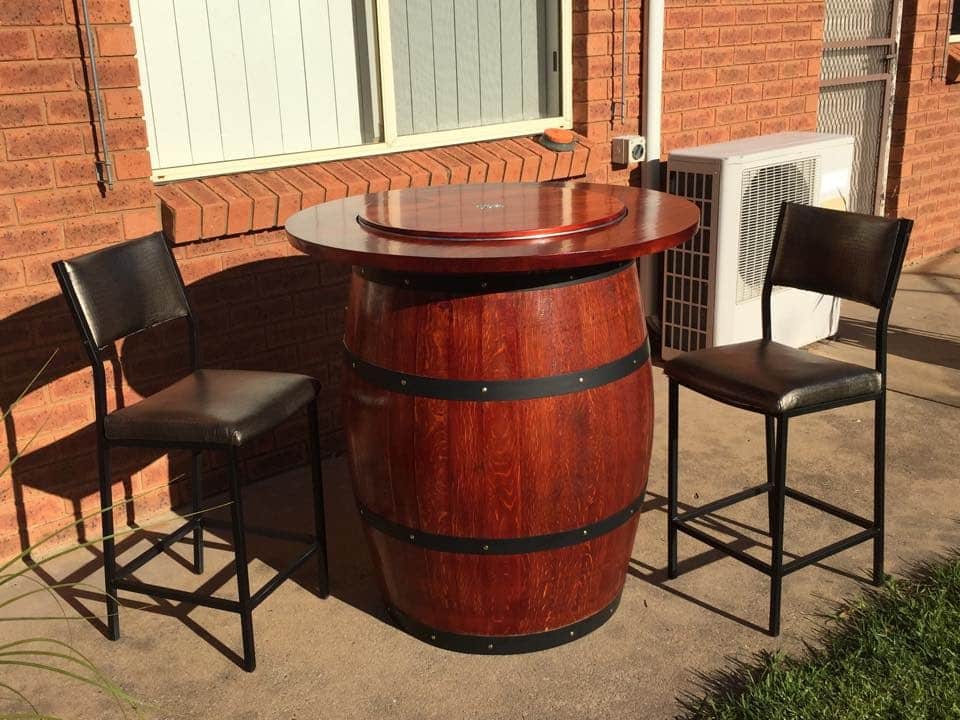
A wine barrel can be transformed into a stunning table with a built-in ice bucket.
Do over designers’ blog hop
As I mentioned, this is the ‘Do It Over’ Designers Blog Hop, and there are some amazing projects! Be sure to click on the links below for inspiration.


If you’re interested in any of the items used in this project, we’d appreciate it if you used our affiliate links. Clicking these links earns us a small commission at no extra cost to you, helping us create more inspiring and exciting projects to share. We’d also love to hear your thoughts—feel free to leave a comment or share this post!


15 Comments
Kim Montenero
September 23, 2023 at 9:28 pmWow! Now that’s a dramatic upcycle! I would never guess that you didn’t buy the set that way. It’s very beautiful!
Anita Holland
September 24, 2023 at 3:29 pmThanks Kim, I was thrilled how they turned out.
Patti @ Pandora's Box
September 23, 2023 at 10:00 pmWow – what a project! Both the table and the chairs are stunning and so unique! Well done!
Anita Holland
September 24, 2023 at 3:30 pmThanks so much Patti, this set was such a challenge at times. But worth it for the end result.
Ann
September 23, 2023 at 10:24 pmWow, Anita! The bar stools look amazing and your son must love them. That is the best makeover I’ve ever seen!
Anita Holland
September 24, 2023 at 3:32 pmThanks Ann, that is an awesome compliment. He did love the set.
Gail @Purple Hues and Me
September 23, 2023 at 10:25 pmMy word Anita, your makeover bar stools are gorgeous and match the table perfectly! Your woodworking skills are amazing! Wow! Just wow!
Anita Holland
September 24, 2023 at 3:33 pmThanks so much Gail, I am self taught so your compliment is greatly appreciated. 😍
Julie
September 23, 2023 at 11:27 pmThat is just SO clever! You would never know this wasn’t always a beautiful high end set.
Anita Holland
September 24, 2023 at 3:34 pmThanks Julie, it took me a while to make this set but got there in the end.
Tania
September 24, 2023 at 12:08 amHoly smokes, that’s genius!! They look great!
Anita Holland
September 24, 2023 at 3:34 pmThank you so much.
Tuula @ Color Me Thrifty
September 27, 2023 at 12:18 amWowza! Your bar stools turned out amazing!
Anita Holland
September 30, 2023 at 2:18 pmThank you so much. 😍
Michelle Leslie
October 17, 2023 at 12:48 amWOW, WOW, WOW!!! The makeover looks incredible, Anita. Such a clever idea and they match the table perfectly.