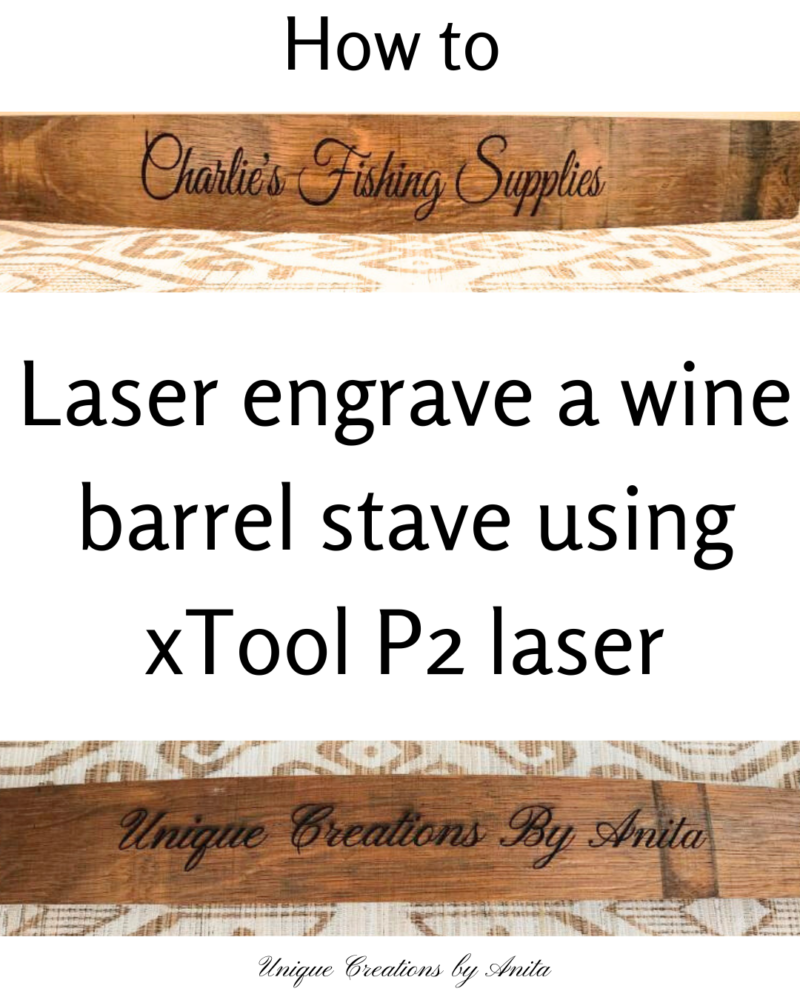
Laser engraving wine barrel staves with the xTool P2 CO₂ laser’s Curved Surface mode is a brilliant way to turn leftover barrel pieces into custom bar décor. In this tutorial, How to Laser Engrave Wine Barrel Staves with xTool P2’s Curved Surface Mode, I’ll show how I set up, mapped and engraved a curved stave, plus how I fixed scorch marks and sealed the finish for indoor or outdoor use.
I’ve built coffee tables and outdoor tables with built-in wine buckets from barrels before—now I’m putting all those spare staves to work with names, quotes and personalised bar signs.
Before we dive into this tutorial, be sure to subscribe to my bimonthly newsletter to be the first to see my latest projects. You can also follow me on Pinterest and Facebook, where I also include my unique mixed-media art projects
How to Laser Engrave Wine Barrel Staves with xTool P2’s Curved Surface Mode
**This post may contain affiliate links. This means I earn a small commission on links used at no extra cost to you. Please see my disclosure policy for more information.**
Materials & Tools
- xTool P2 CO₂ laser
- xTool Riser Base (height extension)
- xTool Creative Space (XCS) software
- Wine barrel stave, trimmed so the engravable section is ≤ 42 cm
- Pencil and tape measure (the xTool one is handy)
- Painter’s/masking tape (optional, helps reduce scorch)
- Orbital sander + 120-grit discs (and 180–240-grit for a quick finish)
- Exterior clear varnish or polyurethane (for outdoor signs) + brush
- Non-slip mat or scrap blocks to stabilise the stave in the bed
- Baby wipe
Setting up the xTool P2 laser
Prepare the stave and machine
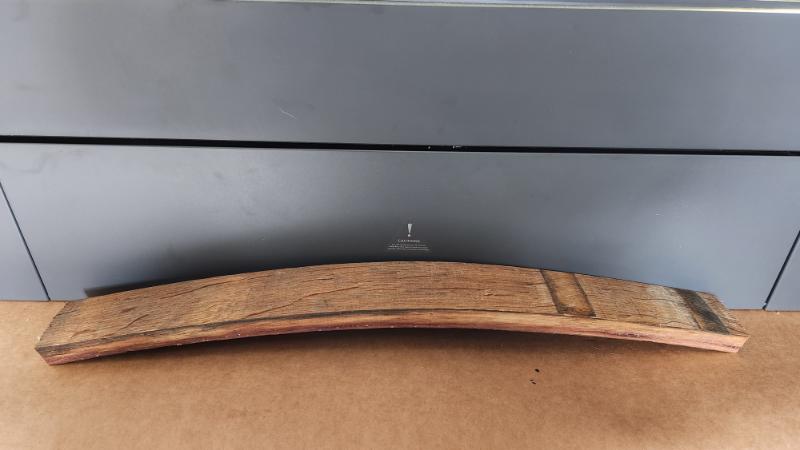
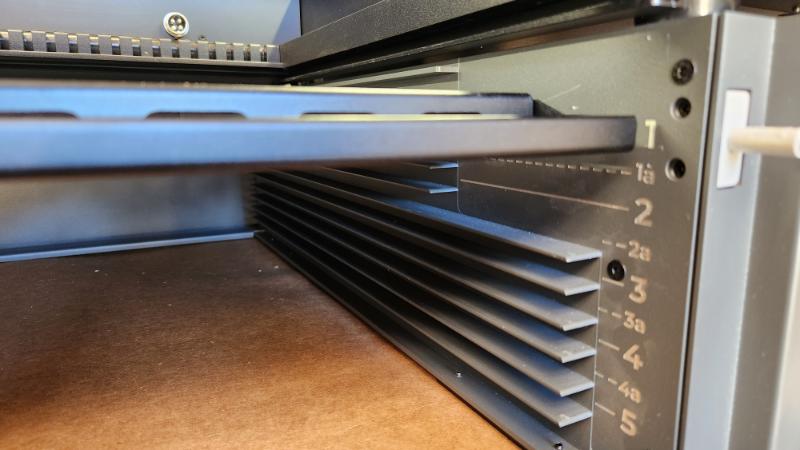
The wine barrel stave I used was too long for the bed, so I trimmed 15 cm from each end to keep the curve intact. In Curved Surface mode, the maximum engravable area is 42 cm (16.5 inches), so I pencilled a 42 cm window on the stave as my mapping guide. To engrave a large, curved piece like this, you’ll need the xTool P2 Riser Base.
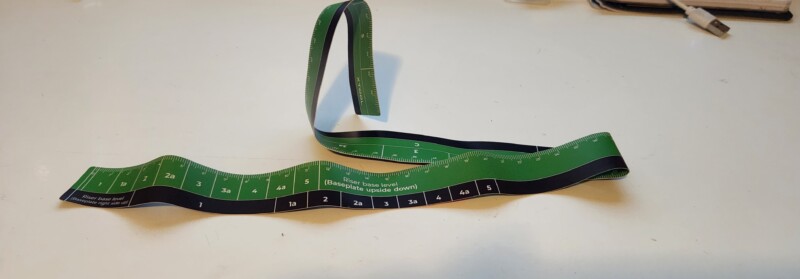
The Riser Base has nine height settings you can adjust to match your item’s depth. xTool also includes a handy tape measure so you can size your piece and choose the correct level.
For level adjustment, open the front door on the base riser and slide the base plate into the correct slot.
Mapping the wine barrel stave
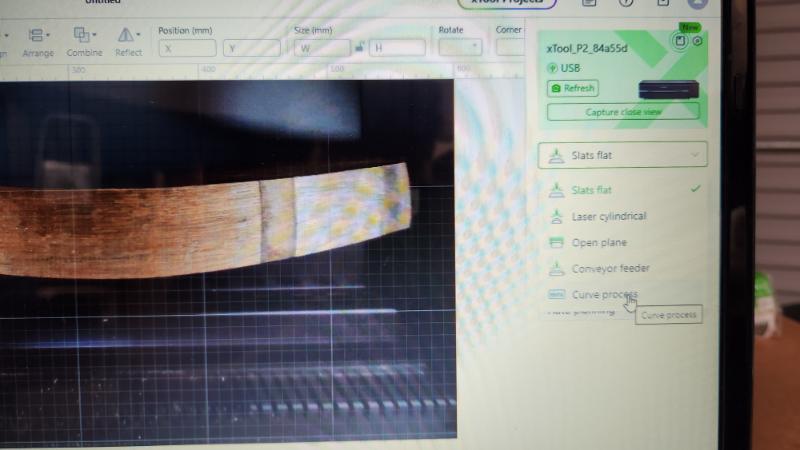
For a regular flat engraving on the xTool P2, you’d hit Refresh to see a live view of your material, then place your design directly onto that image. In Curved Surface mode, that workflow changes—you must first map the piece so xTool Creative Space (XCS) can build a 3D model of the surface.

In the menu on the right-hand side, start by selecting the curved process setting.
This step is a little trickier on a desktop than on a laptop or tablet. You need to look down into the top of the machine while lining up the laser with your material at the same time. When you begin, the measuring window pops up to start the mapping process.

Use the on-screen directional arrows to move the red dot to your starting point. Your start and end points are always the upper-left and lower-right corners, as shown in the diagram.
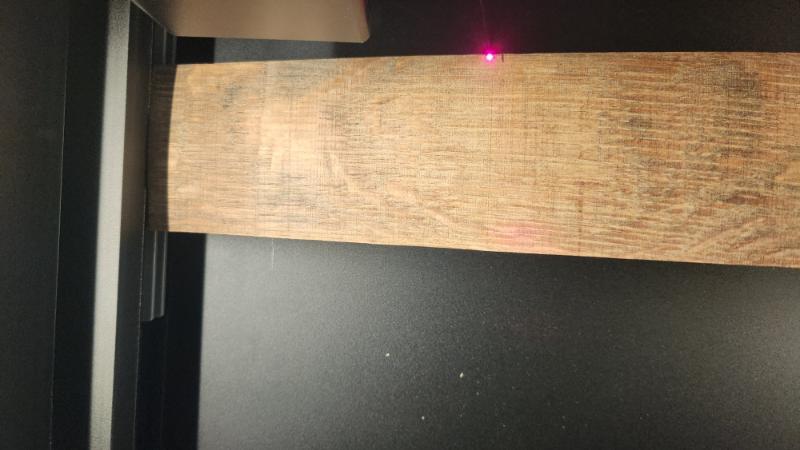
As you get closer to the pencil mark, reduce the move distance so the red dot shifts in smaller steps. When it’s aligned with your starting point, click Vertex 1.

You now move the red dot to the lower right mark using the same method mentioned above.
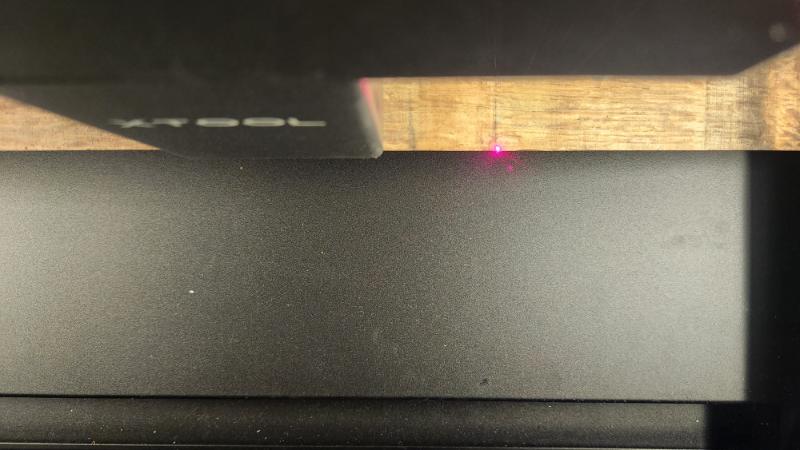
Once the red dot is aligned with your lower mark, select Vertex 2.
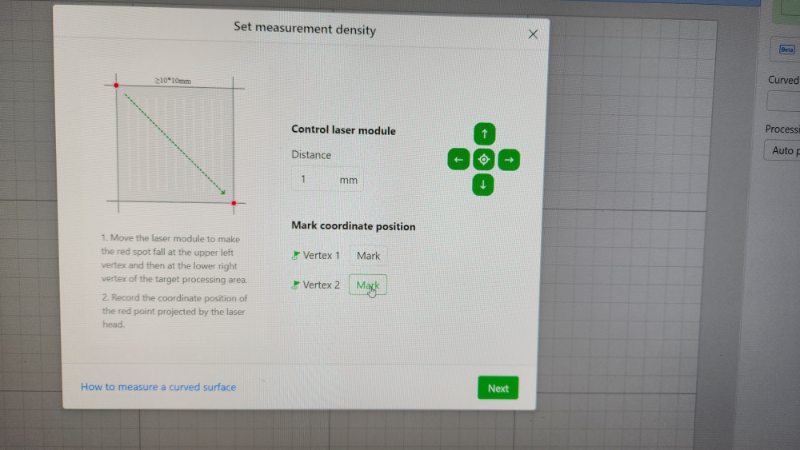
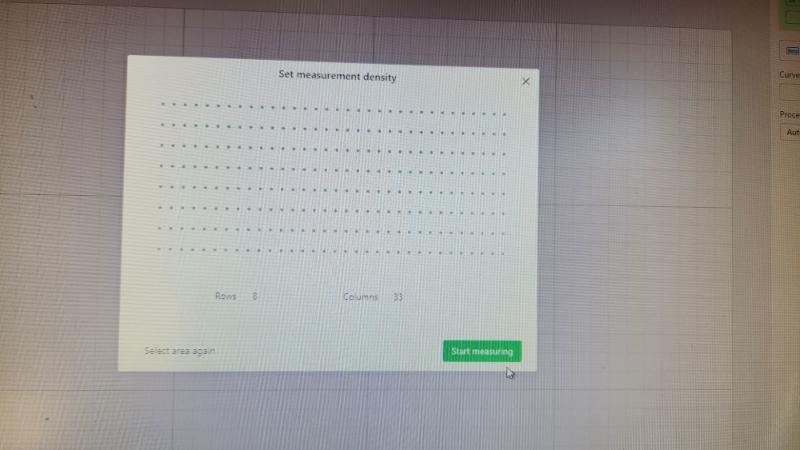
The measuring screen below will pop up, and the software will map out the area for you.
Adding your design
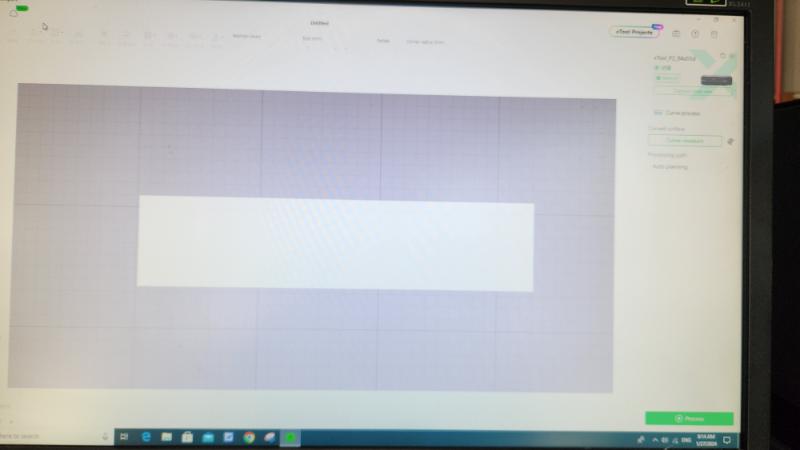
A white rectangle will appear; this is the total area where you can add your design
Next, select the Text tab on the left. A text box will appear with the word “HELLO”. On the right, under Text, type the wording you want to engrave on the wine barrel stave.
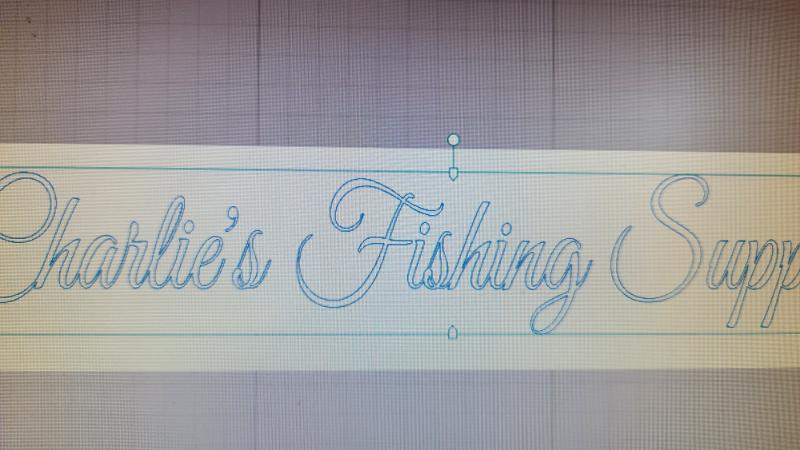
It is on this screen that you can adjust the fonts, sizes and spacing etc.
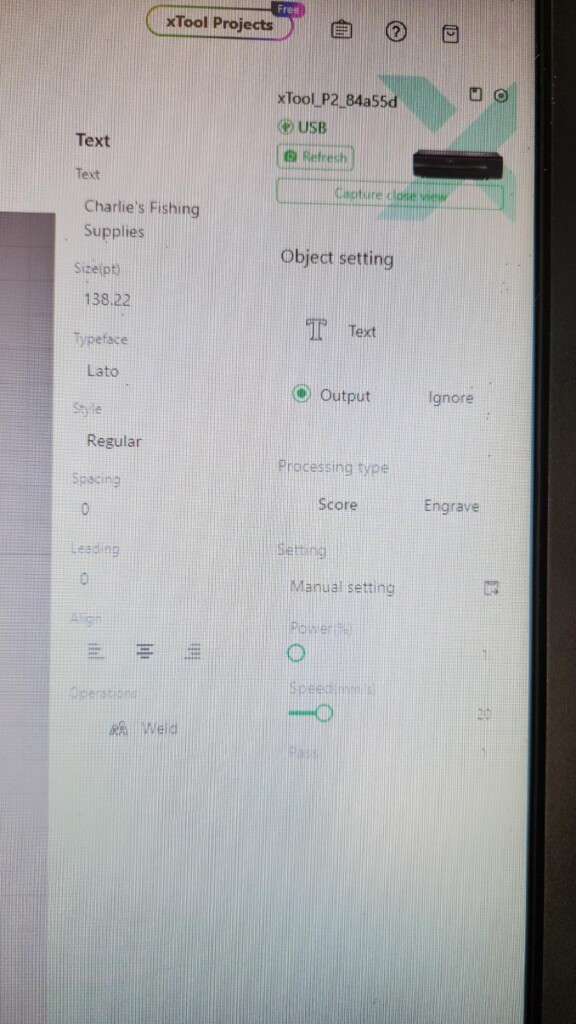
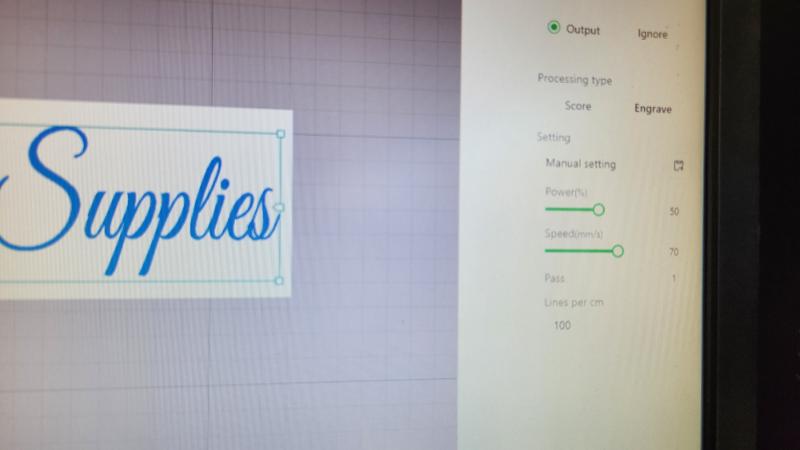
Adding your power settings
Click the text layer to open the settings panel. Toggle Output on. For first runs on oak staves, start with lower power, higher speed, and work up. Oak can scorch because of tannins. Do a small test at one edge if you can. If the first pass looks light, run a second pass rather than blasting it in one go. Next, you will see a preview screen pop up. Press the start button on the screen and then”start”on the xTool laser machine.
Now you can sit back and watch the magic happen. You can see the laser engraver in action HERE
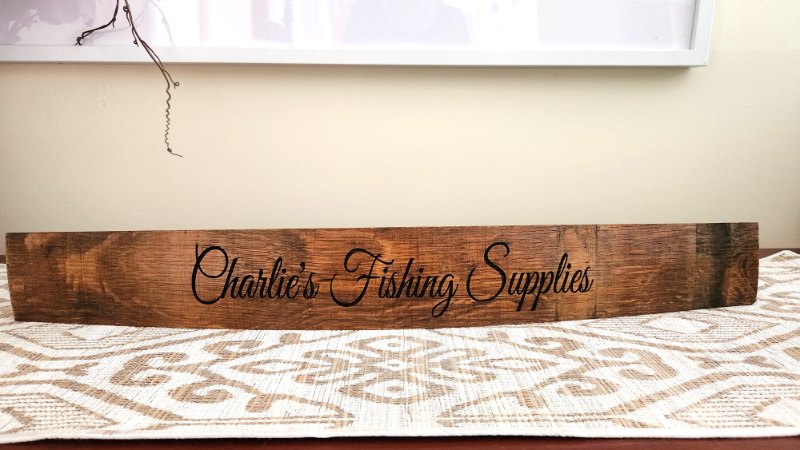
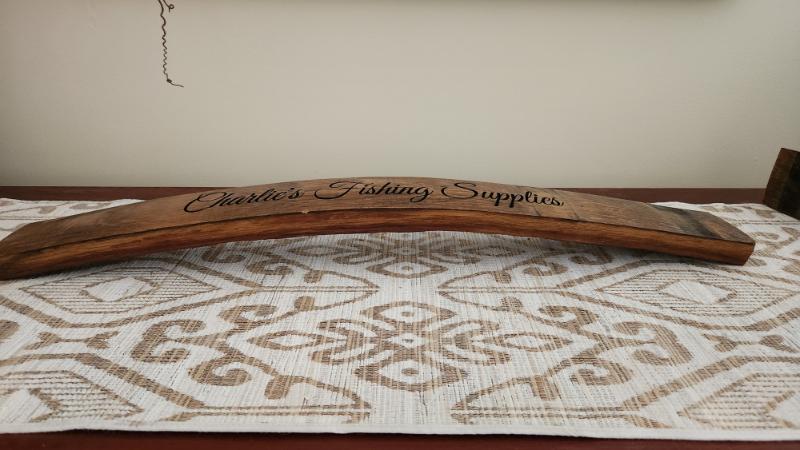
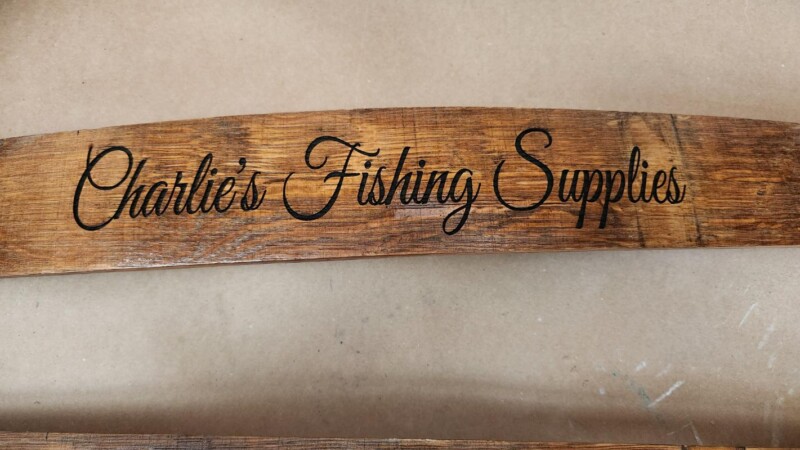
I did have a few scorch marks on the surface, so I think my power was a bit too high. To remove the scorched marks, I sanded the surface using an orbital sander using a 120-grit sanding disc. Optional scorch-reduction: burn through painter’s masking tape applied over the engraving area. Peel after engraving. On projects I’ve done since writing this tutorial, I’ve found the marks wipe away easily with a baby wipe.
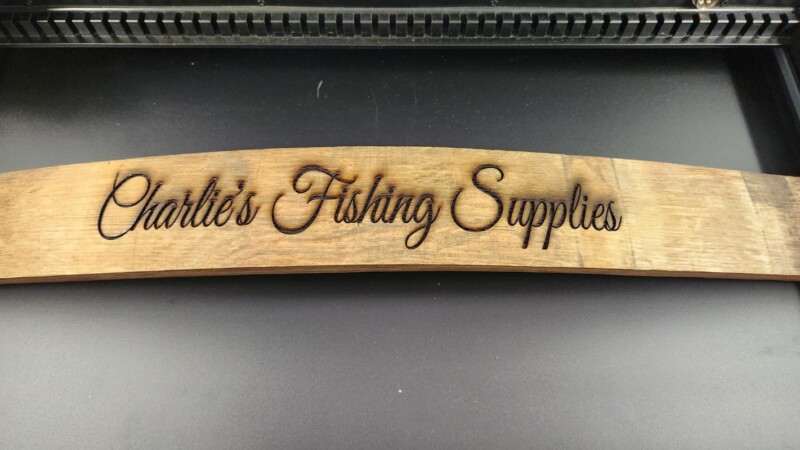
If you’ll be hanging your signs outdoors, seal the surface with an exterior-grade varnish.
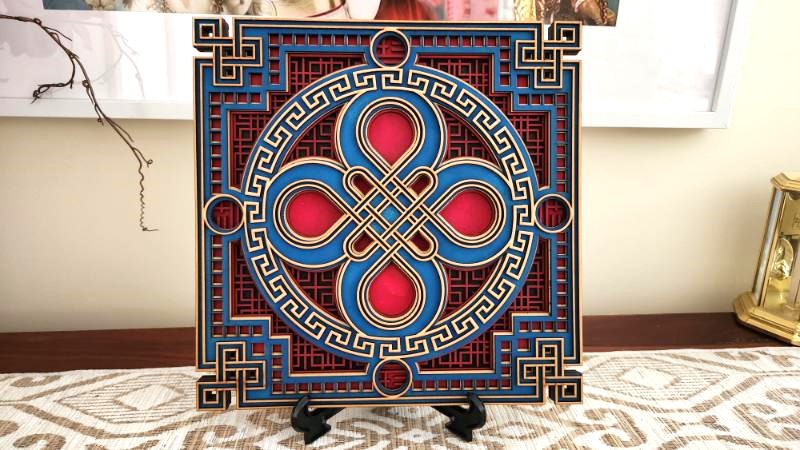
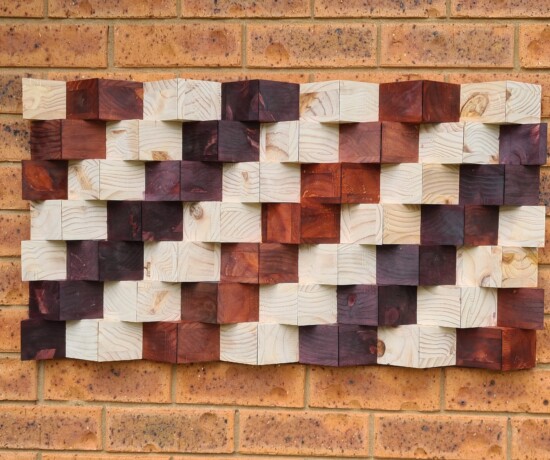
If you are looking for more project ideas using an xTool P2 laser, see how I made this stunning multilayered wall art.
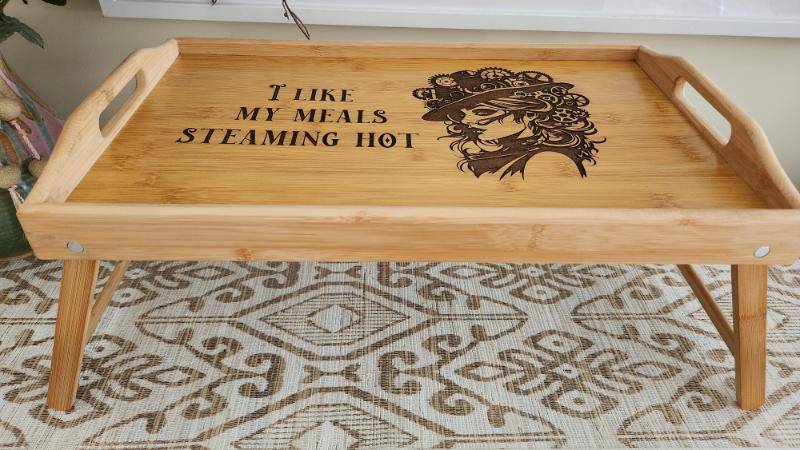
Another great idea is to laser engrave this steampunk dinner tray.

If you’re interested in any of the items used in this project, we’d appreciate it if you used our affiliate links. Clicking these links earns us a small commission at no extra cost to you, helping us create more inspiring and exciting projects to share. We’d also love to hear your thoughts—feel free to leave a comment or share this post!

4 Comments
Sara
April 2, 2024 at 10:51 pmThis is awesome Anita; can’t wait to try this on a curved surface!
Anita Holland
April 4, 2024 at 11:48 pmThanks Sara, I did lots of different curved items, a very interesting process.
Michelle Leslie
April 2, 2024 at 11:47 pmYou definitely know how to push your new toy to the limits and your tutorials are always so detailed and easy to follow. Pinning for one day when I can afford something like this. Thanks, Anita
Anita Holland
April 4, 2024 at 11:48 pmThank you Michelle, it is just brilliant.