
If you’ve ever struggled with tangled jewellery or mismatched earrings, this DIY is for you. How to build a jewellery display stand came to life when one of the ladies in our aged care home needed a better way to organise her jewellery. Each morning after getting dressed, she picks out jewellery to match her outfit. But she was storing her treasures in plastic cups. The result? Tangled necklaces, lost earrings, and always wearing the same few pieces.
So I decided to build her a jewellery display stand using recycled materials. It needed to hold rings, necklaces, and brooches—all easy to see and access. The final result is practical, elegant, and budget-friendly.

Before we dive into this tutorial, be sure to subscribe to my bimonthly newsletter to be the first to see my latest projects. You can also follow me on Pinterest and Facebook where I also include my unique mixed-media art projects.

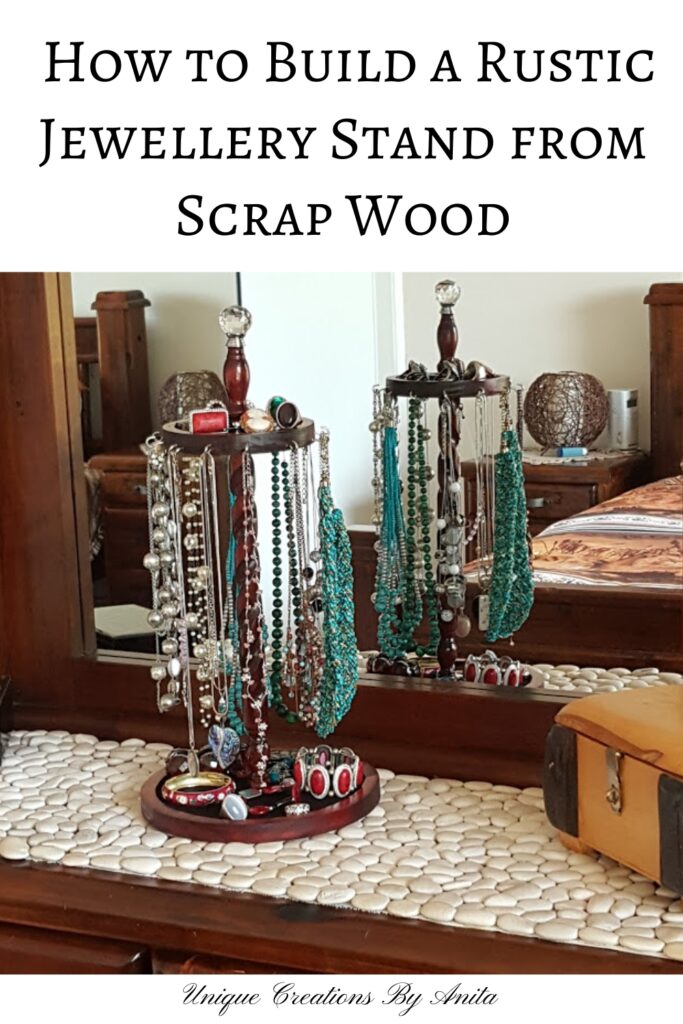
How to build a jewellery display stand
**This post may contain affiliate links. This means I earn a small commission on links used at no extra cost to you. Please see my disclosure policy for more information.**
Materials Needed
- Recycled timber offcuts
- Jigsaw
- Wood router
- Orbital sander (100-grit disc)
- Bench sander or flap wheel sanding disc
- Wood stain (dark mahogany)
- Spray polyurethane
- Felt and kraft paper
- Epoxy glue
- Paint stripper (optional)
- Drill and drill bits
- Bolts and a large nut
- Small cup hooks (for necklaces)
- Old doorknob (optional)
Step 1: Choose and Cut the Wood
I used off-cuts from an old corner unit for the base and top shelf. The central post came from a dismantled chair leg. Made entirely from free recycled materials, this post will show you exactly where to find them.

You’ll need two timber circles:
- One 240mm diameter for the base
- One 140mm diameter, 20mm thick, for the top shelf

Use a jigsaw to cut the circles close to the lines. If, like me, you struggle with fine detail cutting, try this tip: use a bench sander to smooth and perfect the circle using your drawn guide as a template.

This also reduces splintering from cutting across different wood grains.

Step 2: Add a Routed Lip for Storage
To prevent items from falling off the shelves, I added a 1cm deep lip around the edges using a router.

Start from the centre of the wood and work outward. That gives the router base something stable to rest on.

If the router bites a little deep in places, don’t worry, it will be hidden or sanded later. I used a flap wheel on my drill to smooth around the lip.

Next, I used an orbital sander to smooth out the inside of the stand.

Step 3: Stain and Line the Shelves
I applied a dark mahogany stain using a small brush, making sure to get into the routed grooves.

To line the trays, use kraft paper to trace the inner circle. Press the brush end along the edges to create a crease.

Cut the template and use it to cut felt inserts for a soft, elegant lining.

Step 4: Prep and Finish the Post
The old post was dark and detailed, making sanding tricky. So I used paint stripper instead. Brush on the stripper, wait for it to lift, then scrub with warm soapy water and a stiff brush. Once dry, stain the post to match the trays and seal with spray polyurethane. If you don’t have a decorative post, a wooden dowel will also work well.

Step 5: Fit the Post to the Base
Drill a hole in the centre of your base tray. To support the post securely, drill a hole slightly smaller than the nut.

Line the hole with epoxy glue and hammer the nut into place. Let it dry completely.

Tip: Don’t router underneath the hole if the base is thin, as it weakens the timber.
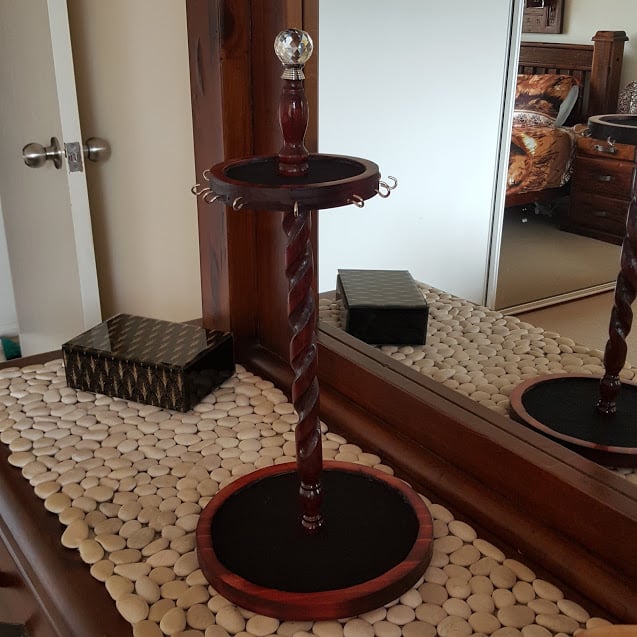
Step 6: Final Assembly
Cut the post shorter for the top shelf. Drill and bolt the smaller tray onto the post.

You can screw in some small hooks around the post to hang necklaces. For a decorative finish, I added an old doorknob to the top.

The project wasn’t planned perfectly, but the finished result works beautifully—and best of all, she now wears different jewellery every day!

More jewellery storage ideas
Old book repurposed into a jewellery box

Old shoes repurposed into ring holders


If you’d like to find any of the items used in this project, we’d greatly appreciate it if you used our affiliate links. These links provide us with a small commission at no extra cost to you, allowing us to continue creating and sharing more inspiring projects. We’d also love to hear your thoughts—feel free to leave a comment or share this post!


No Comments