
DIY Upcycled Toddler Craft Table with Storage turned an old veneer table into an art station that my great‑niece loves. The craft desk offers a dedicated spot for all her art supplies, keeping the mess contained in one area. A built‑in kraft paper roll lets her draw or paint, then tear off the used sheet for a fresh canvas. I also added a whiteboard for her felt‑pen sketches and a play‑dough station that keeps squishy dough off the carpet.

Before we dive into this tutorial, be sure to subscribe to my bimonthly newsletter to be the first to see my latest projects. You can also follow me on Pinterest and Facebook, where I also include my unique mixed-media art projects.
DIY Upcycled Toddler Craft Table with Storage
**This post may contain affiliate links. Which means I earn a small commission on links used at no extra cost to you. Please see my disclosure policy for more information.**
Materials Needed
- Old table with damaged
- Plywood sheet
- Wood glue
- Nail gun + nails
- Wood router
- Circular saw
- Wood screws
- Chisel + hinge drill bit
- Pocket hole jig + pocket screws
- Thin MDF
- Brass hinges
- Orbital sander and discs
- Paint
- Unicorn SPiT Gel Stain & Glaze (red)
- Water‑based polyurethane
- Curtain brackets
- Kraft paper roll
- Scrap aluminium strip
- Small flower pots
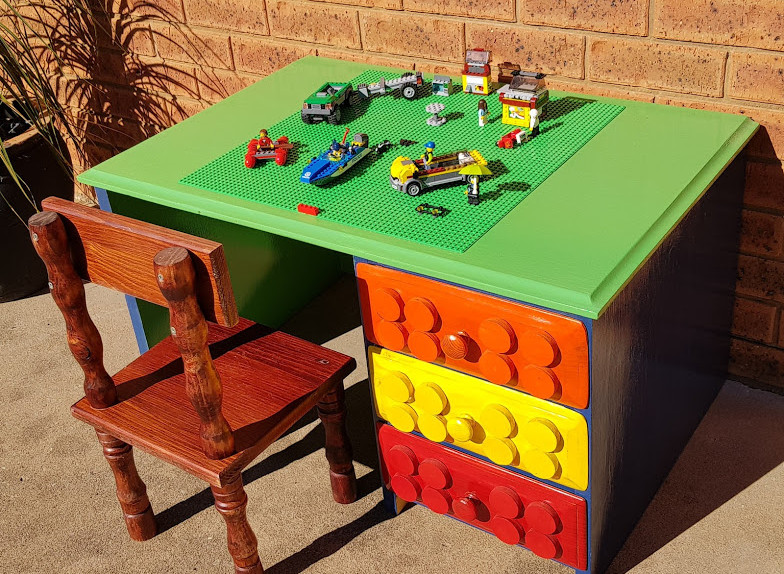
- Whiteboard + LEGO base plate
- Zebra bench
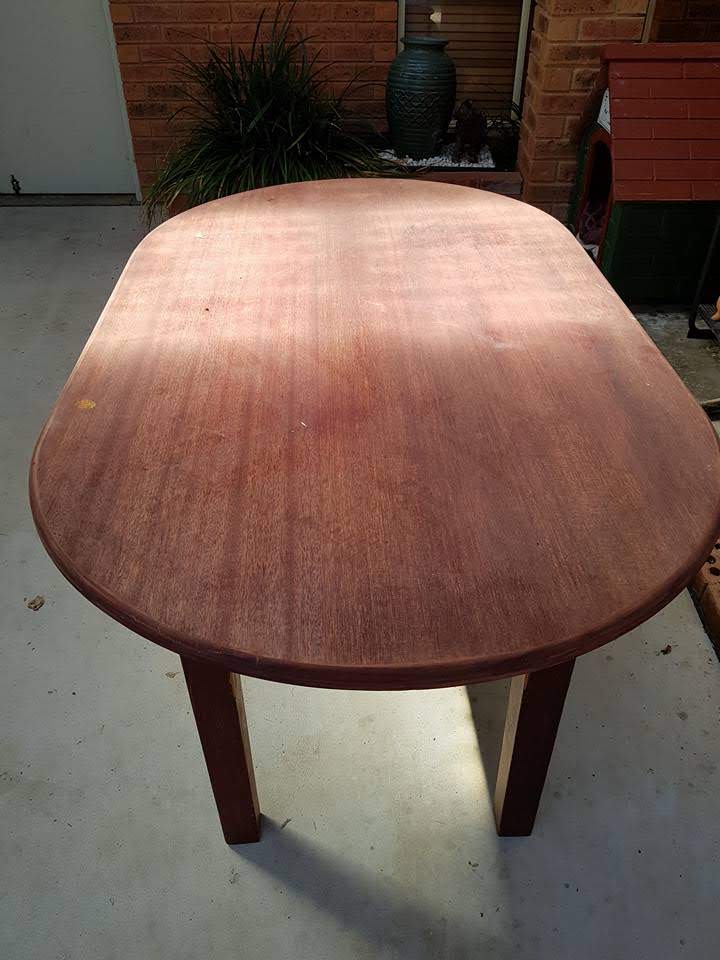
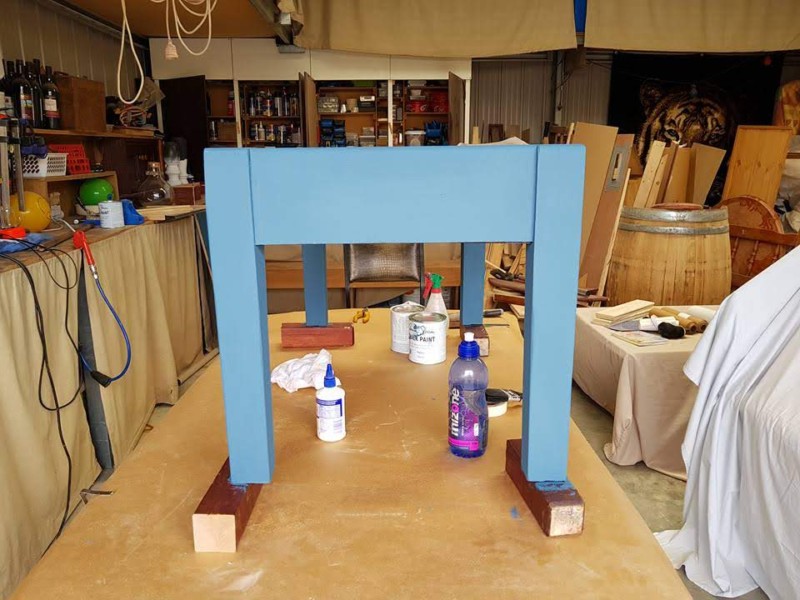
Prepare the Base Table
Originally, the table included a drawer housing but arrived without the actual drawer, so I decided to build my own storage. I removed the tabletop and set it aside for later reuse. If your table wobbles, apply wood glue to each joint and clamp it until it’s rock solid.
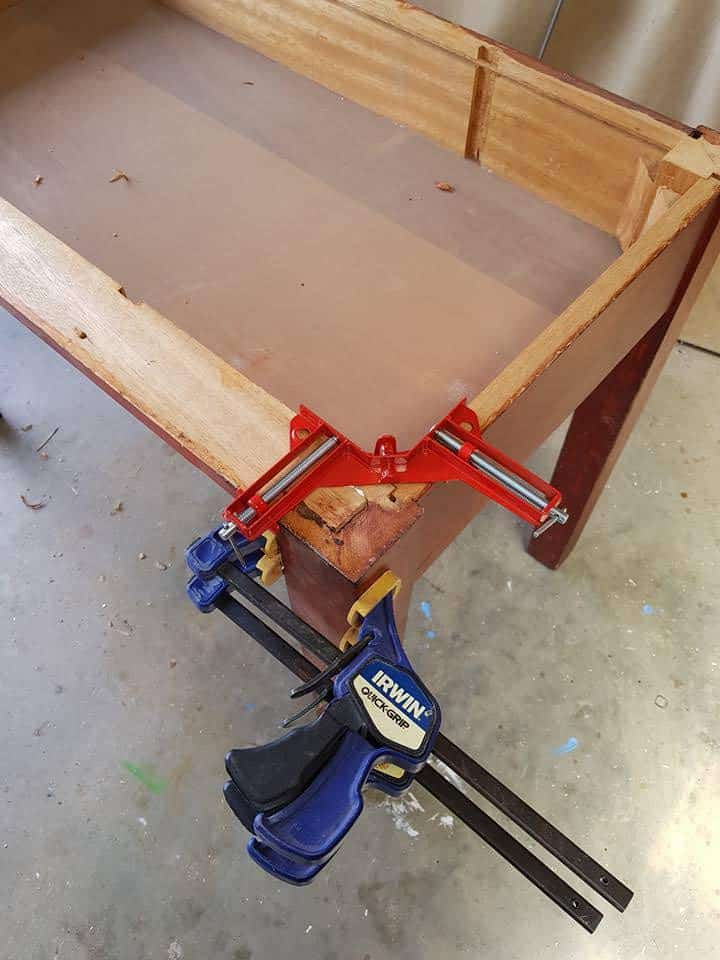
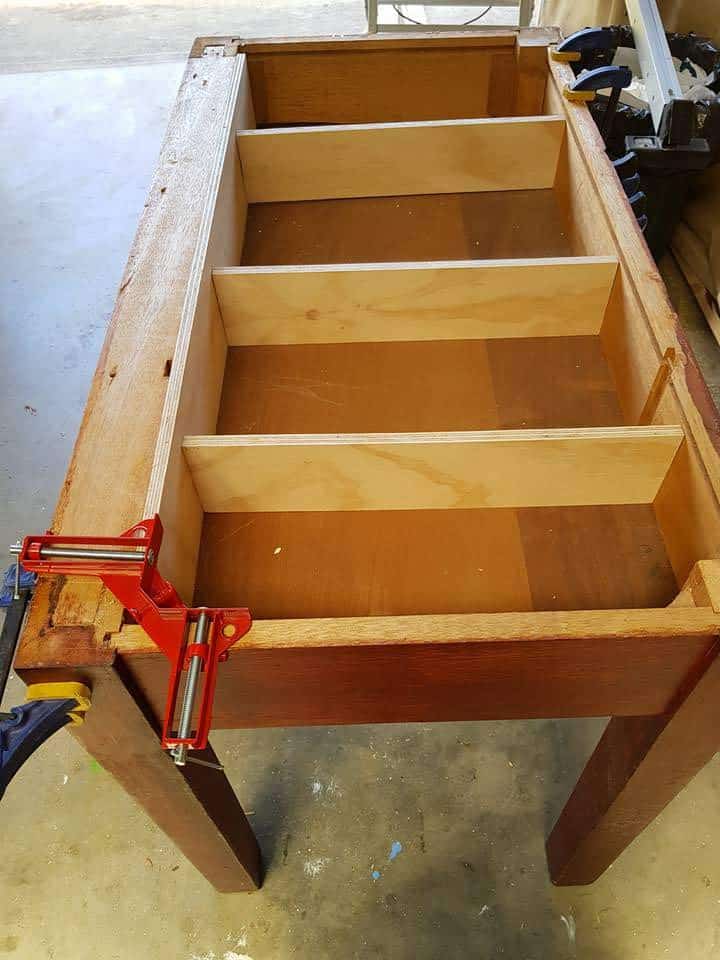
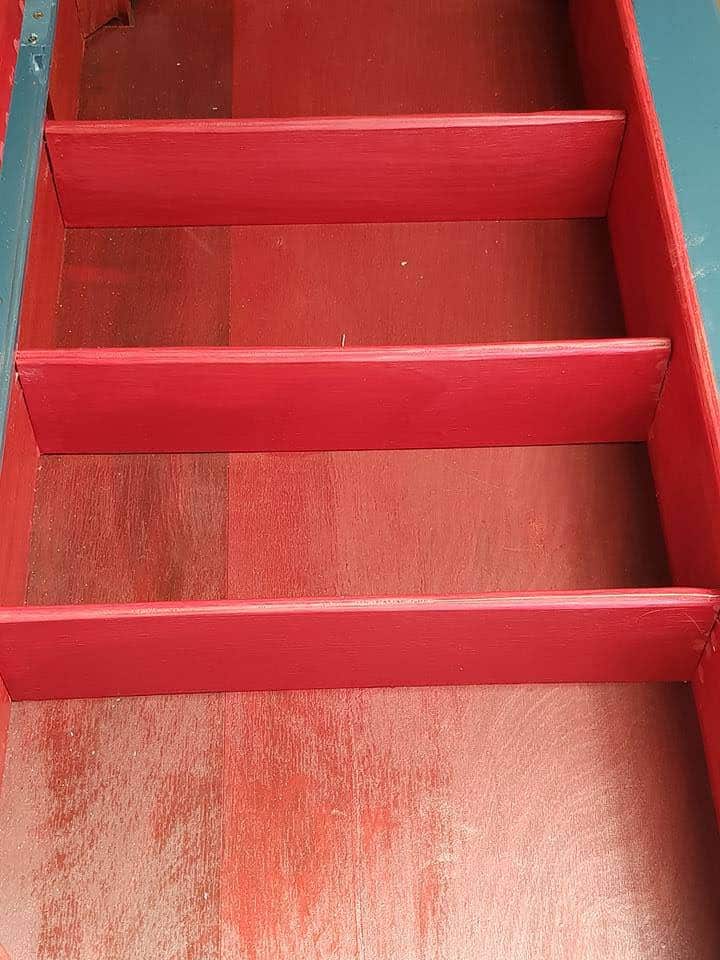
Add partitions
To create built‑in storage compartments, I measured the table’s interior width and cut a plywood panel to fit snugly. I glued and nailed it in place with a nail gun. Then I added vertical dividers to define separate craft zones. Finally, I rounded all corners with a wood router for child‑safe edges.
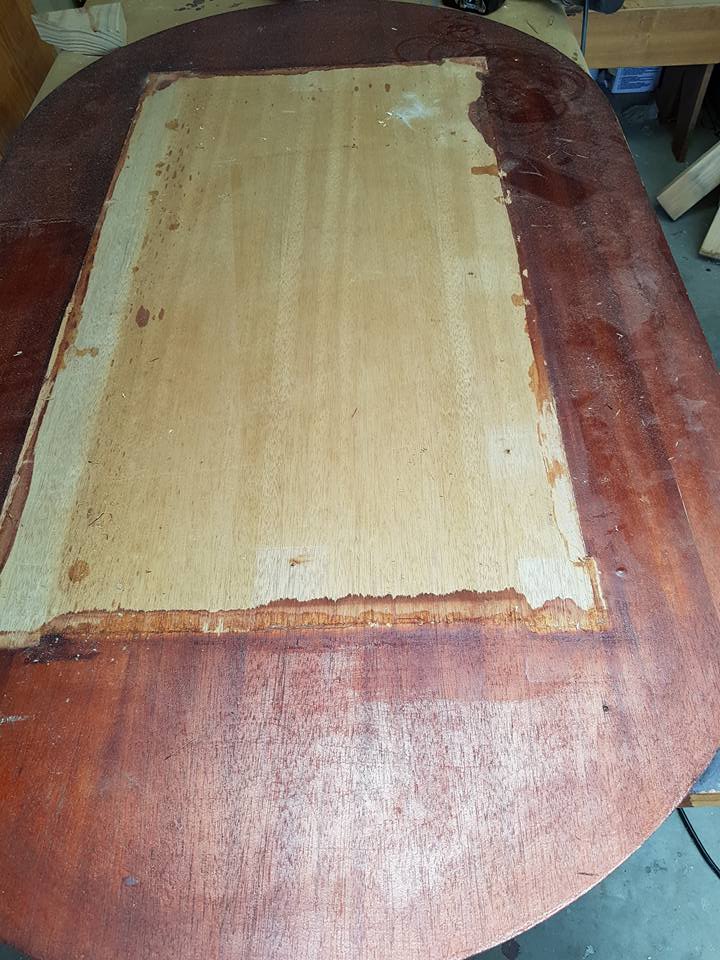
Construct the Tabletop
Repurpose wood from the original table to fashion the lid. Measure the top of the table and cut a new board with a circular saw, leaving a 2 cm overhang on all sides. Chisel a hinge recess into the base, then mount the hinges to attach the lid securely.

Adjust Table Height
Cut the table legs down to 53 cm using a circular saw for toddler comfort.
Build a Side Storage Box
Use tabletop offcuts to build a small side box with pocket hole joints. Attach a thin MDF base and route all box corners for a child‑friendly finish.

Integrate Craft Accessories
Create a slot in the lid to hold a whiteboard and add a LEGO base plate on the reverse. This dual feature offers drawing and building fun on one surface.

Paint and Finish
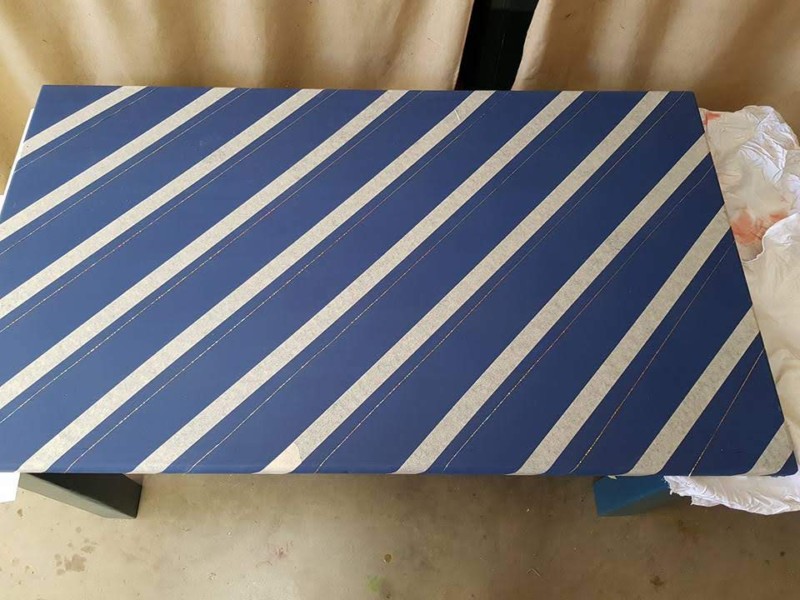
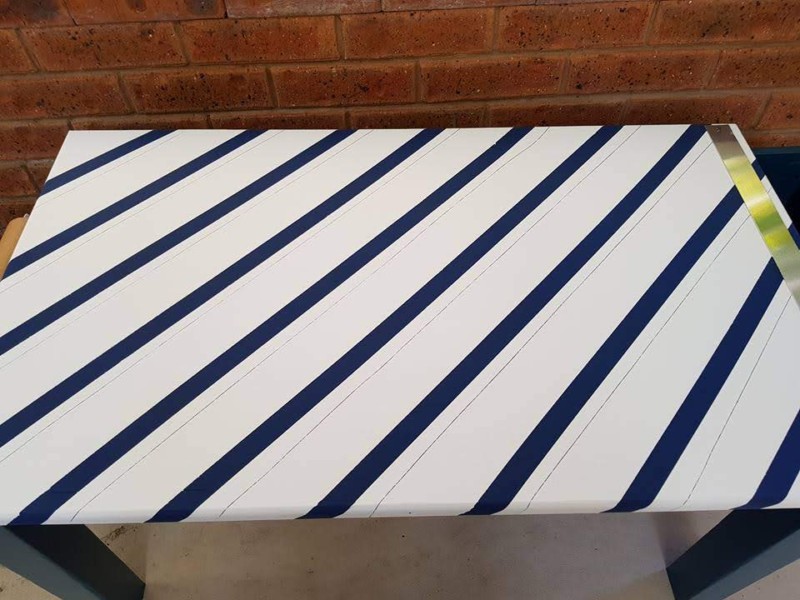
Sand all surfaces with an orbital sander until smooth, then paint in bright, colourful hues to stimulate your toddler’s creativity. I used chalk paint and Unicorn SPiT gel stain because they were on hand, but any acrylic paint will work.
To make the lid more colourful, I first applied a solid base coat, then placed painter’s tape in stripes and painted over with contrasting hues for a bold, eye‑catching design.
Apply wood glue to the side of the storage box, then drive in the pocket‑hole screws to secure it to the desk. Clamp it firmly and let the glue cure. To protect your painted finish, slip a soft cloth between the clamps and the desk before tightening.

Install Kraft Paper Roll
Fit a kraft paper roll across the table front using curtain brackets.

Secure the paper end with an aluminium strip for easy tearing.

Accessorise and Add Seating
Place small flower pots in the side box for supply storage. Add a zebra bench or repurpose another bench for toddler seating.

If you’d like to make your own zebra bench or create a themed bench to match your craft table, I’ve put together a step‑by‑step tutorial to guide you through the process.

DIY toddler‑friendly play furniture ideas
Upcycled a sturdy old desk into a sand‑pit tabletop for sensory play.

I upcycled an old study desk into a toddler‑sized LEGO/activity table complete with built‑in storage.


If you’d like to find any of the items used in this project, we’d greatly appreciate it if you used our affiliate links. These links provide us with a small commission at no extra cost to you, allowing us to continue creating and sharing more inspiring projects. We’d also love to hear your thoughts—feel free to leave a comment or share this post!

6 Comments
Amy Halberg
February 25, 2019 at 6:35 pmI’m so excited to have found you! You are so creative and I can’t wait to see what you come up with next !!!
Agen Bola SBOBet
September 25, 2019 at 2:59 amThe information you provide is really useful, thank you
Anita Holland
September 26, 2019 at 1:05 pmThank you so much, I was fun making it. I kept coming up with more ideas for it.
IDN Live
September 25, 2019 at 4:48 amNice article, waiting for you next article
Anita Holland
September 26, 2019 at 1:06 pmThank you so much, always doing new projects. Just need time to add them to my website.
Anita Holland
February 23, 2020 at 1:10 pmThank you so much for adding my projects to your roundup.