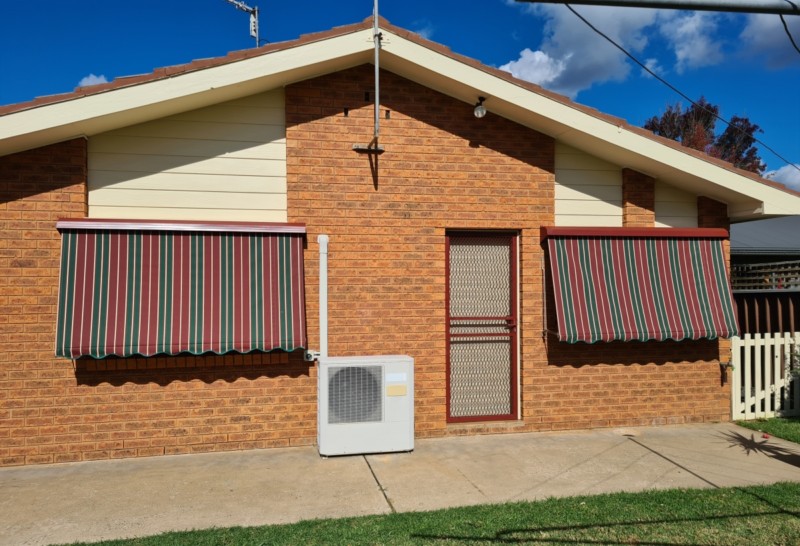
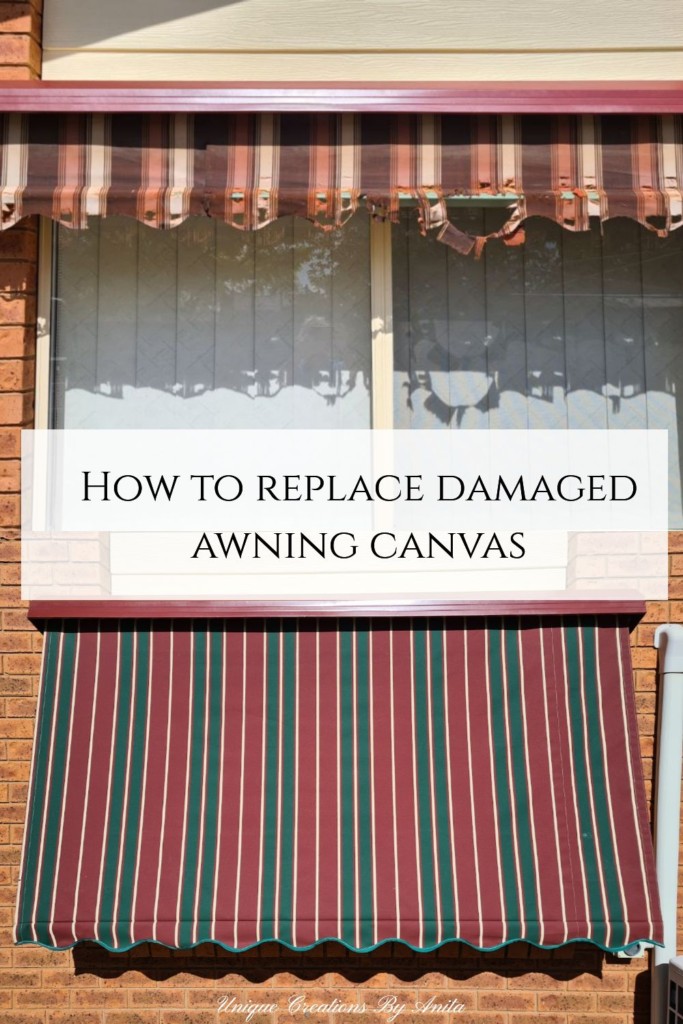
After repainting our home inside and out, I stood back to admire the fresh finish—then those tired retractable awning blinds stole the spotlight for all the wrong reasons. They were faded, brittle, and falling apart from years in the sun. In this post, DIY Retractable Awning Canvas Replacement, I’ll show you how I replaced both awning canvases myself for about $300 after receiving an $850 quote. It was far easier than I expected, and the result lifted our street appeal instantly.
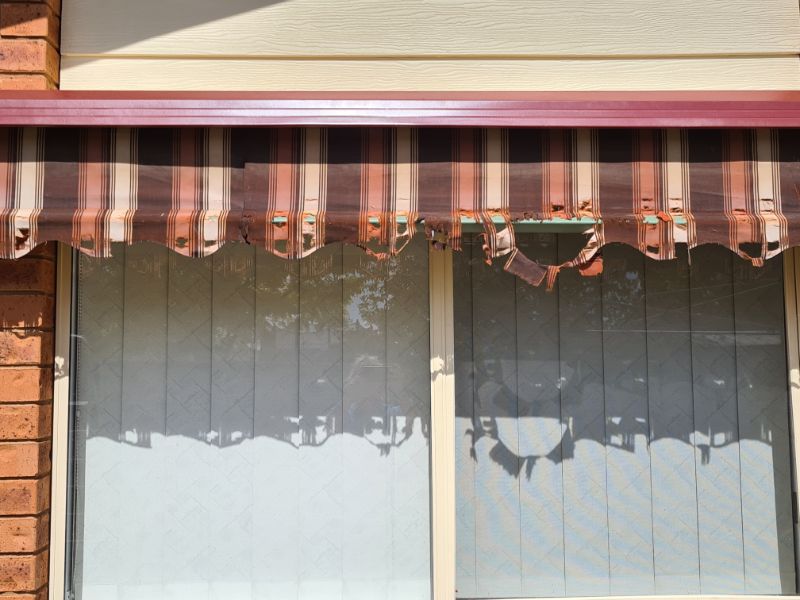
The awnings came with the house 15 years ago and have served us well. The replacement quote felt steep, and the hardware still worked. With the right fabric, UV-safe thread, and a steady plan, you can refresh your awnings on a budget and keep waste out of landfill.
Before we dive into this tutorial, be sure to subscribe to my bimonthly newsletter to be the first to see my latest projects. You can also follow me on Pinterest and Facebook, where I also include my unique mixed-media art projects
DIY Retractable Awning Canvas Replacement (and How I Saved $550)
*This post may contain affiliate links. This means I earn a small commission on links used at no extra cost to you. Please see my disclosure policy for more information.**
Materials needed
- Outdoor awning canvas (UV-stable), 183 cm wide — allow extra for pattern matching (≈5–6 m for two 1800 × 1200 mm blinds)
- UV-bonded polyester/nylon thread (outdoor grade)
- Heavy-duty sewing machine (walking foot or Teflon foot recommended)
- Sewing machine needles size 16/100–18/110
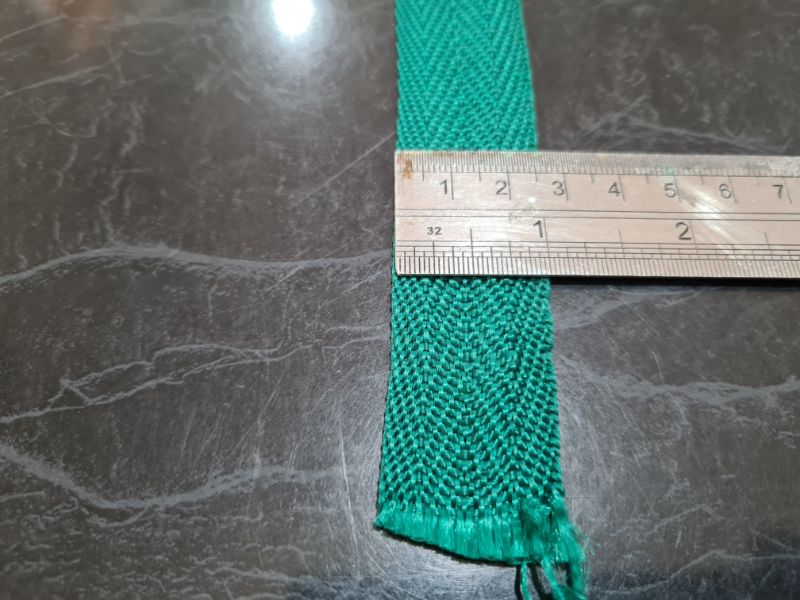
- UV polypropylene binding, 25 mm (for the scalloped valance)
- Measuring tape
- Large square/straightedge
- Tailor’s chalk or fabric pencil
- Strong fabric scissors
- Metal ruler (for folding straight hems)
- Fabric clips (e.g., Wonder Clips)
- Drill and drill bits
- Pop rivets (to suit end-cap holes, typically 4 mm) and a rivet gun
- Silicone spray (optional, helps the fabric slide in the grooves)
Remove the blind and the old canvas
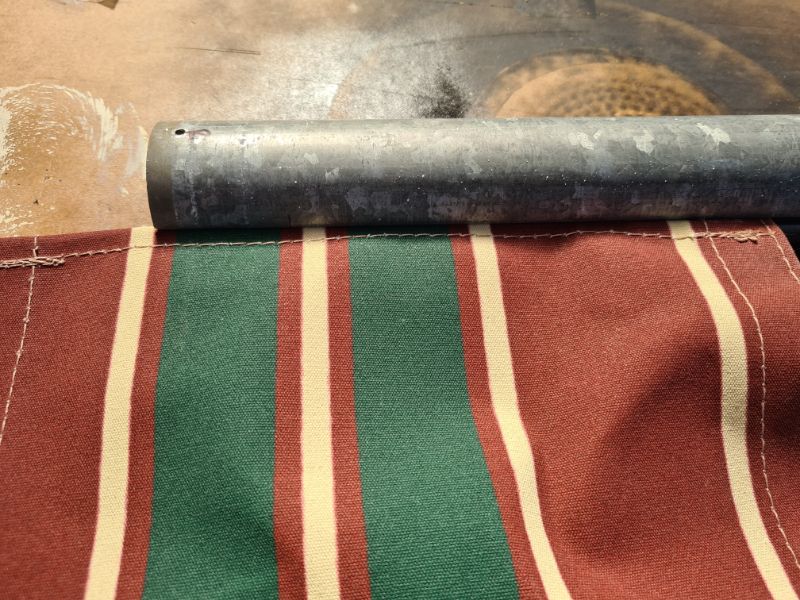
Unbolt the blind from the brackets—mine used two bolts per side. One bolt linked the arm to the front bar; another secured the canvas in the groove.
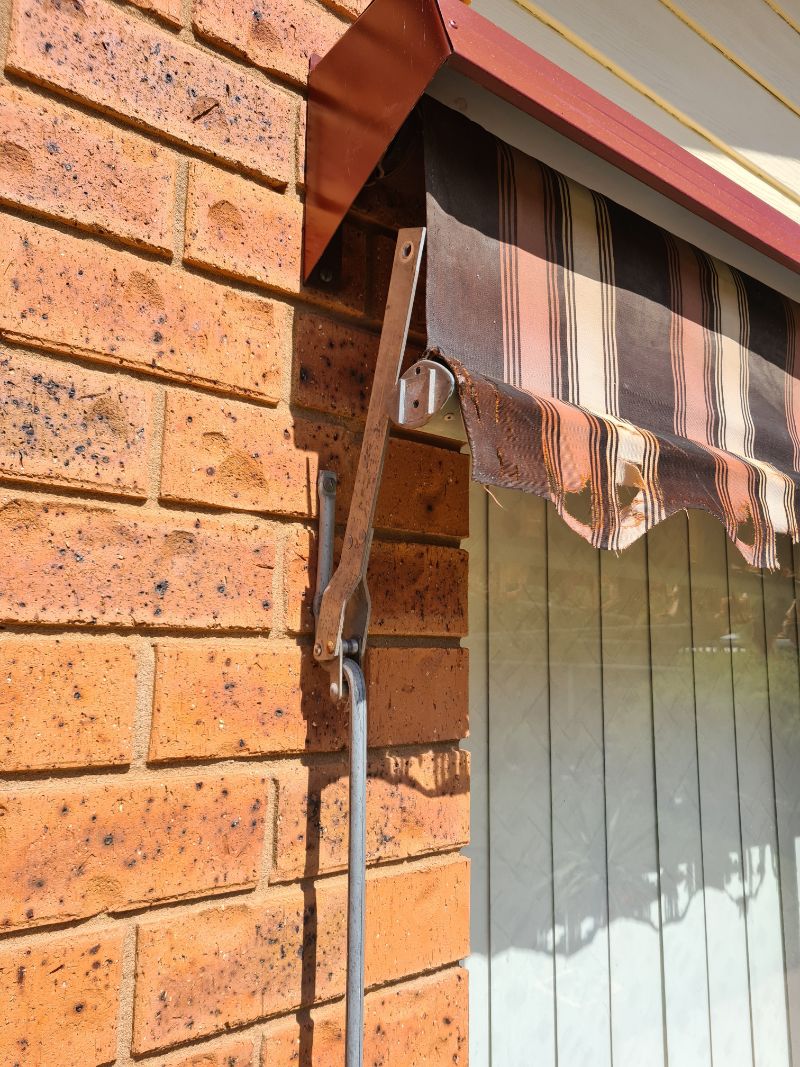
Drill out the pop rivets on one end cap to slide the fabric out.
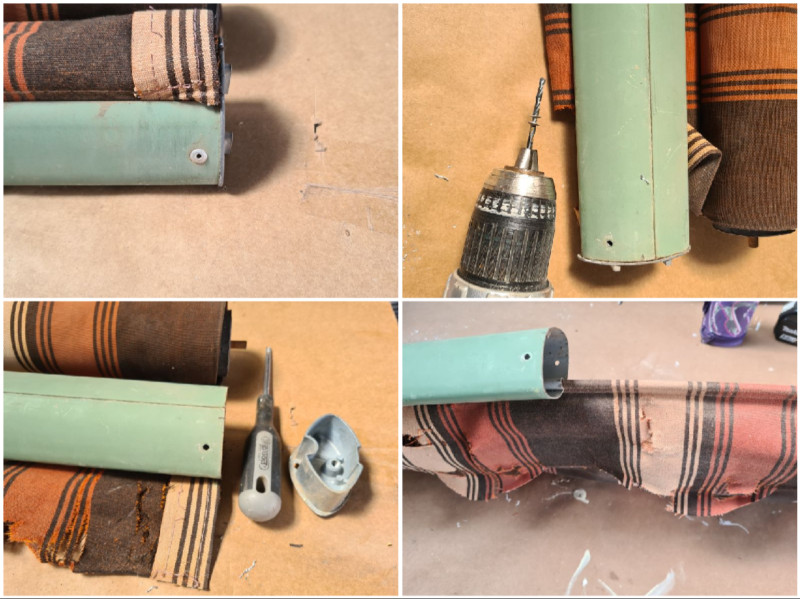
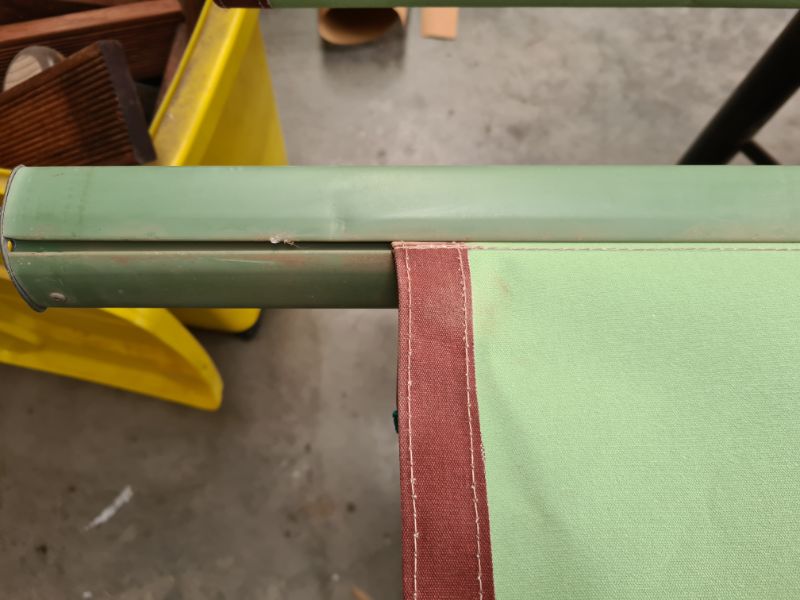
The top pole was slightly different, with what looks like a spring-loaded gadget at one end. I left that side alone and drilled out the pop rivets from the other end. I wasn’t sure if removing the spring-loaded side would have any effect, and I didn’t want to risk breaking it. The bottom-left image shows the spring-loaded side.
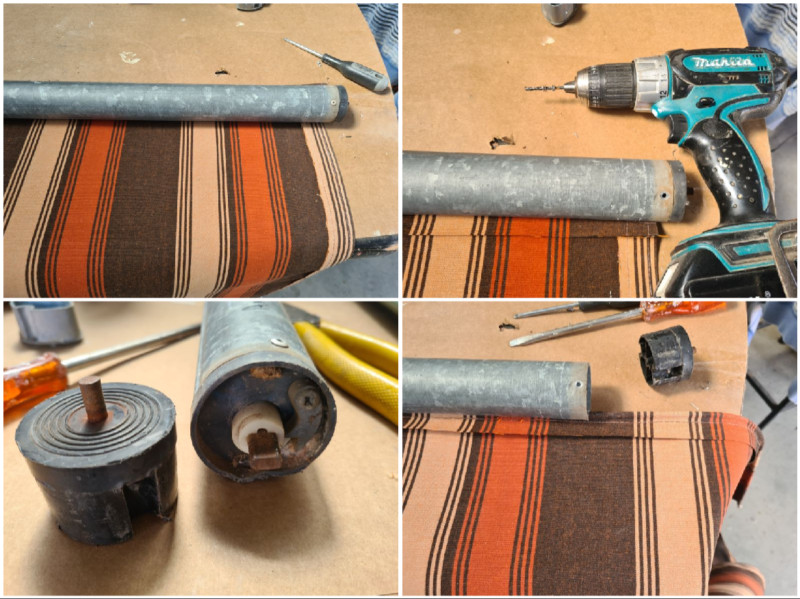
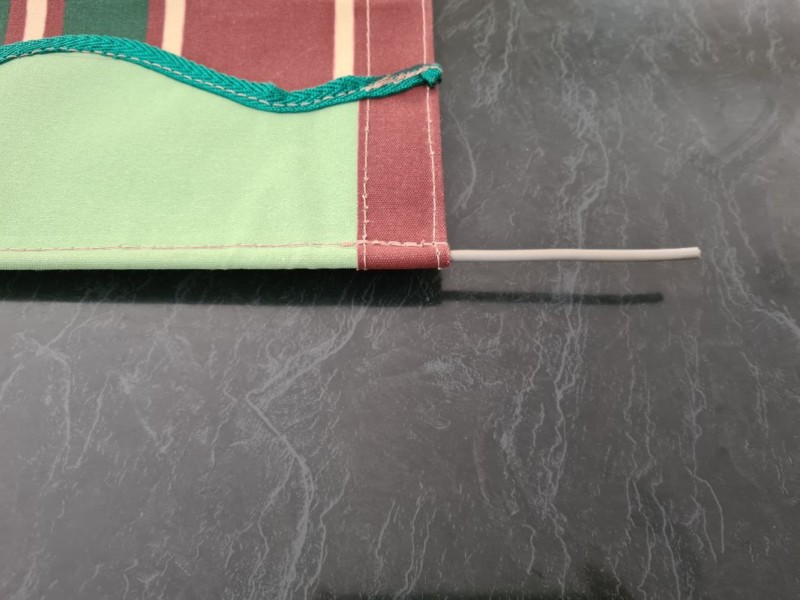
Once you’ve removed the canvas, slide out the thin PVC rods from the hems and set them aside for safekeeping. Take note of which rod goes where—mine were different. The top seam had a softer black, rubbery rod, while the bottom seam used a hard white PVC rod.
Measure once, measure twice
You’ll need UV-bonded nylon thread, UV polypropylene binding for the scalloped edges, and heavy-duty needles.

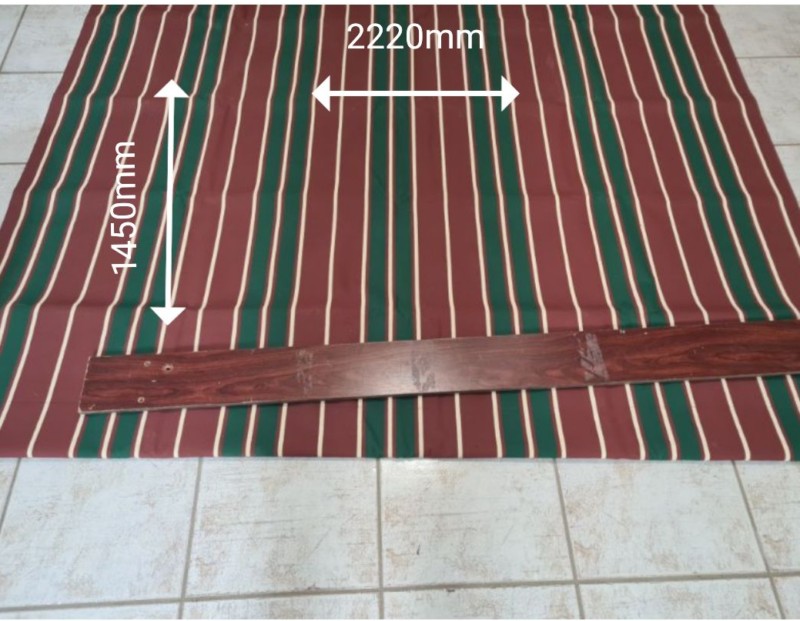
The windows for these pull-down awnings measure 1800 mm × 1200 mm. I was lucky to still have the old awning to use as a template for the new ones.
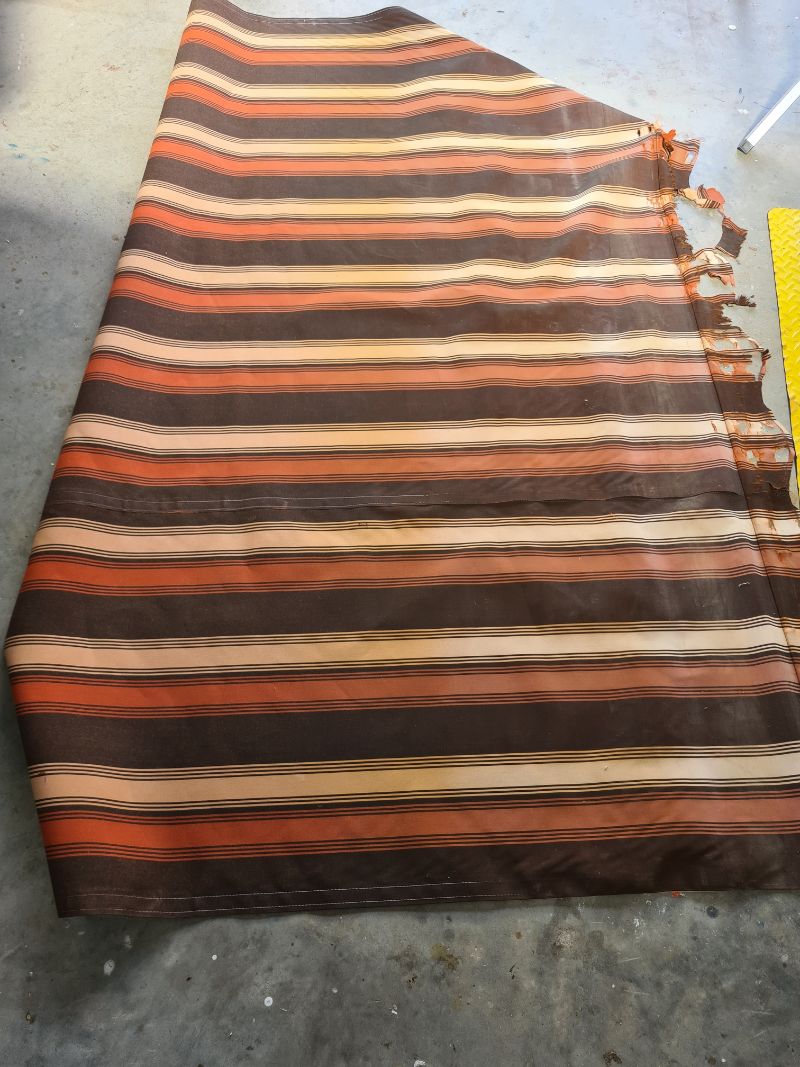
I took all my measurements from it and used those as a guide when ordering the canvas. I chose a 183 cm wide fabric and ordered 6 metres—more than I needed—but I wanted extra to match the pattern at the joins and achieve the full width.
The measurements below were the sizes of the canvas awning before sewing the hems and seams.
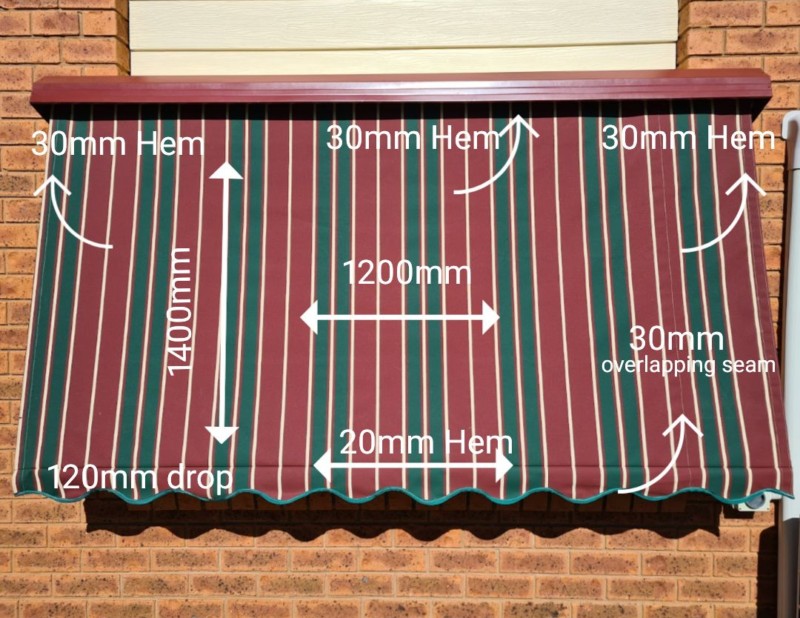
The measurement below was after sewing.
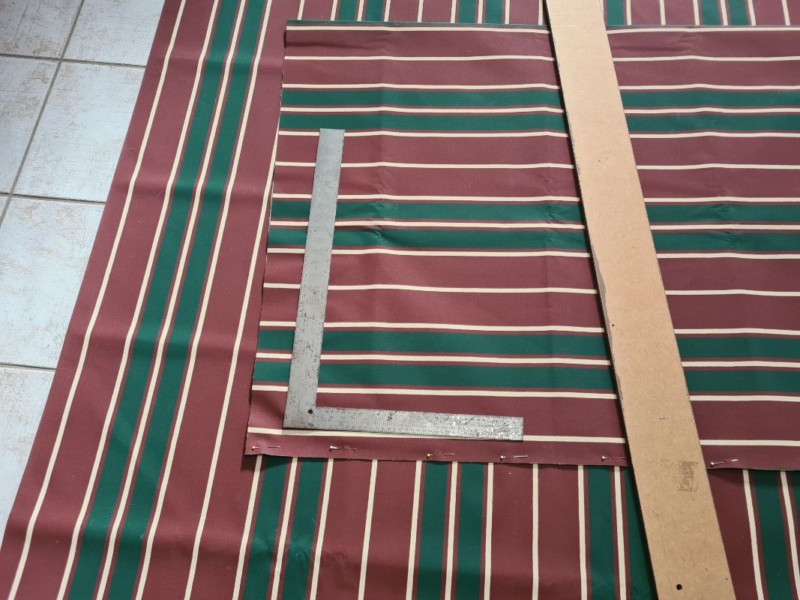
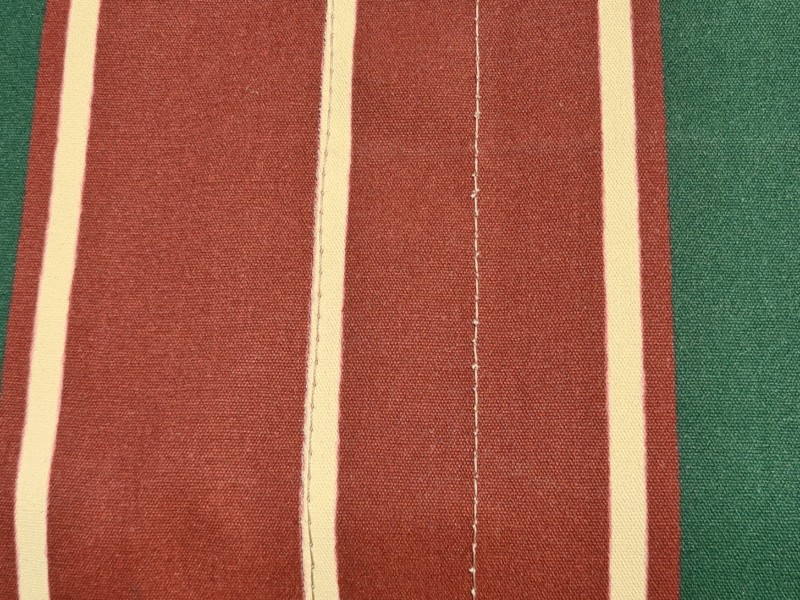
My first mistake was assuming the canvas roll was perfectly square—fortunately, I caught it on the first cut. Use a large square to create a true straight edge before you start. Once I had a straight edge, I cut three panels at 1450 mm in length. You may need a fourth panel if your pattern repeat won’t match across the joins.
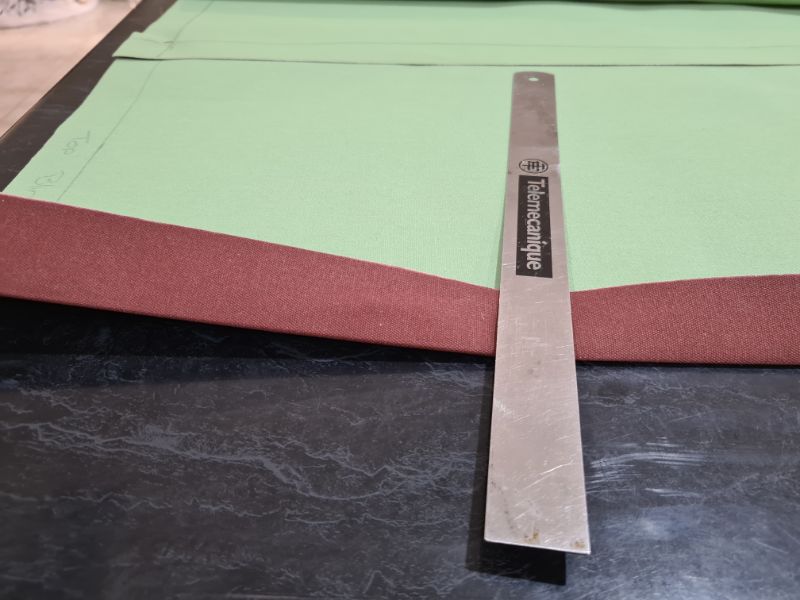
Matching up the pattern
Once I’d lined up the pattern repeat, I trimmed the excess using the fabric’s guidelines and left a 30 mm overlap for the joining seam.
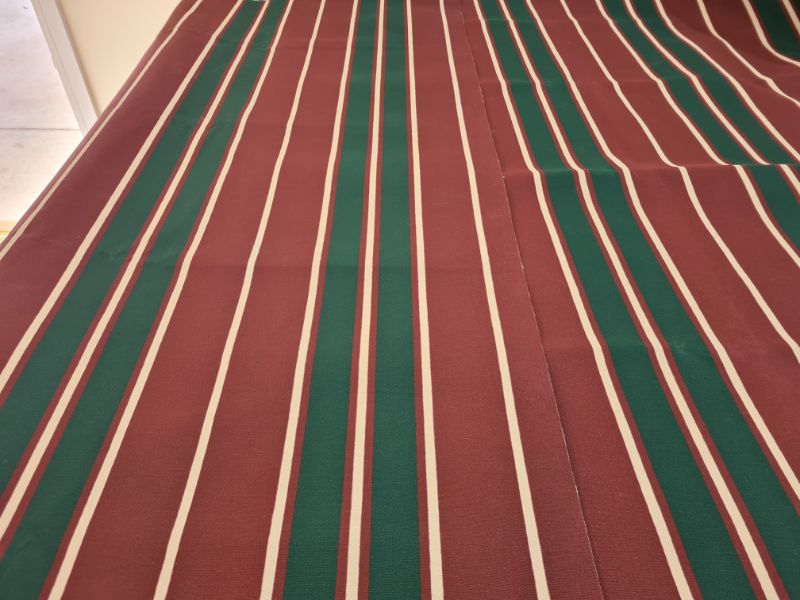
You can pin these together to make it easier to sew them later. Repeat this for the second awning.

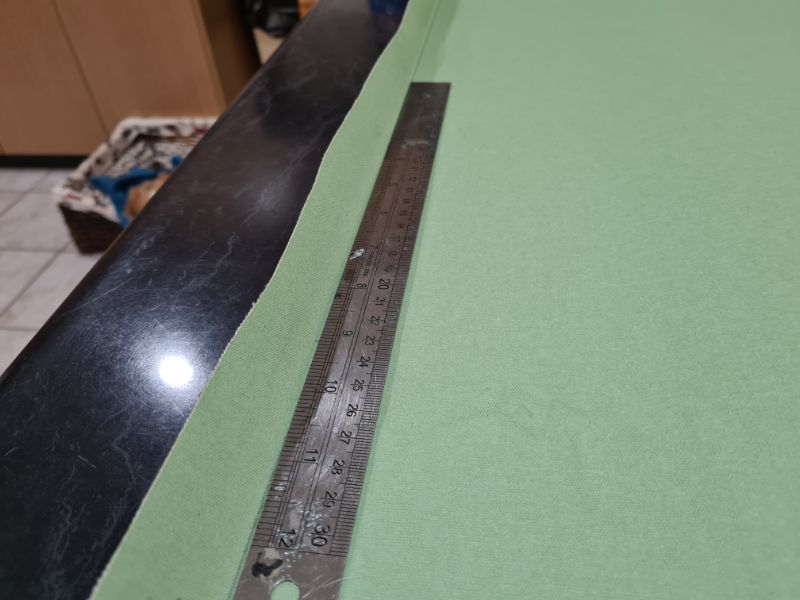
Mark tidy hems that sew straight
Mark a 30 mm hem along the top and both sides. Canvas can fight the iron and wander.
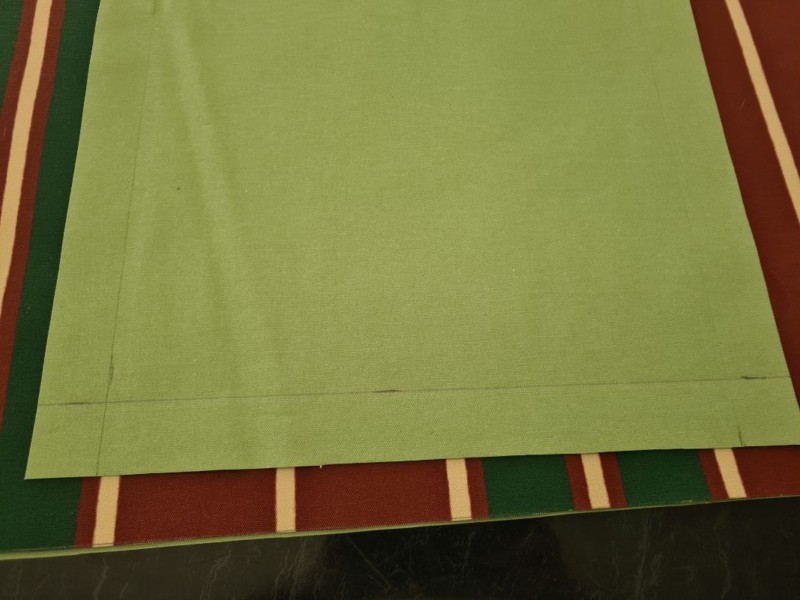
My fix: slide a metal ruler inside the fold on the marked line, fold the canvas over it, then press the outer edge flat. The hem stays straight and crisp, ready to stitch.
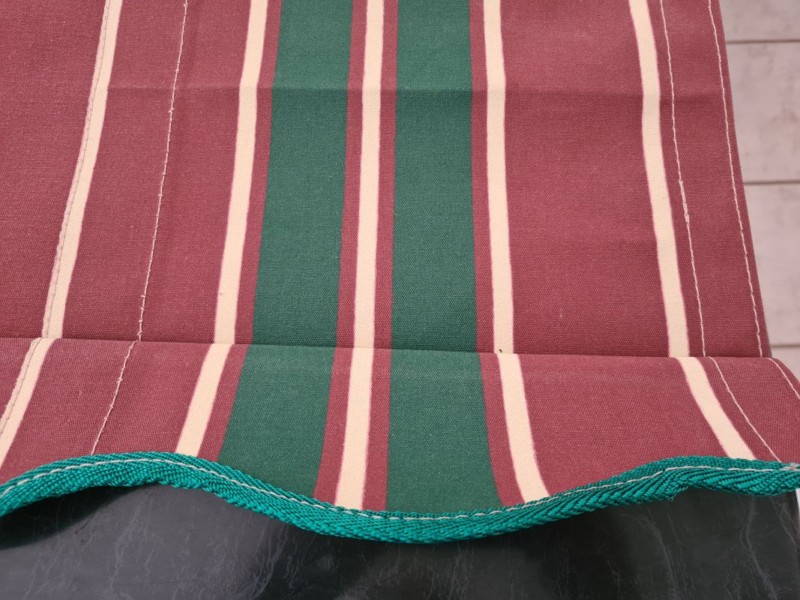
Add a scalloped front valance (optional)
A straight front works fine, but I love a classic scallop. I printed five A4 curves, taped them together, then laminated the paper with kraft card to stop the template shifting. Make the template full size so it butts neatly against your 20 mm hemline. Trace the scallops, leave 30 mm beside the last curve at each end for strength, and cut with sharp shears.
Making the scalloped edge
You can have a straight edge for the front, but I liked the look of the scalloped edge. I had no idea how to do this, and my way was a little long-winded, but it worked. I browsed the internet for the shape that I wanted and printed it on A4 paper 5 times. I cut out the wavy lines and taped them together to get my scalloped edge.
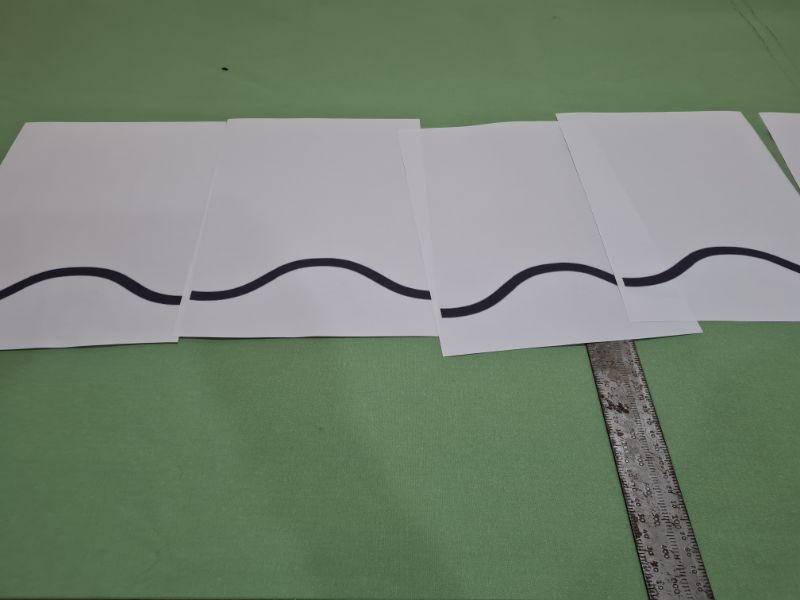
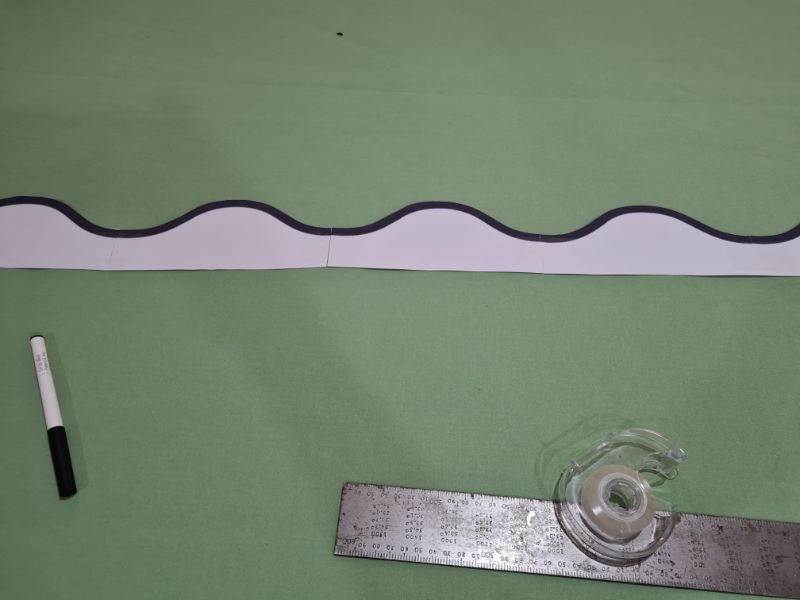
While I was tracing the lines, the paper was very thin and kept shifting. To make the template thicker and more stable, I added a layer of thick kraft paper to the back.
At this point, I realised it would be easier to make the template the full size of the scalloped edge. That way, I could butt it against the 20 mm hemline and keep the scallops perfectly even.
The thicker template made tracing the scalloped edges far easier and much quicker.


Sew like a pro on heavy fabric
Use a heavy needle and UV thread. Sew two parallel rows on the hems for strength. A walking foot or Teflon foot helps feed the canvas evenly. Test tension on a scrap first. If your domestic machine struggles, borrow a sturdier one—mine did!
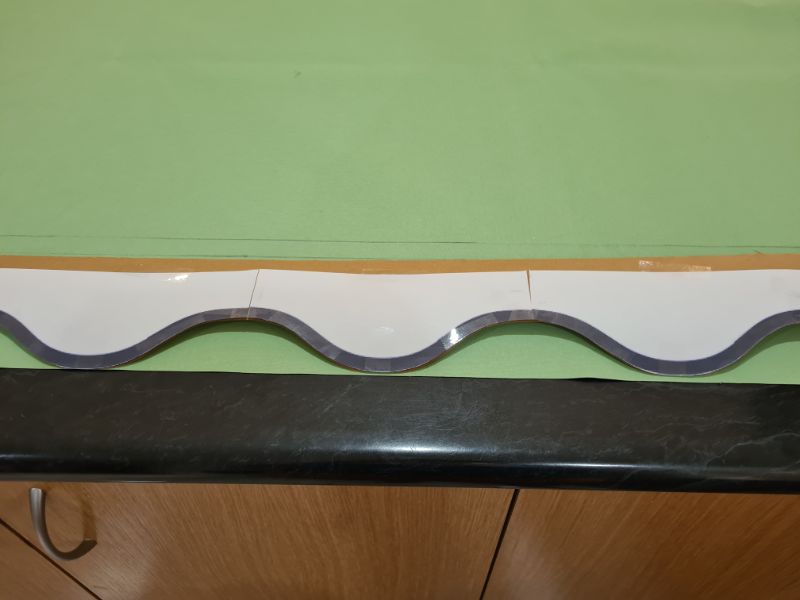
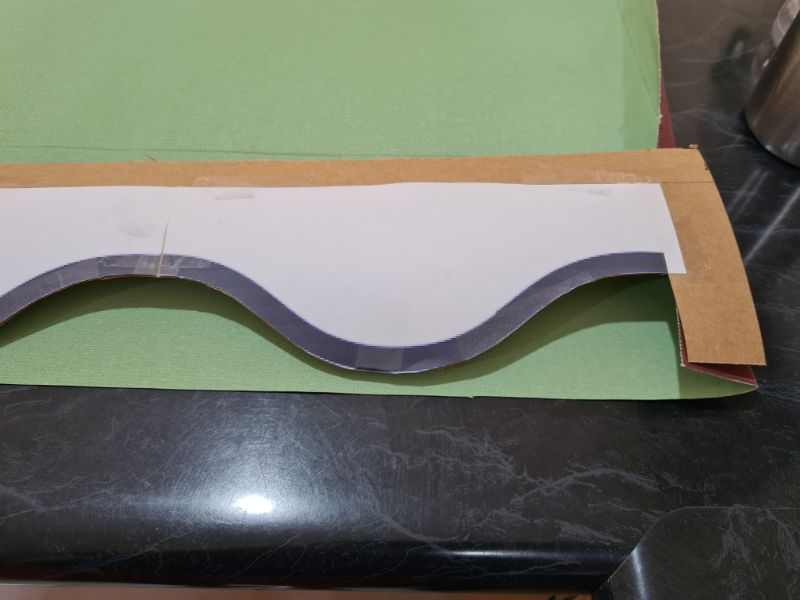
Bind the scalloped edge
To prevent fraying, add 25 mm UV binding around the scallops. Pins can snap in thick layers, so feed and sew in short sections, folding the binding over the edge as you go. Clips are safer and faster than pins.
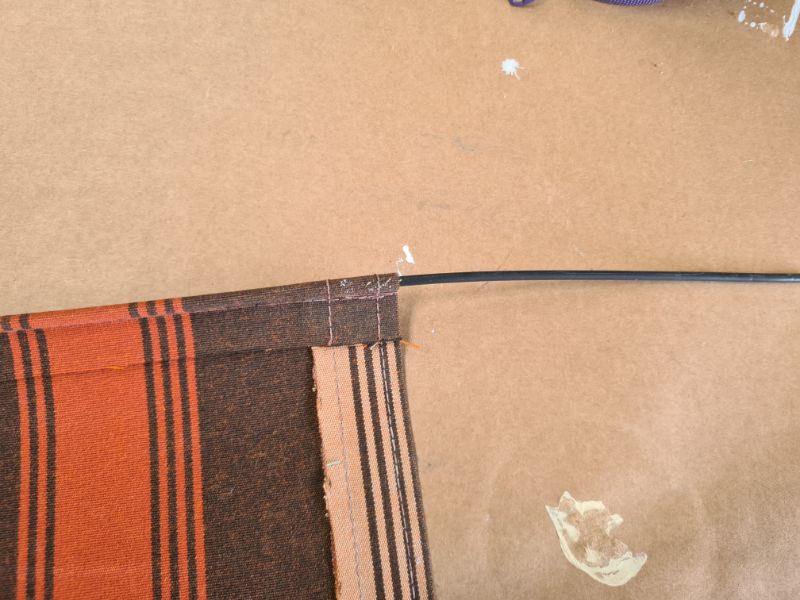
Reinsert the rods
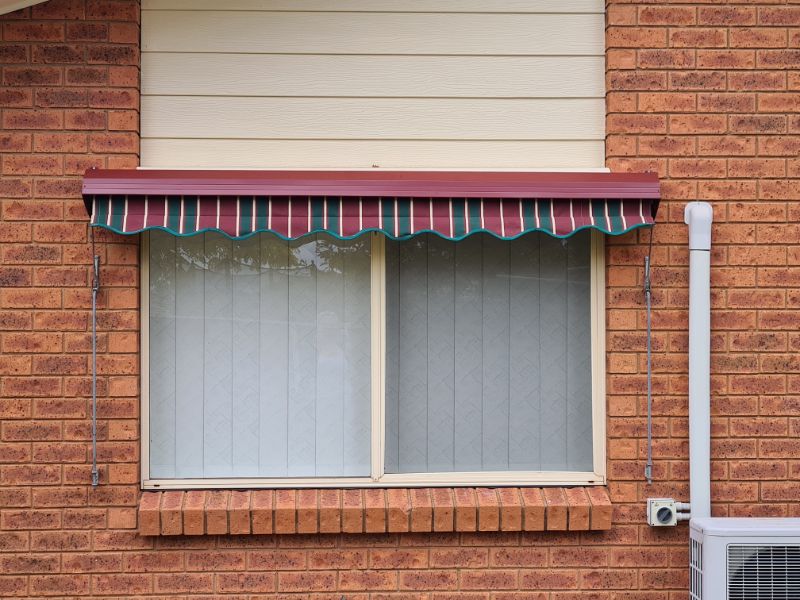
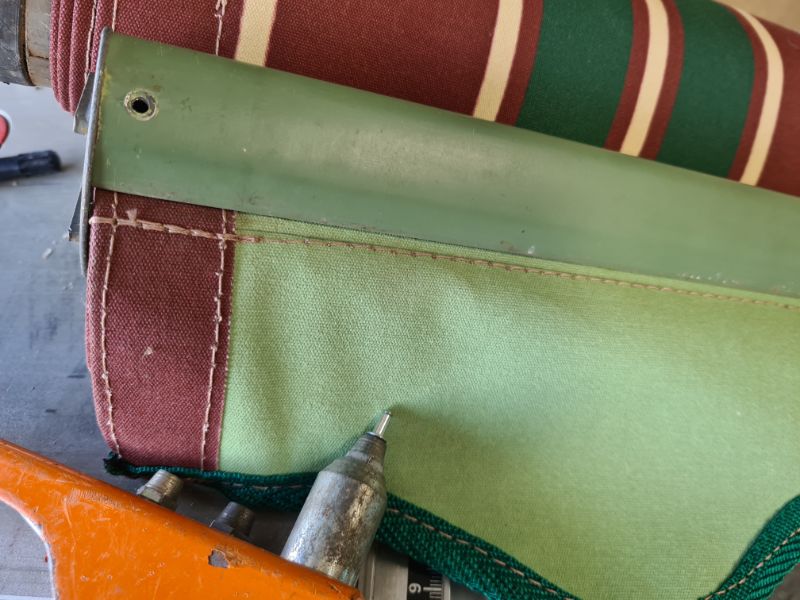
Slide the original PVC rods back into the hem channels. Keep the top and bottom rods in their original positions so they suit the roller and front bar. These rods are important because they anchor the fabric into the groove of the awning mechanism.
The awning is now complete and ready for reassembly.
Fit the canvas to the roller and front bar
This step needs patience. The fabric slides into the roller groove, but seam joins are thicker and can snag.
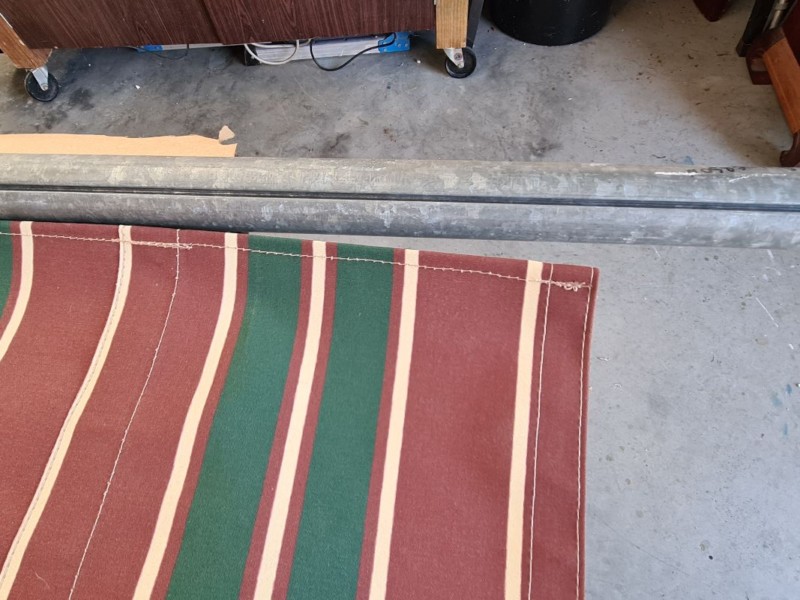
I pushed while my husband gently pulled from the opposite end. A flat screwdriver helps guide a stubborn seam into the slot. A light mist of silicone spray on the groove can help the feed.
The front bar usually accepts the panel more easily because of the stiffer rod.
Once both edges are seated, replace end caps and secure with new pop rivets.
Rehang, tension, and test
Seat the roller: one end sits in a round hole, the other in a slotted bracket. Roll the canvas onto the tube by hand. Re-bolt the arms to the end caps and replace the set screws at the rod ends. Extend and retract the blind a few times to check tracking and tension.

Cost, time, and results
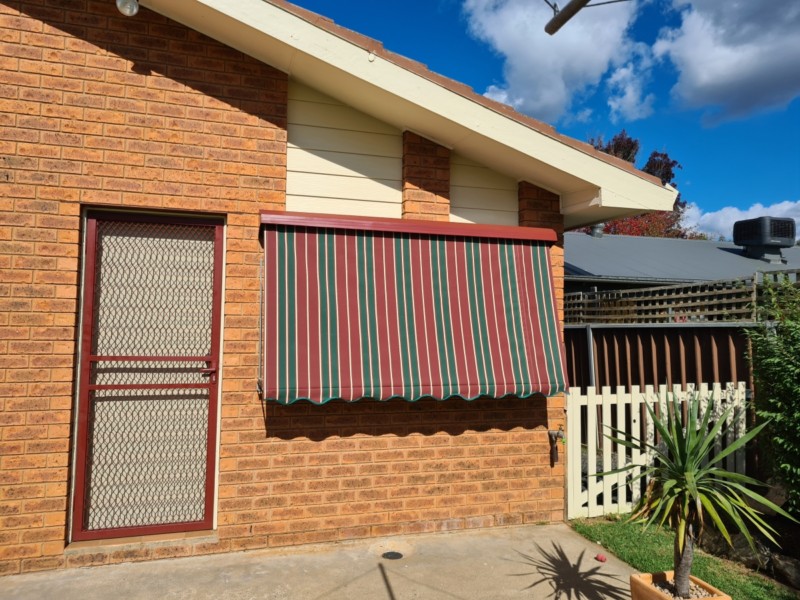
The professional quote was $850 for both blinds. Doing it myself cost roughly $300 in materials. Cutting, sewing, and fitting took a weekend, including the scalloped valance. The awnings now look new, and the fresh canvas complements our new paint perfectly.
More DIY projects
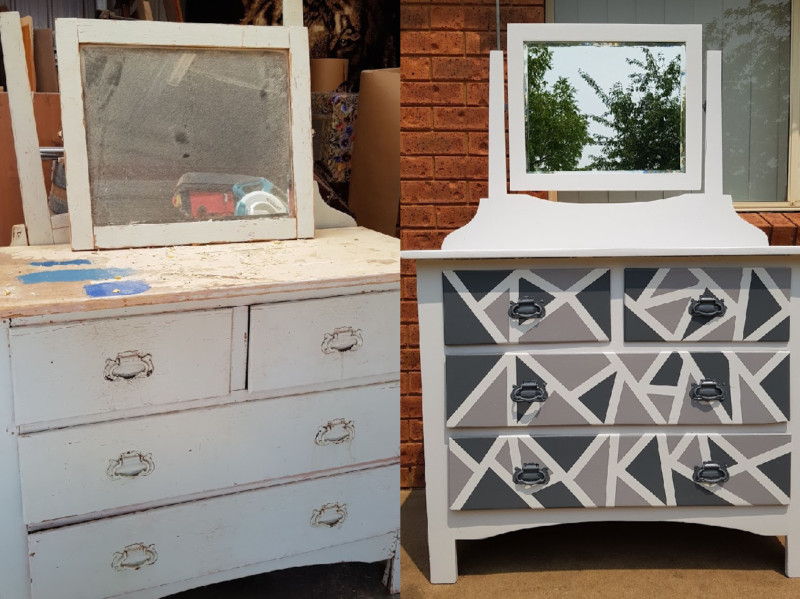
See how I turned this old dresser from trash to treasure with a quick restoration and an easy-to-do geometric paint finish.
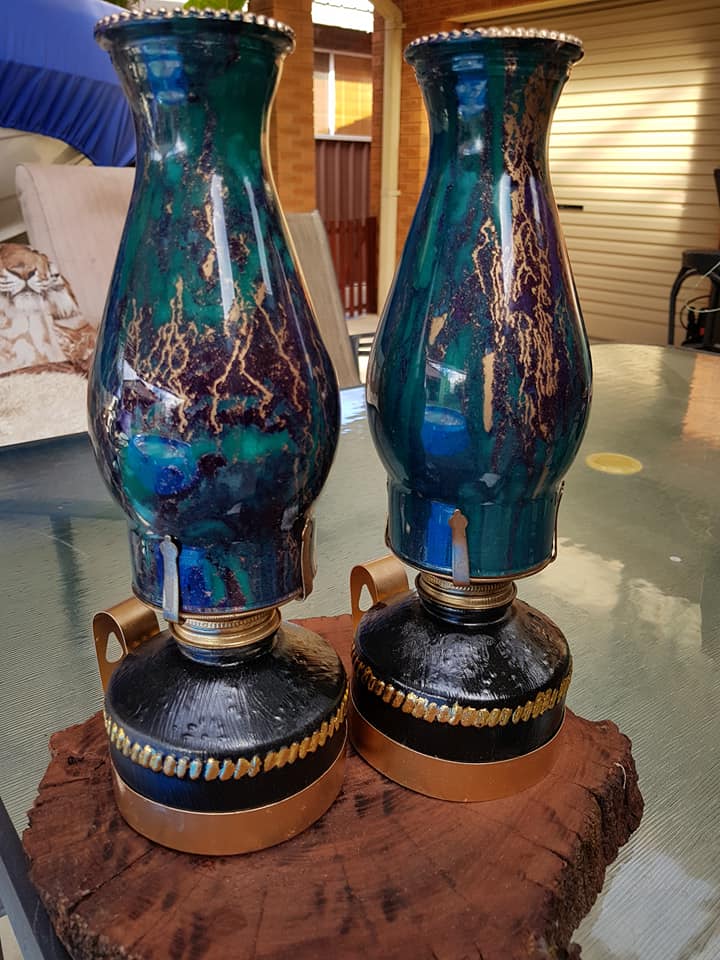
Unicorn SPiT stain and glaze are so popular right now. Check out this simple method to create a beautiful gold vein effect on glass.

If you’re interested in any of the items used in this project, we’d appreciate it if you used our affiliate links. Clicking these links earns us a small commission at no extra cost to you, helping us create more inspiring and exciting projects to share. We’d also love to hear your thoughts—feel free to leave a comment or share this post!

12 Comments
maria
April 25, 2022 at 10:06 pmWow, you did an amazing job, love the fabric, its almost identical. I have these canvas chairs that I want to replace, its kind of same what you did. I may try it. If I can find them in my storage unit.
Anita Holland
April 26, 2022 at 5:31 pmThank you Maria, I was thrilled how well they turned out and I was dreading it. But it was easier than I thought, so jump in and dig those chairs out.
Sara
April 26, 2022 at 3:15 amNothing better than fresh paint and new awnings to add to curb appeal. Well done Anita!
Anita Holland
April 26, 2022 at 5:32 pmThanks Sara, I was so happy how it all turned out. This is the back of my house, I am still working on another decor for my walls because they look so bare.
Rosemary Palmer
April 26, 2022 at 4:12 amIt’s great the mechanism part was still able to be used. We bought a roll up shade for the balcony of our apartment and it helps so much.
Anita Holland
April 26, 2022 at 5:33 pmThanks Rosemary, I was lucky because I think that would be expensive to replace the whole awning.
Kippi
April 27, 2022 at 1:17 pmYou did an amazing job replacing the awning fabric!
Happy Spring,
Kippi
Anita Holland
April 27, 2022 at 6:11 pmThank you so much Kippi.
Michelle Leslie
April 27, 2022 at 10:25 pmSuper impressed, Anita. We had awnings at our previous home and they were looking just as bad as your old ones. I just left them, because they seemed like such a bother to replace. Wish I’d seen your tutorial back then. Those things come in so handy with the kind of weather we get.
Anita Holland
April 30, 2022 at 8:17 amThanks, Michelle.They are super handy when it gets to temps of 40plus, I suppose that is why they got so bad.
Marie
May 25, 2022 at 3:44 pmThis is so handy. They look great. My husband and I have been thinking to add a retractable awning to it back porch. Just need to carve out time!
Anita Holland
May 27, 2022 at 3:18 pmThank Marie, I kept putting it off for years too until I painted the outside and they looked so bad.