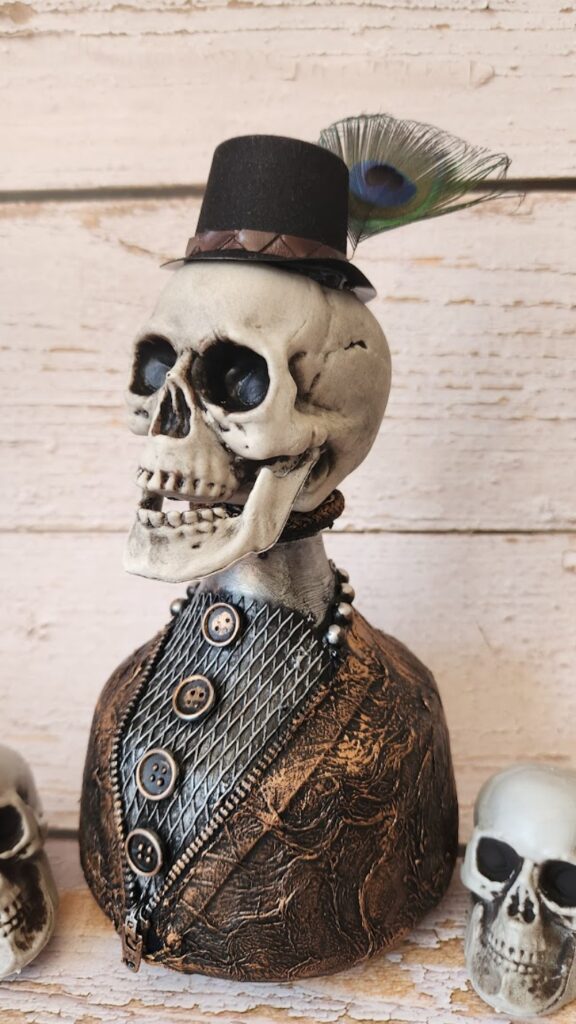
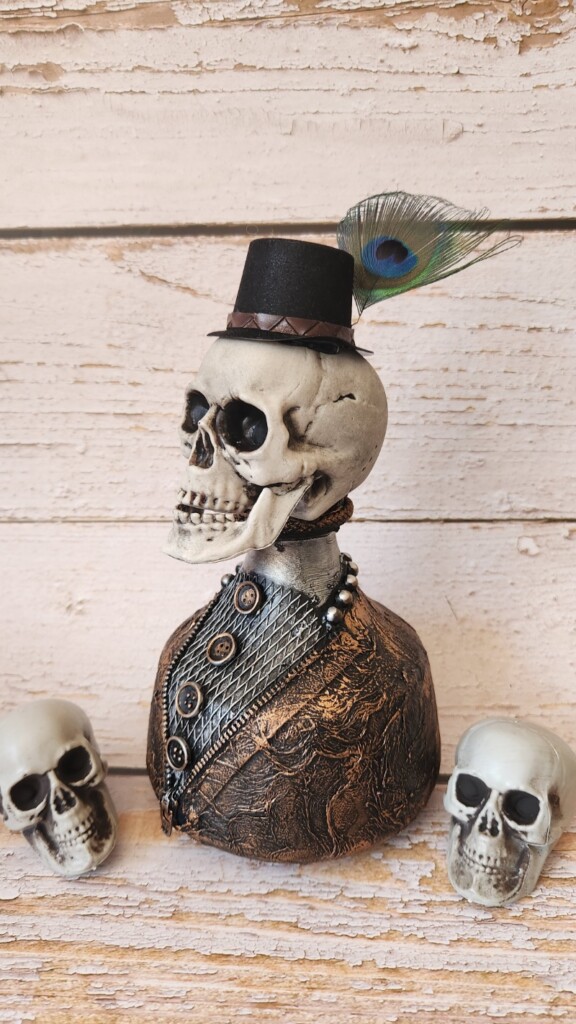
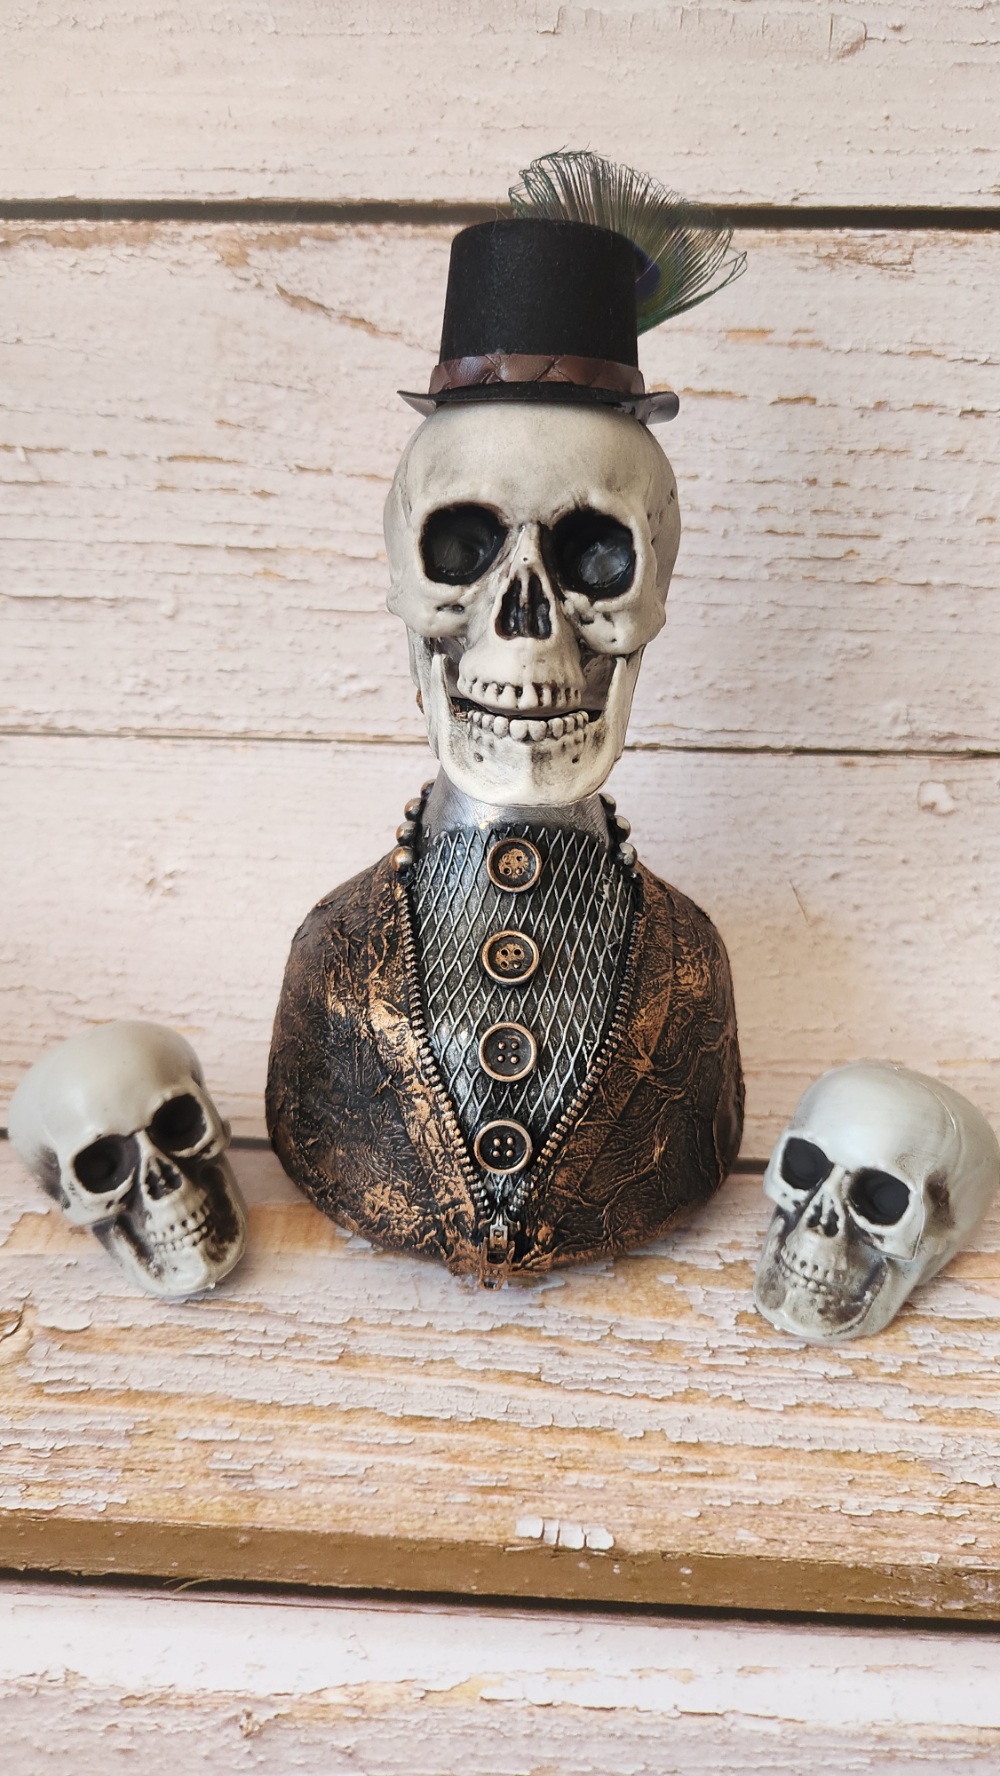
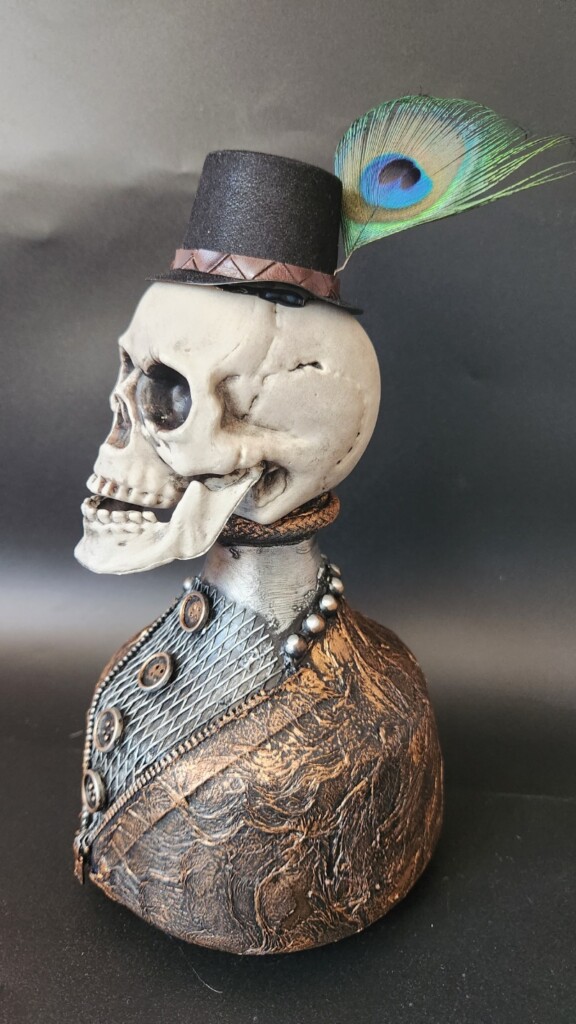
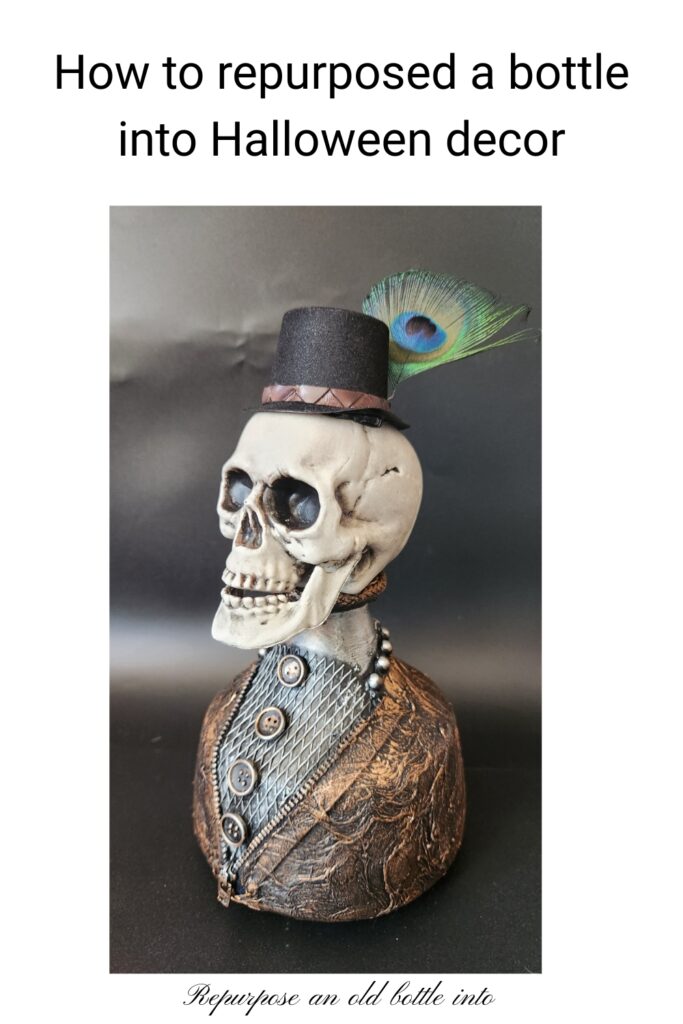
If you are looking for a quick and easy DIY Halloween project, this spooky DIY skull bottle is perfect. Using simple supplies like an old ceramic bottle, serviettes, and a budget plastic skull, you can create a creepy Halloween decoration that looks like it is dressed in clothes. This project is also beginner-friendly for anyone wanting to try mixed media art assemblage without needing expensive tools or advanced skills.
This skull bottle was created for the International Bloggers Club (IBC) Challenge, where each month we work on a common theme. The theme for this round was Ceramic Crafts, and I decided to transform a plain ceramic bottle into a fun Halloween display piece.
Before we dive into this tutorial, be sure to subscribe to my bimonthly newsletter to be the first to see my latest projects. You can also follow me on Pinterest and Facebook, where I also include my unique mixed-media art projects
DIY Skull Bottle for Halloween – Easy Mixed Media Art Project
**This post may contain affiliate links. This means I earn a small commission on links used at no extra cost to you. Please see my disclosure policy for more information.**
Materials Needed
- Empty ceramic or glass bottle
- Craft glue or Mod Podge
- Paper serviettes (napkins)
- Recycled buttons
- Rope
- Netting sack (onion or alcohol bottle mesh)
- Recycled zipper
- Acrylic paints (black, bronze, silver)
- Bronze or copper wax paste (optional)
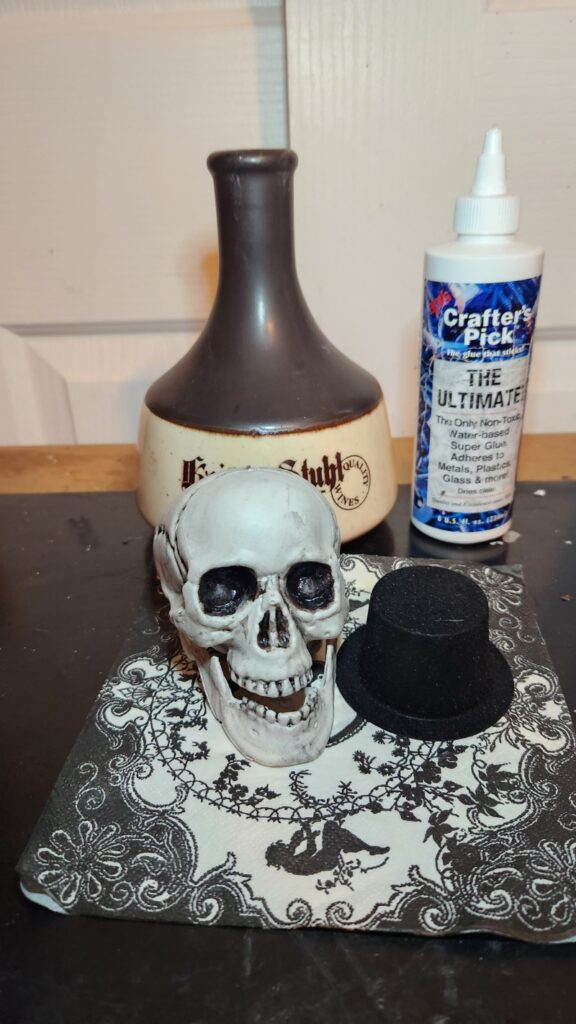
- Plastic skull (budget store)
- Doll’s hat or mini top hat
- Beads
- Peacock feather (optional)
- Hot glue gun and glue sticks
- Scissors or craft knife
Making the skull bottle base
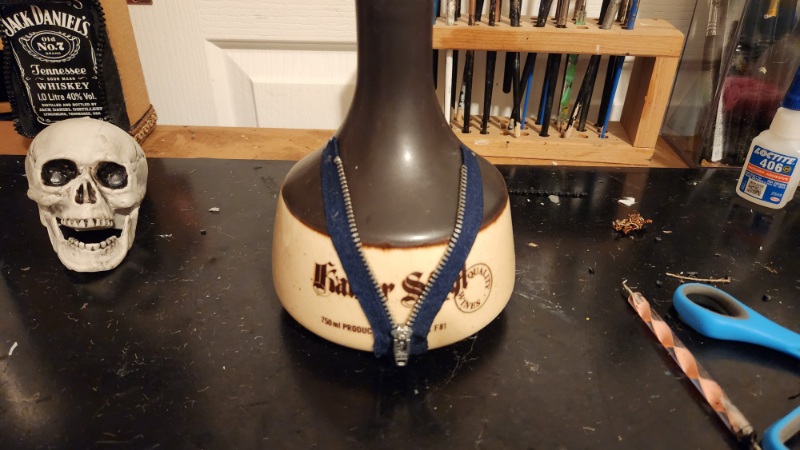
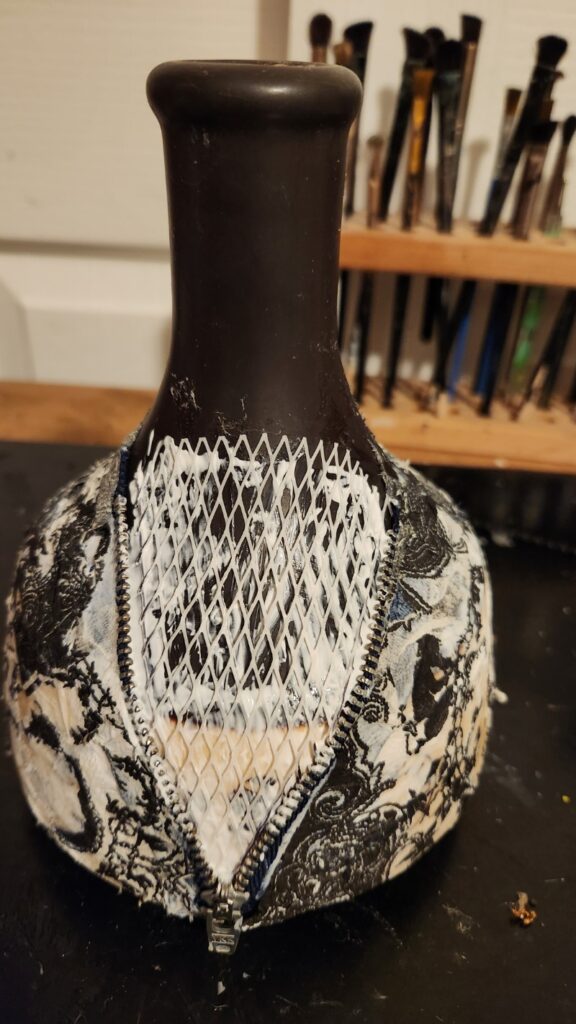
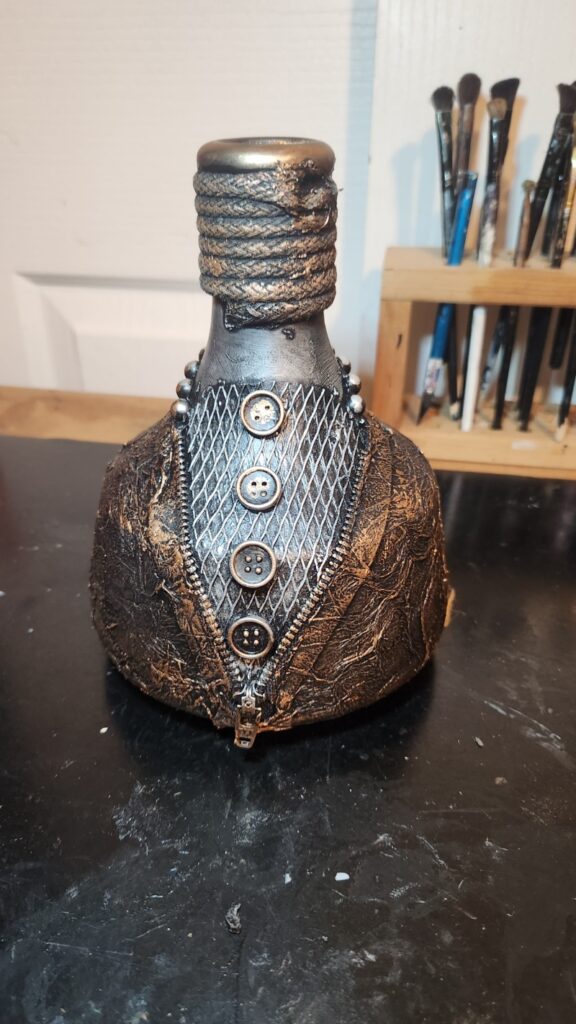
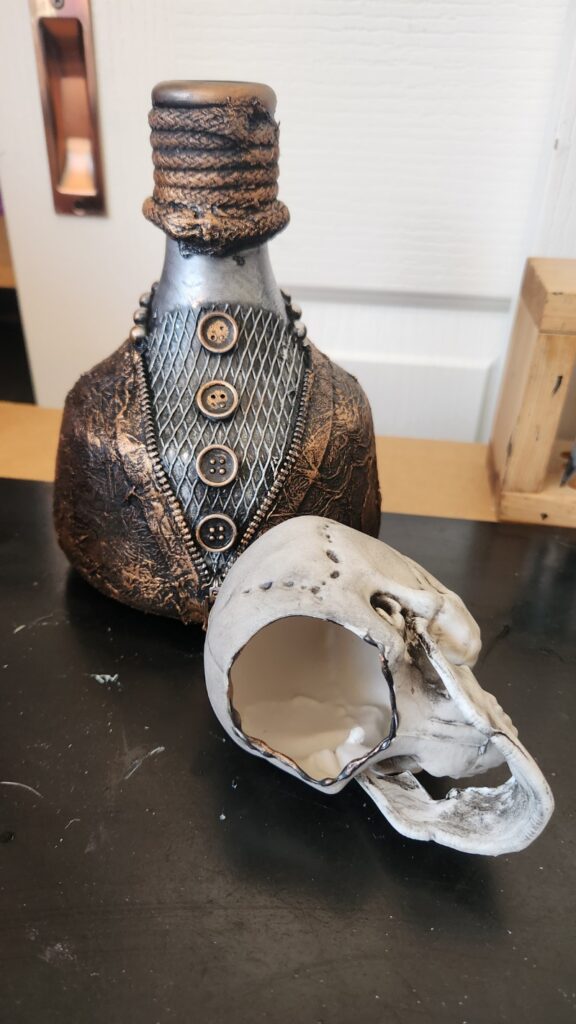
Start by attaching a zipper down the front of the bottle with hot glue. Leave the zipper slightly open so it looks like a jacket. If you don’t want to buy one, recycle a zipper from an old pair of jeans.
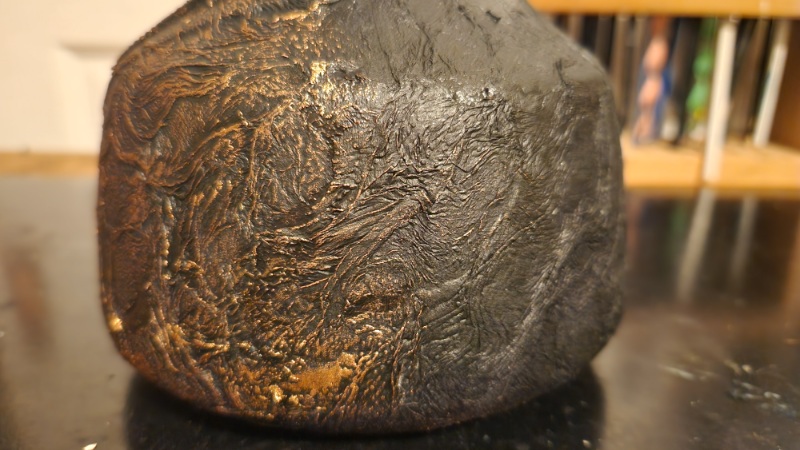
Separate your serviettes into single layers and apply glue to the bottle surface. Press the serviette into the glue with your fingers or a soft brush, creating wrinkles for texture. Once dry, remove the excess paper serviette.
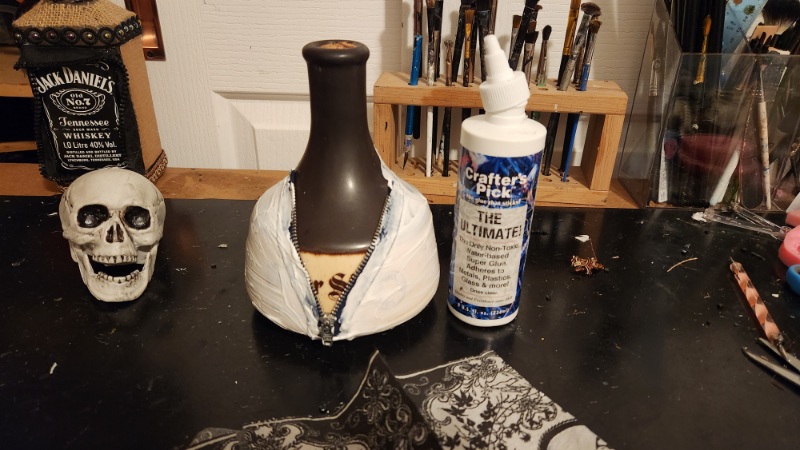
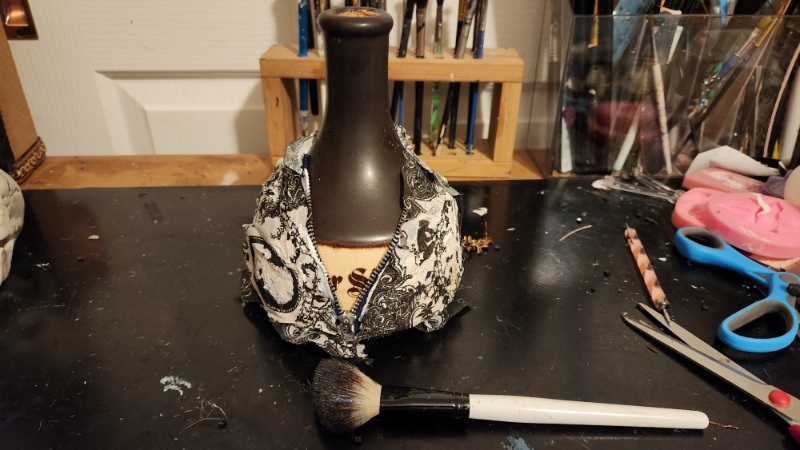
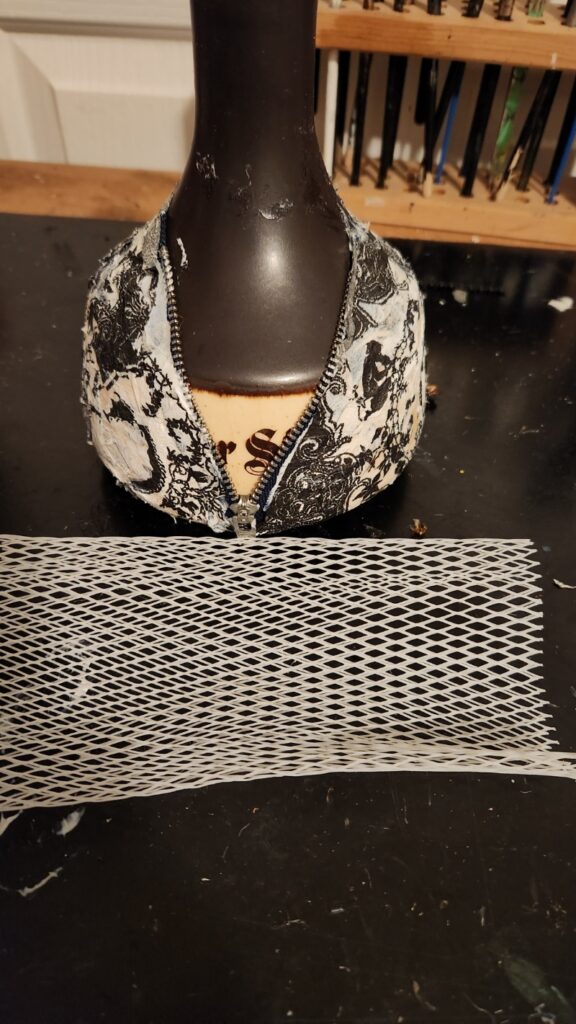
Add extra interest by pressing netting mesh into glue over the top layer—onion bags or alcohol bottle mesh both work perfectly. For more tips and tricks on items you can use to add texture to your assemblage projects, this post has it all.
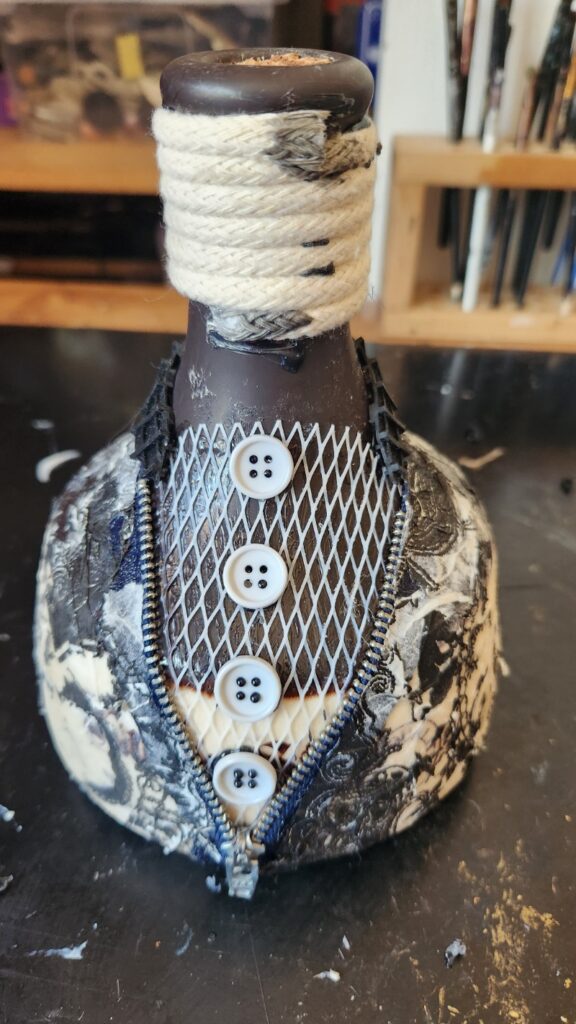
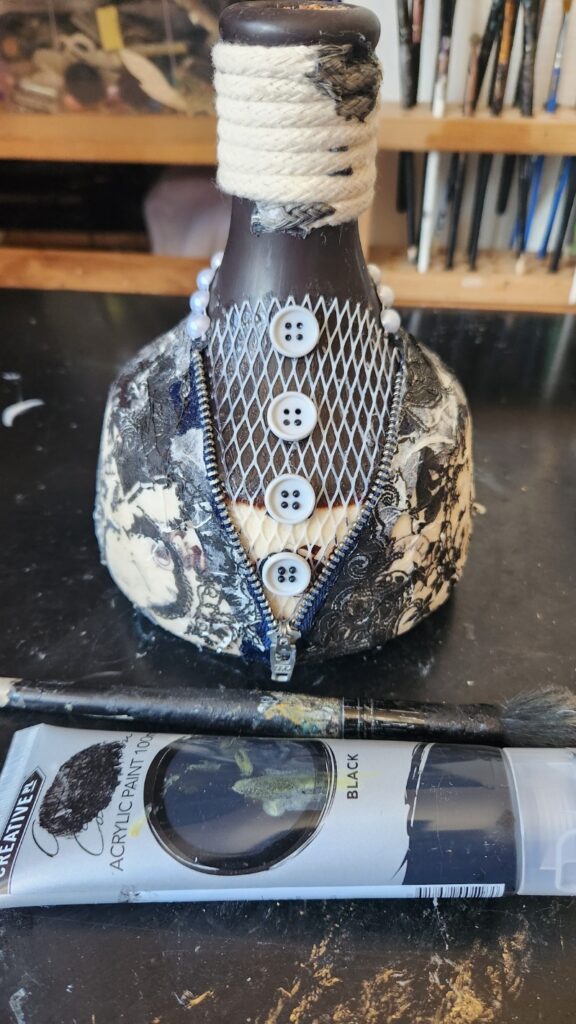
Once dry, glue buttons onto the front and wrap rope around the bottleneck. This keeps the skull steady when added later. For a collar effect, I first tried rubber, but it didn’t hold well, so I switched to a bead trim, which worked beautifully.
Painting the Bottle
Coat the entire bottle with black acrylic paint. To speed up drying, use a hairdryer.
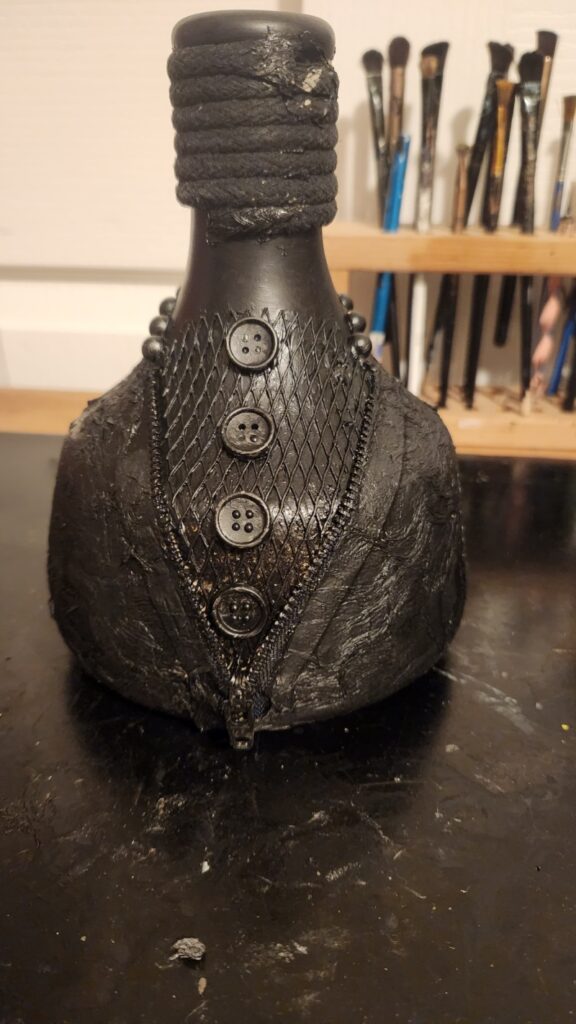
To highlight the texture, I rubbed bronze wax paste over the raised areas with my fingertip, allowing the details to shine through.
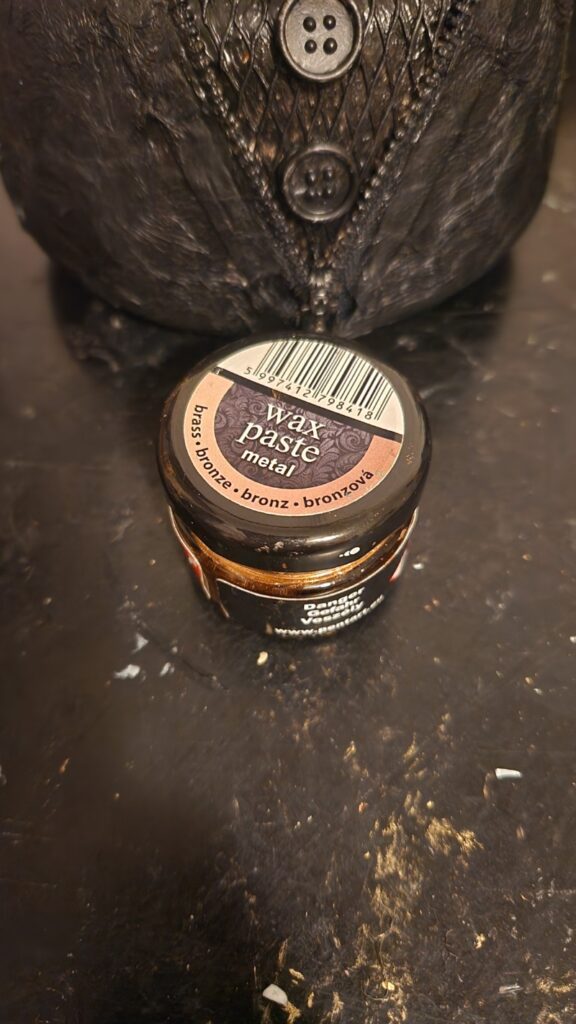
The idea is to highlight only the raised surfaces while leaving the rest black. If you don’t have bronze wax paste at home, you might already have the ingredients to make your own, and this post will show you how. Alternatively, you can achieve the same effect with acrylic paint. Add a small amount of paint to your brush, then wipe off the excess onto a paper towel until the brush feels almost dry. Lightly brush over the surface, allowing the colour to catch only on the raised areas. This technique is known as dry brushing.
I used silver wax inside the ‘shirt’ area to make it stand out more, giving the jacket contrast and adding depth to the design
Preparing and Painting the Skull
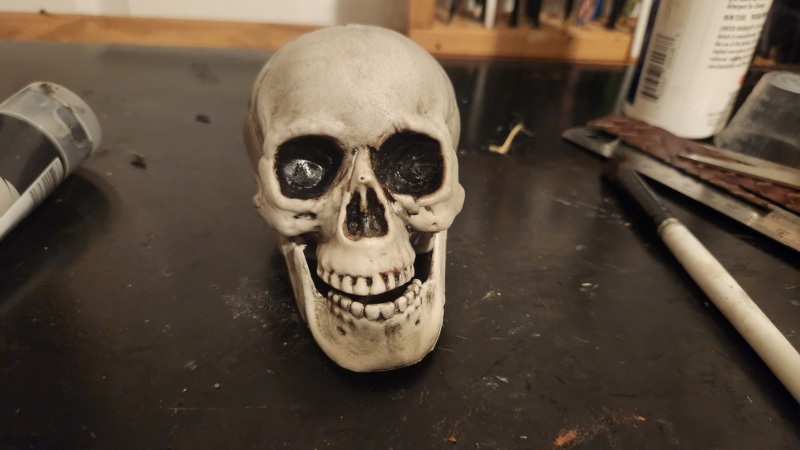
A cheap $1 plastic skull from a budget store made the perfect topper, but looked too plain at first. To give it more character, I brushed black acrylic paint into the crevices and wiped the excess off with a baby wipe.
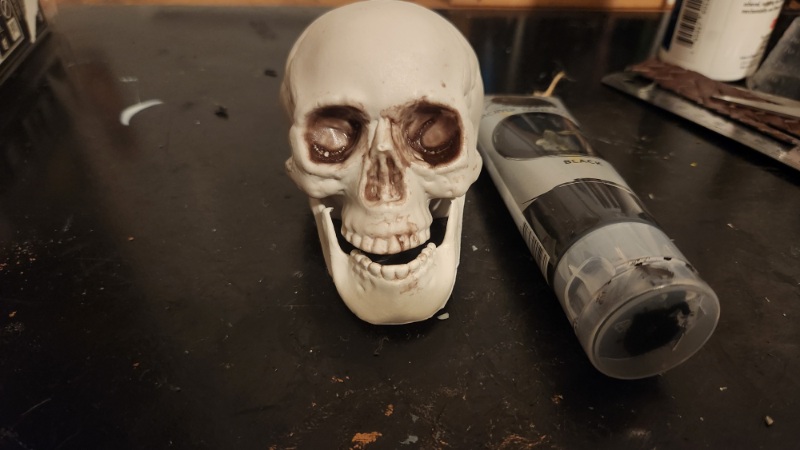
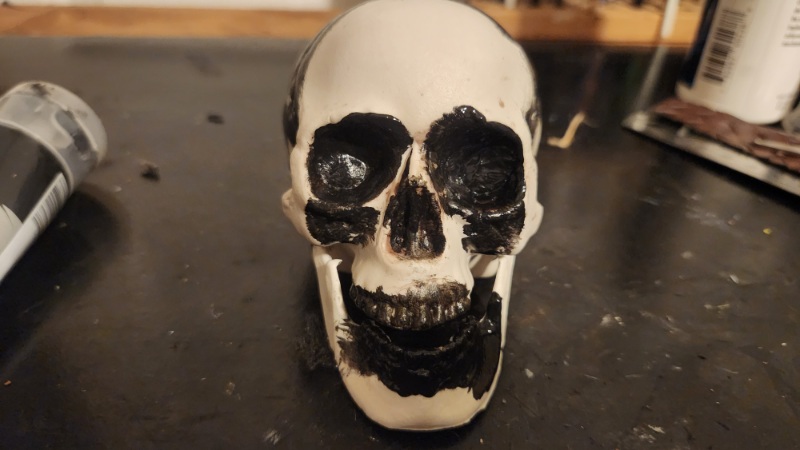
This technique left dark shading in the details, making the skull more realistic and a little creepier.
Cut a hole in the bottom of the skull using a craft knife so it can slide over the bottleneck.
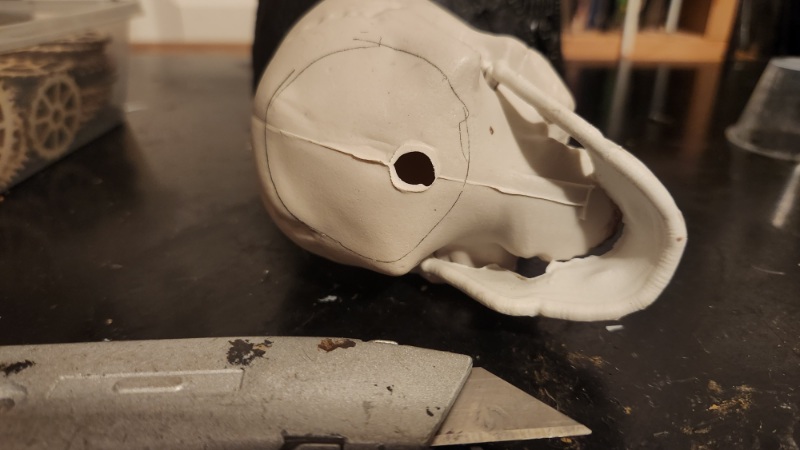
Secure it with an extra rope ring around the top as a stopper.
Adding Final Details
To finish, glue a mini hat on top of the skull and embellish it with a peacock feather. I bought mine online, but you could also make your own top hat from cardboard or felt. The final look is both eerie and fun—a perfect handmade piece for a Halloween display.
More Halloween project ideas
This grim reaper was made from an old towel soaked in cement and draped over a form to create its eerie shape.

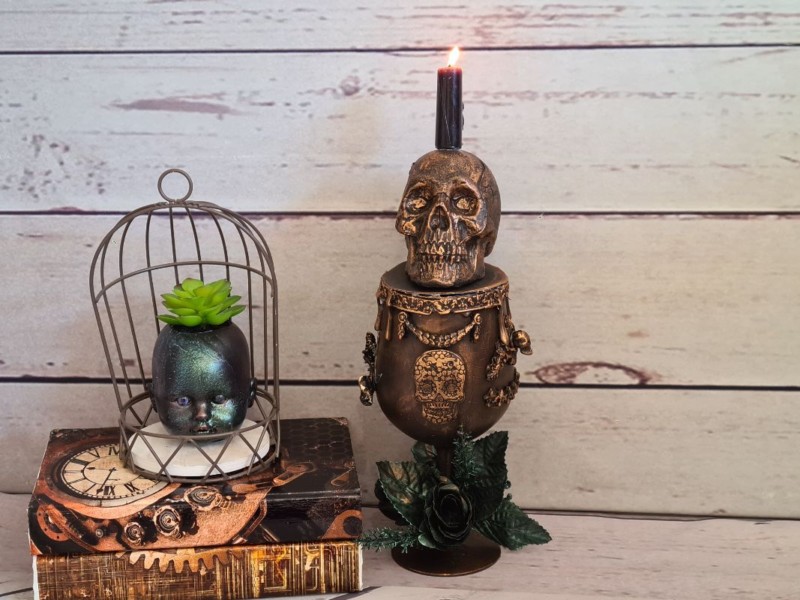
This skull goblet makes a striking table decoration and would be the perfect centrepiece for any Halloween party.
More about IBC

If you follow my blog, you will know I am part of the IBC (International Bloggers Club), which is a group of talented bloggers from around the world. We have members from Spain, South Africa, Australia, the United States, and Canada. Each month, we come together and create a project with a common theme.
To see the “Ceramic crafts ” contributions from my fellow bloggers joining us this month, keep scrolling. Please feel free to jump over and give them some love.
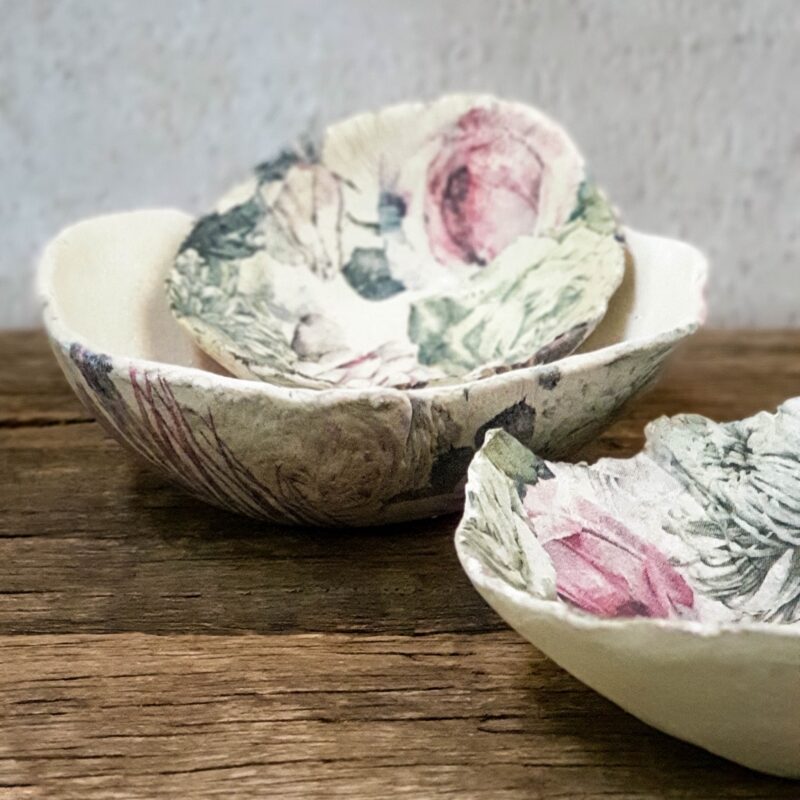
Michelle from A Crafty Mix shared really cool bowls made from clay and paper napkins
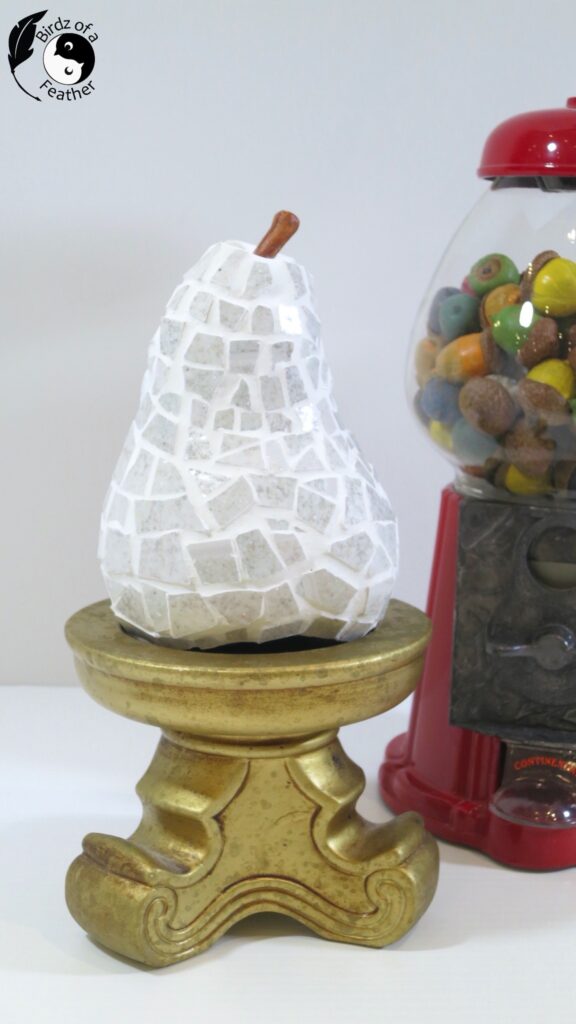
Sara from A Birdz of a Feather shared a stunning tile mosaic
Rachel from Tea and Forget Me Nots shared how to paint a ceramic with a vintage feel.

If you’re interested in any of the items used in this project, we’d appreciate it if you used our affiliate links. Clicking these links earns us a small commission at no extra cost to you, helping us create more inspiring and exciting projects to share. We’d also love to hear your thoughts—feel free to leave a comment or share this post!


8 Comments
Sara
October 23, 2023 at 10:24 pmIncredible transformation of a ceramic bottle Anita! Love how you added all that texture; especially the mesh. I always look at that stuff and wonder what you can do with it; now I know !
Anita Holland
October 24, 2023 at 6:51 pmThanks Sara, before anything gets thrown away in our house they always ask if I want it first. 🤣🤣
Michelle Leslie
October 24, 2023 at 2:04 amAs always, your Steampunk creations are amazing, Anita. You have such a knack for putting odd things together to create a retro-futuristic aesthetic. Using the onion bag is genius, BTW. I’ll remember that trick. He looks like such a gentleman and would fit right into Sofie’s hat shop in Howl’s Moving Castle.
Anita Holland
October 24, 2023 at 6:52 pmThanks Michelle, a nice quick and easy project. I will just add some more bits and pieces and sell him off.
Rachel Bowyer
October 24, 2023 at 2:18 amThis is stunning. Simple tools but a clever process fitting it all together. I’d love to try this.
Anita Holland
October 24, 2023 at 6:53 pmThank Rachel so easy when you see how it is done.
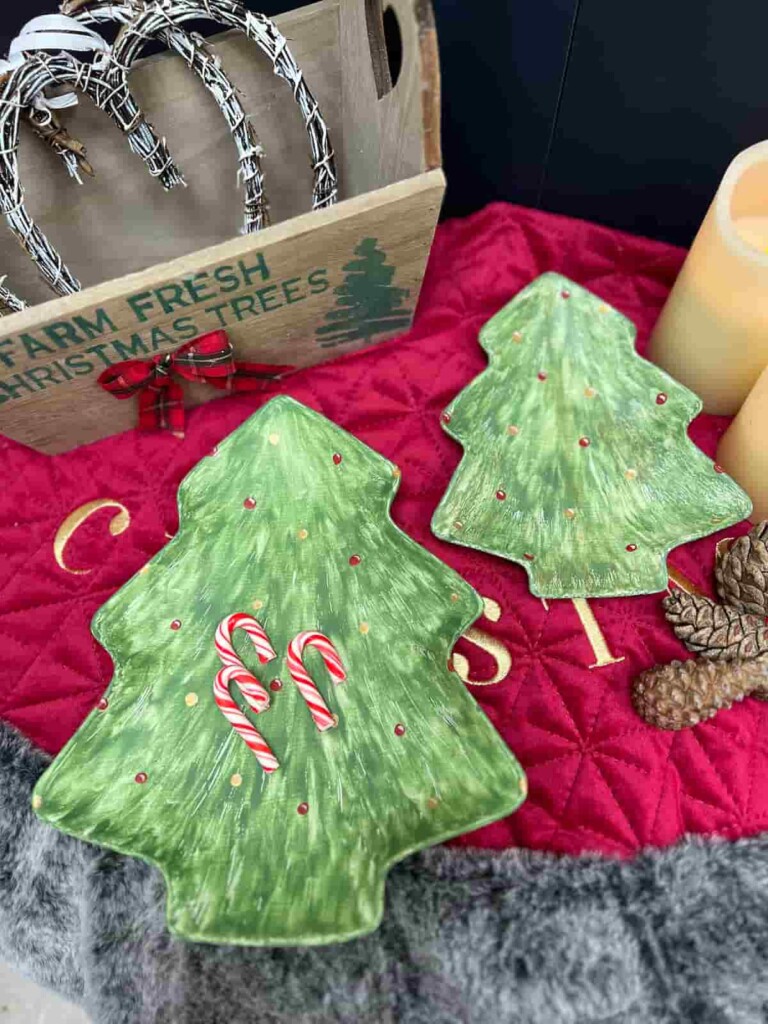
How To Paint a Ceramic Christmas Tree With Vintage Feel – Tea and Forget-me-nots
October 30, 2023 at 5:55 pm[…] Unique Creations By Anita’s DIY Skull Bottle […]
Clay-Baked Napkin Bowls: Easy Crafting - A Crafty Mix
October 15, 2024 at 12:24 am[…] from down under in Australia channeled her inner Steampunk wizardness to transform a bottle into this proud […]