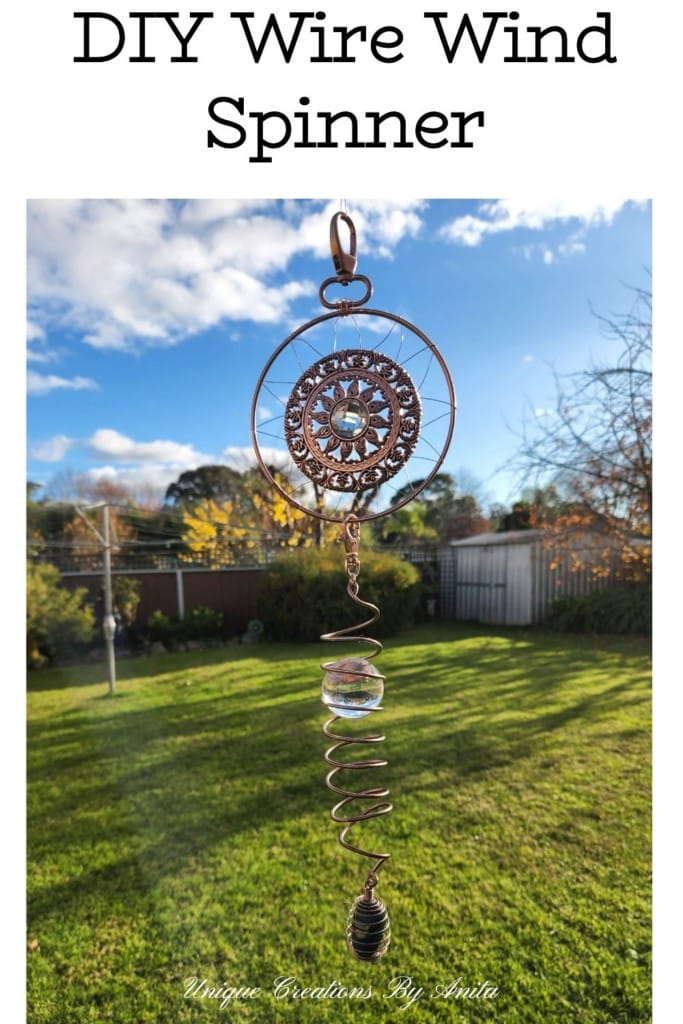
It’s time again for the International Bloggers Club (IBC) monthly challenge, and this month’s theme was “Wired”. For my project, I decided to create a DIY Wire Wind Spinner using almost entirely recycled materials. This simple, budget-friendly garden décor idea takes just a few hours to make, and the results are stunning.
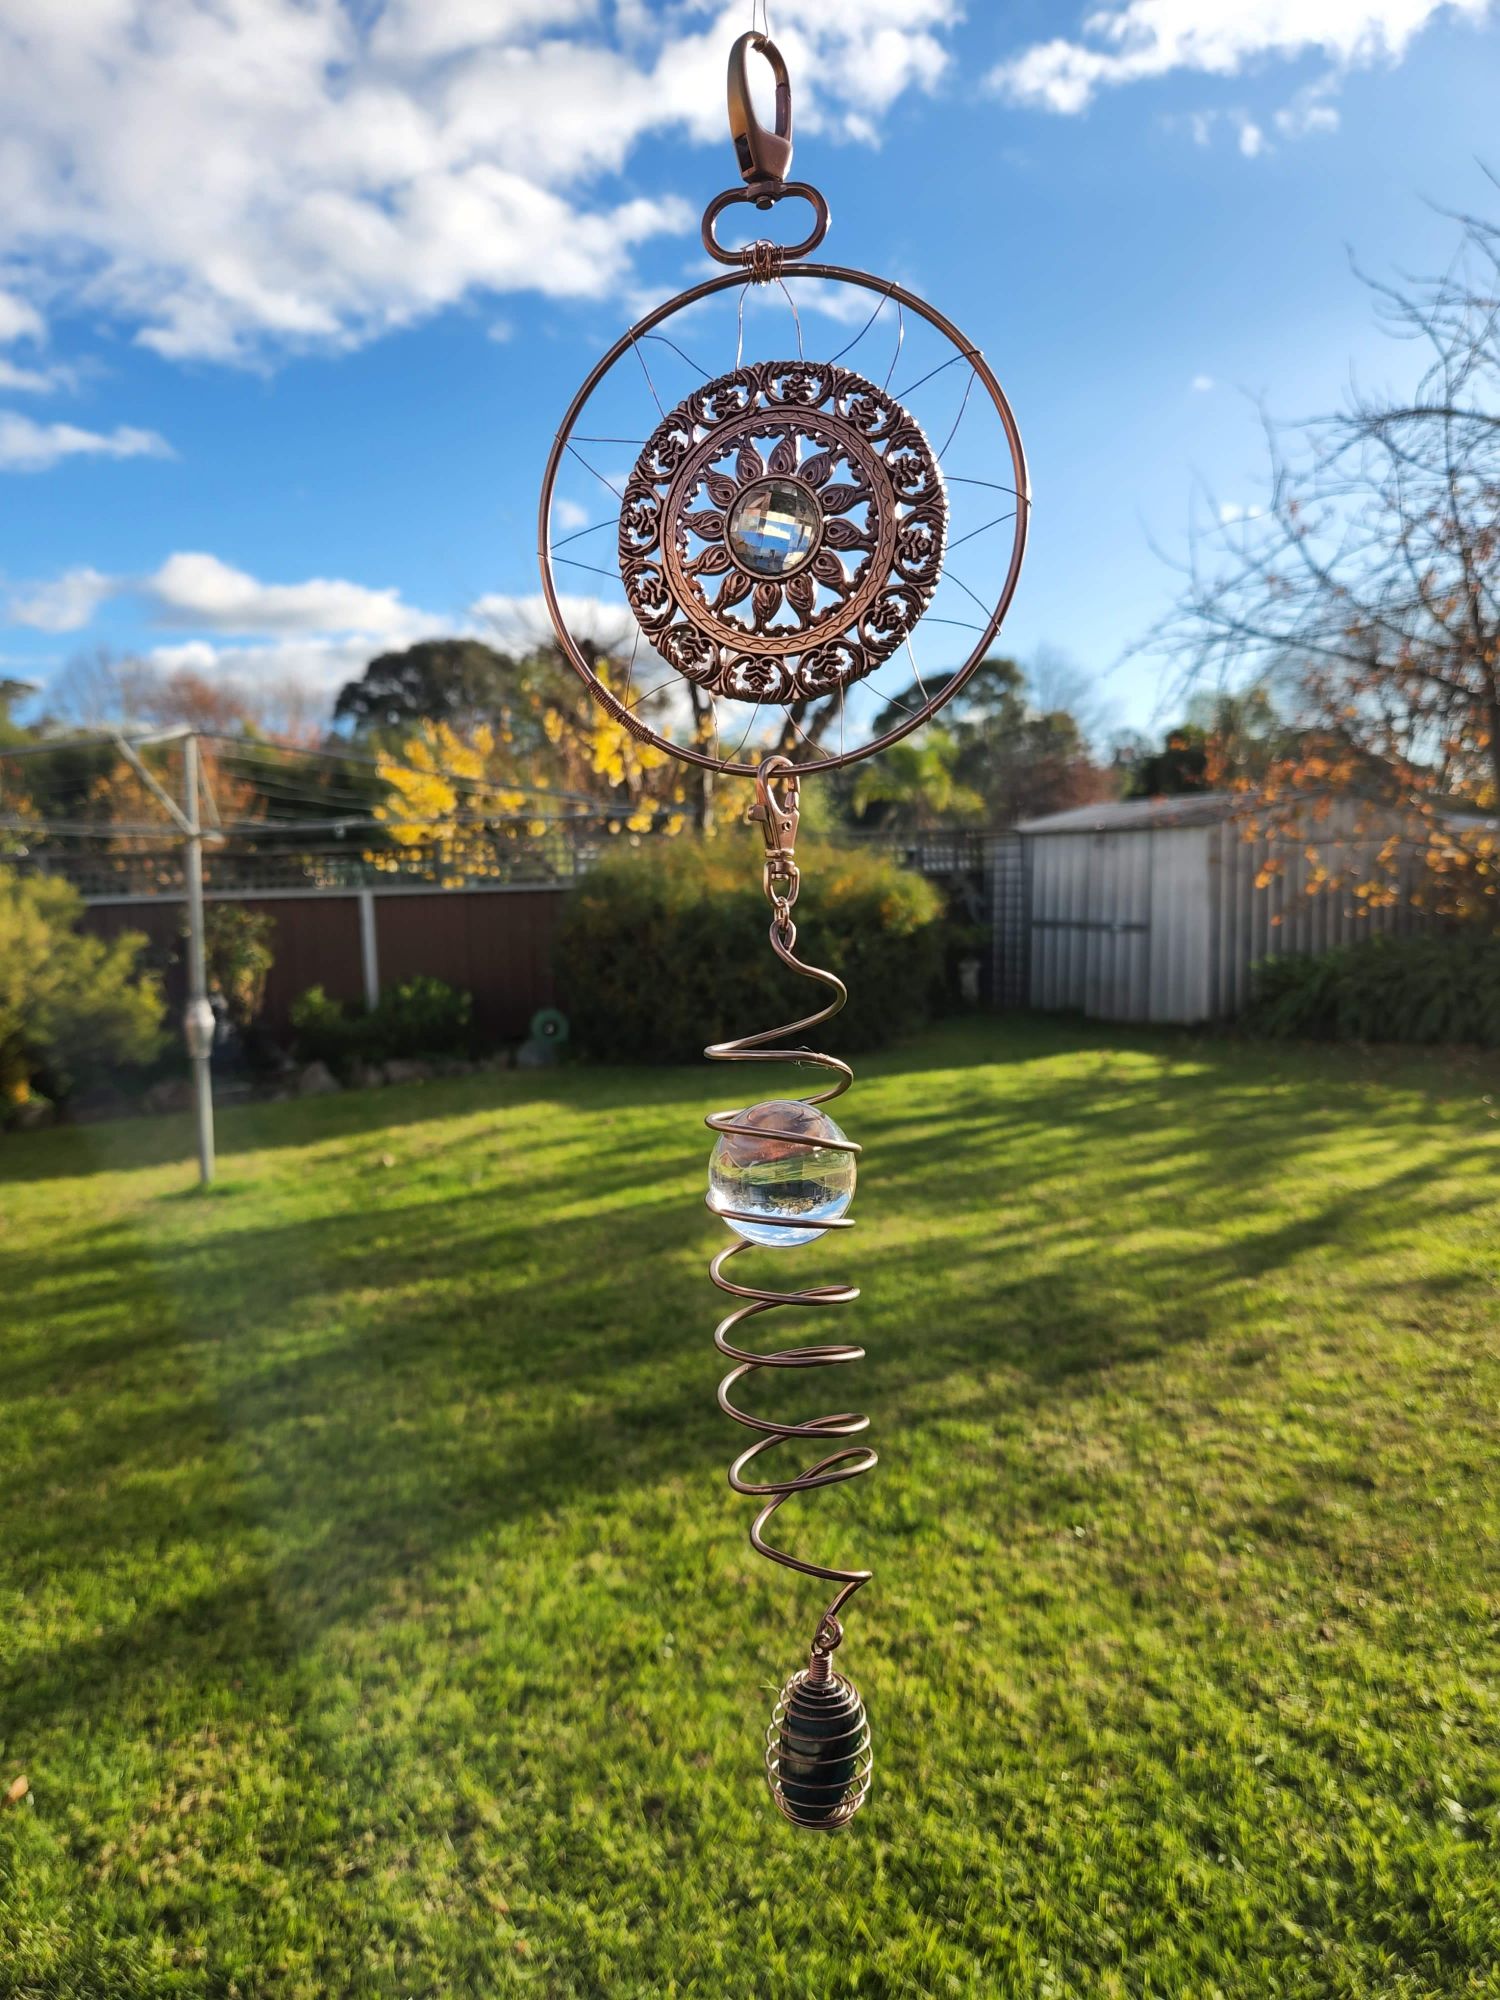
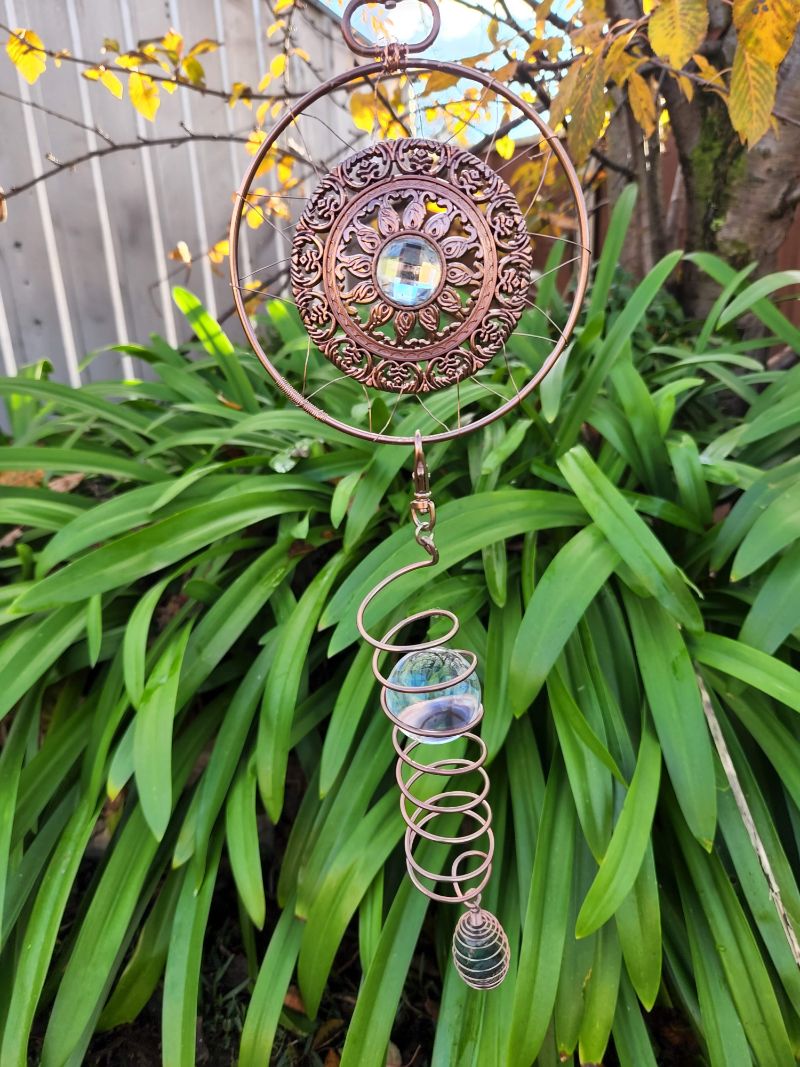
The finished spinner catches the light beautifully as it turns in the breeze, adding movement and charm to any outdoor space. Like most of my projects, I relied on upcycled finds — including parts from an old handbag, stripped electrical wire, and a second-hand necklace. If you’ve been looking for a creative way to use leftover wire and scrap materials, this project will inspire you to see the potential in what others might throw away.

Before we dive into this tutorial, be sure to subscribe to my bimonthly newsletter to be the first to see my latest projects. You can also follow me on Pinterest and Facebook, where I also include my unique mixed-media art projects
DIY Wire Wind Spinner from Recycled Materials – Easy Garden Décor Project
**This post may contain affiliate links. This means I earn a small commission on links used at no extra cost to you. Please see my disclosure policy for more information.**
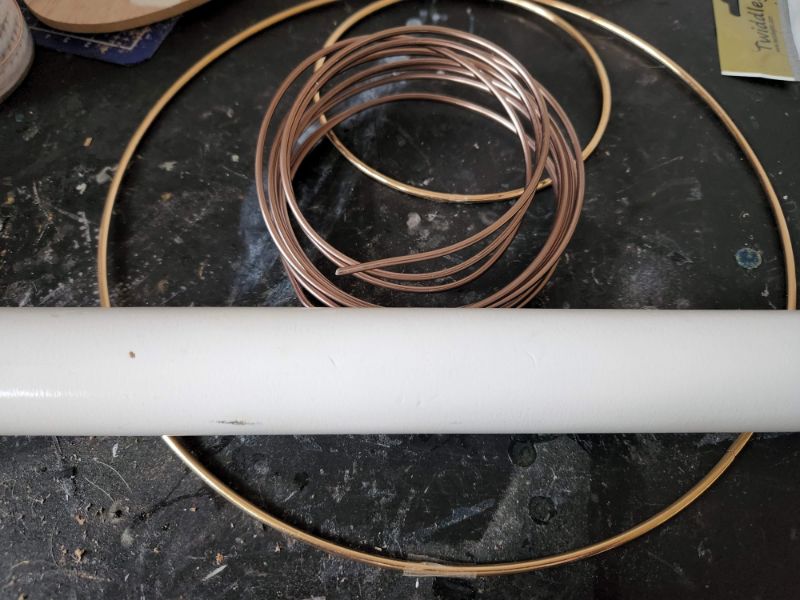
Materials Needed
- Recycled decorative disc (mine came from an old handbag)
- Stripped copper wire (harvested from an electrical cable)
- Small wire hoop (I used a $3 Kmart wreath frame)
- Aluminium jewellery wire (2.5mm)
- Hook from an old handbag strap
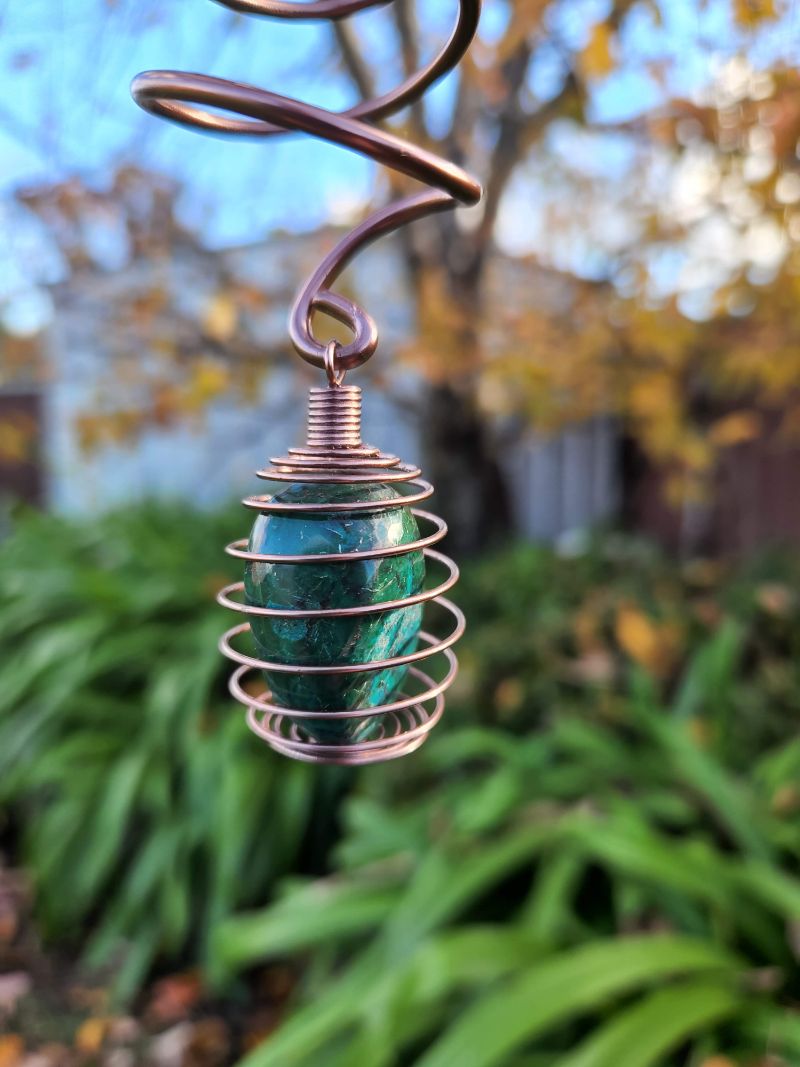
- Wire coil basket (from a second-hand necklace)or make one
- 40mm glass ball
- Copper spray paint
- Long nose pliers
Harvesting Free Wire
If you’re lucky enough to have an electrician in your household, you’ll probably have spare wire lying around.
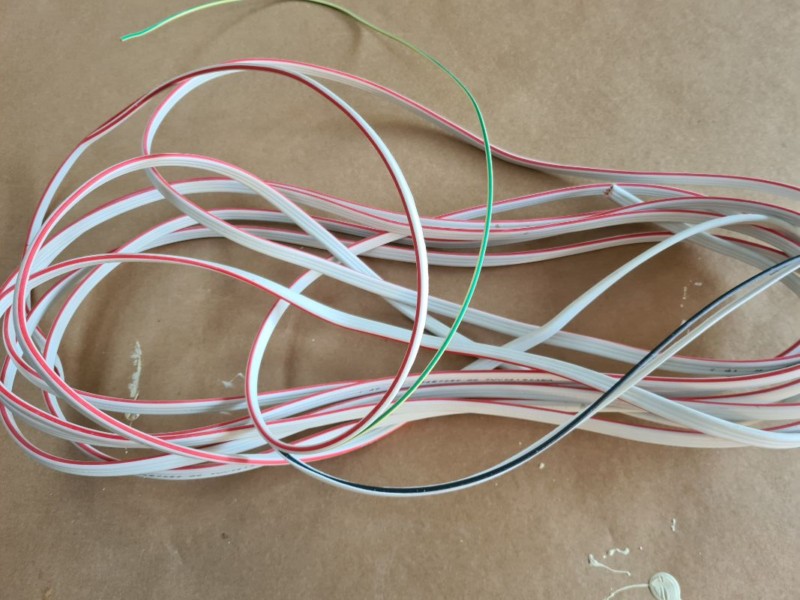
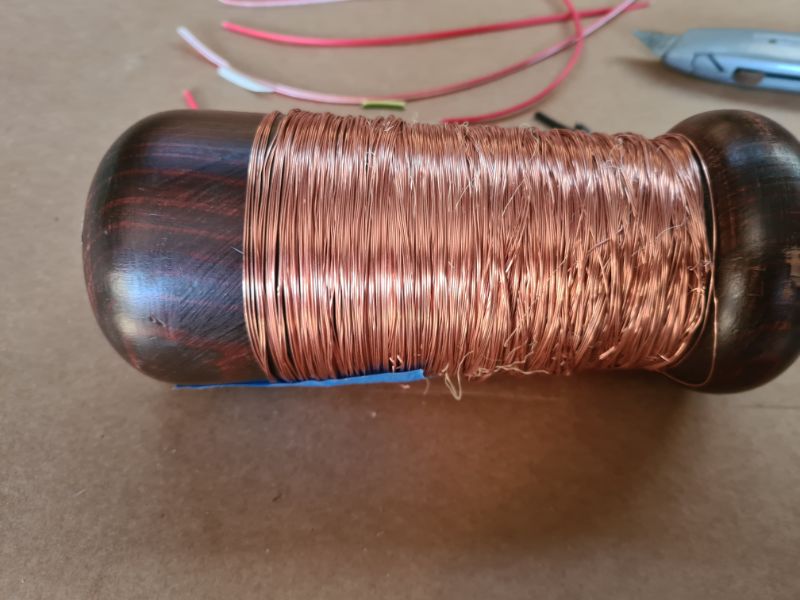
I removed the plastic coating from some old electrical cable, then wound the bare copper wire around a scrap piece of wood to prevent tangling. I only needed a small amount for this project, but the rest will come in handy for future creations.
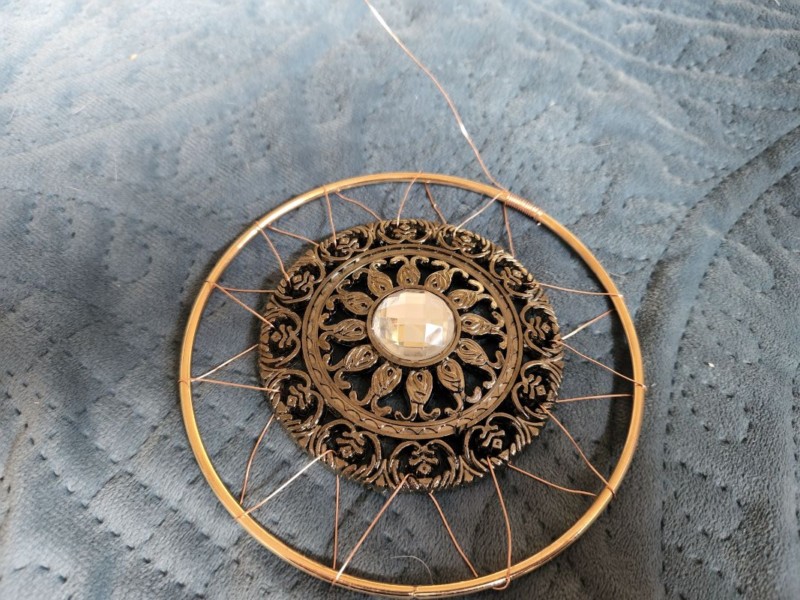
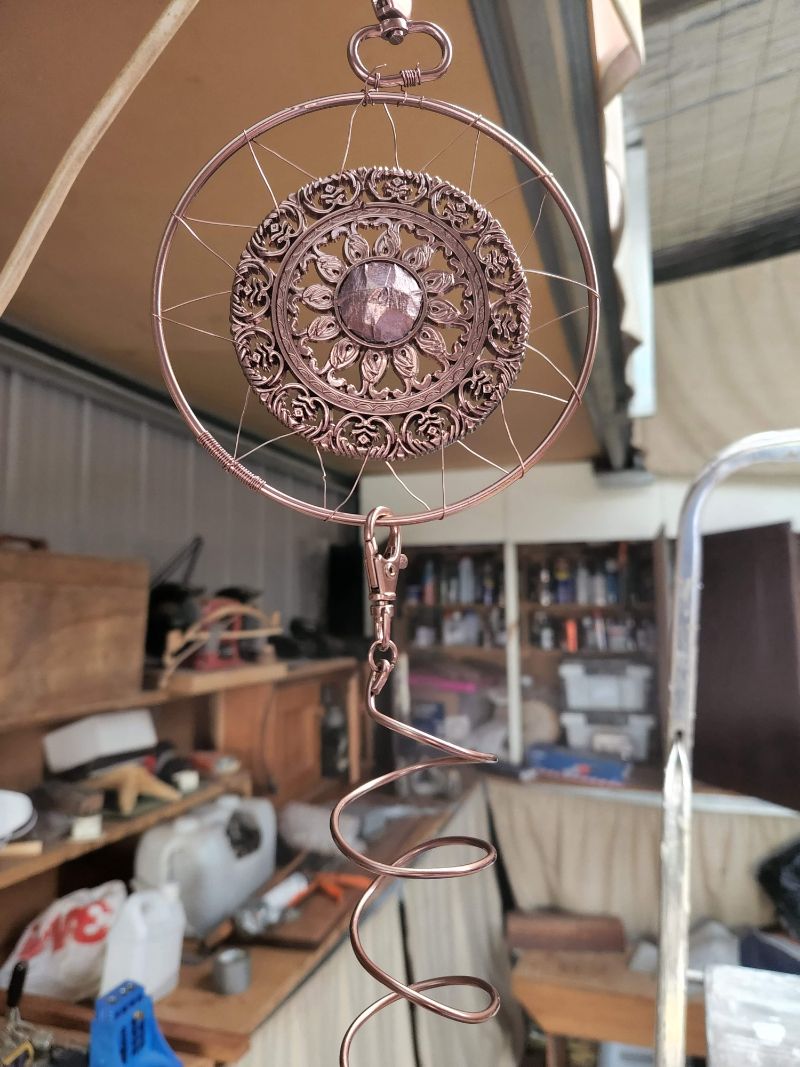
Making the Top Section
The top hoop came from a set of two wire wreath frames from Kmart’s craft section.
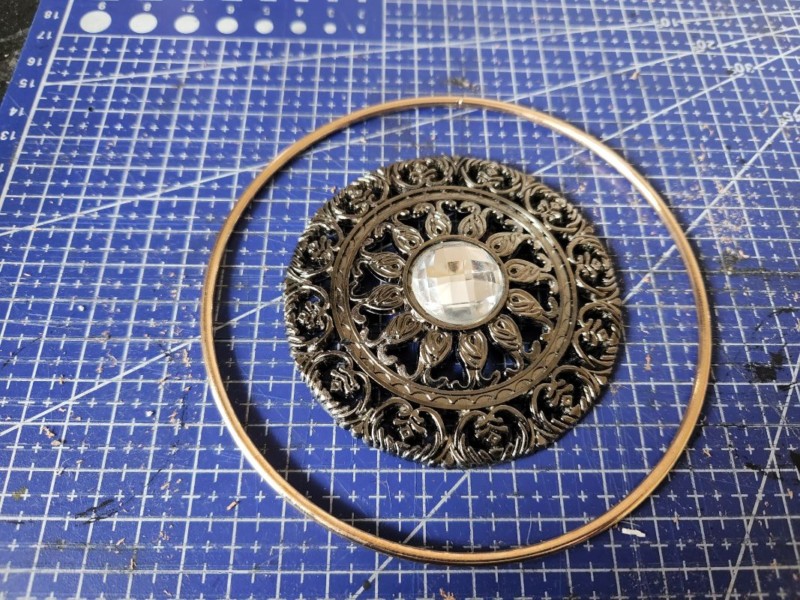
I used the smaller one and attached my decorative disc to it with copper wire, weaving the wire securely around the frame. The disc was originally an embellishment from a handbag, proving that recycled fashion items can make excellent craft components.
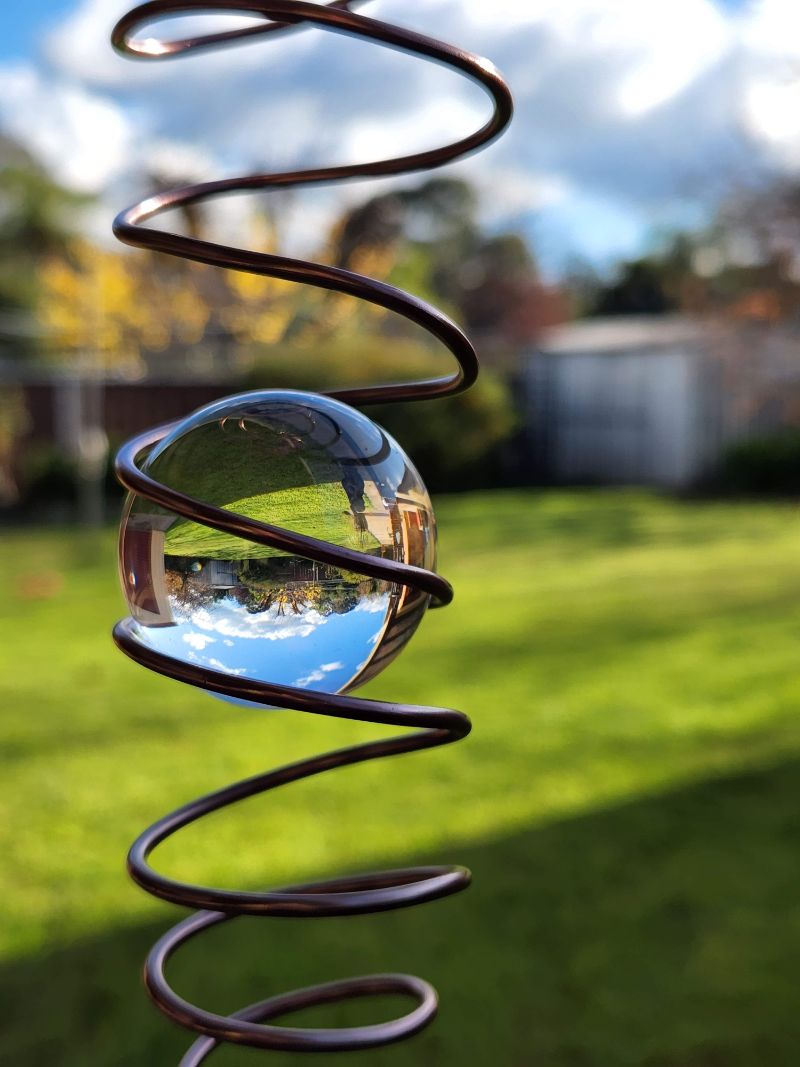
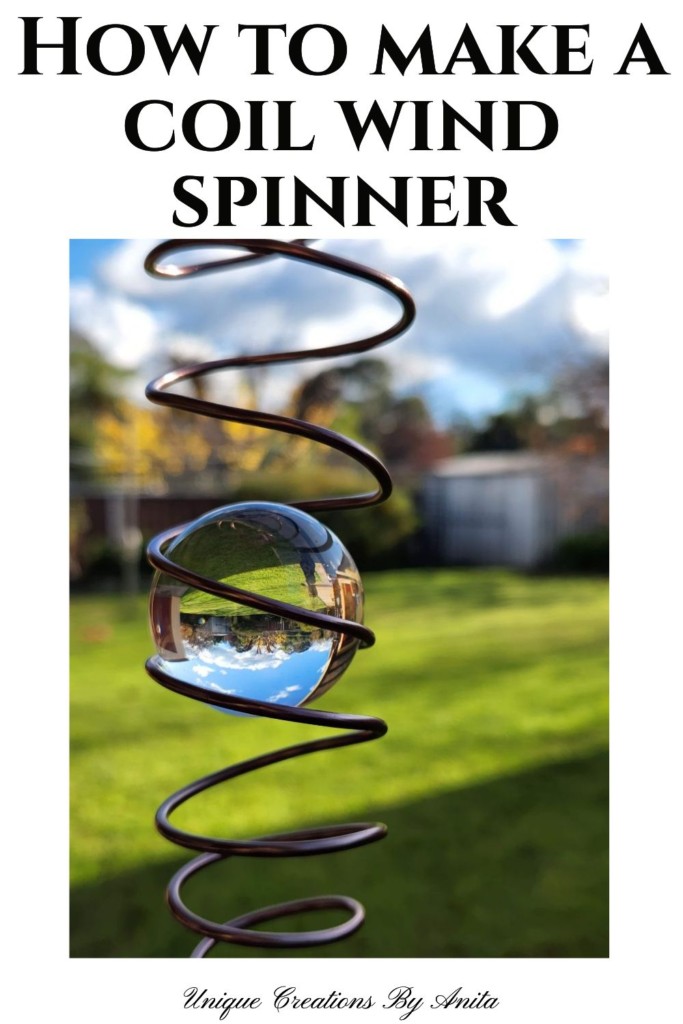
Creating the Coil
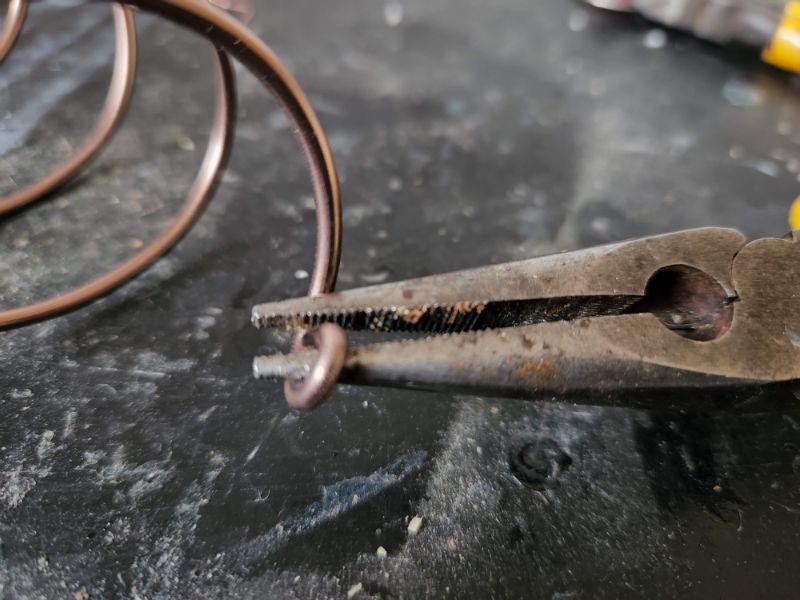
The spiral coil was made from lightweight 2.5mm aluminium jewellery wire, which bends easily and is ideal for this type of project.
I wound the wire tightly around a small table leg, pushing the coils together for a uniform shape. Both ends were finished with a small loop made using long-nose pliers.
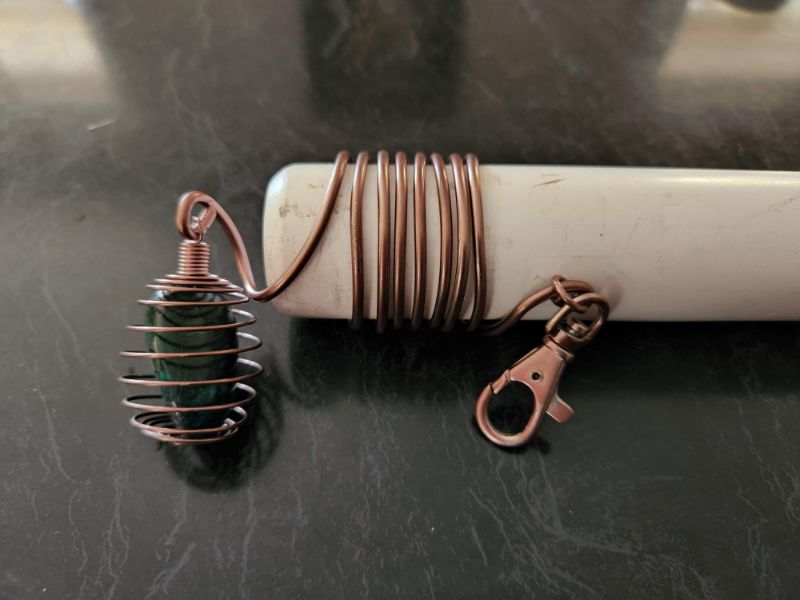
I connected the top hoop to the coil using a hook salvaged from the handbag strap, then attached a small coil basket — an upcycled necklace pendant — to the bottom. If you can’t find a cage to recycle, you can easily make one yourself using thinner wire shaped into a small basket or coil. This extra weight helped the spinner hang and turn smoothly. If your wind spinner doesn’t rotate properly, it’s usually because there isn’t enough weight at the bottom. Adding a heavier element, such as a metal charm or additional coil, will help it spin more freely in the breeze.
Painting the Wind Spinner
With the mix of different metals and finishes, the spinner looked mismatched. A quick coat of copper spray paint unified the design and gave it a warm, rustic finish. (Excuse the chaos in my workshop — a tidy-up is reserved for warmer weather!)
Adding the Glass Ball
A 40mm glass ball was placed inside the coil, where the tension of the wire holds it firmly in place. If you’re worried about it slipping out, simply compress the coils slightly to secure it.
Displaying Your Spinner
Using leftover copper wire, I attached the finished wind spinner to a tree branch in my garden.
The glass ball sparkles in the sunlight, and the copper finish complements the greenery beautifully.
More garden decor ideas
I upcycled an old futon into a plant stand for my garden

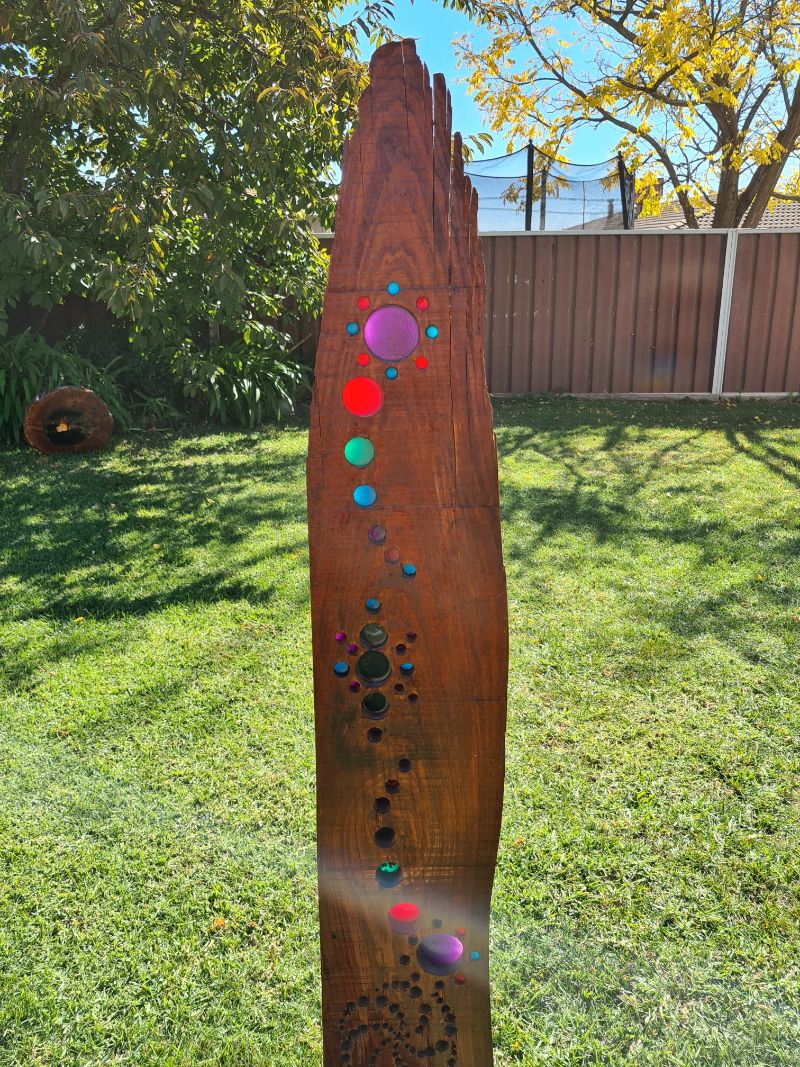
Another great idea you can use to decorate your garden is this large wooden suncatcher
More about IBC
If you follow my blog, you will know I am part of the IBC (International Bloggers Club), which is a group of talented bloggers from around the world. We have members from Spain, South Africa, Australia, the United States, and Canada. Each month, we come together and create a project with a common theme.
If you missed last month’s “Hooked on Crochet ” theme, here is the link to my “Dementia sensory mat” The “Wired ” contributions from my fellow bloggers for this month’s challenge are listed below; please feel free to jump over and give them some love.
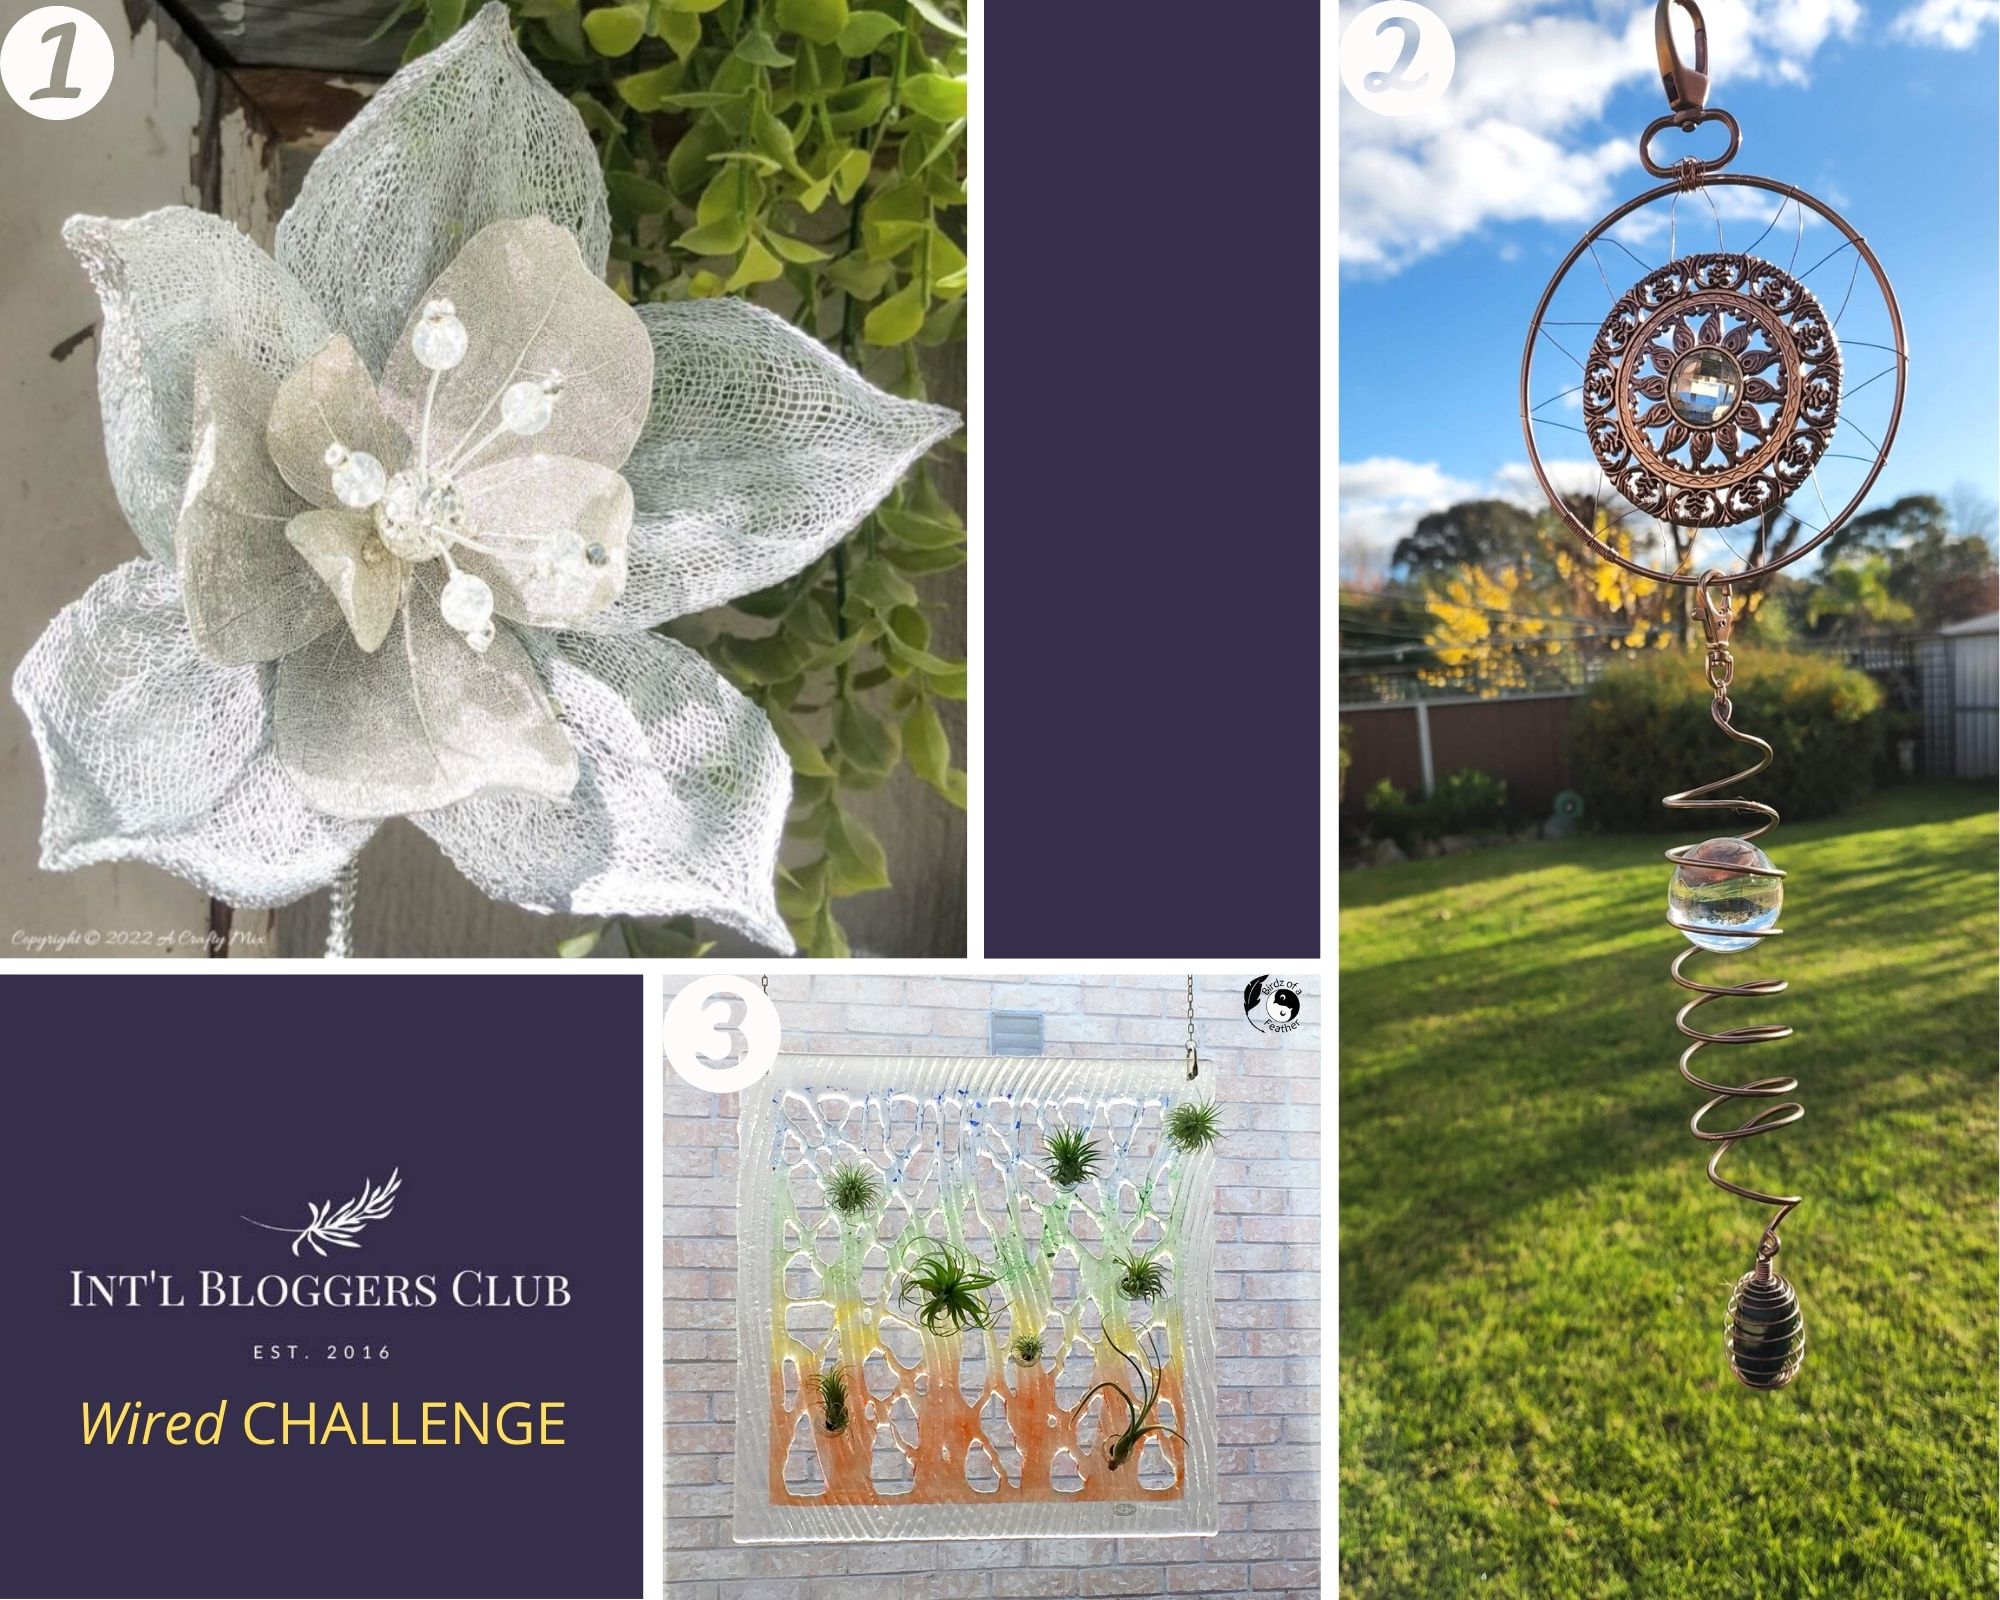
- A Crafty Mix|How to make a large wire flower
- Me
- Birdz of a feather | Unique air plant holder
If you’re interested in any of the items used in this project, we’d appreciate it if you used our affiliate links. Clicking these links earns us a small commission at no extra cost to you, helping us create more inspiring and exciting projects to share. We’d also love to hear your thoughts—feel free to leave a comment or share this post!


14 Comments
A Crafty Mix | How to Make a Large Wire Flower - A Crafty Mix
June 20, 2022 at 10:12 pm[…] shared another Unique Creation. I would love one of these wind spinners for our […]
Sara
June 20, 2022 at 10:12 pmYour wind spinner is fantastic Anita; love how you brought it all together with copper paint. What have you found is the best way to harvest the copper from electrical wire? I find it impossible to remove, but you must have a trick or two lol?
Anita Holland
June 20, 2022 at 10:33 pmThanks Sara, it looked pretty naff with all the different colours. As for stripping the wire it all depends on the wire. My husband said some are harder to peel than others. This one was very easy. I made a small cut length wise and pulled it back in one go.
Michelle Leslie
June 20, 2022 at 10:30 pmI neeeeeeeed one of these for our garden. They’re always so fascinating to watch when the wind starts and with all the jewelry wire I have hiding in my craft cupboard it should be a breeze 😉 Thanks for the lovely idea, Anita. I know what I’ll be making this weekend.
Anita Holland
June 20, 2022 at 10:36 pmThanks Michelle, this must be the quickest project I have ever made. It was hell to photograph due to the wind, but I used your trick using fishing line on a stick lol
Marie-Interior Frugalista
June 21, 2022 at 3:33 amFirst, I love that you used recycled materials to make this gorgeous wind spinner. You would pay big bucks for one like it in the shops here in Canada. You have inspired me to make a wind spinner for my backyard. I have the perfect tree to hang it from.
Maria
June 21, 2022 at 4:15 amI was reading the other two posts ahead of you and just realized you all are doing wire. Just dawned on me you guys are all part of the same challenge. This spinner is just beautiful perfect for garden art
Ann
June 28, 2022 at 3:53 amYour wind spinner is beautiful, Anita. My Dad was a telephone repairman/installer back in the day and he used to bring home spare wire. I wish I still had it now!
Anita Holland
June 28, 2022 at 11:52 pmThanks so much Ann.
10 DIY Wind Spinner Ideas For Hanging Decorations - DIYnCrafty
June 20, 2023 at 3:16 pm[…] uniquecreationsbyanita […]
Lucy Turcotte
November 13, 2023 at 11:38 amWhere do you find the glass balls?
Anita Holland
November 17, 2023 at 4:35 amI bought them from aliexpress in China.
Claudia
June 15, 2025 at 5:23 amHi, Anita! My spinner doesn’t spin…Why??
Anita Holland
June 17, 2025 at 12:34 pmHave you got the correct attachment that allows it to spin. Look closely at the attached on the bottom it turns inside the clip.