
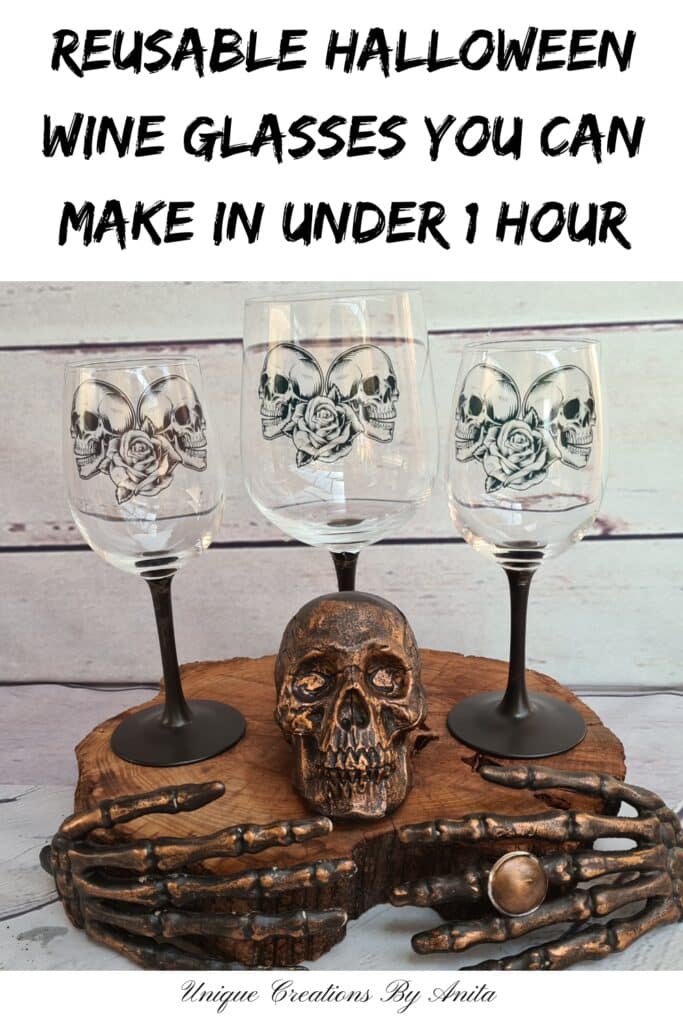
With Halloween creeping up, it’s time to start crafting fun and easy decorations. This tutorial shows how to decorate wine glasses for Halloween using removable graphics. This quick method is perfect if you want stylish table décor without permanently altering your glassware. The best part? After the spooky season, you can simply soak off the designs and reuse your glasses for any occasion.
You can even change them up for Christmas—just imagine cute Santas or snowmen! If you’re looking for a more permanent option, I’ll also explain how to seal your graphics.

Before we dive into this tutorial, be sure to subscribe to my bimonthly newsletter to be the first to see my latest projects. You can also follow me on Pinterest and Facebook, where I also include my unique mixed-media art projects.
How to Decorate Wine Glasses for Halloween with Temporary Graphics
**This post may contain affiliate links. This means I earn a small commission on links used at no extra cost to you. Please see my disclosure policy for more information.**
Materials Needed
- Clear wine glasses (340ml+ works best)
- Waterslide decal paper (for inkjet printers)
- Inkjet printer
- Acrylic spray sealer
- Bowl or sink with water
- Soft cloth or paper towel
- Black gesso (optional)
- Optional: Dishwasher-safe Mod Podge or permanent glitter paint
Step 1: Choose and Print Your Halloween Graphics
Start by finding high-resolution Halloween images. Search for free-for-commercial-use graphics if you plan to sell. Use a standard inkjet printer to print them onto waterslide decal paper. Let the ink dry completely before sealing.

Spray a light coat of acrylic sealer over the printed sheet. Let it dry, then add another two coats, drying between each layer. This seals the ink and prevents smudging when soaked in water.

Step 2: Cut Out and Soak the Designs
Cut out each graphic as close to the edge as possible for a clean finish.

Fill a bowl or your sink with water. Place the cut image into the water. It will curl—don’t worry! Hold it under for about 30 seconds. You’ll know it’s ready when the backing paper slides easily.

Step 3: Apply the Graphic to the Glass
Wet the area of the glass where you’ll apply the graphic. This helps you slide the image around on the surface for positioning.

Carefully slide the design off the backing paper onto the wet surface of the glass. Adjust as needed, then smooth it out with a soft cloth, pushing from the centre out to remove air bubbles and water.

Let it dry thoroughly.

Step 4: Paint the Stems (Optional)
For extra impact, paint the stems black. I used black gesso for a temporary finish. If you want them to be permanent, use black glitter paint sealed with dishwasher-safe Mod Podge.

Step 6: Remove Graphics After Halloween
Want to reuse the glasses? Just soak them in hot water for a few hours. Use your fingernails or a scraper to gently remove the decals. They should come off easily.
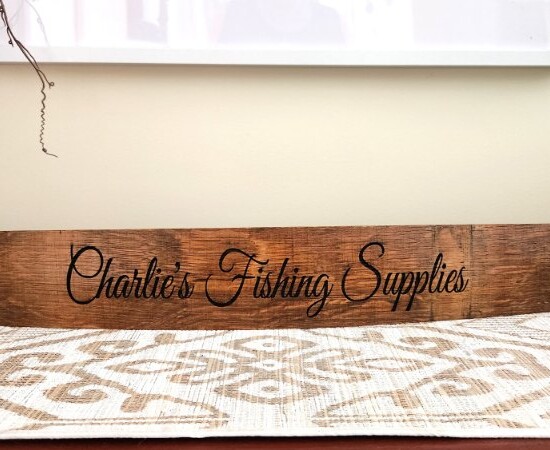
For a permanent finish, skip the soaking step and seal your glasses with dishwasher-safe Mod Podge. Another option is to add the glitter stems like I did for these glitter stem wine glasses below.
")
You can also recycle an empty bottle into spooky Halloween skull decor using easy mixed-media techniques to go with the glasses.


If you’d like to find any of the items used in this project, we’d greatly appreciate it if you used our affiliate links. These links provide us with a small commission at no extra cost to you, allowing us to continue creating and sharing more inspiring projects. We’d also love to hear your thoughts—feel free to leave a comment or share this post!


Marie-Interior Frugalista
August 7, 2020 at 10:40 pmI need some of that waterslide paper in my life! Your skull glasses for Halloween are too stink’n cute. The possibilities are endless for creating cute seasonal glasses and gifts with that paper. Pinned 🙂
Anita Holland
August 8, 2020 at 9:09 amWho wouldn’t Marie, so much you can do with it.
Anita Holland
August 8, 2020 at 9:08 amThank you so much, That is very nice of you to say xx
Cie
August 10, 2020 at 1:11 pmThis does look like a fun idea! I bought a glass etching set last year that I haven’t had a chance to use yet. I was thinking of doing something similar to this but where the designs would be permanent. I enjoyed this post.
Anita Holland
August 10, 2020 at 5:36 pmThank you so much. I have done the etching in the past and it has always worked really well using the cream and a stencil. This is more a temporary application for an occassion.
Karen, the next best thing to mummy
August 10, 2020 at 6:30 pmLove this idea #anythinggoes@_karendennis
Anita Holland
August 12, 2020 at 12:29 pmThank you so much.
Michelle Leslie
August 10, 2020 at 8:47 pmNow that’s going to be one fun Halloween party. Love the idea of using the decals to make glasses for different occasions without ending up with a whole cupboard full of different glass. Thanks for that Anita. You always come up with such clever ideas
Anita Holland
August 12, 2020 at 12:30 pmThank you Michelle, It is a better idea because you can have new glasses each time.
Sara
August 10, 2020 at 10:28 pmAre you and Michelle drinking together – lol! Great project; love that it’s removable!
Anita Holland
August 12, 2020 at 12:31 pmWe must be Sara, But I think I am the better drinker because Michelle keeps breaking her glasses. lol
Lori Nell
August 10, 2020 at 10:59 pmLove those Halloween wine glasses! Great that you can remove them and add something for each season!!
Anita Holland
August 12, 2020 at 12:33 pmThank you Lori, This way we can have new ones each time.
Meegan L Fast
August 10, 2020 at 11:12 pmGreat ideas with such a easy process! I didn’t know this was so easy and fun.
Thanks for sharing your tips and tricks.
Have a great week!
Anita Holland
August 12, 2020 at 12:34 pmThank you, Meegan, I love waterslide paper the possibilities are endless.
Allyson
August 11, 2020 at 12:11 amYour glasses look real good! Great idea making the designs temporary, but good to know you can add dishwasher safe mod podge to make them permanent. I wasn’t familiar with waterslide paper so I popped over to check it out. Thanks for introducing me to the product.
Anita Holland
August 12, 2020 at 12:34 pmYou are very welcome Allyson, it is great stuff to play around with.
Deana Landers
August 11, 2020 at 2:31 amI’ve always wanted to stenc wine glasses. Yours are wonderful. Thank you for this, Anita
Anita Holland
August 12, 2020 at 12:39 pmThank you so much, Deana.
Julie Briones
August 11, 2020 at 2:43 pmHalloween already? These are quite inspiring and you could make them with style transfer!
Anita Holland
August 12, 2020 at 12:41 pmThank you Julie, Not quite Halloween yet, this just became Halloween because I like the graphic. lol
Laura Kelly Walters
August 11, 2020 at 3:33 pmWow! So cool!
Anita Holland
August 12, 2020 at 12:42 pmThank you xx
sam
August 12, 2020 at 12:17 amwow, this is really cool and lovely idea to personlise items or even give them as gifts X #anythinggoes
Anita Holland
August 12, 2020 at 12:47 pmThank you so much, I think they would make cool gifts.
Anita Holland
August 12, 2020 at 12:39 pmThank you Marilyn.
Anita Holland
August 12, 2020 at 12:40 pmThank you so much Michelle, I have been doing a few this year. I really love Halloween.
Susan M.
August 12, 2020 at 11:44 pmI’ve been looking for a personalized giveaway that isn’t too expensive! This is a great idea – thanks!
Anita Holland
August 13, 2020 at 11:51 amThank you so much.
Beth Watson
August 13, 2020 at 12:19 amHow fun! Halloween is coming so soon! So excited!
Anita Holland
August 13, 2020 at 11:52 amThank you.
Carol
August 13, 2020 at 11:43 pmOMG! These are so stunning! I am in the Halloween spirit so these definitely caught my eye and I’m featuring them when this week’s BFF Open House opens tonight! Thanks for sharing!!
Anita Holland
August 14, 2020 at 6:34 amThank you so much Carol for the lovely comment and the feature.
Meg Daves
August 14, 2020 at 2:08 amI love that this technique can be used to make personalized glasses for any occasion!
Ann Butler
August 14, 2020 at 2:10 amThe glitter stems are my favorite!
Anita Holland
August 14, 2020 at 6:33 amI liked them too, I am still using those ones a year later.
Liz
August 14, 2020 at 3:13 pmWow, this is a great tip and tutorial!! Thank you very much. Definitely going to use this for Halloween!!
Anita Holland
August 14, 2020 at 5:05 pmThank you so much, they were really fun to make.
Clearissa Coward
August 15, 2020 at 2:39 amYour glasses are amaing. What a fun craft idea. I had never heard of water paper but you can bet it is in my vocabulary to stay. Thanks for sharing at #omhgww. Your article has been tweeted and pinned.
Anita Holland
August 18, 2020 at 8:00 amThank you so much for the great comment and all the shares. I am glad I have introduced you to a new product you will have lots of fun with it.
Marty Walden
August 17, 2020 at 6:46 amThat’s such a great idea and I think of tons of things I’d like to try with your technique. Thanks for sharing!
Anita Holland
August 18, 2020 at 8:01 amThank you so much, Marty.
Leanna
August 31, 2020 at 9:22 amHalloween must be a blast at your house. I laughed when I saw the glass that said Get ready to stumble. Priceless fun. That transfer paper looks amazing. Pinning.
Anita Holland
September 1, 2020 at 12:31 amThanks, That was a gift to my sister when we went to Thailand for a girly holiday.
Carol
September 7, 2020 at 9:53 pmThese glasses would be great for a Halloween party! #MMBC
Anita Holland
September 8, 2020 at 11:36 amThank you so much, the idea is very versatile. You can have new ones for every holiday.