
If you’re wondering how to build a target shooting game that’s simple, fun, and engaging for seniors, this DIY project is perfect. As an aged care nurse, I often step in as the activities officer when our regular coordinator is on holiday. During one of those times, I decided to create a homemade target shooting game for the residents in our aged care home. It turned out to be a big hit!
In the past, I brought in Nerf guns and paper targets, and the residents absolutely loved the concept. However, one major challenge was that many found it difficult to load and operate the Nerf guns, especially those with limited hand strength or arthritis.
This time around, while thinking about how to build a target shooting game that’s more accessible, I came up with a creative and user-friendly alternative. Instead of using toy guns, I designed a system that allows residents to launch soft balls easily without requiring much strength or coordination.

Before we dive into this tutorial, be sure to subscribe to my bimonthly newsletter to be the first to see my latest projects. You can also follow me on Pinterest and Facebook, where I also include my unique mixed-media art projects.
How to build a target shooting game
**This post may contain affiliate links. This means I earn a small commission on links used at no extra cost to you. Please see my disclosure policy for more information.**
Materials Needed:
- Ping-pong balls (lightweight and safe)
- Foam recycled mattress
- Plastic cups
- Balloons (for launching power)
- Wood or foam boards (for the targets)
- Paint and markers (for decorating the targets)
- Spray adhesive
- Felt
- Felt numbers
- Sewing machine

Make the target base
To create the base for my target shooting game, I repurposed an old MDF tabletop — a great way to keep costs down and reduce waste. I picked up the felt and Velcro tape from a local budget store, along with a pack of cheap ping pong balls, which work perfectly for this activity.
This was actually my second attempt at building the game. My first try didn’t go so well — I quickly discovered that not all felt are created equal. The Velcro tape wouldn’t stick properly to the first type I bought, which made the whole setup unreliable. On my second go, I took the Velcro into the store with me and tested it on different felt options before purchasing. That small step made all the difference — the new felt held the Velcro securely, and the game worked exactly as I hoped.

Since I couldn’t find large pieces of felt, I purchased A4-sized sheets from the budget store and stitched them together using a zig-zag stitch on my sewing machine. During my first attempt, I simply glued the felt directly onto the base. While this worked temporarily, I found that each time the Velcro balls were pulled off, the felt began to lift. It functions, but it’s definitely not durable.

Creating the Backing
To hold the foam in place, I used an offcut from an old black sheet. It’s important not to pull the fabric too tightly, as it can create resistance and make it harder for the balls to stick to the target. I stapled the sheet securely to the back of the board to keep everything in place.

Making the Rings for the Target
To make the rings, I used a large compass and first created templates from kraft paper. I folded both the paper and the felt before cutting, using the same cardboard template for each circle and trimming it smaller for every layer. Make sure to keep the offcuts—they come in handy later on.

Glueing the Rings onto the Target
Once the circles were cut, I centred the first ring on the board and used pins to mark where the spray adhesive should go. When using spray adhesive, less is definitely more. I applied a light coat to both surfaces and allowed them to become tacky before sticking them together.

Those Kraft paper off-cuts came in handy again here. I used them to shield the area around each ring and prevent overspray. The pins held the ring in place while I worked, and I made sure to spray all the edges well to avoid lifting.

Despite using spray adhesive, if I were to make another target shooting game, I would opt to sew the rings on instead. It’s easy to use too much glue, which makes the felt go stiff. This happened in a few spots on my board, and while it still works, sewing would’ve provided a better result.

I repeated this process until all the circles were applied.

This step was repeated until all the circles were applied.
Adding the Scoring Numbers
To add numbers to the target, I used pre-cut felt numbers from the craft store and glued them on. In my first version, I tried foam numbers left over from another project, but the balls just bounced off them, so I definitely recommend using felt instead.

For a more polished finish (and because this was for work), I added tacks around the edge of the target. It made the whole thing look a bit more professional.

To hang the target, I used thick fishing line folded several times for strength, and stapled it securely to the back of the board using a staple gun.
Sealing the Back
To tidy up the back, I cut a circle from kraft paper and stapled it over the back of the board. I cut a small slot where the fishing line was stapled so it could still be pulled through for hanging.


How to Make a Target Shooting Gun
To make my DIY launcher, I used a hard plastic cup I had in the cupboard and removed the base. You’ll want to avoid soft plastic cups, as they lose their shape quickly. I used my benchtop sander to grind off the bottom—this was the quickest and cleanest method I found. Afterwards, I smoothed any rough edges by hand. It’s essential to have a smooth edge so the balloon doesn’t tear when fitted.

For the launcher mechanism, I tied a knot at the end of a balloon and cut off the top. Then, I stretched the balloon tightly over the base of the cup. To fire a ball, simply load it into the cup, pull back the balloon, and release. The knot strikes the ball and sends it flying toward the target.

Making the Velcro Balls
To create the sticky balls, I used Velcro tape cut into narrow strips. I wrapped a full strip around each ping pong ball, then used smaller pieces to fill in the gaps. The Velcro I used wasn’t a premium brand—just something inexpensive from the budget store—and it worked perfectly.

I made six balls for my game, but you can make as many as you like. Just make sure the Velcro doesn’t overlap the edges of the ball, or it will start to lift. I had to go back and trim mine to fix this.

Fluffing the Felt
As I mentioned earlier, using too much spray adhesive can flatten the felt fibres, making it difficult for the balls to stick. Unfortunately, I realised this after the project was finished and didn’t want to start over. To fix the issue, I wrapped Velcro around my hand and gently rubbed it over the target to fluff the fibres back up. It made the board look a bit fuzzy, but with use, it will wear in naturally.

How to Play the Game
Each resident gets six turns to hit the target. The aim is to score as many points as possible by hitting the rings with the highest value. It’s a simple yet engaging game that’s fun, inclusive, and easy for everyone to enjoy, even those with limited mobility or strength.
")
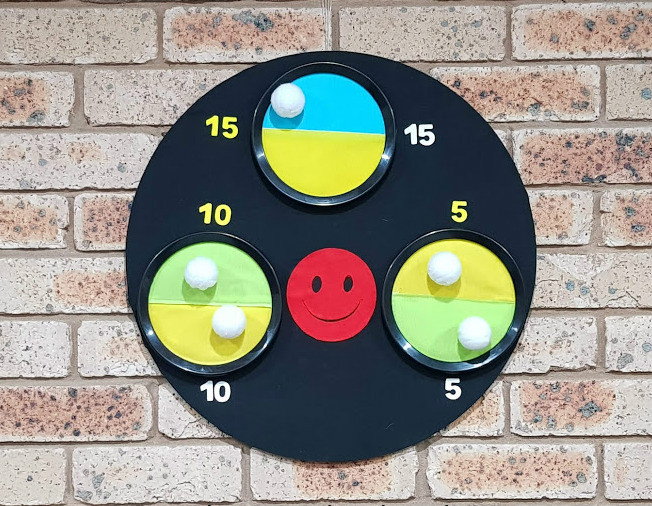
This was another version I made using a bought catch and throw game and handmade velcro balls, played in the same way as the game above.
More DIY Games

Another version of the target shooting game

If you’d like to find any of the items used in this project, we’d greatly appreciate it if you used our affiliate links. These links provide us with a small commission at no extra cost to you, allowing us to continue creating and sharing more inspiring projects. We’d also love to hear your thoughts—feel free to leave a comment or share this post!


1 Comment
Anita Holland
December 12, 2019 at 8:17 pmThank you for the shout out on my project.