I’m always on the hunt for free furniture to upcycle, and this old study desk was perfect for a DIY LEGO desk and activity table with storage. My plan was simple: cut the desk to toddler height, reinforce the frame, turn the drawer fronts into LEGO-style bricks, and keep the top flexible so it works for building, drawing, and crafting.

Before we dive into this tutorial, be sure to subscribe to my bimonthly newsletter to be the first to see my latest projects. You can also follow me on Pinterest and Facebook, where I also include my unique mixed-media art projects
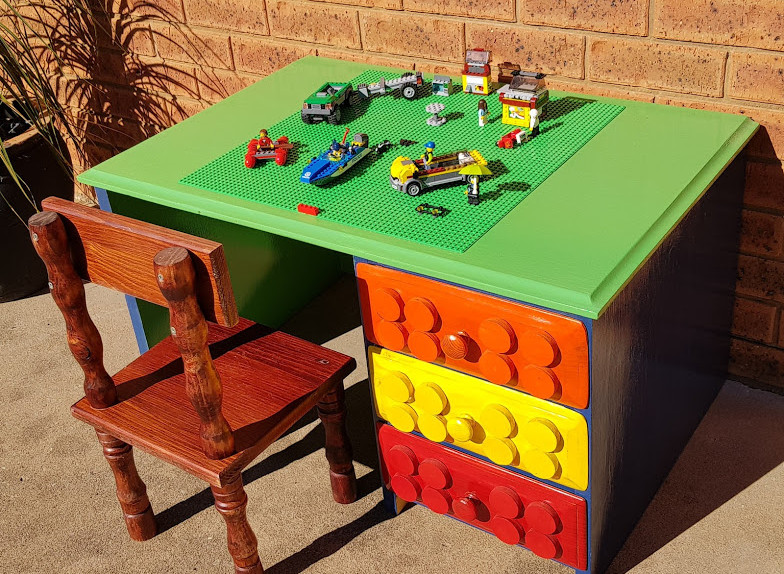
Old Study Desk Repurposed into a Lego/Activity Table with storage
**This post may contain affiliate links. This means I earn a small commission on links used at no extra cost to you. Please see my disclosure policy for more information.**
Materials and tools you’ll need
- Old study desk (with drawers)
- Heat gun (for sticker removal) and plastic scraper
- Measuring tape, ruler and pencil
- Jigsaw or circular saw; square for straight cuts
- Safety gear: mask, ear protection, eye protection, gloves
- Orbital sander, sanding discs (80/120/180 grit) and sanding block
- Wood filler, putty knife, and clamps
- PVA wood glue and epoxy (for discs)
- Hole saw set and scrap timber (for LEGO “studs”)
- Angle grinder with sanding disc (to flatten fancy drawer profiles)
- Unicorn SPiT Gel Stain & Glaze (for discs and drawers) or any timber-safe paint
- Annie Sloan chalk paint in blue and green (desk) or similar
- Oil-based clear varnish (discs/drawers) and water-based polyurethane (desk)
- Foam brushes, small roller, clean rags
- Felt pads for the desk feet
- LEGO baseplates (loose), non-slip mat or low-profile hook-and-loop dots (optional)
Why this style of desk works
This style lowers easily without losing storage. You get roomy drawers for sorting bricks, plus a generous top for building or craft. I sized this one for a three-year-old, so it’s comfortable now and for a few years to come. Here is a similar one I upcycled into a sandpit table. I hardly ever buy second-hand furniture—instead, I hunt it down for free. Here’s where I find it.

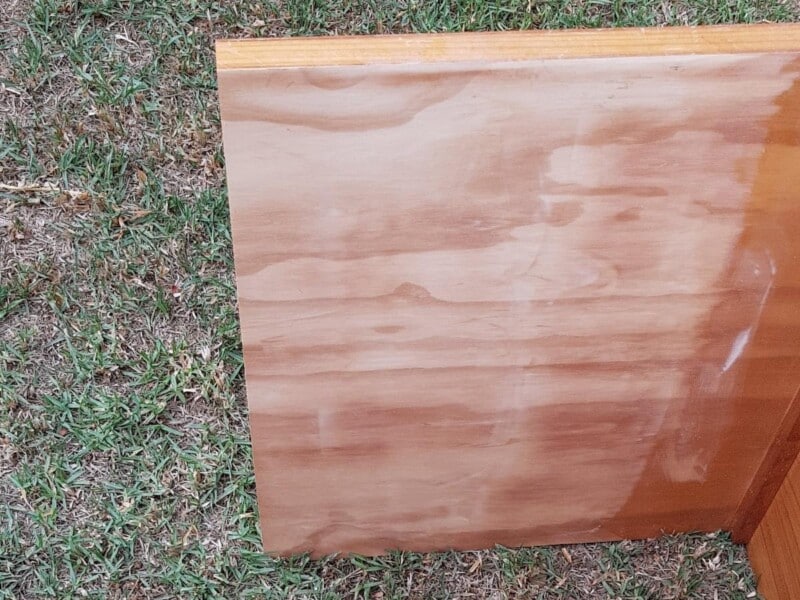
Remove the stickers
The desk was covered in stickers. Peeling made a mess, so I used a heat gun. Warm each sticker and lift it with a plastic scraper. The glue softens and releases cleanly. Wipe any residue with mineral turps, then a damp cloth.

Cut the desk to toddler height
I built this for a three-year-old. A 50 cm overall desk height worked well. Mark a level cut line with a ruler and square. Check for nails or screws in the cut path. Cut, then check the stance so all legs sit flat.

Sizing tip:
For toddlers, aim for a 45–55 cm desk height. For early primary, 55–65 cm works. Match the chair so elbows sit just above the top when seated.

Reinforce the sides and back
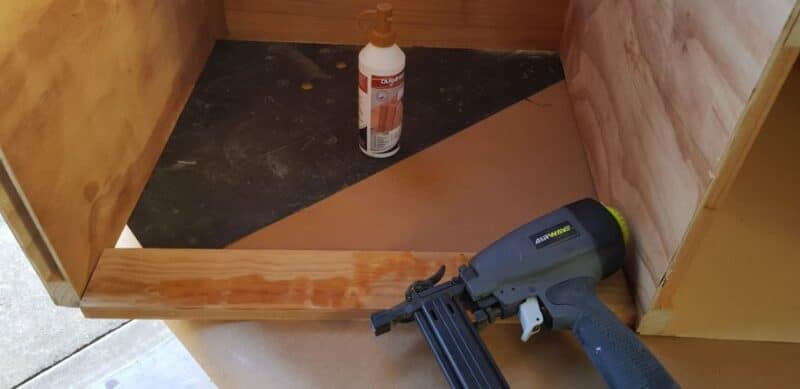
After cutting, I discovered the side panels were hollow. I salvaged timber from the off-cuts, slid it into the cavities, and glued it in to restore strength.
Replace or refit the back support rail so the desk is stable again. Clamp the wood while the glue cures. Add felt pads to protect floors. You can see the hollow panels in this image that need to be reinforced with the piece you cut off.
Sand and repair
Sand the whole desk with an orbital sander: 80 grit to level, 120 to smooth, 180 to finish. Fill dents and holes with wood filler and let it dry.
Neat trick for shallow dents: place a damp cloth on the dent and run a hot iron over it. The steam swells the fibres and lifts the dent. Sand lightly after.

Flatten fancy drawer fronts
My drawer fronts had decorative ridges that clashed with the LEGO look. I used a grinder with a sanding disc to flatten them, then refined them with the orbital sander. Wipe off the dust before finishing

Make the LEGO “studs”
Use a hole saw and scrap timber to cut discs. Cut as many as you need to cover each drawer in a classic LEGO pattern.
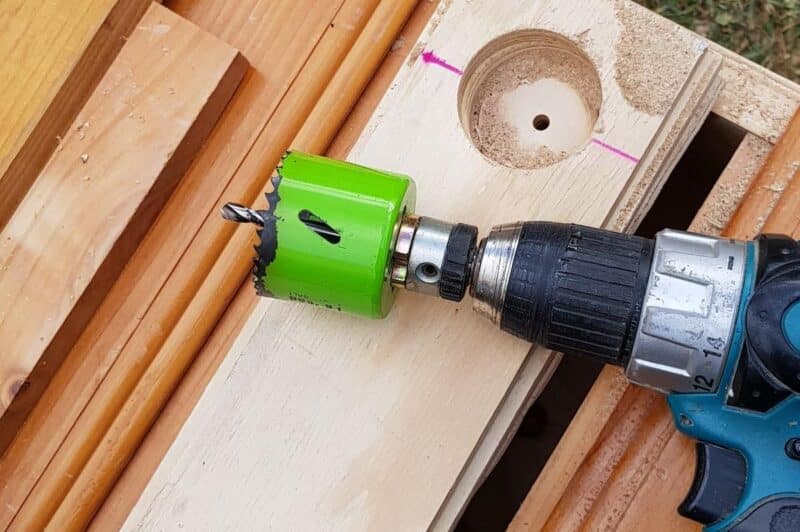
Hole saws leave a tiny centre mark; fill it with wood filler. When dry, rub each disc on a sanding block to level the filler and soften the edges.

Paint and seal
I painted the discs and drawers with Unicorn SPiT Gel Stain & Glaze because that’s what I had on hand, and it gives rich colour. Two coats did the job. I sealed with an oil-based clear varnish for durability.

The desk base got Annie Sloan blue and green chalk paint, then two coats of water-based polyurethane. I added three extra coats on the top to handle crayons, pencils, and the odd knock.

Build the drawers
Position the discs and fix them with epoxy so they stay put. Press each disc firmly and wipe away the squeeze-out. Let the epoxy cure fully.

Slide the drawers back in and admire the LEGO look. If any stick, rub a little beeswax on the runners and the drawer sides to help them glide smoothly.

plates (loose, not glued)
My first plan was to glue baseplates to the top. I changed my mind, so the desk could switch between LEGO play and craft. Loose baseplates are stored in the drawers and come out when needed. If you want a light grip without commitment, sit them on a thin non-slip mat, or use a few low-profile hook-and-loop dots that you can remove later.

Finished Lego desk- close-up view


More toddler furniture ideas
After more toddler-friendly builds? Don’t miss these projects. I upcycled an old table into a craft-and-activity station with built-in storage.

Or this really cute zebra bench.


If you’re interested in any of the items used in this project, we’d appreciate it if you used our affiliate links. Clicking these links earns us a small commission at no extra cost to you, helping us create more inspiring and exciting projects to share. We’d also love to hear your thoughts—feel free to leave a comment or share this post!

3 Comments
Marie
July 11, 2019 at 2:42 pmVisiting from the Home & Garden Thursday party and had to pop over to take a closer look. What a great idea! Love what you did on the drawer fronts. My grandson would love something like this! Pinned 🙂
Anita Holland
July 12, 2019 at 3:32 amThank you so much, my husband wishes I would learn to cook instead of building in my shed.
Michelle Leslie
March 30, 2021 at 9:29 pmWhat an abSoooooooLutely brilliant idea Anita. I just love the way you’ve done those drawers. So clever using a hole saw to make the lego blobs ( not sure that’s the right word 😀 )