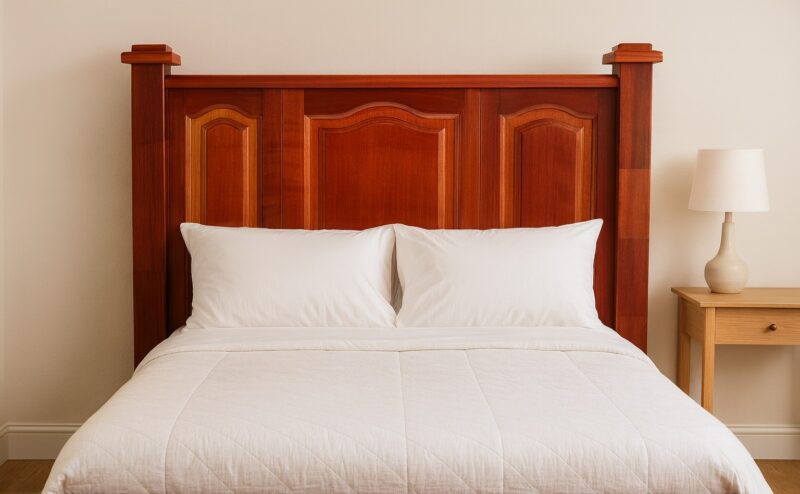
I turned a pile of old kitchen cupboard doors into a modern, stain-finished timber headboard—an upcycled build that looks custom. My sister wanted a headboard for her granddaughter’s room at her place, but she didn’t want it painted. She needed a piece she could dress with playful kids’ bedding, yet still feel right for adult guests.

Reclaimed doors kept costs low and gave me solid timber to work with. Chunky posts frame the panel for a sturdy, classic look. A hidden rear brace adds strength for easy moving. I chose a warm cedar stain with satin polyurethane, which highlights the grain and hides everyday scuffs. The subtle two-tone detail in the routed profiles adds depth without locking you into one colour scheme. Style it sweet and fun for sleepovers, then switch to crisp linens for a calm, grown-up guest room.
")
Before we dive into this tutorial, be sure to subscribe to my bimonthly newsletter to be the first to see my latest projects. You can also follow me on Pinterest and Facebook, where I also include my unique mixed-media art projects
DIY Headboard from Recycled Kitchen Cupboard Doors
**This post may contain affiliate links. This means I earn a small commission on links used at no extra cost to you. Please see my disclosure policy for more information.**
Materials
- Recycled kitchen cupboard doors (mine were 20 mm thick)
- Two timber posts for the sides (approx. 90 mm × 90 mm; length to suit your bed height)
- Two rails for top and bottom slots (I used 110 cm to suit a single bed frame at 107 cm)
- 100–180 grit sanding discs for a random-orbit sander
- Degreaser (sugar soap or bleach spray), sponge scourer, clean rags
- Wood glue
- Nail Gun with battery or compressor
- Wood router
- 75–100 mm wood screws (for the rear support beam)
- Cedar wood stain (or favourite timber stain)
- Oil-based satin polyurethane (at least two coats)
- Recycled hardwood fence post (approx. 100 mm wide) for rear support beam
- Wood filler (optional), furniture pads (optional)
Tools: Tape measure, combination square, clamps, table saw (or circular saw with guide), router with straight bit and round-over bit, hammer and chisel, nail gun, drill/driver, countersink bit, PPE (mask, eye and ear protection).
Plan your size and layout
Measure the bed base and mattress width. Mine needed to clear a 107 cm wide single bed. I allowed an 8 cm reveal above the doors to visually “cap” the panel and give room for bedding. Decide on your headboard height so that pillows sit below the panels.
Clean up the cupboard doors
I removed every hinge, handle and catch and saved the hardware for other projects. Years of kitchen life left a greasy film, so I sprayed the surfaces with sugar soap (bleach spray also works), let it sit, and scrubbed with a sponge scourer. After a wipe-down and full dry, I sanded with 100 grit, then 180 grit for a smooth finish.

The grooves were fiddly to sand by hand, so I leaned into a two-tone look—sanding the flats clean and leaving a touch of depth in the profiles for contrast.

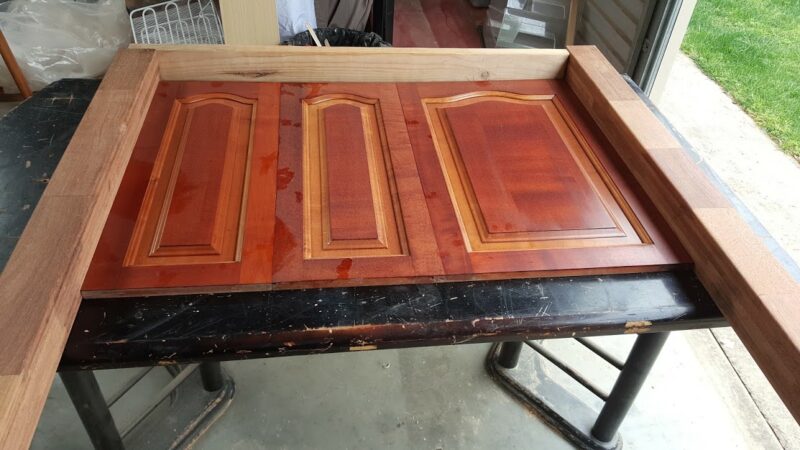
Make the posts and grooves
The side posts are chunky—90 mm × 90 mm—and heavy, which gives the headboard a solid, classic feel. I measured the length of the doors and added 8 cm to leave that top reveal.

Because my doors are 20 mm thick, I cut a 20 mm-wide, 20 mm-deep groove centred along the inside of each post.

I used the table saw for multiple passes, then cleaned the groove with a chisel for a snug fit.

Cut the top and bottom rails
To hold the doors in place, I cut two rails at 110 cm (to suit the 107 cm bed width). I repeated the groove process—20 mm wide by 20 mm deep—so the doors could slot into both rails. A square fit here keeps the whole panel neat, so take a moment to check everything is straight.
Stain the doors
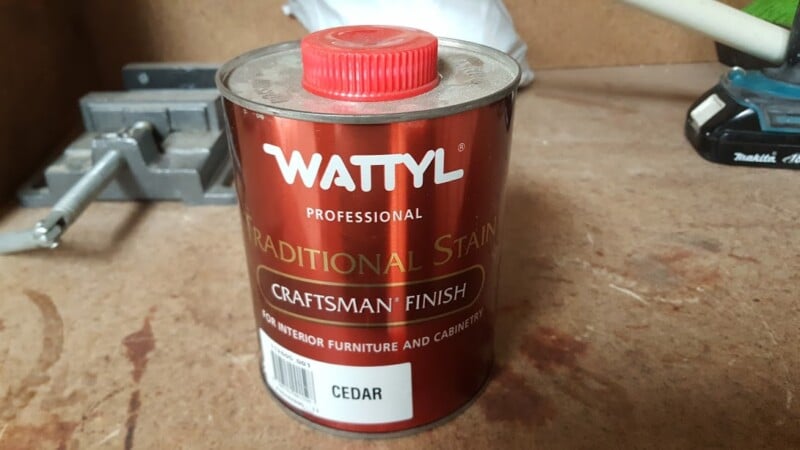
Staining the doors before assembly is faster and cleaner. I brushed on cedar stain, wiped back the excess, and let the colour settle. It looked a bit flat at first, but the stain always warms up once the clear coat goes on—don’t panic if yours does the same.

Assemble the headboard panel
With all grooves cut, I dry-fitted the doors into the posts and rails. When I was happy, I glued every slot, seated the doors, and fixed them from the back with a nail gun for extra strength. Work on a flat surface and clamp as you go to keep the panel straight. I got so involved that I did not take a picture of the top and bottom beams.

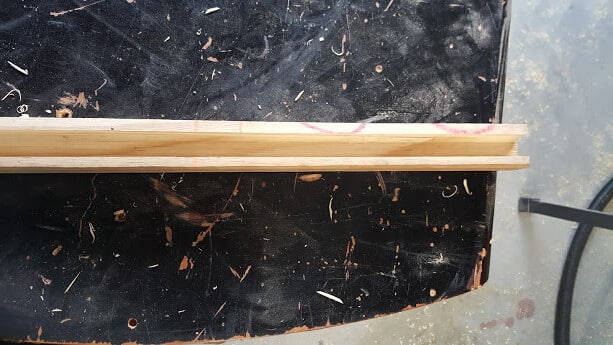
Add a rear support beam
Those posts are hefty, so I added a hidden brace across the back to stop any racking during moves. I used a 100 mm-wide recycled hardwood fence post as the beam. It was 20 mm thick, so I routed a 20 mm recess into each post to house the beam.

Clamping both posts together and running a straight fence made this step quick. I pre-drilled and drove long wood screws through the posts into the beam. It’s on the back, so the timber colour mismatch doesn’t matter.

Dress the posts with caps
The tops looked a bit plain, so I made simple stacked caps: two 140 mm × 140 mm squares and two 90 mm × 90 mm squares. I rounded over the edges with a router for a softer look. I glued the first square and fixed it with two countersunk screws so the next square sits flush. The smaller top squares were glued and pinned with the nail gun.

Final sanding, stain and clear coat
I sanded the new caps and any bare timber, then stained to match the doors. For protection, I rolled on two coats of oil-based satin polyurethane, brushing the grooves and edges. A light de-nib between coats with 320 grit keeps the finish smooth and helps the cedar colour pop.

More great DIY headboards
Add charm with bold, modern geometry, which you can customise with this barn quilt headboard.

Give any wooden headboard a geometric makeover using this simple technique.


If you’re interested in any of the items used in this project, we’d appreciate it if you used our affiliate links. Clicking these links earns us a small commission at no extra cost to you, helping us create more inspiring and exciting projects to share. We’d also love to hear your thoughts—feel free to leave a comment or share this post!


61 Comments
Michelle
November 2, 2016 at 3:35 pmThat’s gorgeous Anita!! I’m with you on not sanding that inside groove, that’s the worst thing trying to get into all the little corners. It looks lovely and the original color in the groove adds interest.
Anita Holland
January 15, 2017 at 9:12 amThanks Michelle, just saw your comment, sorry for the delay.
Emilia M Birtch
November 24, 2016 at 4:19 amlove that looks vintage!
Lynne
January 10, 2017 at 12:44 pmI’m impressed!
Anita Holland
January 15, 2017 at 9:04 amThanks, did turn out better than I hoped
Margaret Miller
January 10, 2017 at 1:38 pmI need to paint my kitchen cupboard doors, but have noticed that the cooker hood is a bit dusty and greasy. Can you suggest what is the best thing to remove greasy dust from wooden surfaces. Many thanks.
Anita Holland
January 15, 2017 at 9:07 amDont think I have the best answer, I used bleach wipe, because i was sanding the surface down I was not to worried about the surface, But did not seem to do any harm. Maybe test a section first.
Barbara
January 10, 2017 at 8:13 pmTurned out beautiful! And you are a fantastic brother too !!
Anita Holland
January 15, 2017 at 9:09 amThanks a great compliment. Just had to reply, I am a great sister. My brother cant build like me. LOL
Betty Wampler
January 10, 2017 at 10:33 pmBeautiful job.
Anita Holland
January 15, 2017 at 9:10 amThanks Betty
Mike
January 11, 2017 at 3:05 amLooks great. Congrats
Anita Holland
January 23, 2017 at 3:51 amThanks
Laurie
January 17, 2018 at 2:17 pmWhat is that little decorative piece in picture 8?
Anita Holland
January 18, 2018 at 12:47 amIt is the groove that the back supports slot into. I just put them together so they would be level. I found it easier that way than doing them one at a time.
Lisa Lombardo
July 17, 2019 at 4:45 pmThis is beautiful! Thanks for sharing on Farm Fresh Tuesdays!
Anita Holland
July 18, 2019 at 3:17 amThank you
Mary
July 22, 2019 at 5:22 amThis is such an impressive repurpose of cupboard doors. You are so very talented.
Anita Holland
July 24, 2019 at 3:24 amThank you, Mary, I did impress myself with this repurpose.
Jennifer
August 3, 2019 at 7:53 pmWhat a cool idea! Thanks for sharing at the Weekend Blog Hop at My Flagstaff Home! –Jennifer
Anita Holland
August 4, 2019 at 9:43 pmThank you!
Michelle
August 5, 2019 at 12:41 amA fabulous transformation! I bet your sister is thrilled.
Anita Holland
August 5, 2019 at 3:16 amThank you so much, yes she did love it.
Jennifer Wise
August 7, 2019 at 2:14 pmSuch an interesting and unique look. So creative. Nicely done! 🙂
#unlimitedmonthlylinkparty
Anita Holland
August 8, 2019 at 2:31 amThank you so much, it was one of the favourites that I built.
Kristie
August 9, 2019 at 7:40 pmGood job. This is going to be one of my features for the Little Cottage Link Party, next Monday at 9 am.
Anita Holland
August 10, 2019 at 12:23 amThank you so much for hosting and for the great feature.
Barbara Chapman
August 15, 2019 at 11:21 pmThis project turned out really great! Thank you for sharing at Share Your Style #219; I featured it for this week’s SYS #220. <3 I am actually thinking of making my own shiplap headboard but it might be easier if I found one premade.
Have a wonderful week,
Barb 🙂
Anita Holland
August 17, 2019 at 10:12 pmThank you so much for the lovely comment and the feature. Greatly appreciated.
Chas Greener
August 16, 2019 at 1:52 amWhat a beautiful headboard and so very cool that it was made with beautiful kitchen cabinet doors. Thanks for sharing with To Grandma’s House We Go, I’ll be featuring you next week.
Anita Holland
August 17, 2019 at 10:14 pmThank you so much, Chas, for the lovely comments and the feature. Greatly appreciated
Anita Holland
August 17, 2019 at 10:27 pmThank you so much
Cecilia
August 18, 2019 at 5:54 pmFabulous repurpose, Anita! Thanks for sharing at Vintage Charm!
Anita Holland
August 19, 2019 at 7:43 amThank you so much.
Toni Hembree
January 20, 2020 at 1:13 amBeautiful! I’m so glad you didn’t paint it. I’ve seen too many projects that cover up lovely wood with paint. Your attention to detail is amazing. Congratulations !
Anita Holland
January 20, 2020 at 1:31 amThank you so much for the lovely comment. I do paint furniture bit only if I cant save it firs, or a customer requests it.
Maria
April 9, 2020 at 3:49 amBeautiful job on this head board
Anita Holland
April 13, 2020 at 10:40 amThank you Maria
Deana Landers
April 5, 2021 at 10:16 pmAnita, what an amazing idea! I ‘m glad I saw the cabinet doors before and after because I never would have guessed. I love it!
Anita Holland
April 6, 2021 at 3:34 pmThank you Deana, This is one of my favourite build because it turned out so unique.
Sara
April 5, 2021 at 10:45 pmThat turned out gorgeous – and your reluctance to sand turned into a great design feature :)!
Anita Holland
April 6, 2021 at 3:35 pmThank you Sara. Reluctance I am not too sure that is the word, more like too much fiddly work. lol
Denise Reeser
April 5, 2021 at 11:38 pmSuch a great way to repurpose old cabinet doors. The bed turned out nice.
Anita Holland
April 6, 2021 at 3:35 pmThank you so much Denise, I love how it turned out and it is solid so it will last years.
Libbie@alifeunfolding
April 6, 2021 at 2:36 amI love how this turned out! Beautiful craftsmanship!!
Anita Holland
April 6, 2021 at 3:36 pmThank you so much Libbie, that is a lovely compliment.
Marty Walden
April 6, 2021 at 3:12 amI absolutely love this! Headboards are ridiculously expensive and this is a great way to repurpose!
Anita Holland
April 6, 2021 at 3:37 pmThank you Marty, I totally agree. They are so expensive and flimsy to boot.
Maria
April 6, 2021 at 4:21 amI can do something like this. I love yours! I’m looking to create two twin headboards for my grandson room
Anita Holland
April 6, 2021 at 3:37 pmThan k you Maria, The way I made these was so basic I think anyone could have a go.
Kristi Haight
April 6, 2021 at 2:11 pmThis is my kind of project. Love how you reused old cabinet doors. Beautiful!
Anita Holland
April 6, 2021 at 3:38 pmThank you Kristi, I love to reuse or repurpose in all of my projects.
Linda Johnston
April 6, 2021 at 11:58 pmimpressive! Great tutorial for everyone.
Anita Holland
April 13, 2021 at 11:08 amThank you so much, Linda
Meegan
April 7, 2021 at 12:20 amYour attention to detail and beautiful style give your “new” headboard a professional look. Thanks for sharing, Anita. Love it! Pinned for reference.
Anita Holland
April 13, 2021 at 11:09 amThank you so much Meegan, my OCD always seems to kick in. lol
Brooke
April 7, 2021 at 9:52 pmWe are all about the repurposed. upcycled projects here at Farmhouse1820 and this one is perfect Anita. Great job! I love all the detail in the wood and that stain is the perfect choice.
Anita Holland
April 13, 2021 at 11:09 amThank you so much Brooke, reusing materials keeps my hobby cheap.
Rosemary Palmer
April 10, 2021 at 10:07 pmLove this – I see so many of these great ideas and think of things I passed up at yard sales – or worse, got rid of.
Anita Holland
April 13, 2021 at 11:11 amI have become a hoarder now, I always find use after I have thrown it away so now I hang onto them.
Headboard made from recycled kitchen cupboards – Home and Garden
September 14, 2022 at 6:37 pm[…] This DIY headboard was made from recycled kitchen cupboards and recycled wood. Nowadays lots of people are throwing away their old kitchens and this headboard could be an inspiration for them to recycle them into something new. You can see the full tutorial here. […]