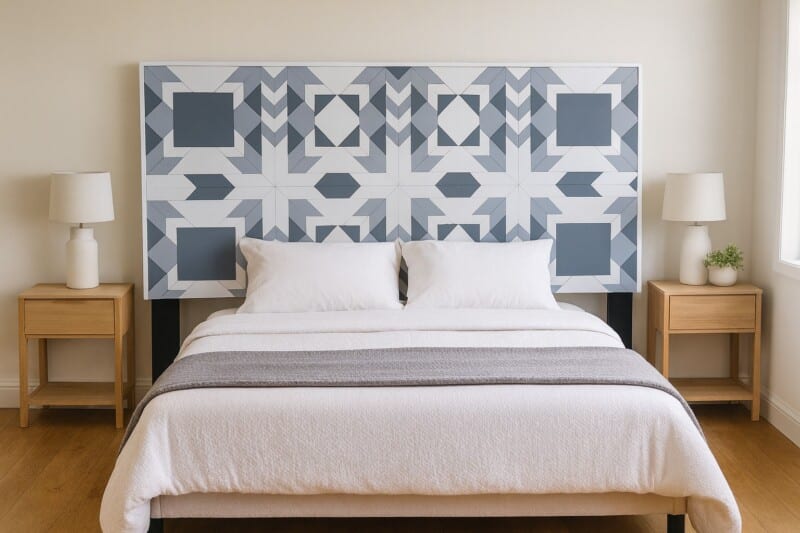
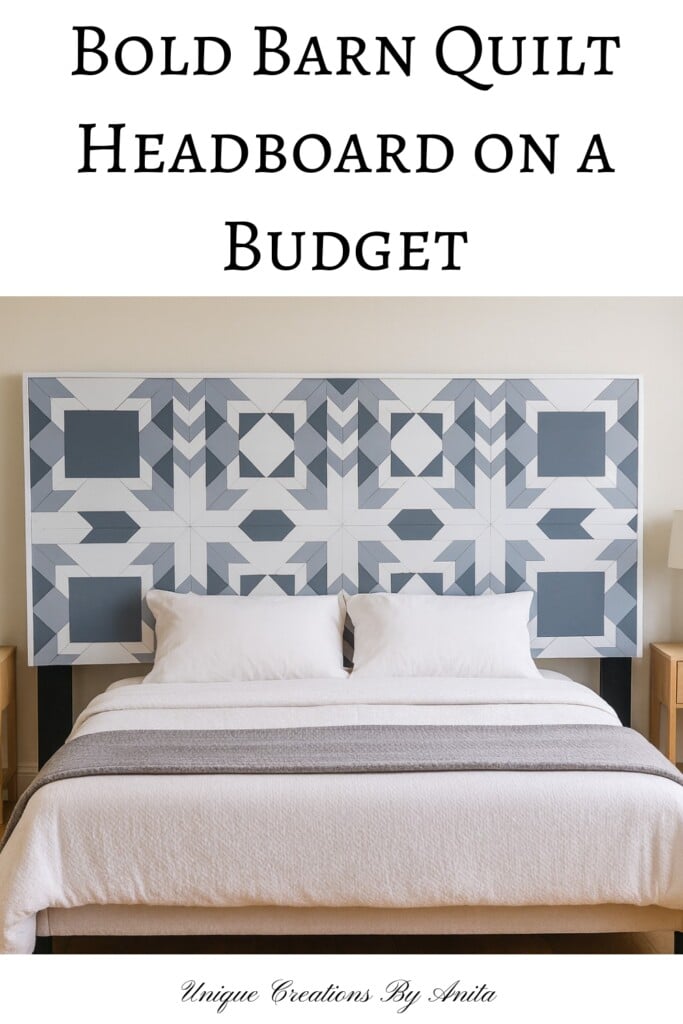
When my daughter bought her first home, she wanted a stylish bedroom straight away, on a tight budget. This DIY barn quilt headboard delivers a bold, geometric statement for a king-size bed without the designer price tag. Built from 12 mm plywood and scrap timber, the pattern echoes classic quilt blocks but feels modern in a stained-or-painted finish. Go big or go home, right?
A barn quilt is a geometric pattern made from repeating shapes. Translating that into a timber headboard gives you strong lines, easy colour choices, and a lot of visual texture. The design scales to any bed. It also hides small timber flaws because the eye reads the pattern first.

Before we dive into this tutorial, be sure to subscribe to my bimonthly newsletter to be the first to see my latest projects. You can also follow me on Pinterest and Facebook, where I also include my unique mixed-media art projects
DIY Barn Quilt Headboard (King Size) – Budget Makeover With Big Impact
**This post may contain affiliate links. This means I earn a small commission on links used at no extra cost to you. Please see my disclosure policy for more information.**
Tools and materials
- 12 mm plywood sheet for the headboard base (approx. 1900 mm × 950 mm for Australian king)
- 12 mm plywood offcuts for the quilt blocks
- Circular saw and straightedge guide
- Mitre saw
- Table saw (or circular saw with guide) for ripping 50 mm strips
- Orbital sander + sanding discs (120–240 grit)
- Hot glue gun and glue sticks
- PVA wood glue
- Painter’s tape / masking tape and pencil
- Router with round-over bit (for the frame)
- Scrap timber for the frame and rear brace
- Nails or brad nails + nail gun (or screws) Nail gun (battery)
- Paint or stain + roller and brush
- Safety gear: eye protection, hearing protection, dust mask, clamps
Plan and measure the base
Measure the mattress width and add 30–60 mm on each side for overhang. For a king, aim for at least 1900 mm wide and 900–1200 mm high, depending on your style. Mark the plywood base with a centreline and divide it into eight equal sections.

Add diagonal pencil lines corner-to-corner and one vertical/horizontal through the centre. These guidelines keep the pattern square and straight in photos and in real life. Don’t be intimidated—it’s not hard. Design one square, then repeat it in every square.

Prepare and rip the plywood
This build loves off-cuts. Trim away damaged edges and sand both faces flat before cutting the small pieces—it’s faster and safer.

Rip the sheet or offcuts into 50 mm-wide strips with a table saw (or clamp a straightedge and use a circular saw). Slight warps won’t matter once the pieces are small.

Set up the saw (and avoid my mistake)
Before cutting any angles, zero the laser and confirm whether it shows the kerf’s left or right. Cut a test piece and check with a speed square. Set a stop block on the mitre saw fence so every repeat is identical.

Don’t stack-cut two pieces at once—kickback is real, and it can fling timber at your face. Start by cutting identical shapes and simply varying their lengths. There’s no fixed measurement here, because each piece has 45° mitres, and they’ll slot together neatly in different combinations. If one doesn’t fit quite right, cut another and fine-tune the length.

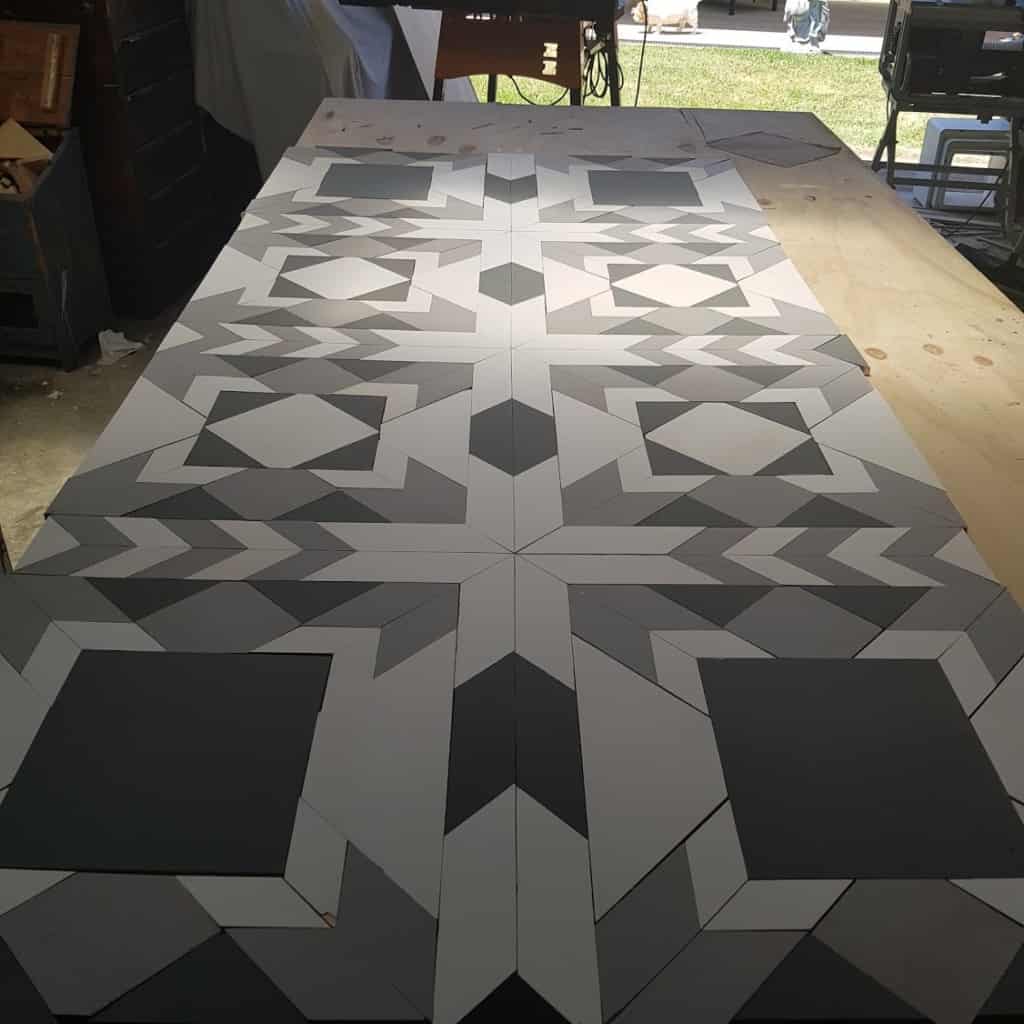
Design your barn quilt
This step can take a while if you want a unique design, as I did. I started with a starburst block in the centre and worked my way out, using the guidelines to keep the pattern straight.

You only need to design one block, then duplicate it for the others. Keep moving the pieces around until you’re happy with the layout. That first square will show you exactly how many of each piece you need. If you cut too many pieces, use the extras in this scrap-wood wall art.

Pre-paint the pieces the fastest way
Once I was happy with the design, I hot-glued the centre pieces in place. I painted the wood with a roller, which didn’t work well—the paint filled the gaps and changed the look. Paint the pieces before you glue them down. Hot glue was enough to hold the blocks in place.

I tried to remove them, but they were stuck fast. The one piece I did get off split the plywood. The visible joins are part of the look, so after the paint closed them up, I used a ruler and a fine-tip pen to draw the gap lines back in.

Once I was happy with the fully painted panel, it was easy to duplicate the pattern, using the pieces from the first panel as my colour guide. I had slight gaps because I didn’t check the mitre saw’s laser was set correctly, and I only fixed it halfway through the cuts.

It’s faster to paint all the pieces at once. Hot-glue the first “V” in place, then add as many rows as you like beneath it. Glue the last two pieces at the ends to stop the stack from shifting. Roll on two light coats of paint—it only takes seconds. When the paint is dry, slip a chisel under the glued spots to pop the pieces free. This saves a lot of time. I tweaked the design on the four outer blocks to remove the gaps caused by the misaligned laser.

Assemble the panels
Glue the centre pieces first so the eye tracks true. Work outwards, keeping the gaps consistent.

Hot glue grabs fast and is enough to hold while the PVA sets.
Trim the edges clean
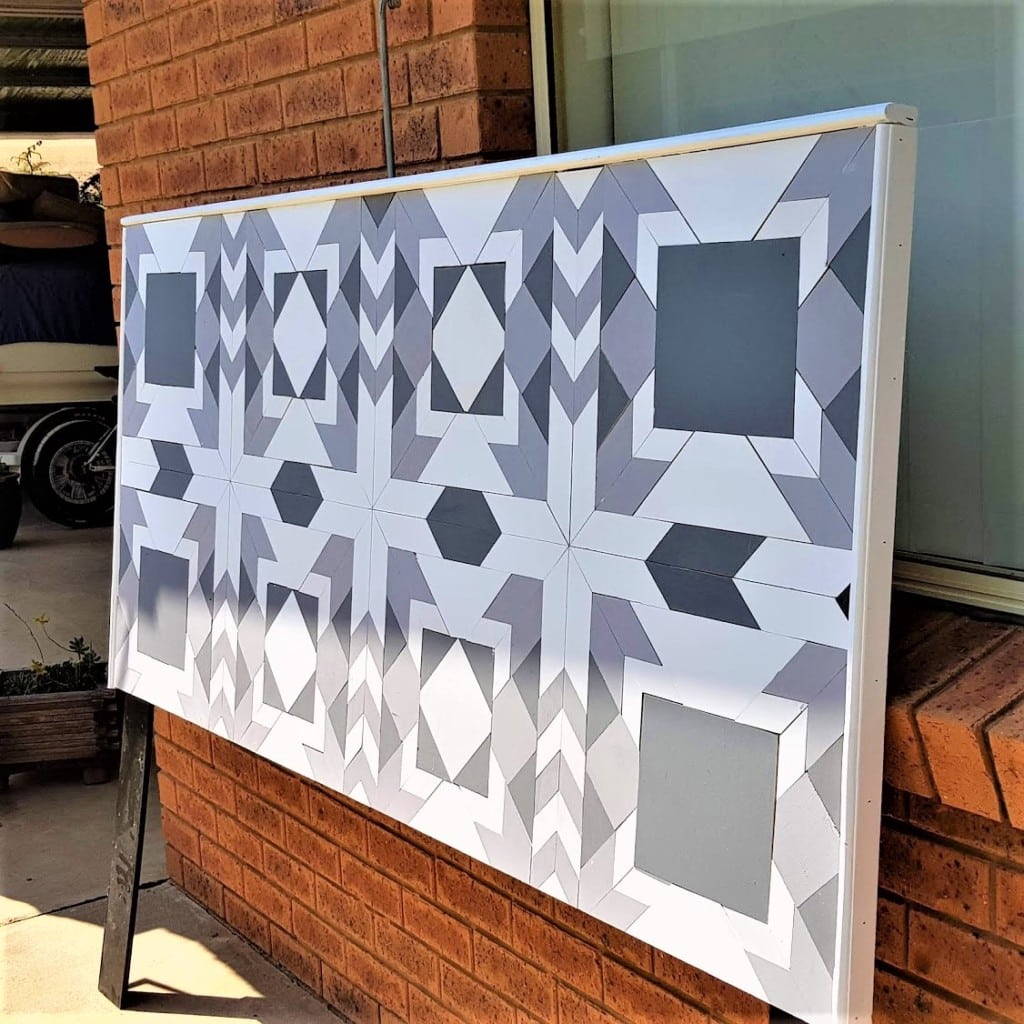
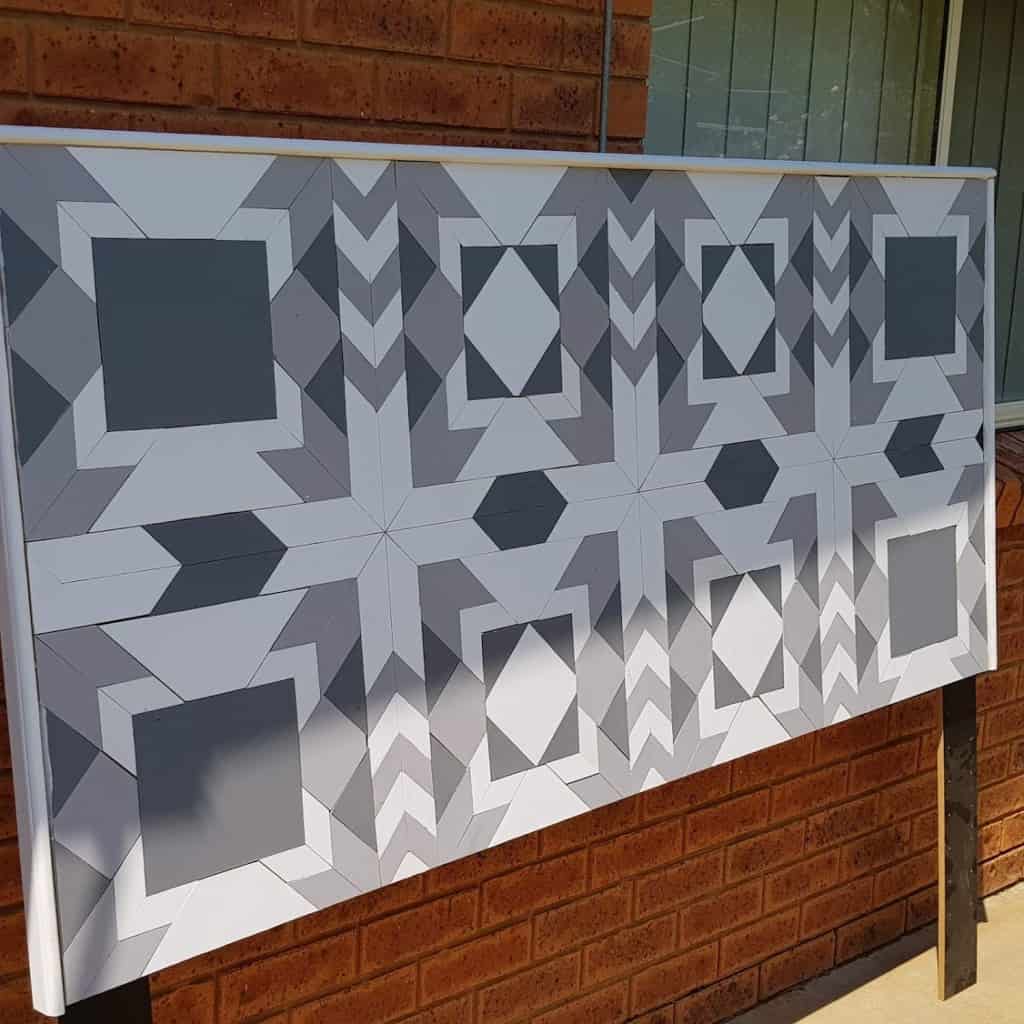
When the pattern is complete, tape along the cut line to reduce splintering. Clamp a straight scrap as a fence and run a circular saw around all four sides to square the panel. The result looks professional and makes framing easier.

Build and fit the frame
Cut scrap timber for a simple picture-frame border. Round over the outer edges with a router. Paint or stain before installation for sharp lines. Glue and nail the frame onto the headboard edges.

Add a rear brace and legs
A large plywood panel can bow when lifted. Fix a horizontal brace across the back to stiffen it. For a freestanding headboard, cut legs to reach floor height plus the panel height (measure your base and mattress; mine totalled 900 mm). Glue and nail or screw the legs to the back, making sure the headboard clears skirting boards. Alternatively, you can fix it onto the wall with mounting brackets.

Finish and style
Touch up the paint, then seal with clear acrylic or furniture wax for a soft sheen. Mine wasn’t perfect—the laser was out of alignment, and I’d gone too far before I noticed to start again—but I’m still thrilled with the result, warts and all.

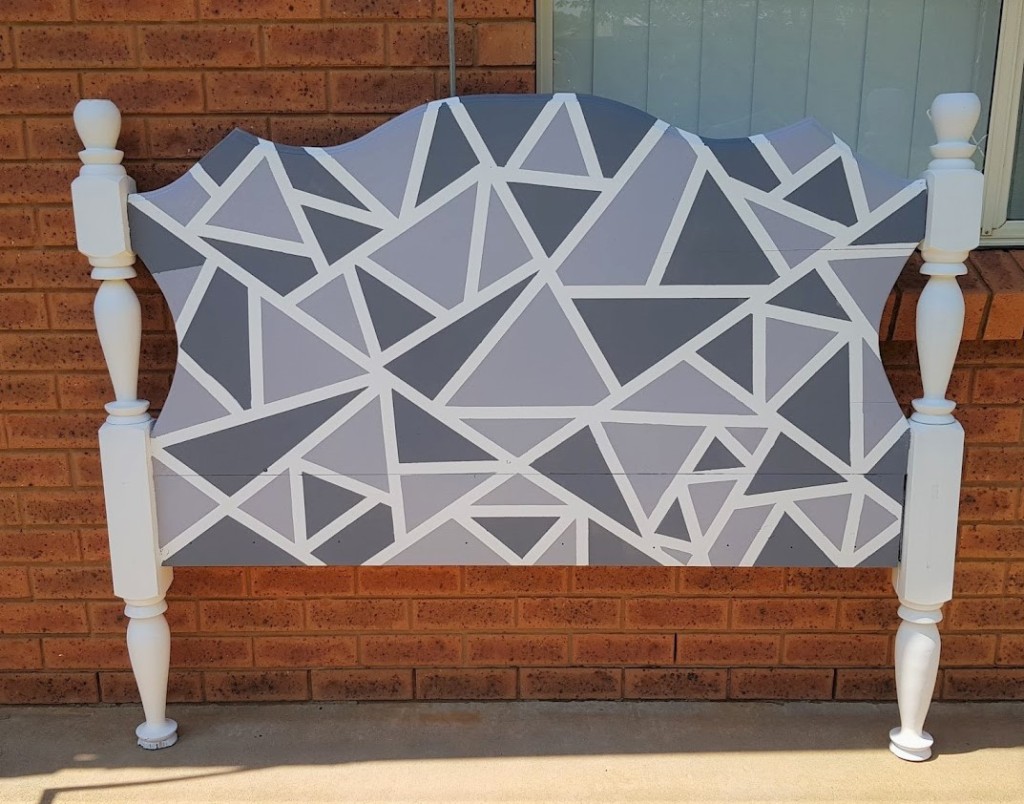
If you’re not ready to tackle this build but love the look, check out my simple tutorial to paint the same geometric design onto an old headboard that was headed for the tip.
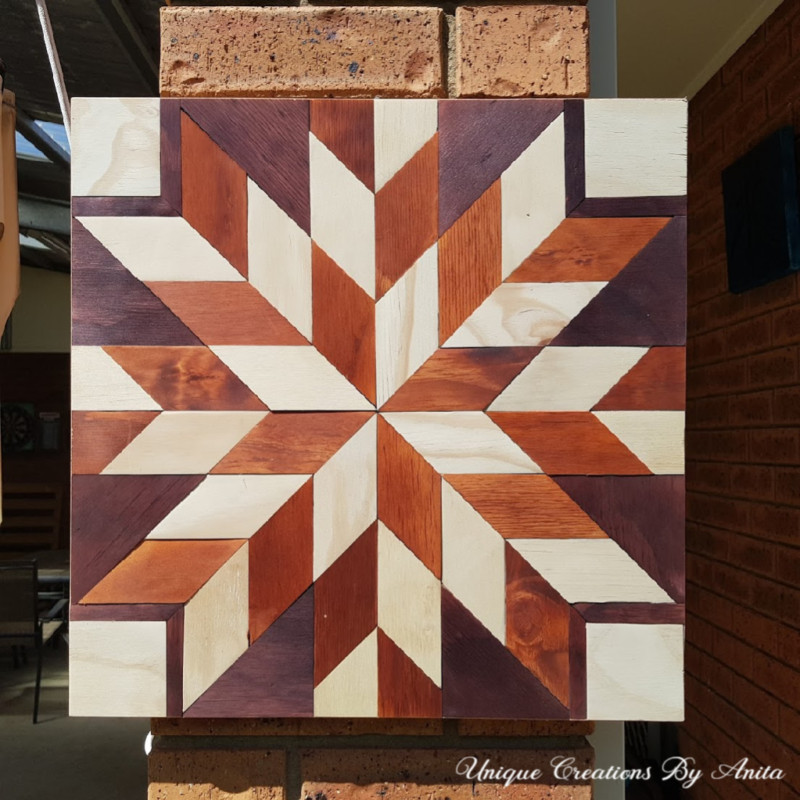
If you want to practise a basic barn quilt, this tutorial will show you how. The starburst is easier because every piece of wood is the same, so you can’t really go wrong.

If you’re interested in any of the items used in this project, we’d appreciate it if you used our affiliate links. Clicking these links earns us a small commission at no extra cost to you, helping us create more inspiring and exciting projects to share. We’d also love to hear your thoughts—feel free to leave a comment or share this post!


50 Comments
Jenna
November 4, 2019 at 11:52 pmThis is simply incredible!! What skills you have and it’s beyond creative! WOW and WOW!
Anita Holland
November 6, 2019 at 12:22 amThank you so much, Jenna, for the lovely compliment. It was very time consuming to do, but it was worth it in the end.
Marie
November 6, 2019 at 2:55 pmWow, this is beautiful Anita! I can only imagine how much time it took to make with all that intricate cutting and placement. You rock the power tools, girl! Pinned 🙂
Anita Holland
November 7, 2019 at 8:33 pmThank you Marie, Other girls get perfume and jewellery for birthdays, I get power tools and love it.
Stacy Roman
November 11, 2019 at 4:27 amIt came out beautiful, great job, I love it.
Lauren Renee Sparks
November 11, 2019 at 2:23 pmThat is really beautiful. Visiting you from the good random fun link up. laurensparks.net
Anita holland
November 11, 2019 at 8:01 pmThank you so much 😀
Naomie Moore
November 11, 2019 at 5:37 pmWow! Certainly a labor of love. ❤ You did an awesome job, a thing of beauty. I am sure your daughter is over the moon. Make sure you sign your pieces. Thanks for sharing the good, bad and ugly with us, as that is the way it goes sometimes. 🤗😎
Dee | Grammy's Grid
November 12, 2019 at 5:11 amLooks nice! Thanks so much for linking up at the #UnlimitedMonthlyLinkParty 6. Shared.
Anita Holland
November 12, 2019 at 9:26 amThank you so much.😉
Carole @ From My Carolina Home
November 13, 2019 at 1:15 pmWow, what a fabulous idea!!
Anita Holland
November 14, 2019 at 2:08 amThank you so much😀
Donna via Funky Junk Interiors
November 14, 2019 at 6:50 amOhhh my goodness… now that is one WOW headboard! The detail is phenomenal and the outcome so beautiful!
This beauty will be featured in this upcoming weekend’s DIY Salvaged Junk party. Thanks for bringing it over! 🙂
Anita Holland
November 14, 2019 at 7:17 amThank you so much Donna for the lovely comment and for the feature on my headboard. It was very challenging for a first attempt, but I was thrilled with the outcome. 😉
Pam
November 14, 2019 at 7:01 pmWow, that’s amazing! So much work, and it looks so cute! My daughter and her new husband recently bought their first house too, and my daughter is really anxious to get everything fixed up right away. Your daughter is lucky to have such a creative mom.
Anita Holland
November 14, 2019 at 11:27 pmThank you Pam, she has a list for me to make. I just need time to make them between work and play. 😀
Teresa
November 15, 2019 at 11:21 amThat’s just amazing, you did a wonderful job!
Thank you for sharing at The Really Crafty Link Party. Pinned!
Anita Holland
November 15, 2019 at 12:54 pmThank you so much for the lovely comment.
Sharon
November 17, 2019 at 3:14 pmSo AMAZING! Absolutely stunning!
Thank you for sharing w us at Creative Muster! Pinned 🙂
Blessings to you!
xoxoxo Sharon
Adoring Creations
Anita Holland
November 18, 2019 at 12:09 pmThank you so much for the lovely comment. 😉
Kristie
November 18, 2019 at 5:35 amI’m featuring your headboard tomorrow on the Little Cottage Link Party! I hope you’ll drop in and see it!
Anita Holland
November 18, 2019 at 12:15 pmThank you so much for the feature. I will definitely stop by, I love the parties 🤩
Anita Holland
November 18, 2019 at 12:13 pmThank you so much Michelle, I have to be honest and say I think so too 🤣🤣 she loved it so much she wanted another one. But too soon after the first one for me. 😂
Linda on Poinsettia Drive
November 20, 2019 at 12:29 pmThank you for sharing on the Classy Flamingos. Impressive.
Julie Briones
November 21, 2019 at 4:17 pmWhat a lovely headboard, Anita! So intricate, too! I don’t think we saw this at Tuesday Turn About last week… hope to see you this week!
Anita Holland
November 22, 2019 at 1:03 amThank you so much, I must have missed it. I will add it next week with my new projects.
Liberty
November 22, 2019 at 3:43 amAnita, this is gorgeous!! Wow!!! I pinned it. I appreciate all the work that went into it, and then all the work that went into making this post about it. Thank you for sharing at Best of the Weekend.
Liberty @ B4andAfters.com
Anita Holland
November 22, 2019 at 12:32 pmThank you it was a special request for my sister. It looks really cool with her Christmas lights display.
Colin holland
November 26, 2019 at 12:12 pmGreat headboard, love it. Test
Antionette Blake
December 15, 2019 at 6:57 pmWow, you did an amazing job, so much work but definitely worth it. I feel guilty that we just went and bought a new bedroom set with a headboard which was the first time ever and this was our 3rd and final move!
#trafficjamweekend
Anita Holland
December 16, 2019 at 5:31 amThank you so much, it was a labour of love for my daughter. It was a bit ambitious for a first attempt.
natelia bailey
January 25, 2020 at 1:54 pmBeautiful job Anita, wow! I can see the work you put into this, and what a great idea, I really love it. One little thing, I wish your daughter had underplayed her bedding to co-ordinate with the beauty of the design you worked so hard on. A simple white or gray bedspread with a pop of color( yellow, pink, coral,or teal) throw pillows would have really shown off the beauty of the head board you designed. Right now it seems hidden to me.
Anita Holland
January 27, 2020 at 1:35 amThank you so much for your lovely comments. This headboard was my first attempt and every with the errors I am still happy with how it turned out. As for the bedding, unfortunately, she does not have the money to buy new at this time, but she does agree with you.
Alexis Azzarito
January 25, 2020 at 2:48 pmDear Anita
What an inspiration you are! The headboard is beautiful and your open account of what worked first time and what didn’t was honest and brave. Those who are prepared to share their experiences are those who truly make a difference. Brilliant!!!! Alexis
Anita Holland
January 27, 2020 at 1:32 amThank you so much for your very kind comments. I am self-taught, so each project is a learning curve for me. So as you can imagine they don’t always work out the first time. But that is how we learn.
Maria
August 24, 2020 at 10:25 pmAbsolutely stunning headboard! Workmanship is beautiful
Anita Holland
August 27, 2020 at 11:43 amThank you so much Maria
Lori Nell
August 24, 2020 at 10:35 pmWow, Anita! That is a spectacular piece of art! So much detail in the headboard. It is just beautiful!!
Anita Holland
August 27, 2020 at 11:44 amThank you so much, It really did test my patience at times.
Sara
August 24, 2020 at 11:30 pmThis is so fabulous; I want one for myself!
Anita Holland
August 27, 2020 at 11:44 amThank you so much Sara, With your skills, I am sure it will be a breeze.
Meegan
August 25, 2020 at 12:37 amI am absolutely blown away and impressed by your new headboard. You have much MORE patience than I do. This is incredibly stunning.
Anita Holland
August 27, 2020 at 11:47 amThank you Meegan, You can tell at the end I did lose patience and added the big squares in the middle.
Deana Landers
August 25, 2020 at 1:57 amAnita, what an amazing, creative and loving gift for your daughter. My granddaughter is 19 and we buy her power tools for gifts also. She loves to build.
Anita Holland
August 27, 2020 at 11:51 amThan k you so much Deana. It is so great to hear your daughter loves to build, great to get more women having a go. I only started the end of 2016 and taught myself watching youtube videos.
Kim Purvis
August 25, 2020 at 4:17 amThis is amazing! I can’t believe these are indivivdual peices! Just incredible.
Anita Holland
August 27, 2020 at 11:54 amThank you Kim, It was a bit ambitious being my first attempt at a barn quilt. But got there in the end.
Marty Walden
September 1, 2020 at 6:17 amThat is just amazing! You’re incredible!
Anita Holland
September 2, 2020 at 8:14 amThank you so much, Marty, it was mostly fun to create lol
Jeanne
December 31, 2020 at 3:33 amBeautiful project!