
Late last year, we welcomed two mischievous Jack Russell terrier puppies into our family, and they’ve kept us on our toes ever since. Their cheeky new trick is pushing my 14-year-old dog out of her bed so they can claim it for themselves. That sparked my idea for this project—a cosy hobbit-style dog house, designed especially for them.
Our dogs are spoilt and normally sleep inside, but when I’m at work, they spend a few hours outdoors. Winters in Australia can be bitterly cold, and I wanted somewhere warm, sturdy, and safe for them. After losing count of how many soft beds they’ve destroyed, I decided to build a wooden dog house that they’d have a harder time demolishing. To look at their sweet faces, you wouldn’t think it—but these little terrors are master destructors!

This project also happens to be part of this month’s International Bloggers Club (IBC) challenge. Our theme is “Furever”, so I created this deluxe hobbit-style dog house for my fur babies. You’ll find more about IBC and the other bloggers’ contributions at the end of this post.
Before we dive into this tutorial, be sure to subscribe to my bimonthly newsletter to be the first to see my latest projects. You can also follow me on Pinterest and Facebook, where I also include my unique mixed-media art projects
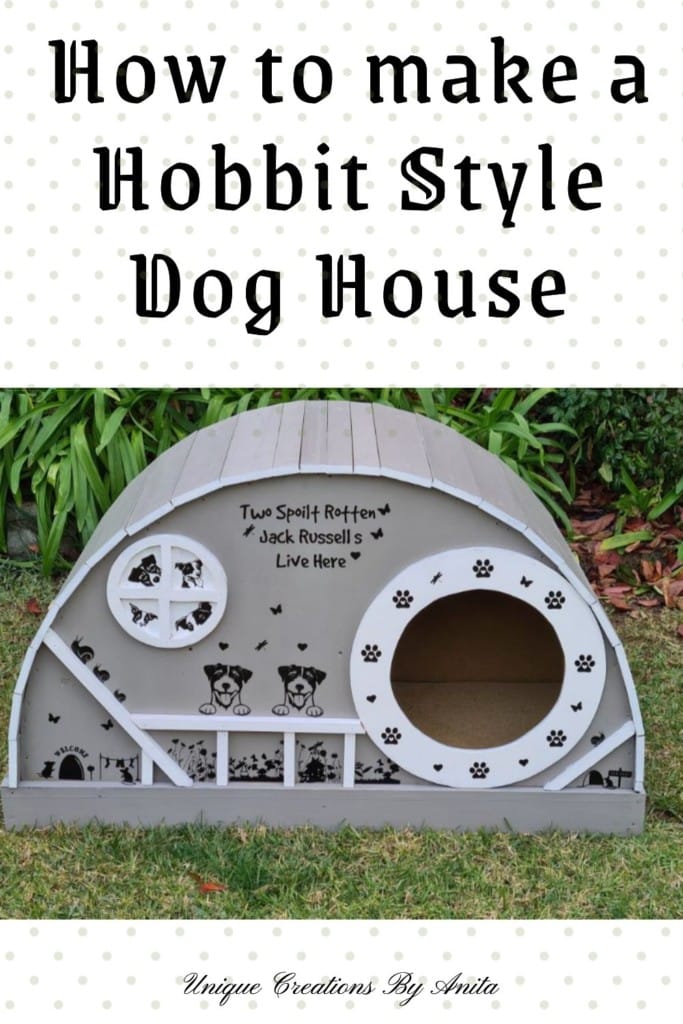
Hobbit Style Dog House for Jack Russell Terriers
**This post may contain affiliate links. This means I earn a small commission on links used at no extra cost to you. Please see my disclosure policy for more information.**
Materials Needed
- Recycled coffee table (base)
- 12mm plywood sheets (sides and arches)
- 2 x 4 timber for framing and roof supports
- Screws, brackets, and wood glue
- Jigsaw and drill
- Table saw
- Carpet tiles
- Grey acrylic paint
- Polyurethane or exterior varnish
- Vinyl decals (optional, made with Cricut)
- Painted wood offcuts (optional for decoration)
Making the base
To make the base, I used a recycled coffee table measuring 1150mm x 600mm. The table already had legs, which I cut down to 10cm to lift the base off the ground. This way, when we get heavy rain and water flows over the gutters, the dog house stays dry.
I used mostly recycled materials for this project, which fits perfectly with the theme of my website, so please overlook the rough quality of some pieces. If you’d like to see how I source my free materials, this post will show you how.

I framed the base using 2x4s. To secure the frame to the base, I glued and screwed offcuts of wood to the base.

Cutting the sides
I don’t work from plans—I make up my projects as I go. That means they don’t always work out perfectly the first time, and I often have to adapt and adjust along the way. That is what happened next.
Using 12mm plywood, I sketched the hobbit-style arches with a large homemade wooden compass. My first mistake was cutting the arch before boxing in the base, which made the arch too small. I fixed this later by adjusting the frame and brackets.

It is easier to sand the sides before they are attached to the base.

Next, drill a hole large enough to fit the jigsaw blade and cut out the door. I must have been in la-la land when I cut mine because it turned out massive. Judging by its size, you’d think I was building for Great Danes rather than Jack Russells, though their level of destruction does make it seem fitting. A doorway of about 25cm is more suitable for Jack Russells, and I’ll show you later how I fixed my oversized cut.

Adding Carpet for Comfort
To make the house warmer and cosier, I glued and stapled carpet tiles to the base.

Extra carpet was added to the sides for insulation.

Attaching the Walls
Since my arches were cut short, I attached the sides using metal brackets instead of directly screwing into the frame.

I added smaller wood supports to hold the two walls firmly together.

Building the Roof
The roof framework was cut from halved 2 x 4s to keep the house lightweight.

My original plan included astroturf for a whimsical hobbit look, but the puppies tore it up before I started. Instead, I opted for a timber overhang, which looked even better.
If your dog house will be fully outdoors, add waterproofing. Mine sits under a pergola, so I skipped this step.

Roof slats were screwed in starting from the bottom up, with thinner cuts near the arch top for a snug fit.

This project would have been much easier if I had cut the sides to screw directly into the base, but I managed to work around the mistake.

View from the back

Fixing the Door
The oversized doorway was corrected with a circular plywood frame. The middle cut-out was recycled into a window. Before attaching the frame, I managed to climb halfway inside to carpet the roof interior—yes, the doorway was that big!

Painting and Decorating
The house was painted grey using acrylic paint, then sealed with two coats of polyurethane. For added charm, I glued painted wood offcuts to the sides, giving the house a rustic cottage feel.

The finishing touches came with playful vinyl decals cut on my Cricut.

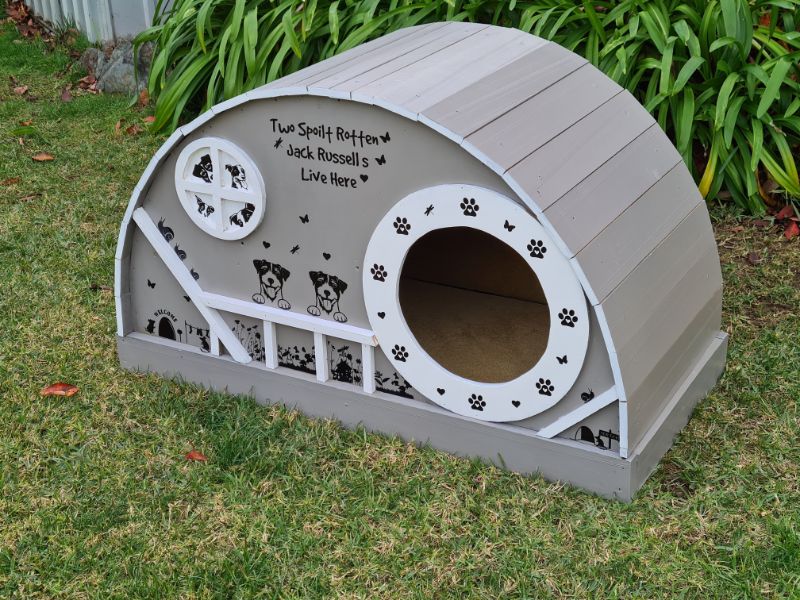
The Finished Hobbit Style Dog House
Once soft bedding was added, Pepsi and Max inspected their new daytime retreat. Judging by their reactions, it got the terrier tick of approval.


Max wasn’t thrilled when the old girl claimed it first!


More pet-related projects
I made these fun bandannas for my dogs.

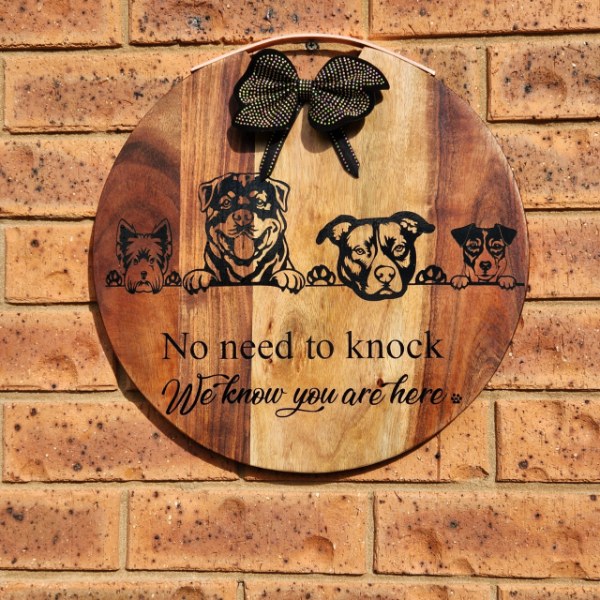
This welcome sign was created using a recycled cheeseboard and added fun decals.
More about IBC
If you follow my blog, you will know I am part of the IBC (International Bloggers Club), which is a group of talented bloggers from around the world. We have members from Spain, South Africa, Australia, the United States, and Canada. Each month, we come together and create a project with a common theme.
If you missed last month’s “Funtabulous planter ” theme, here is the link to my Planter made from an old chocolate tin. The “Furever ” contributions from my fellow bloggers for this month’s challenge are listed below. Please feel free to jump over and give them some love.
A Crafty Mix|Spun pet hair heart

Birdz of a feather| String Art Dog

Interior Frugalista|Repurposed chair seat dog leash holder

If you’re interested in any of the items used in this project, we’d appreciate it if you used our affiliate links. Clicking these links earns us a small commission at no extra cost to you, helping us create more inspiring and exciting projects to share. We’d also love to hear your thoughts—feel free to leave a comment or share this post!


27 Comments
Michelle Leslie
July 19, 2021 at 10:52 pmI don’t know how many times I’ve said this, Anita, but you are so creative. It always boggles my mind how you as a self-taught DIY-er can think up plans to make something and wing it as you go along. And oh my, I had to laugh at the antics that Pepsi and Max get up to 😀 Jackies are such characters, and so loving too, when they take a break from destroying the world.
Anita Holland
July 21, 2021 at 10:11 amThank you so much Michelle, I have never been able to follow someone else’s plans I just seem to make a mess every time. I still have the messes my way but it is so much more fun. I do adore my terrible two and hope they will outgrow their destructive stage. lol
Sara
July 19, 2021 at 11:20 pmI love every bit of detail you put into this wondrous creation! It amazes me that you can create something like this on the fly.
Your two fur babies look every bit as mischievous as my sisters’ dogs, but don’t they make our lives so much more fun!?
Anita Holland
July 21, 2021 at 10:13 amThank you so much for the great comment. I do agree dogs bring their own magic to your home. Every home should have a dog or two to liven it up.
Laura L WALKER
July 20, 2021 at 12:59 amThis is adorable. xo Laura
Anita Holland
July 21, 2021 at 10:14 amThank you so much Laura, for the comment and for supporting my website.
Marie - Interior Frugalista
July 20, 2021 at 1:30 amI’ve said this before and I’m saying it again; girl, can you rock the power tools! I am a project winger too so I can appreciate how you don’t give up when things go array and tweak your plans to make it work. Your dog house idea is AWESOME and so unique (you live up to your blog name). Don’t get me started on those two cuties! Pepsi/Max – named after the soda?
Anita Holland
July 21, 2021 at 10:15 amThank you so much Marie, you always leave the kindest comments. Yes they were named after our favourite drink Pepsi max lol
maria
July 20, 2021 at 3:54 amWow, you, crafty mix and Bird in a feather must be celebrating pet week, I love this, the cutest ever.
Anita Holland
July 21, 2021 at 10:15 amThanks Maria, yes we had a Furever challenge this month on IBC.
Deana
July 20, 2021 at 7:21 amAnita those 2 spout rotten Jack Russell dogs of yours are blessed. Their home is warm and stylish. You everything fantastic.
Anita Holland
July 21, 2021 at 10:17 amThank you Deana, I have to giggle because I went to all that effort and they still spend most of their time on the couch or bed. They rule our home. lol
Barbara Chapman
July 21, 2021 at 2:13 amAnita, this is a good-sized dog house! So adorable!!! I’m sure your buddies are enjoying their new dog house immensely. 🙂 Happily pinned for you and I’ll share on FB. 🙂
Hugs,
Barb 🙂
Anita Holland
July 21, 2021 at 10:18 amThanks Barbara, I think in the end my old girl will have this one and those two terrors will still pinch hers.
Libbie
July 21, 2021 at 3:46 amThis is just adorable!!! Pinning for later.
Anita Holland
July 21, 2021 at 10:18 amThank you so much for your support, Libbie.
Meegan
July 22, 2021 at 10:28 amAnita, This sweet dog home is perfect in everyway. My husband loves Jack Russell Terroirs. I love all the little details that show their personalities.
Anita Holland
July 23, 2021 at 11:29 amThank you so much Meegan, They are the cutest even though they are so destructive. We are hoping they will grow out of it.
Rachelle
July 25, 2021 at 8:15 amAnita, you are one sweet mommy to your dog babies. Building them special housing that is stylish to boot. Great job!
Anita Holland
July 26, 2021 at 4:12 pmThank you so much, they are too cute so do deserve it when they are being good. lol
Donna @ Modern on Monticello
July 25, 2021 at 12:42 pmLove love love this! Your fur babies are adorable too. I have four dogs – big dogs – so I need to convince my husband to make one to fit a 100 pound German Shepherd. LOL So glad you shared this and continue to spoil those babies.
Anita Holland
July 26, 2021 at 4:13 pmThank you, he will have no problem making one. I think my first door would allow a german shepherd to get in.
Rebecca Payne
August 1, 2021 at 1:39 amSo Creative. I love it and your cute dogs.
TD Creedy
April 4, 2022 at 8:15 amHi, I loved this and although I don’t have a dog I do get hedgehogs in our garden and am toying with making one of these to help them survive. There are hedgehog house plans on line but not as nice as this and I could possibly tweak it to look like a hedgehog with an added pointedeeee nose to one side with a front to back shelf holding the feeding bowls . Do you have any advice on making the dog house more durable to U.K. weather please? Rain wind and more rain. Lol. I was toying with roofing felt?
Anita Holland
April 4, 2022 at 6:26 pmI like the idea of the hedgehog house. I stapled carpet tiles around the whole inside of this house. Mine is undercover and is only used during the day, they sleep inside at night. You would also need to waterproof it if it is not undercover.
A Crafty Mix | Spun Pet Hair Heart – A Precious Keepsake - A Crafty Mix
January 24, 2023 at 11:18 pm[…] I think Anita’s puppies are going to have a ball in their new hobbit styled home. […]
Spun Pet Hair Heart – A Precious Keepsake - A Crafty Mix
September 6, 2024 at 3:53 pm[…] I think Anita’s puppies are going to have a ball in their new hobbit styled home. […]