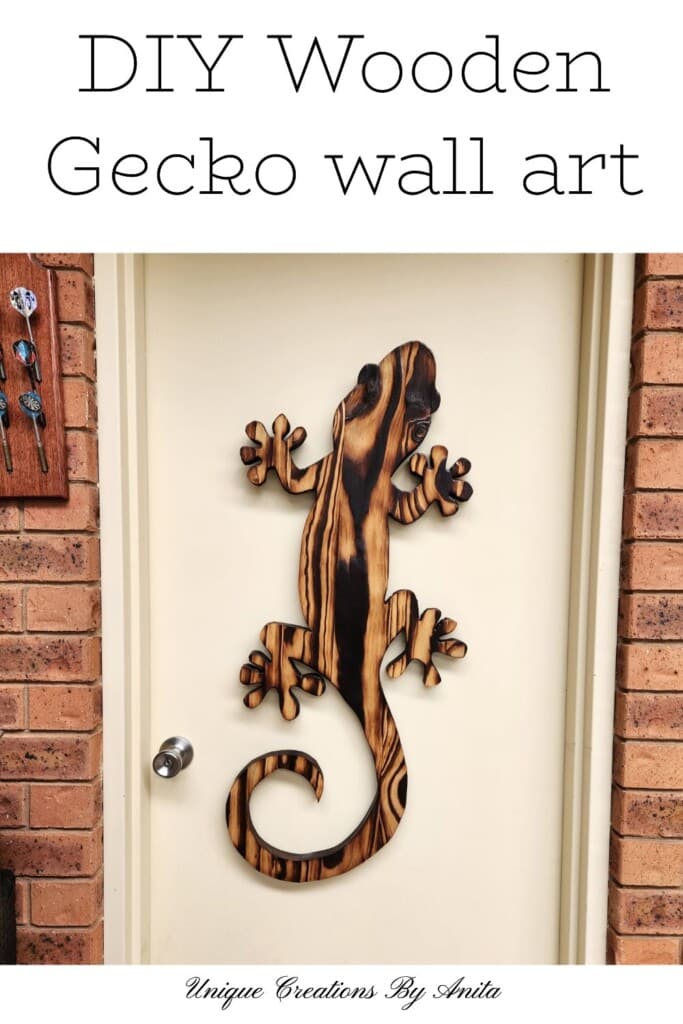
Looking for DIY outdoor decor that stands out? This giant Shou Sugi Ban wooden gecko climbs the wall with bold texture and gorgeous colour. I upcycled a free sideboard top, burned the timber for dramatic grain, and sealed it so it’s ready for the verandah or patio. One rescued panel. One simple technique. Show-stopping outdoor wall art.
This project is part of the Do It Over Designers hop hosted by Ann at The Apple Street Cottage. We “do over” old or unused items into something new. Scroll to the end to explore the other makers’ projects.
Before we dive into this tutorial, be sure to subscribe to my bimonthly newsletter to be the first to see my latest projects. You can also follow me on Pinterest and Facebook, where I also include my unique mixed-media art projects
Shou Sugi Ban Wooden Gecko Wall Art
**This post may contain affiliate links. This means I earn a small commission on links used at no extra cost to you. Please see my disclosure policy for more information.**
Materials Needed
- Recycled solid-wood panel (sideboard top works well)
- Full-size gecko template (projector or tiled printouts)
- Spray adhesive, masking tape, and clamps
- Jigsaw with fine wood blades
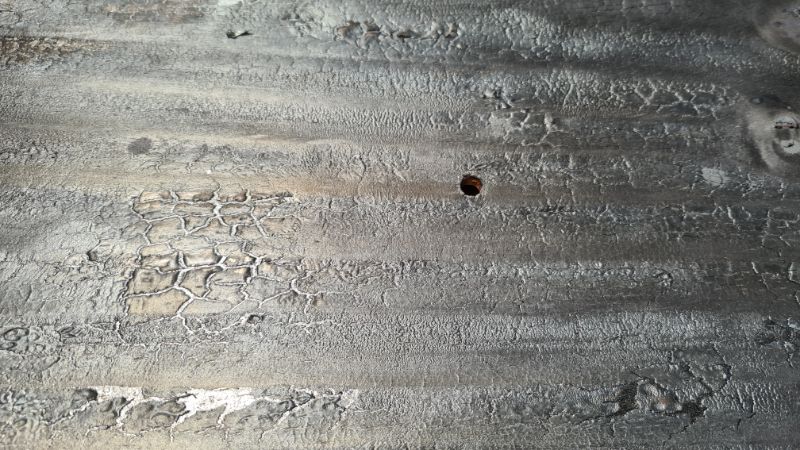
- Drill + 10–16 mm bits (relief holes)
- Non-flammable work surface (sheet metal or concrete)
- Torch and gas (MAP preferred; propane OK)
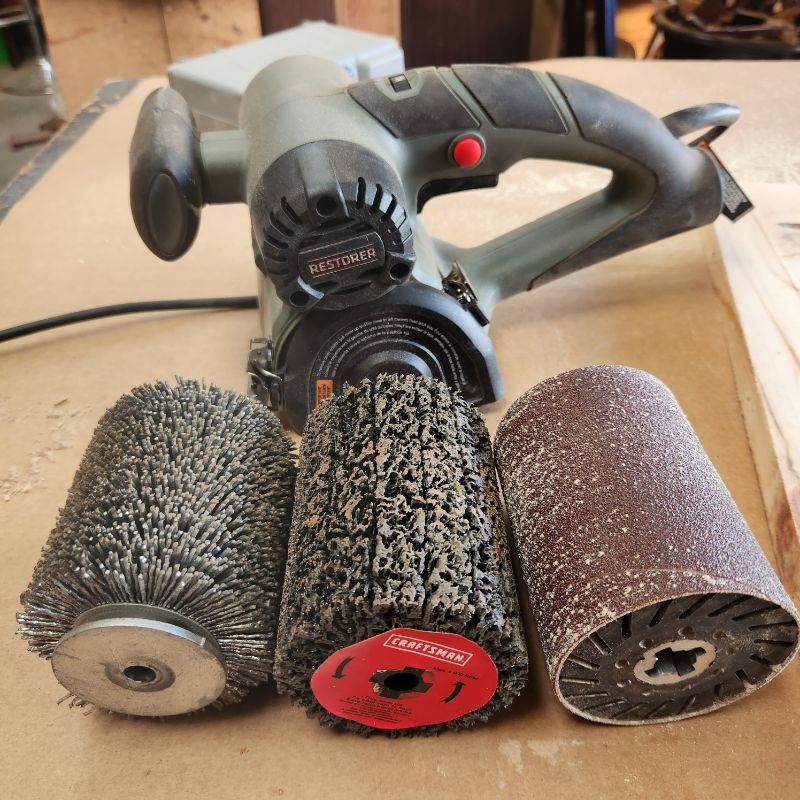
- Wire brush, coarse nylon drill brush or restorer tool
- Orbital sander (optional) + 120–180-grit discs
- Exterior varnish or spar urethane + brushes/lint-free cloths
- Unicorn Spit “Dragon’s Belly” (optional colour)
- Hanging hardware: French cleat or keyhole hangers, screws, masonry anchors
- Wood glue (repairs)
- PPE: P2 respirator, safety glasses, heat-resistant gloves, fire extinguisher
Tools and supplies include a jigsaw, torch with MAP gas, wire/nylon brushes, exterior varnish, a full-size template, and a French cleat for mounting.
Make the Template
To create a full-size gecko template, start by finding a clear silhouette with clean edges. Project the image onto a wall and adjust the distance until the gecko is the size you want. Tape a large sheet of paper to the wall and trace around the outline. This paper cut-out is your master template.
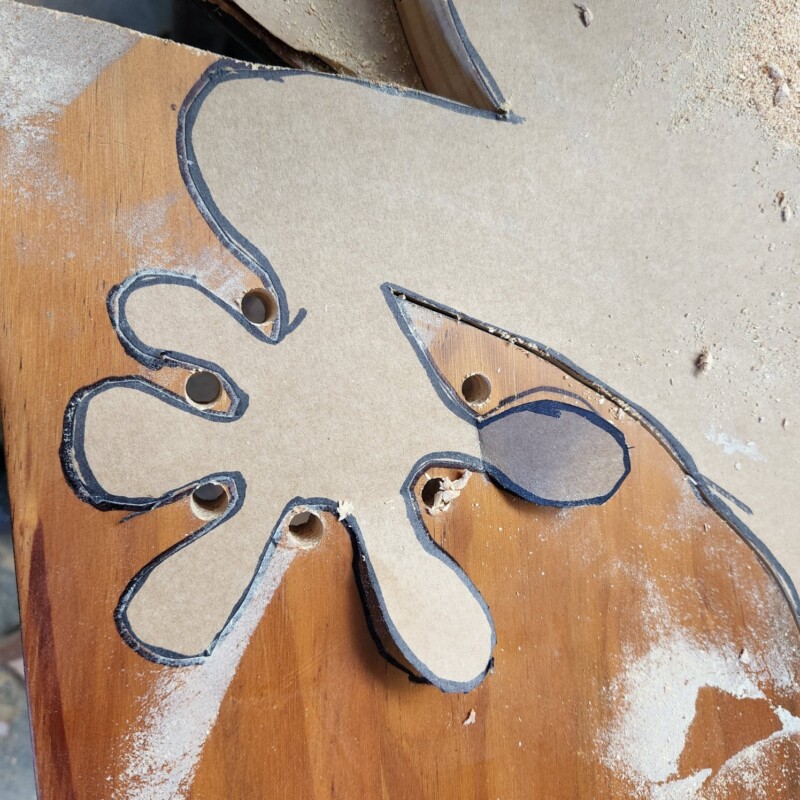
Lightly mist the back of the paper template with spray adhesive and position the template on the timber. The adhesive holds the paper in place while you cut.

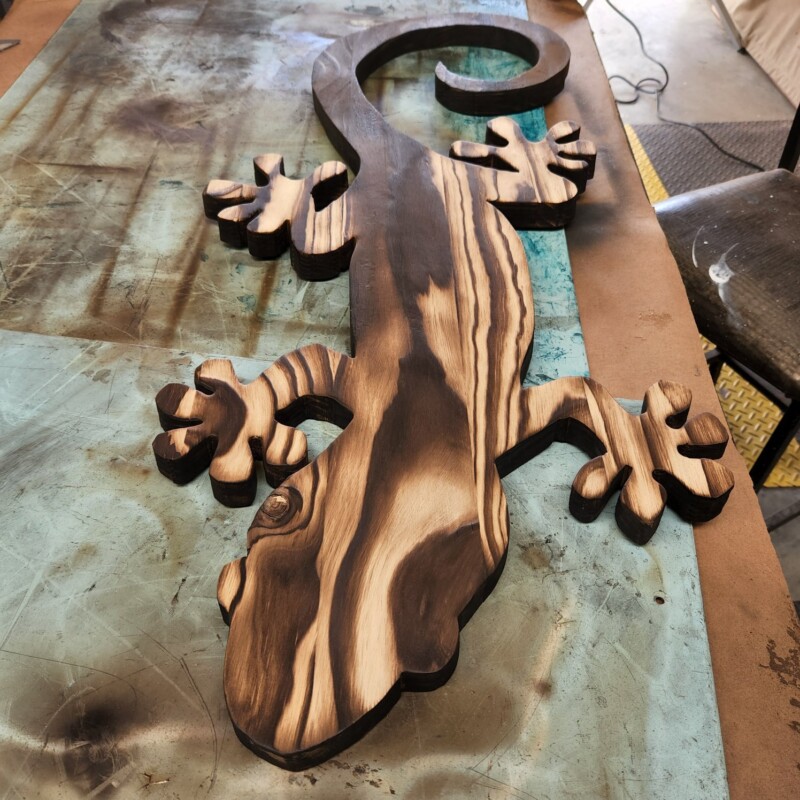
Cut the Gecko Cleanly (Relief Holes Save Time)
Clamp the timber to a sturdy bench. Drill relief holes at tight turns, like toes and tail curves. These holes let the jigsaw blade turn without fighting the grain. Use a sharp, fine-tooth blade and work slowly.
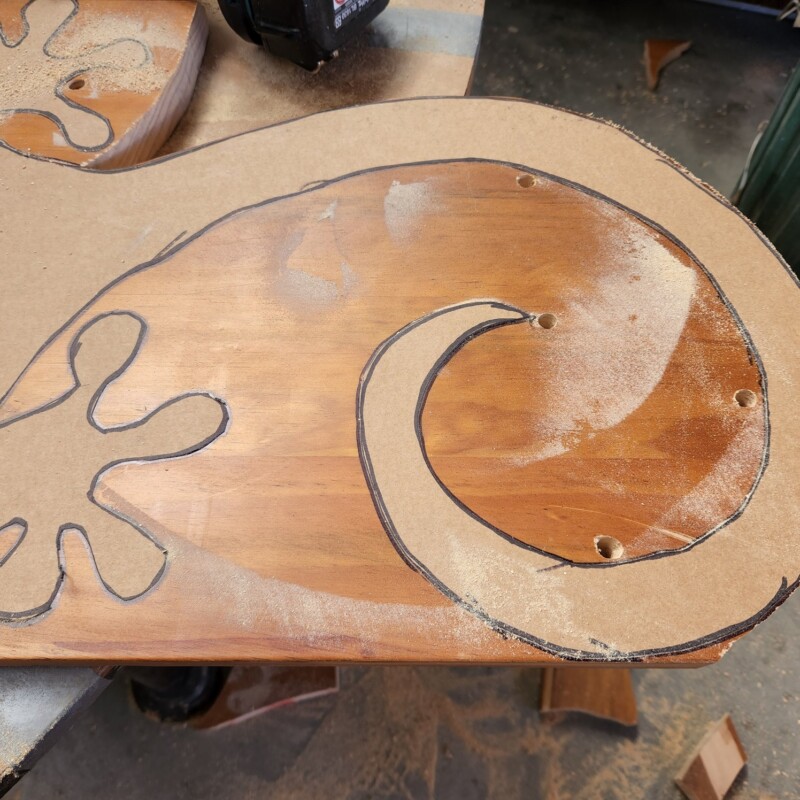
I’m not a jigsaw pro, so the relief holes were a lifesaver. They made the fingers and toes much easier to cut.
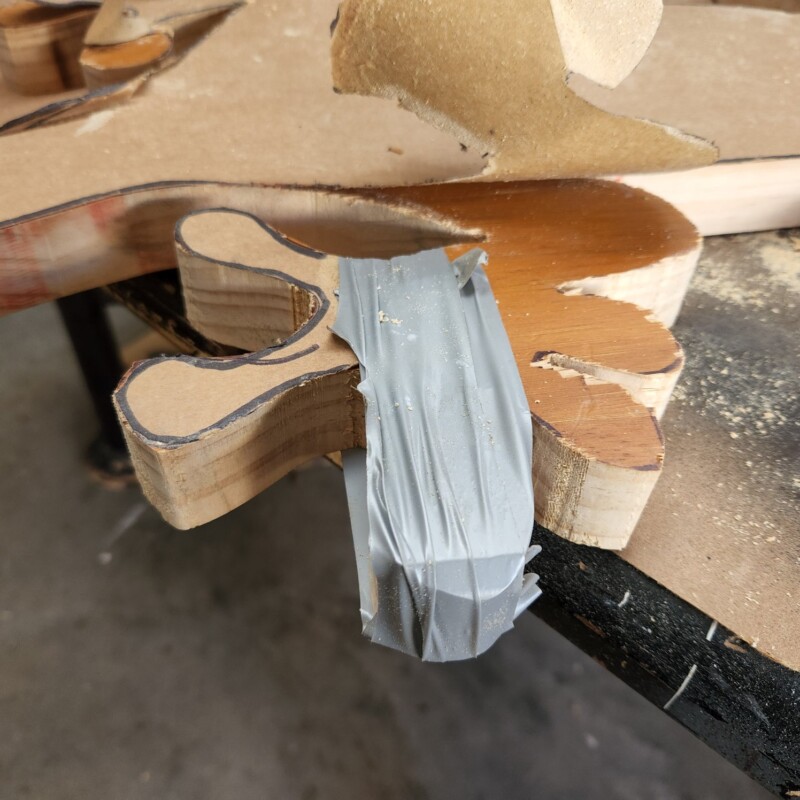
Quick Fix for Mishaps
If a small piece breaks (a “finger” in my case), don’t panic. Glue it back, tape it in place, and let it cure fully. Clamping the timber before cutting prevents most vibration and breakages.
Burn Safely for That Shou Sugi Ban Grain
Move outside or into a well-ventilated area. Suit up with a respirator, glasses, and gloves. Place the gecko on a non-flammable surface like sheet metal.
I prefer MAP gas because it burns hotter and faster. Propane works, but large panels can warp if you linger.
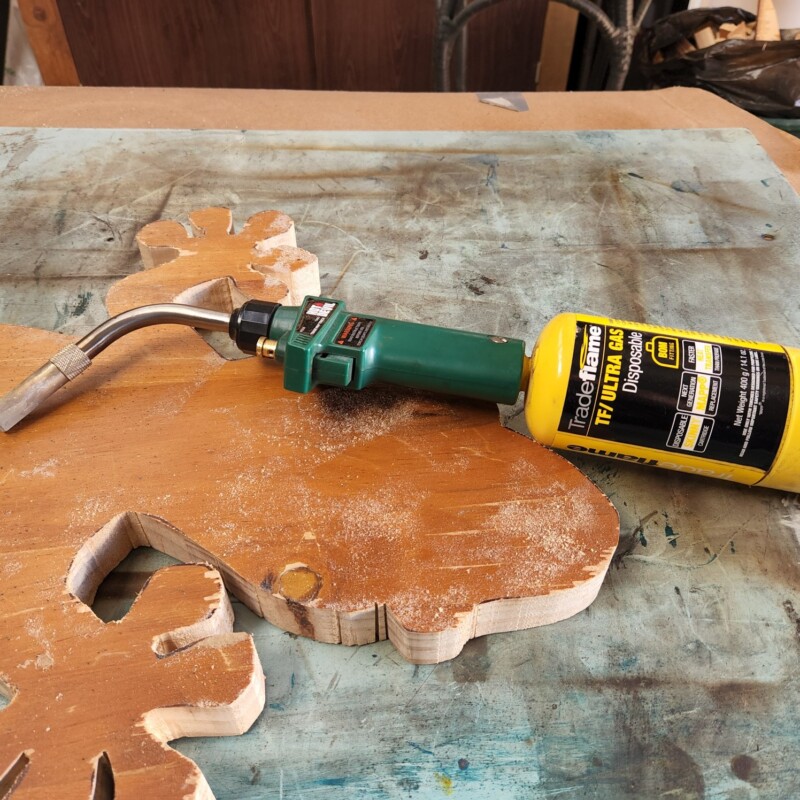
Move the flame slowly and evenly. Aim for an even char with that fine, cracked sheen.
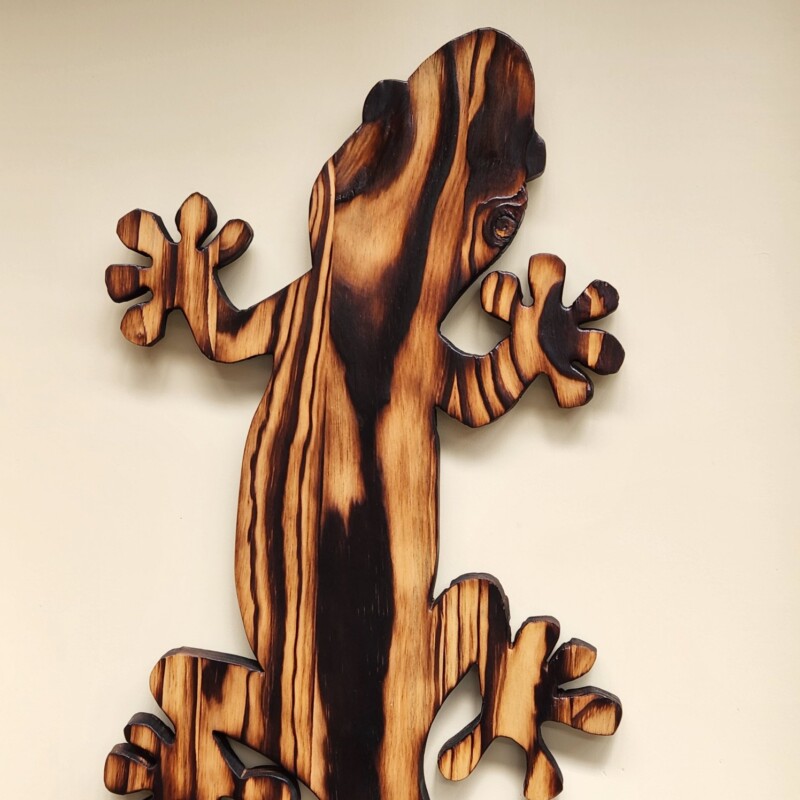
Brush Back to Reveal Texture
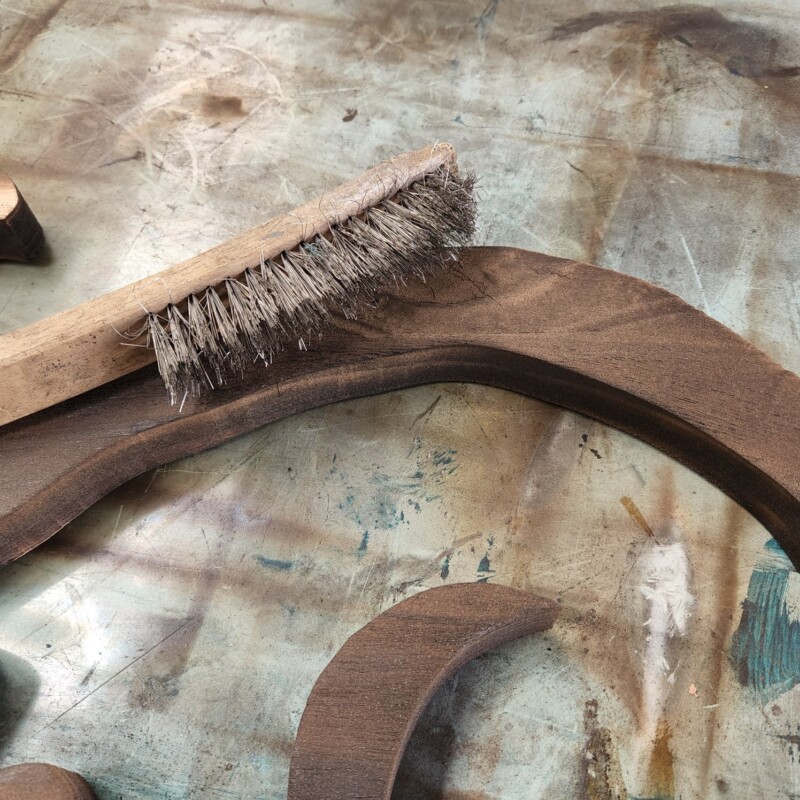
Knock off loose char with a hand wire brush first. This reduces dust when you sand.
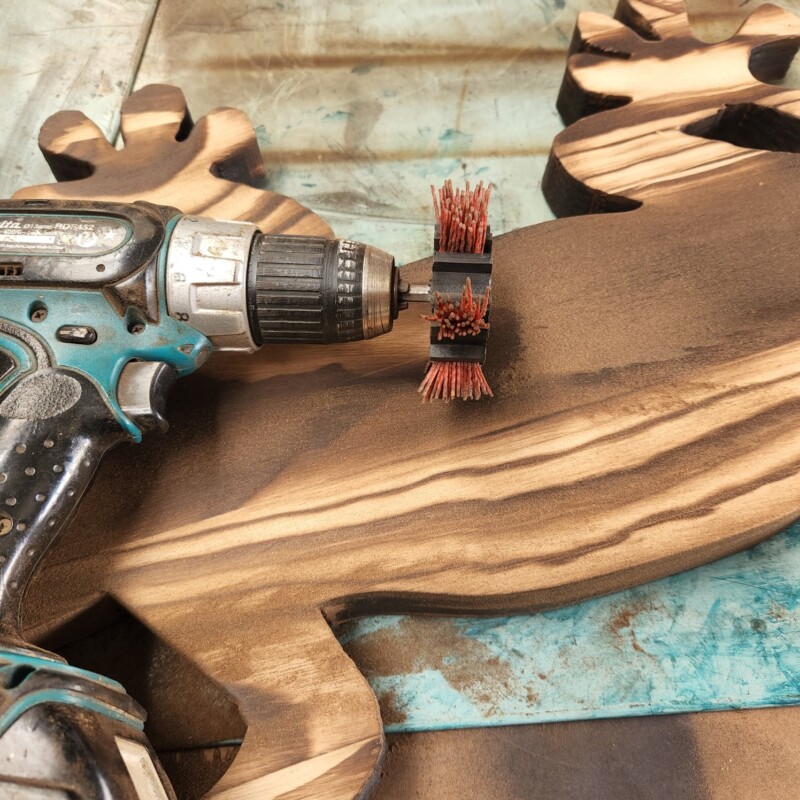
Switch to a coarse nylon drill brush or a restorer tool and work with the grain. The hard latewood stays dark. The softer earlywood brushes back to a lighter tone. This contrast creates that deep, rippled texture you can feel.

Want more texture? Do a second—or even a third—light burn. Let the timber cool between passes, brush off loose char, then reburn in slow, even sweeps.
Tip: A restorer machine speeds this stage up a lot. I used to spend hours brushing. With a restorer, it’s minutes.
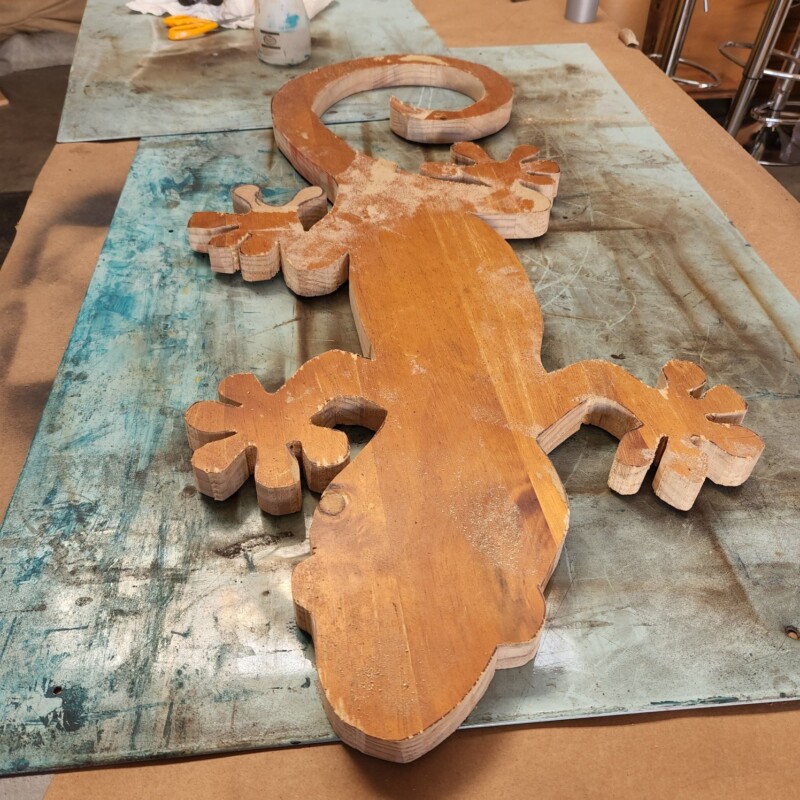
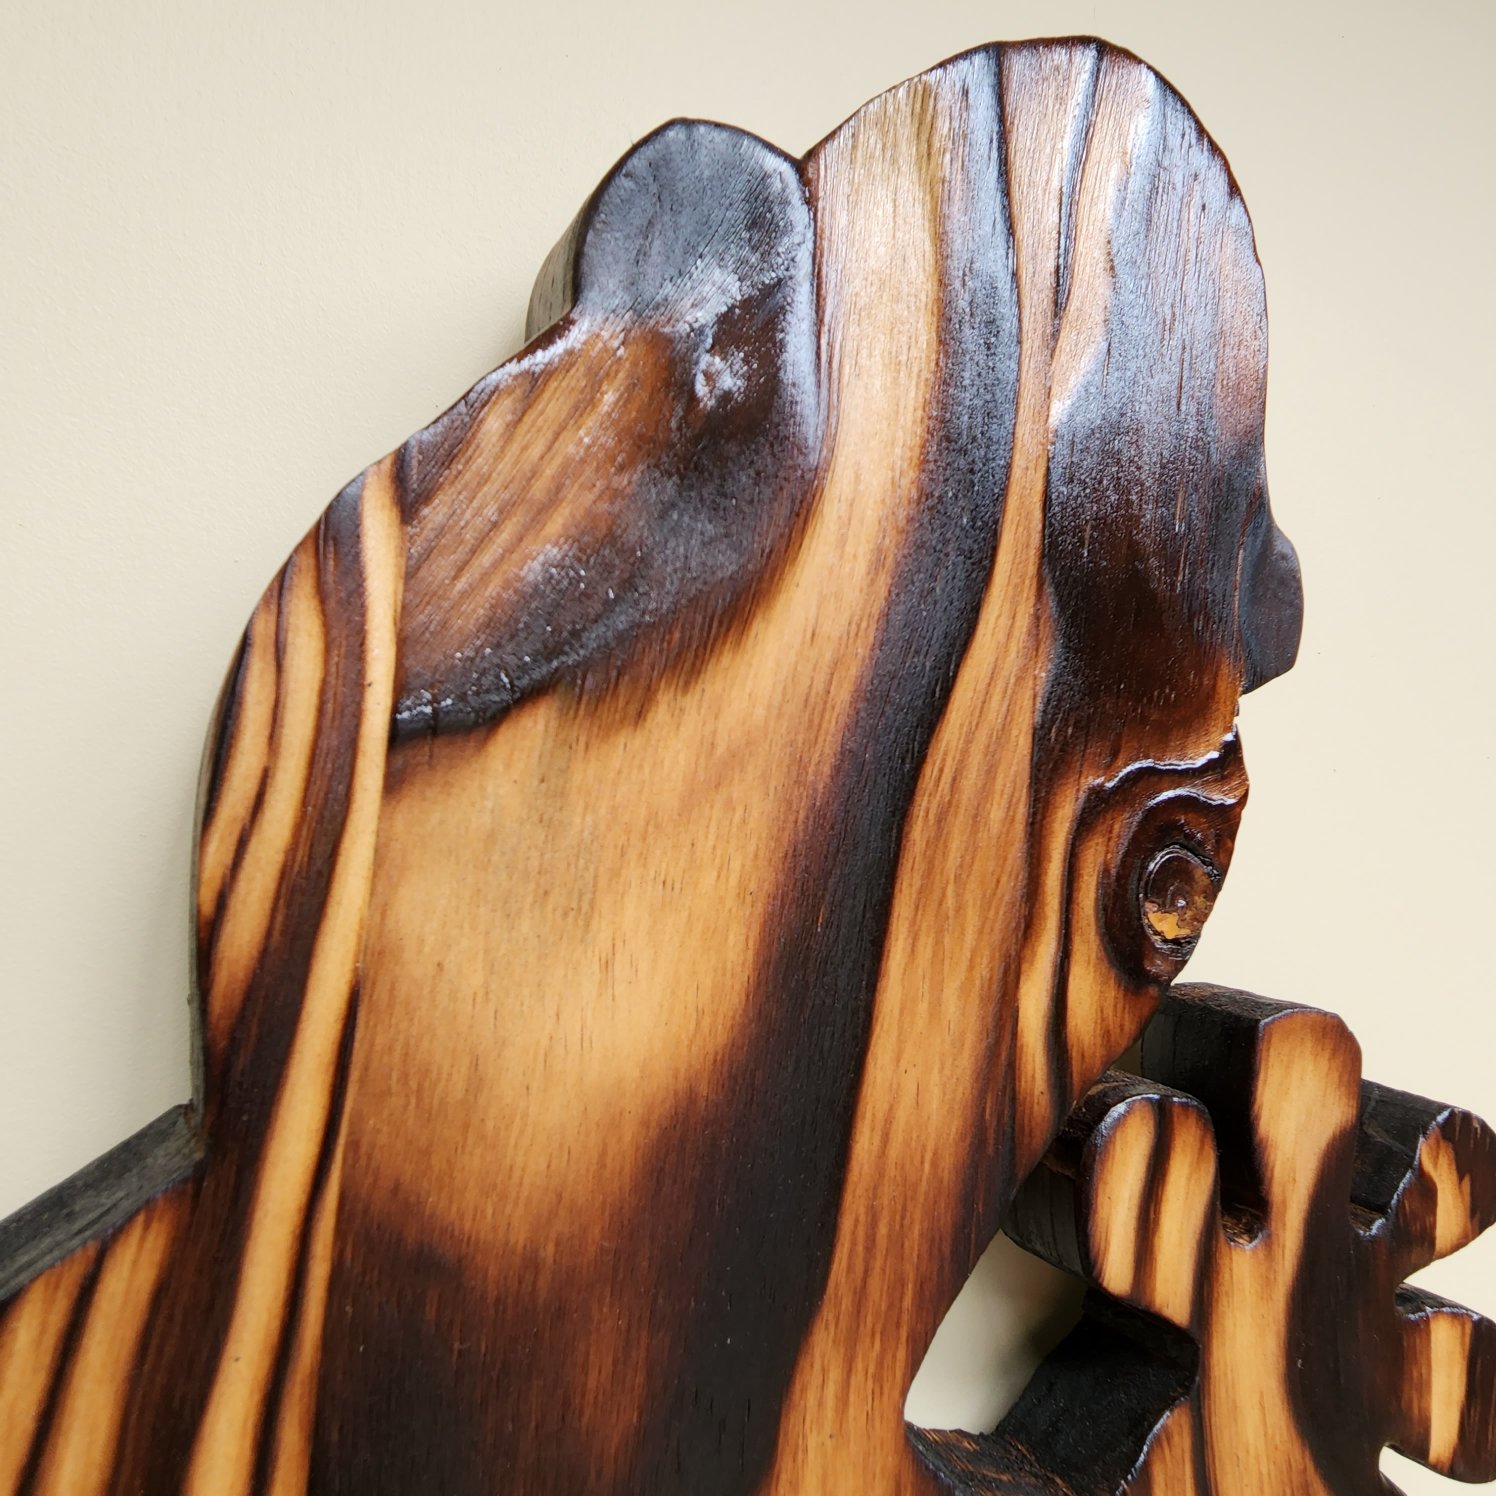
Sand for Drama (Deeper Sand = Brighter Colour Later)
Dial in the look with 120–180-grit sanding. Vary the depth a little to create light and shade. The deeper you sand in the low areas, the more colour variation you’ll get once sealed or stained. You can see the dramatic result of deep sanding in this post. Keep strokes aligned to the grain to avoid scratch marks.
After a second burn, the grain deepened and the ridges stood up beautifully. The camera barely catches it—the texture is far more dramatic in person.
Seal the Timber for a Weather-Ready Finish
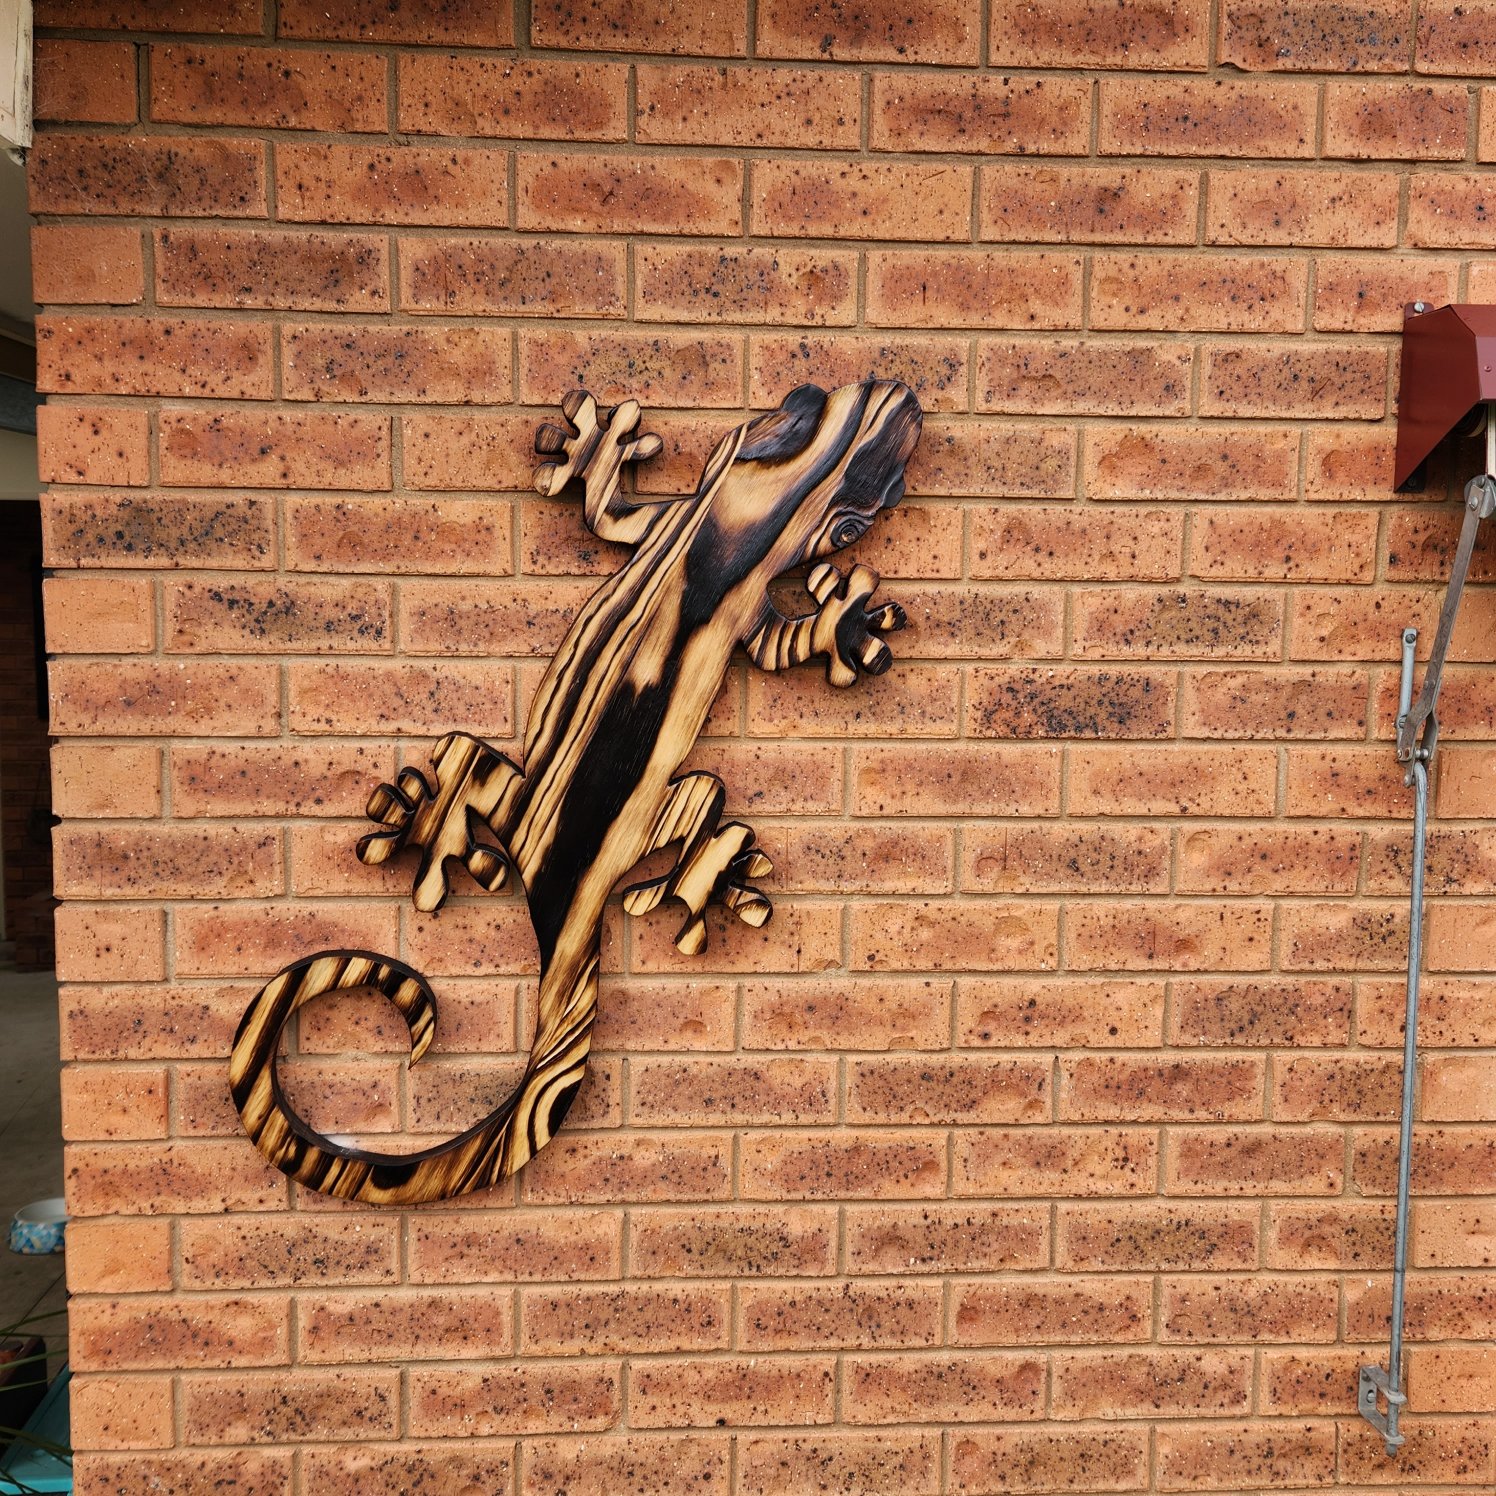
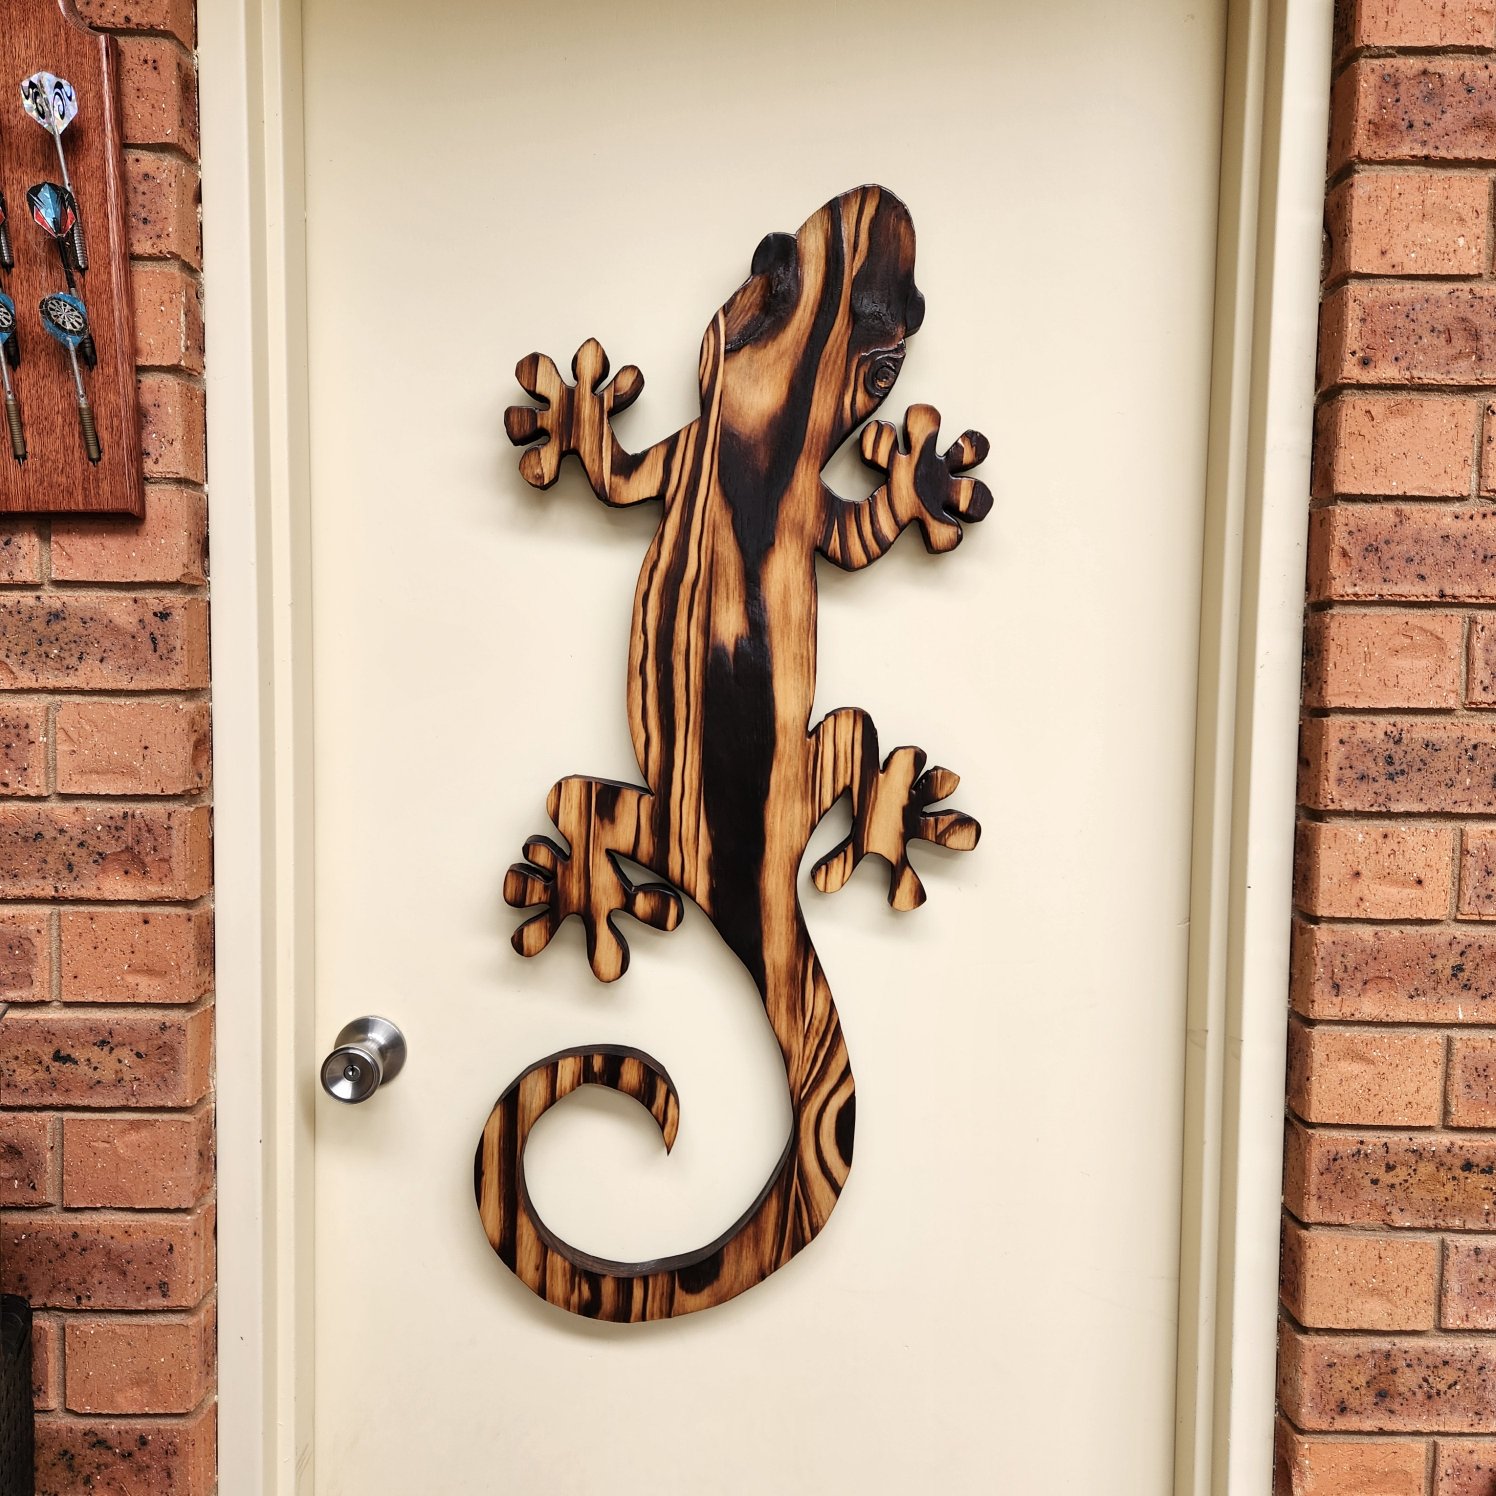
Dust off with a tack cloth. Apply two coats of exterior varnish or spar urethane, letting each coat dry fully. Sealing deepens the tones and lifts the grain. It also protects against the sun and rain outdoors.
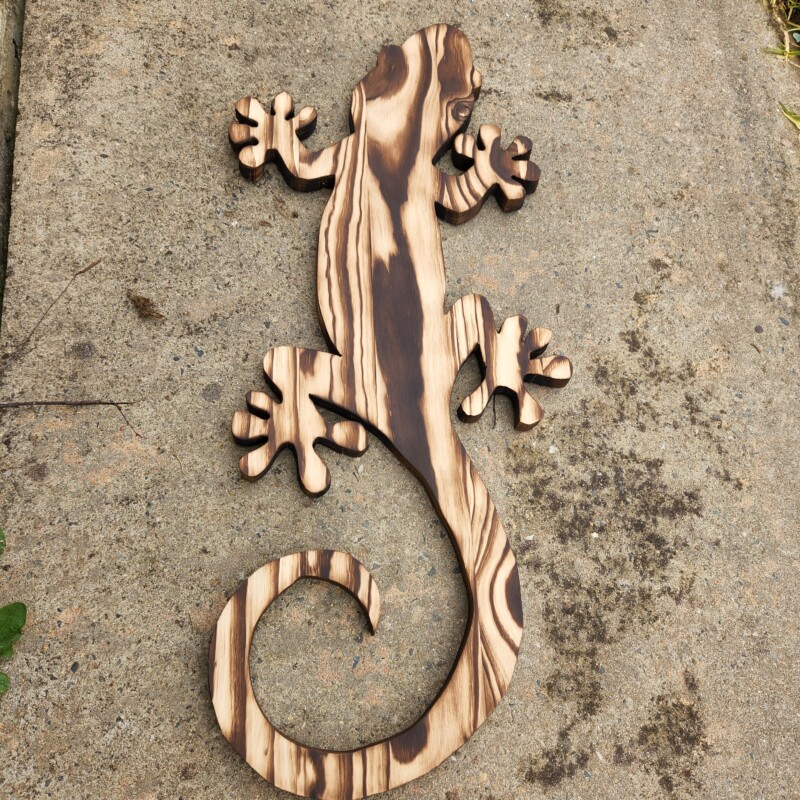
The colour shift after sealing is instant and very satisfying.
The images below show the texture of the surface. This cannot be truly appreciated from the photos, as they do not do it justice.

Adding colour to the wooden gecko
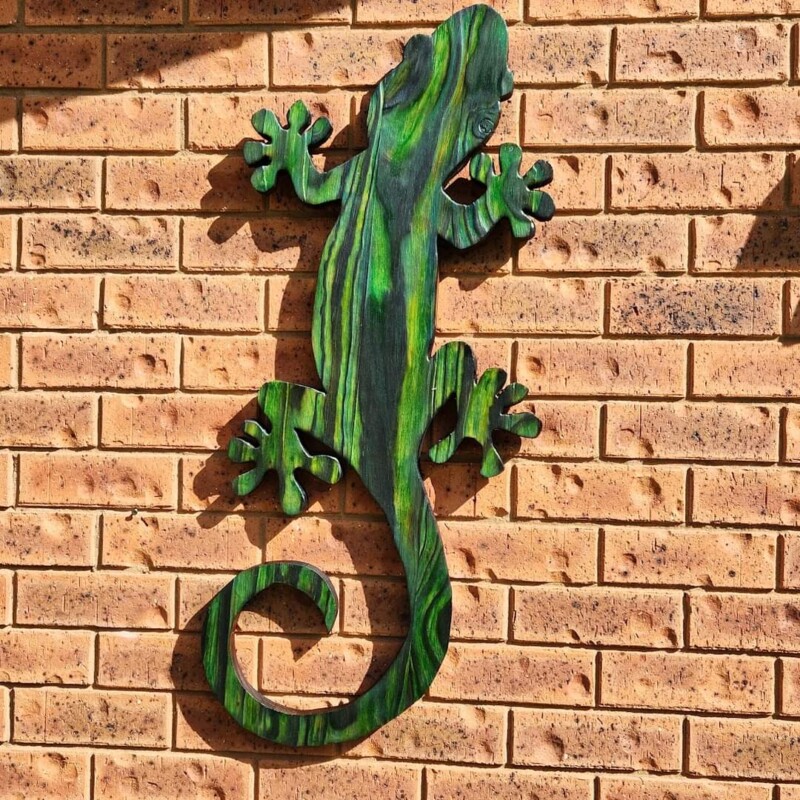
(Optional): Add Colour With Unicorn Spit
I tested Unicorn Spit “Dragon’s Belly” for a bright green wash. Want to add colour to Shou Sugi Ban? I’ve documented the methods I tried and the exact products I used in this post.
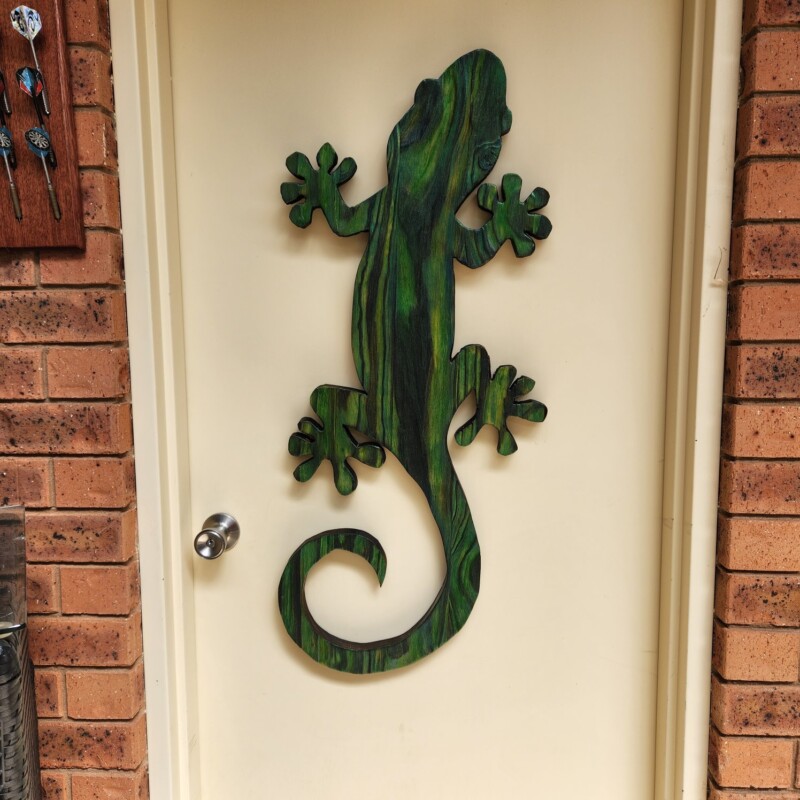
Believe it or not, I only used one colour. The multi-tone look comes from sanding depth and grain contrast. Apply a light coat, wipe back, then reseal with clear exterior varnish once dry. Can’t decide between natural and coloured? Try both on test scraps before you commit.

Outdoor Suitability & Mounting
Best under cover on a patio or verandah. Re-coat yearly in harsh sun. Mount with a French cleat for strength and easy levelling. Use masonry anchors on brick. Seal any fresh holes.
More DIY Decor ideas
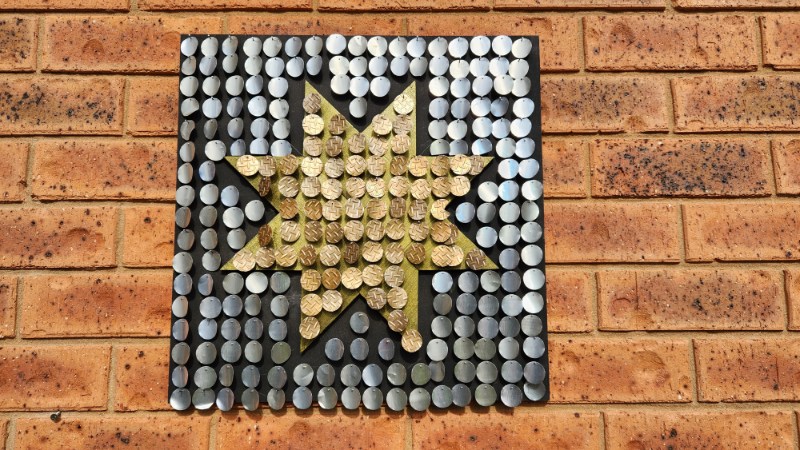
This shimmering wall hanging is made from recycled aluminium cans. I punch the cans into neat circles and smooth the edges. Then I nail each disc to a timber board in overlapping rows. In the wind, the discs shimmer and give a gentle, musical jingle.
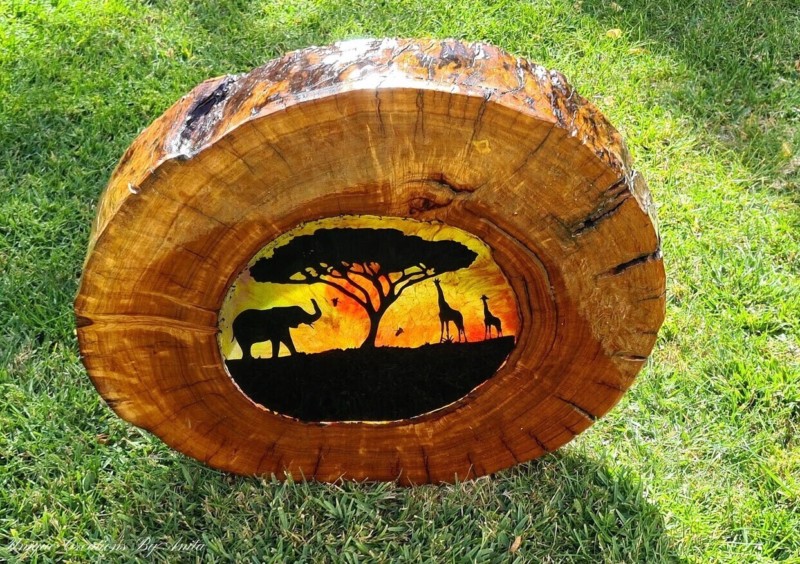
Create a wooden suncatcher with an African theme for your garden using a slice of wood.
Do over designers’ blog hop
As I mentioned, this is the ‘Do It Over’ Designers Blog Hop, and there are some amazing projects! Be sure to click on the links below for inspiration.

Southern Sunflowers

If you’re interested in any of the items used in this project, we’d appreciate it if you used our affiliate links. Clicking these links earns us a small commission at no extra cost to you, helping us create more inspiring and exciting projects to share. We’d also love to hear your thoughts—feel free to leave a comment or share this post!


26 Comments
Easy Wood Craft for a Patriotic Table Centerpiece - Modern on Monticello
May 27, 2023 at 9:01 pm[…] Unique Creations by Anita […]
Kim
May 27, 2023 at 9:23 pmAnita, you are a true artist and always share the most unique and creative upcycles. This one is gorgeous…both ways. I’m sorry, but I’m no help. I can’t decide which one I like better either. Honestly, I’d be thrilled to have either one of them in garden. Oustanding!
Anita Holland
May 28, 2023 at 11:17 pmThanks so much Kim, I really do appreciate your awesome compliment. I love the challenge of trying to come up with something unique.
sara allen
May 27, 2023 at 10:14 pmI”m in love with this project Anita! My nephew had a gecko (Gordon) and would go crazy for this too. So glad the casualty with the gecko’s finger and not yours! Well done.
Green is my favourite colour and it really pops on the brick. But I also love it natural so I won’t be much help in helping you decide lol.
Anita Holland
May 28, 2023 at 11:20 pmThanks Sara! I love ghekos too. I have them all over my house and garden. I did go with the green in the end because it stood out on the bricks.
Patti @ Pandora's Box
May 27, 2023 at 10:15 pmStunning!! This art was new to me! Love the size as it certainly makes a statement!
Anita Holland
May 28, 2023 at 11:21 pmThanks Patti I have always been a go big or go home person 🤣🤣
Ann
May 27, 2023 at 10:24 pmThis is an amazing technique, Anita. Thank you for the tutorial on it. Your gecko is beautiful and I think I like the green since it’s a gecko!
Anita Holland
May 28, 2023 at 11:22 pmThanks Ann! I did go with the green in the end.
Tania
May 27, 2023 at 11:48 pmVery cool and I’m so glad you added the green, he’s awesome!
Tania
Anita Holland
May 28, 2023 at 11:23 pmThanks so much Tania 😉
Gail @Purple Hues and Me
May 28, 2023 at 12:08 amYou are one amazingly creative artist, Anita! I had never heard of Shou Sugi Ban before now. Both the green and natural finish look gorgeous! Thanks for sharing with us so many creative techniques!
Anita Holland
May 28, 2023 at 11:24 pmThanks for the great compliment, it makes my day when others enjoy my projects.
Julie
May 28, 2023 at 12:22 amWowza! Your gecko is amazing. I love the burnt wood effect too, it’s stunning.
I was going to say I prefer the natural colour but when I saw the green stain in the bright sunshine it totally won me over, it looks fabulous.
Anita Holland
May 28, 2023 at 11:26 pmThanks so much! The green was even nicer in reality the camera did not pick up all the shimmer in the green.
Rachel
May 28, 2023 at 1:29 amI was impressed when I saw the wood coloured version but gasped when I saw the green. Wow! I can see exactly why it’s your passion. What a brilliant project.
Anita Holland
May 28, 2023 at 11:27 pmThanks Rachel, it is such a great technique and every project is so unique.
Tuula @ Color Me Thrifty
May 28, 2023 at 1:31 pmWow! I’m totally amazed by how awesome your geckos are. They both turned out great, but as a color-loving gal I have to say that the green is so gorgeous.
Anita Holland
May 28, 2023 at 11:15 pmThanks so much, I did go for the green in the end.
Anita Holland
May 28, 2023 at 11:28 pmThank you so much for your comment the green did win in the end.
Donna @ Modern on Monticello
May 31, 2023 at 4:14 amVery unique project and it looks amazing! I can’t decide but I like both colors for this project. Either way, I am very impressed with your knowledge and skill on how to pull this look off. I enjoyed reading the post.
Allyson @ Southern Sunflowers
June 1, 2023 at 4:04 amYour wooden gecko looks spectacular!! I love both looks, but the green really gives an extra wow factor.
RUTH WEIMER
June 3, 2023 at 1:59 pmYOU DID IT AGAIN!!! …WITH NO END IN SIGHT!
Michelle Leslie
August 22, 2023 at 3:03 amWhat a superb specimen. The one knot on the right looks like an eye <3 Both variations are beautiful but I'm partial to Unicorn SPiT and dragon's belly is such a lovely colour. Apt for your gecko too. Now he has super human powers to stand out against the brick wall.
Anita Holland
August 22, 2023 at 10:35 amThanks so much Michelle, I did stay with the dragon belly in the end.
Add a Splash of Colour to Farmhouse Kitchen Decor – Tea and Forget-me-nots
October 22, 2023 at 7:12 am[…] Unique Creations by Anita […]