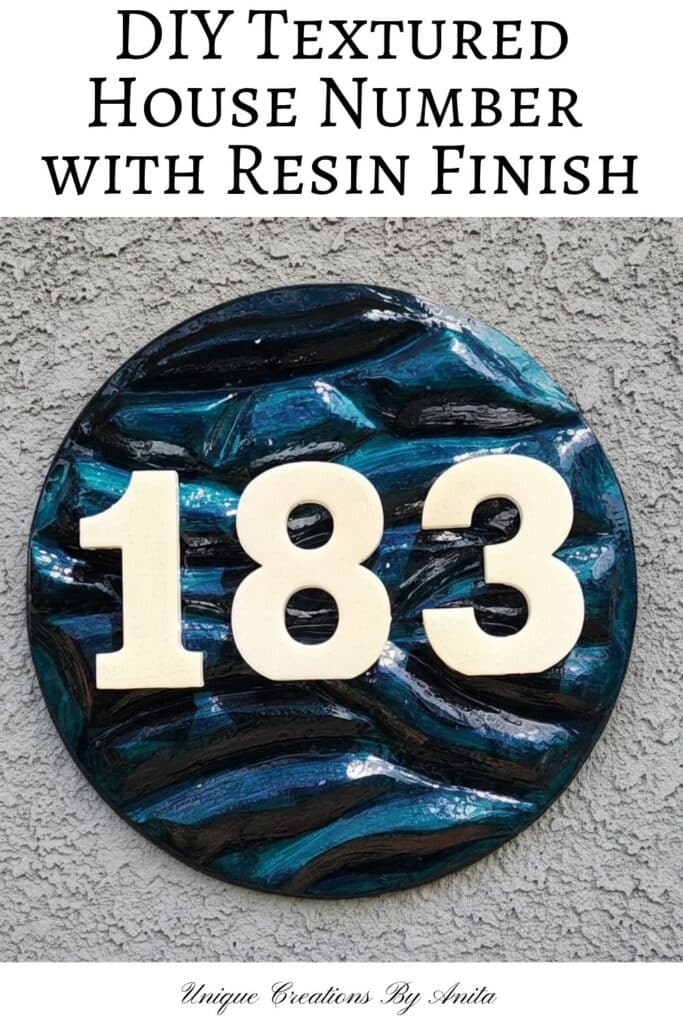
If you’re looking to boost your home’s kerb appeal with a unique handmade touch, this DIY textured house number sign is a perfect weekend project.
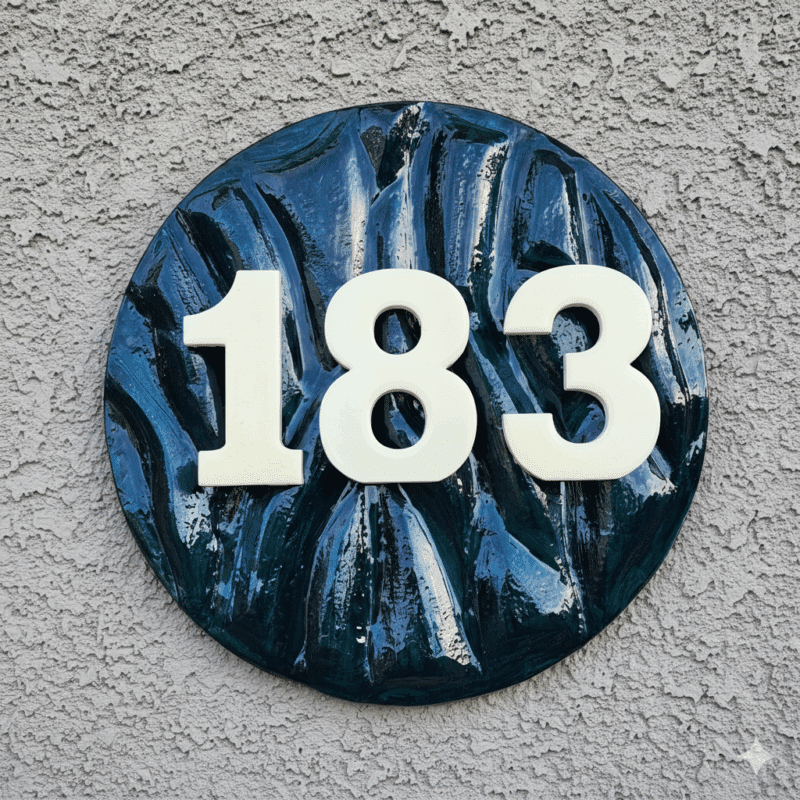
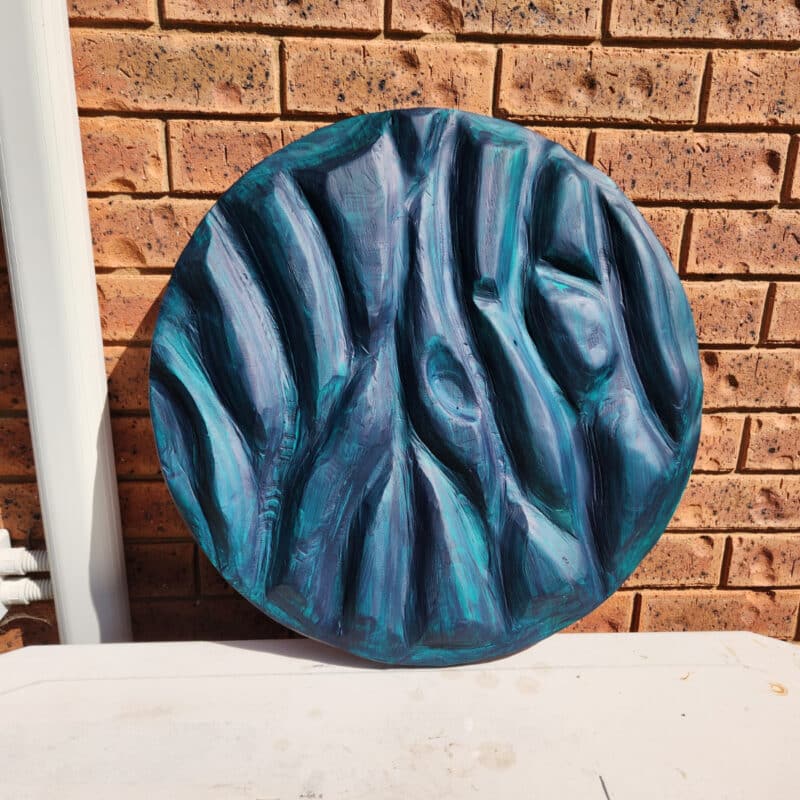
I created this striking piece using a leftover round of wood from a wine barrel table I made earlier. Instead of tossing it out, I decided to transform it into a bold and weatherproof house number sign for my sister’s home. The textured carving, deep ocean-inspired colours, and glossy resin finish make it a true statement piece against a brick wall.
Before we dive into this tutorial, be sure to subscribe to my bimonthly newsletter to be the first to see my latest projects. You can also follow me on Pinterest and Facebook, where I also include my unique mixed-media art projects.
DIY Textured House Number Sign with Resin Finish
**This post may contain affiliate links. This means I earn a small commission on links used at no extra cost to you. Please see my disclosure policy for more information.**
Materials Needed
- Round plywood board 60cm x 60mm (mine was from an old wine barrel table)
- Grinder with 80-grit sanding disc
- Coarse nylon sanding brush and drill
- 120-grit sandpaper
- Unicorn Spit Navajo Jewel and acrylic paint (Deep Sea)
- Water spray bottle
- Foam brush
- 2:1 epoxy resin
- Small blowtorch
- Large house numbers
- Two-part epoxy glue
- Countersunk screws
- Keyhole bracket and wall screw
- Safety glasses and respirator
Creating the Base
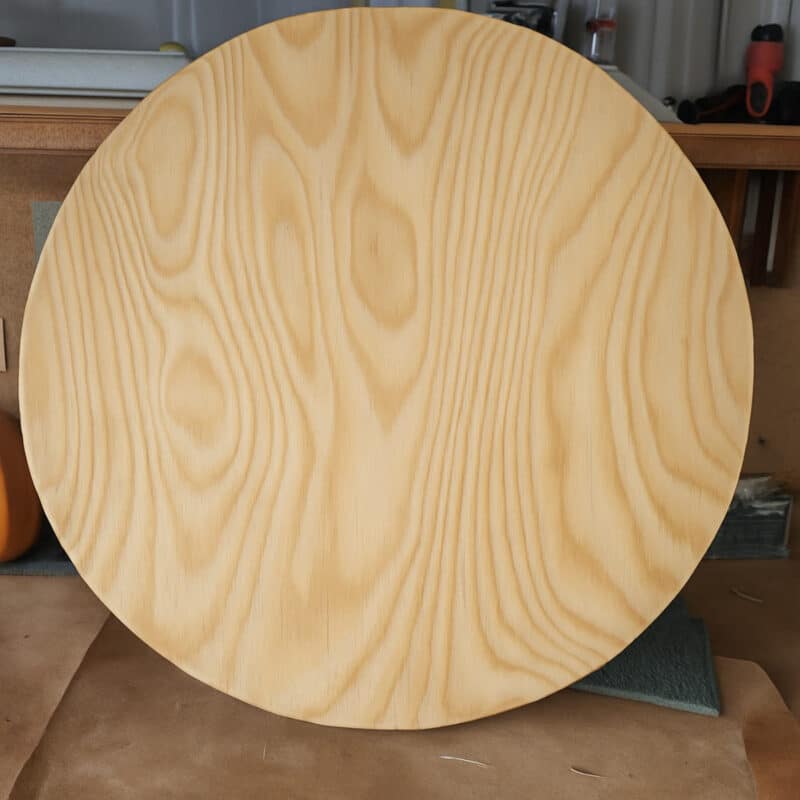
The base for this project was a thick round piece of wood made from several layers of 12mm (60mm x 60cm)plywood glued together. You can use any solid timber or plywood, but plywood has the added benefit of revealing its beautiful layered edges once carved. The size was ideal for large house numbers that could be easily seen from the street.
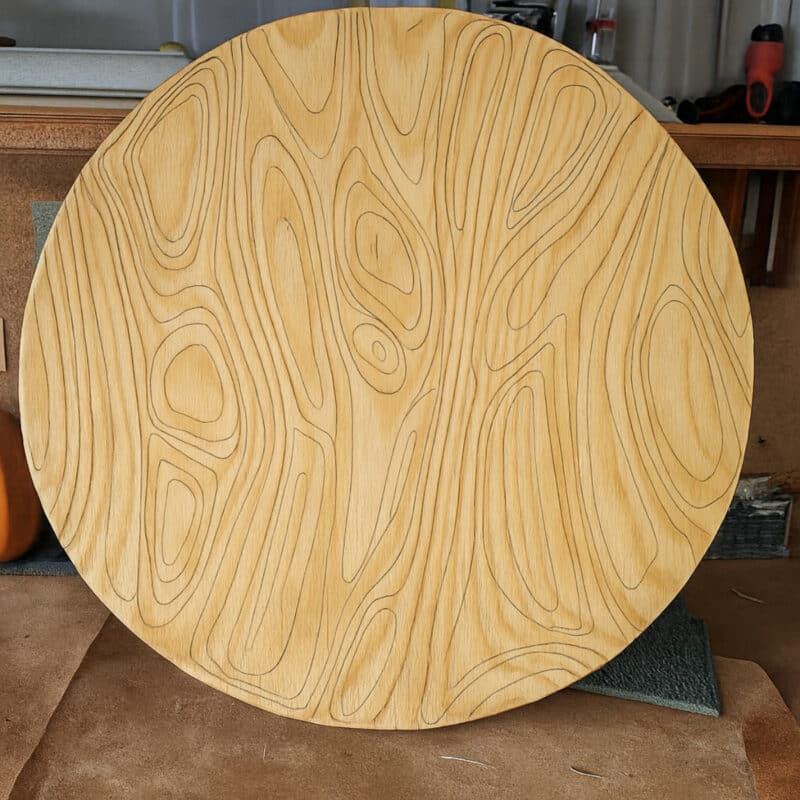
I started by sketching random flowing lines across the surface to use as loose carving guides. I didn’t follow them too strictly — I prefer to let the design evolve naturally. My goal was to create a wavy, textured surface that would catch the light and give depth once painted and coated in resin.
Carving and Shaping the Texture
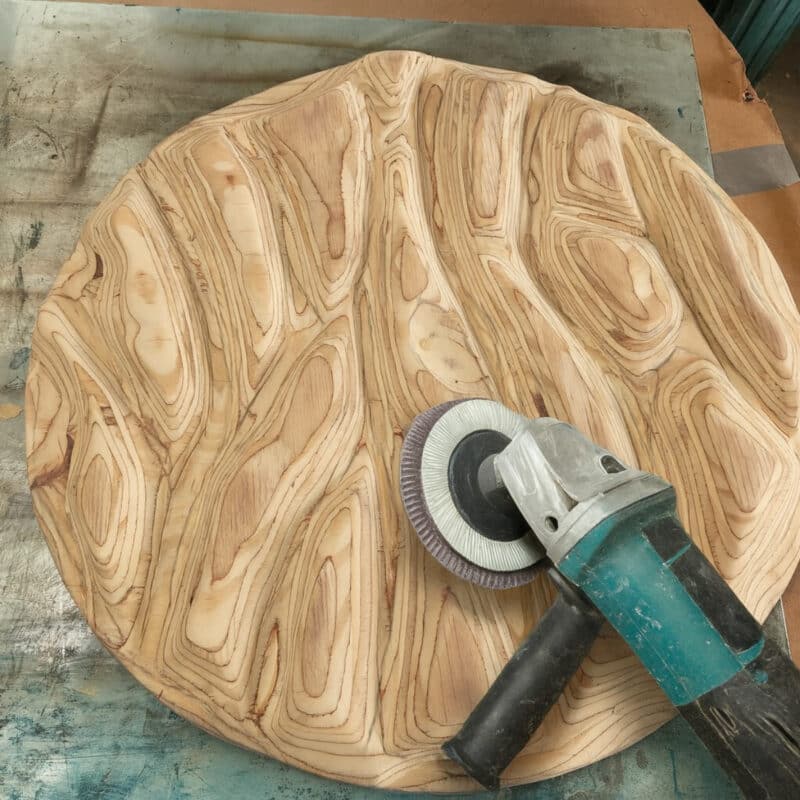
For carving, I used an 80-grit sanding disc attached to a grinder to remove the bulk of the wood. This step creates a lot of dust, so I highly recommend doing it outdoors and wearing safety glasses and a respirator.
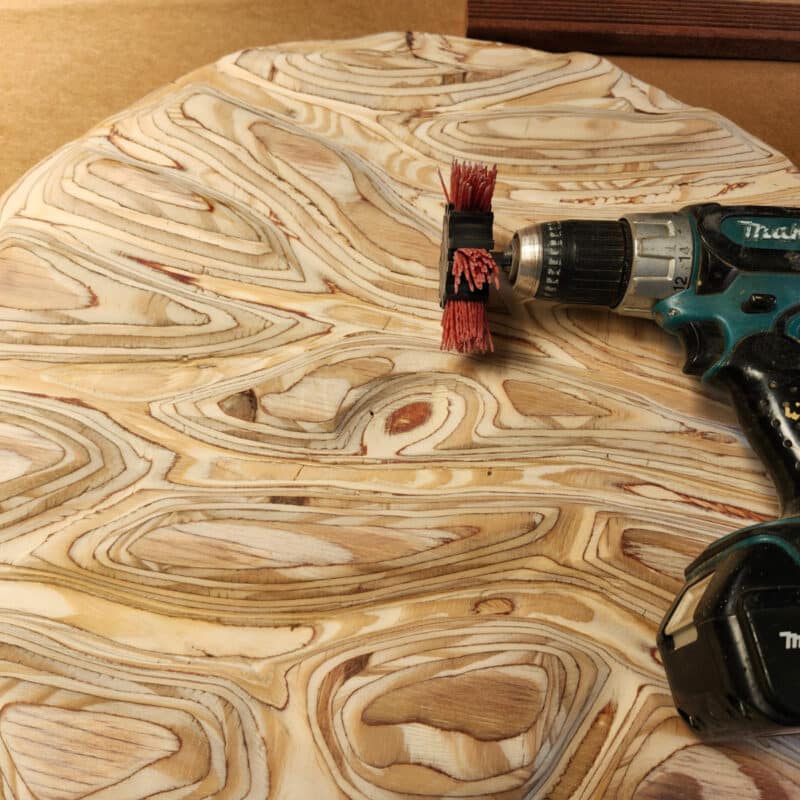
Once the rough shaping was complete and the design began to take shape, I switched to a coarse nylon sanding brush on a drill. This tool helped smooth out the rough areas left by the grinder while accentuating the plywood layers. Sand with the grain of the wood and work carefully between each groove.
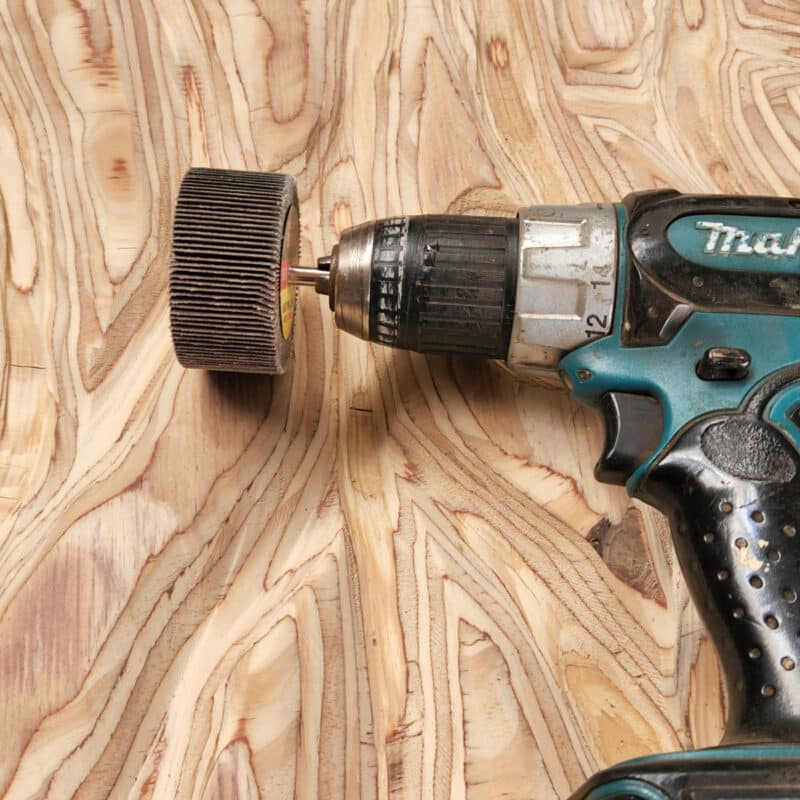
If you don’t have a coarse nylon brush, you can use a flap wheel attached to a drill, which works just as well for smoothing and shaping the textured surface.
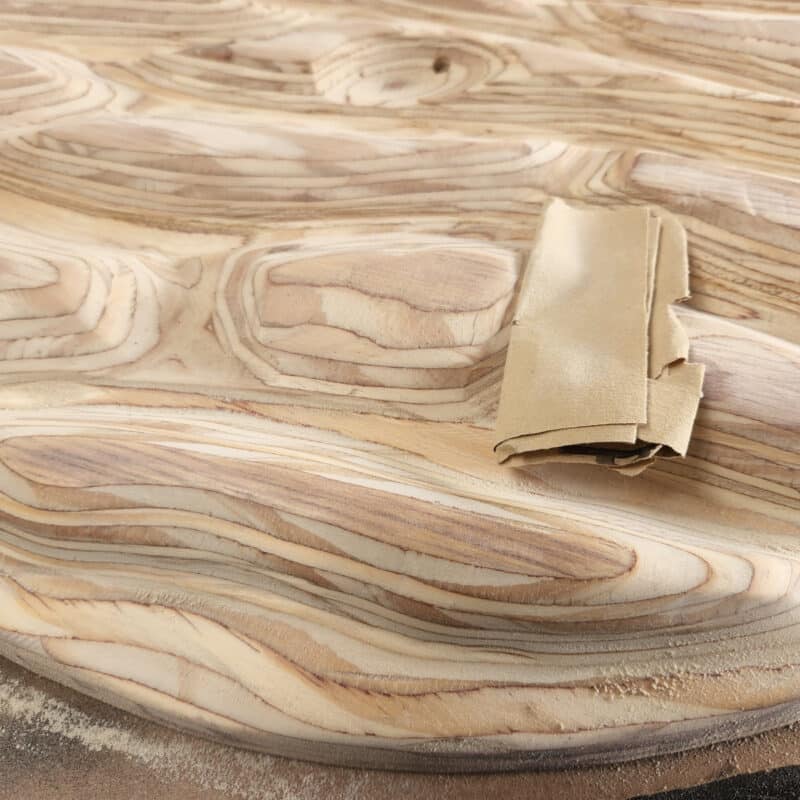
Once I was happy with the shape, I hand-sanded the surface with 120-grit sandpaper to smooth it further and reach into the tighter gaps that the brush couldn’t access.
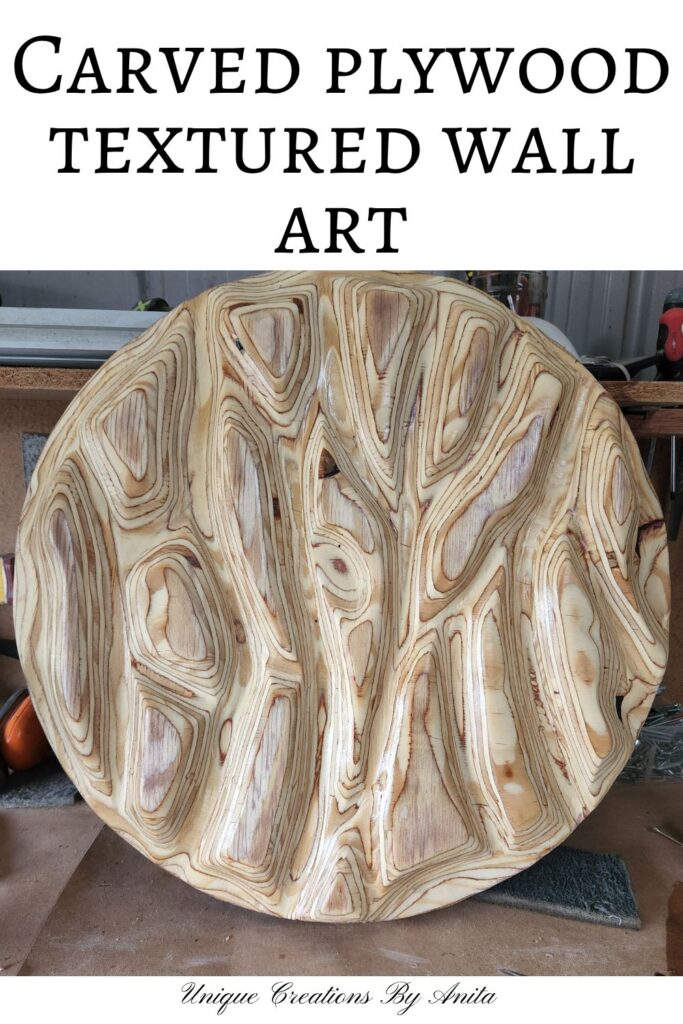
At this stage, you could stop and simply apply a few coats of clear varnish — it looks fantastic as a textured wall art piece on its own. But I wanted a bright, eye-catching finish that would stand out on my sister’s brick wall.

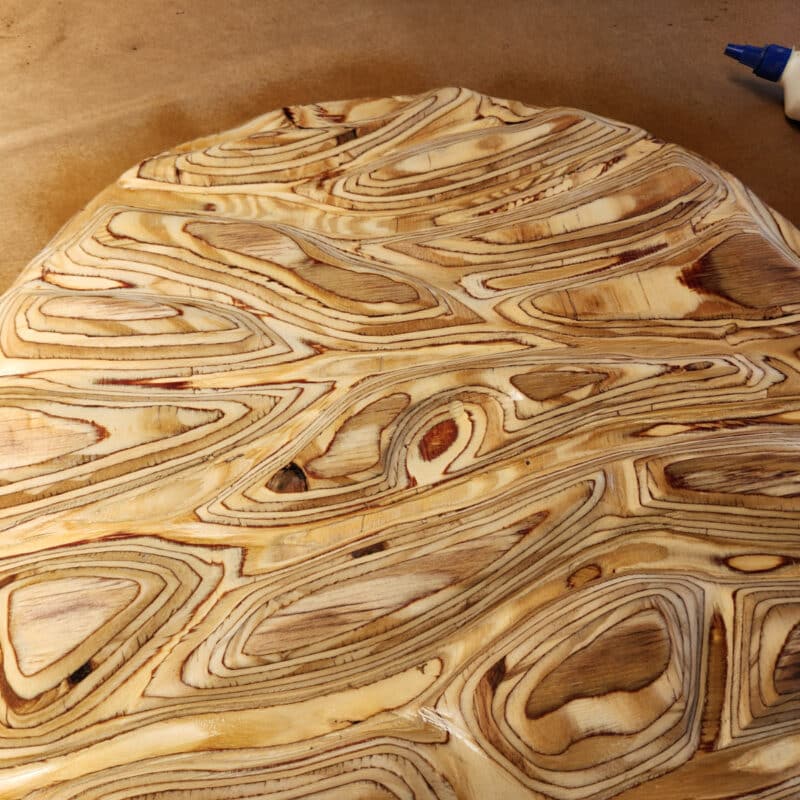
The view below shows how deeply the wood has been carved and highlights the beautiful textures created by the layered plywood.

Adding Colour and Depth
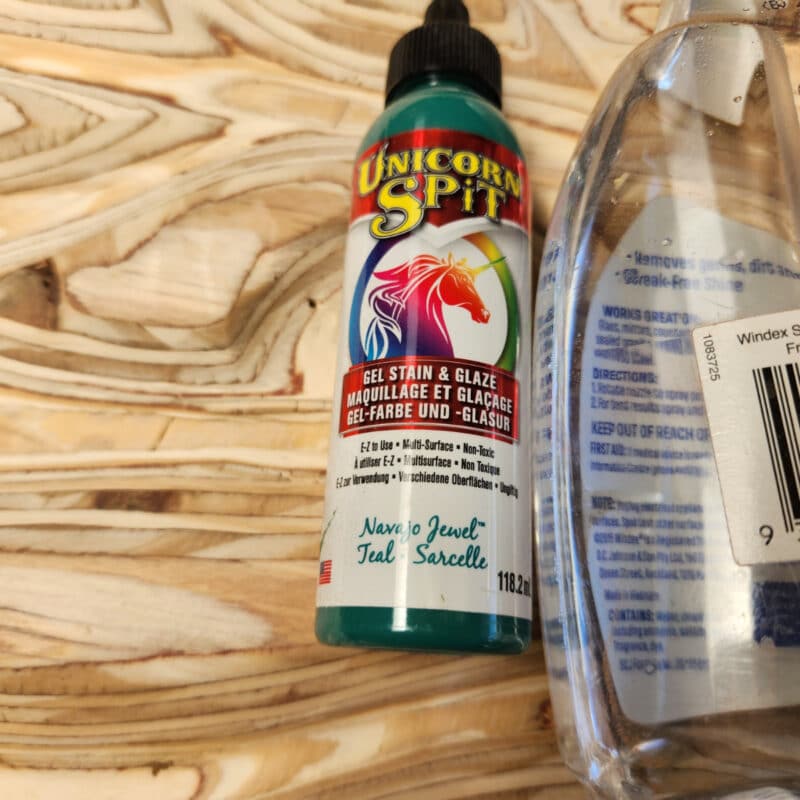
Before painting, I misted the surface with water to hydrate the wood. This helps prevent blotchy paint absorption. The image below, with the surface sprayed with water, gives a good indication of how the textured wall art will look once it’s varnished or coated with resin.
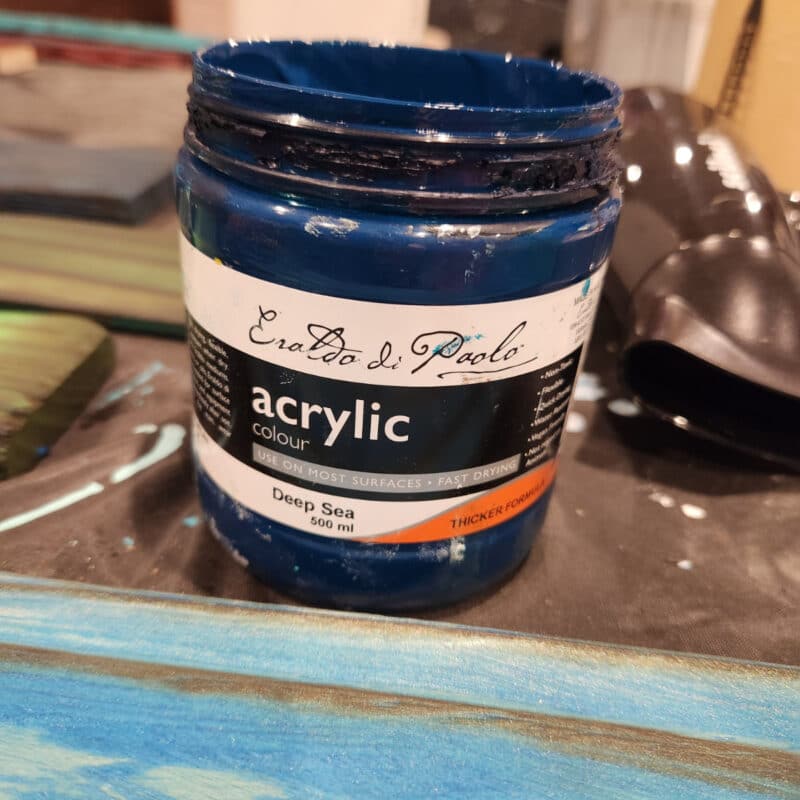
I initially applied a coat of Unicorn Spit Navajo Jewel, but the colour felt too light. To deepen it, I added acrylic paint in a shade called Deep Sea, which produced a rich, dark blue-green tone reminiscent of ocean waves. I blended the colours until I achieved a layered, dimensional effect, perfect for highlighting the carved texture.
I let the paint dry overnight to ensure there was no moisture trapped in the wood before applying the resin.
When planning the placement of your house numbers on the curved surface, make sure there are enough raised areas that sit flush with the numbers so they can be securely fastened.

Coating with Epoxy Resin
To seal and protect the surface, I mixed a small batch of 2:1 epoxy resin and applied it with a foam brush. The resin adds a beautiful glass-like shine and protects the wood from the elements. If bubbles appear, gently sweep a small blowtorch (like a crème brûlée torch) over the surface to pop them. Some small areas resisted the resin, likely due to glue between the plywood layers, so I touched those up with an extra coat once the first layer had cured.

Adding the House Numbers
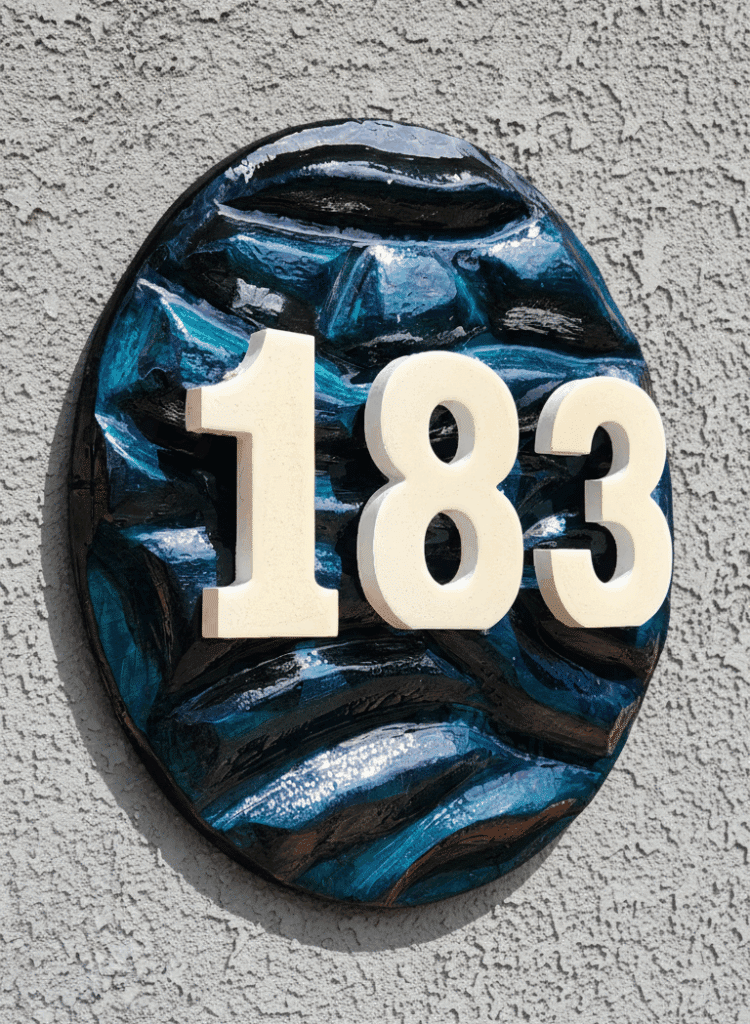
To complete the design, I chose large white wooden numbers that would contrast against the dark blue background. I coated them with a thin layer of epoxy resin for added weather protection. To attach them securely, I first used two-part epoxy glue to position them, then drilled pilot holes from the back and added long countersunk screws for extra strength.
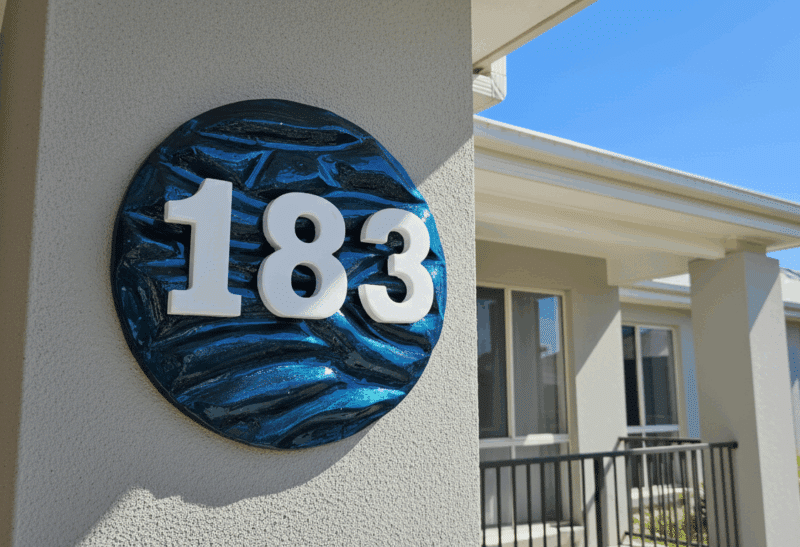
Finally, I installed a keyhole bracket on the back for easy hanging. It slides neatly over a screw in the wall, allowing the sign to sit flush and securely.
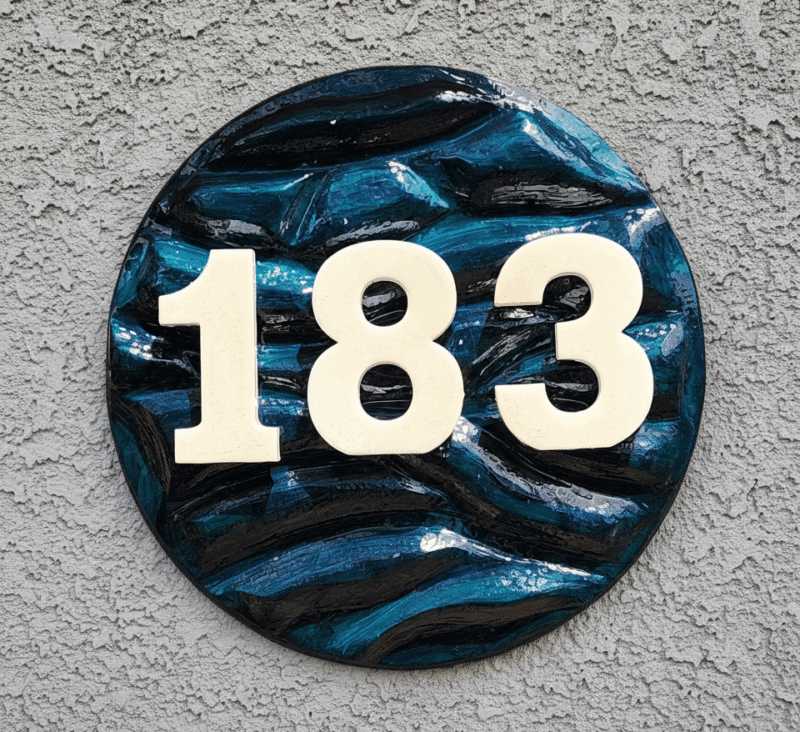
The finished result is a bold, glossy, textured house number sign that’s durable and stylish — a perfect mix of rustic and modern design that instantly upgrades your home’s exterior.
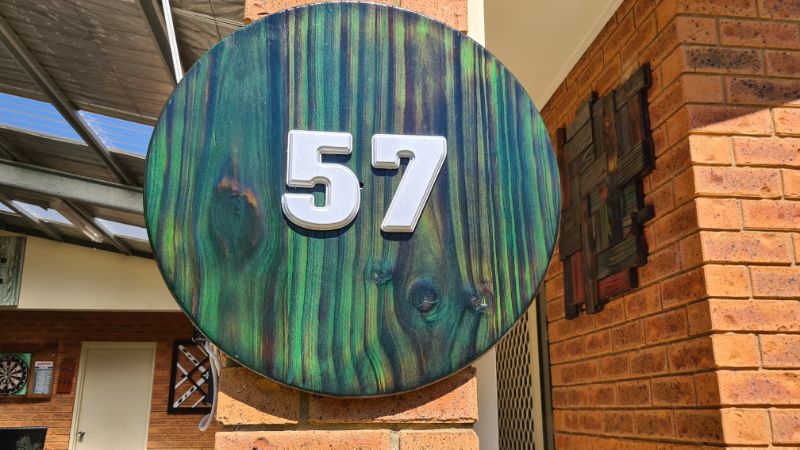
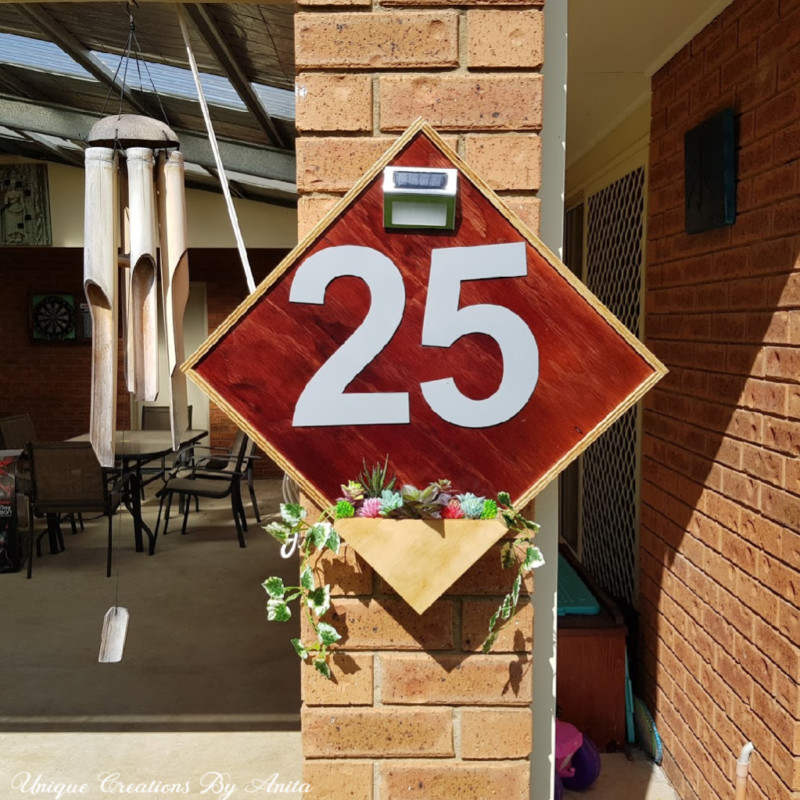
More house number ideas
This house number is a combination of shou sugi ban wood burning with unicorn spit stain.
This house number features a planter box filled with faux greenery for a no-maintenance touch, along with a solar light that illuminates the numbers beautifully at night.

If you’d like to find any of the items used in this project, we’d greatly appreciate it if you used our affiliate links. These links provide us with a small commission at no extra cost to you, allowing us to continue creating and sharing more inspiring projects. We’d also love to hear your thoughts—feel free to leave a comment or share this post!


2 Comments
Michelle Leslie
January 14, 2026 at 2:42 amI don’t think plywood has ever looked more beautiful. This is gorgeous, Anita. I’m in two minds about whether I like the raw, textured plywood or the resin, painted version more. I love wood grain. It always tells such a beautiful story but the resin and colors make the grooves pop and look so dynamic.
Anita Holland
January 20, 2026 at 7:13 pmI 100% agree with you, I only added the colour and resin to seal the wood and add some colour to here brick wall.