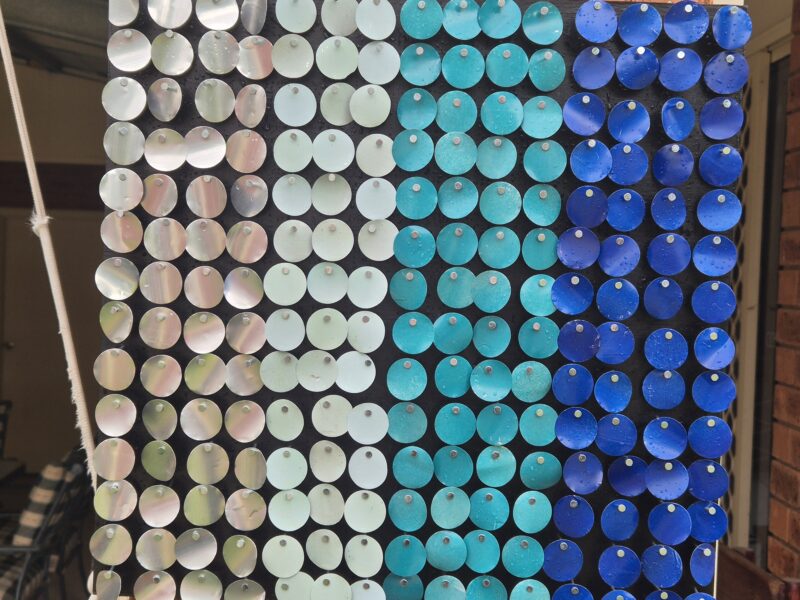
When I started creating this Moving Aluminium Can Mosaic Wall Art, I imagined a colourful wall hanging made from recycled drink cans that would shimmer in the sun. My original plan was to use the printed side of the aluminium cans, and I was almost halfway through nailing the colourful discs onto my board when I stepped back and took it outside. The movement was beautiful, but the colours didn’t pop the way I hoped. The silver circles, on the other hand, shimmered, reflected the sun, and created the most amazing sound as they moved in the breeze. That simple change transformed the whole project into a striking moving mosaic that dances with every breath of wind.
This tutorial shows how I prepared the board, safely cut and punched nearly 1,500 aluminium discs, and attached them to create a dynamic decorative wall hanging for the garden. The project is ideal for anyone who loves recycled art, outdoor décor, and unique handmade pieces that bring movement, light, and texture into the garden.
Before we dive into this tutorial, be sure to subscribe to my bimonthly newsletter to be the first to see my latest projects. You can also follow me on Pinterest and Facebook, where I also include my unique mixed-media art projects.
Moving Aluminium Can Mosaic Wall Art for the Garden
**This post may contain affiliate links. This means I earn a small commission on links used at no extra cost to you. Please see my disclosure policy for more information.**
Materials Needed
- Recycled aluminium drink cans (I used 72 cans)
- Marine ply board (mine was 1200 × 930 mm)
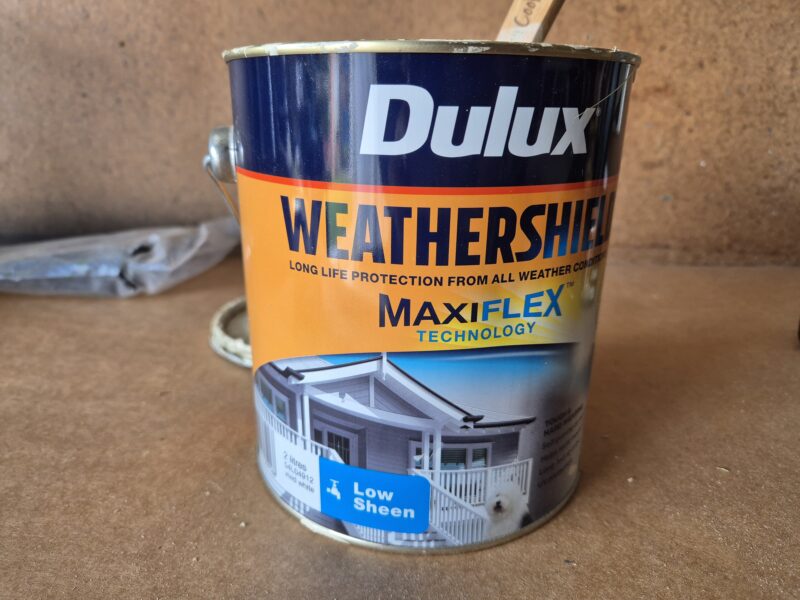
- Weather seal outdoor paint
- Black outdoor acrylic paint
- 1inch hole punch
- Scissors
- Thick gloves for safety
- Small brad nails
- Drill and thin drill bit
- Wood block
- Clamps
- Pencil and ruler
- Keyhole bracket for hanging
Preparing the Board
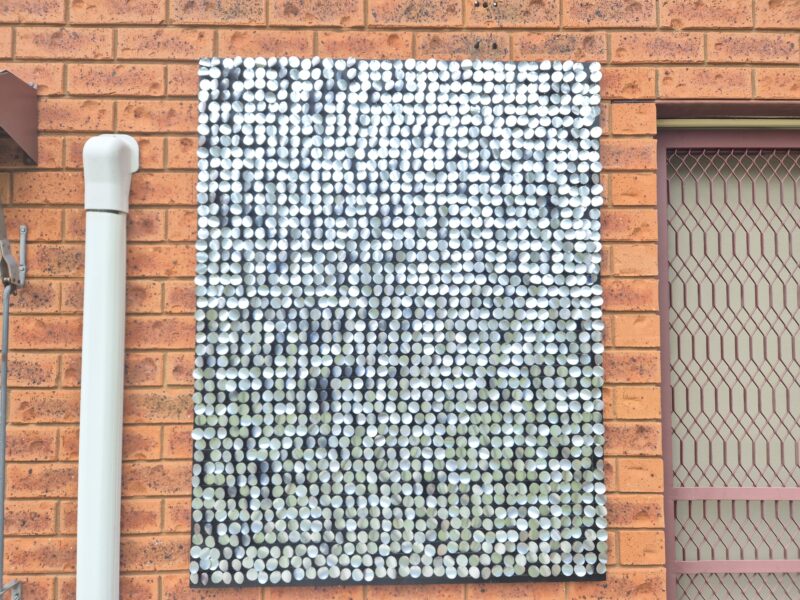
Because I wanted this moving mosaic to hang outside permanently, I chose marine ply for durability. My board measured 1200 × 930 mm, a good size for a strong visual impact in the garden.
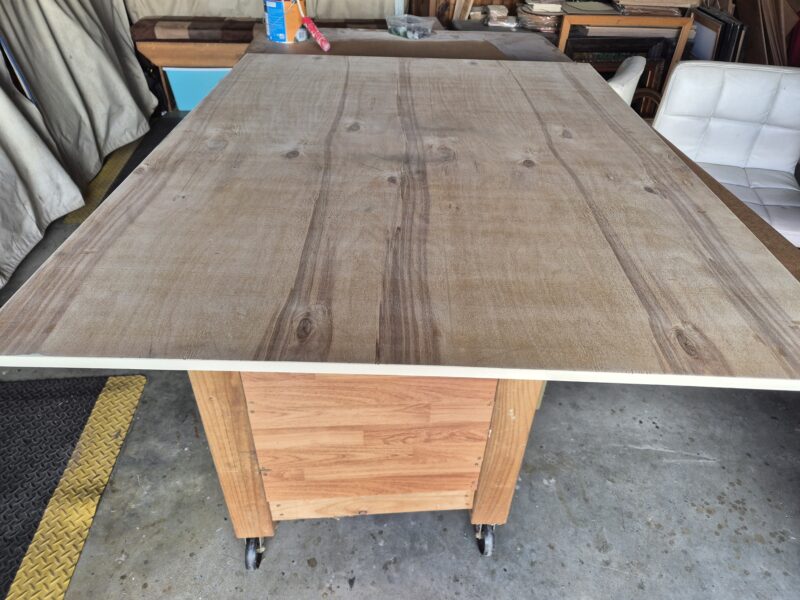
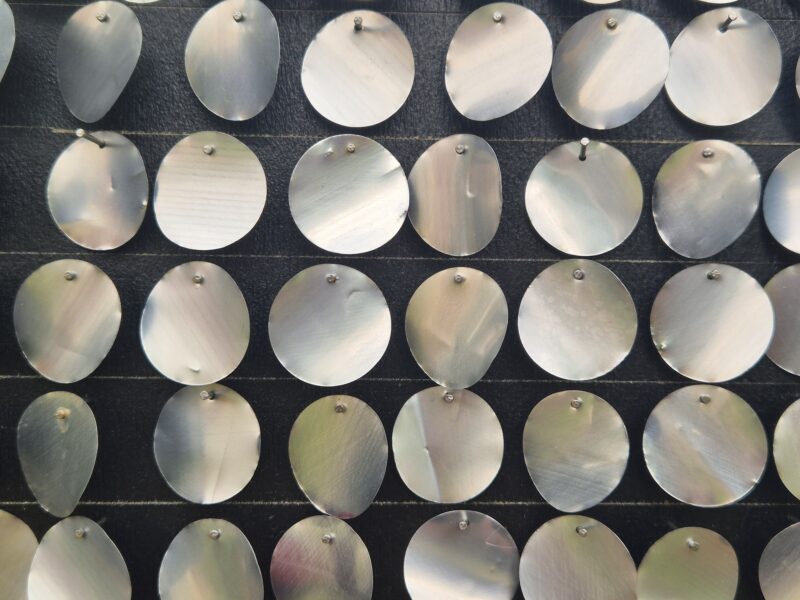
I sealed both sides with two coats of weatherproof paint, allowing it to dry between coats. Once sealed, I added one coat of black outdoor acrylic paint. The black background is essential because it makes the silver discs appear brighter and more reflective.
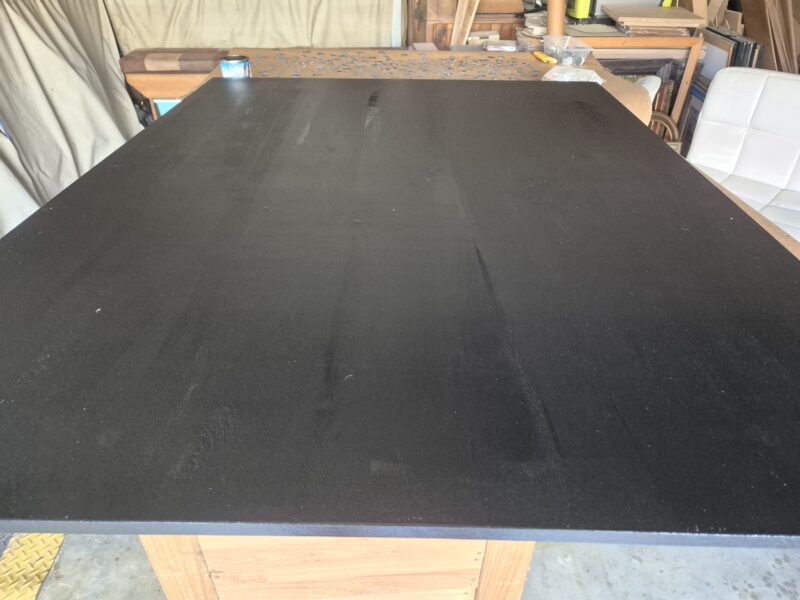
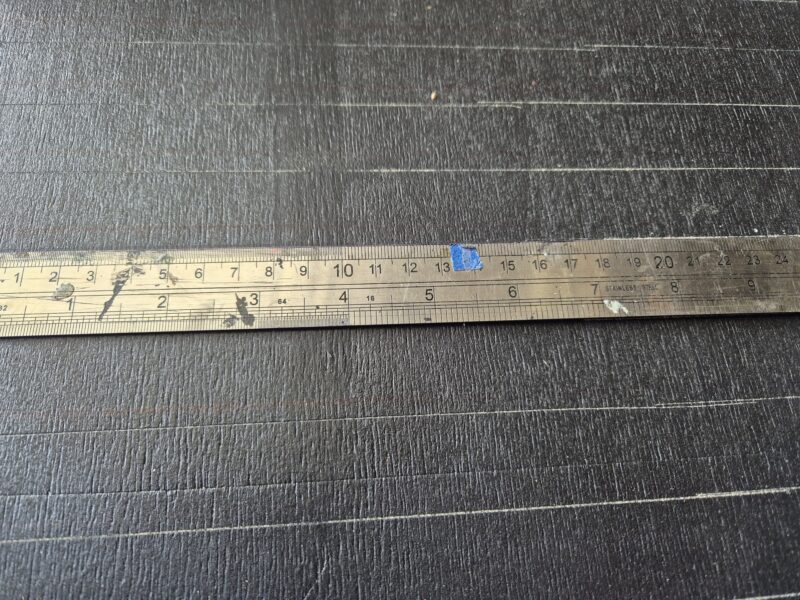
To keep my rows straight, I marked 1 inch guidelines across the board. I only drew lines in one direction because the discs are spaced by lining each one beside the previous circle.
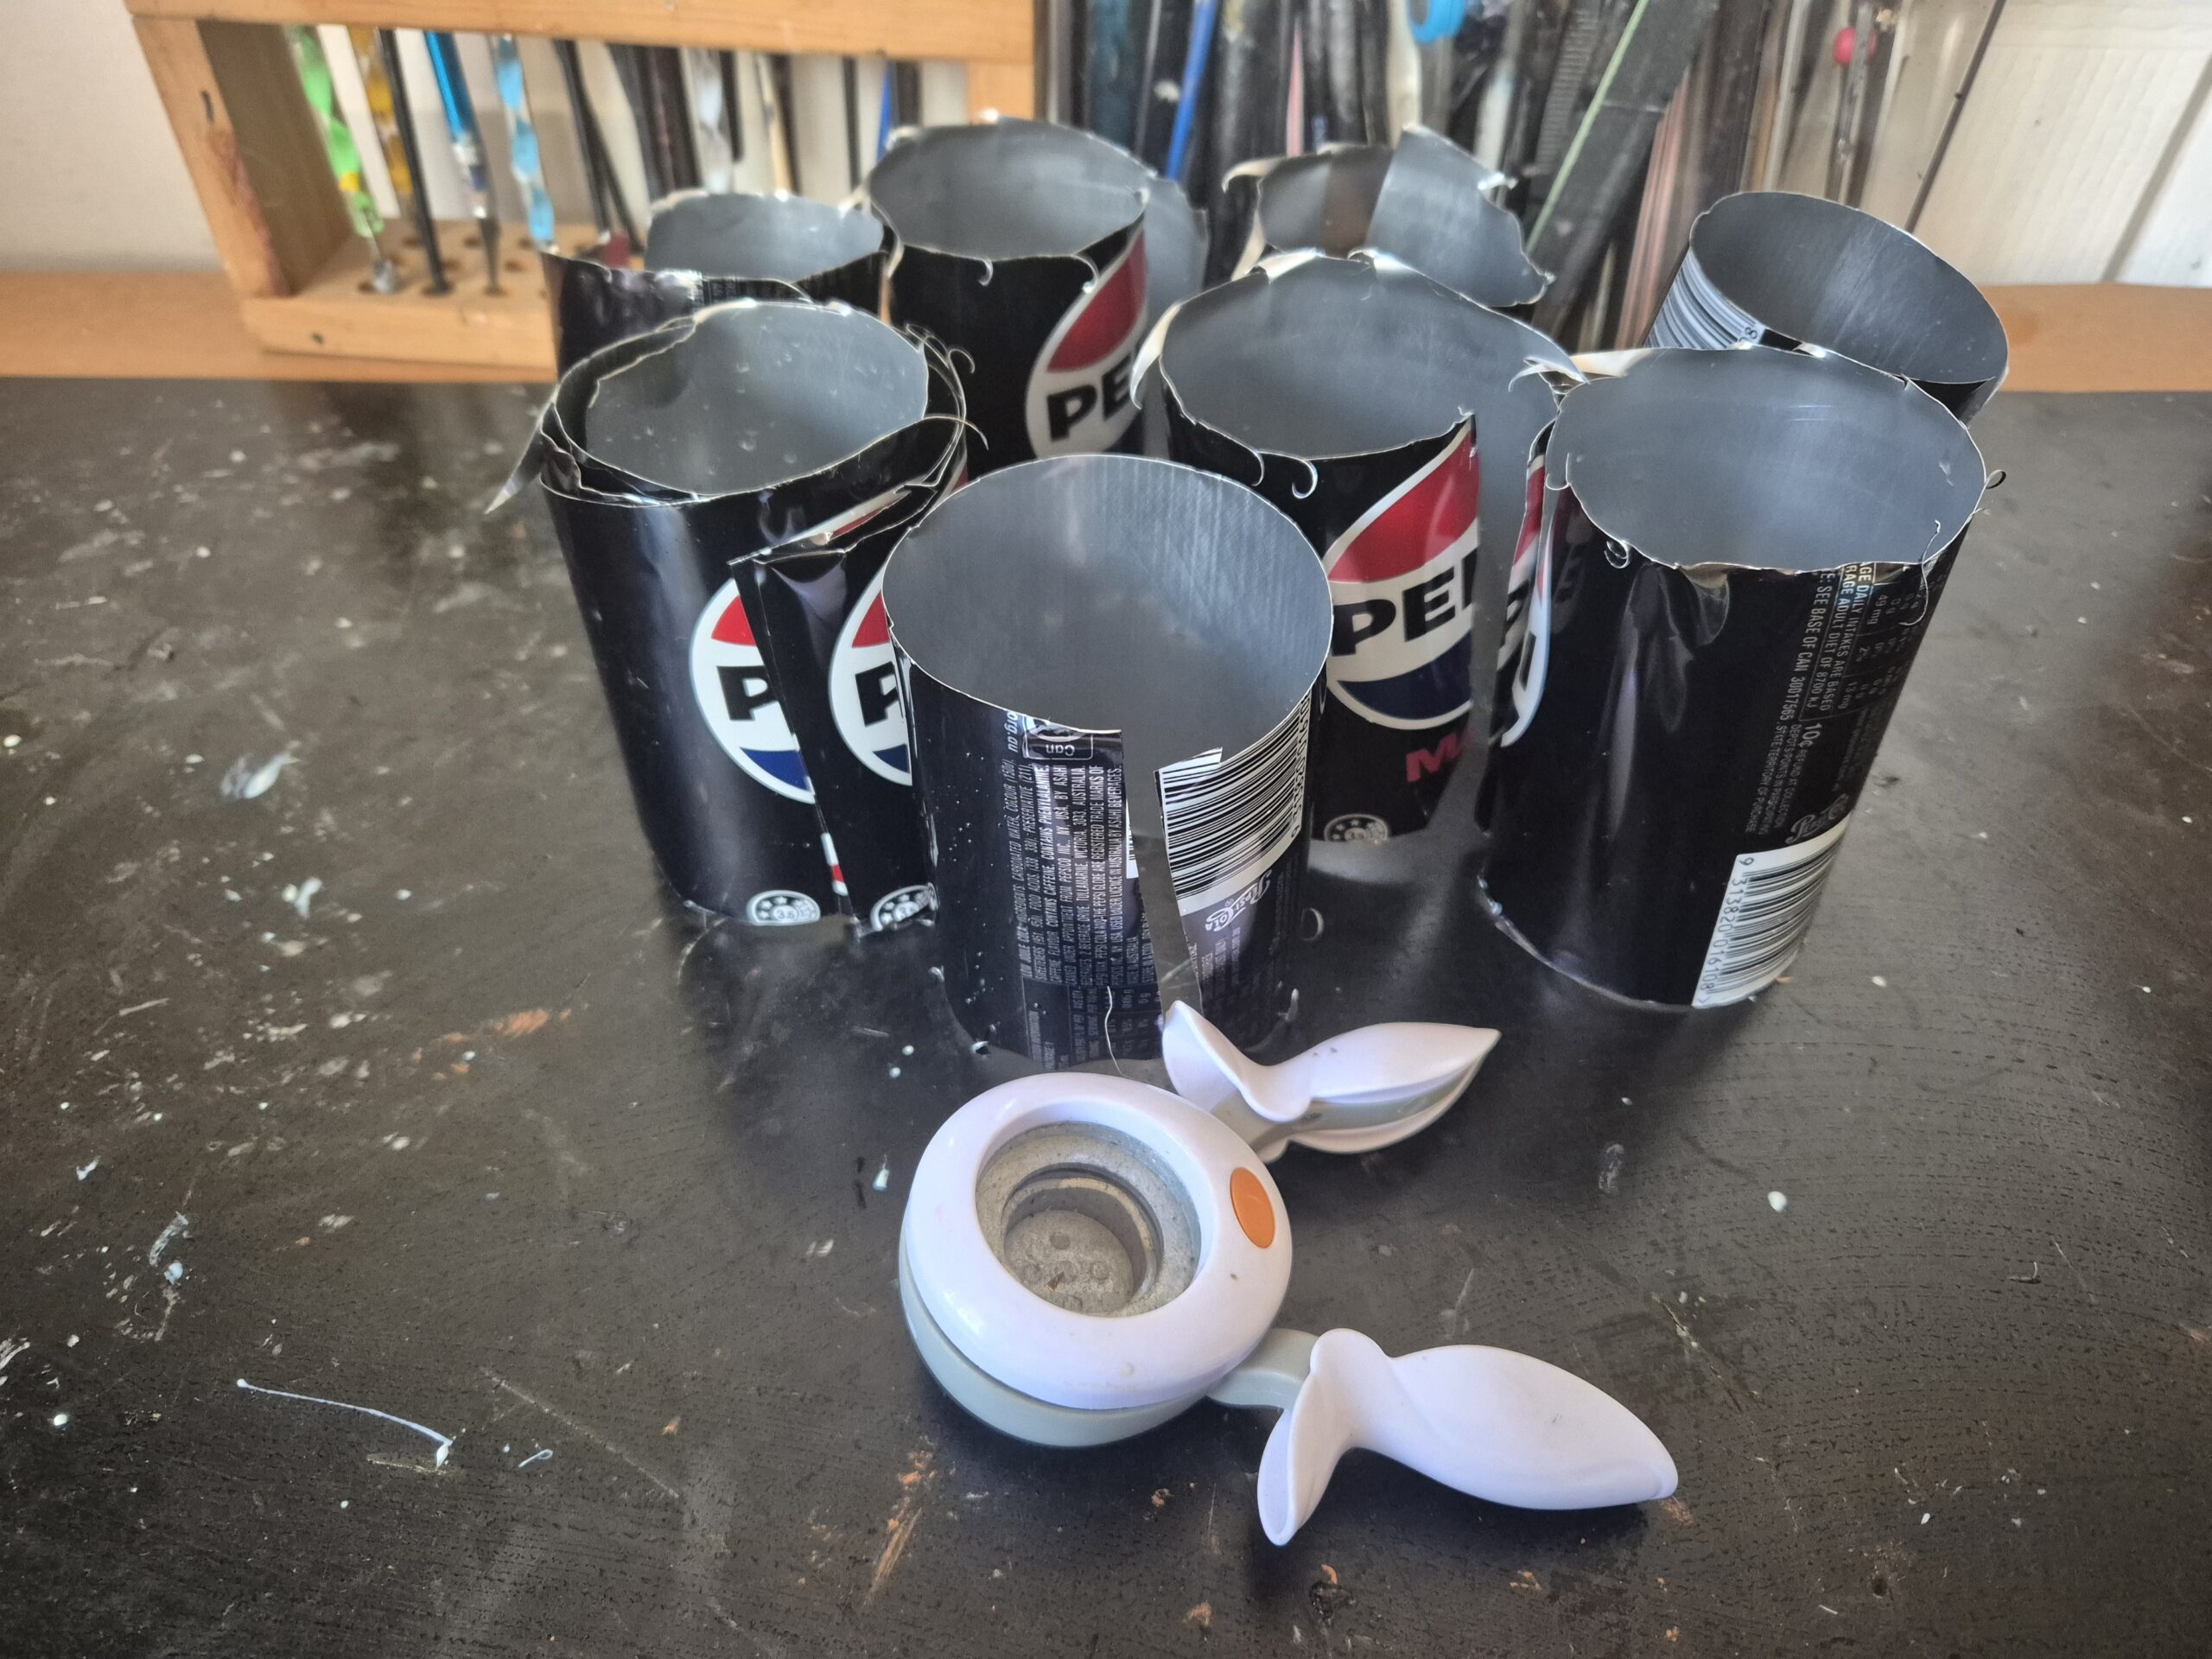
Cutting the Aluminium Cans Safely
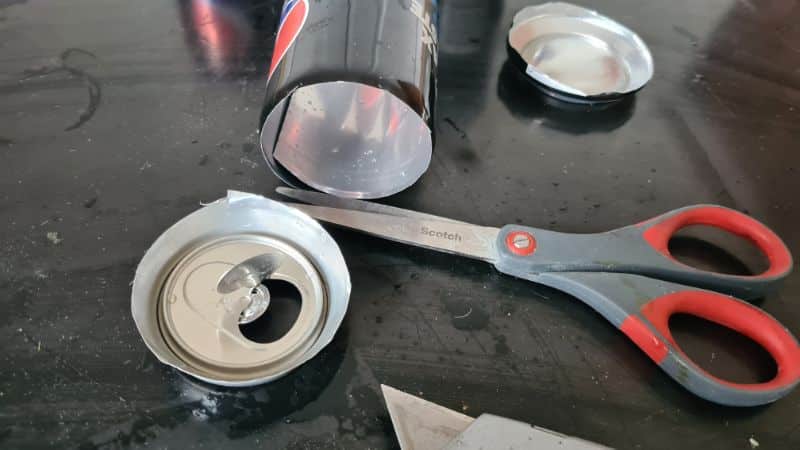
Cutting drink cans can be dangerous, so safety matters.
Wear thick gloves to protect your hands from sharp edges.
- Use a sharp knife to pierce the top of the can.
- Cut around the top rim with scissors or tin snips and remove it.
- Cut down the side of the can in a straight line.
- Remove the bottom of the can the same way as the top.
- Open the aluminium sheet and flatten it. Rolling it backwards helps remove the curve.
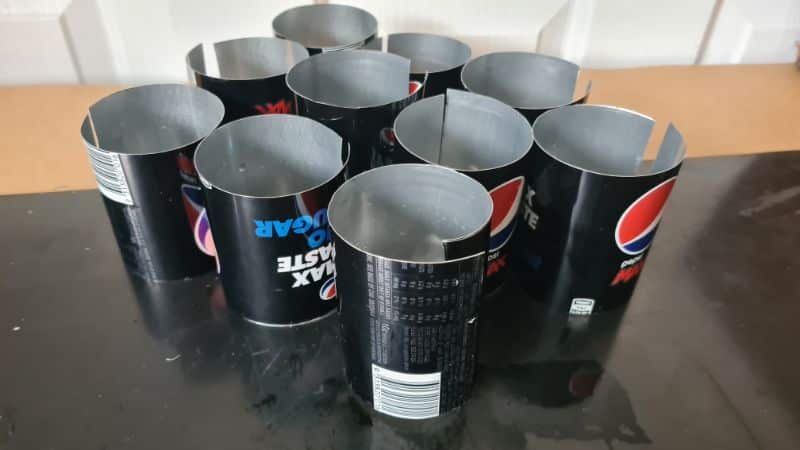
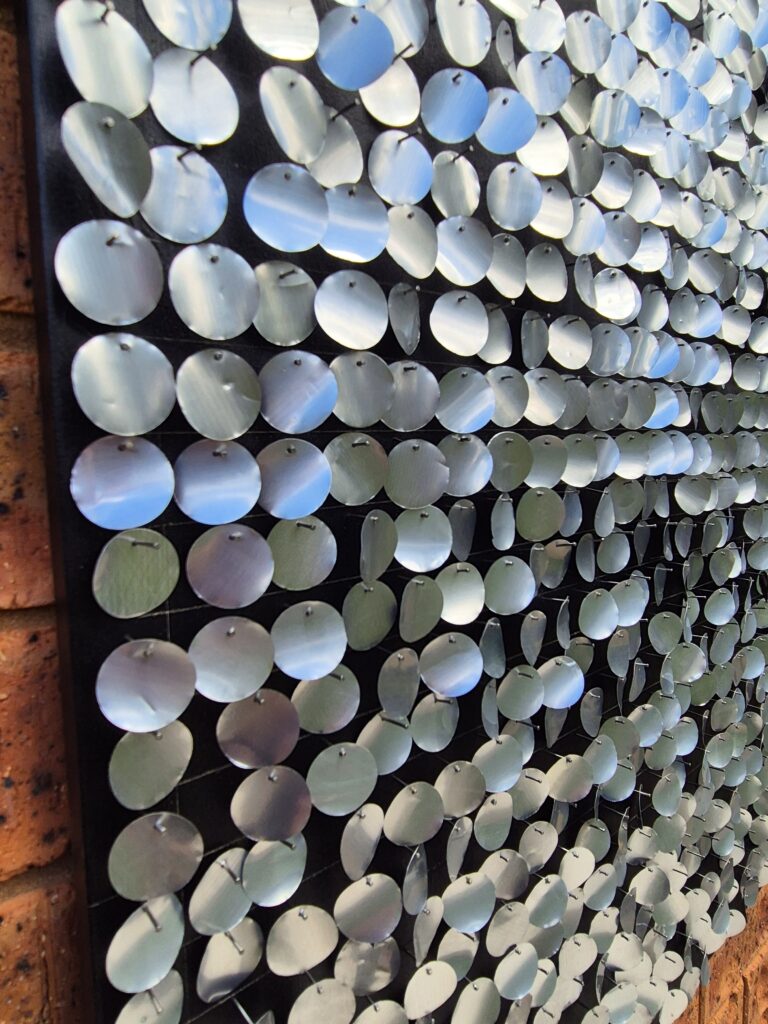
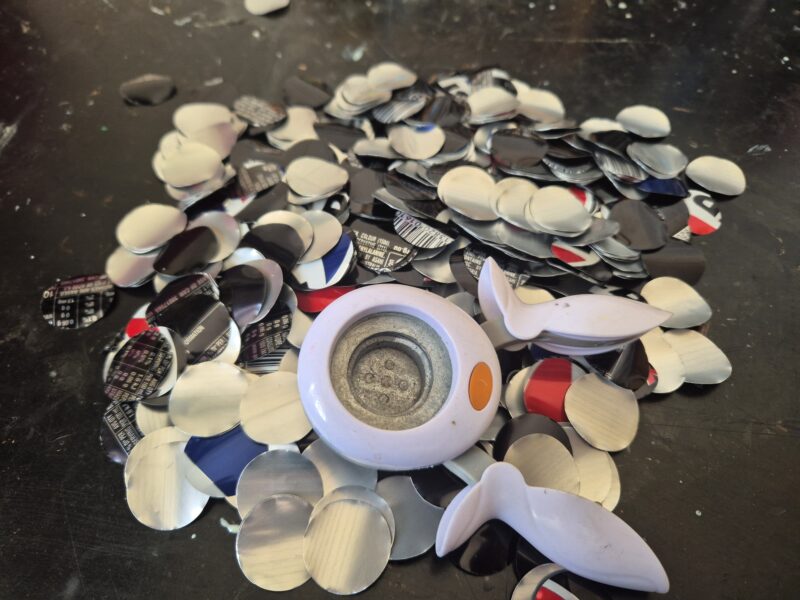
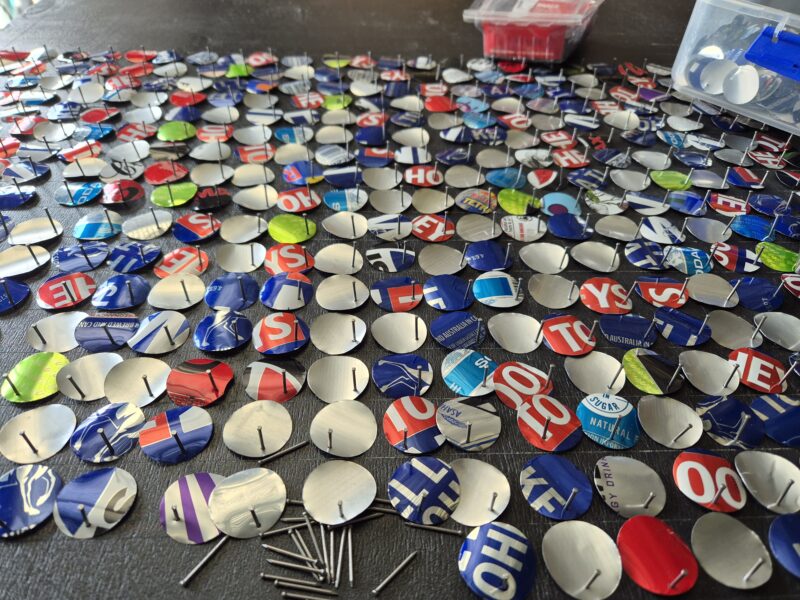
Once the aluminium sheets were flattened, I used a 1 inch hole punch to cut out the circles. For a board this size, I needed 1,495 silver discs, which worked out to around 24 circles per can. I found the easiest method was to punch a row of circles around the outer edge of the can sheet first, then trim away the punched section. After that, I punched the remaining circles from the centre panel.
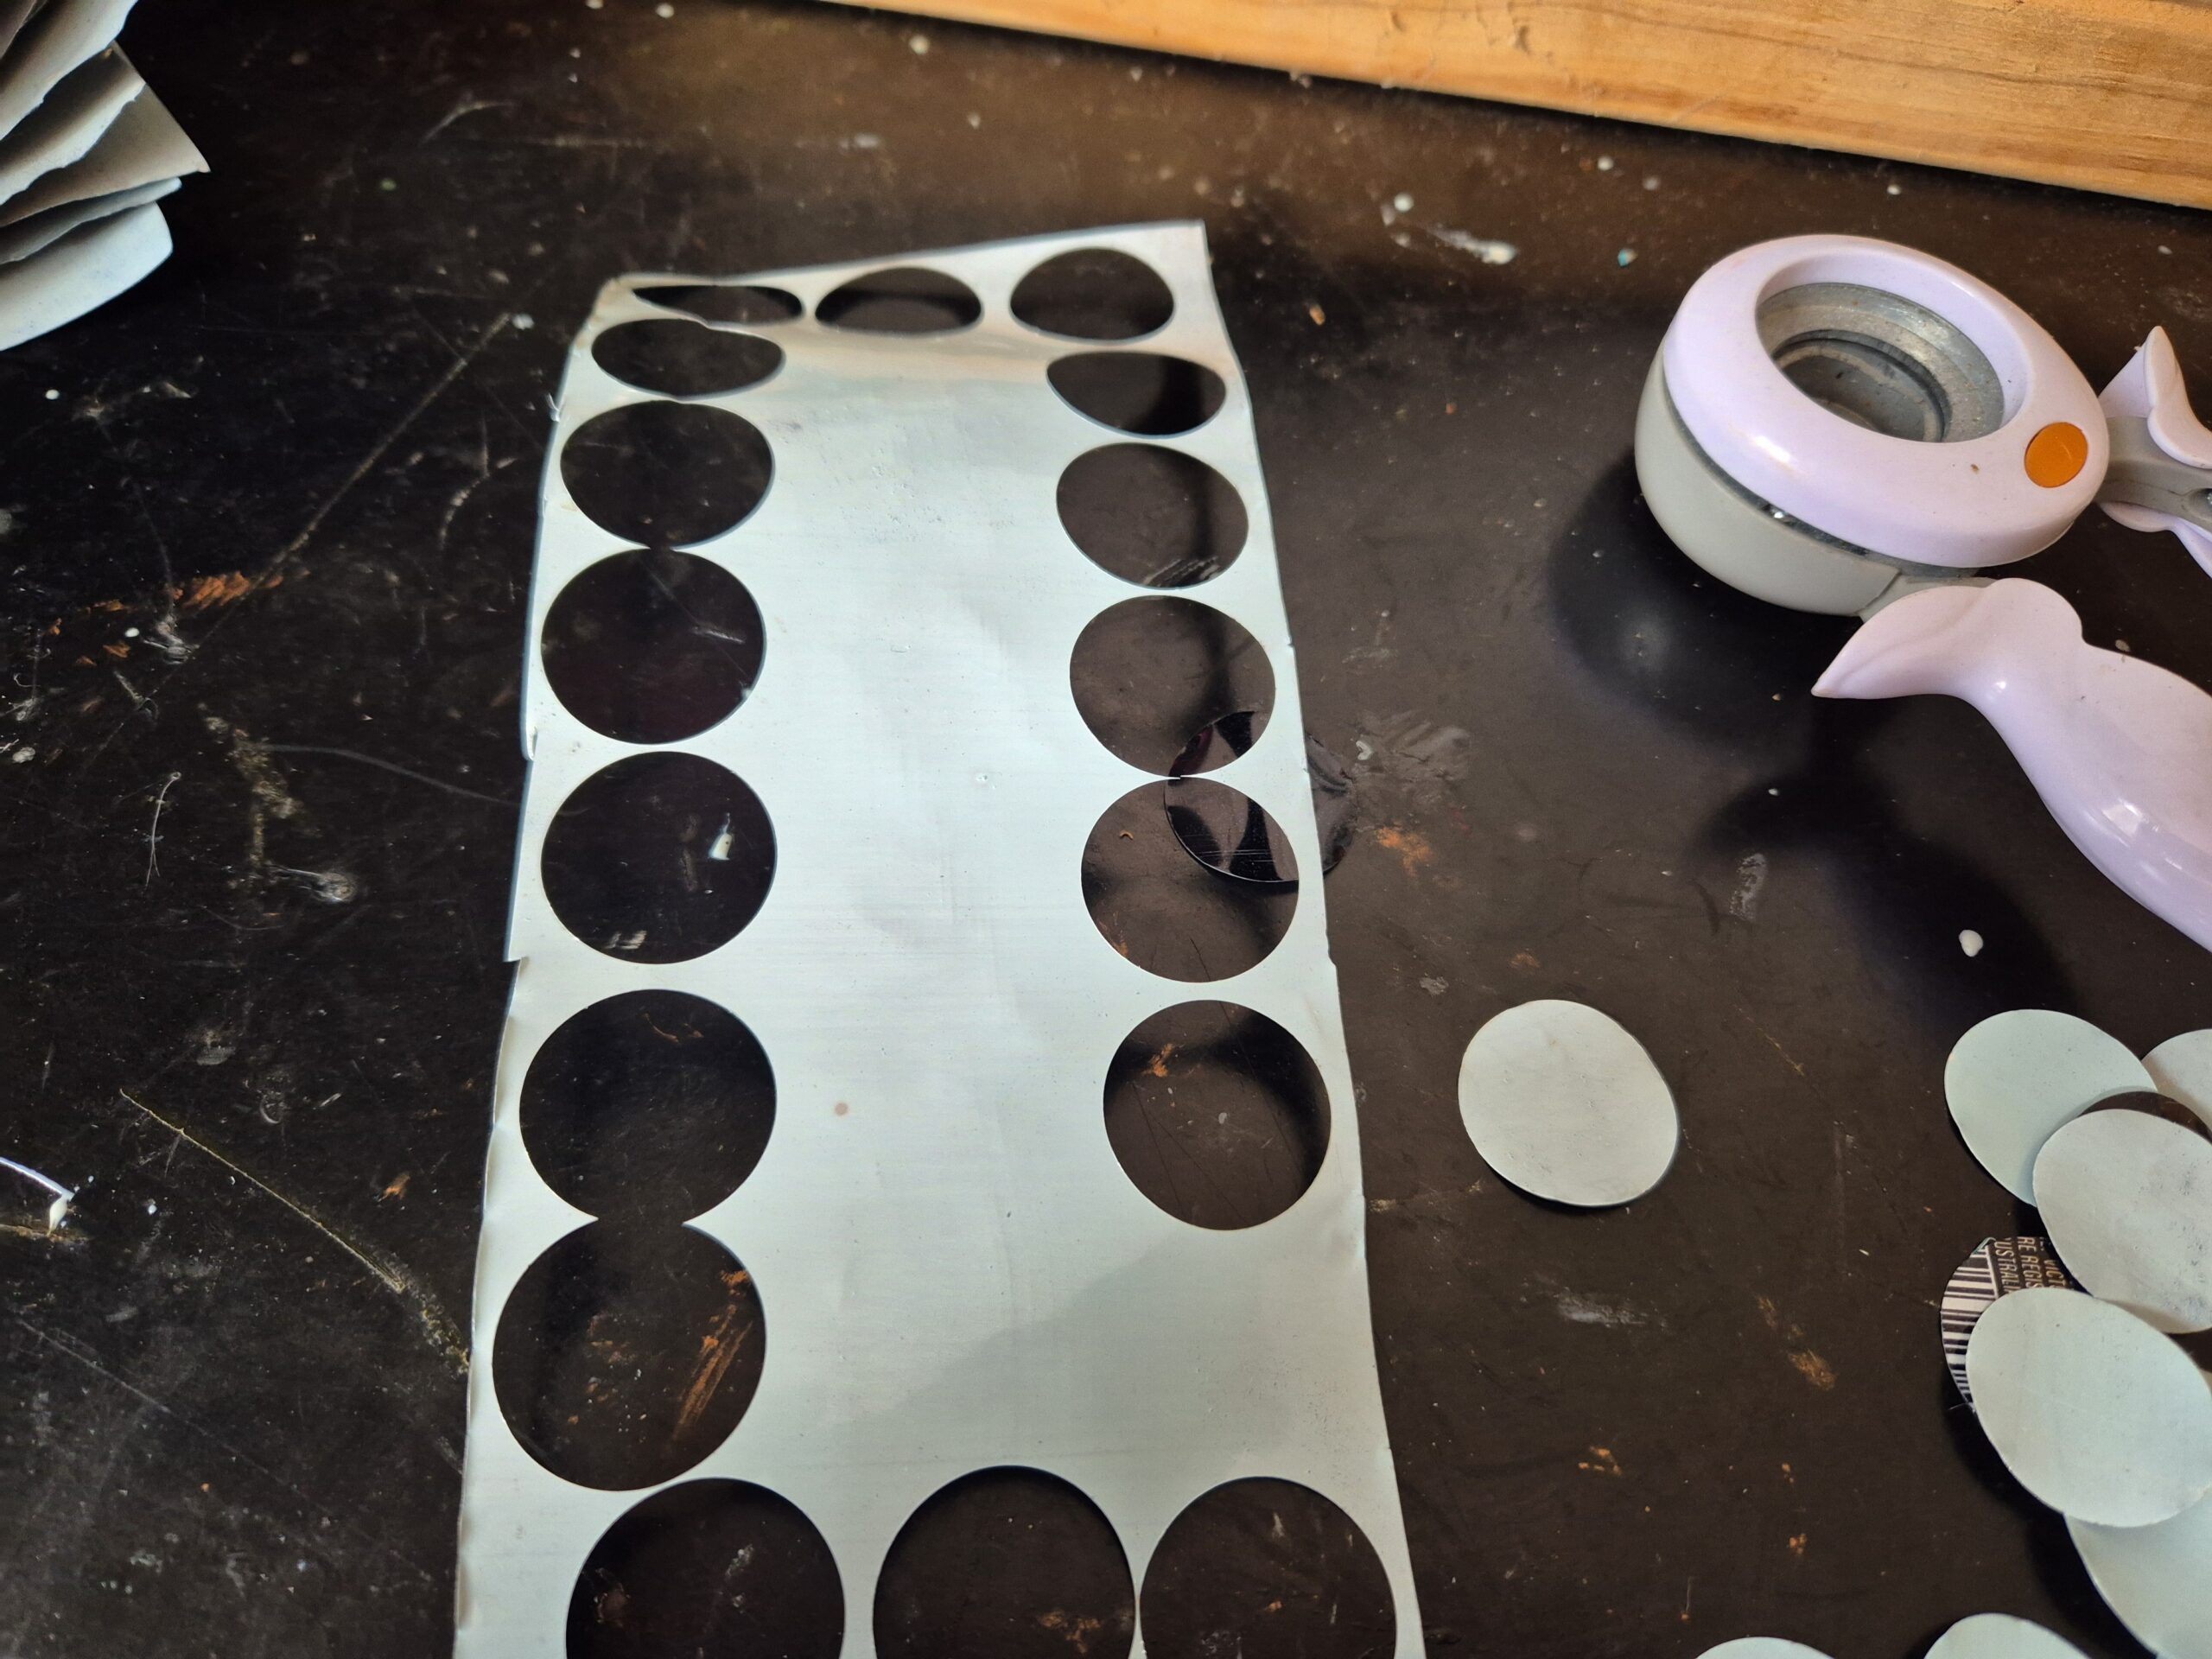
This method gave me clean, consistent discs and helped reduce waste from each can. I’m not sure if all hole punches work the same way, but mine creates a slight natural curve in each aluminium circle. That gentle bowing makes it much easier for the wind to catch them, adding even more movement and shimmer to the finished mosaic.
Drilling Holes in the Circles
To drill the holes cleanly and consistently: I stacked a few aluminium circles at a time and clamped them together using wood clamps. I placed a block of wood underneath the area I planned to drill and used a thin drill bit to create a small hole near the edge of the stack.

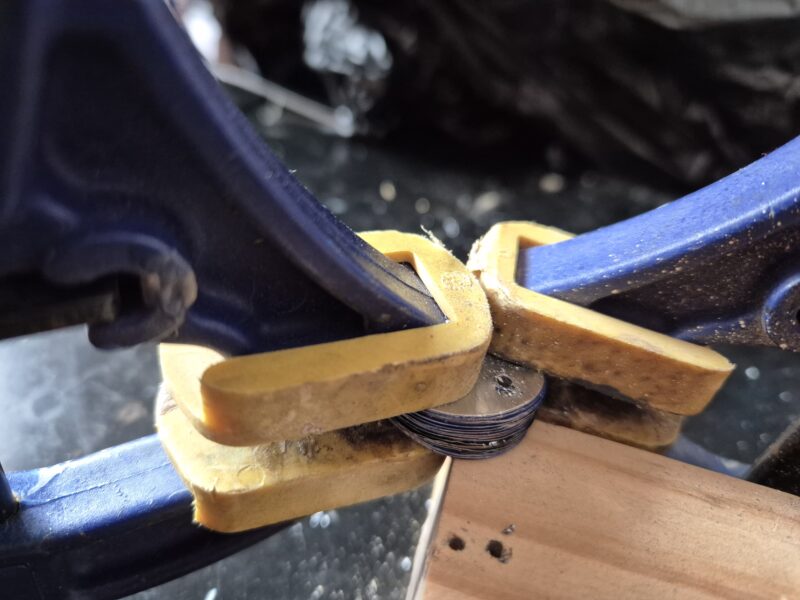
Before drilling, check the size of the nails you plan to use. I chose small brad nails because the tiny nail heads are barely visible. Large nail heads tend to distract from the shimmering effect. To keep every disc uniform, I used one finished disc as a template for drilling the next stack so the holes always lined up in the same place.
Nailing the Discs to the Board
I began in the middle of the board, then worked my way downward. This prevents leaning over nails, which can catch your skin. Lay the first circle on your guideline, line up the drilled hole, and tap in a small brad nail.
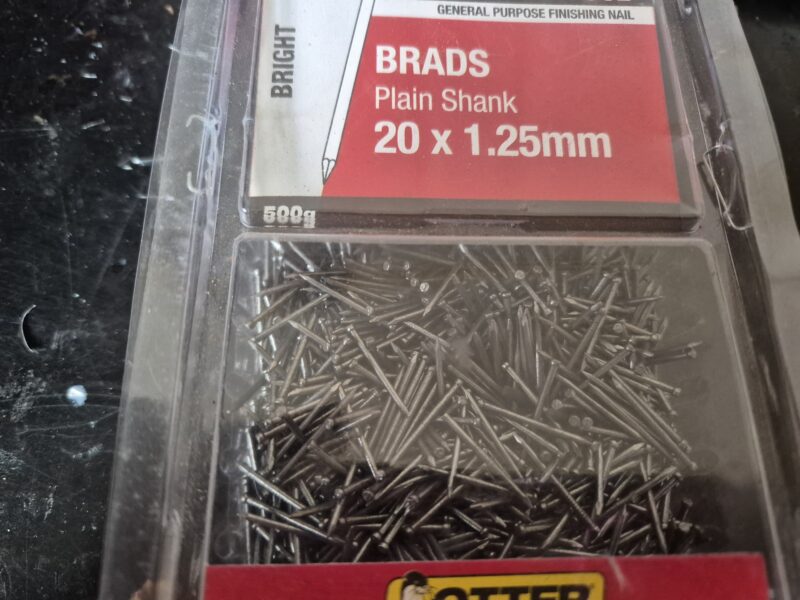
The brad nails are thin, so they go into the timber easily without pre-drilling.
Once the bottom half was finished, I flipped the board and repeated the process on the top half. I spaced the discs close together but not touching, giving them plenty of room to move freely in the wind. This was also the stage where I decided to flip every coloured disc over so the silver side faced up. It took about four hours, but it was absolutely worth the effort.
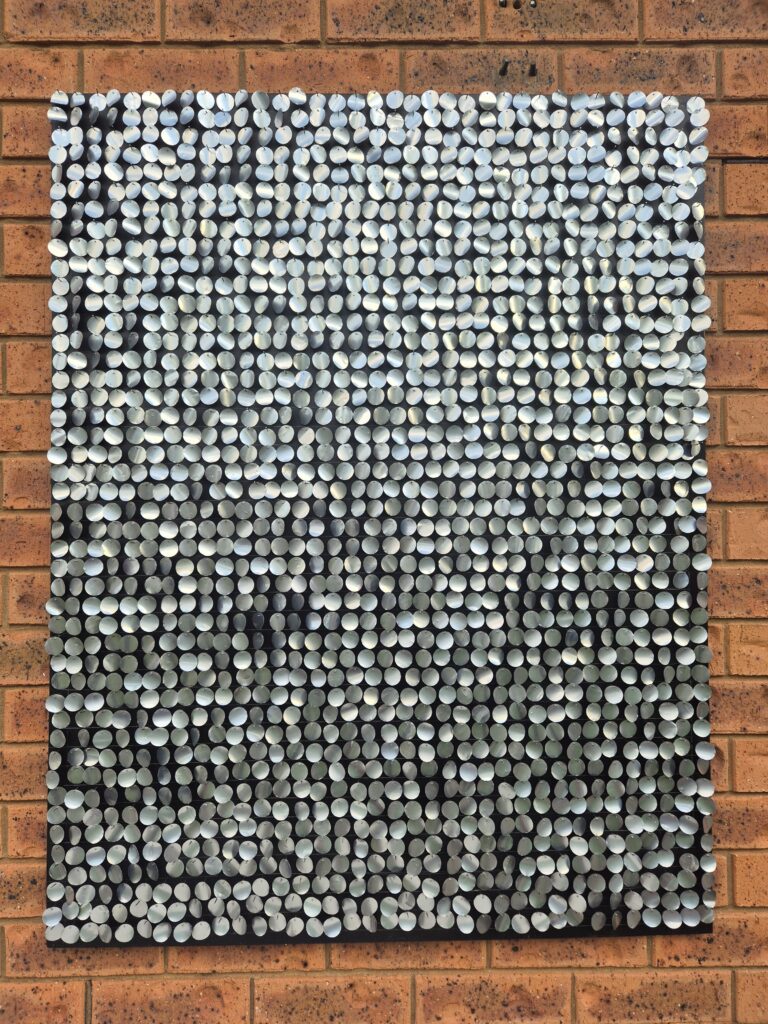
With all the silver circles in place, the finished piece became a mesmerising wall hanging that ripples like water whenever the breeze passes through. The movement, shimmer, and gentle clinking sound are stunning—especially in the late afternoon sun. This project’s possibilities can be expanded by adapting different shapes and colours to achieve a distinct look.
Hanging the Moving Mosaic
To hang the mosaic securely in the garden, I added a keyhole bracket to the back of the board. Once mounted on the wall, the mosaic instantly transformed the space with light and movement.
More projects made from aluminium cans
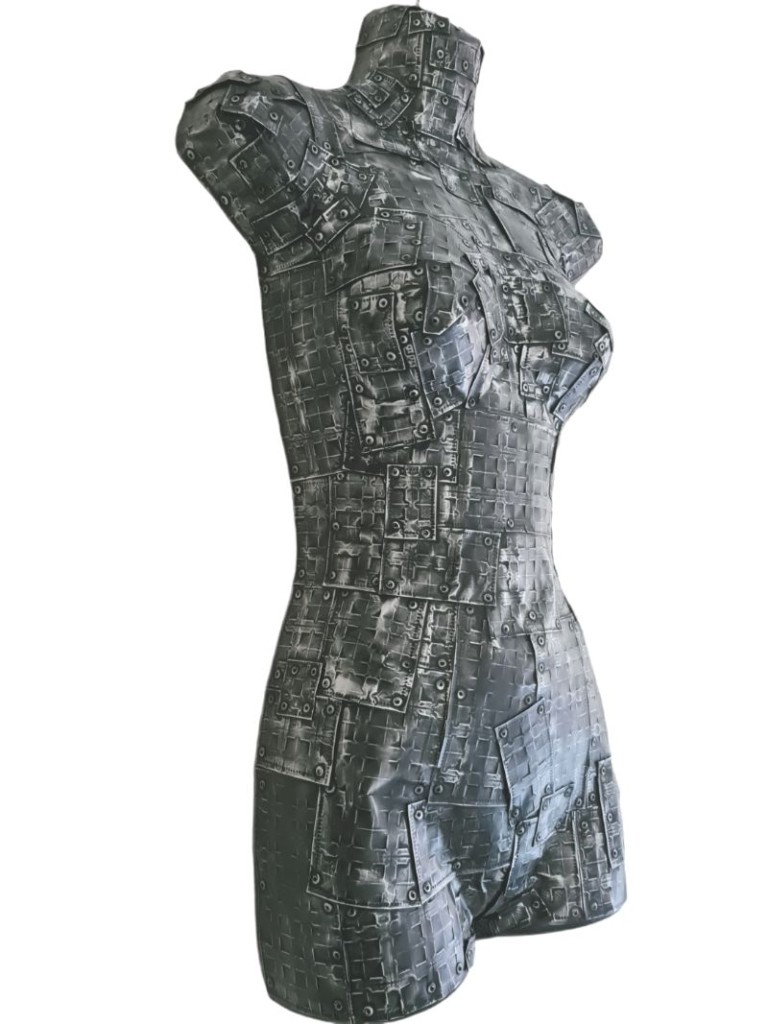
This Mannequin was covered in embossed aluminium can to create this industrial look.
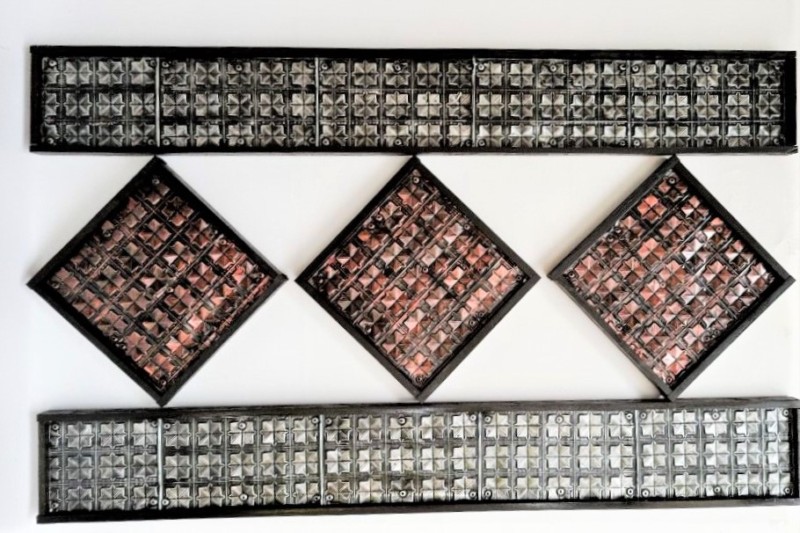
You can also use this same technique to create wall art using recycled aluminium cans.

If you’re interested in any of the items used in this project, we’d appreciate it if you used our affiliate links. Clicking these links earns us a small commission at no extra cost to you, helping us create more inspiring and exciting projects to share. We’d also love to hear your thoughts—feel free to leave a comment or share this post!


4 Comments
Michelle Leslie
January 14, 2026 at 2:33 amOMW, that sound of those circles tinkling in the wind is just beautiful. I have to make one!! So peaceful.
Anita Holland
January 20, 2026 at 7:14 pmThis is one of my favourite projects i have made and kept. It is so big the sound and movement is mesmerising to watch.
Stacy
April 28, 2026 at 12:36 pmThank you for such great instructions!! I helped make one of these as a school small group art project. I’m thinking of making a larger one for my home.
How do you prevent the discs from sliding back against the board in the wind? Is there a certain angle that I should use to put the nails in? Or does the breeze tend to push them forward? Thanks!
Anita Holland
April 28, 2026 at 3:22 pmI found the wind gets under them and moves them back. Occasionally one gets stuck which i do have to move forward. This big one is so pretty to watch.