
When I first started building with recycled materials, one project I dreamed of was a headboard bench. They were everywhere—Pinterest, Instagram, DIY blogs—you name it. But finding a matching headboard and footboard was harder than I expected. So instead, I got creative and built this DIY headboard bench with storage using two mismatched headboards and salvaged wood.
This upcycled bench not only saved money but added loads of charm and functionality with a hidden storage box under the seat. Here’s how you can make your own, even if your headboards don’t match.

Before we dive into this tutorial, be sure to subscribe to my bimonthly newsletter to be the first to see my latest projects. You can also follow me on Pinterest and Facebook, where I also include my unique mixed-media art projects.
How to Build a Headboard Bench with Hidden Storage Using Recycled Materials
**This post may contain affiliate links. This means I earn a small commission on links used at no extra cost to you. Please see my disclosure policy for more information.**
Materials Needed
- 2 recycled headboards (or a headboard and footboard)
- Plywood or formply for the box base
- Bolts, washers, and nuts
- Wood glue
- Screws and nails
- Corner brackets
- Scrap timber for bracing and leg supports
- Chalk paint
- Primer (for sealing formply)
- Water-based polyurethane sealer
- Appliques
- Epoxy glue
- Foam and fabric (for seat cushion)
- Nail gun and staple gun
- Orbital sander with 120-grit discs
- Router and round-over bit
- Angle grinder with cutting disc

Step 1: Build the Storage Box
Start by building the box first. I used formply reclaimed from a construction site. It’s solid, but has a black coating, so I planned to paint over it.

Box dimensions used:
- 4 x 1350mm x 400mm (sides)
- 2 x 400mm x 400mm (ends)
Pre-drill and countersink all holes. Screw together the panels to form your box.

Step 2: Attach the Box to the Headboard
Lay the box face down and align the headboard to the back. Drill bolt holes, insert bolts through the headboard into the box, and tighten with nuts.
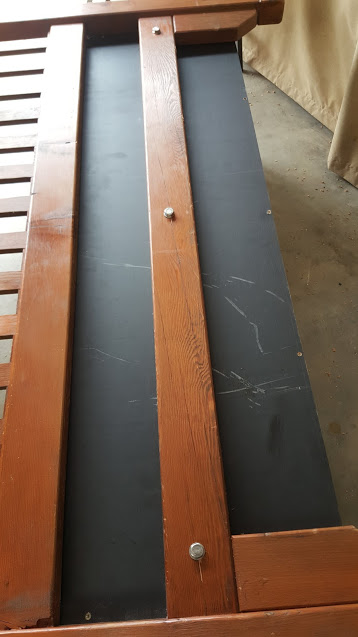
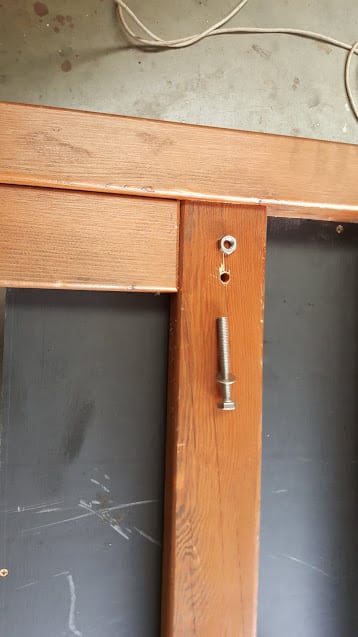
I left the bolt ends sticking out for now and trimmed them later with an angle grinder once I confirmed the fit. Use scrap wood to support the box while you level it and prepare the legs.

Add two hinges to the lid so it can open and close.
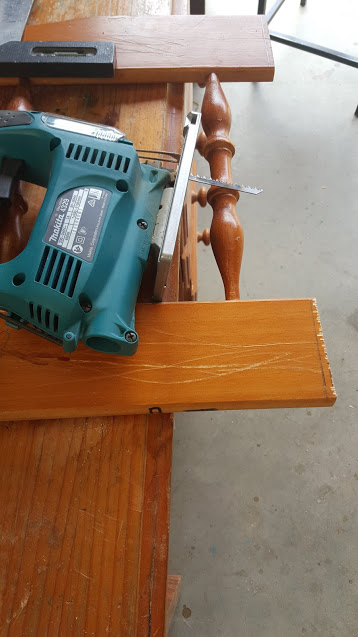
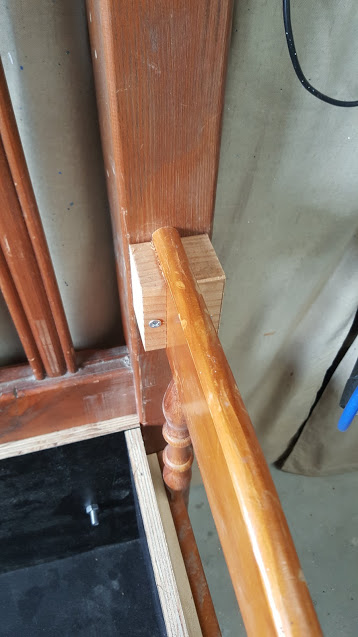
Step 3: Add the Legs
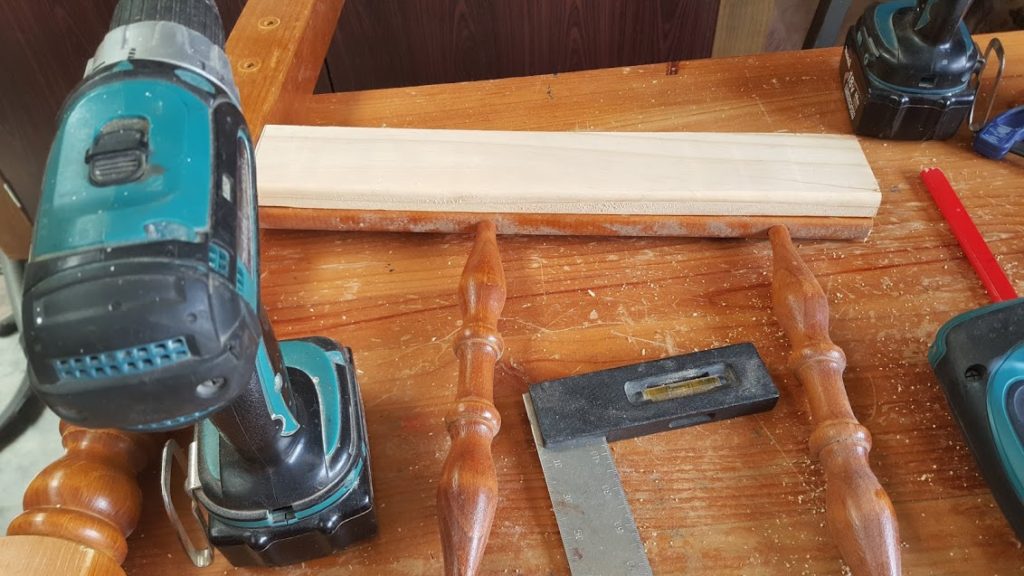
I cut the legs from the second headboard using a jigsaw. Because of the curved design, gaps formed between the legs and the box. To fix this, I added spacers made from scrap wood using glue and screws.
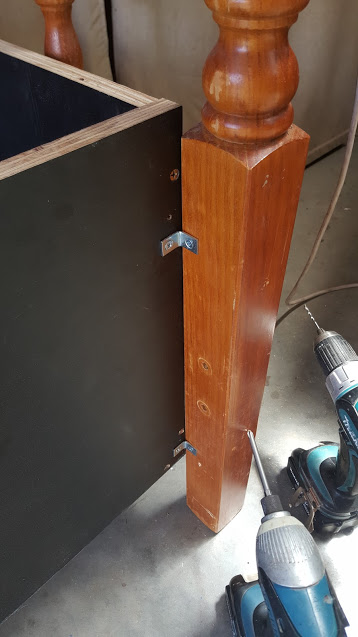
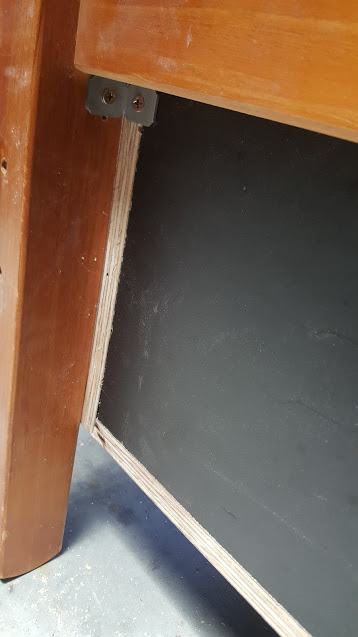
To secure the legs:
- Add blocks on either side of each leg and drill through all layers
- Insert long screws to lock the leg position
- Add side screws from the inside of the box into the legs
- Reinforce with corner brackets
I added extra brackets underneath for stability—better safe than sorry!
Step 4: Hide the Brackets
To hide the brackets, I routed a rounded edge onto a strip of timber using a round-over bit and glued it over the brackets. I also used some leftover trim to dress up the bottom front.

Step 5: Painting the Bench
Chalk paint is often said to stick to any wood without sanding or primer, but that wasn’t true for the formply. I lightly sanded the entire surface using 120-grit sandpaper, then applied a primer. Without priming, the paint just wouldn’t adhere properly to the slick coating on the formply.

Paint the entire bench with two coats of Annie Sloan chalk paint in white. To protect it for daily use, seal it with three coats of water-based polyurethane instead of wax.

Step 4: Hide the Brackets
To hide the brackets, I routed a rounded edge onto a strip of timber using a round-over bit and glued it over the brackets. I also used some leftover trim to dress up the bottom front.

Step 6: Add Decorative Appliques
I painted three appliques with Annie Sloan French Linen and glued them onto the backrest using epoxy. A few small nails secured them in place, but be careful—nail guns can crack detailed appliques.


Step 7: Make a Seat Cushion (Optional)
Cut foam to the size of the bench lid. Cover it with fabric and secure it underneath using a staple gun for a soft, comfortable finish.


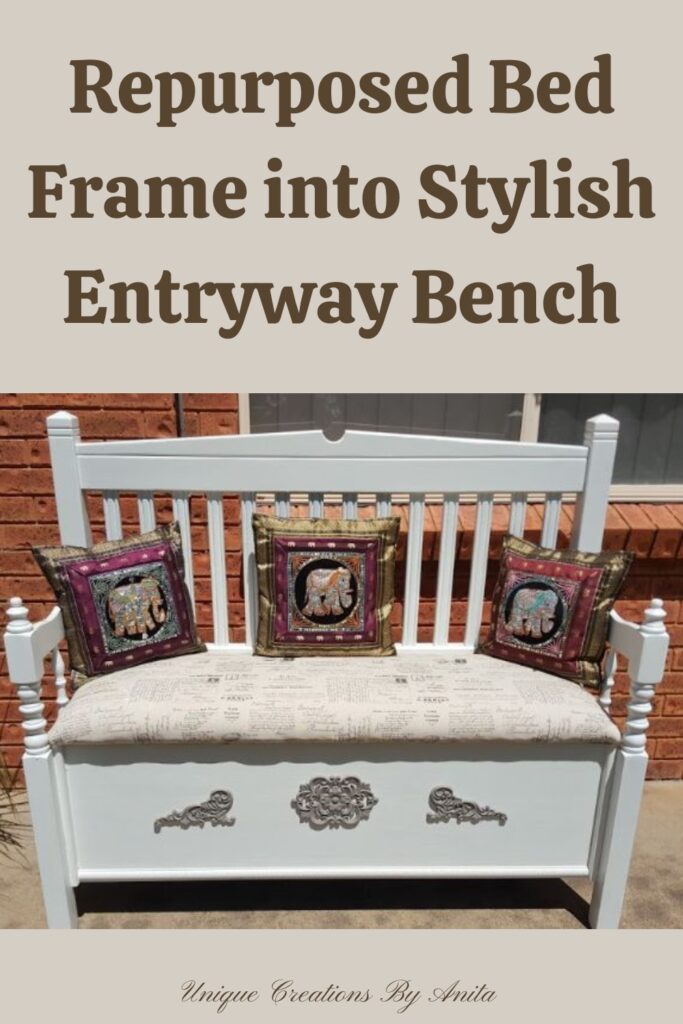
Finished Headboard Storage Bench
This DIY headboard bench is strong, beautiful, and useful, with hidden storage and a soft cushion top. It proves you don’t need matching bed frames or new timber to create something unique and functional.

More DIY projects you may like
This old piano was repurposed into a bar/ drinks cabinet

This old table was repurposed into a party table.
")

If you’d like to find any of the items used in this project, we’d greatly appreciate it if you used our affiliate links. These links provide us with a small commission at no extra cost to you, allowing us to continue creating and sharing more inspiring projects. We’d also love to hear your thoughts—feel free to leave a comment or share this post!


22 Comments
Steav Smith
July 19, 2018 at 4:51 amAmazing article, article is explained in a good way and with images, it makes easy for us to understand this article.
Anita Holland
July 19, 2018 at 8:04 amThank you very much, that is very kind of you to say.
Anita Holland
April 29, 2019 at 2:42 pmThank you so much for your kind words and sharing my post it was greatly appreciated.
Cathy Kennedy
October 21, 2019 at 12:40 pmAnita,
You did a fabulous job. I love seeing how people do this sort of thing. It’s amazing how creative people such as you can be turning something old into something new!
Anita Holland
October 22, 2019 at 12:00 amThank you so much Cathy, Repurposing furniture into something new is my favourite DIY.
Karren Haller
October 21, 2019 at 11:54 pmIt is so amazing to me how creative bloggers are, I love how your bench turned out, great job! Thank you for sharing on #omhgww and hope to see you again next week!
Anita Holland
October 22, 2019 at 12:03 amThank you Karren, It turned out better than I had hoped.
Sylvia | Grace for a Gypsy
October 24, 2019 at 4:57 amBeautiful job! Great tutorial! I have made one of these before, and I sure wish I had your tutorial! Yours is beautiful.
Teresa
October 25, 2019 at 2:46 pmI love this idea! I’m not sure I’m crafty enough to pull it off, but I still love it. Great job!
Thank you for sharing at The Really Crafty Link Party. Pinned!
Anita Holland
October 26, 2019 at 8:22 pmThank you, I was as simple as building a box and screwing it on to the headboards. Looks a lot harder than it was.
Tracy Albiero
October 25, 2019 at 4:38 pmI love the look of this. What a great way to reuse old bed frames. This would be great in my hallway. Thanks for linking up to #trafficjam
Anita Holland
October 26, 2019 at 8:26 pmThank you, Tracy. It would look good in any hallway, and the box can be used as storage for shoes.
Clearissa Coward
October 27, 2019 at 4:32 pmWhat a lovely trash to treasure. Beautifully done. Thanks for sharing with #omhgww.
Anita Holland
October 27, 2019 at 9:49 pmThank you so much for the lovely comment.
Michelle
October 28, 2019 at 7:49 pmAbsolutely fabulous! I bet someone will snatch it up quickly. Furniture AND storage! Thank you for linking up to Creative Compulsions!
Anita Holland
October 28, 2019 at 9:16 pmThanks, Michelle, it did sell really quickly. Think they are popular because of the storage.
Cecilia
November 4, 2019 at 5:07 pmYou are so resourceful at piecing together custom furniture. Thanks for sharing at Vintage Charm!
Anita Holland
November 6, 2019 at 12:24 amThank you Cecilia, I waited a long time to find a suitable bedhead but one never came so I had to improvise.
Dee | Grammy's Grid
November 6, 2019 at 5:43 pmHow pretty, nice job!! Thanks so much for linking up at the #UnlimitedMonthlyLinkParty 6. Shared.
Anita Holland
November 7, 2019 at 8:32 pmThank you.
DecorCraftDesign
November 8, 2019 at 3:09 pmFantastic made! Thank you for linking up at You’re The Star Blog Hop! Have a blast weekend!
Anita Holland
November 10, 2019 at 4:03 amThank you so much.