
I’ve always loved the idea of turning leftover bits and pieces into something useful and beautiful. These DIY wood clocks are a perfect example of how you can repurpose scrap wood and other recycled materials into functional home décor. This post isn’t a step-by-step tutorial—most of these clocks were created before I started documenting my process—but I hope they inspire your creativity.
DIY wood clocks made from recycled materials
Recycled Fabric and Epoxy Resin Clock
This was one of my first attempts at creating a unique diy wood clock from scratch. I started with random pieces of scrap wood I had lying around the shed. I arranged them until I was happy with the design, then secured them with screws and used a nail gun to attach smaller decorative pieces to the front.
The front face was covered in a bold lion print fabric. To protect it, I brushed on a thin layer of epoxy resin, which sealed the fabric and gave it a glossy finish. After a light sanding, I applied a second coat for extra shine and durability. Using a wood router, I carved out a shallow cavity at the back to house the clock mechanism, which I bought from Amazon. I was really pleased with how this one turned out—it’s even more striking in person.
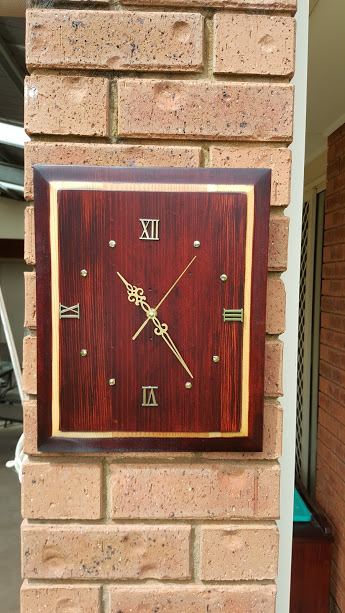
Decorative Wooden Wall Clock
This next clock uses a similar base structure to the lion fabric clock but is simpler in style. I bought a decorative wall design from a budget shop and incorporated it into my own handmade wooden backing. The simplicity of the plain design worked so well, I ended up making several variations of this one.

DIY Family Photo Clock
This personalised family photo wood clock was inspired by a version I spotted online that used photo frames as hour markers. That original concept didn’t quite work out as planned, so the design took a new direction.
The base began as a large wooden circle, onto which a vinyl decal was applied. Wood stain was brushed over the exposed areas, but unexpectedly, it bled into the decal, causing it to peel. Surprisingly, this created a beautiful ghost-like outline of the lettering—a happy accident that gave the clock a unique character.
To complete the piece, smaller circles were cut using a hole saw, laminated family photos were glued into place, and a clock mechanism was added to the centre. The end result was a meaningful and eye-catching keepsake.

Industrial Style Hanging Clock
Another fun project using only what I had on hand. I created a square wooden frame from scrap timber and added decorative brass studs to each corner. The clock face—purchased from a discount store—was attached using metal chains and hooks for a quirky, industrial vibe.
This one always gets compliments!

Drawer Front Clock
Talk about upcycling! This wooden clock was made from the front panel of a broken drawer. I sanded it back to remove any old finish, then used a router to cut a recess for the clock mechanism. I kept the design simple by adding only numbers and letting the natural wood grain shine.
Rustic Log Slice Clock
For this wood clock design, I used an offcut from a log. I ran it through a thickness planer to get it to the desired size and smoothness. Then I stained the surface and applied a coat of oil to enhance the wood grain. It’s a rustic and earthy piece—perfect for a cabin or nature-themed room.

Buddha Canvas Clock
One of my more experimental designs: I created this clock using an old Buddha canvas. I added a clock mechanism to the centre and turned it into a serene and spiritual timepiece. This project shows that you really can turn anything into a clock if you’re willing to think outside the box.

Final Thoughts
All of these DIY wood clocks were made with recycled or budget-friendly materials—scraps of wood, drawer fronts, fabric offcuts, inexpensive wall art and old canvases. They go to show that with a bit of creativity, you can make custom DIY clocks that are both stylish and sustainable.
If you’d like to try one of these projects yourself, or if you’re after any of the materials I used (like epoxy resin, clock mechanisms, or wood stain), I’d really appreciate you using my affiliate links—it helps support this site at no extra cost to you.
Feel free to leave a comment or share this post if you found it helpful or inspiring!


No Comments