
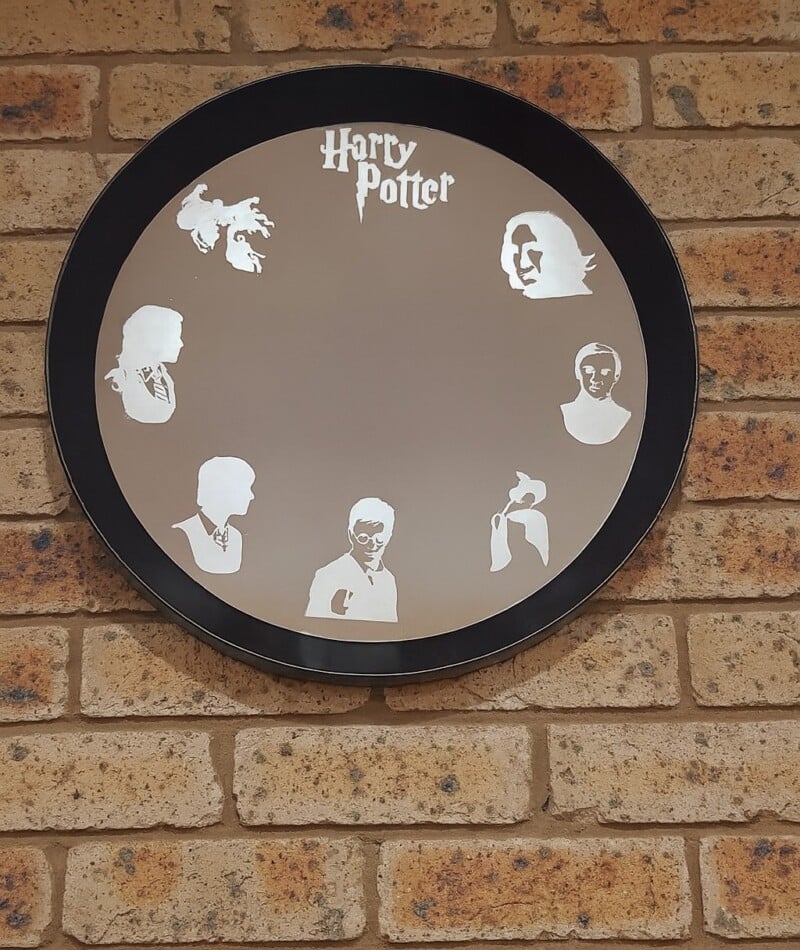
If you have a Harry Potter fan in your life, then this DIY Harry Potter Etched Mirror project is a perfect gift idea! I was stumped for a gift for my son’s girlfriend until I remembered her love for all things magical. This etched mirror not only captures the essence of the wizarding world but is also a functional piece of decor. This fun project involves using a Cricut to cut out custom graphics, which are then transferred onto the mirror using vinyl stencils and etching cream.
Whether it’s for a birthday, Christmas, or just a thoughtful gift, this Harry Potter-inspired mirror will surely add a magical touch to any room. Plus, the process is simple and can be adapted to other designs, so you can create a unique piece that suits any Harry Potter fan’s style.
Before we dive into this tutorial, be sure to subscribe to my bimonthly newsletter to be the first to see my latest projects. You can also follow me on Pinterest and Facebook, where I also include my unique mixed-media art projects.
Harry Potter Etched Mirror
This post may contain affiliate links. This means I earn a small commission on links used at no extra cost to you. Please see my disclosure policy for more information.**
Materials Needed:
- Mirror
- Cricut or Silhouette Cameo vinyl cutter
- SVG graphics (purchased from Etsy)
- Etching cream
- Transfer tape
- Weeding tools
- Vinyl black
- Small paintbrush
- Alcohol or glass cleaner
- Windex or glass cleaner for post-cleaning
- X-Acto knife
1. Preparing the Mirror
Before starting, ensure the mirror is clean. Use a glass cleaner or alcohol to wipe away any fingerprints and dirt. A clean surface is essential for the vinyl stencil to stick properly.

2. Finding and Adding Graphics
I sourced all the graphics for this project from Etsy, where you can instantly download SVG files. Look for bundles as they often offer great value. I also downloaded a custom “Harry Potter” font from DaFont for the text. Upload these files into Cricut Design Space and prepare them for cutting on your vinyl.

3. Cutting the Graphics
Using a Cricut or Silhouette Cameo vinyl cutter, cut out your graphics from the vinyl. Since the vinyl will be used as a stencil, it’s perfectly fine to use inexpensive vinyl. Once the design is cut, use weeding tools to carefully remove the excess vinyl.

4. Transferring the Images
Now, use transfer tape to transfer the vinyl design onto the mirror. I recommend using pre-used transfer tape, as it’s less sticky and will be easier to work with.

Place the design carefully where you want it on the mirror. Use a scraper to smooth out the tape and remove any air bubbles. Make sure there are no bubbles around the edges, as this can cause the etching cream to leak and ruin the design.
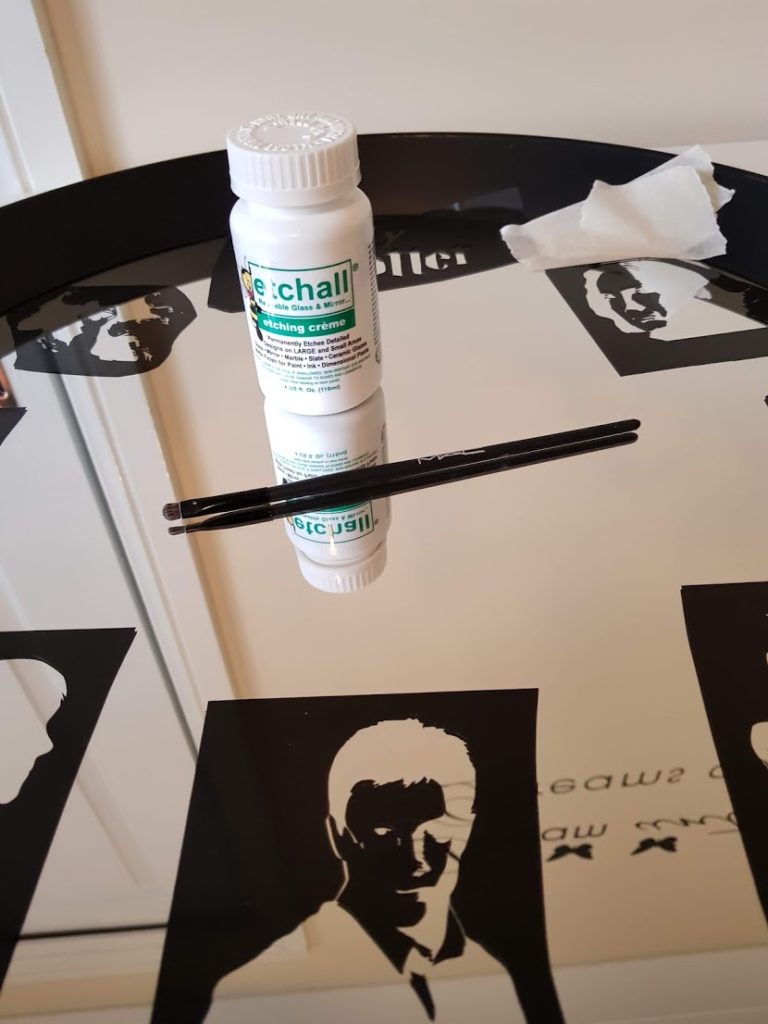
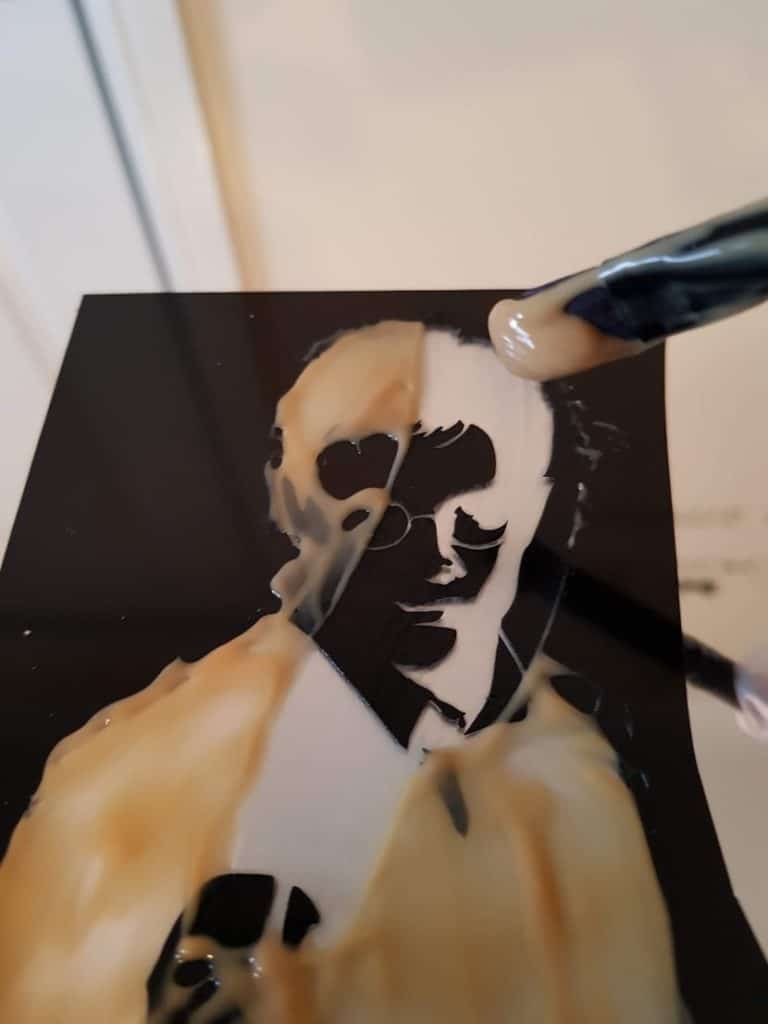
5. Applying Etching Cream
Next, apply a generous layer of etching cream to the exposed areas of the mirror using a small paintbrush. It’s best to leave some excess vinyl around the design to prevent the cream from spilling over. Let the etching cream sit for 15 minutes so it can work its magic. Don’t worry about wasting any cream; you can reuse it later.

6. Cleaning Up the Etching Cream
After 15 minutes, use a paintbrush to remove the etching cream and place it back in the bottle. Rinse the mirror thoroughly with water and wipe off any excess cream using paper towels.
Make sure the mirror is completely clean before moving on to the next step.

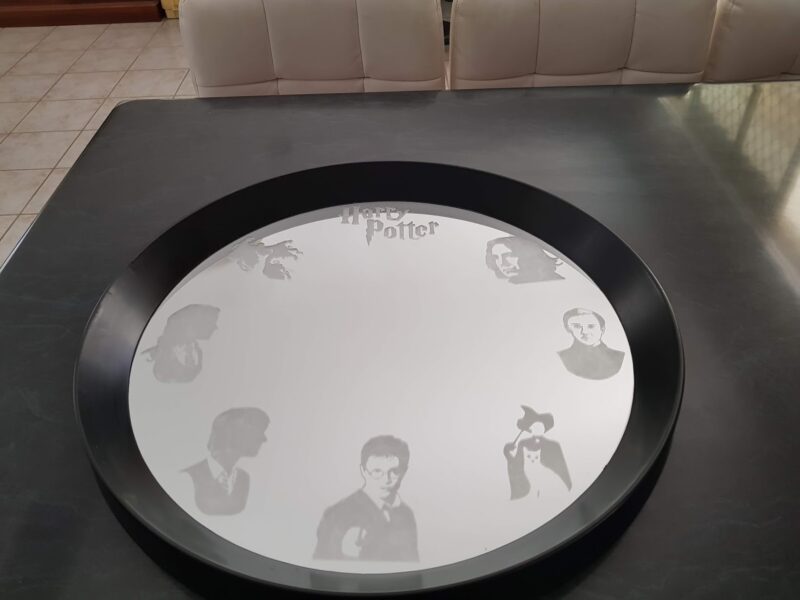
7. Removing the Vinyl
Once the mirror is dry, carefully remove the vinyl from the mirror. I like to use an X-Acto knife to lift the edges of the vinyl for easier removal. After all the vinyl is peeled away, give the mirror one final clean using Windex or a similar glass cleaner.
8. Alternative: Using Vinyl Stickers
If you don’t want to use etching cream, you can cut the design using Oracle 651 vinyl and apply it directly onto the mirror using transfer tape. This method gives you a glossy look without the need for etching.

Here are a few Harry Potter items I made as gifts. My Son’s girlfriend is a school teacher, so I made gifts that were related to a school theme. I used permanent vinyl for these two.

They are also going to America and will be going to Harry Potter World in Orlando. So her last item was a Harry Potter wallet, for this one I used Iron-on vinyl.

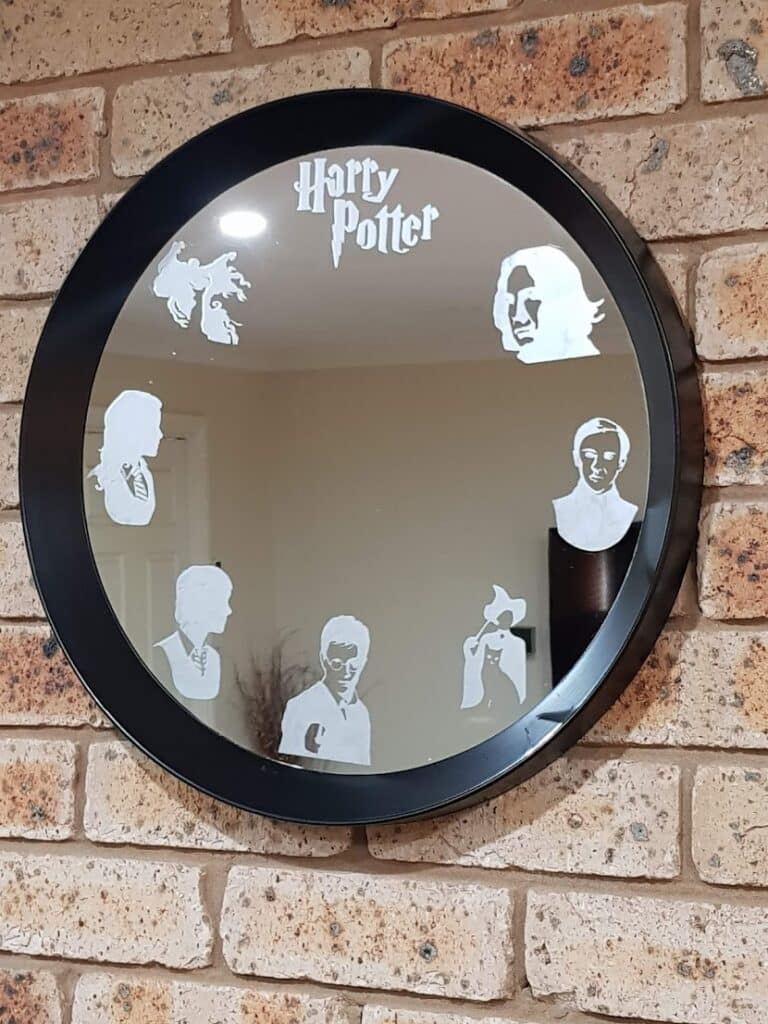
Photographing mirrors can be tricky because of unwanted reflections from the surrounding room. I edited the photo to remove the reflection so you can clearly see the etched design.

Cricut project ideas
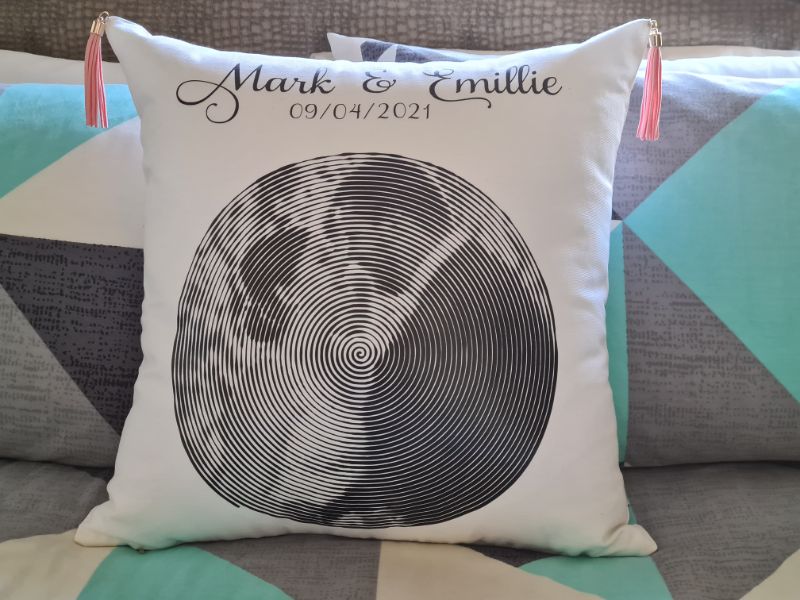
I used my Cricut to make a personalised cushion as an anniversary gift to celebrate their wedding day. The photo was transformed into a Spiral Betty design, adding a unique and artistic touch.
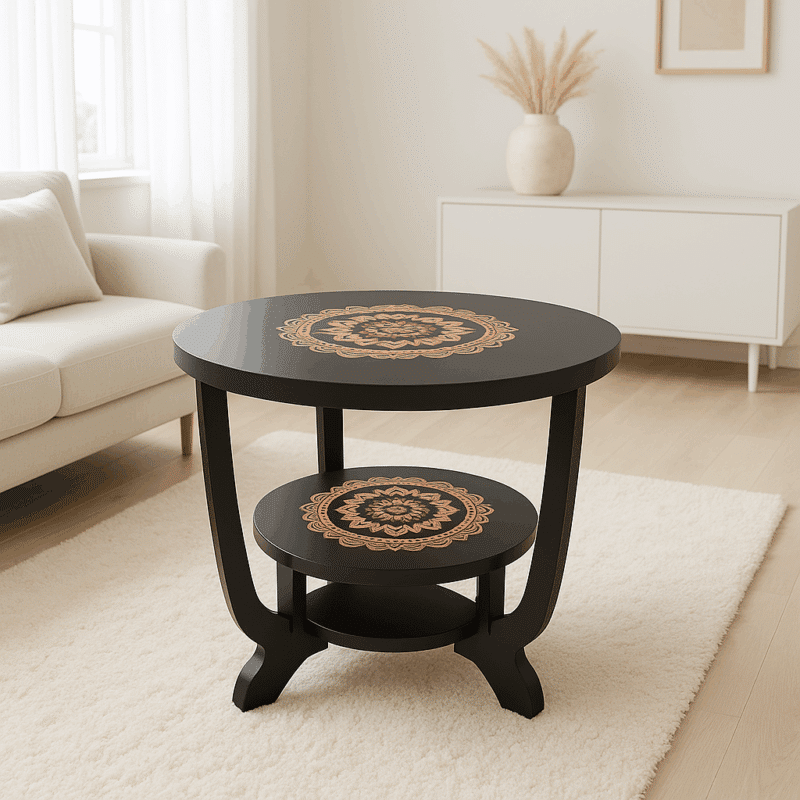
Another creative way to use a Cricut is to make stencils for applying gold leaf designs to furniture, adding a touch of elegance and detail to your pieces. You can see all my Cricut project HERE if you are looking for inspiartion.

If you’d like to find any of the items used in this project, we’d greatly appreciate it if you used our affiliate links. These links provide us with a small commission at no extra cost to you, allowing us to continue creating and sharing more inspiring projects. We’d also love to hear your thoughts—feel free to leave a comment or share this post!


20 Comments
Mother of 3
July 11, 2019 at 7:56 pmI am a huge Harry Potter fan (as are my two boys) and I just love all these ideas! Though my favorite are the two drink containers. Found you at artsy fartsy where I also shared a Harry Potter idea– Harry Potter pancakes. Pinned.
Anita Holland
July 12, 2019 at 3:28 amThanks for the visit I will go over and check those pancakes out.
Julie
August 1, 2019 at 1:13 pmThese are such fun HP ideas, I love how the mirror is still very functional, you’ve not covered the whole thing which is brilliant!
Anita Holland
August 1, 2019 at 11:26 pmThank you, My first attempt was vinyl buy found I could not clean it. And I thought there no point having a mirror if you cant use it.
Susie Bentz
August 1, 2019 at 9:58 pmThese are all just awesome! Found you through the Linky Party!
Anita Holland
August 1, 2019 at 11:31 pmThank you so much, I am new to link parties too.
Dee | Grammy's Grid
August 7, 2019 at 3:54 pmThanks so much for linking up at the #UnlimitedMonthlyLinkParty 3! Shared.
Anita Holland
August 8, 2019 at 2:33 amThanks for sharing
Karen, the next best thing to mummy
August 7, 2019 at 5:00 pmLove this mirror, so would my grandson #alittlebitofeverything@_karendennis
Anita Holland
August 8, 2019 at 2:41 amThank you so much.
Habiba
August 8, 2019 at 1:27 pmI have been eying glass etching projects every now and then and I really think etching cream needs to go up on my shopping list. Great project!
Anita Holland
August 9, 2019 at 1:09 amThis was my first project and it was so easy to do, so why not take the leap. You will have fun and no glass will be safe in your home.
Cecilia
August 12, 2019 at 7:03 pmMy daughter and daughter-in-law would love this! Thanks for sharing at Vintage Charm!
Anita Holland
August 13, 2019 at 12:45 pmThank you.
judee
August 14, 2019 at 1:42 amVery creative and you are right- everyone knows someone who is a Harry Potter fan!
Anita Holland
August 14, 2019 at 3:56 amThank you so much.
Monika Ohson | TravelerInMe
August 14, 2019 at 5:49 amThis is indeed a unique gift for a Harry Potter fan. Kudos!!
Anita Holland
August 14, 2019 at 7:09 amThank you so much.
Julie Briones
August 19, 2019 at 5:57 amTHIS is VERY cool! My kids would get a kick out of this and it is SUPER inspiring for other themes, as well! Pinned! Thanks for sharing at Tuesday Turn About, Anita!
Anita Holland
August 19, 2019 at 7:47 amThank you, with the Cricut or similar machine you can have any theme.