
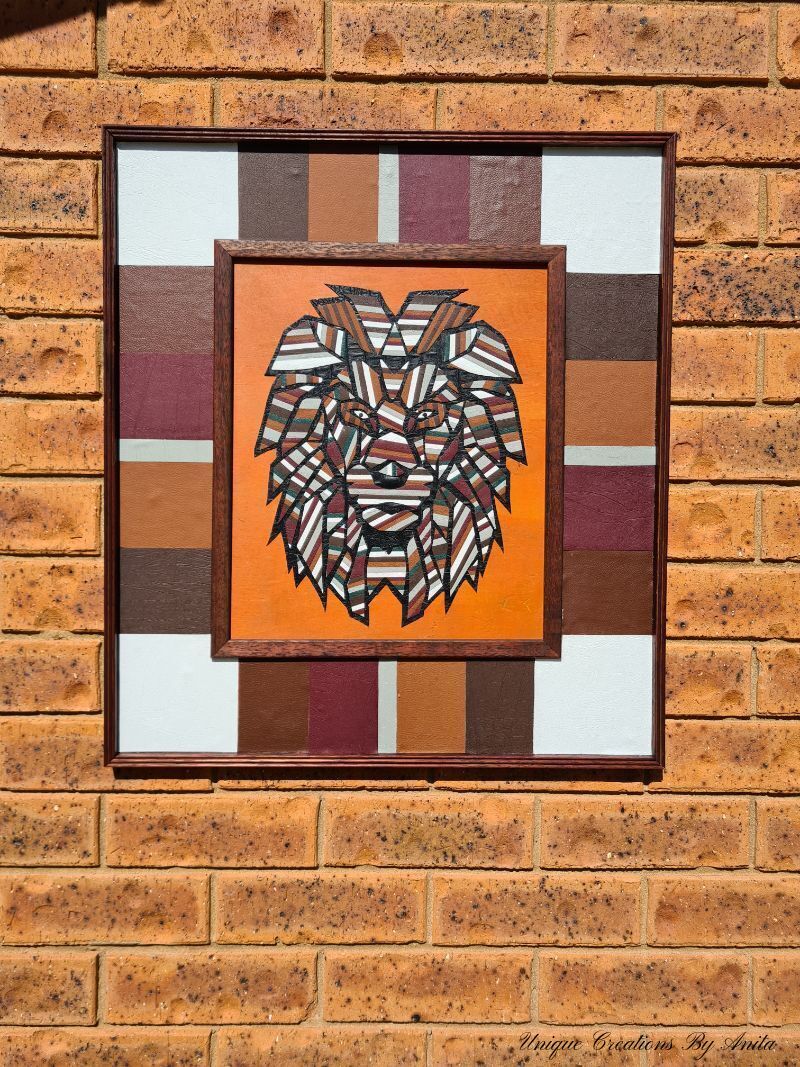
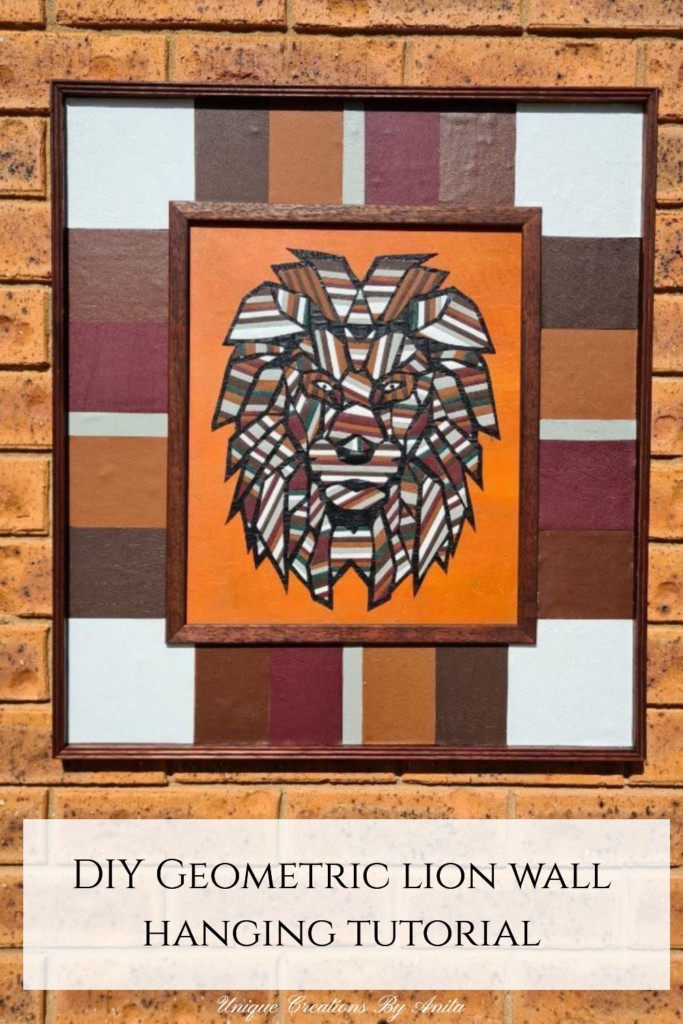
I have recently taken a few months off from blogging to repaint the inside and outside of my house. Instead of putting the same wall decor back up, I wanted to create all new ones. My bedroom decor is all heavy wood with African themed bedding, so I wanted to try and create a geometric lion wall hanging made from faux leather.
I purchased the geometric lion SVG cut file from Etsy to cut the design out of leather for my wall hanging. For some colour inspiration, I browsed Pinterest and discovered a similar image that caught my eye. I loved the colour effect they used, and it became the inspiration for my project. However, this threw off my initial plan, as I believe the design was likely digitally created. This meant I couldn’t use my Cricut vinyl cutter as I had hoped. Despite this setback, I came up with an alternative solution to bring my vision to life.
This project also ties in perfectly with our latest International Bloggers Club (IBC) challenge, which focuses on using leather in creative ways. More about IBC at the end of the post.

Before we dive into this tutorial, be sure to subscribe to my bimonthly newsletter to be the first to see my latest projects. You can also follow me on Pinterest and Facebook, where I also include my unique mixed-media art projects
How to make a geometric Lion Wall with Faux Leather
*This post may contain affiliate links. This means I earn a small commission on links used at no extra cost to you. Please see my disclosure policy for more information.**
Materials Needed:
- Geometric Lion SVG cut file (from Etsy)
- Faux leather in black and various colours
- Exacto knife
- Craft cutting mat
- The Ultimate glue or tacky glue
- Plywood (for the frame)
- Danish oil (for finishing the frame)
- Recycled decking planks (for the frame)
- Raw Senna paint (for background)
- Paintbrushes
- Small brush for applying glue
- Scissors for cutting leather
Cutting out the image
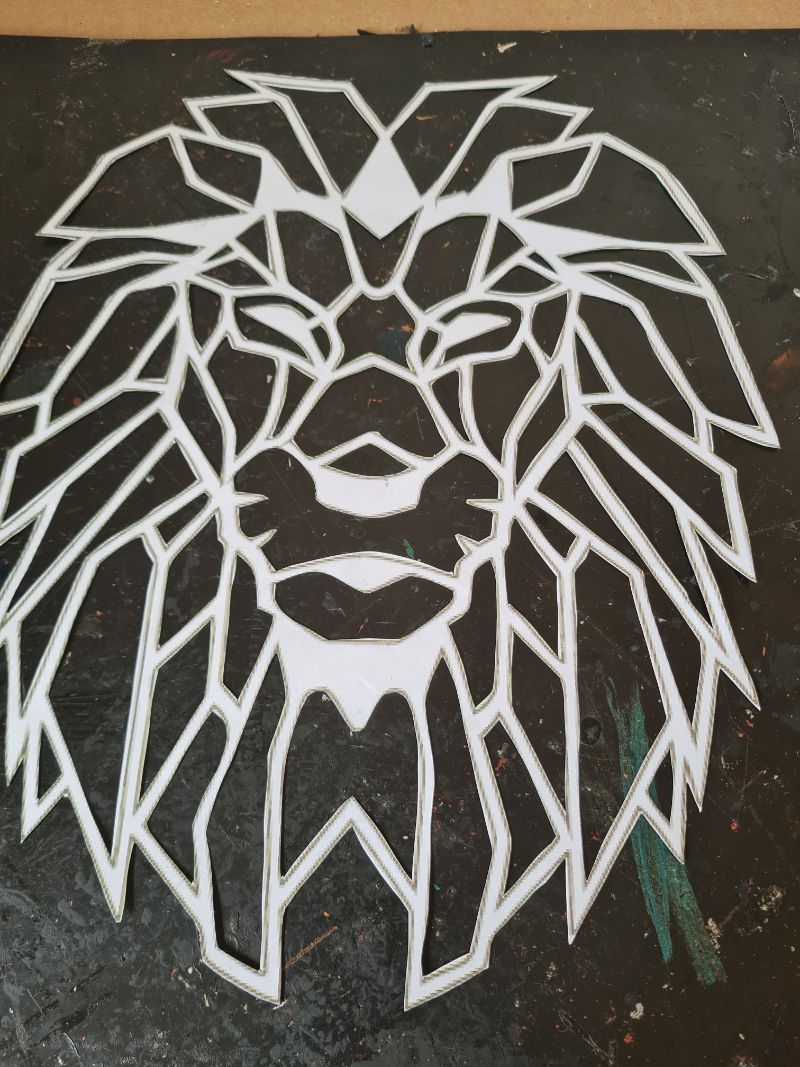
Start by choosing a design for your geometric lion. I found this beautiful geometric lion SVG on Etsy, which I printed onto A3 paper for easy handling. You can choose any geometric animal or mandala design that speaks to you.
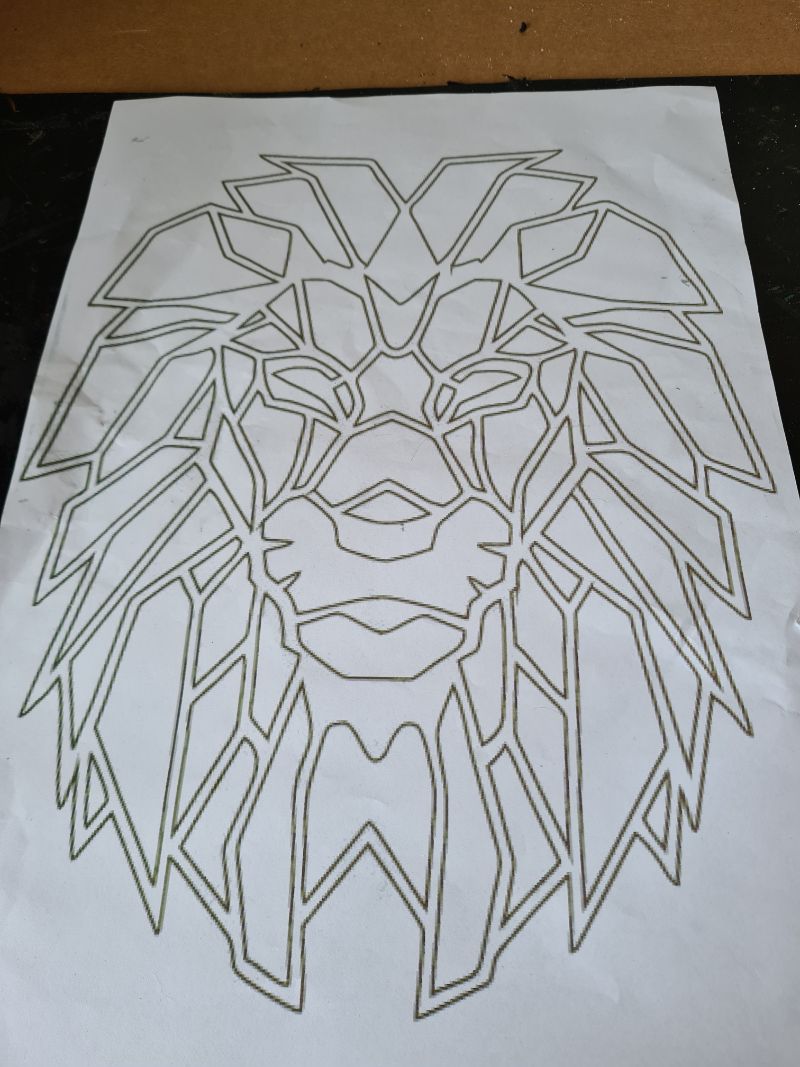
Using an Exacto knife, carefully cut out the sections that will be covered in leather.
Take your time to ensure the cuts are neat, as you’ll use these pieces as templates for the leather.
Once all the inner pieces are removed, cut around the outer border to create the shape of the lion.
Cutting the Background in Faux Leather
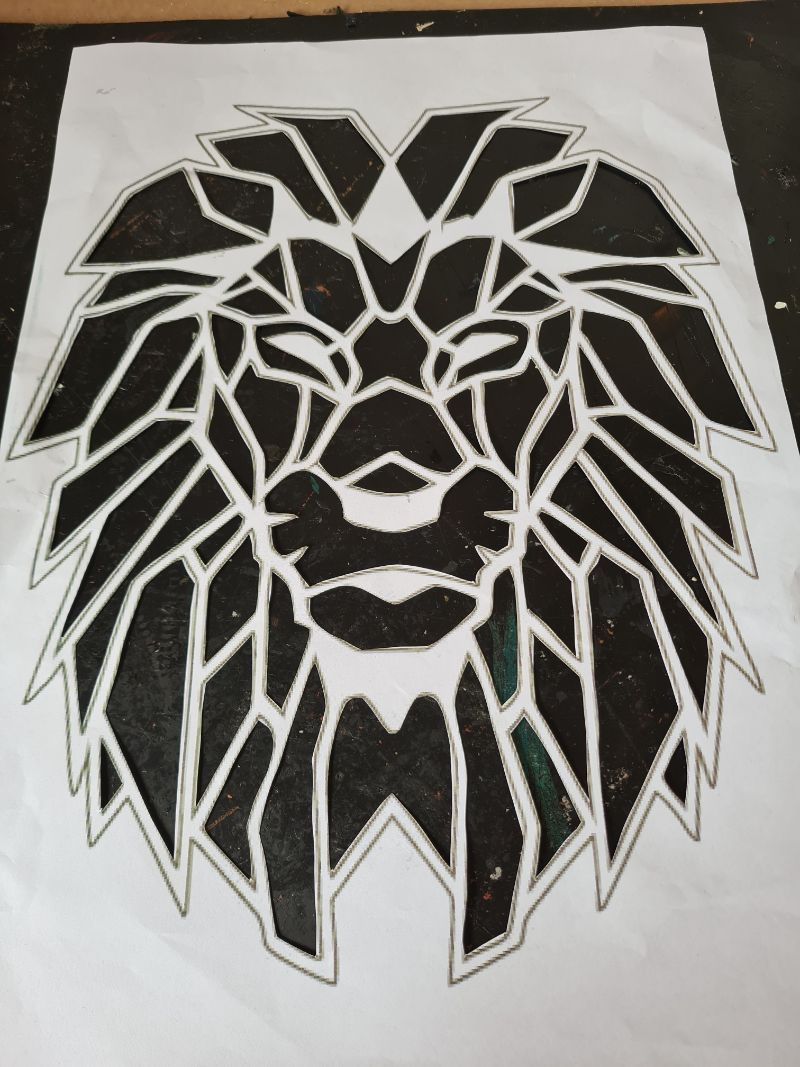
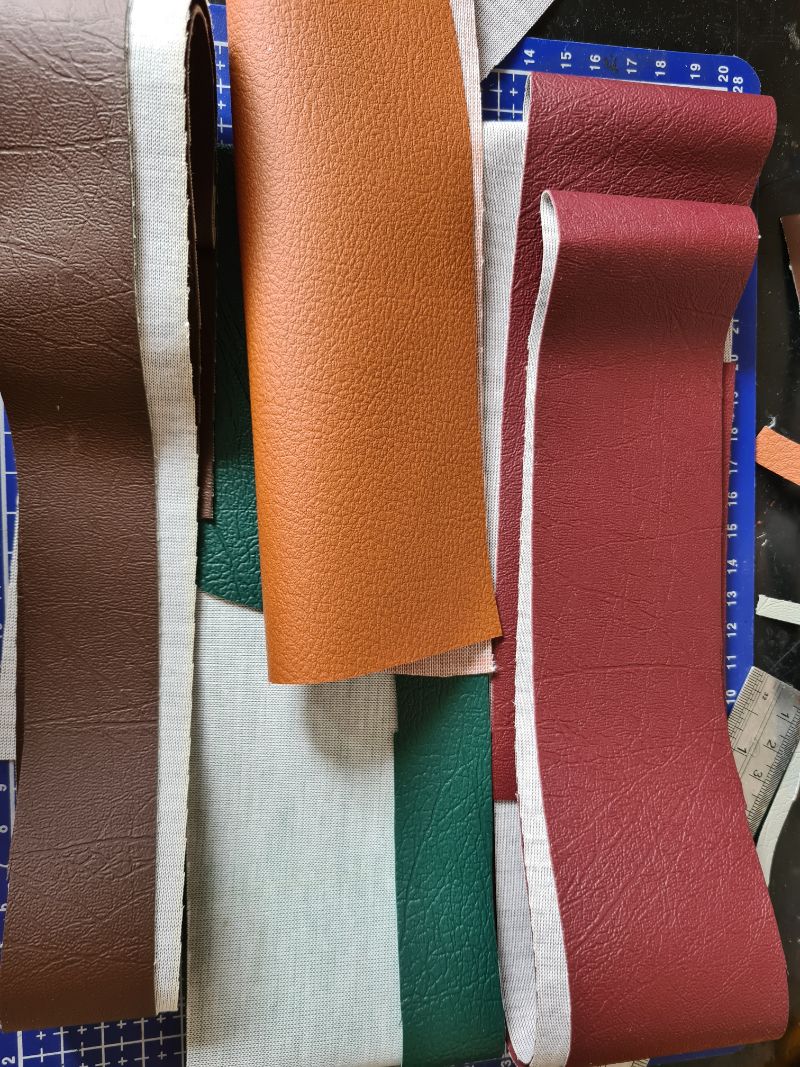
For the background, I opted for black faux leather to make the colours pop. Tape the paper template onto the leather and cut around the outer border. This leather piece will form the base for the remaining design.
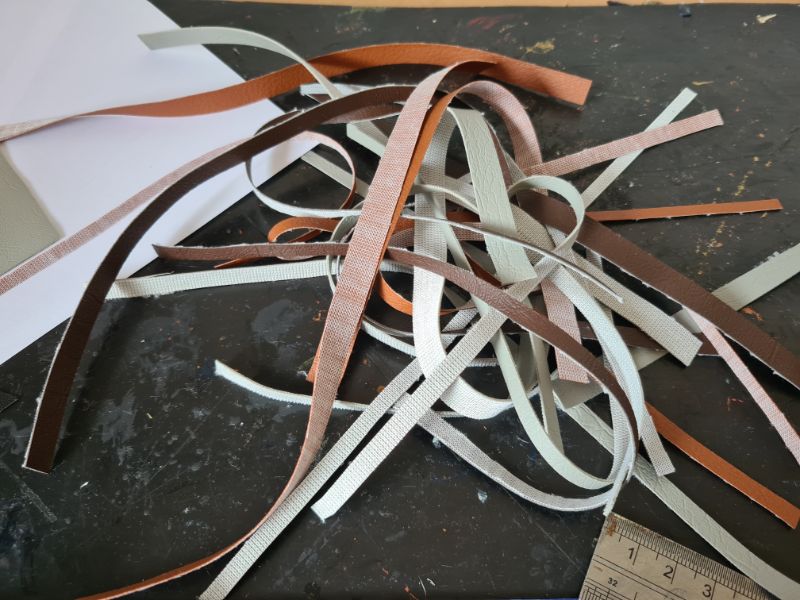
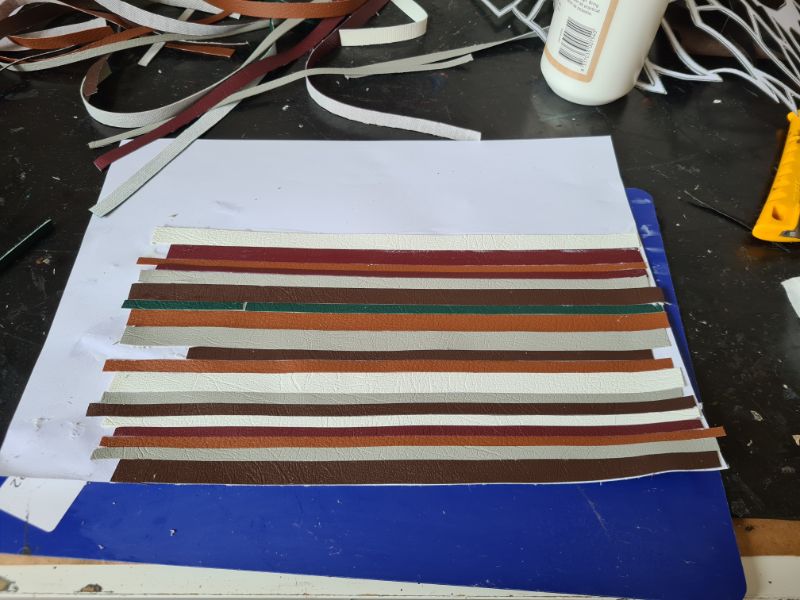
Cutting the leather strips
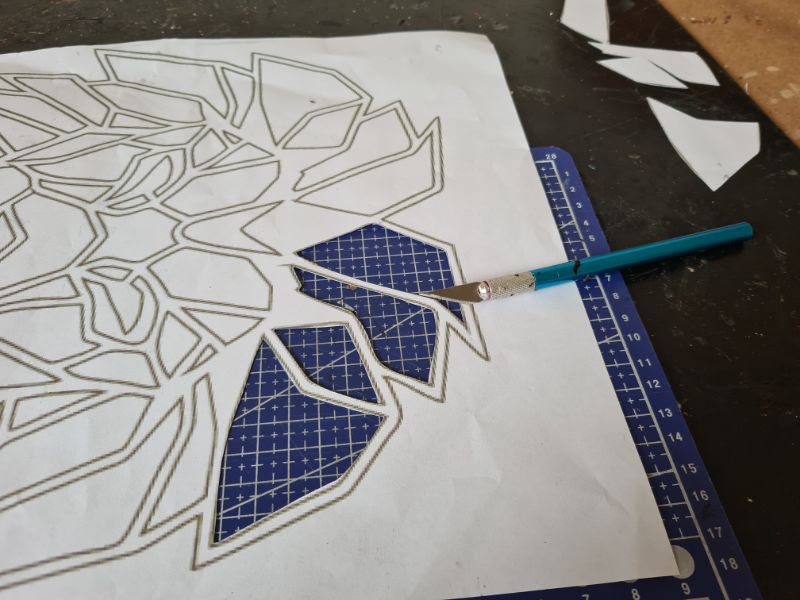
I used a mix of leather scraps I had from previous projects. Cut these scraps into approximately 1 cm strips. The exact width isn’t important as long as they are relatively straight.
For those with a Cricut vinyl cutter, this step can be done with the machine, but be cautious if your cutting mats aren’t sticky enough.
Glueing the leather strips
Start glueing the leather strips to A4 sheets of paper. I initially used a basic craft glue, but it made the paper soggy and weak, so I switched to The Ultimate glue, which worked far better. Apply a thin layer of glue on the paper and press the leather strips down. You can mix and match leather colours to add interest.
Cutting out the templates
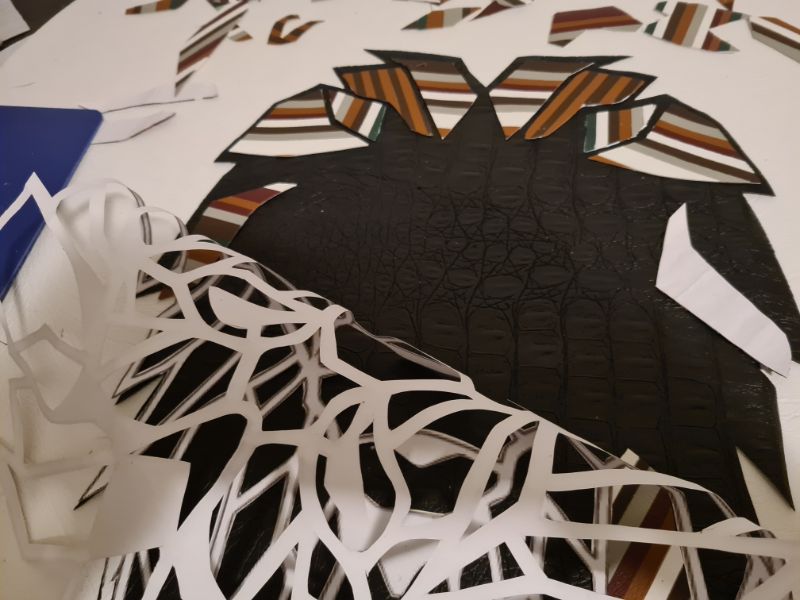
Once the leather strips are glued to the paper, place your templates over them and cut out the pieces. Be creative here; cutting the leather at different angles can add depth to your geometric design.
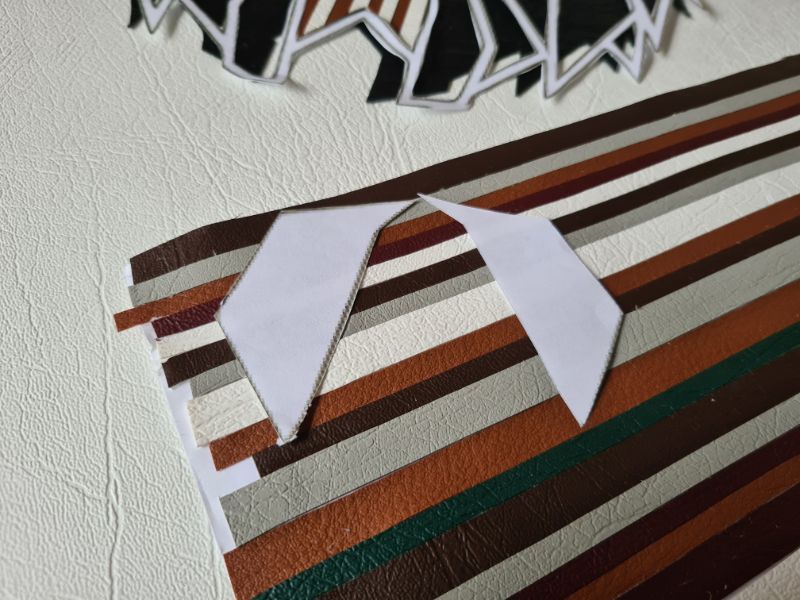
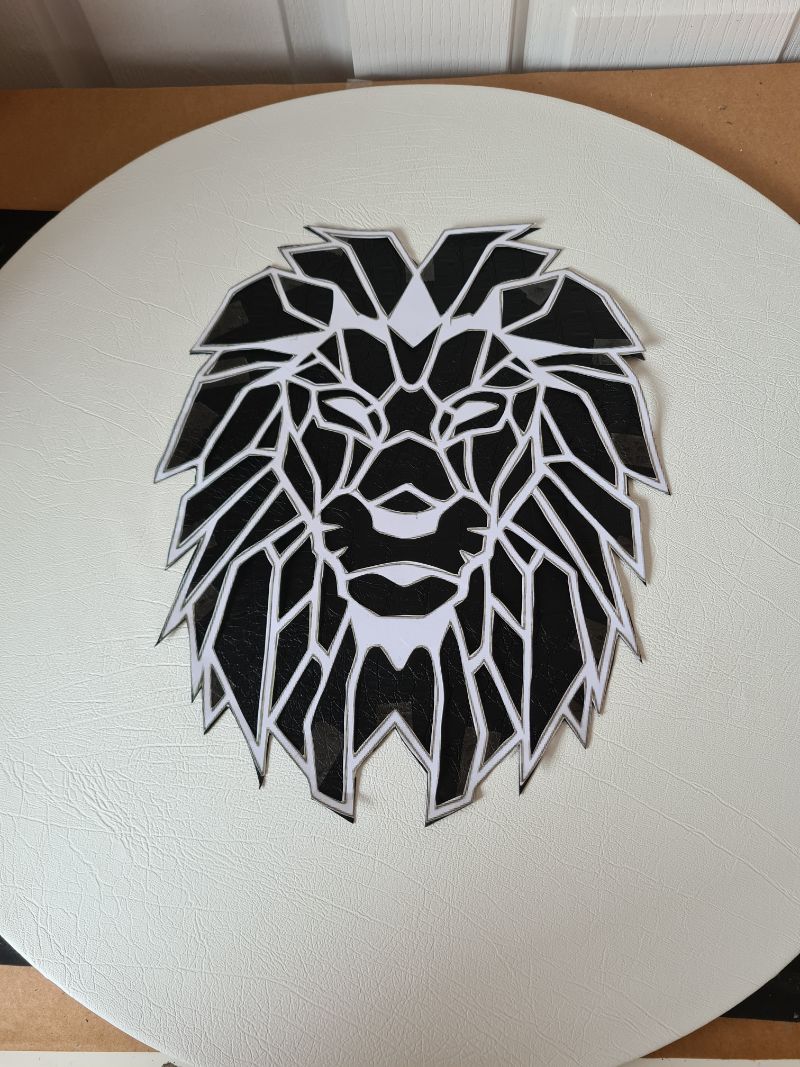
At this stage, I did not glue them in place. I waited until I had cut all the templates out, and I was happy with how the geometric lion looked.
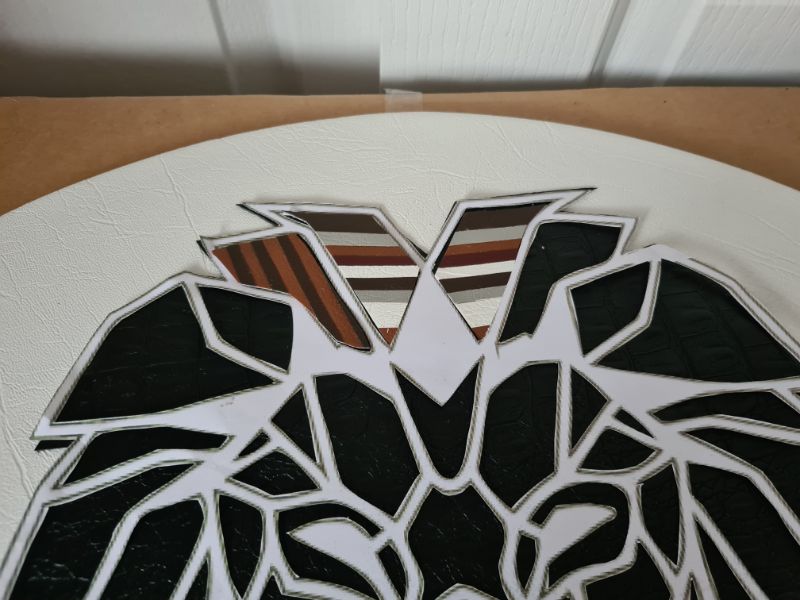
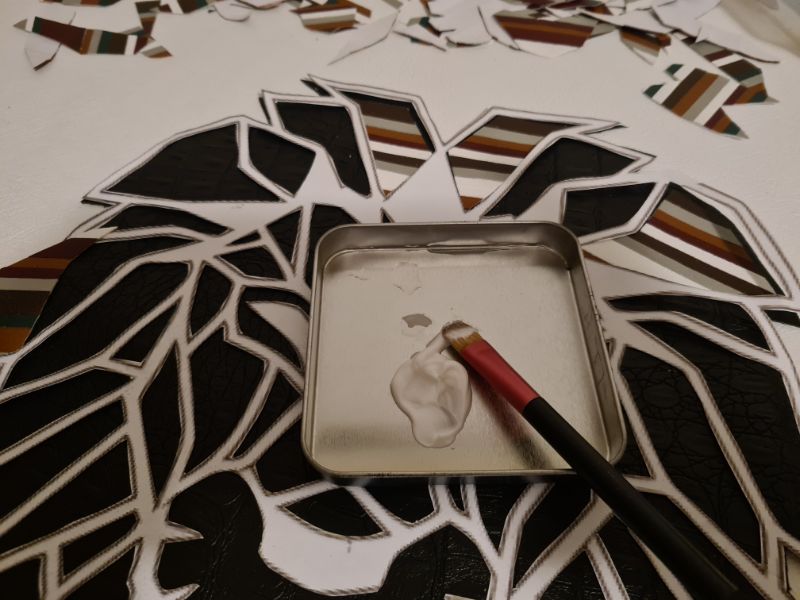
I became so engrossed in this stage that I forgot to take a picture of the next step. It was simply an image of all the templates in place. Next, I carefully slid the templates off the base, preparing them for glueing. To ensure the templates were positioned correctly, I used the paper template as a guide over the black base. I found it easier to apply the glue with a small brush, making sure to cover all the edges. Then, I carefully placed the glued template onto the base.
It is a good idea to lift up the paper template from time to time to make sure you have not accidentally glued it to the base.
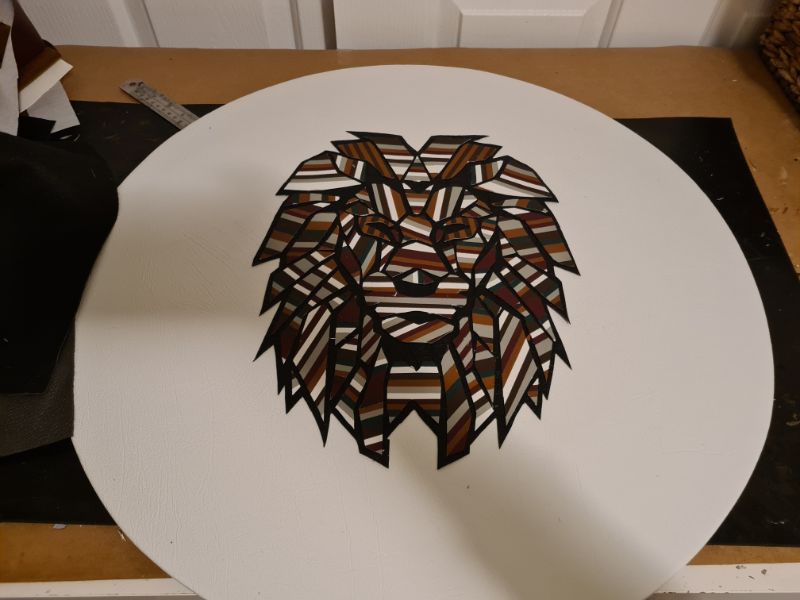
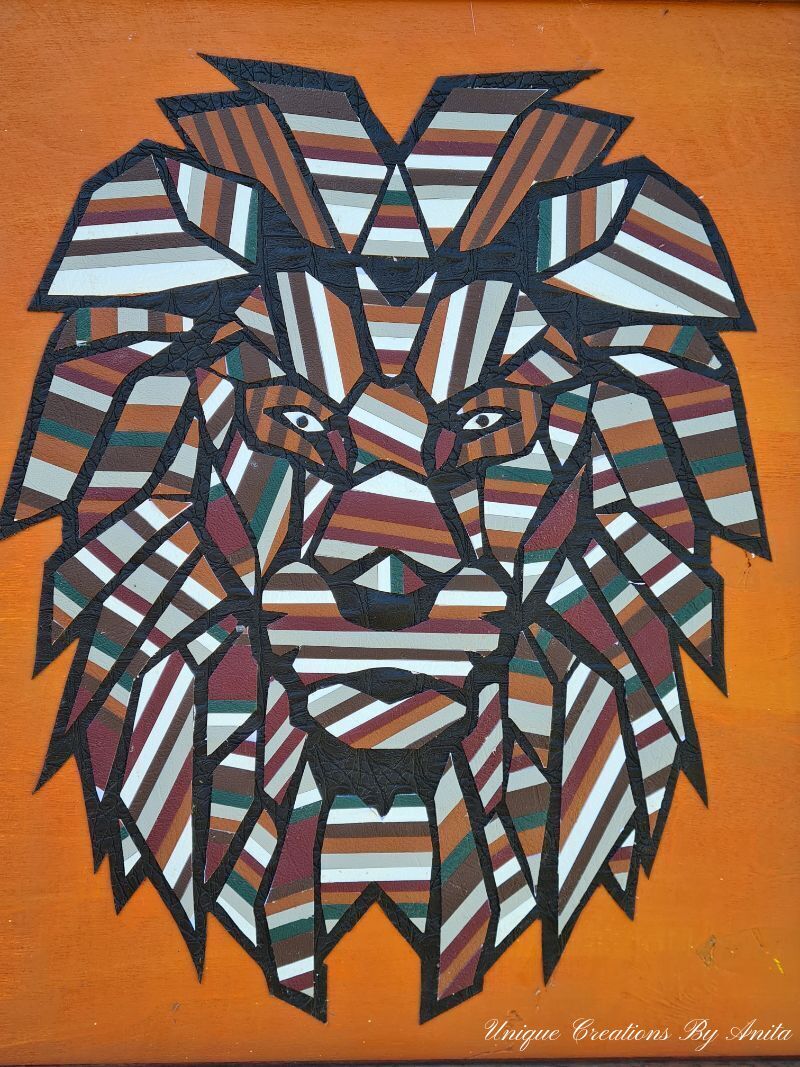
Repeat this process until all the pieces are glued in place. It took me about an hour to complete this step. The image below shows my geometric lion fully assembled and glued together.
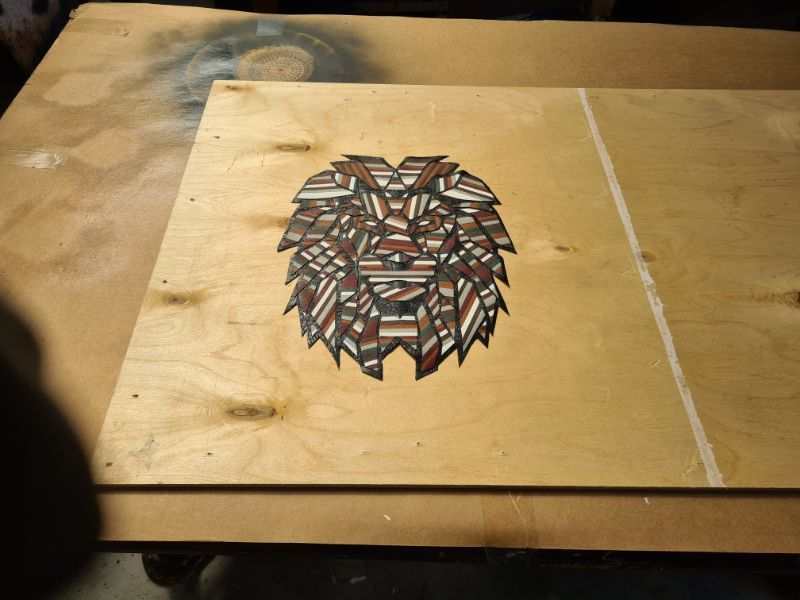
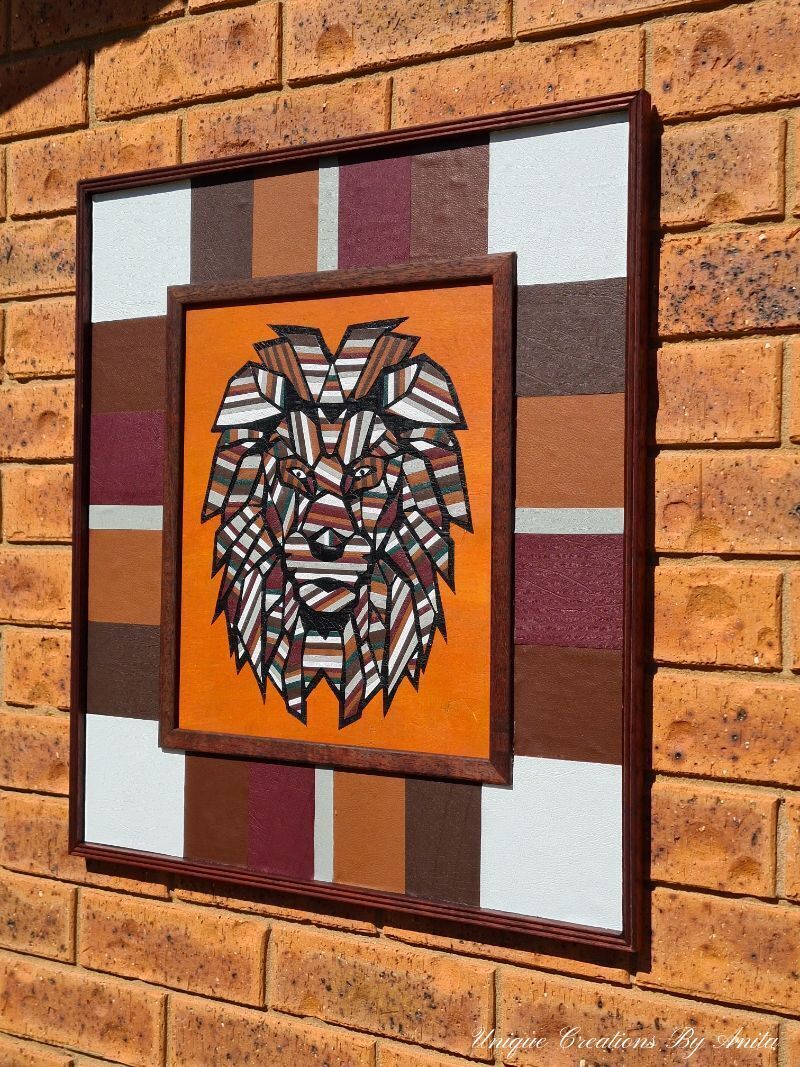
Making the frame
I put so much effort into creating this geometric lion that I felt it deserved a unique frame to complete the look. I used a scrap piece of plywood and cut it into the shape I envisioned. My plan was to create a double frame: the first frame would surround the geometric lion, followed by a layer of assorted leather, and then a second frame on top.
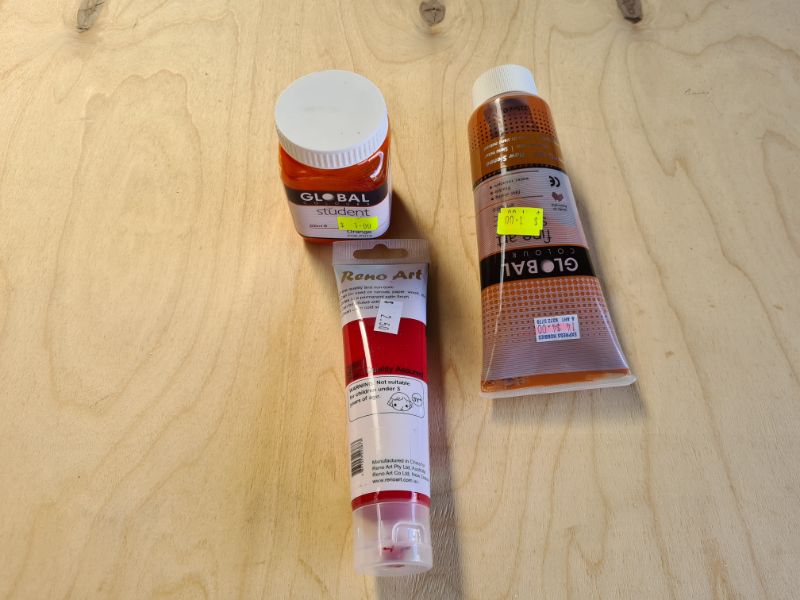
For the background around the lion, I painted the base with raw senna paint. Then, I used small amounts of orange, red, and yellow, blending them together with a dry brush. My intention was to mimic the colours of the African sky, but I didn’t quite achieve the effect I was hoping for.
To make the frame, I used some recycled decking planks that I had been given. I liked the idea of incorporating the grooves from the planks into the frame design. I cut four 1cm pieces from the sides of the decking, appreciating the curved shape they had. Then, I cut four 1.5cm pieces of the wood that still had the grooves in them.
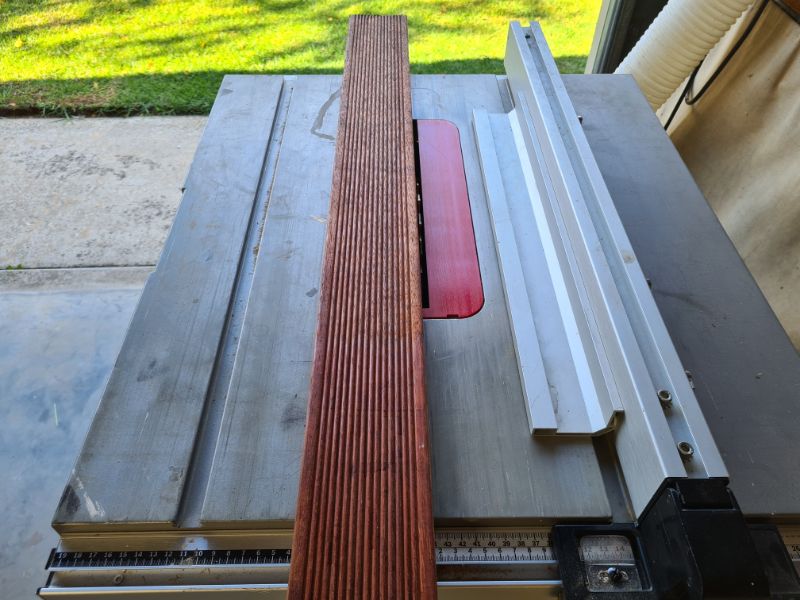
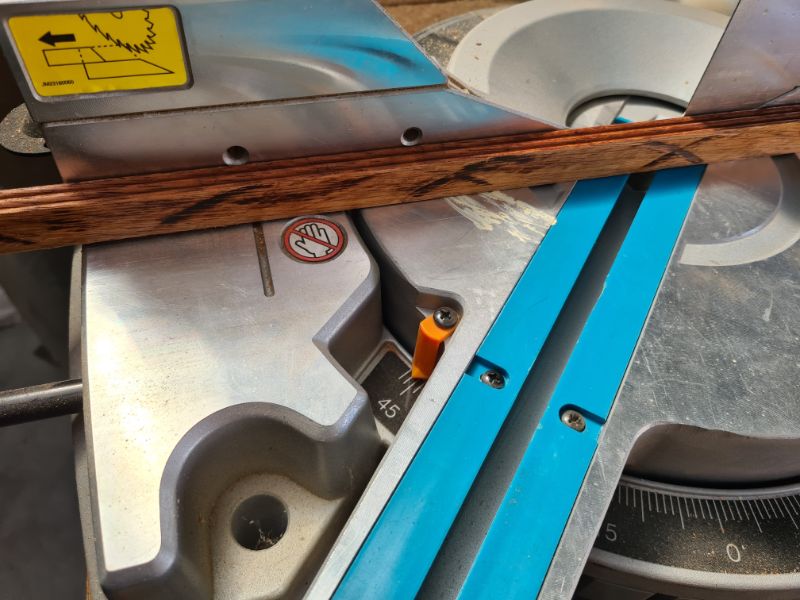
The wood was then cut at a 45-degree angle to make my frames.
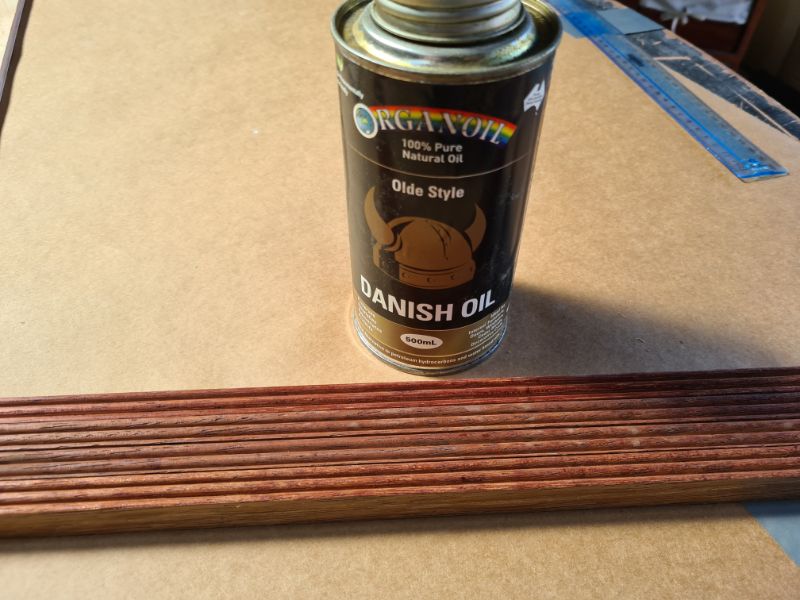
Before I glued the frame together, I added some Danish oil to the wood to bring back the natural colour.
Assemble the frame
My frame was now ready for the final touch, which was to add some leather patches to the gap between the two frames. I cut the patches to size and glued them in place.
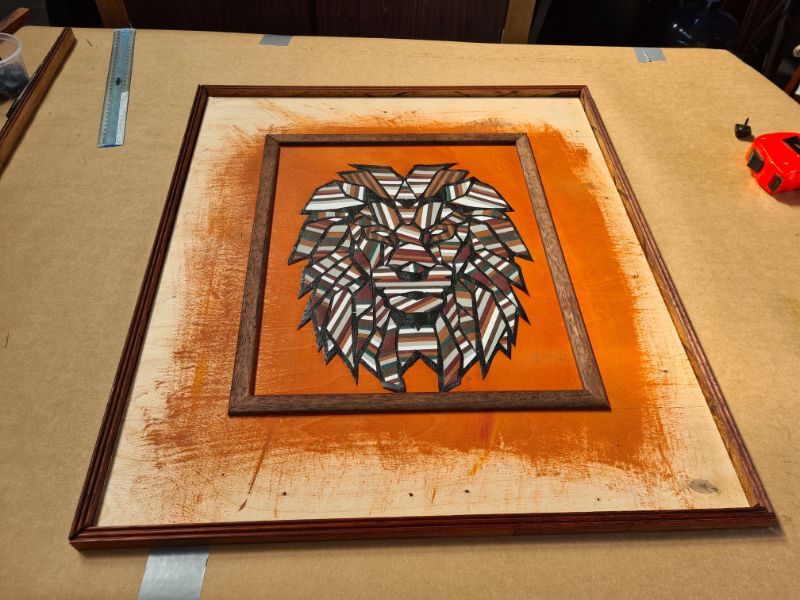
It wasn’t until the end that I realised the lion’s eyes appeared lifeless, so I added some pupils to bring it to life. With that, my geometric leather lion wall hanging was complete.
I was a bit disappointed with how the final picture turned out, as the recycled wood I used showed some flaws through the faux leather.
More project ideas
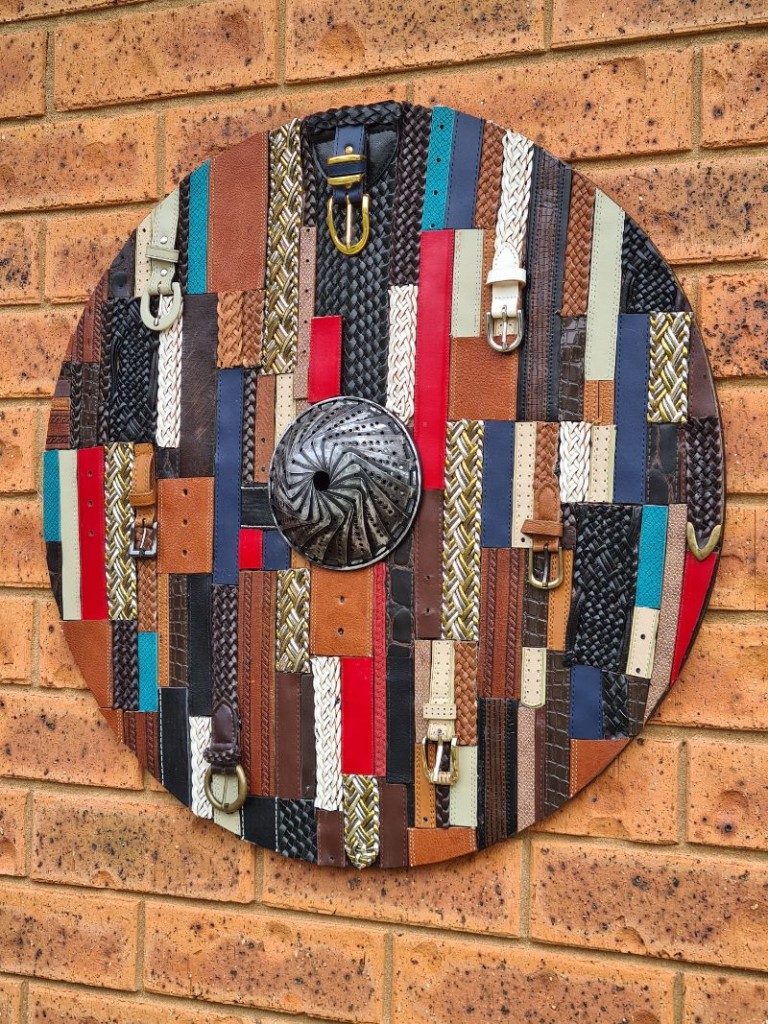
This wall hanging was crafted using a collection of recycled belts.
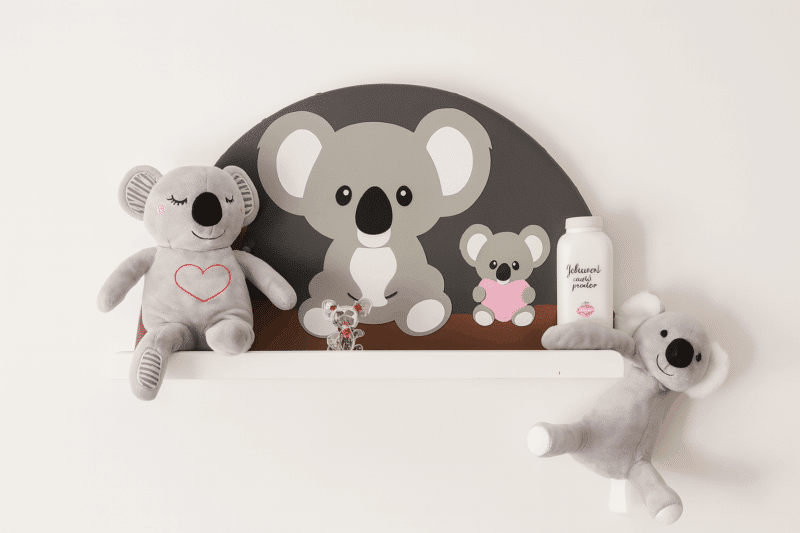
This nursery shelf was created in a similar way using a Cricut vinyl cutter.
More about IBC
If you follow my blog, you will know I am part of the IBC (International Bloggers Club), which is a group of talented bloggers from around the world. We have members from Spain, South Africa, Australia, the United States, and Canada. Each month, we come together and create a project with a common theme.
If you missed last month’s “All bottled up ” theme, here is the link to my Monster octopus bottle. The “Pleatherable Leather ” contributions from my fellow bloggers for this month’s challenge are listed below. Please feel free to jump over and give them some love.
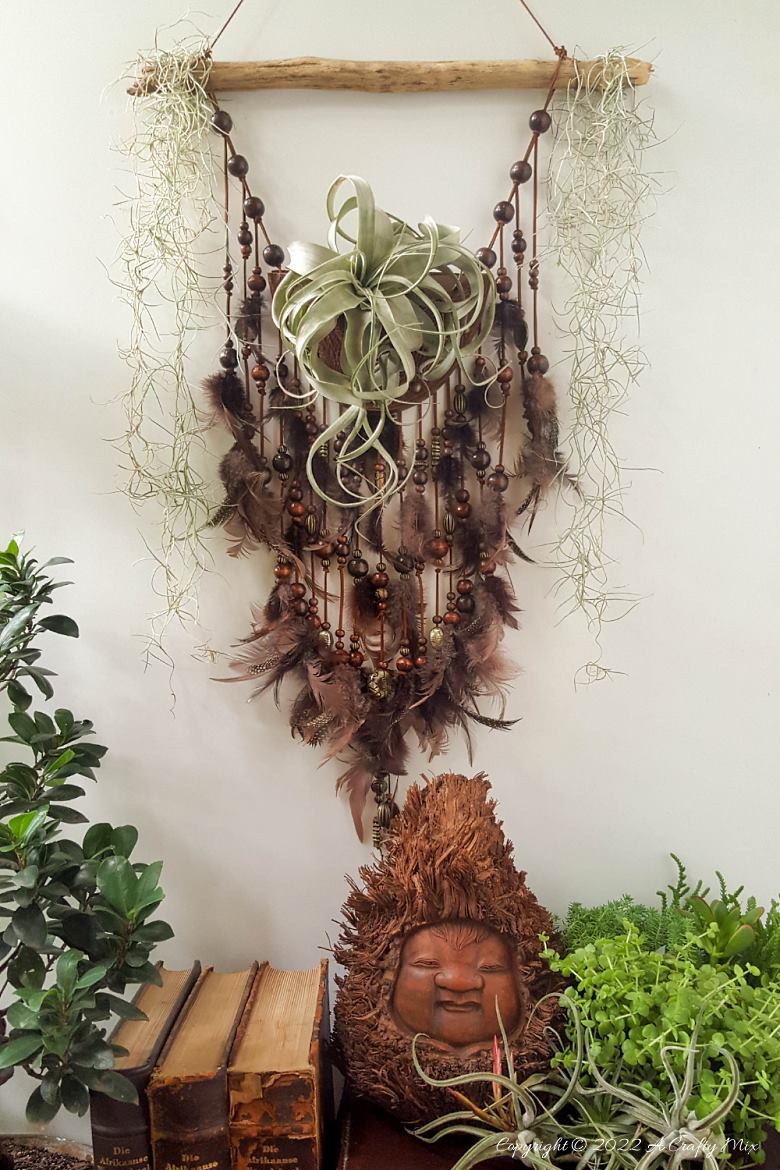
A Crafty Mix| Boho leather tillandsia planter
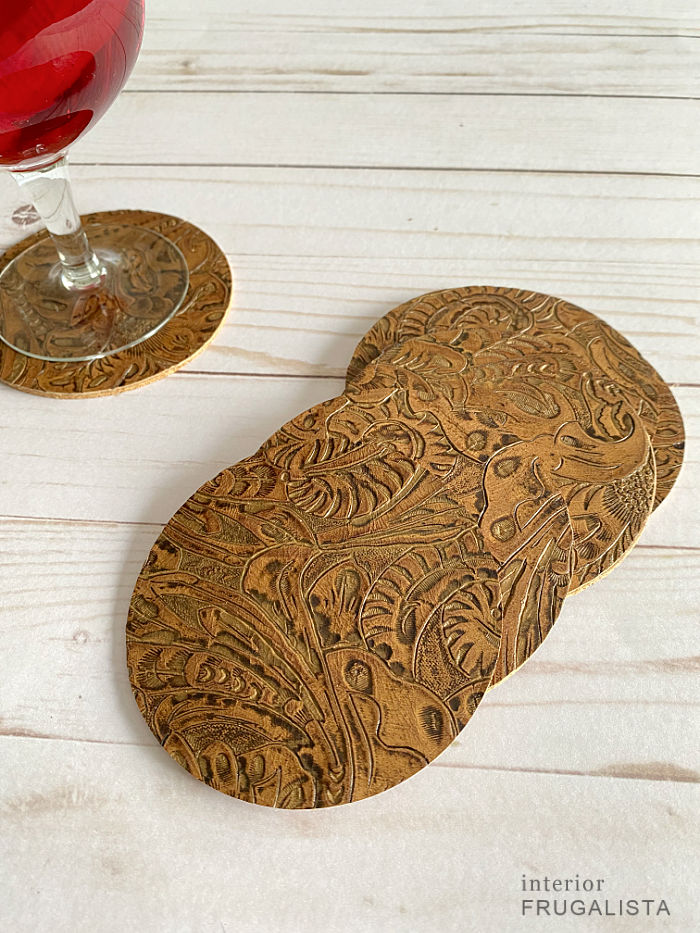
Interior Frugalista|Easy embossed leather coasters
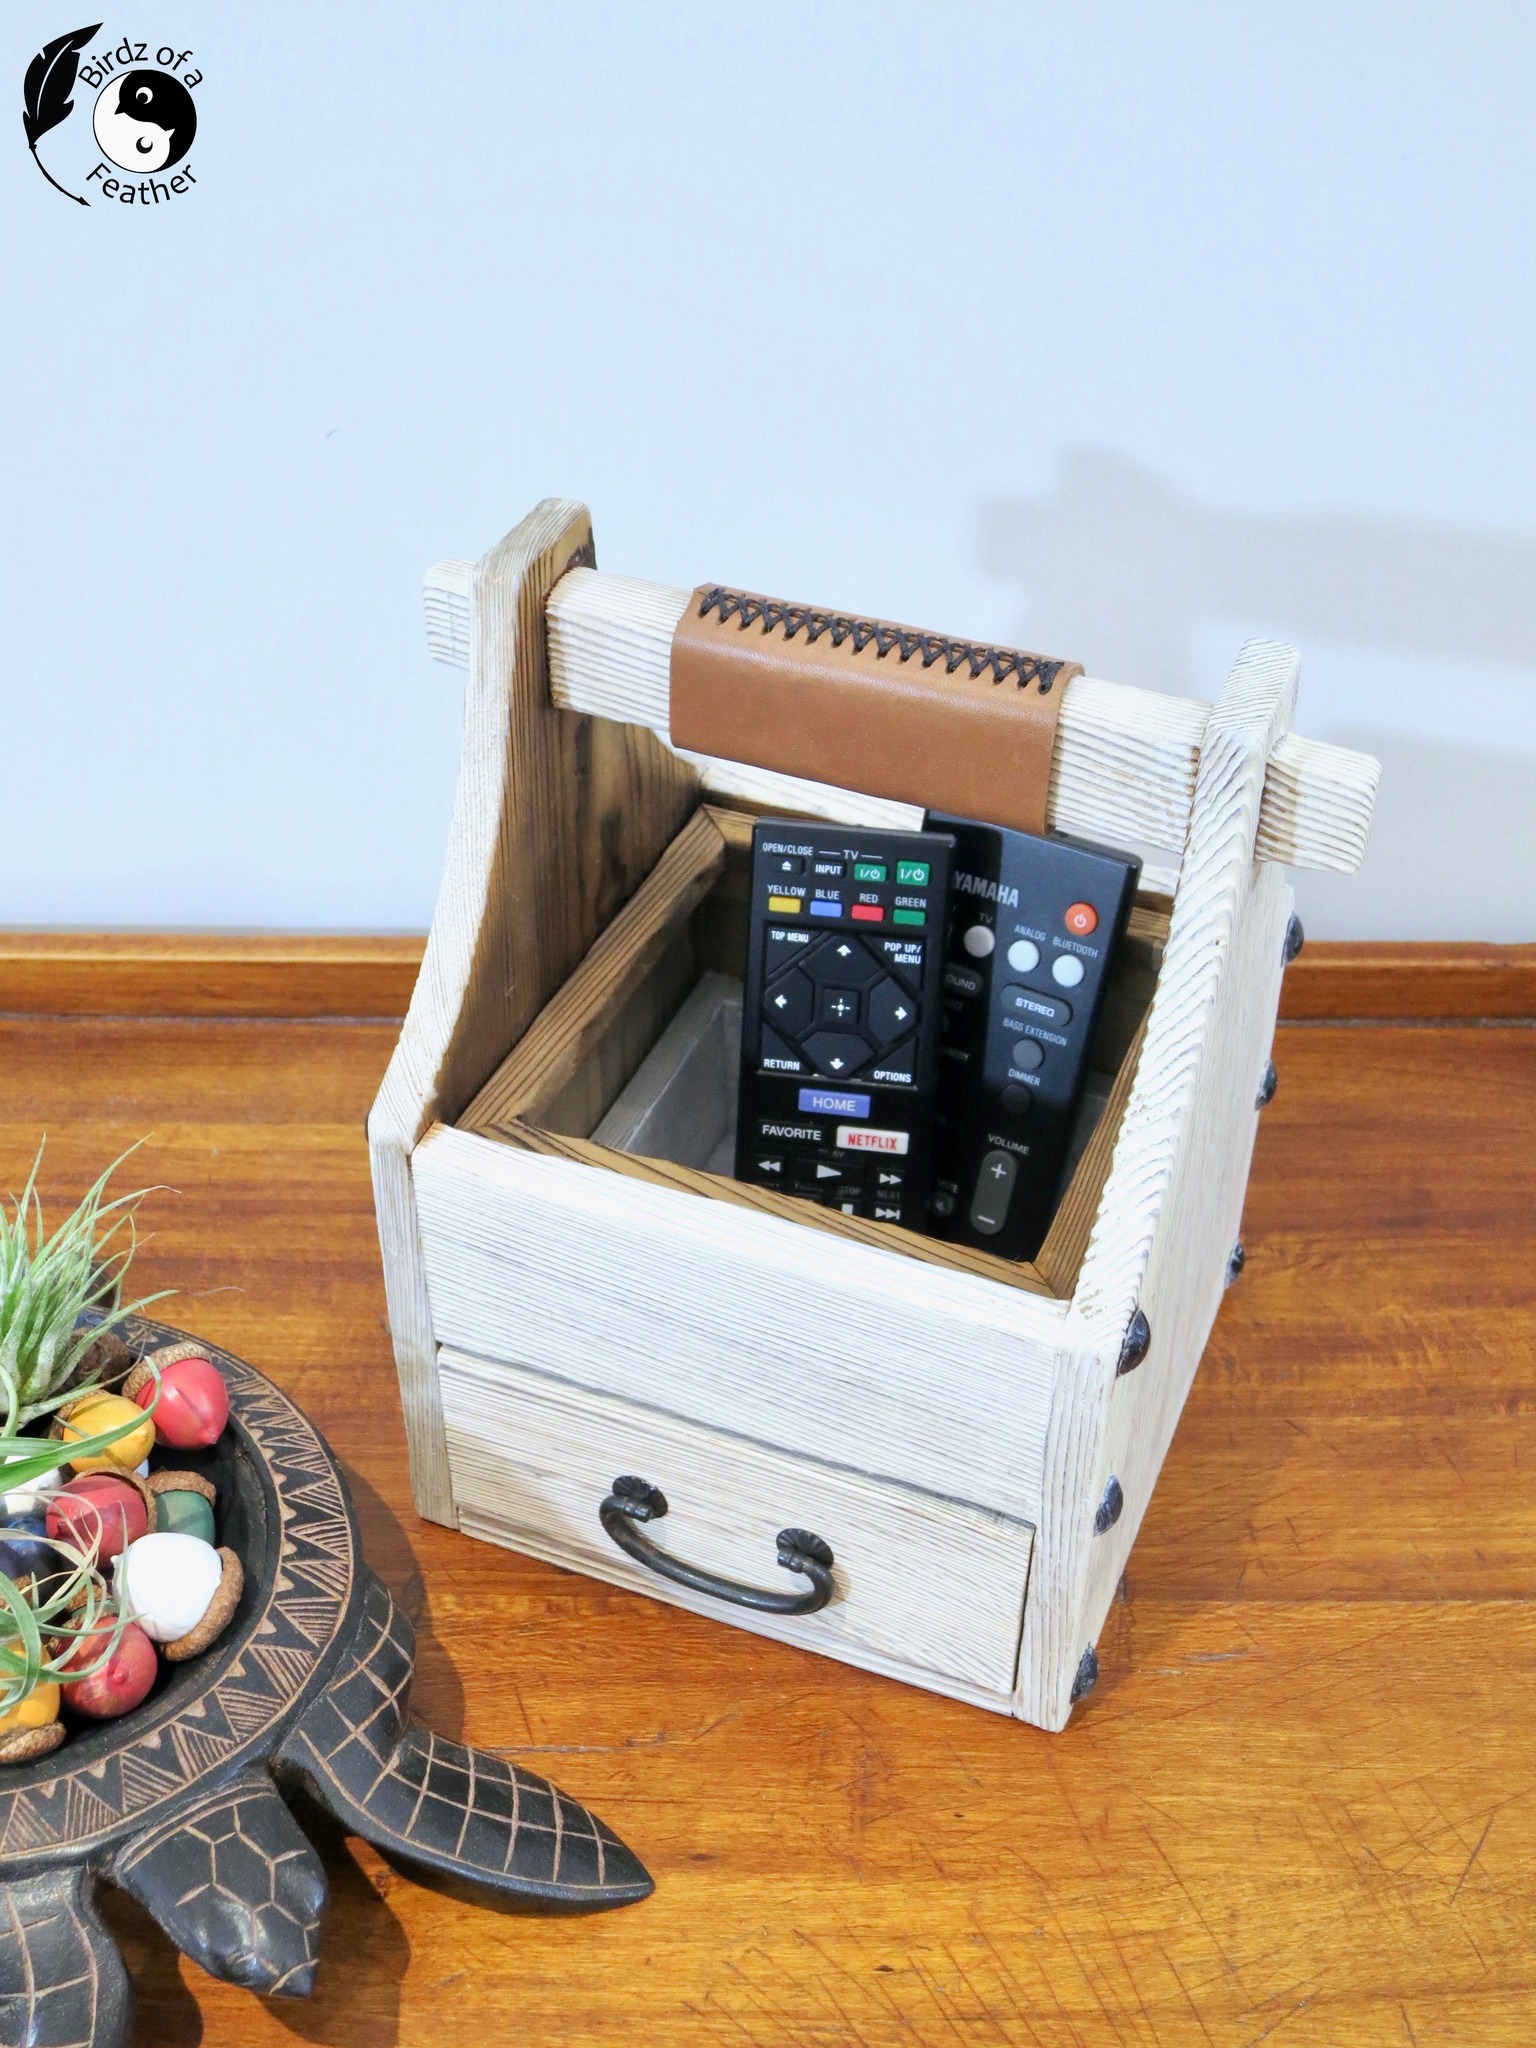
Birdz of a feather | Remote control holder
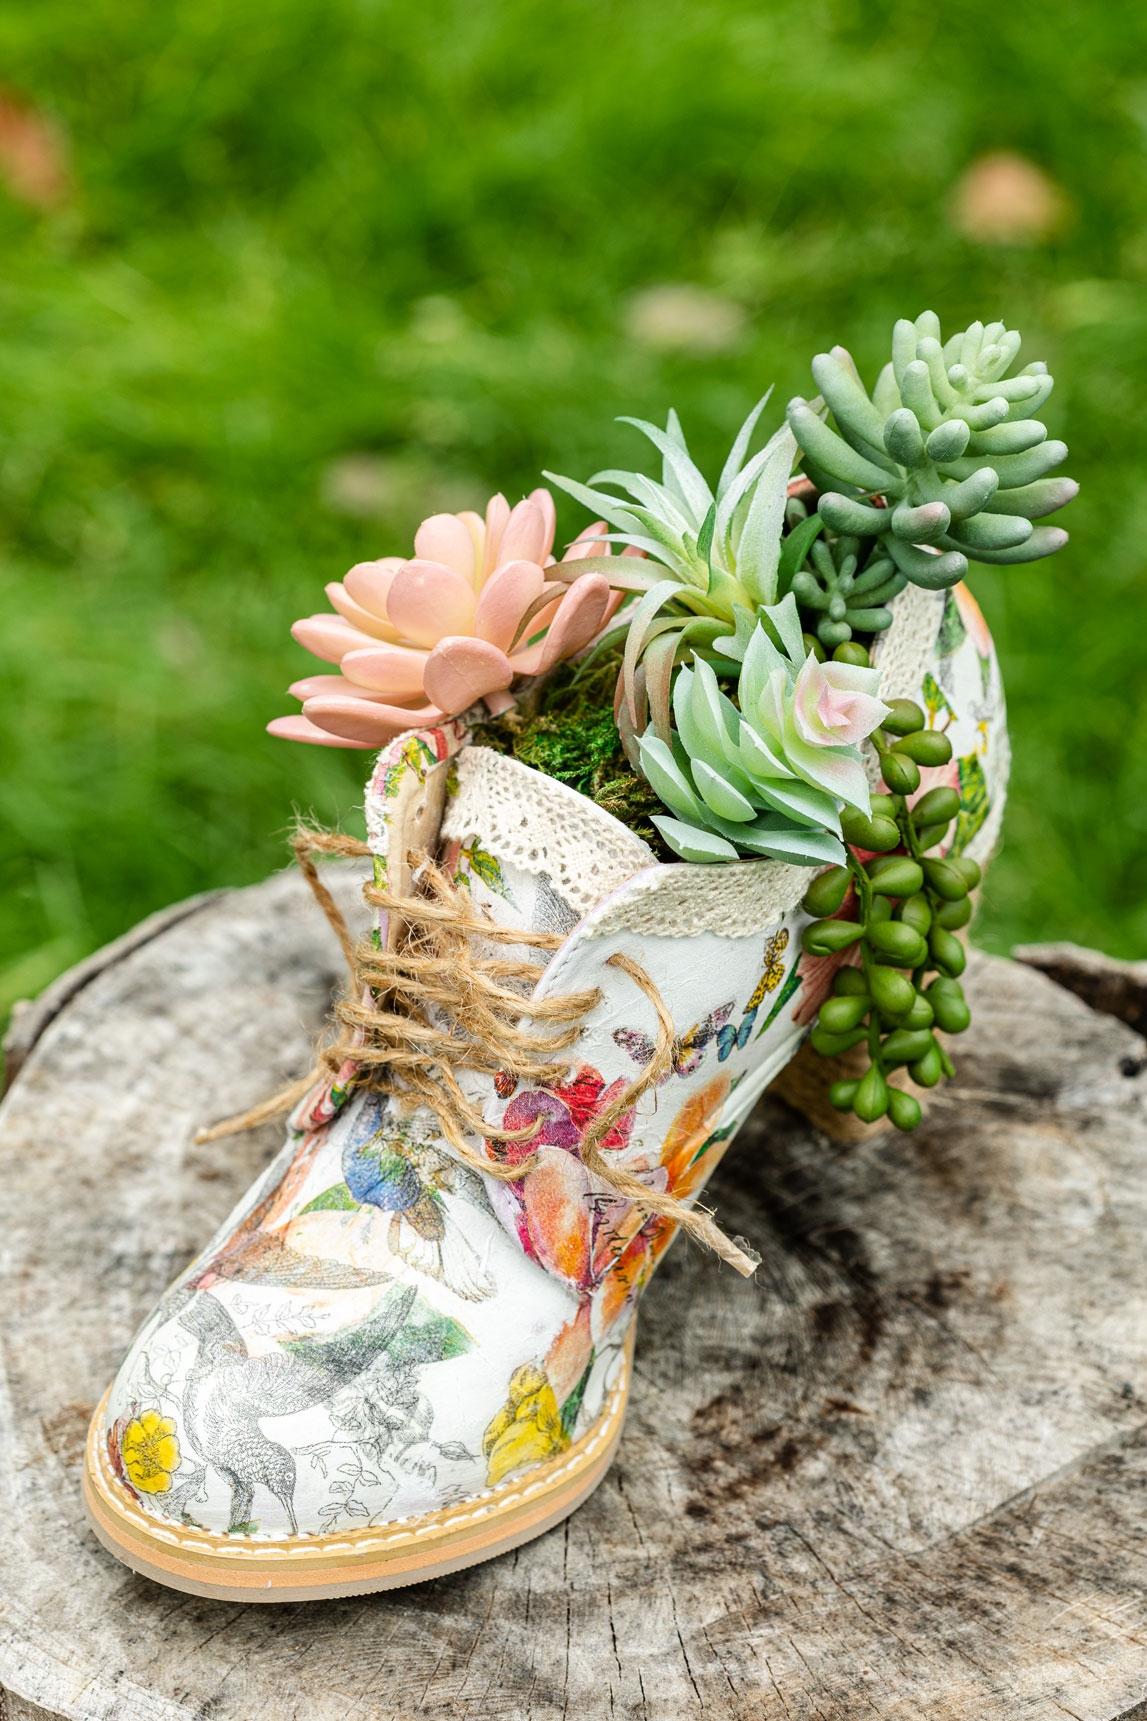
Kippi At Home|Succulent planters

If you’re interested in any of the items used in this project, we’d appreciate it if you used our affiliate links. Clicking these links earns us a small commission at no extra cost to you, helping us create more inspiring and exciting projects to share. We’d also love to hear your thoughts—feel free to leave a comment or share this post!


11 Comments
A Crafty Mix | Make a Boho-Styled Leather Tillandsia Planter - A Crafty Mix
April 18, 2022 at 9:29 pm[…] unique creation by Anita. Wouldn’t this geometric wall art look stunning in a pub or safari […]
Michelle
April 18, 2022 at 10:26 pmI was wondering how you did this. So it’s basically like building a puzzle with leather. That’s great to know. I thought it was going to be terribly complicated. My Dad has a house in the bushveld near Hazyview and he would go gaga over something like this on their entrance hall.
Anita Holland
April 20, 2022 at 1:37 pmThanks, Michelle, yes it is very much like a puzzle. It was a lot easier than the tutorial showed as long as your picture is not too detailed. I loved going to the game reserves in that area, I spend many a good time there. I think that is why my decor still has a strong African theme. You know the saying you can take the girl out of the bush, but not the bush out of the girl.
Sara
April 18, 2022 at 10:54 pmWow, just wow! Your lion is incredible Anita; the mix of colour gives a spectacular effect. What a great piece of artwork for your newly painted house.
Anita Holland
April 20, 2022 at 1:38 pmThanks so much Sara, this is one of my favourites. I have a few more coming.
Kippi
April 18, 2022 at 11:29 pmYour lion wall hanging is an amazing piece of art created from leather. I am sure this will look gorgeous in your bedroom.
Anita Holland
April 20, 2022 at 1:39 pmThanks so much Kippi, it does look great.
Marie B.
April 19, 2022 at 1:59 amBe still my Leo lioness heart, this is AMAZING!! Wow, I’m so impressed by the time and effort you put into making this fabulous geometric leather wall hanging, Anita.
Anita Holland
April 20, 2022 at 1:40 pmThanks Marie, it was really not that hard more boring and repetitive. But the results were worth it. About 4 hours in total.
Maria
April 19, 2022 at 8:12 amPainting is a ton of work. Loved the lion beautiful
Anita Holland
April 20, 2022 at 1:40 pmThanks Marie, I am terrible at painting so this was the next best thing.