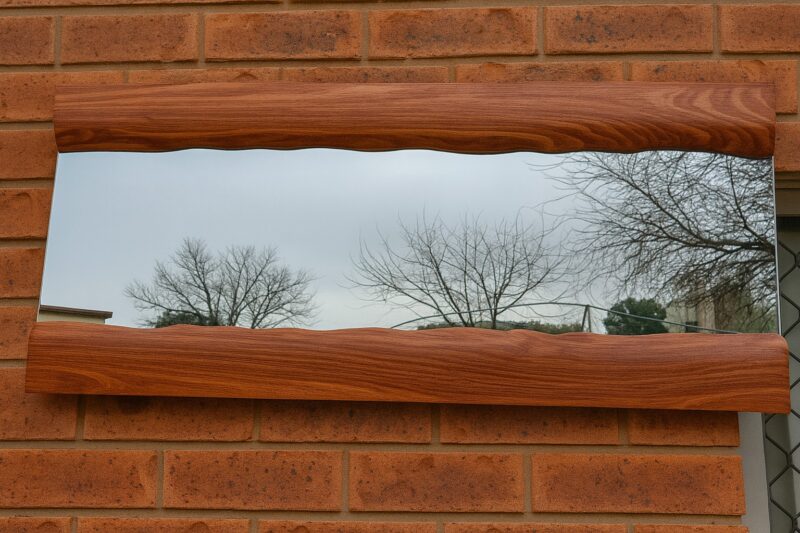
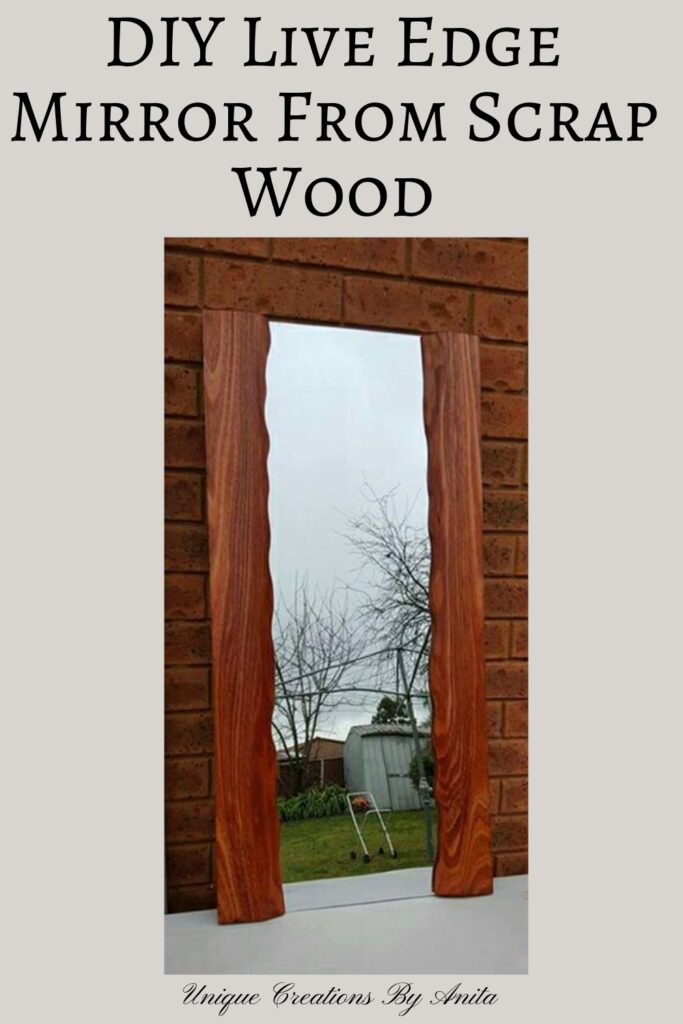
Live edge mirrors are all the rage right now; they’re earthy, stylish, and totally unique. But have you seen the price of those things in stores? I decided to make my own DIY version using mostly recycled and salvaged materials. I found an old, ugly mirror for free on a local marketplace and saw instant potential. It was dated and bland, but with a bit of creativity (and a lot of sawdust), I turned it into a beautiful statement piece using a split log I got for free from a local wood mill. If you love rustic home décor and want a project that mixes woodworking and upcycling, this live edge mirror tutorial is perfect.

Before we dive into this tutorial be sure to subscribe to my bimonthly newsletter to be the first to see my latest projects. You can also follow me on Pinterest and Facebook where I also include my unique mixed-media art projects.
How to Make a Live Edge Mirror From Scrap Wood
**This post may contain affiliate links. This means I earn a small commission on links used at no extra cost to you. Please see my disclosure policy for more information.**
Materials Needed
- Recycled mirror (mine was cut to 1300mm x 400mm)
- Glass cutting knife
- Split log or half-round timber (at least the length of your mirror)
- Circular saw
- Electric planer
- Thickness planer (optional but helpful)
- Jigsaw
- Angle grinder with sanding disc
- Orbital sander
- Sandpaper: 180 grit and 320 grit
- Wood stain (I used cedar)
- Furniture or rubbing oil
- Plywood (for the backing board)
- No More Nails or similar construction adhesive
- Screws
- Clamps (optional but helpful during assembly)
- Hanging hardware (D-rings or French cleat)
Step 1: Rescuing and Cutting the Mirror

The original mirror wasn’t the right size or shape for the look I wanted. Luckily, the mirror was thin enough to be cut down easily. I used a glass cutting knife to score the surface, snapped it gently, and ended up with a clean piece measuring 1300mm long and 400mm wide.
Tip: Always wear safety goggles and gloves when cutting glass. Work on a flat surface and take your time with the scoring to avoid cracks.
Step 2: Getting Your Hands on the Right Wood

I had seen similar live edge mirrors on Pinterest, usually made with fancy hardwood slabs. But being the DIY recycler I am, I kept my eyes open for alternatives. One day, I noticed a few split logs at our local timber mill and asked how much they cost. Because I only needed a couple, the owner kindly gave them to me for free and even delivered them to my house! The logs were 4 metres long and perfect for this project.
Step 3: Flattening and Shaping the Log
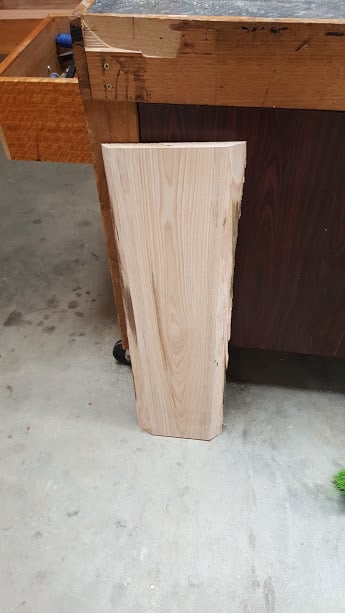
I cut a section of the log the same length as my mirror. To flatten one face, I used an electric planer to remove the bulk of material. Once the log was flat enough, I ran it through a thickness planer a few times. This helped reduce the weight and gave a smoother, more uniform finish.
Important: Logs are heavy and rough, so take your time and work in stages. Removing too much too quickly can cause tear-out or blade damage.
Step 4: Creating the River Edge Look
Next, I cut the log lengthwise with a circular saw to get two mirror frame pieces. I wanted the outer edge to stay natural and thick, while the inner edge would mimic the curve of a riverbank.
Using a jigsaw, I freehand cut a wavy edge to mimic the natural flow of a live edge. To help guide the cut and keep things consistent, I first traced a rough template onto the wood using some scrap timber as a guide. This gave the inner edge of the log that organic, flowing shape that live edge mirrors are known for.
To shape and bevel the edge inward—almost like a shallow riverbed—I switched to an angle grinder fitted with a sanding disc. This helped remove the bulk of the wood quickly. I then smoothed everything out with an orbital sander, starting with 180 grit and finishing with 320 grit for a silky-smooth finish.
Step 5: Finishing the Timber
Once I was happy with the shape and smoothness, I applied a cedar wood stain to bring out the grain and add warmth. After it dried, I rubbed in a finishing oil to enhance the colour and protect the timber. This step really made the wood pop and gave it a rich, professional look.
Alternative Finishes: You could also use epoxy resin on the inner edges for a glossy river effect or experiment with woodburning for texture.
Step 6: Mounting the Mirror

I cut a sheet of plywood slightly larger than the mirror to serve as the base. I applied No More Nails glue to the back of the mirror and pressed it firmly onto the centre of the board.
Once that dried, I positioned the log halves on each side, letting them overlap the mirror slightly for a seamless edge. I screwed the logs into the plywood from the back to make sure they were secure. If needed, you can clamp the wood while the glue sets to prevent any shifting.
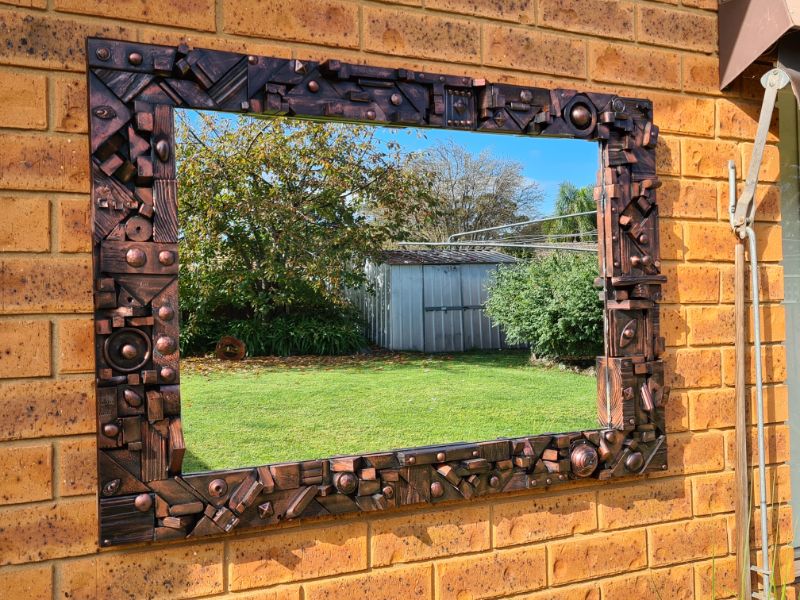
More Unique DIY Mirrors
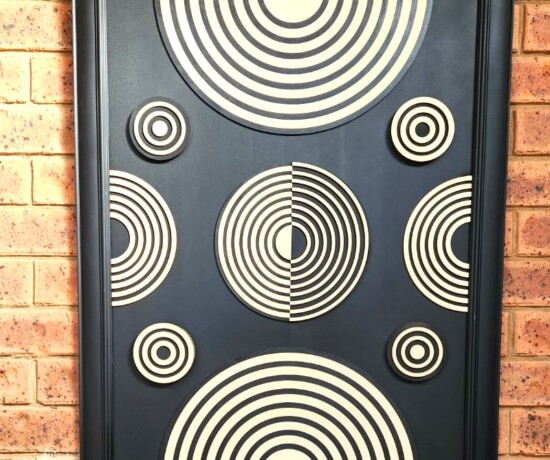
This mirror was made entirely from scrap wood in my workshop and leftover bits and pieces from my craft room.
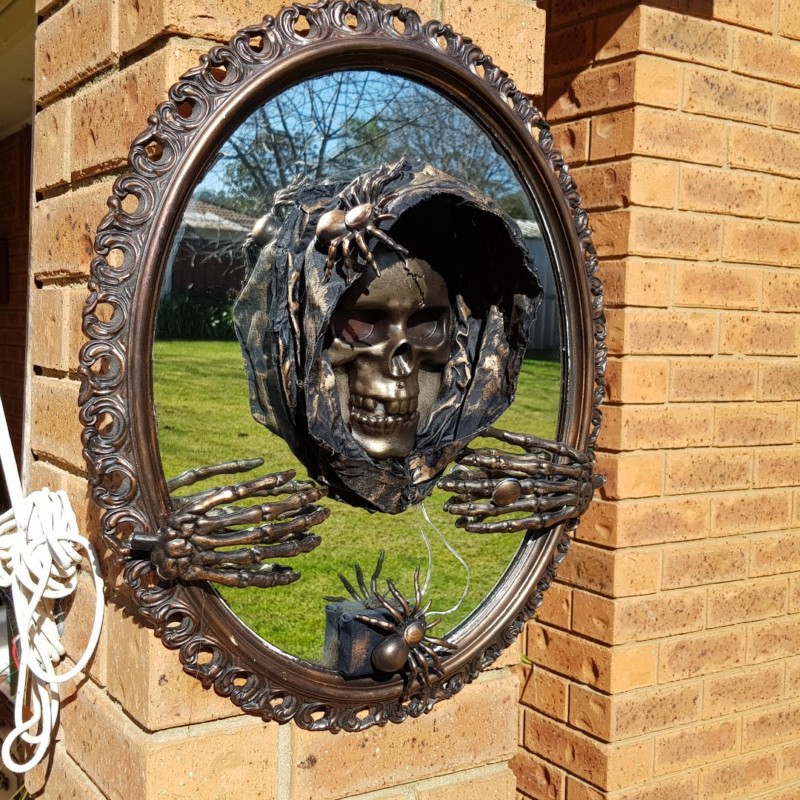
This was a mirror I made for Halloween.


If you’d like to find any of the items used in this project, we’d greatly appreciate it if you used our affiliate links. These links provide us with a small commission at no extra cost to you, allowing us to continue creating and sharing more inspiring projects. We’d also love to hear your thoughts—feel free to leave a comment or share this post!


No Comments