
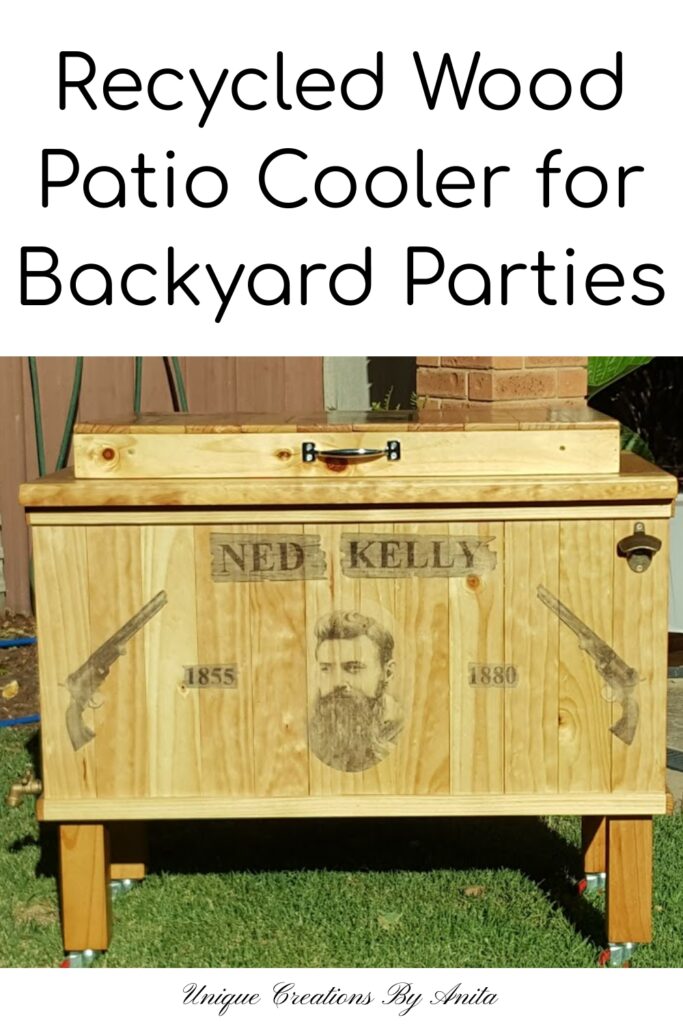
Patio coolers made from old eskies are all over Pinterest, but I wanted to make something larger and more eye-catching. That’s why I created this Ned Kelly-themed patio cooler using a broken freezer—a fun, functional and totally unique addition to any outdoor space. With plenty of room for drinks and ice, a drain tap, and rustic style, this DIY patio cooler is perfect for your next backyard party.

Before we dive into this tutorial, be sure to subscribe to my bimonthly newsletter to be the first to see my latest projects. You can also follow me on Pinterest and Facebook, where I also include my unique mixed-media art projects.
How to Make a Themed Patio Cooler Using a Recycled Freezer
**This post may contain affiliate links. This means I earn a small commission on links used at no extra cost to you. Please see my disclosure policy for more information.**
Materials Needed
- Old broken freezer
- Recycled wood (bed slats, table legs, scrap timber)
- Thickness planer (optional)
- Table saw
- Wood glue
- Pocket hole jig + screws
- Nail gun + compressor (or hammer and nails)
- Hinges (heavy-duty)
- Handle
- Swivel casters
- Outdoor wood varnish
- Silicone sealer
- Gel medium (for image transfer)
- Tap and plumbing fittings (PVC pipe, clear tubing, clamps)
- Wood filler
- Random orbital sander + sanding discs (180 & 240 grit)
- Router + round-over bit
- Bottle opener
- Bleach (for cleaning interior)
- Drill + countersink bit
Step 1: Find a Freezer
Check your local Facebook Marketplace or community group. I asked for a broken freezer and picked one up the same day—free! It doesn’t need to work; just have a solid shell. I considered using an esky or fridge, but chose a freezer for the extra space and cleaner interior without door shelves.
Step 2: Strip It Down
Start by removing the compressor and internal elements. Simply cut the copper pipes and pull out any shelves or baskets.

Seal the holes inside with silicone and plastic patches cut from shelf supports. Clean it thoroughly using bleach and let it dry.


Step 3: Build the Base Frame
Use recycled timber where possible. I cut old bed slats in half and ran them through a thickness planer to even them out. Thick wood is best for supporting the weight of the ice-filled cooler.

Flip the freezer upside down and build a sturdy base using a pocket hole jig, wood glue, and screws. I used the base of the freezer as a guide to cutting the wood.

Step 4: Attach the Legs
This is where I made my first mistake. I tend to build my projects as I go, which means not everything always works out perfectly. I reused some old table legs as supports for the base, but I attached them incorrectly. The legs should be mounted on the outside of the frame—both at the top and bottom—not on the sides.
To avoid splitting the timber, I drilled pilot holes first and used a countersink drill bit so the screw heads would sit flush. This is important later when adding the side slats, as raised screws can cause alignment issues.
Wrong positioning of legs.

When attaching your legs, make sure to leave a gap at the top equal to the thickness of the timber you’ll use for the apron. In my case, that was 2cm.
Refer to the image below to see the correct way to position the legs. It’s also a good idea to do a test fit now to make sure your freezer fits snugly inside the frame before moving on.
Correct leg positioning.

Step 5: Add Leg Supports
The next step was to add wood supports between the legs to stabilise the frame. I used scrap wood from my offcut pile for this, since the supports aren’t visible in the finished piece.

I followed the same process as before—drilling pilot holes and countersinking screws—to ensure the screw heads sat flush with the surface. This stage gives you a clearer look at the gap left for the apron. Make sure not to include the lid when measuring this gap; it only needs to accommodate the apron timber.

To prevent the freezer from shifting inside the frame, I added stop blocks to the inside of the legs. These blocks hold the freezer securely in place without being seen from the outside.
Step 6: Box It In
I cut all the slats to the size I needed for the sides, but I’m not including exact measurements because they’ll vary depending on your freezer. I cut mine to fit neatly between the top and bottom frame supports. To attach the slats, I used a nail gun connected to a compressor, but you can also use a hammer and nails if that’s what you have on hand.
I started with the front panel first, leaving a slight overhang on both sides equal to the thickness of the timber I was using. I repeated the same process for the back. One of the middle slats needed to be trimmed slightly to fit into the remaining space. I installed the side slats last. Because of the front and back overhangs, the side panels sat flush, creating a cleaner and more polished look.

Step 7: Make and Attach the Apron
Build a top frame using 2 cm-thick timber. Use a pocket hole jig and glue to assemble, making it slightly larger than the box. Drill pilot holes and countersink screws to attach it. Fill holes with wood filler. Remove the original freezer hinges—mine prevented the lid from opening fully.

Build a thinner timber frame around the lid, just like you did for the base. Using thinner wood makes the lid lighter and easier to lift. Once the frame is assembled, glue and nail the slats across the top to cover it. Start at the outer edges and work your way inward. This ensures even spacing and a balanced look—any smaller filler piece will blend in better at the centre than it would on just one side.

Secure the frame to the original freezer lid using long screws driven through the timber and into the internal lid structure. To finish, sand the entire surface smooth using 180 grit sanding discs, followed by 240 grit for a polished result.
Step 9: Add Drainage
To drain the water from melted ice, I had to come up with a simple plumbing solution. I used a PVC elbow joint connected to clear flexible tubing, which I clamped at both ends—one to the PVC pipe and the other to a small tap using ring clamps. I originally tried to connect the tap directly to the PVC pipe, but couldn’t find a fitting that worked, so the flexible tubing was the best solution.

To install the drainage system, I drilled a hole through the base of the freezer using a hole saw the same diameter as the PVC pipe. I inserted the pipe and sealed around it with silicone sealer to prevent any leaks. To keep the tap in place, you can secure it to the wooden frame with a U-shaped hinge or bracket. Once everything is assembled, it’s a good idea to test for leaks. Fill the cooler with water and place it on a concrete surface—any dripping will be easy to spot.

Step 10: Final Touches
Use a router with a round-over bit to smooth the edges. Install heavy-duty hinges to the outside of the lid and add swivel casters for easy movement. Finish with a handle, a bottle opener, and two coats of outdoor varnish to seal and protect the wood.

Optional: Add Themed Artwork
I chose a Ned Kelly theme for this build because almost every man cave or home bar in Australia features Ned Kelly memorabilia, so it adds character and also makes the cooler easier to sell later.
To create the artwork, I used gel medium to transfer images directly onto the timber. It took a few attempts to get it right, but the result was well worth the effort. If you’re new to this technique, check out my detailed guide on image transfer methods here to see which one works best for your next project.

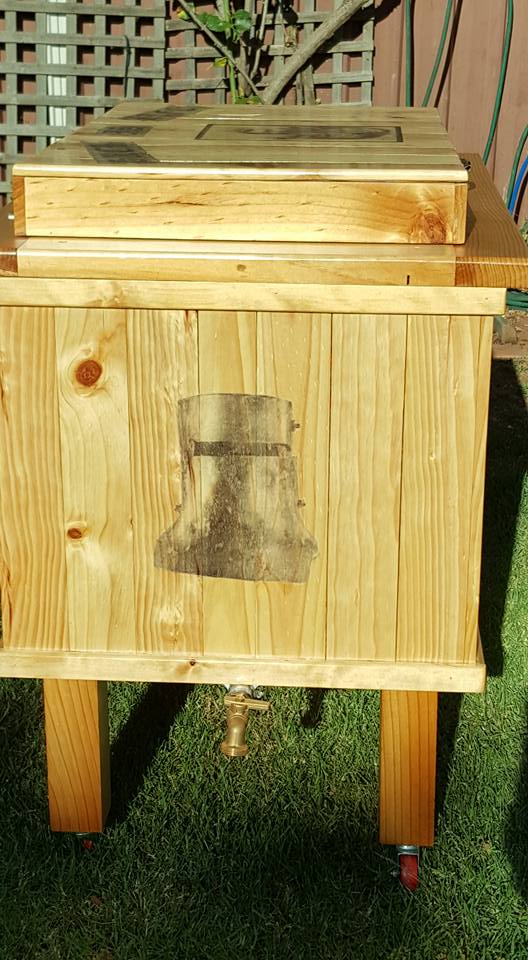
Side View of Box
")

Similar themed DIY project ideas
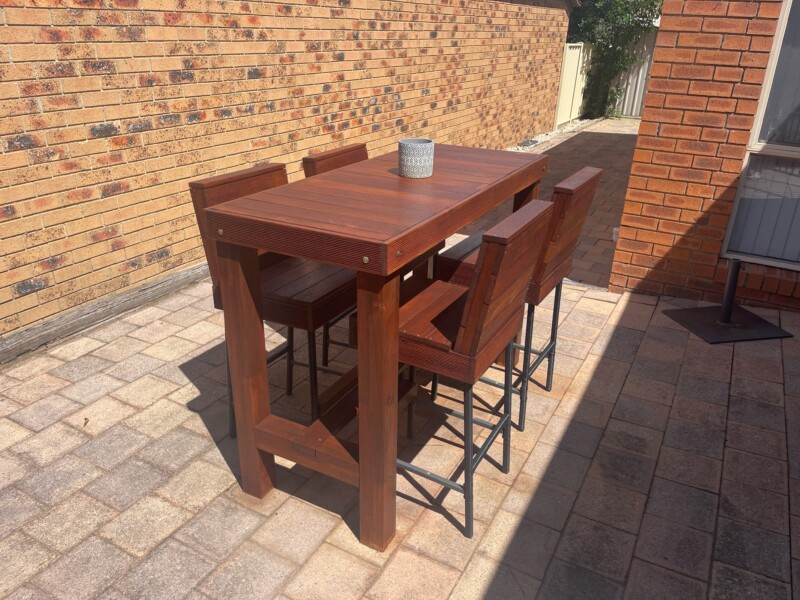
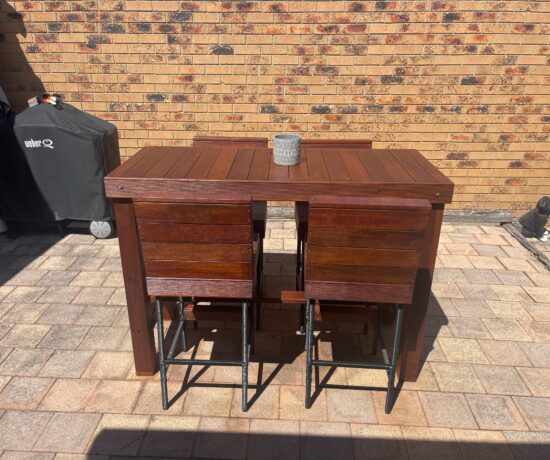
This outdoor bar table was built using mostly recycled and upcycled materials, making it an eco-friendly and stylish addition to any backyard.
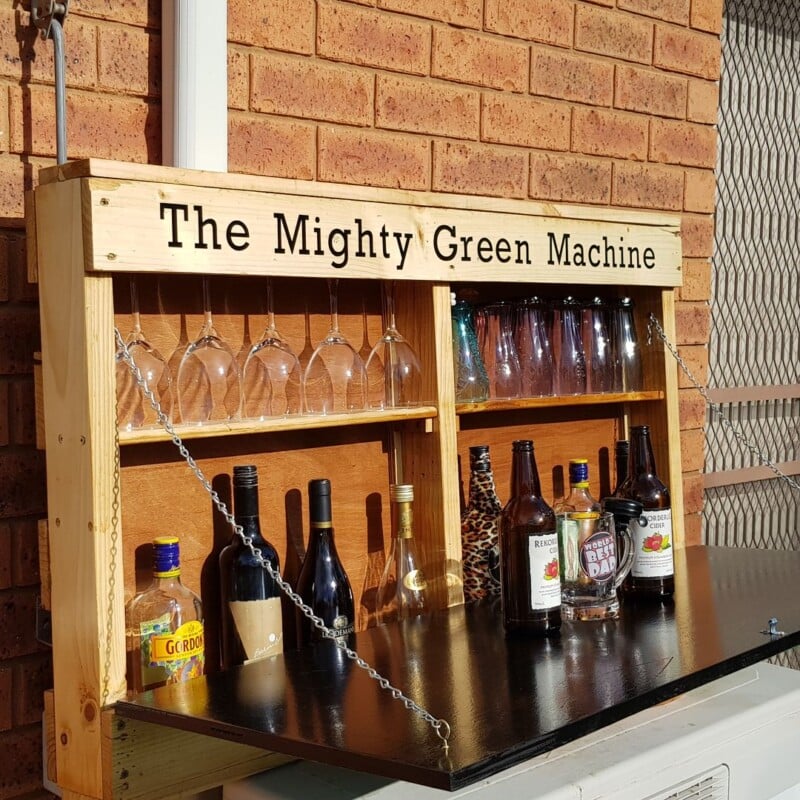
This wall bar was made from recycled pallet wood and is great for outdoor entertaining.

If you’d like to find any of the items used in this project, we’d greatly appreciate it if you used our affiliate links. These links provide us with a small commission at no extra cost to you, allowing us to continue creating and sharing more inspiring projects. We’d also love to hear your thoughts—feel free to leave a comment or share this post!

22 Comments
Michelle Lanyon
December 16, 2016 at 5:21 amAwesome work!
Anita Holland
December 27, 2016 at 7:47 amVery kind of you, Thanks
Mike
January 11, 2017 at 3:11 amWhat a great idea. Awesome job
Jackie
June 3, 2017 at 2:37 pmThe only thing I would add, is some heavy duty wheels! Other than that what an awesome clever idea.
Mary Calder
June 3, 2017 at 5:47 pmI’m thinking of using a large ice chest that has a broken lid hinge. It is one with deep insulation to last for a week on trips. Pictures and descriptions are easily adapted to any size. Thanks
Anita Holland
June 23, 2017 at 6:20 amYour very welcome, would like to see it when you are finished. Was thinking about doing a big one.
melanie
November 10, 2017 at 8:02 pmOMG I need to make one of these asap! such a good idea!
Anita Holland
November 11, 2017 at 2:54 amThank you Melanie, a great project made from mainly all recycled materials. I was so popular it sold with in minutes of posting it. Good luch and would love to see your finished product if you do make one.
Nina
January 17, 2018 at 6:28 amThis is a cool idea!
Anita Holland
January 18, 2018 at 12:48 amThank you, turned out better than I thought.
Stacee
February 1, 2018 at 5:31 pmFun and Fantastic! you should make more and sell them!
Anita Holland
February 2, 2018 at 12:18 amThank you, I have been asked to make a Harley Davidson one just waiting to find a broken freezer.
Vanessa
July 12, 2019 at 12:34 pmYour patio cooler is really, ahem, cool!
Anita Holland
July 13, 2019 at 2:29 amThank you so much.
Ann
July 20, 2019 at 6:27 pmFabulous way to repurpose an old appliance. Thank you for sharing at Party In Your PJ’s!
Erlene
July 24, 2019 at 4:50 amThis is so cool and a great way to reuse an broken mini freezer.
Anita Holland
July 25, 2019 at 1:27 amThank you, It was all I could find. lol
Maria
April 9, 2020 at 3:42 amFantastic cooler upcycle
Anita Holland
April 13, 2020 at 10:39 amThank you so much.
Matt Saunders
July 12, 2021 at 11:53 amVery nice work. Main thing I would change is the plumbing. You can get threaded pvc adapters that will allow you to attach your faucet or valve (I like to use ball valves in this situation) directly to your pvc pipes. Cleaner look & less chances of any leaks. BTW, with the faucet or ball valve there’s no need to move the cooler to drain it.. Just hook up a garden hose & you can.let gravity water any part of your yard or garden that’s lower. Also I agree that heavier wheels should be used. Even with a freezer this size if it’s filled 80-90% with drinks & ice the wt will be far more than most regular casters can handle.
Anita Holland
July 12, 2021 at 1:35 pmThank you so much for the info Matt.
23 DIY Patio Cooler Ideas and Plans
June 16, 2024 at 2:53 pm[…] Mini Fridge Patio Cooler […]