
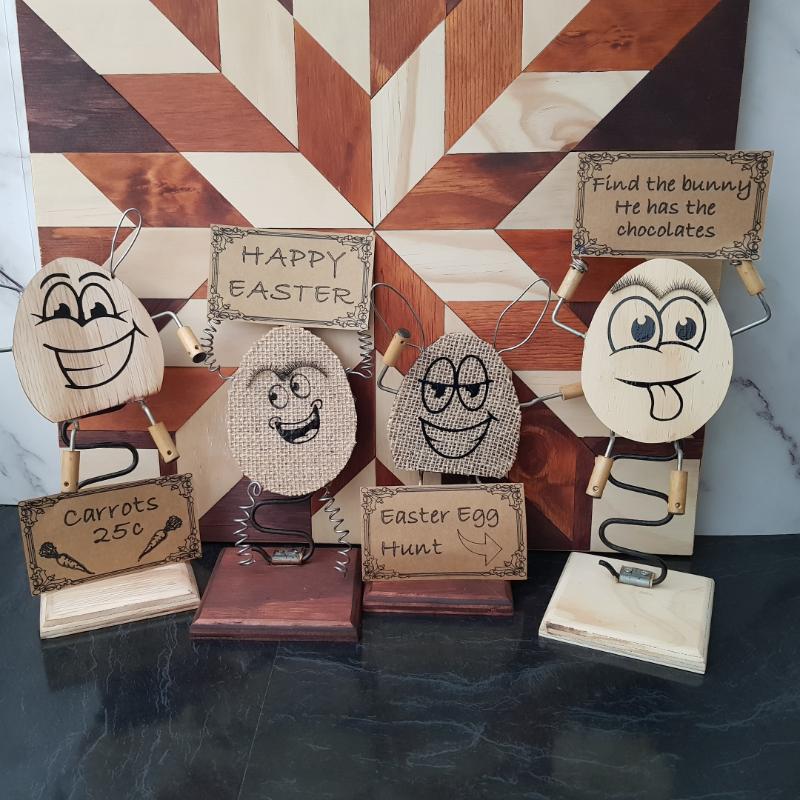
Easter is just around the corner, and I couldn’t resist joining in with some Rustic Fun Easter Decorations using scrap materials from my workshop. These aren’t your typical Easter bunnies and eggs—but that’s exactly what makes them special! Created from old springs, plywood, and leftover vinyl, they’re full of character, charm, and a touch of quirky fun. Plus, this month’s International Bloggers Club (IBC) theme is Easter, so be sure to check out my fellow bloggers’ amazing projects at the end of this post.

Before we dive into this tutorial, be sure to subscribe to my bimonthly newsletter to be the first to see my latest projects. You can also follow me on Pinterest and Facebook, where I also include my unique mixed-media art projects.
Rustic Fun Easter Decorations Made from Recycled Junk
**This post may contain affiliate links. This means I earn a small commission on links used at no extra cost to you. Please see my disclosure policy for more information.**
Materials Needed
- Scrap plywood
- Chair base springs
- Burlap or hessian fabric
- Permanent vinyl (black)
- Cricut Maker or Joy
- Transfer tape
- Soldering wire or jewellery wire
- Old piano key parts (optional)
- Hot glue gun
- Tacky glue
- Craft paper
- Jigsaw and sander
- Router and round-over bit (optional)
- Grinder or metal saw
- Felt tip marker
- Easter face clipart

Making the Easter Egg Heads
I’m no good at drawing, so I printed an egg shape to use as a template. I traced the shapes onto scrap plywood using a felt-tip marker.

To cut them out, I used a jigsaw with the plywood face down to reduce splintering. You can also apply masking tape along your cut lines to minimise damage.

I cut out four egg shapes—two of them modified at the base to suggest bunny heads. Once cut, I sanded all edges smooth.

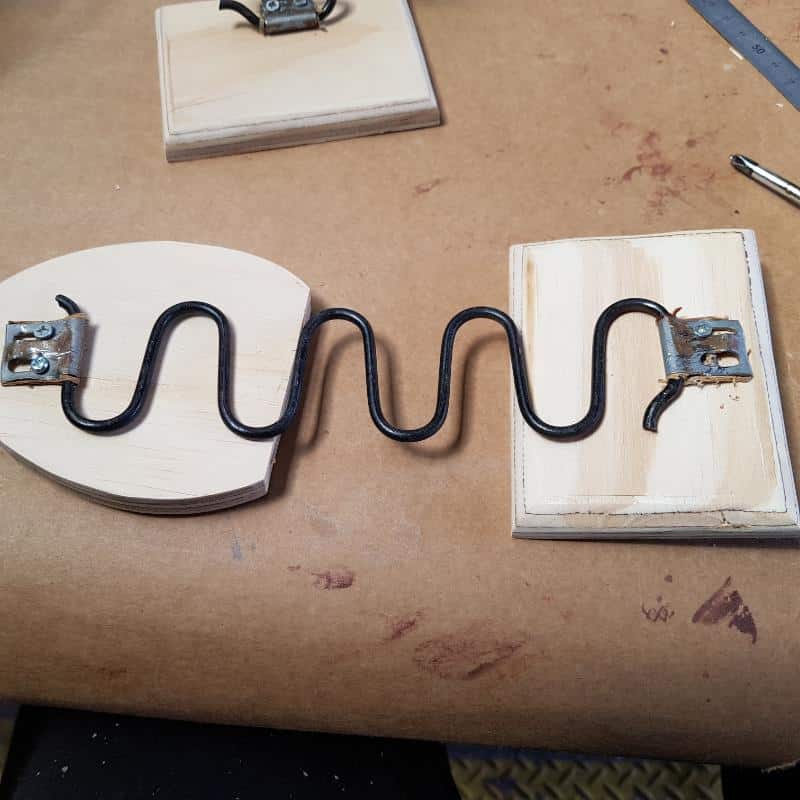
Building the Base from Old Springs
The idea was to make the heads wobble like bobbleheads, so I needed sturdy bases. I used random plywood offcuts for each one, smoothing them with sandpaper. For a neater finish, I routed the edges with a round-over bit—but that step is optional.

To attach the springs, I reused the original brackets from the chair where I found them. I used a grinder to cut the springs to size (a saw works too if you don’t mind the effort).
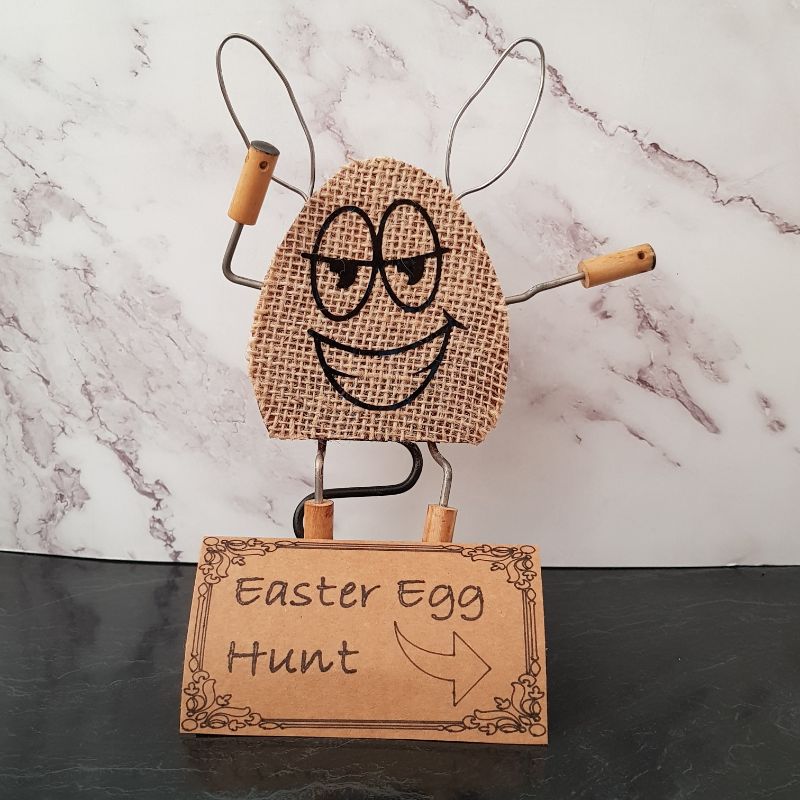
Adding Burlap Texture
A few of the plywood pieces had damage that couldn’t be removed, so I glued scraps of burlap fabric over the surface using tacky glue. Once dry, I trimmed the excess.

Creating the Vinyl Faces
To give my characters some personality, I cut faces using my Cricut machine and black permanent vinyl. I found fun clipart images online and imported them into Cricut Design Space.

Using transfer tape, I applied the vinyl decals to the plywood and burlap surfaces and burnished them with a scraper before peeling off the tape.

Making Arms and Legs from Wire
For the arms and legs, I used soldering wire (borrowed from my husband’s toolbox). I wrapped it around a paintbrush to create springy coils. You could also use jewellery wire or pipe cleaners.

I drilled small holes into the sides of the heads and hot-glued the arms and legs in place. I also reused parts from some old piano keys as additional limbs—finally finding a use for them after years in storage!

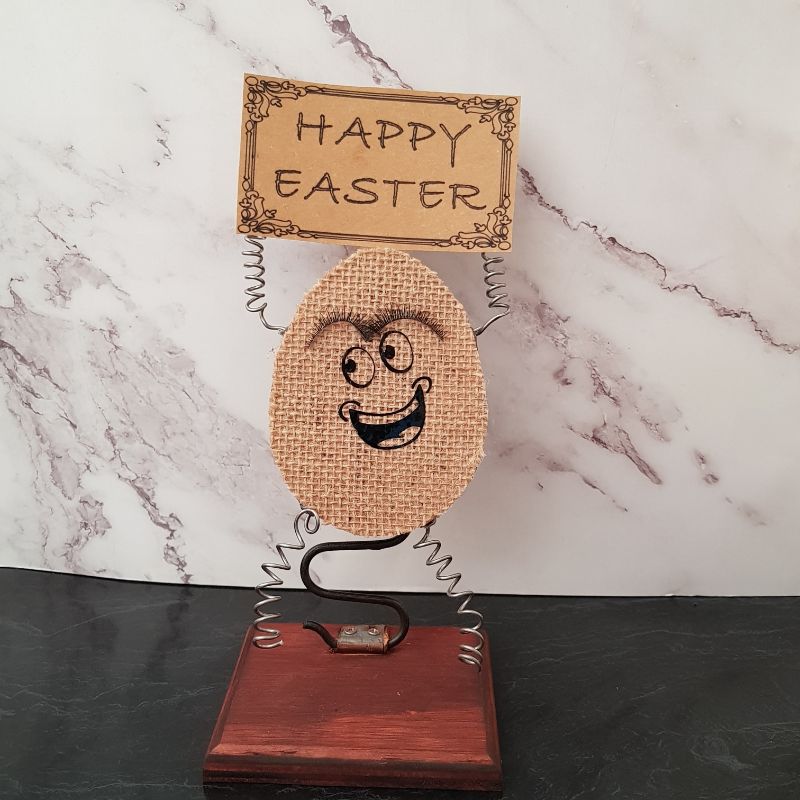
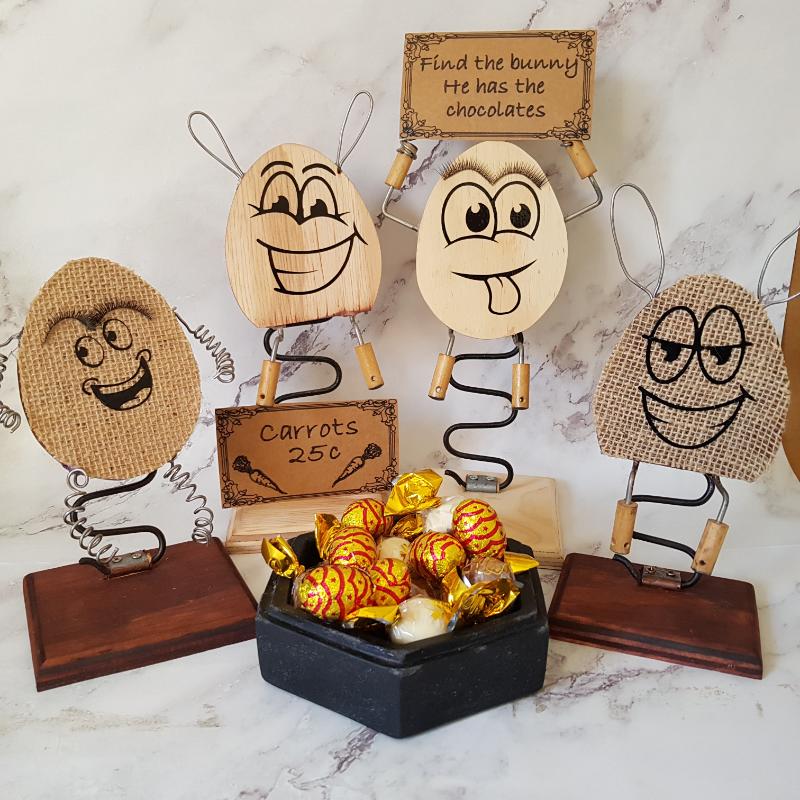
Adding the Final Touch: False Eyelashes!
As much as I loved the vinyl faces, they still felt incomplete—until I remembered some unused false eyelashes I had lying around. Gluing them on added the perfect quirky twist to these rustic Easter decorations.


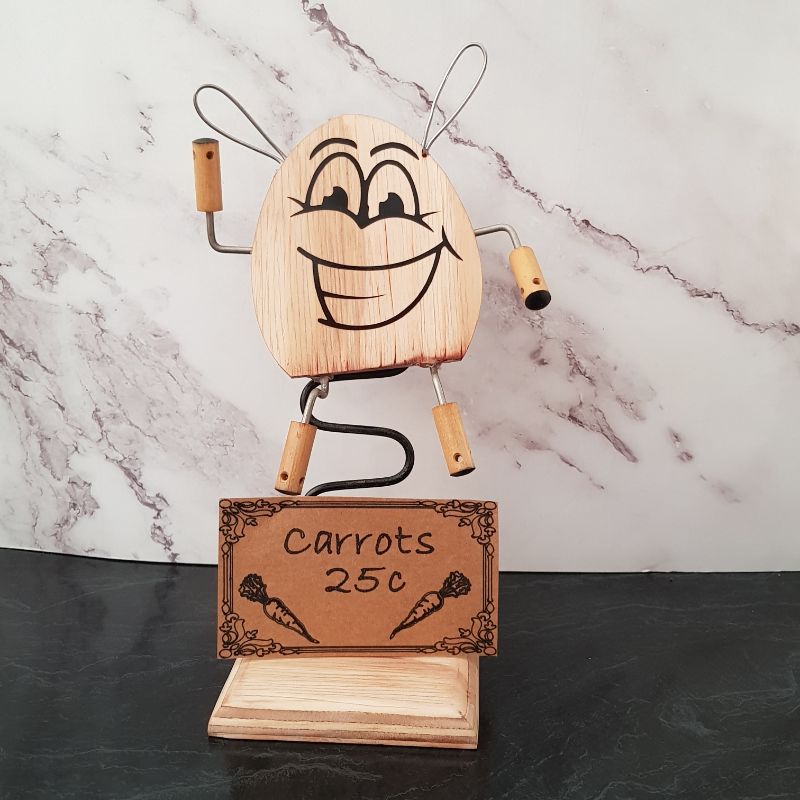
Making Easter Signs with Cricut Pens
To tie it all together, I created mini signs for my characters to hold. Using the Cricut pen feature, I typed phrases like “Hoppy Easter” in Design Space, selected a fun font, and added a decorative border.

The signs were drawn on craft paper I normally use to cover my workshop table—recycling at its finest!

Finished Rustic Easter Decorations
These fun and funky Easter characters may not be your typical pastel bunnies, but they reflect my love for recycling and creativity. Each one is unique and packed with personality.

Happy Easter, and don’t forget to scroll down to see what my talented IBC friends have created this month!
About IBC (International Bloggers Club)
If you’re new here, I’m part of the International Bloggers Club, a group of creatives from around the globe—including Australia, Spain, South Africa, Canada, and the US. Each month we share a DIY or craft project based on a common theme.
If you missed last month’s Mixed Media theme, here is the link to my Mixed Media Mirror Makeover. The contributions from my fellow bloggers are listed below. Please feel free to jump over and share your thoughts.
1 Interior Frugalista | Super easy dollar store easter wreath
2 Faeries and Fauna | Dollar store wooden easter bunny buffalo check makeover
3 A Crafty Mix | Giant faux concrete easter egg
4 Raggedy Bits | Farmhouse topiary easter bunny bucket

My Sweet things| DIY cement mushrooms


If you’d like to find any of the items used in this project, we’d greatly appreciate it if you used our affiliate links. These links provide us with a small commission at no extra cost to you, allowing us to continue creating and sharing more inspiring projects. We’d also love to hear your thoughts—feel free to leave a comment or share this post!


53 Comments
Rosie Doal
March 24, 2020 at 6:46 amWow these are so cute – and so creative x #MMBC
Anita Holland
March 24, 2020 at 1:43 pmThank you so much for the lovely comment.
Marie
March 24, 2020 at 7:02 amYou don’t call yourself Unique Creations by Anita for nothing. How unique, creative, and stinking adorable are these! Girl, I wish you lived closer because I sure could use some tips on how to rock the Cricut.
Anita Holland
March 24, 2020 at 1:47 pmThank you so much Marie. I did struggle with this one, they just worked out in the end after a few changes. I can’t believe you don’t use your Cricut more it is so basic to use once you get the hang of it. I use mine in nearly all my projects now. I LOVE mine.
Allyson
March 24, 2020 at 8:18 amYou have a very creative imagination. Your fun Easter eggs look great!
Anita Holland
March 24, 2020 at 1:49 pmThank you so much, I do get these strange ideas at times. And trying to build using recycled materials, always gives a unique look in the end.
Melinda Cummings
March 24, 2020 at 9:12 amSo creative!!
Anita Holland
March 24, 2020 at 1:58 pmThank you so much, that is very kind of you to say.
Catherine Holmes
March 24, 2020 at 11:38 amThese are so much fun and great to think we can do them ourselves too – thank you #AnythingGoes
Anita Holland
March 24, 2020 at 2:00 pmThank you so much, it is great to create something from junk laying around at home.
Michelle Leslie
March 24, 2020 at 4:21 pmI’m always amazed by your creativity Anita, your bunny egg creations are the best. They’ve all got so much personality and look like real characters. I can almost hear them chuckling away and planning a whole bunch of fun things to do over the Easter weekend. Lock the doors, coz here comes trouble 😀
Anita Holland
March 25, 2020 at 1:59 pmThank you so much, I did do the faces a few times before I settled in these ones. I gave them to our nursing home to cheer them up and give them a bit of a giggle.
Michelle Leslie
March 4, 2021 at 5:35 pmThat’s so special Anita. I bet they’ll be putting them up every year.
Anita Holland
March 7, 2021 at 12:13 pmThanks Michelle,I will for sure.
creativejewishmom/sara
March 25, 2020 at 2:06 amBrilliant Anita, so refreshing compared to well you know, anything plastic! Thanks for sharing on craft schooling sunday!
I hope you and yours are playing it safe and are well, during these scary times. At least it gives all the creative folks more chance to catch up on all those things these have been dreaming of doing, hopefully.
Anita Holland
March 25, 2020 at 2:03 pmThank you so much, it is hard sometimes to come up with something unique for Easter. Bunnies and eggs have been done to death, but I was really happy how these turned out. I wish I could stay at home and craft but unfortunately, I have to work being an aged care nurse. But there is still time after work. Stay safe.
Alex
March 25, 2020 at 9:51 amWow, so creative and cool. #MMBC
Anita Holland
March 25, 2020 at 2:03 pmThank you so much, it makes my day when others enjoy my projects.
Karen, the next best thing to mummy
March 25, 2020 at 8:50 pmI love that these are original #alittlebitofeverything@_karendennis
Anita Holland
March 27, 2020 at 12:38 pmThank you Karen, they are very different.
Michelle Miller
March 26, 2020 at 5:29 amThese are so stinkin’ cute!! I love that you came up with these just by using things you already had. How creative!
Anita Holland
March 27, 2020 at 12:39 pmThank you so much. I live in a little town in the country and supplies are limited. That is why I chose to do all my projects out of recycled materials. lol
angie
March 26, 2020 at 11:46 pmlove it simply to cute thanks for sharing
Anita Holland
March 27, 2020 at 12:40 pmThank you so much, One lady said they look like M $ M’s, now that is all I see. lol
Sam-Raggedy Bits
March 27, 2020 at 10:27 amThese are so stinking cute!! I love that you have made them from things that you already had. Who wouldn’t have a big smile on their face seeing these at Easter!
Anita Holland
March 27, 2020 at 12:43 pmThank you so much Sam, I gave them to our aged care home as Easter decorations and they had a good giggle.
Julie
March 28, 2020 at 12:34 amThese are fun! Thanks for sharing with us at Handmade Monday
Anita Holland
March 31, 2020 at 1:43 pmThank you so much.
T'onna | Sew Crafty Crochet
March 29, 2020 at 5:08 amWow! These are so fun creative, and unique! I’m pinning these for later! I love rustic and fun crafts! I hope you’ll share them at this week’s Snickerdoodle Create Bake Make Link Party!!!
Anita Holland
March 31, 2020 at 1:43 pmThank you so much, I will be sure to share them.
Cecilia
March 30, 2020 at 5:40 amHow fun! Thanks for sharing at Vintage Charm!
Lauren
March 31, 2020 at 3:34 amAnita Holland, I laughed and laughed at your wonderful idea. I’M still laughing and I’m wishing my brother was alive as we used to prank each other and come up with wonderfully crazy fun gifts like these. ( I’VE also surprised him by saran wrapping his bedroom and bathroom doors, loos, etc.!!! Told you we were crazy. LOL LOL) YOU’VE PUT A GRIN ON MY FACE AND IN MY HEART OF MEMORIES. THANKYOU.
Anita Holland
March 31, 2020 at 1:46 pmThank you so much Lauren, I am glad I could give you a giggle. I do have some mad ideas. Sounds like you and your brother had a great relationship.
Gail Sisson
March 31, 2020 at 4:21 amHa these are so neat absolutely love the eyelashes very well done
Anita Holland
March 31, 2020 at 1:46 pmThank you, they would get more use out of the eyelashes than I would. lol
Anita Holland
March 31, 2020 at 1:47 pmThank you so much Michelle, My husband thought i was mad coming up with them.
Dee | Grammy's Grid
March 1, 2021 at 8:43 pmHow cute are those? Love the wood and burlap! Thanks so much for linking up with me at the Unlimited Monthly Link Party 22. Shared!
Anita Holland
March 2, 2021 at 1:35 amThank you Dee, they turned out cute in the end.
Sara
March 2, 2021 at 2:47 amThat’s the best Easter decor ever. I’m always amazed at how you think up ways to use the stuff you have around – those piano key parts are awesome. I guess if your husband ever runs out of solder, he knows where to look for some – lol!
Anita Holland
March 7, 2021 at 12:07 pmThank you so much Sara. I try and create my own projects rather than duplicate what others have made. I used most of his solder in many of my projects so he will have to go hunting. lol
Brooke
March 2, 2021 at 5:17 amThese are so beautiful! I love each and every one of them. Wonderful project and easy to follow along. Thanks for sharing.
Anita Holland
March 7, 2021 at 12:08 pmThank you so much Brooke, I just used items I had laying around at home.
Shelley Whittaker
March 3, 2021 at 1:07 amThese are so fun! I don’t think I would have the patience to make them myself, but I love them 🙂 #AnythingGoes
Anita Holland
March 7, 2021 at 12:12 pmThank you so much.
Kasia@Wooden Pallet Projects
March 3, 2021 at 2:22 amOmg, I love them! So cuuute! Thank you, Anita, you always come up with such awesome projects 🙂
Anita Holland
March 7, 2021 at 12:20 pmThank you so much, I get so many ideas in my head I have to write them down or I forget them lol
Marilyn
March 6, 2021 at 12:11 pmCongratulations! Your post was my feature pick at #OverTheMoon this week. Each Hostess displays their own features so be sure to visit me on Sunday evening and to see your feature! I invite you to leave more links to be shared and commented upon. Please don’t forget to add your link numbers or post title so we can be sure to visit!
Naush Samama
March 9, 2021 at 8:09 amSuper cute Easter decor !!
Happy Women’s day.
Thank you for sharing with us at Meraki Link Party.
Have a wonderful week.
Much love
Naush
Anita Holland
March 12, 2021 at 8:14 amThank you so much Naush. That is so kind of you to say.
Rachelle
March 12, 2021 at 7:25 amAnita, this is perfect for those who want Easter décor, but not all pastels. The eyelashes had me smiling at the way they were used.
Thank you for adding your posts to the Friday with Friends link party!
Anita Holland
March 12, 2021 at 8:23 amThank you so much Rachelle, I was just having some fun with what I had laying around at home.
Dee | Grammy's Grid
March 27, 2021 at 6:28 pmCONGRATS! Your post is FEATURED at my Unlimited Monthly Link Party 23!
Anita Holland
March 28, 2021 at 2:08 pmThank you so much Dee, I really do appreciate it.