
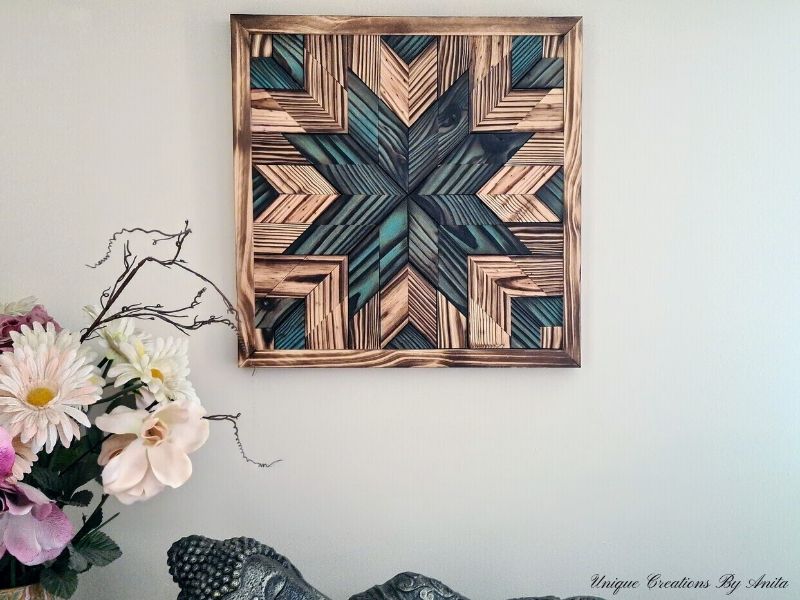
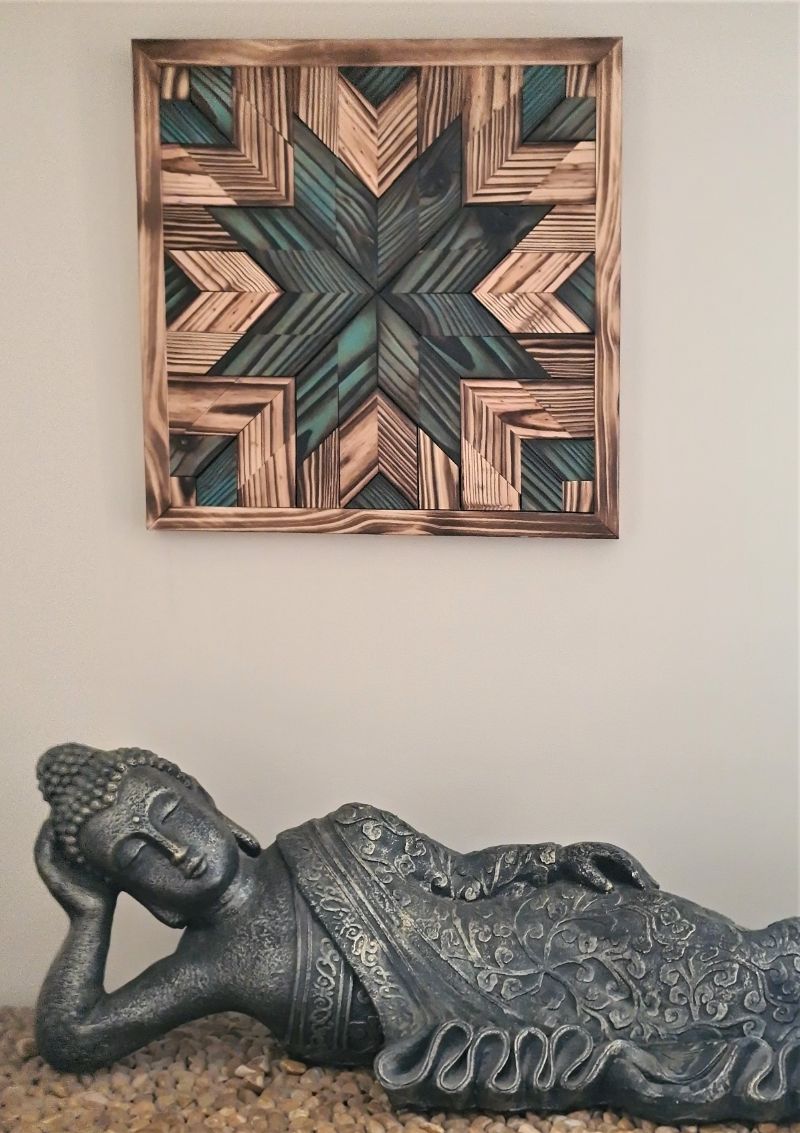
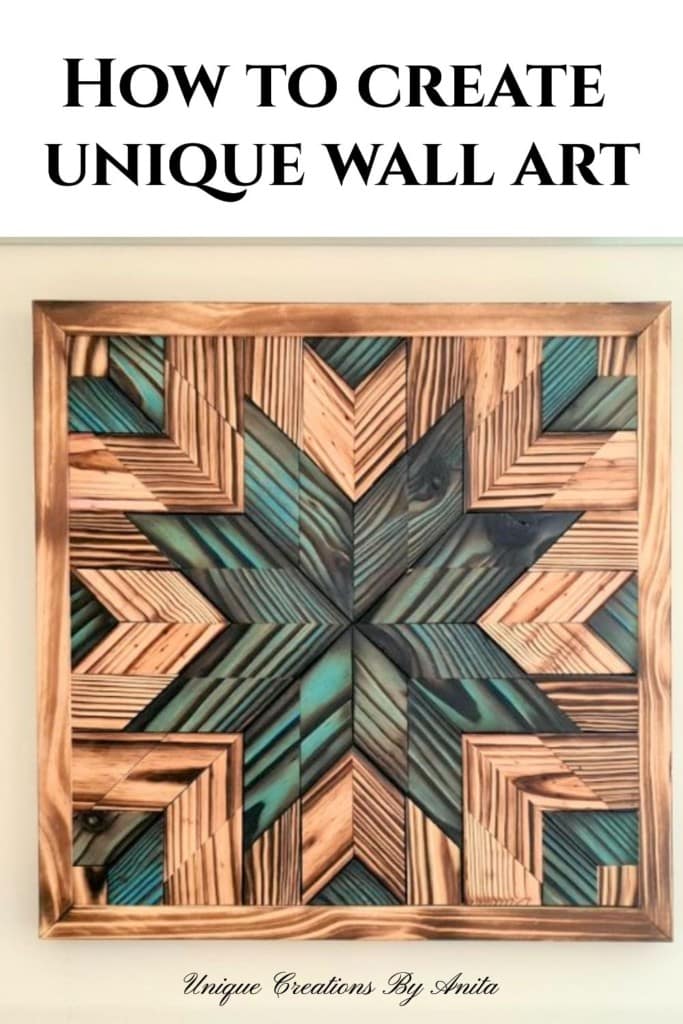
Recently, I fell in love with the Japanese wood-burning technique known as Shou Sugi Ban and knew I had to combine it with a barn quilt design. The result is this stunning Shou Sugi Ban barn quilt wall hanging—a unique piece of wall art that adds texture, colour, and character to any home.
By using recycled pine and a blowtorch, you can create a bold piece of art that looks like it came straight out of a high-end store. Don’t be put off by the intricate design—if you can cut wood and piece together a puzzle, you can make this wall hanging.
And since it’s time again for the International Bloggers Club Challenge (IBC), our theme this month is “Wall and All.” My contribution is this Shou Sugi Ban barn quilt, blending Japanese wood-burning with the timeless charm of geometric quilt art.
I’m also thrilled to share that my blog was nominated in the Amara Blog Awards for “Best Creative Skill.” Thank you to everyone who has supported my projects—it means the world!

Shou Sugi Ban Barn Quilt Wall Hanging
**This post may contain affiliate links. This means I earn a small commission on links used at no extra cost to you. Please see my disclosure policy for more information.**
Materials Needed
- Pine wood (preferably recycled)
- Blowtorch (Map gas or propane)
- Wire brush
- Drill with coarse nylon brush attachment
- Safety glasses and a respirator
- Table saw or mitre saw
- Ruler and pencil for guidelines
- Acrylic paint (teal or colour of choice)
- Hot glue and glue sticks
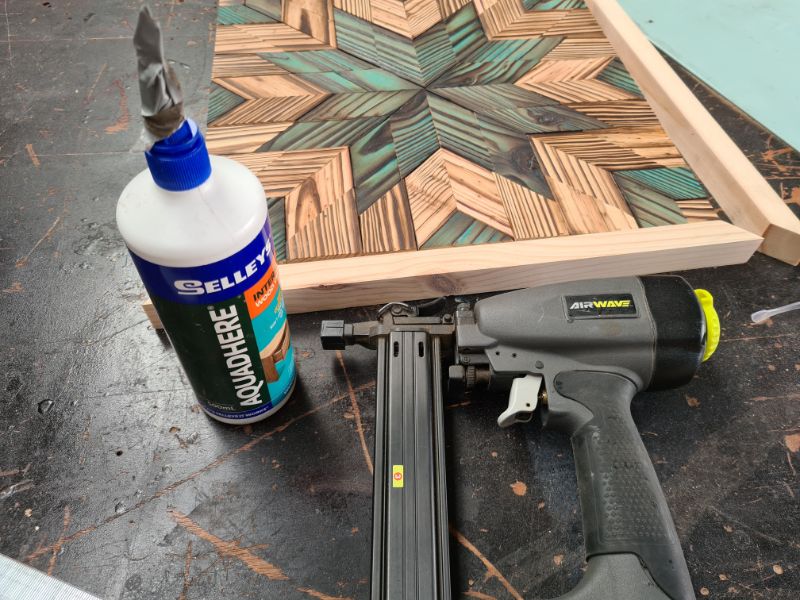
- Wood glue
- Baseboard
- Circular saw for trimming edges
- Pallet wood offcuts for the frame
- Nail gun (optional)
- Wall hanging bracket
Choosing the Right Wood
For this project, I recommend pine. After experimenting with different types of wood, pine gave me the most dramatic results. I recycled old drawers from a broken dresser, along with some knotty pine scraps, which worked beautifully. Using thinner wood helps keep the wall hanging lightweight. I like to create all my projects using recycled materials, and I’ve developed a few handy ways to source them. Here’s how I find the pieces I need so you can try it too.

Burning the Wood
Burning brings out the texture and grain in the wood. Use a blowtorch and make sure your work area is clear of anything flammable. I use MAP gas instead of propane because it burns hotter, making the wood-burning process faster and more effective. I used metal plates on my bench for safety.
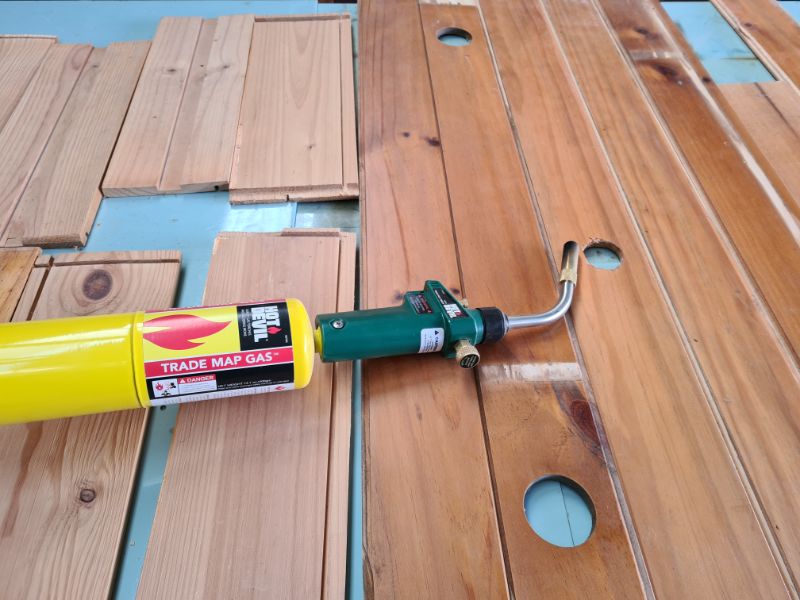
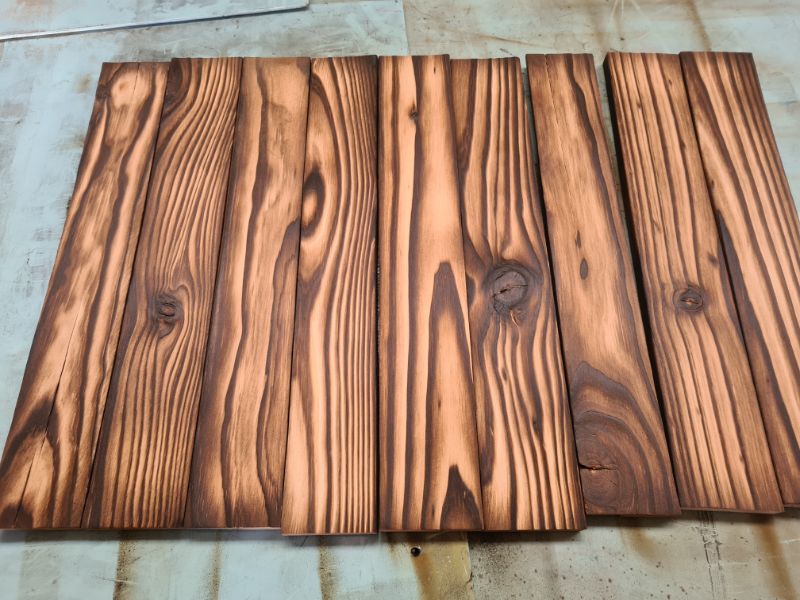
Burn the surface until charred—about 30 seconds for thinner pine.
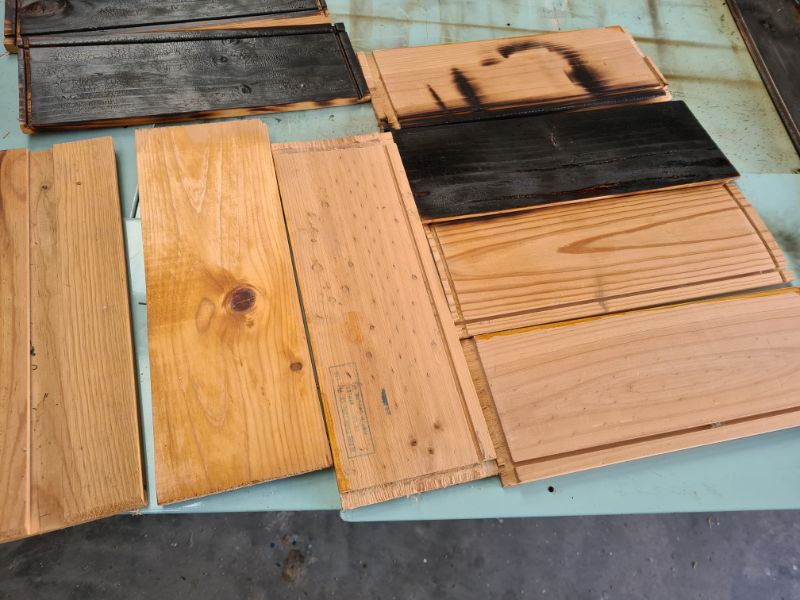
The burnt wood below is how the wood should look after burning. Burn before cutting to save time.
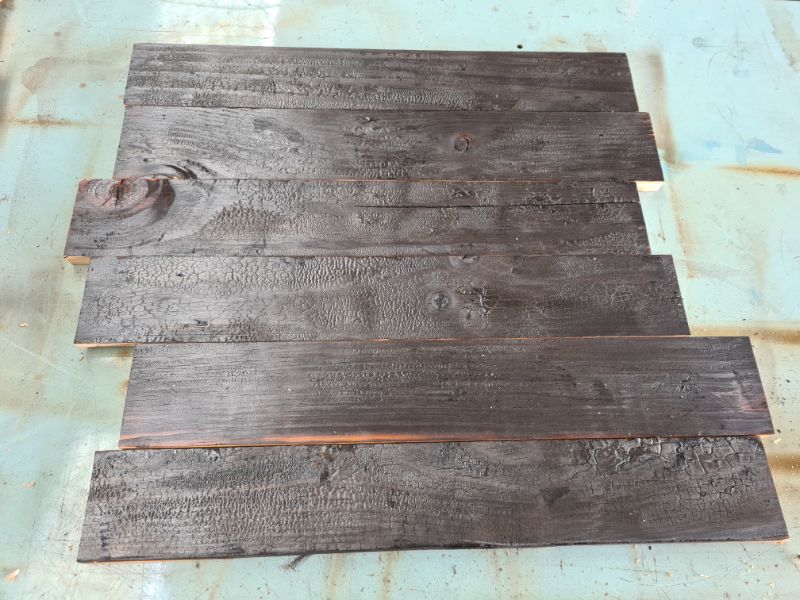
Next, I cut the wood into 50mm pieces using a table saw. I would recommend that you burn the sides so the pine colour does not stick out if you have a slight gap.
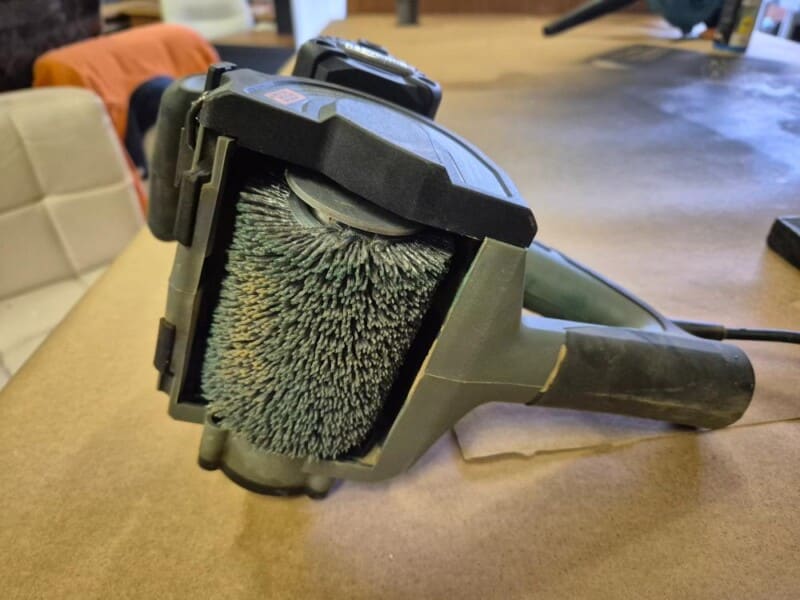
Sanding the Wood
This part is messy but worth it. Start with a wire brush to remove the charred surface, brushing with the grain.
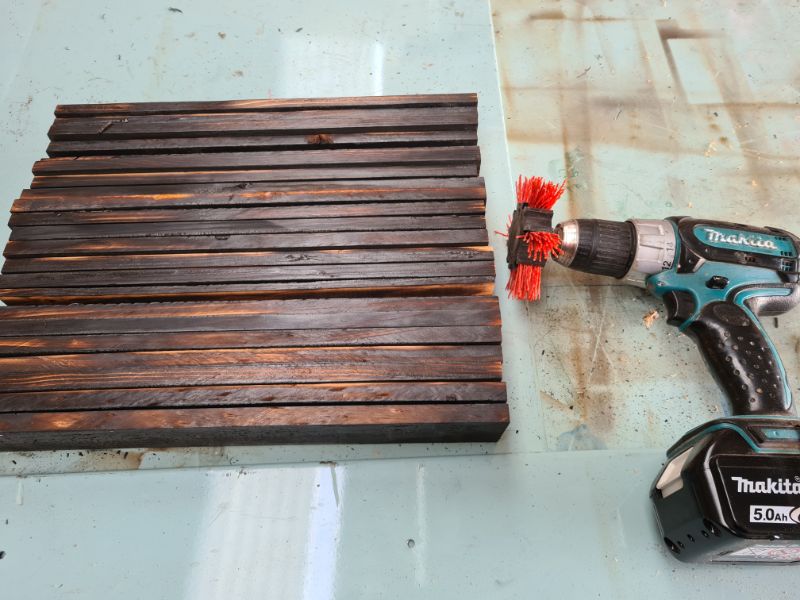
Once the charred surface has been removed, switch to a quicker sanding method by using a drill fitted with a coarse nylon brush. This tool strips away the softer wood between the grain with ease. If you don’t have a drill, you can still achieve the same results using a wire brush—it just takes more time and effort.
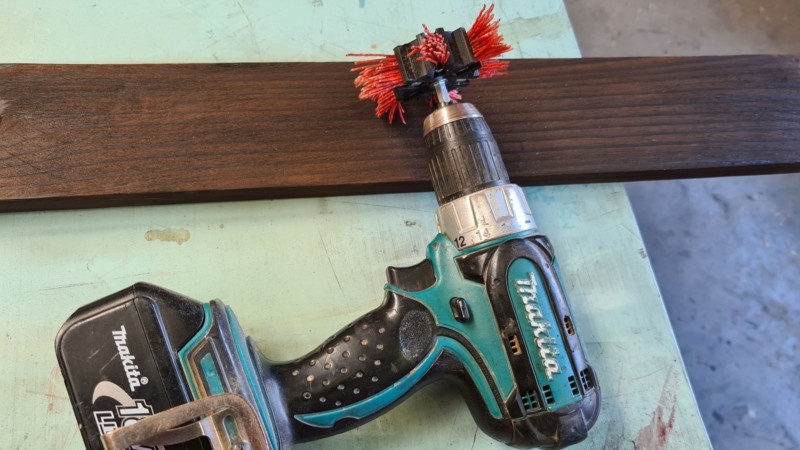
The fastest method is to use a drum sander or restorer tool fitted with a nylon brush, which cuts sanding time down to just minutes.

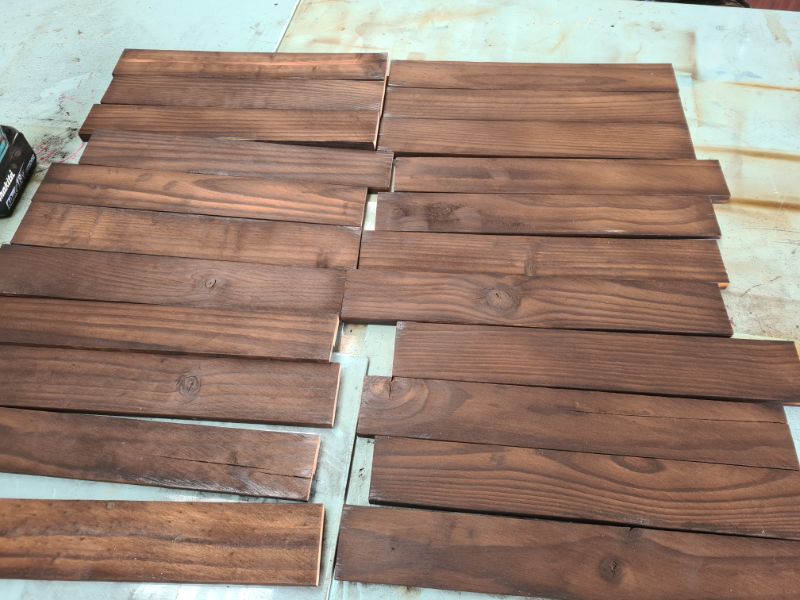
The striking contrast between the light pine and the dark grain is what makes the design pop. For bolder effects, sand deeper to expose more of the lighter wood, and leave a few darker patches for added character.
Adding Colour
In my last Shou Sugi Ban wall art project, I used Unicorn Spit and stain, which needed sealing with oil-based polyurethane. Once sealed, the raw light wood darkened, changing the look more than I wanted.
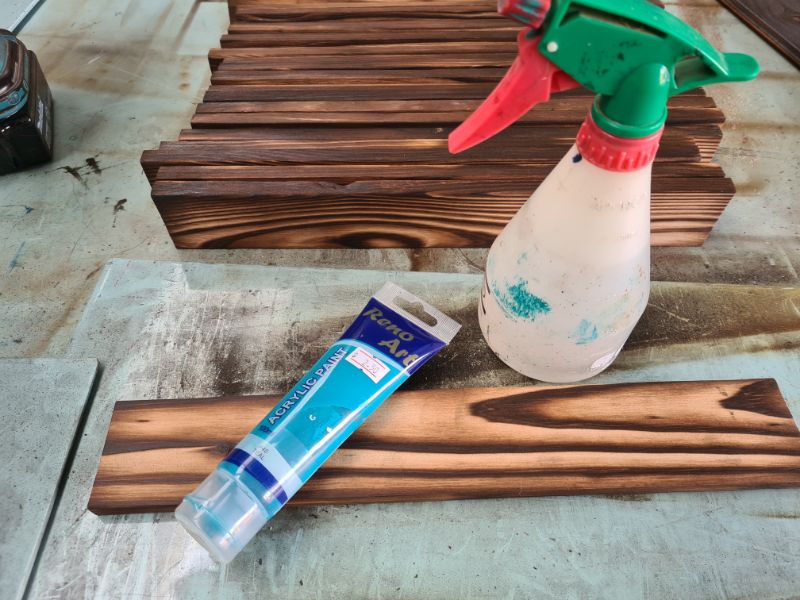
For this project, I chose teal acrylic paint because I wanted to keep the light wood tones without them darkening under polyurethane. To add colour, start by lightly misting the surface with water—this helps prevent the raw wood from absorbing the paint unevenly.

Next, use a sponge brush to apply the paint, then wipe away any excess with a dry cloth.
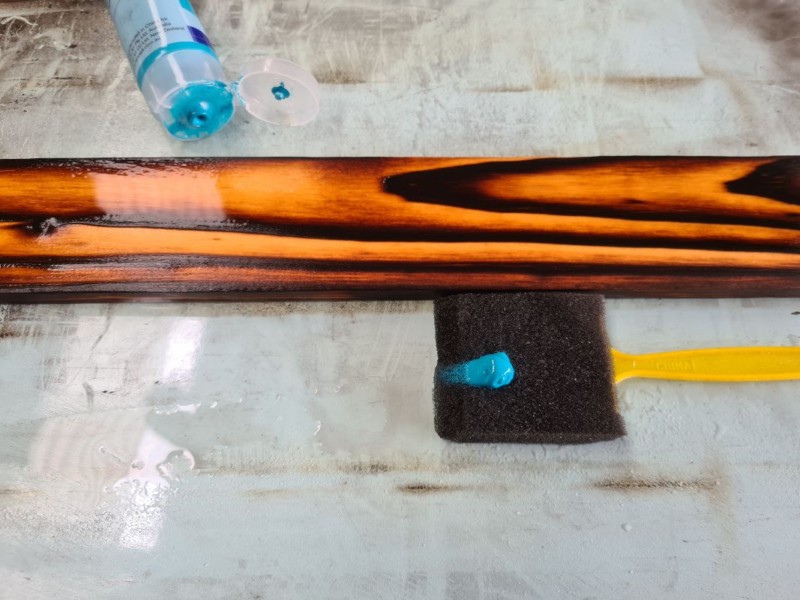
Repeat the process until you achieve the depth and vibrancy you like.
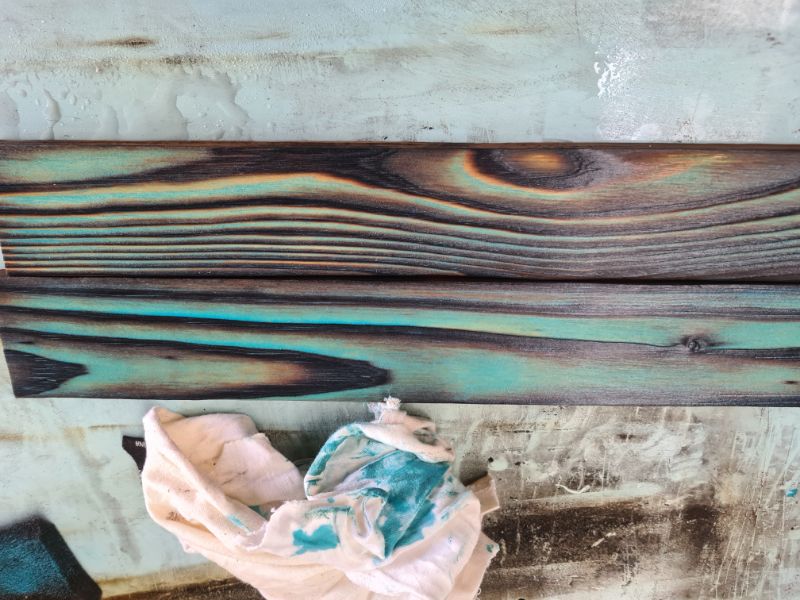
The amount of sanding will affect how the colour settles, creating unique variations that ensure no two pieces ever look the same.

Building the Base
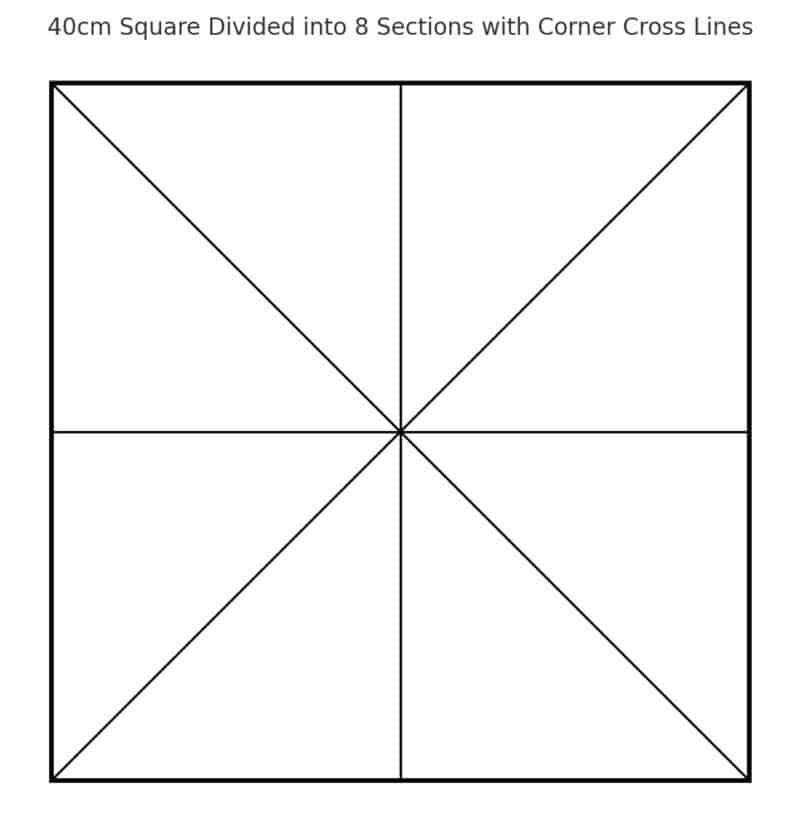
I wanted my finished wall hanging to measure 400mm square, so I cut the base at 410mm. This gives me a few extra millimetres to trim off later, ensuring clean, straight edges. Divide your board as shown in the image below. These guidelines are important when laying out a barn quilt pattern because they keep the design symmetrical and evenly aligned across the square.
Cutting the Wood Pieces
Cut all your wood pieces at the same angle—45 degrees works well. For a barn quilt design, cut half with the painted side up and half with it down.
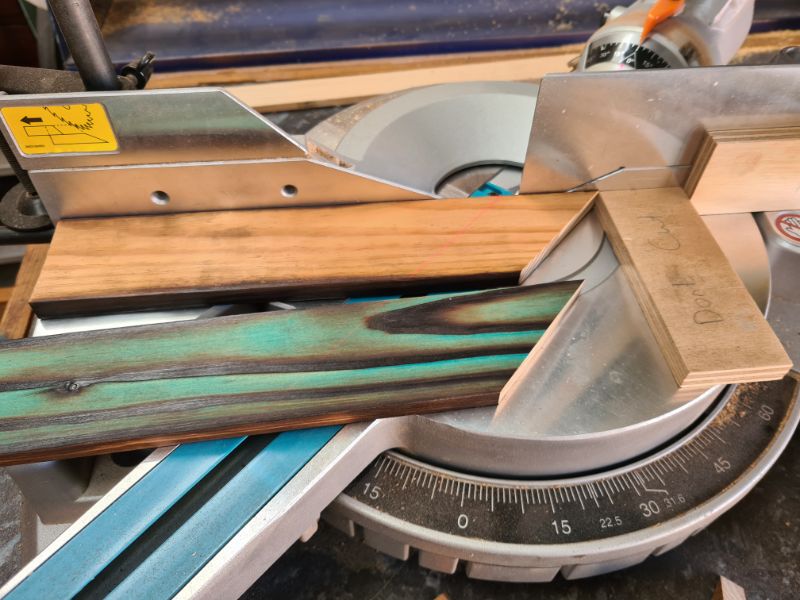
This way, you can form arrow shapes that slot together.
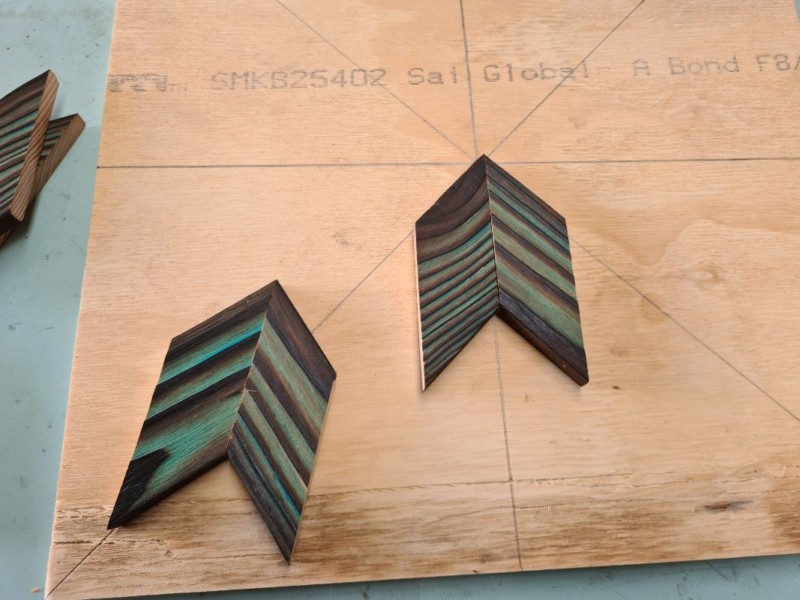
Creating the Design
Start with the centre and work outward, arranging your arrows along the guidelines.
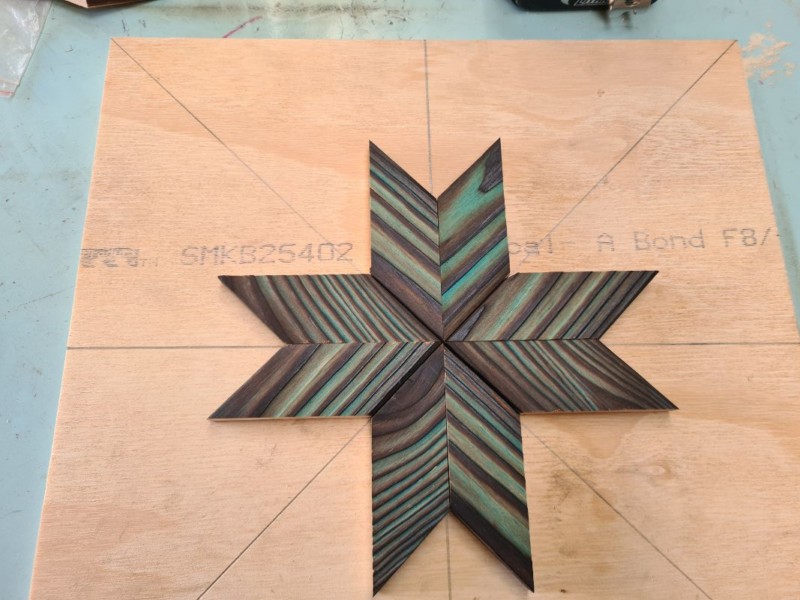
Don’t glue yet—play with the placement and mix colours and textures until you’re happy.
Beginners can start with this simple design, where every piece of wood is cut to the same size for an easy, uniform layout.
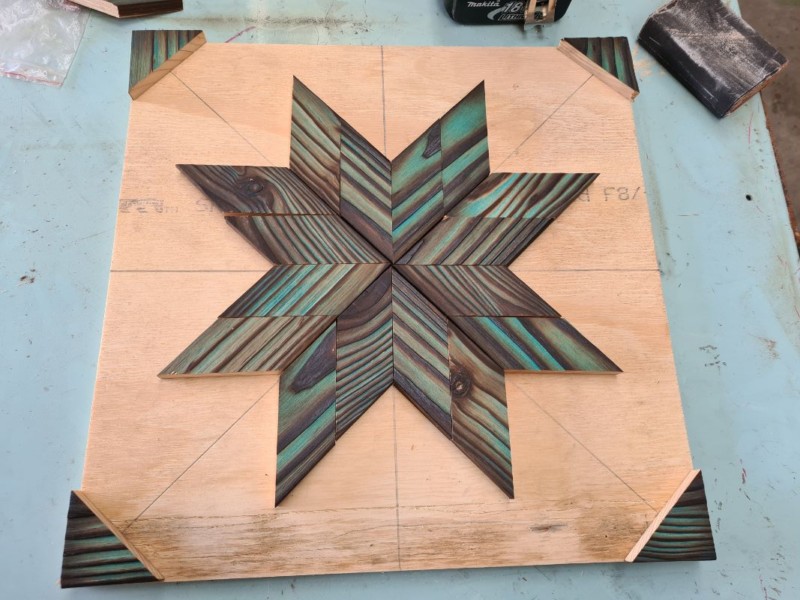
This was the design I came up with, and as you can see, all the wood pieces are still the same size and shape. The pattern was created mainly by adding coloured pieces among the plain wood. At this stage, you can carefully slide the design off the base, ready for glueing. It’s a good idea to take a photo so you can easily put the pieces back in place if they get mixed up. Here’s another simple design you can try.

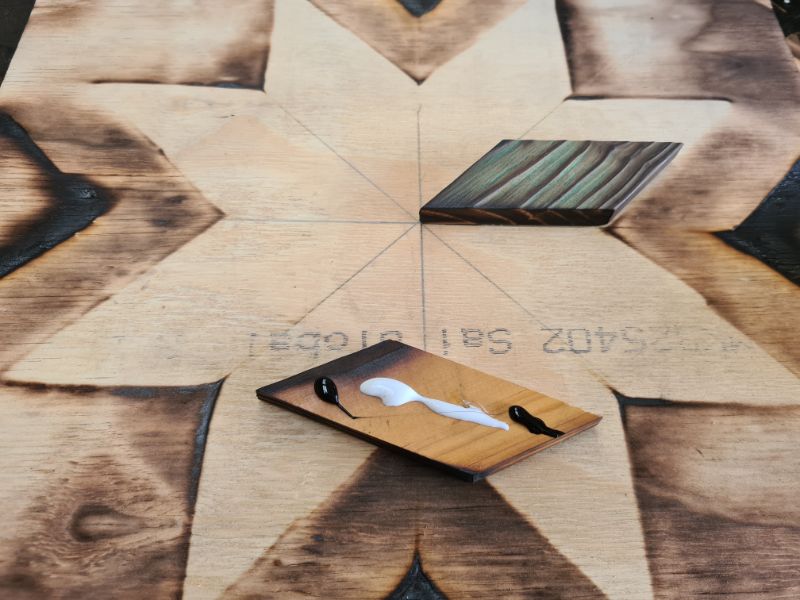
Glueing the Quilt
Use a combination of hot glue and wood glue. The hot glue holds pieces instantly, while the wood glue dries strongly. It’s easier to fill the gaps after the pieces have been glued down. The wood pieces will still keep the same shape, but some may hang over the edges. For the corners, you can cut small squares or triangles to neatly fill the spaces.
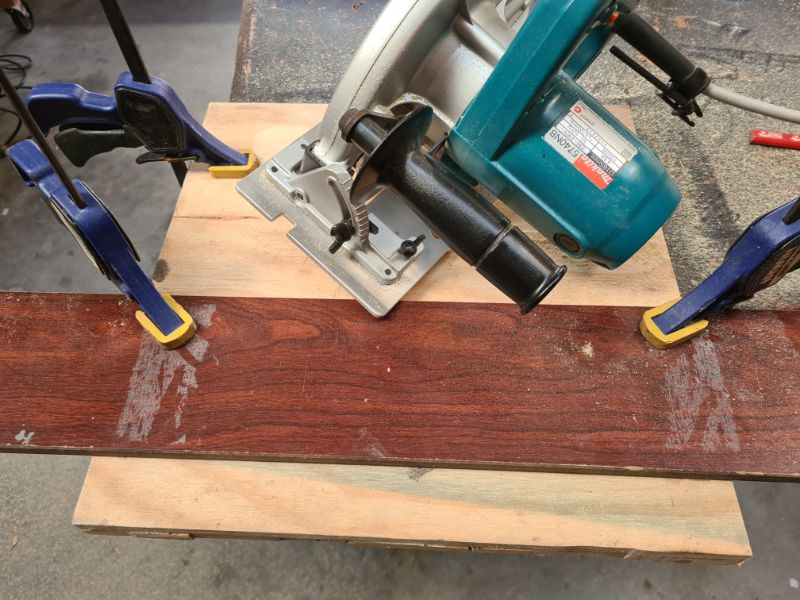
Trimming the Edges
Once the glue has fully dried, I use a circular saw to trim and straighten the edges. Placing a piece of straight wood as a guide makes it easier to cut a clean, even edge.
Framing the shou sugi ban barn quilt
I used offcuts of pallet wood to make the frame. I cut the wood 5mm higher than the wall art.
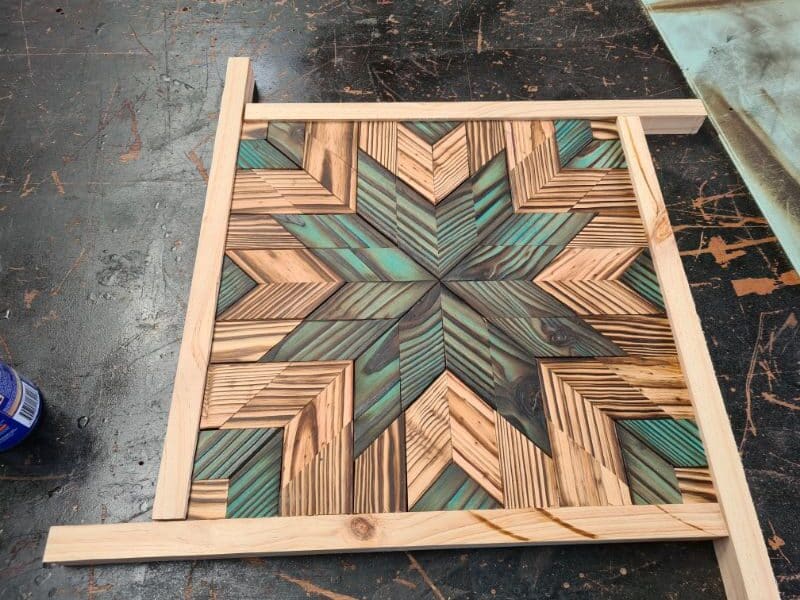
You can create a simple frame by gluing the wood directly to the sides once it’s cut to size, as shown in the image above. For a more polished look, cut the ends at a 45-degree angle so they fit neatly together.
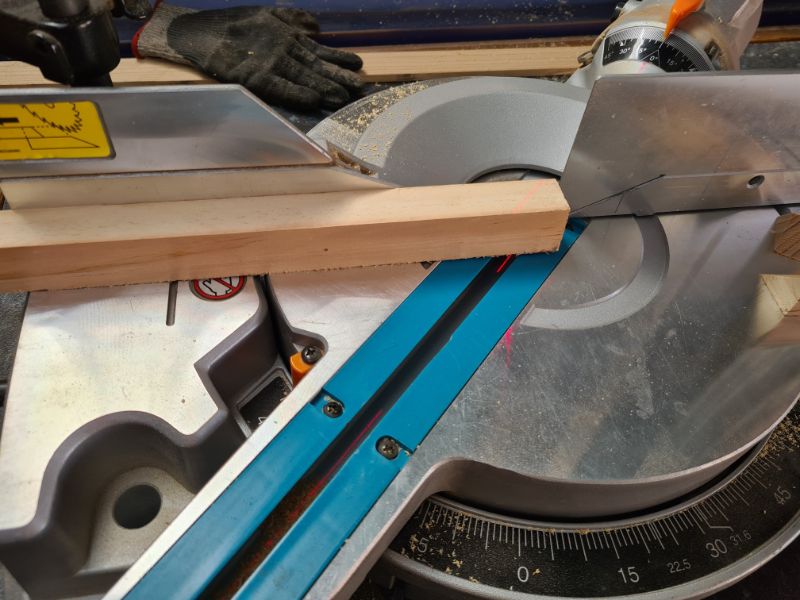
I cut my frame pieces at a 45-degree angle, and as you can see in the image below, the extra 5mm gap helps the wall hanging stand out beautifully.
I used the blowtorch again and lightly burned the wood on the frame. To attach the frame, I used wood glue and a nail gun.
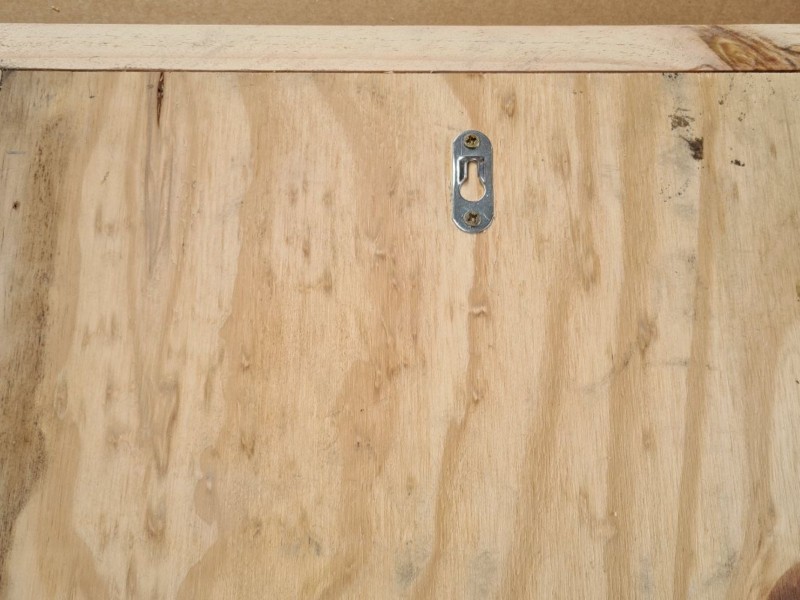
Hanging the shou sugi ban barn quilt wall art
Screw a simple bracket into the back, and your Shou Sugi Ban barn quilt wall art is ready to hang.
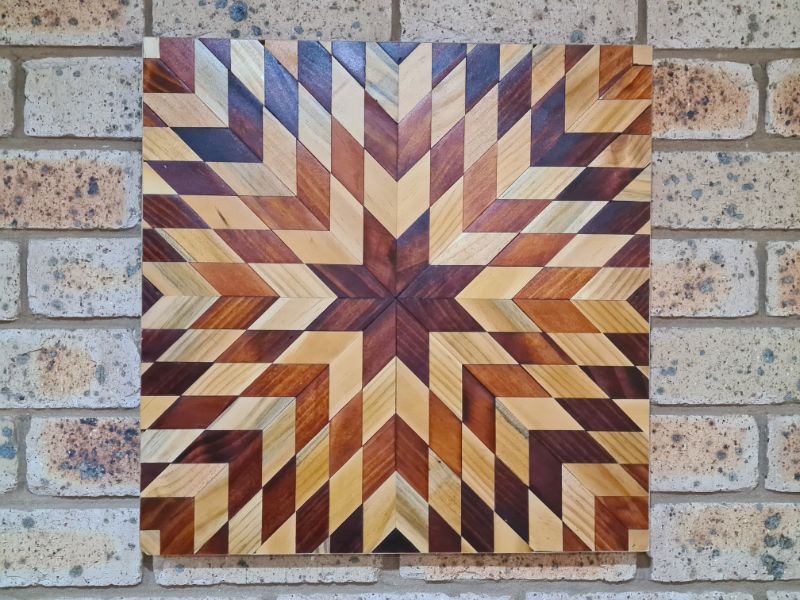
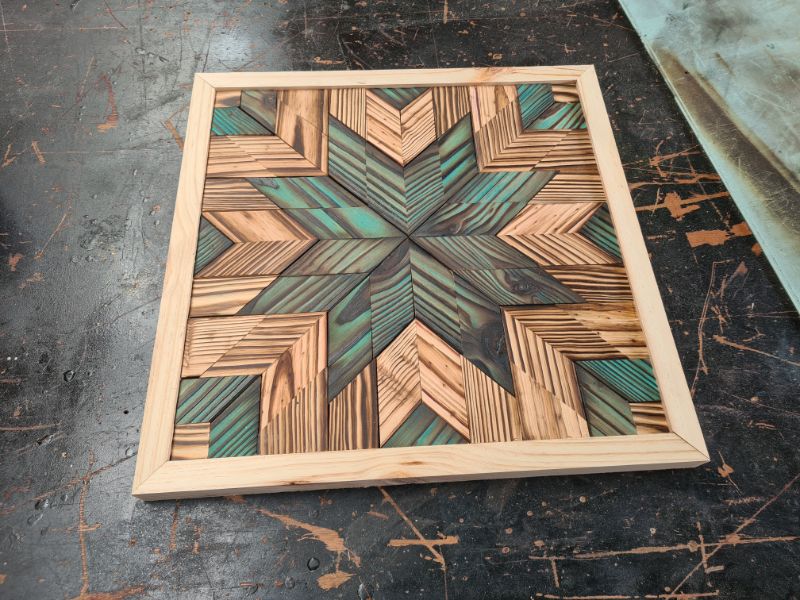
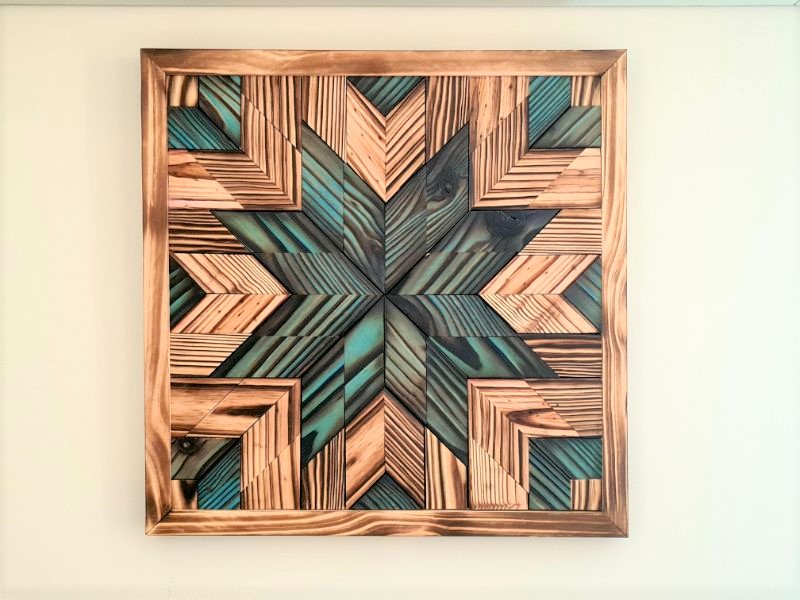
Completed wall art
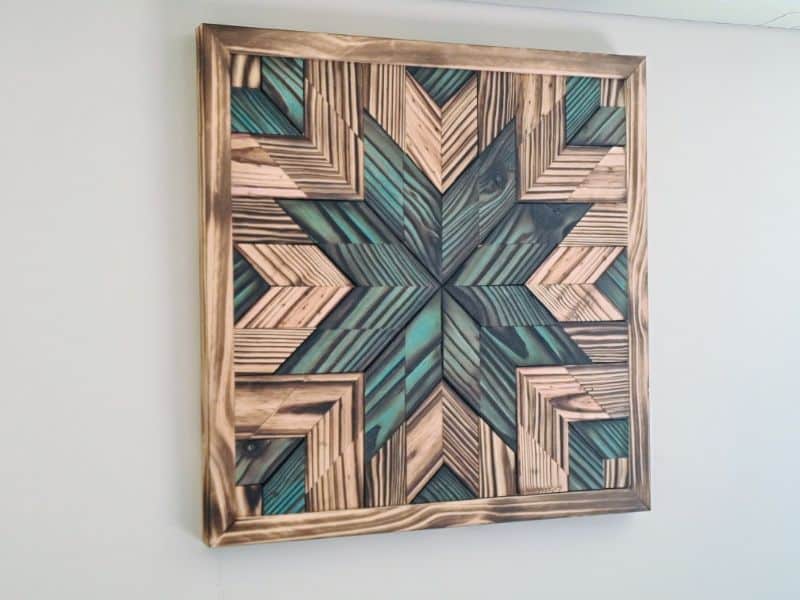
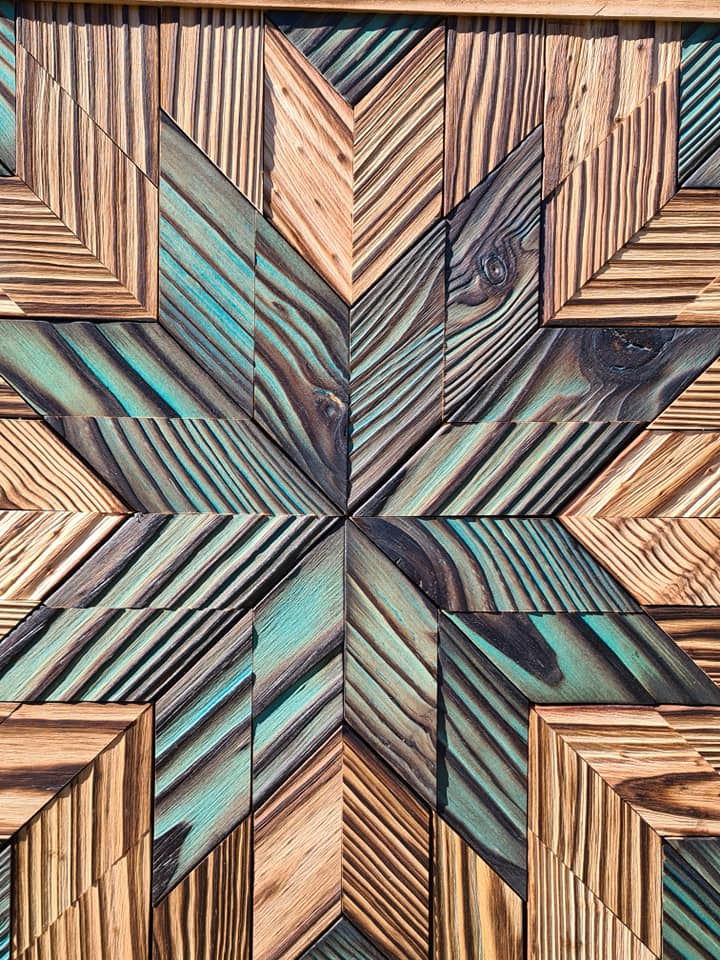
Each piece has a unique texture and colour depth, making it a one-of-a-kind statement for your home.
You can see some of the textures in this up-close image. The photos taken outside show the more accurate colour.
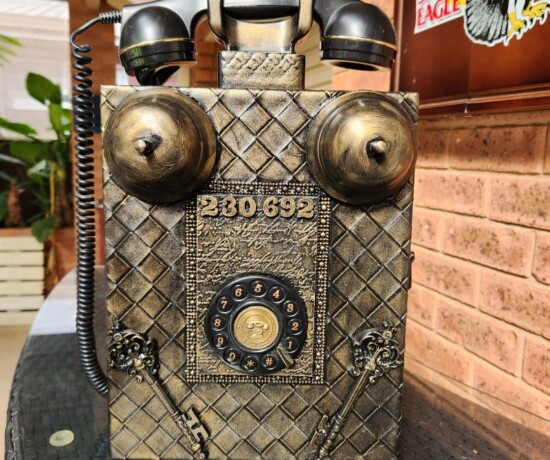
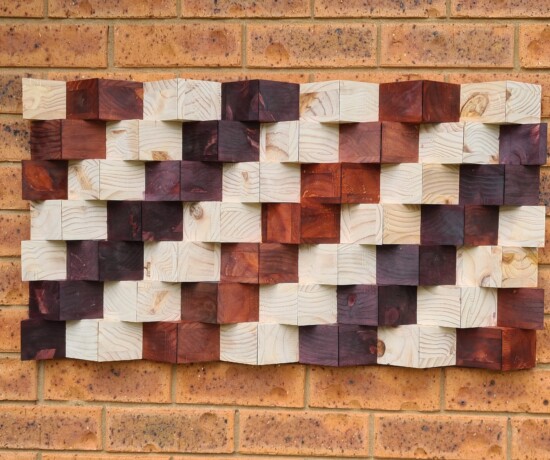
More great DIY wall decor ideas
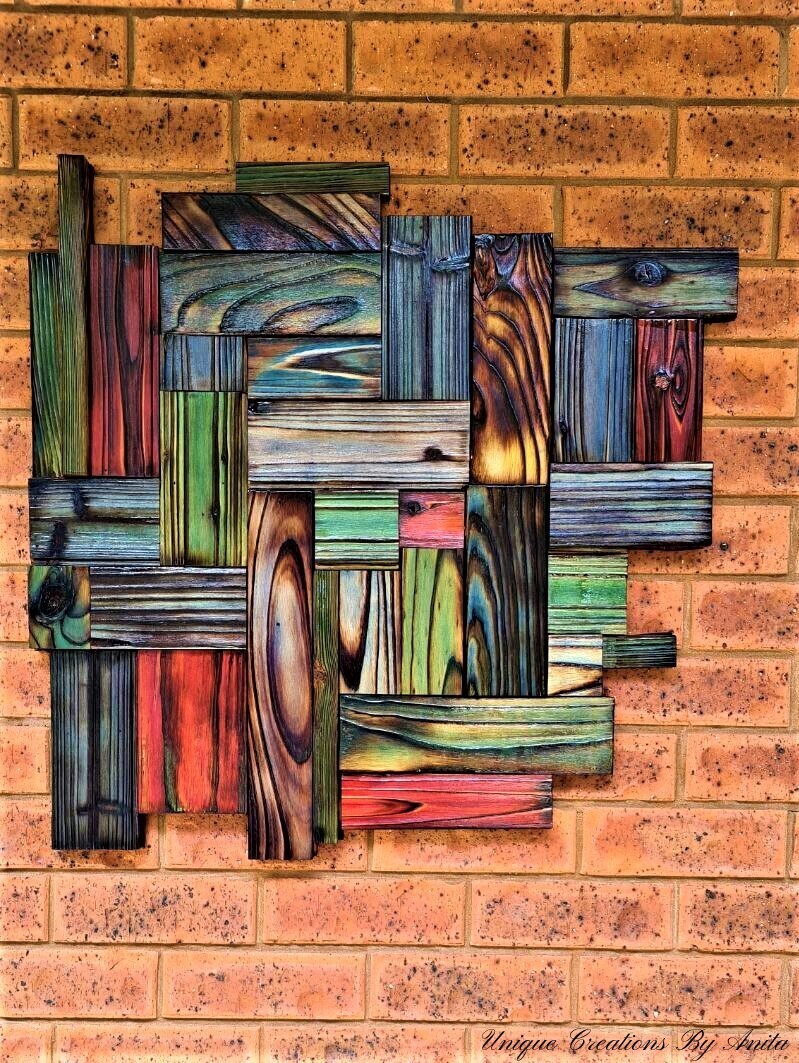
This wall art was created using the same wood-burning technique as above.
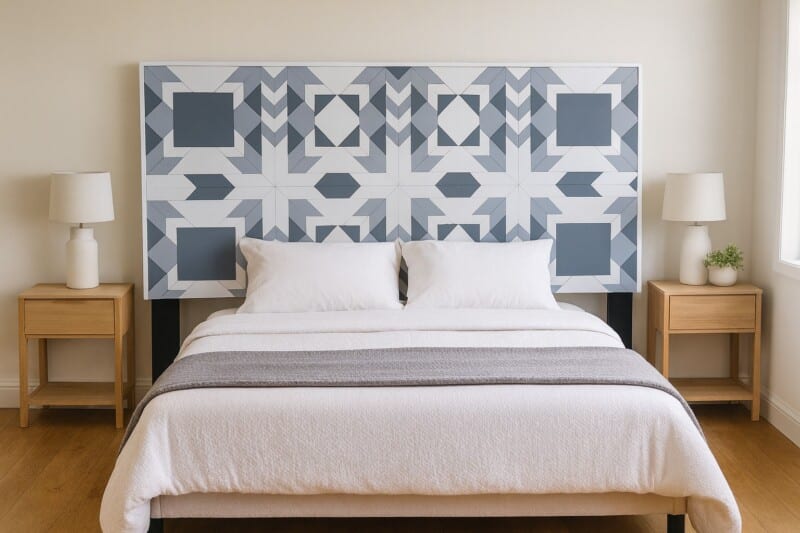
If you’re feeling adventurous, you could even try creating a barn quilt headboard for a bold and unique statement piece.
More about IBC
If you follow my blog, you will know I am part of the IBC (International Bloggers Club), which is a group of talented bloggers from around the world. We have members from Spain, South Africa, Australia, the United States, and Canada. Each month, we come together and create a project with a common theme.
If you missed last month’s “Furever challenge ” theme, here is the link to my Hobbit-style dog house. The “Wall and all ” contributions from my fellow bloggers for this month’s challenge are listed below. Please feel free to jump over and give them some love.
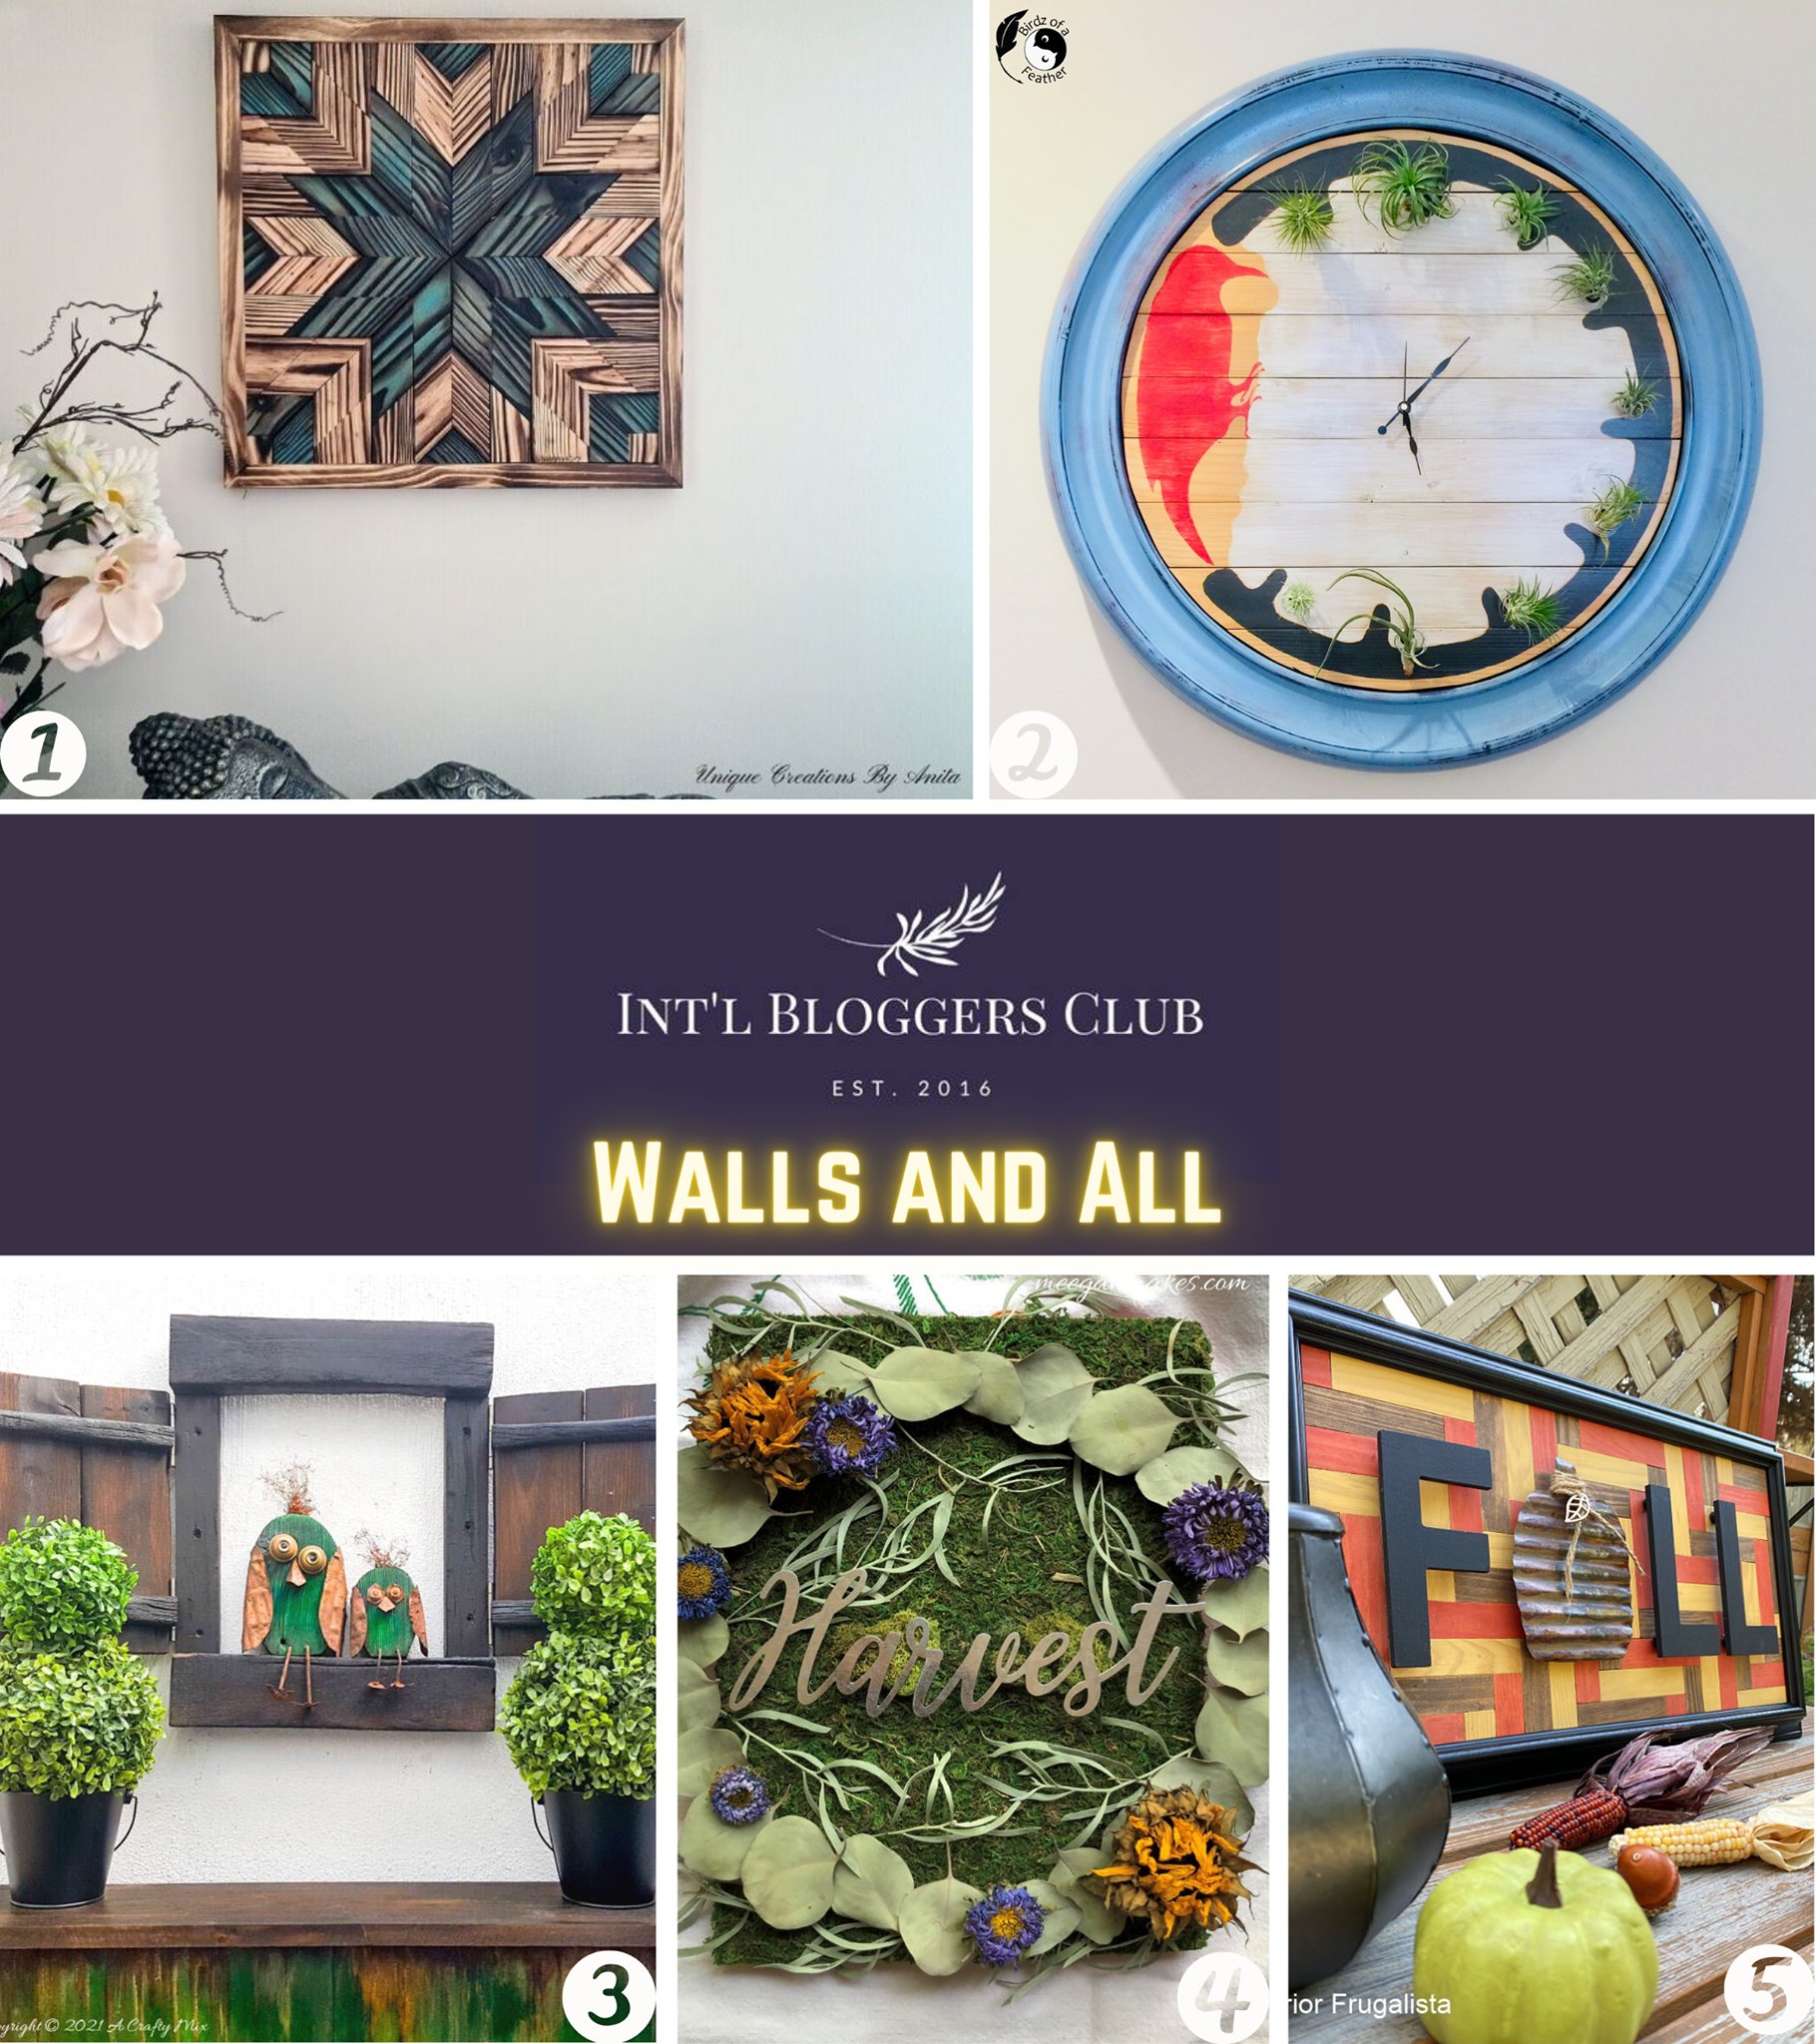
- Me
- Birdz of a feather |Wooden Wall Art DIY
- A Crafty Mix|Yakisugi Shutter Frame Junk Birds
- Meegan Makes|Moss Wall Art with Eucalyptus Leaves and Dried Flowers
- Interior Frugalista|Easy Wood Tile Mosaic Fall Wall Art

If you’re interested in any of the items used in this project, we’d appreciate it if you used our affiliate links. Clicking these links earns us a small commission at no extra cost to you, helping us create more inspiring and exciting projects to share. We’d also love to hear your thoughts—feel free to leave a comment or share this post!

13 Comments
Michelle Leslie
August 23, 2021 at 10:20 pmI can’t get over how incredibly beautiful those colors are, Anita. I’m a sucker for seeing the wood grain so always think twice before painting wood. Your beautiful creation does justice to the wood’s natural beauty and there’s a hint of color to make it extra special too. Gorgeous
Anita Holland
August 26, 2021 at 6:57 amThank you so much Michelle.
Patty Birchenough
August 26, 2021 at 9:14 amIt’s absolutely beautiful.
Laura L WALKER
August 23, 2021 at 10:31 pmI am fascinated by barn quilts, Anita. I love yours. xo Laura
Anita Holland
August 26, 2021 at 6:58 amThank you Laura, they are very addictive to make.
Sara
August 23, 2021 at 10:59 pmThis is stunning Anita and I sure picked up several tips and tricks that I’ll use! I’d have never guessed that you started with plain ‘ol pine. I have a stack of that I’ve been saving for years and am so going to use it for this!
Anita Holland
August 26, 2021 at 6:58 amThanks Sara, I am happy to share and inspire.
Marie - Interior Frugalista
August 24, 2021 at 3:00 amAnita, I have admired your gorgeous wood barn quilts and woodworking skills. But I’ve been too intimidated to try because of those intricate miter cuts. Thank you so much for this very helpful tutorial, as it helped alleviate those fears and I think I can do this! I’m just itching to try the shou sugi ban technique. Wow, the colors are absolutely gorgeous!
Anita Holland
August 26, 2021 at 6:59 amThanks marie, you really should have a try they are easier than you imagine.
Meegan
August 24, 2021 at 8:50 amWow! How incredible and vibrant. I can’t get over all the tiny details you take the time to create. So beautiful, Anita! I have GOT to try Shou Sugi Ban soon!
Anita Holland
August 26, 2021 at 6:59 amThanks Meegan, you should definitely have a try.
Moss, Eucalyptus & Dried Flowers Wall Art - What Meegan Makes
February 24, 2024 at 8:41 am[…] Shou Sugi Ban Barn Quilt designed from Unique Creations By Anita […]
DIY Yakisugi Shutter Frame and Junk Birds - A Crafty Mix
September 6, 2024 at 4:49 pm[…] Anita took the art of shou sugi ban to a whole new level with this gorgeous barn quilt. […]