
As a self‑taught DIY enthusiast with a passion for learning how to restore an antique dresser, I’ve built many pieces of furniture by improvising rather than following plans, because sometimes creativity thrives in chaos. While I lack formal training, I have a knack for spotting hidden potential where others see only rubbish.

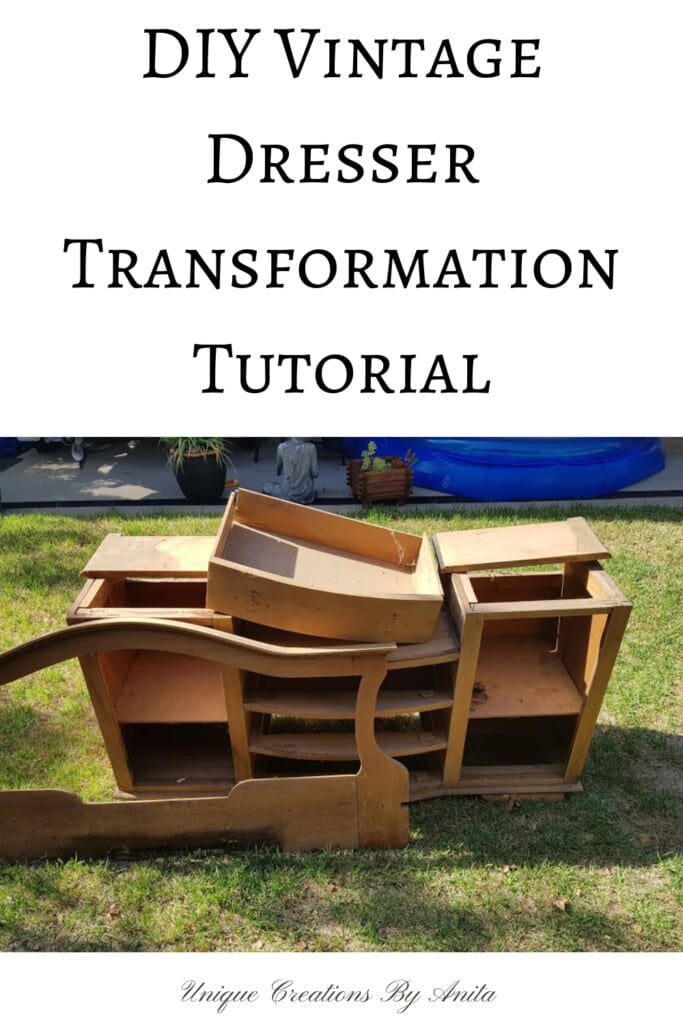
That’s exactly what happened when I found this decrepit dresser on my local for‑sale site: splits down every panel, no legs, rusted or missing hardware, and a peeling mirror—and yes, the spiders and cobwebs were included in the $20 price tag! My son joked it was only fit for firewood, but I was determined to prove the doubters wrong. Despite never having tackled a restoration of this scale before, I believed that with patience, ingenuity and a bit of elbow grease, even the most forlorn piece can be reborn.

Before we dive into this tutorial, be sure to subscribe to my bimonthly newsletter to be the first to see my latest projects. You can also follow me on Pinterest and Facebook, where I also include my unique mixed-media art projects
Tips for Restoring an Antique Dresser
**This post may contain affiliate links. Which means I earn a small commission on links used at no extra cost to you. Please see my disclosure policy for more information.**
Materials Needed
- Orbital sander with 120‑grit and 240‑grit discs
- A clothes steamer and a set of wood clamps
- Quality wood glue (PVA or carpenter’s glue)
- Wood filler and a putty knife
- Scrap plywood and veneer tape
- box cutter knife
- Replacement legs or salvaged furniture legs
- Undiluted white vinegar and a container for hardware soak
- Mirror‑effect spray paint
- Dark Mahogany wood stain and oil‑based satin varnish
- Fine‑grade sandpaper blocks for hand finishing
- Clear wax for drawer runners
- Ratchet straps, gloves, safety goggles and a dust mask
Fixing the frame of the dresser
I started by rebuilding the frame—there was no point proceeding until the structure was solid. Every timber piece was warped and loose, so I hit up Google and discovered that steaming the wood with a clothes steamer could coax it back into shape. Although it did help, the process was excruciatingly slow: I’d steam each board, clamp it straight, then leave it for several days to dry before moving on.

Next, I glued every loose joint—practically every piece of wood on the dresser needed it. To keep the frame perfectly aligned as the adhesive set, I secured everything with clamps and ratchet straps. Once the glue had dried, I filled the few remaining gaps with wood filler.

Adding Replacement Legs
All of the original legs had long since rotted away, so I raided my stash of parts from stripped‑down furniture. I always strip out and save usable pieces from any project beyond repair. I found a perfect set of replacement legs, then screwed them securely into the base. To ensure a seamless fit, I added small timber blocks inside the apron, but you’d never spot them once the dresser was upright.

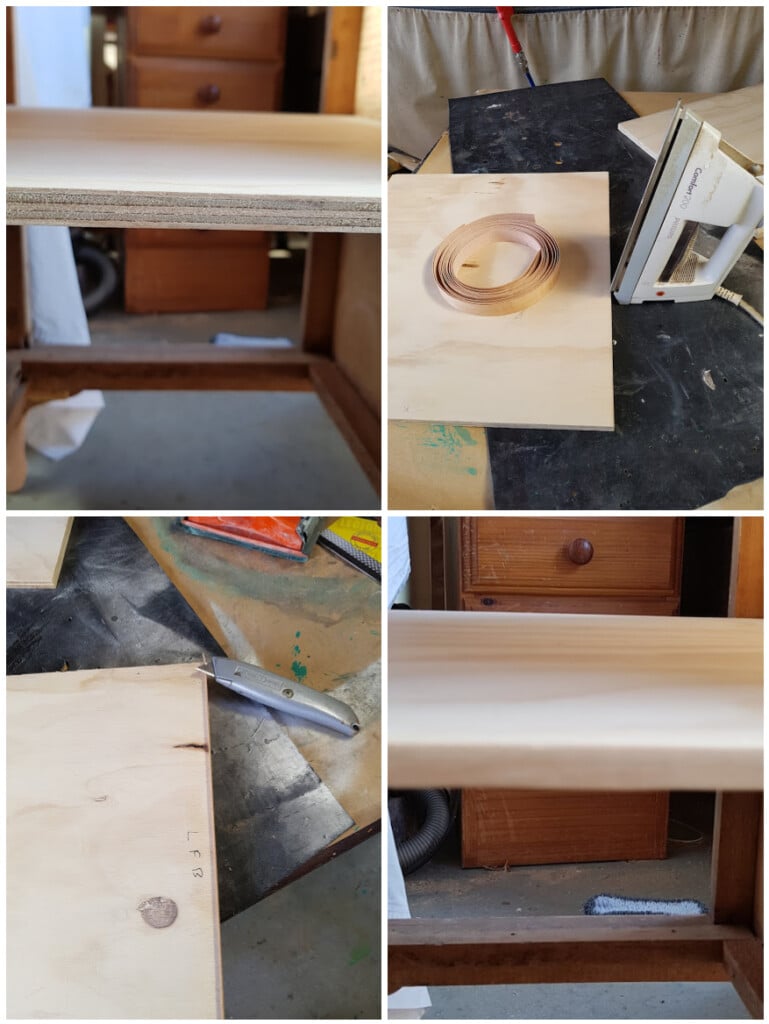
Rebuilding Shelves with Veneer Finish

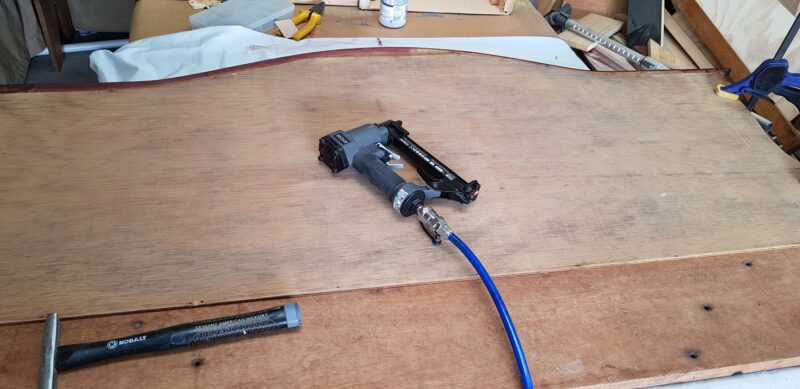
The interior shelves had shrunk so much they were beyond repair. I cut scrap plywood to size, then disguised the layered edges with iron‑on wood veneer tape. After trimming the excess with a craft knife, the new shelves looked indistinguishable from solid timber.
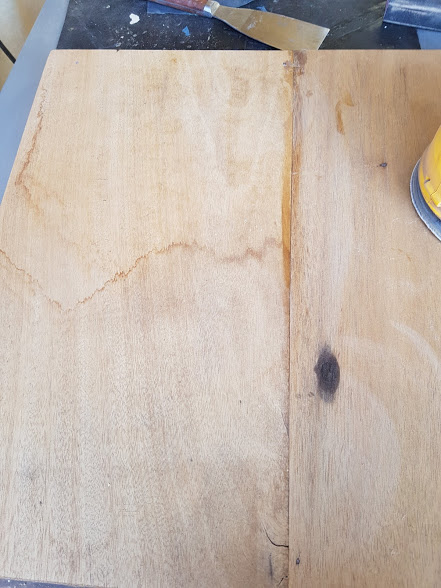
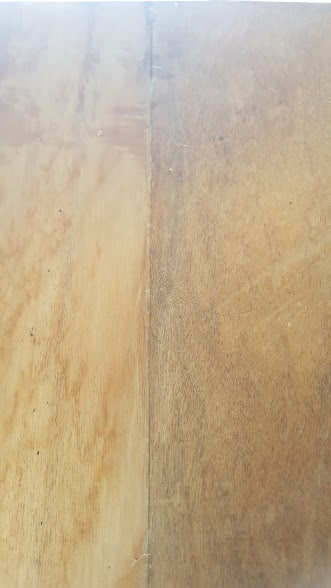
Repairing the dresser tops
The dresser top had suffered the same fate—split down the middle and stained by water.

I steamed and clamped the boards back into alignment, then glued the joint and, once dry, smoothed over every remaining crack with wood filler for a seamless surface.
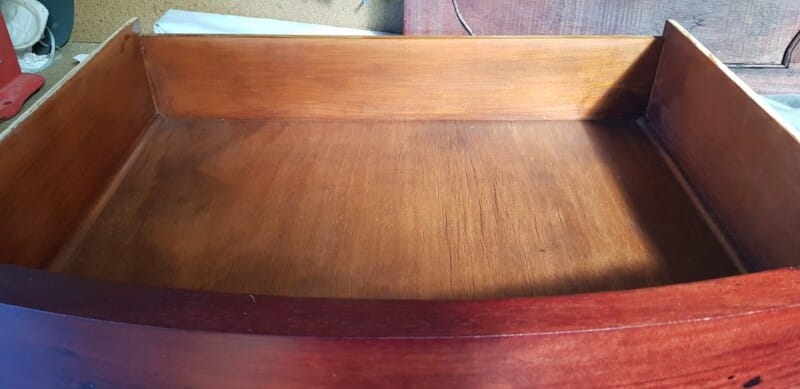
Repairing the drawers
Although the drawer interiors were dry and cracked, I chose to preserve them rather than replace them. I applied wood glue to every seam and used a ratchet strap to hold each drawer tightly while the glue dried.

When I stained the wood, the liquid stain caused the fibres to swell, closing many of the cracks. The drawers still felt stiff until I rubbed Annie Sloan wax on both the inside and outside faces. Suddenly, they glided effortlessly, and the wax even helped conceal the remaining fissures. I couldn’t have been more pleased with this straightforward solution.
Cleaning and Replacing Hardware
My dresser’s knobs and handles arrived so rusty, and half the set was missing. I Googled replacement hardware, but a complete matching set cost a fortune, so I decided to salvage what I had. I soaked every piece in undiluted vinegar for 24 hours, after which the rust wiped away effortlessly, proving this humble remedy works.

For the missing bits, I scavenged similar pulls from my spare hardware stash, choosing styles close enough to blend seamlessly. Once each piece was clean and dry, I gave them a light spray of WD‑40 to ward off future corrosion (skip this step if you plan to paint them). Even painted hardware can still be rescued—discover how in this post.

Repairing the mirror
")
I discovered large patches of peeled finish on the mirror frame that looked unsightly. After calling several glass shops, I learned stripping and respraying wasn’t an option, and ordering a custom‑cut replacement mirror was beyond my budget. Undeterred, I tackled the repair myself with mirror‑effect spray paint. First, I carefully scraped away every flake of old paint using a sharp Stanley knife blade, then wiped the surface clean.
")
Next, I misted on two thin, even coats of mirror‑effect spray, allowing each to flash off before the next. The result wasn’t factory‑perfect, but it looked polished enough to make the dresser sale‑ready.
")
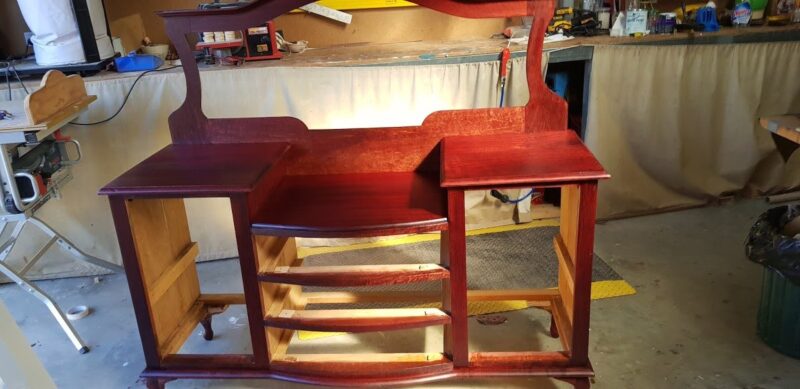
I sanded the frame back to bare timber, applied a rich Dark Mahogany stain, and finished it with two coats of satin varnish.

I refitted the mirror with the original plywood backing, glueing and nailing it firmly in place.
Sanding, Staining and Varnishing
I sanded the entire dresser with a random orbital sander, starting with 120‑grit to remove old finish and imperfections, then refining with 240‑grit for a silky-smooth surface. To camouflage lingering water stains, I applied a Dark Mahogany wood stain—once it dried, none of the blemishes showed through.
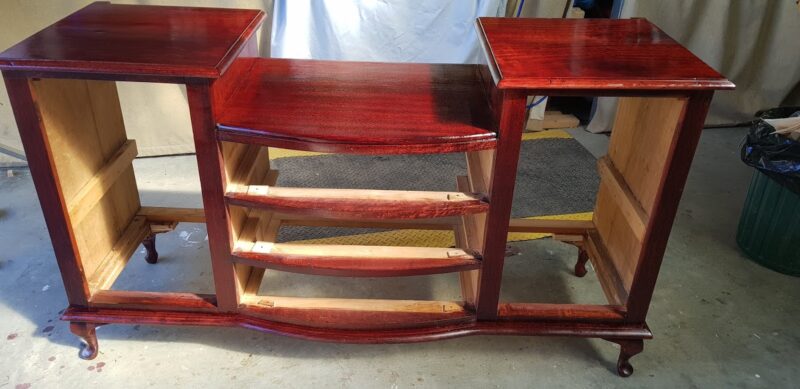
I sealed the dresser with an oil‑based satin varnish, and even after the first coat, the surface gleamed with renewed depth and warmth. (Please excuse the scrap timber and half‑finished projects in the background, I need to tidy the workshop before the next photo shoot!)
Fixing the doors
The dresser doors themselves were in surprisingly good shape—I glued each crack and clamped them until set. However, the hinge screw holes had worn oversized, so the screws wouldn’t hold. To fix this, I dipped a few toothpicks in wood glue, pushed them into each hole, snapped off the excess, and re‑drilled. The screws now bite firmly into the reinforced wood.

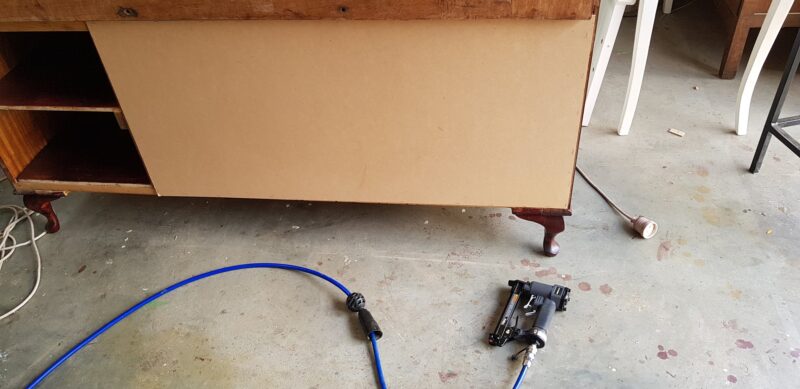
Once the stain and varnish had fully cured, I reinstalled the cleaned hardware and reassembled the dresser. The original back panel was beyond salvage, so I measured and cut a slim sheet of MDF to size, then secured it in place, adding stability and a crisp, finished look.
Final Reveal
Pride doesn’t even begin to describe how I felt seeing the newly restored piece. Depending on lighting and angle, the stain can appear richer or more muted. I had no room inside my house to stage my photos, but the natural light shows the true colour. If you have any questions about tools, techniques or alternative materials, feel free to ask!


This photo is the most accurate to the colour of the finished dresser. Since completing that dresser and selling it so quickly for a tidy profit, I’ve gained the confidence to tackle even more restorations—check them out here.

This angle highlights the mirror repair—while the damage appears more pronounced here, it’s virtually invisible when viewed straight on.

More restoration projects
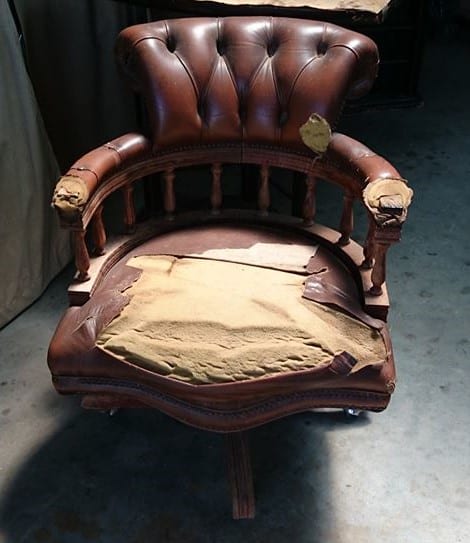
When I came across this antique commode chair, I immediately envisioned restoring it into a stunning feature piece for the bedroom.
")
Another restoration I’m proud of is this captain’s chair—once destined for the skip, it now looks like new.

If you’re interested in any of the items used in this project, we’d appreciate it if you used our affiliate links. Clicking these links earns us a small commission at no extra cost to you, helping us create more inspiring and exciting projects to share. We’d also love to hear your thoughts—feel free to leave a comment or share this post!


58 Comments
Cathy
July 17, 2018 at 10:18 pmWow, that’s gorgeous! Great job!
Anita Holland
July 18, 2018 at 10:56 amThank you Cathy
Syl
July 21, 2021 at 2:34 pmThat took love and patience. You threw yourself into that project. It is fantabulous.
Anita Holland
July 23, 2021 at 11:26 amThank you so much Syl, It was a challenge once they said it could not be done. lol
Emily
July 28, 2018 at 8:54 amI found this post to be very informative and helpful. I will have to recommend you to my friends. I am very thankful to you for giving this post.
Anita Holland
July 28, 2018 at 10:02 amThank you very much Emily, My posts are under construction at the moment. I have some really great projects that I will be putting back up once I have sorted out my site. So stay tuned if you would like to see more.
Joan Bardot
August 27, 2018 at 2:10 pmBeyond excellent work Anita, thanks for sharing!
radio rich
October 11, 2018 at 2:18 amAnita,
I like how this project turned out myself I enjoy restoring antique just as much as I like building new stuff.
my favorite is old oak furniture my day job I help teach young girls and boys in beginning wood class at local school
Anita Holland
October 16, 2018 at 9:50 pmThank you, It did turn out better than I had hoped.
Linda at Mixed Kreations
February 16, 2020 at 8:34 pmWhat a gorgeous piece! You did an awesome job restoring it. Thanks for all the great tips!
Anita Holland
February 16, 2020 at 11:55 pmThank you so much Linda, It was all trial and error as I went along. The end results were worth all the work.
Jane
October 26, 2018 at 1:13 pmWOW Anita. You’ve got talent for sure!! Love the dresser!!
I’ve got some furniture that was left to me by my aunt. Its in good condition except the top of the chest of drawers and the vanity have water damage. I don’t really want to change the color but I’m not sure how I can match it. The color reminds me of some of the pictures of your dresser. I want that dark red and didn’t think Mahogany until I looked at your pictures. If I redo just the top, the rest will look so dull. To do it all, do i sand it all down to bare wood? Any advice or guidance would be appreciated.
Thank you ahead of time!!
Anita Holland
October 28, 2018 at 4:30 amHi Jane,
I don’t think you would be able to just do the top, because all stains are different. I have 3 different brands of dark Mahogany stain and they are all different. I stick to the one brand now for all my projects so I know how the colour will turn out. I am no professional just self-taught but if it was my dresser I would sand it back to bare wood. Remove all the old stain and varnish so It is all the same colour. I personally always use the dark mahogany to cover water marks on wood I just find it hides 99% of them. Good luck with your project and if you need more info I will be happy to try and help.
Patt
November 3, 2018 at 6:34 amSo glad to see your site! Fantastic work and I appreciate the comprehensive descriptions to go with each stage. Very beneficial to anyone wanting to restore. My students will be so pleased to see your work. And you certainly showed the ‘doubters’! I envy your patience and commitment Anita! Awesome job!
Anita Holland
November 4, 2018 at 10:41 pmThank you very much Patt, very kind of you to say. I see any piece of furniture as a challenge. I always like to restore first then paint as a last resort.
Sandra
November 25, 2018 at 2:25 amI loved the project. It inspires to keep looking for old furniture that no one wants or needs any more. Thanks for all the tips. Sandra
Anita Holland
December 7, 2018 at 2:34 amThank you, Sandra, I have done a few projects like this, they are great because most of the time they are free. I find that because they are free I know mind if they don’t work out because it does not cost me anything but my time. This is my hobby so my time to me is free. Winner Winner
Lori Carbone
April 26, 2019 at 12:29 amLooks SO awesome!! Thanks for sending me the information, I really appreciate it!!
Anita Holland
April 29, 2019 at 2:40 pmYou are very welcome
Ann
July 16, 2019 at 3:45 pmThis dresser came out beautiful! I’m a fan of ‘lost-cause projects’ and this sure was a challenge. Thank you for sharing at Party In Your PJ’s! You are being featured on my blog tonight.
Anita Holland
July 17, 2019 at 2:33 amThank you so much, because I do all my DIY using broken and free furniture. I get plenty like this that I try and restore. I have had a few like this that have worked out great. Thank you so much for the feature.
Marie
July 17, 2019 at 1:13 pmWow, you did an amazing job restoring this dressing table! So how did the naysayers respond when they saw the finished restoration?
Anita Holland
July 18, 2019 at 3:17 amThank you so much, I did show it to the guy and he said to me “I told you it was worth $100” I just had to love. It did turn out really good I surprised myself.
TR
July 29, 2019 at 3:02 amA Beautiful dresser you made glorious again, probably better than it’s original. I’ve never seen a vanity/dresser with a mirror shaped like that one. Love it’s form.. Again Great Job!!
Anita Holland
July 29, 2019 at 4:46 amThank you so much, very kind of you to say. The mirror was unique which made it very hard to replace. That is why I had to repair it.
Michelle Leslie
February 11, 2020 at 12:45 pmWow, my friend, you sure proved all the doubters wrong. Stunning makeover.
Anita Holland
February 12, 2020 at 12:48 amThank you, I can’t be told I can’t do anything lol
Christina Woodcock
February 16, 2020 at 1:19 amAnita this is beautiful! Your hard work paid off. ❤️❤️
Anita Holland
February 16, 2020 at 11:50 pmThank you, It was a lot of work but the end results were worth it.
Simone
April 4, 2021 at 1:28 amThat dresser is a gem! So many people these days just paint things and in awful colors too!
They will go out of style in a snap. This will be handed down! Fantastic job! It must have taken forever to do
but well worth it!
thanks for sharing!
Anita Holland
April 4, 2021 at 9:59 amThank you so much, I always try and restore before I paint. I love the look of wood.
Anita Holland
April 6, 2021 at 3:32 pmThank you so much Simone, I am not a big fan of painting wood unless I have no option.
Lynn Kay Nienas
May 26, 2021 at 9:44 amYou did a wonderful job. I just love this piece. Brava!!
Anita Holland
June 1, 2021 at 1:33 pmThank you so much.
Shirley
July 21, 2021 at 11:37 pmAnita..WOW…I am so impressed! I did woodworking and pulling things together like this as a crafter/woodworker too, and honesty I just can’t believe what you have done. This is beyond beyond what someone like you should be doing as a crafter. Phenomenal work!! You definitely went above and beyond! I’ve also been following blogs for a very long time and have never come across someone that would take on a challenge like this. FANTASTIC, PHENOMENAL, EXCELLENT WORK! “”””””a CONGRATULATIONS is certainly in order for YOU!””””””
Anita Holland
July 23, 2021 at 11:28 amThank you so much Shirley, your comment has made my day, month and year all in one. I do projects like this so I can learn new skills because I am self-taught. And if the projects don’t work out I can just reuse the wood in another project and no money lost.
Sara
August 2, 2021 at 9:35 pmYou sure do have the knack for anything involving wood! Phenomenal work on this Anita! Great tip on fixing that mirror; such a time saver.
Anita Holland
August 5, 2021 at 4:15 pmThanks Sara, wood is my first passion.
maria
August 2, 2021 at 9:48 pmYou are great with painting furniture, you have done an amazing job with this one. The repair job was done like a pro. In fact you are a pro.
Anita Holland
August 5, 2021 at 4:16 pmThanks Maria!
Susan Stevenson
August 2, 2021 at 9:51 pmWow great job! It looks like new 🙂
Anita Holland
August 5, 2021 at 4:16 pmThank you Susan.
Angie @ Postcards from the Ridge
August 2, 2021 at 10:39 pmWow! You really worked a miracle on this piece! It looks amazing. I never would have had the patience to put it all back together. Thanks for the tutorial.
Anita Holland
August 5, 2021 at 4:17 pmThanks Angie, you are very welcome. Projects like this teach me new skills.
Laura L WALKER
August 2, 2021 at 11:33 pmIt is beautiful I love that you chose to restore it. Laura
Anita Holland
August 5, 2021 at 4:17 pmThank you!
Rosemary Palmer
August 2, 2021 at 11:48 pmOMG – that had to be a labor of love. Hope you are keeping it, a true treasure to have.
Anita Holland
August 5, 2021 at 4:17 pmIt sure was a labour of love and such good practice.
Linda Johnston
August 4, 2021 at 3:16 amI’m impressed1 beautiful job. Love the stain; it is so similar to my parent’s bedroom furniture which is mahogany.
Anita Holland
August 5, 2021 at 4:18 pmThanks Linda, the stain was dark mahogany.
Meegan
August 5, 2021 at 12:02 amWhat a gorgeous transformation! I especially like the fresh new look. AND how smart to use the Annie Sloan wax to loosen up the drawers. I never would have thought of that. So smart.
Anita Holland
August 5, 2021 at 4:18 pmThanks Meegan, I surprised myself that it worked. lol
Libbie
August 5, 2021 at 10:35 amWhat a beautiful transformation!
Anita Holland
August 5, 2021 at 4:18 pmThanks Libbie!
Kippi Ohern
August 6, 2021 at 1:50 amWow! This dresser turned out better than new. You are very talented!
Hugs,
Kippi
Anita Holland
August 13, 2021 at 3:51 pmThank you so much.
Shirley
June 12, 2022 at 12:55 pmIt’s a beautiful piece, you did a beautiful job on repairing and restoring, HOWEVER, I could never stain something back to make it the same as it was..lol. I am so sick and tired of oak cabinets and red bedroom furniture or any other furniture done in the previous 5 decades! Again, it’s a job well done!
Anita Holland
June 13, 2022 at 4:01 pmThanks so much Shirley. I did have to use a darker stain because of all the water damage on the oak. But I do understand what you are saying.