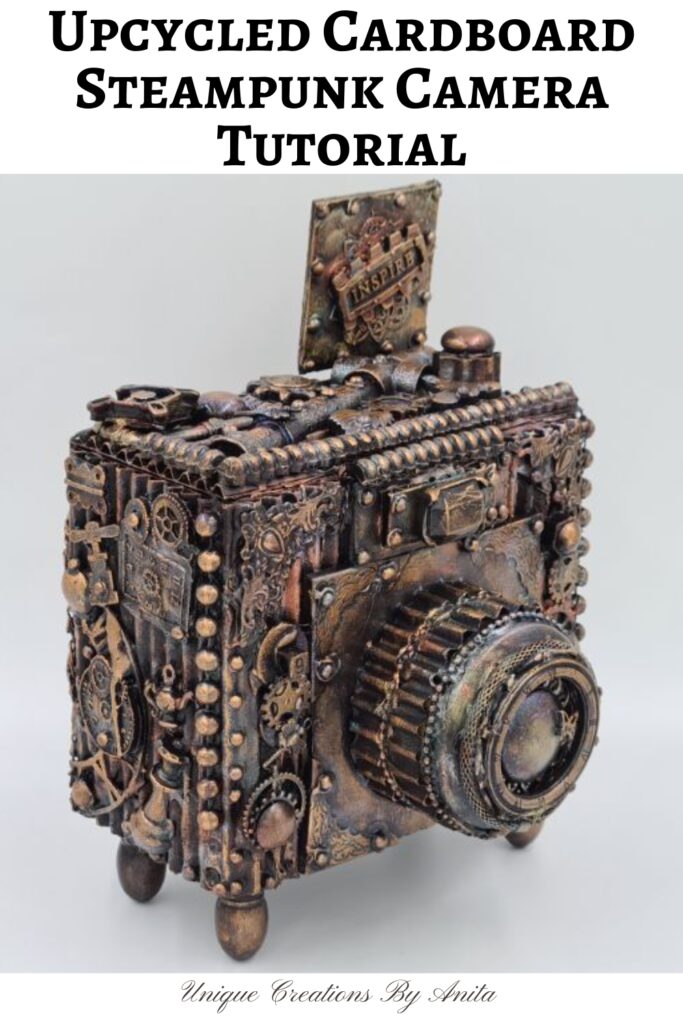
DIY Steampunk Prop Camera: Upcycled Cardboard & Mixed Media Magic combines vintage charm with eco-friendly crafting in one eye-catching project. If you’ve ever scrolled through DIY blogs and wished your photography staging looked as striking as theirs, you’re in the right place. I set out to create a steampunk prop camera from everyday recyclables—cardboard, a soda can, and resin charms—and transformed them into a mixed-media masterpiece that will make your photo backdrops pop. Follow along to discover how simple it is to craft your steampunk photography prop and elevate your shot‑styling game.
Before we dive into this tutorial, be sure to subscribe to my bimonthly newsletter to be the first to see my latest projects. You can also follow me on Pinterest and Facebook, where I also include my unique mixed-media art projects
DIY Steampunk Prop Camera: Upcycled Cardboard & Mixed Media Magic
**This post may contain affiliate links. Which means I earn a small commission on links used at no extra cost to you. Please see my disclosure policy for more information.**
Materials Needed
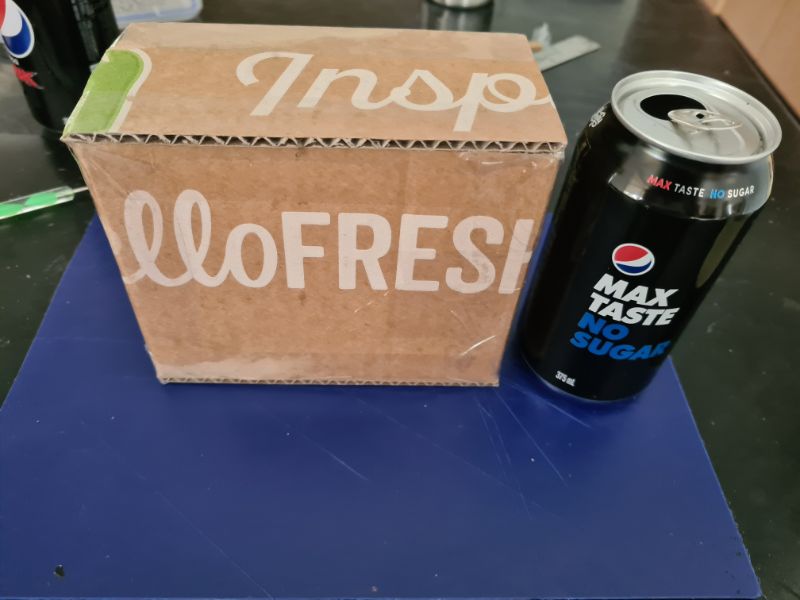
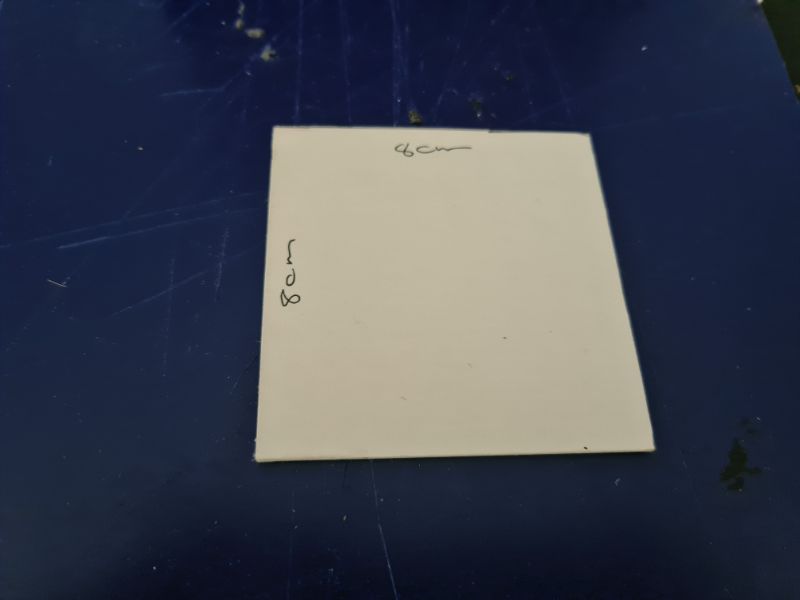
- One cardboard box (approx. 20 cm × 15 cm × 8 cm)
- One empty soda can, cleaned and cut to shape
- Hot‑glue gun and glue sticks
- Strong packaging tape (eg. Sellotape)
- Craft glue (eg. Crafter’s Pick The Ultimate or tacky glue)
- Corrugated cardboard sheets
- Thick cardstock for flash housing and back door
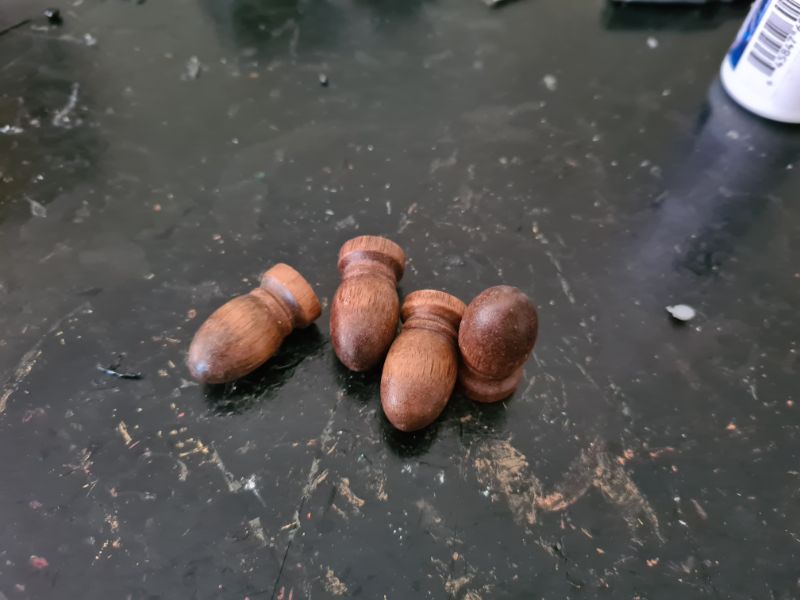
- Small wooden knobs or dowels for camera “legs”
- Resin, silicone moulds and clear resin charms (gears, pearls, filigree)
- Black gesso or acrylic paint
- Metallic wax paste: Blue, gold, copper, bronze and silver(or make your own – see my recipe link)
- Chameleon mica powder (optional)
- Small makeup brush for wax/powder application
- Clear acrylic spray sealer
Build the Camera Structure
Score and fold your cardboard box into a neat rectangle (20 cm × 15 cm × 8 cm).

Reinforce every edge and seam with thick packaging tape so the body stands firm under embellishments.
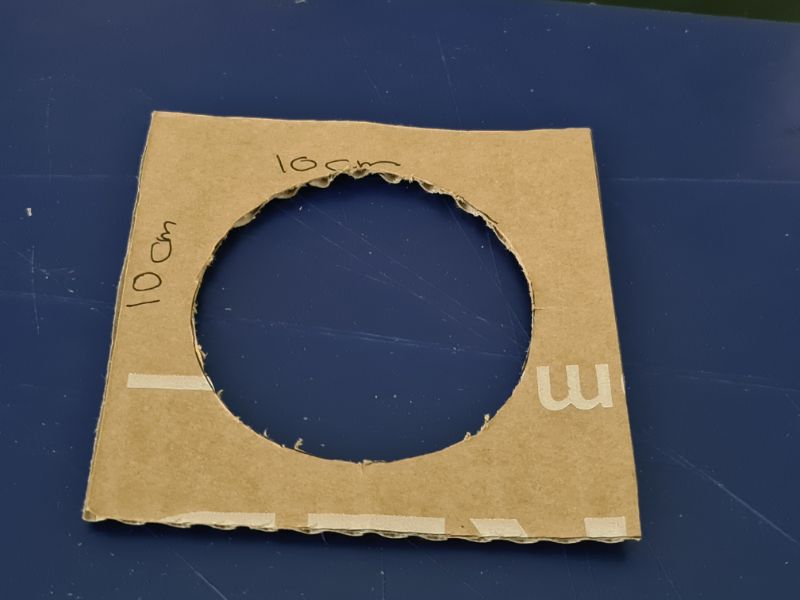
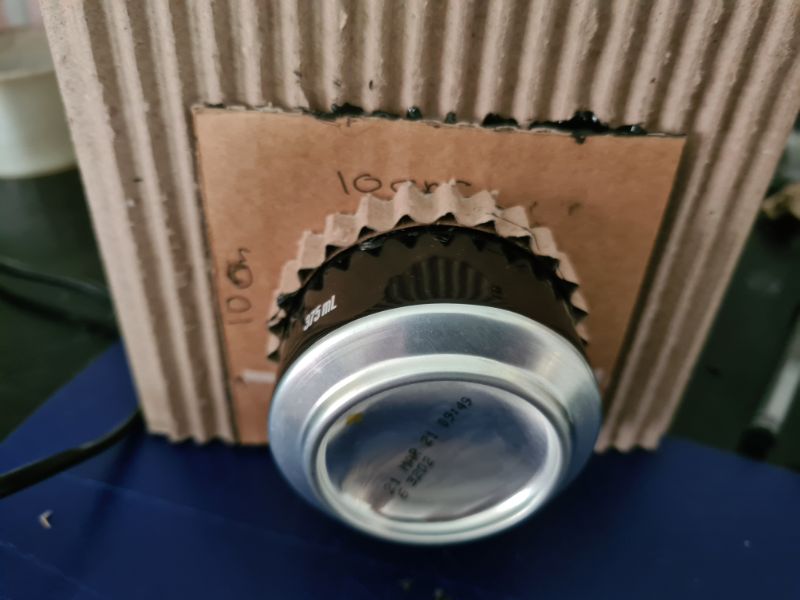
Create the Lens
Slice your soda can in half and notch its rim so it curves into a cylinder.
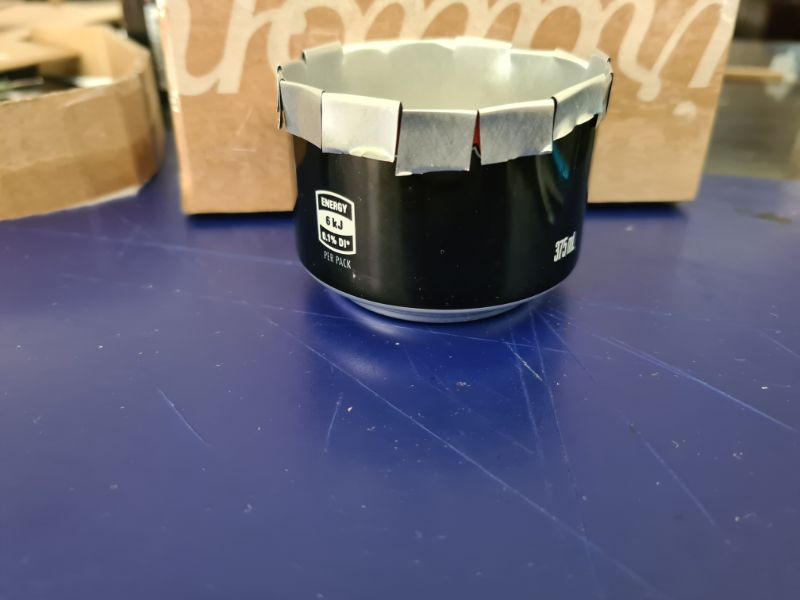
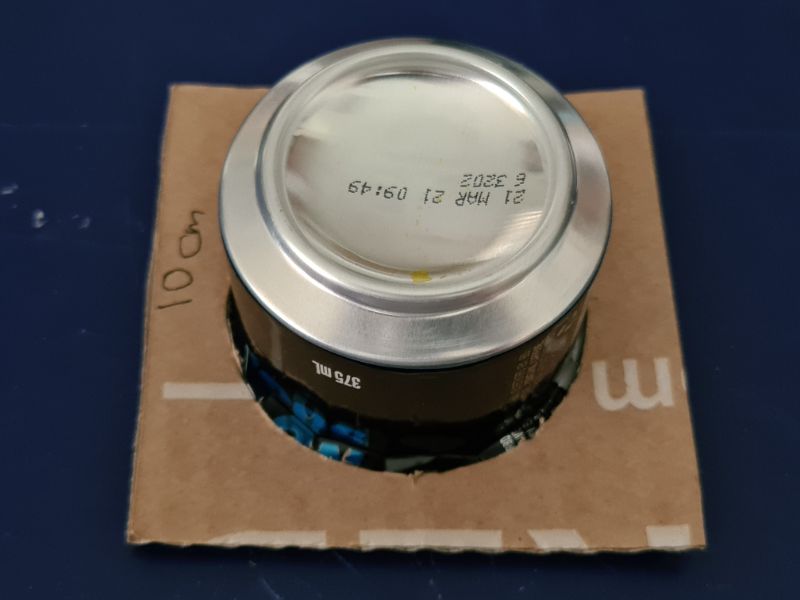
Cut a matching hole in a cardboard circle, then hot‑glue the can to the circle’s lip.
Attach the completed lens to the front face of your camera box with hot glue.
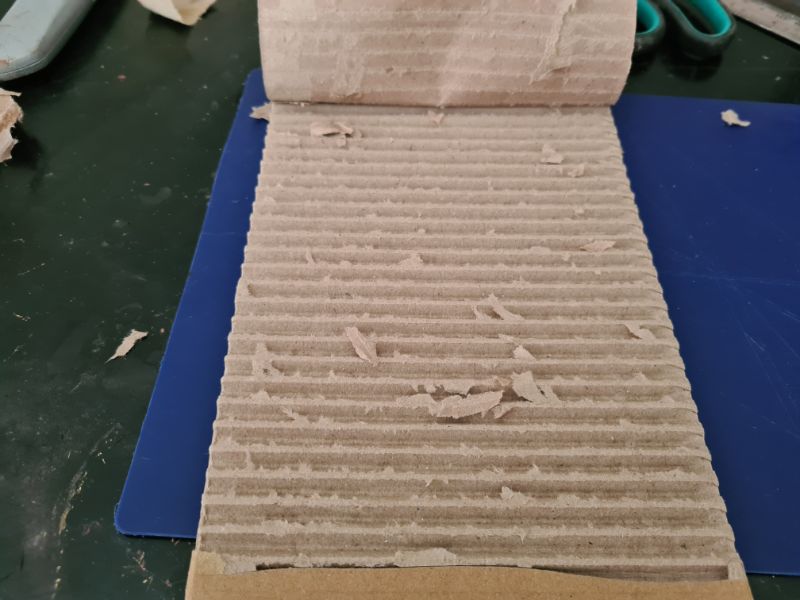
Add Surface Texture
Peel back the cardboard’s top layer to expose the corrugated ridges. Lightly mist it with water, wait a few minutes for the glue to loosen, then gently pull the layers apart—it’ll come away effortlessly.
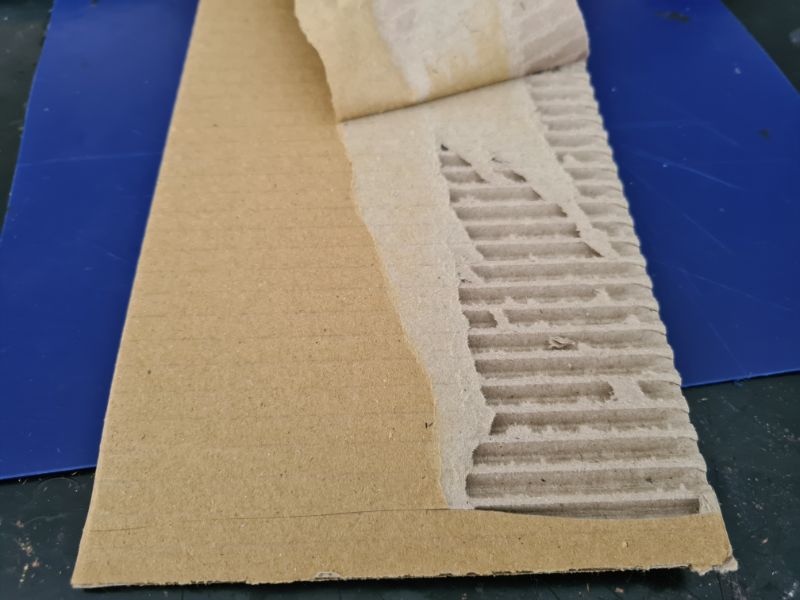
Cut these sheets to cover each side of the box, gluing them down with craft glue. The ridged pattern adds authentic industrial flair.
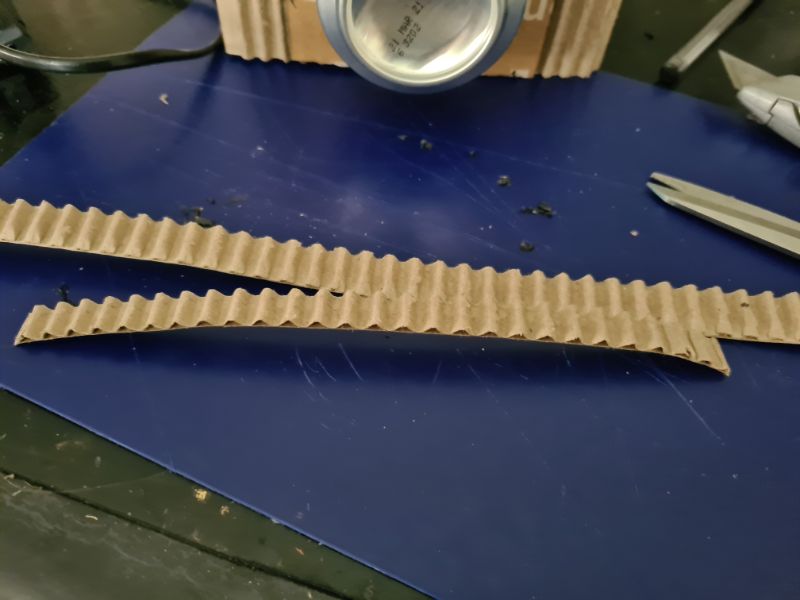
To add texture to the lens and mimic zoom dials, cut thin strips of cardboard and adhere them around the barrel—this will give a realistic, ribbed effect.
Craft the Flash and Back Door
Cut three pieces of cardstock: two outer plates and one spacer to form a flash bracket. Glue them together and affix them atop the camera body.
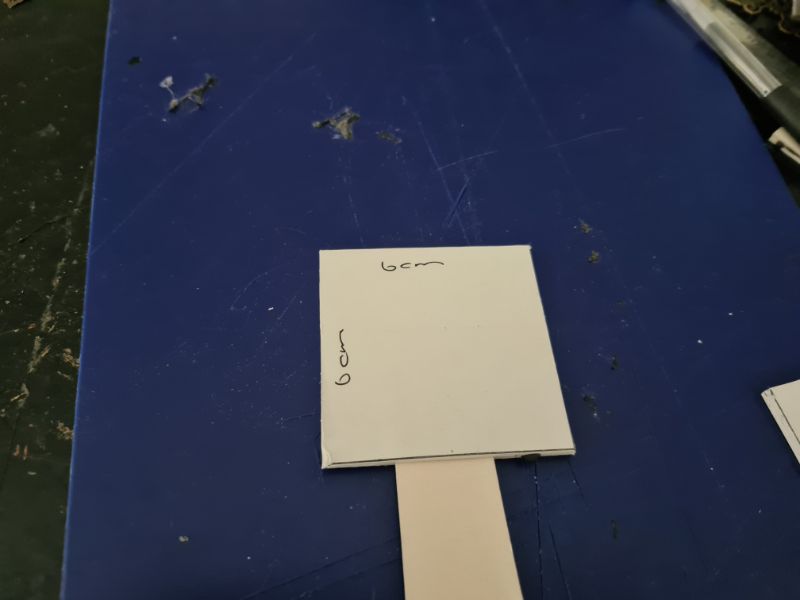
Fashion a back‑door panel from cardstock that fits snugly, mimicking real camera access doors.
To give the camera extra flair, I repurposed some old wooden knobs from my workshop as its “legs,” adding a playful, steampunk‑inspired touch.
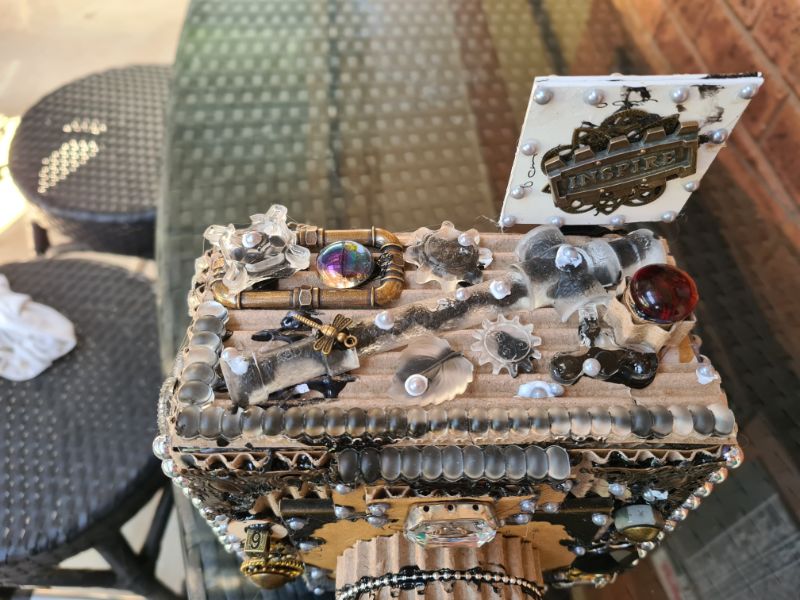
Embellish with Mixed Media
Mixed media combines multiple art mediums in one project. For this camera, I raided my house and workshop for found objects and added a few store‑bought pieces. I cast all the clear embellishments using resin and silicone moulds, then arranged them on the body to mirror the buttons and dials of a real camera. The glass “lens” was a photo charm that proved too small for a pet memorial plaque—perfectly repurposed here. For more tips and tricks on items you can use to add texture to your assemblage projects, this post has it all.
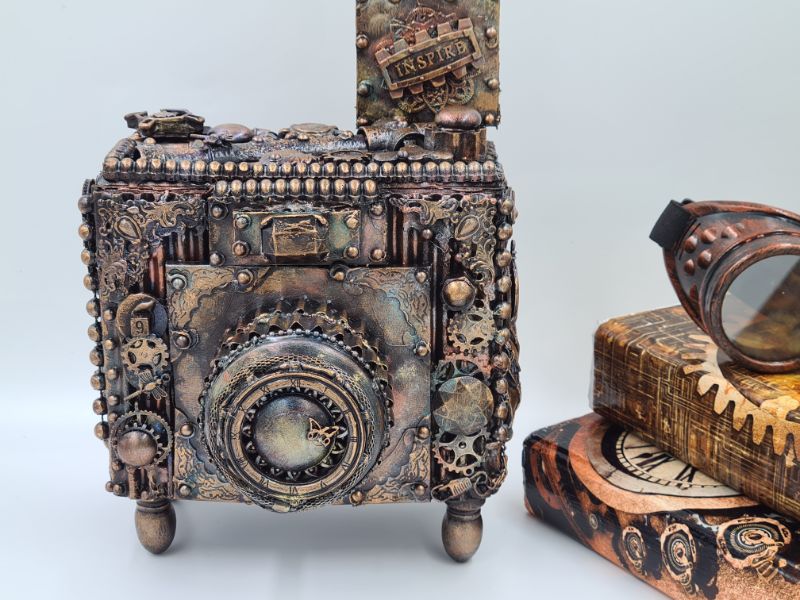
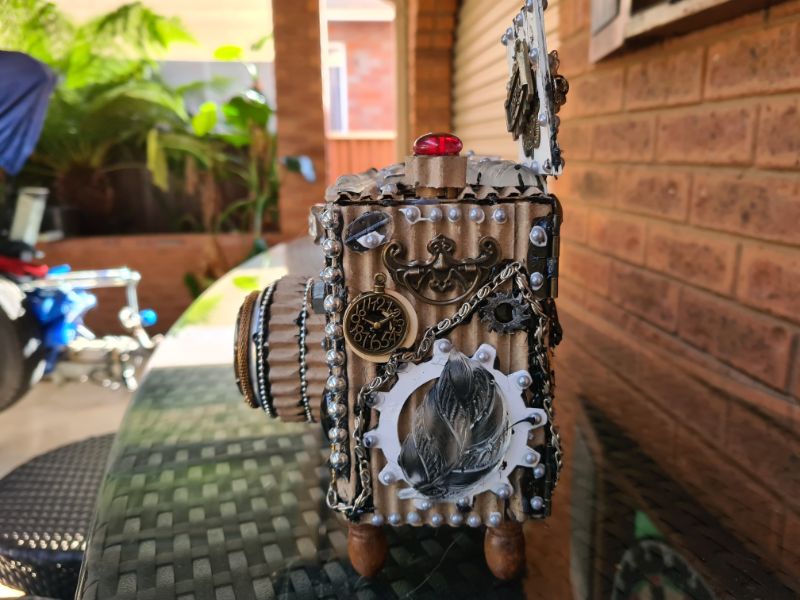
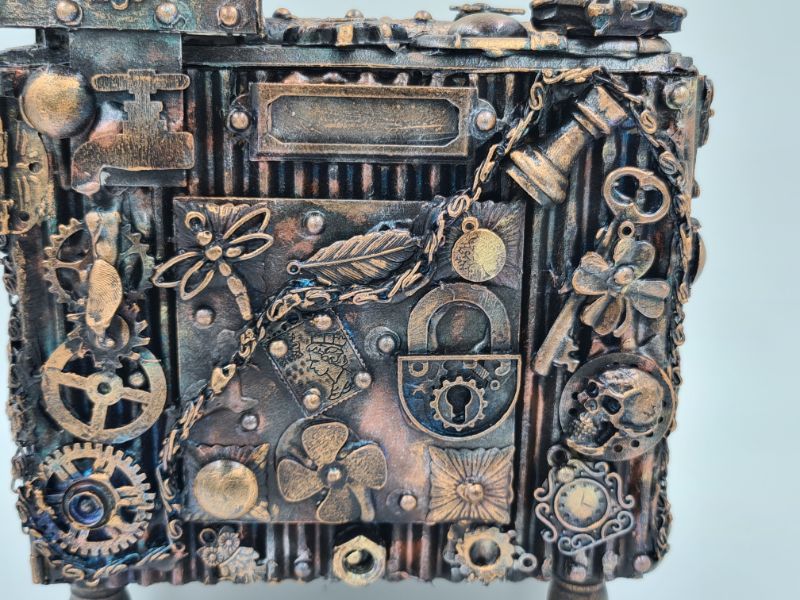
Front of Camera embellishments
- Half pearl beads
- decorative corners flat
- Corner protectors
- Christmas beads
- Steampunk charms
- Steampunk gears
- Decorative buttons
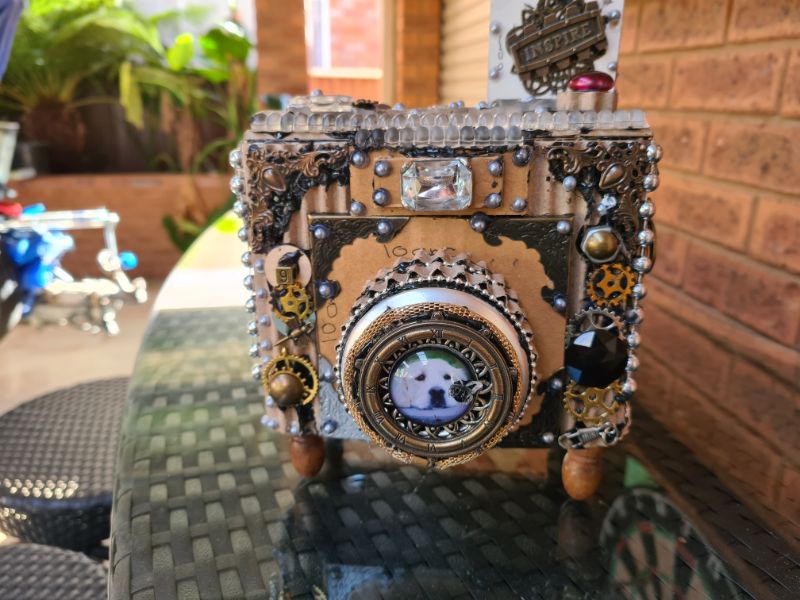
Scroll down for close‑up shots of each detail and links to the supplies. I purchase these embellishments in bulk and use them throughout my mixed media creations.
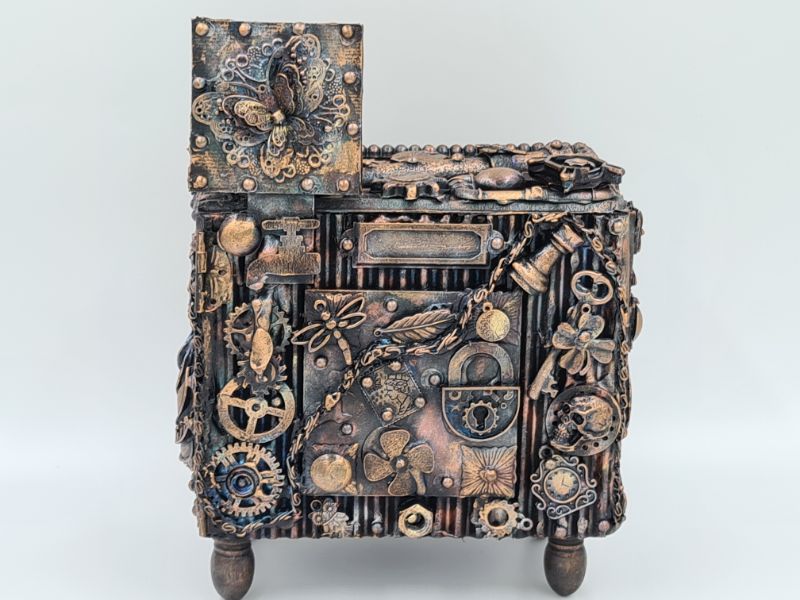
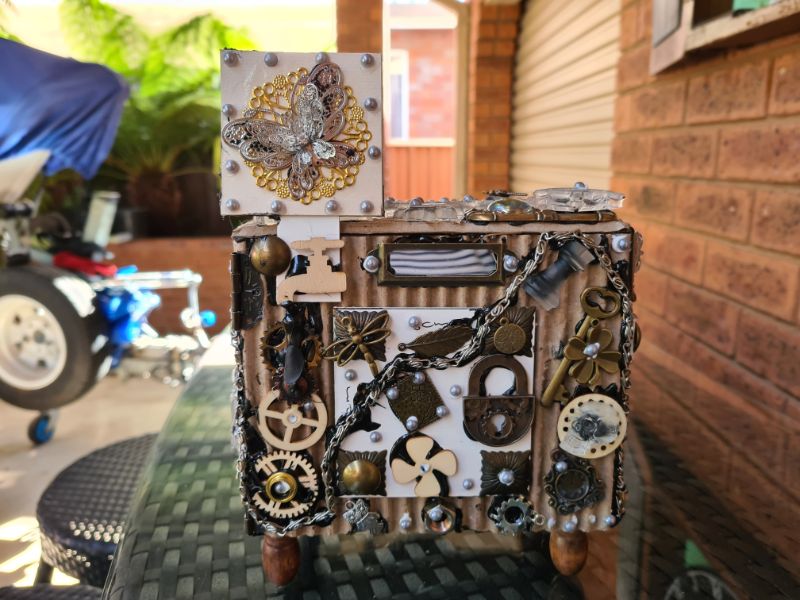
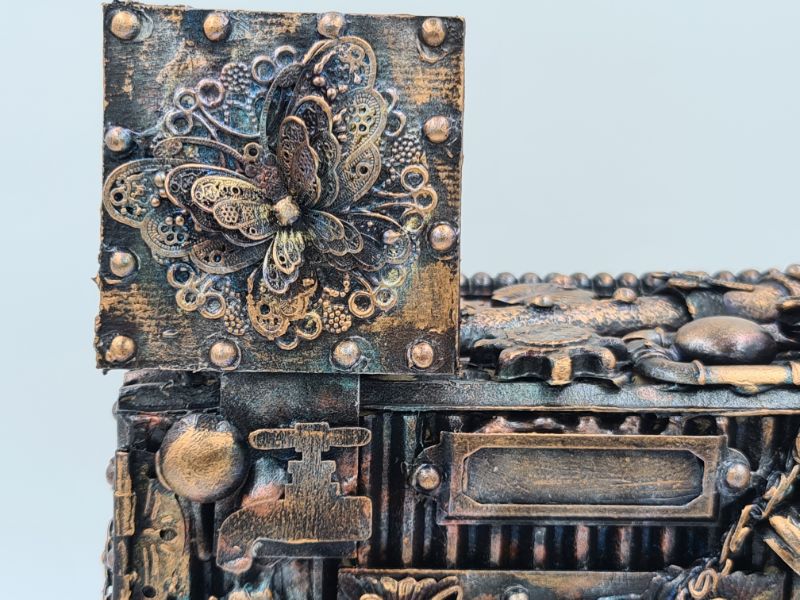
Back of Camera embellishments
- Charms
- Old keys
- Wooden steampunk charms
- Filigree charms
- broken necklace
- Name tag holder
- Steampunk charms
- Resin skull
- Butterfly
- Pipes mould
To succeed in mixed media, you have to look beyond the current chaos—yes, it might resemble something the cat threw up—but once it’s painted, those layers will merge into a cohesive, eye‑catching masterpiece.
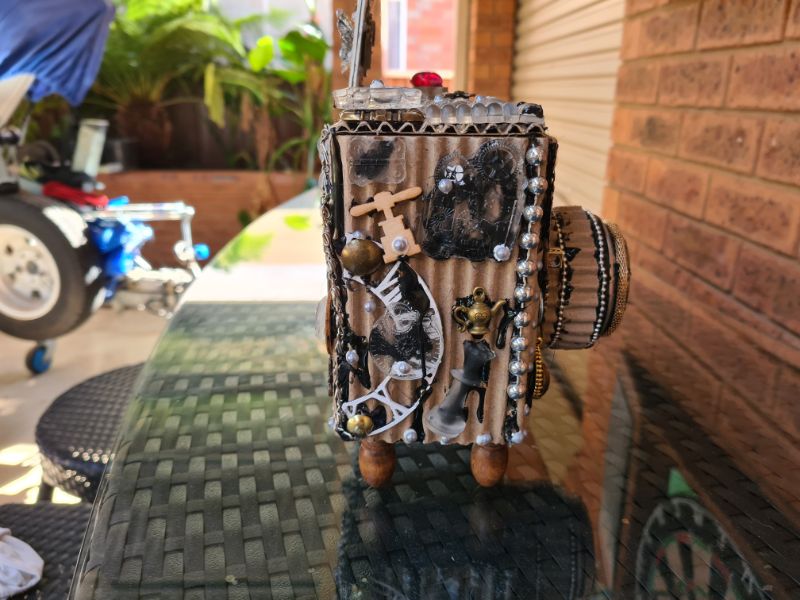
It looks messier now because I used black hot glue under the clear resin charms.
Paint and Wax
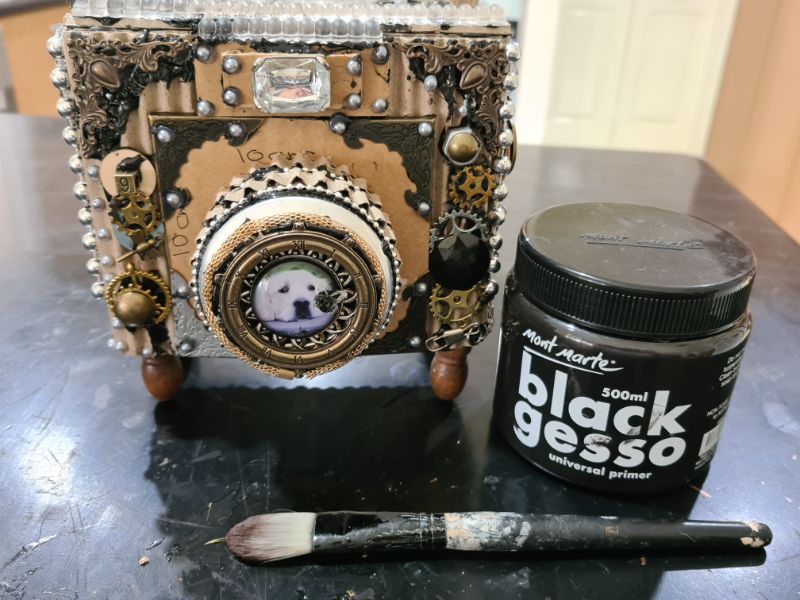
Coat everything evenly with black gesso, working the paint into every crevice for a unified base.
You’re free to get creative with this stage—layer metallic wax pastes however you like. If the finish isn’t quite right, simply add another coat of black gesso and start again. Below is the list of wax pastes I used—they last for years, and I know some have since been discontinued. I’ve added equivalent brand suggestions above, or you can make your own by following this DIY recipe.
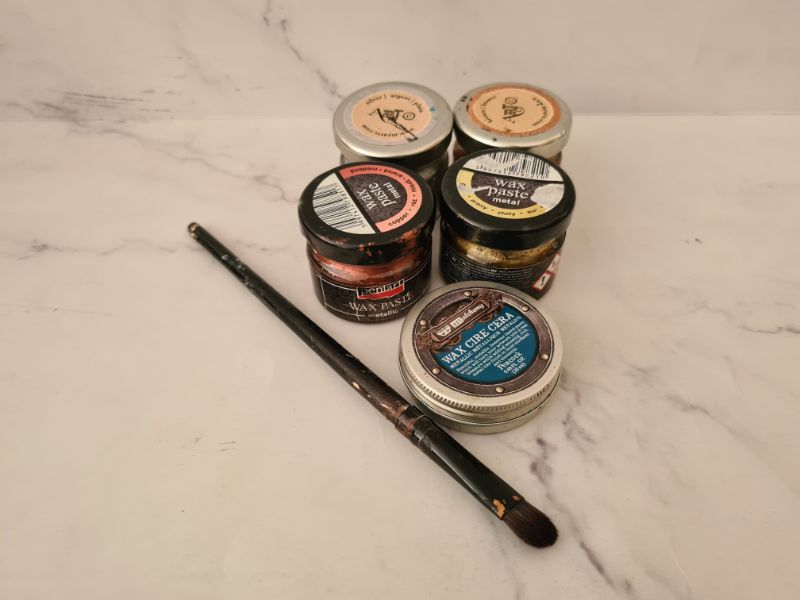
To apply the wax, lightly press the tip of your finger into the paste and sweep it over the raised embellishments. Don’t cover every bit of black gesso—letting some of the base colour peek through maintains that rich, steampunk depth.

I repeated the process, applying just a hint of each colour to every embellishment to build a natural patina. Use a fine brush to dab colour into tight spots with small, circular strokes—loading the bristles sparingly so the black base still peeks through.
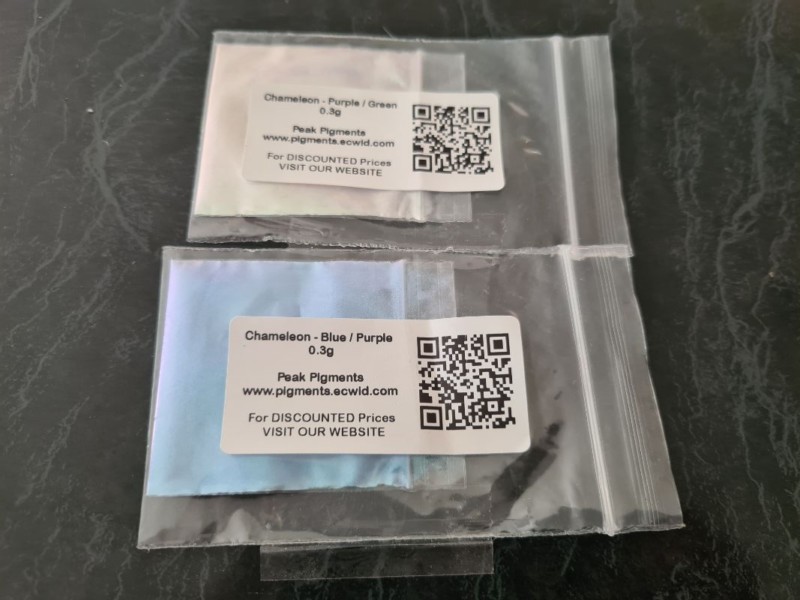
To amp up the shimmer, I dusted chameleon mica powder over the surface immediately after waxing—this ensures it grips the still‑tacky wax. I used a small makeup brush for precise application. This does not show up on the photos very well, but if you have it, it is worth adding it
Seal and Finish
Let the wax paste cure for at least 12 hours, then apply two light coats of clear acrylic spray. The sealer locks in colours, intensifies metallic highlights and ensures your prop withstands repeated use.
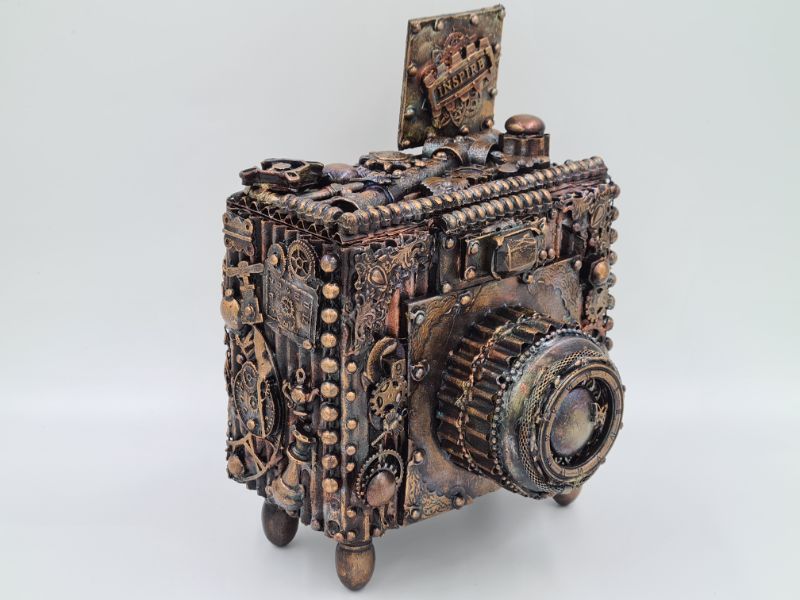
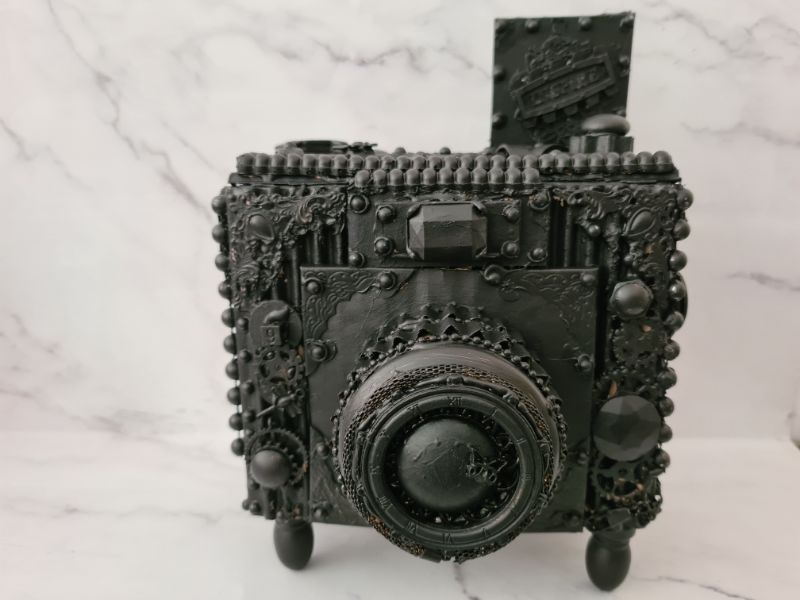
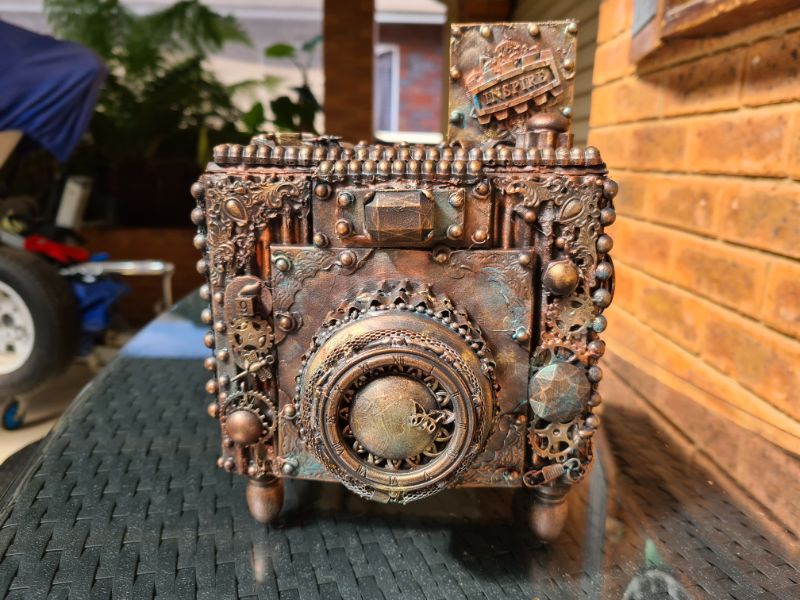
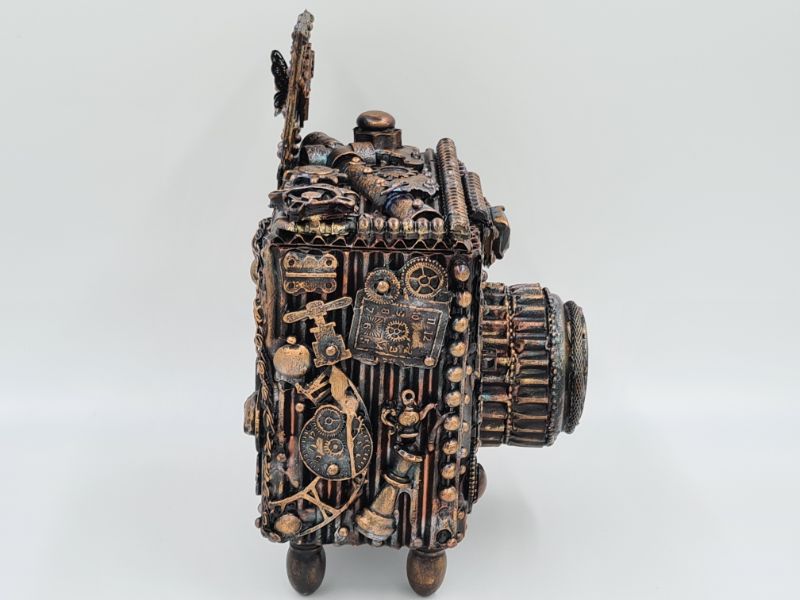
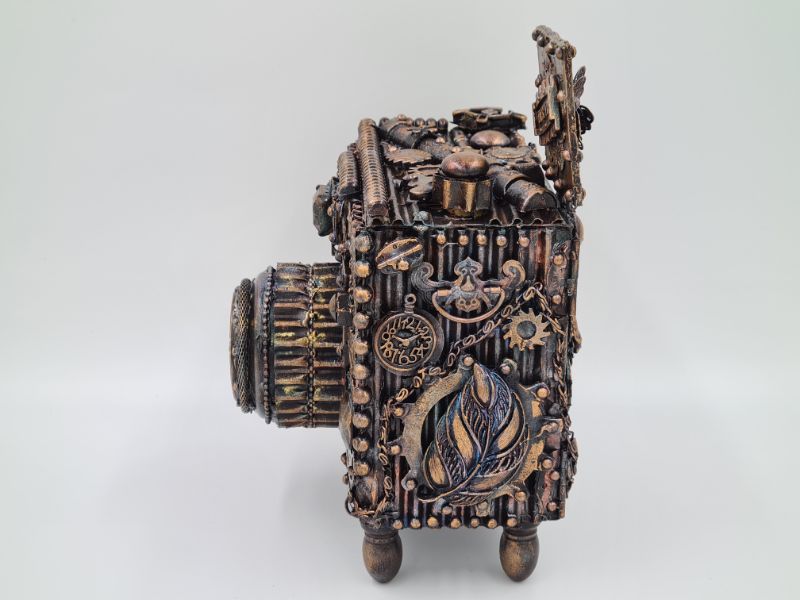
Close-ups of completed Steampunk Camera
Step back and admire your DIY Steampunk Prop Camera—a handcrafted, upcycled photography prop guaranteed to turn heads on your blog and social media feeds.

More Steampunk Projects
Pair it with other steampunk creations like my DIY Steampunk Mannequin. Explore all my mixed‑media creations here for inspiration.

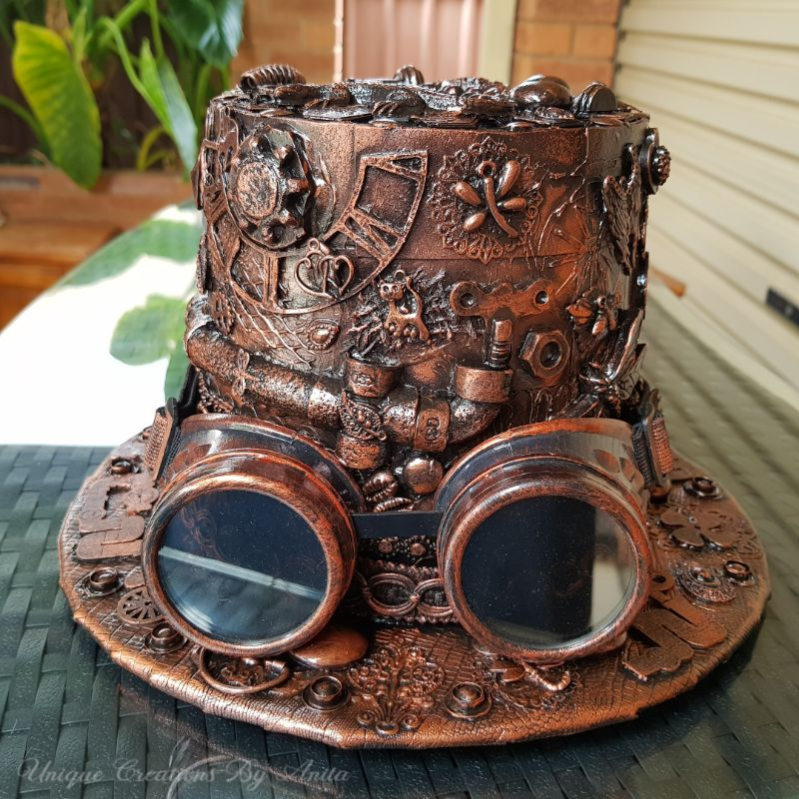
This steampunk hat was built from recycled materials and given a mixed-media makeover.

If you’re interested in any of the items used in this project, we’d appreciate it if you used our affiliate links. Clicking these links earns us a small commission at no extra cost to you, helping us create more inspiring and exciting projects to share. We’d also love to hear your thoughts—feel free to leave a comment or share this post!
52 Comments
Dee | Grammy's Grid
November 8, 2020 at 10:43 amOh my gosh, how unique!! When I saw it I thought it was a real camera with embellishments!! Thanks so much for linking up with me at my #UnlimitedMonthlyLinkParty 18, open until November 26. Shared.
creativejewishmomcom
November 8, 2020 at 9:44 pmWow, Anita this is really fantastic, truly a work of art! thanks so much for sharing on craft schooling Sunday, you have earned a feature!
Anita Holland
November 9, 2020 at 9:52 amThank you so much, I really do appreciate it. xx
Julie
November 9, 2020 at 7:04 amThis turned out really nice.
Anita Holland
November 9, 2020 at 9:58 amThank you so much Julie.
Marie-Interior Frugalista
November 9, 2020 at 10:47 amThere ya go again my Queen Of Steampunk friend. Oh my word, your steampunk camera is AMAZING! I’m so in awe of your creativity.
Anita Holland
November 9, 2020 at 11:08 pmAWW Thank you so much Marie, you always leave the nicest comments they make my day. xxx
Char
May 31, 2021 at 12:31 amI will NEVER make this bc I’m not that talented. But this is GORGEOUS! Your skills are amazing. I love it!
Anita Holland
June 1, 2021 at 1:44 pmThank you so much, you should not doubt yourself. I said the same until I tried it.
Anita Holland
November 11, 2020 at 1:53 pmThank you Marie, I was so happy with the way it turned out.
Libbie@alifeunfolding
November 9, 2020 at 10:42 pmYour work is gorgeous. You need to have a gallery show!
Anita Holland
November 11, 2020 at 1:53 pmThank you Libbie, that is such a lovely thing to say.
Janet
November 9, 2020 at 10:50 pmYour talent is so inspiring and you are so creative! Pinning this one…
Anita Holland
November 11, 2020 at 1:54 pmThank you Janet, I had no idea if this was going to work but turned out great in the end.
Sara
November 9, 2020 at 11:11 pmBrilliant; I love your steampunk creations!
Michelle Leslie
November 9, 2020 at 11:41 pmYou are just brilliant Anita. Goodness, if you didn’t share the step-by-step pics I would have sworn you steampunki-fied a real old camera. So very clever
Christy @ Our Southern Home
November 9, 2020 at 11:50 pmWow! I am amazed at your creativity and crafting skills!!
Anita Holland
November 11, 2020 at 1:56 pmThank you so much, I was never the brightest star in the sky so I had to be given another talent. lol
Vicki and Jenn
November 10, 2020 at 12:00 amYou are a true artisan. We love this steampunk camera. Thanks so much for sharing your process!
Anita Holland
November 11, 2020 at 1:56 pmThank you so much for the great compliment.
Jenna
November 10, 2020 at 12:22 amSuper creative! It caught me eye right away and I had to see how you made it, wow sooooo cool!!!
Anita Holland
November 11, 2020 at 1:57 pmThank you so much, it is a little different.
Sherry
November 10, 2020 at 4:12 amWhat a clever idea! I love it.
Anita Holland
November 11, 2020 at 1:57 pmThank you so much Sherry.
Meegan
November 10, 2020 at 6:29 amWow, just WOW! I love how your creative juices flow. From the cardboard to the can, to the embellishments. You have created something that others just dream about. SO very impressive, Anita.
Anita Holland
November 11, 2020 at 1:58 pmThank you so much Meegan, it is a real challenge to try and create out of recycling but so rewarding when it works out.
Marty Walden
November 10, 2020 at 12:57 pmThis is incredibly impressive! You always have such unique ideas. Great job!
Anita Holland
November 11, 2020 at 1:59 pmThank you Marty, that is a super compliment when means a lot.
Kim Purvis
November 11, 2020 at 4:49 amI love your clever ways of making things from scratch! Love it! Great job and such a cool idea.
Kim
Anita Holland
November 11, 2020 at 1:59 pmThank you Kim, I love the challenge of creating something pretty from rubbish.
Cristele
November 11, 2020 at 5:47 amAnita, I am Cristele, stopping from the Over The Moon Link Party. I love your antique DIY camera. At first glance I thought, WOW where did you find this rustic antique camera, then continued reading and was amazed. Well done!
Anita Holland
November 11, 2020 at 2:00 pmThank you so much for stopping by and leaving an awesome comment.
ROBIN LAMONTE
November 12, 2020 at 12:45 amAnita,
What a GREAT DIY project!
You are so talented and I love all the details on this camera!
Anita Holland
November 13, 2020 at 7:01 pmThank you so much robin, it was so much fun to create.
Kristi @ Chatfield Court
November 12, 2020 at 6:06 pmSo cool and so creative, as always!
Anita Holland
November 13, 2020 at 7:01 pmThank you Kristi, that is so nice of you to say.
Portia Olaughlin
November 13, 2020 at 2:48 pmThat is seriously amazing! I can’t believe it’s cardboard.
Anita Holland
November 13, 2020 at 7:02 pmThank you so much, I had no idea it would turn out so well.
rosemary palmer
November 15, 2020 at 11:53 pmYou create Art. Not just a DIY project – so gorgeous.
April J Harris
November 16, 2020 at 2:48 amMy goodness, what an amazing project! Your steampunk camera is really lovely, Anita! Thank you for sharing and for being a part of the Hearth and Soul Link Party community.
Anita Holland
November 19, 2020 at 4:00 pmThank you so much April
Naush Samama
November 17, 2020 at 9:49 amI love upcycle crafts and completely love how your used cardboard and a can for the body of your project. Stunning !!
Thank you for sharing with us at Meraki Link Party.
Much love
Naush
Anita Holland
November 19, 2020 at 4:03 pmThank you so much Naush, it turned out better than I had hoped.
Anita Holland
November 19, 2020 at 4:04 pmThank you so much, Michele, I really do appreciate the feature.
Sew Crafty Crochet
November 22, 2020 at 9:26 amI love this unique camera! I featured it at this week’s Snickerdoodle Create Bake Make Link Party! I just love all your steampunk creations!!
Anita Holland
November 23, 2020 at 10:09 amThank you so much for the comment and feature.
Dee | Grammy's Grid
November 27, 2020 at 2:31 amCONGRATS! Your post is FEATURED at my #UnlimitedMonthlyLinkParty 19, open until December 26 at 12:05 am.
Anita Holland
November 28, 2020 at 11:26 amThank you so much Dee, I really do appreciate the honour.
Linda
December 1, 2020 at 1:25 pmLOVE, LOVE, LOVE your art. I bought used stilettos and will give it a try at some point. ( Stiletto Ring Holder )
Anita Holland
December 2, 2020 at 3:24 pmThank you so much Linda, I have not been doing it that long but it is very addictive once you get hooked. Good luck with the stilettos and I would love to see how you go. If I can help in any way please let me know.
Nelda Putek
December 12, 2020 at 12:51 pmThank you so much for giving me your website. I am in awe of your talent. I will definitely looking for more of your posts. I’ve already subscribed. can’t wait to begin my steampunk DIY journey. Thanks Nelda
Anita Holland
December 16, 2020 at 1:18 amThank you so much Nelda that is a Fantastic Comment, and thank you for subscribing.