
If you follow my blog, you’ll know I love creating projects from recycled materials, and this time I’m sharing a DIY Upcycled Aluminium Can Wall Hanging that transforms empty Pepsi Max cans into embossed metal panel art. By using an embossing folder, pop rivets and a simple wooden frame, you’ll end up with a striking, interchangeable wall display that you can rearrange whenever you fancy a fresh look.

I’m thrilled to be taking part in this week’s International Bloggers Club (IBC) challenge, themed “I Can Upcycle,” where we’ll be transforming ordinary cans into something extraordinary. Stay tuned for more about IBC at the end of this post!

Before we dive into this tutorial, be sure to subscribe to my bimonthly newsletter to be the first to see my latest projects. You can also follow me on Pinterest and Facebook, where I also include my unique mixed-media art projects
DIY Upcycled Aluminium Can Wall Hanging: Embossed Metal Panel Art
**This post may contain affiliate links. This means I earn a small commission on links used at no extra cost to you. Please see my disclosure policy for more information.**
Materials Needed
- Empty aluminium cans (standard and “mother” size)
- Embossing folder ( your Choice)
- Embossing machine (or rolling pin/primitive method)
- Plywood boards cut to: 1×690 × 120 mm, 2×690 × 80 mm, 4×140 × 140 mm
- Stanley knife, scissors, cutting mat, ruler
- Pop rivet gun and small pop rivets
- Black matte spray paint
- Copper and silver wax paste
- Clear spray polyurethane
- Wood strips (20 mm×10 mm) for the frame
- Wood glue and nail gun, or clamps
- Protective gloves and eyewear
Cutting the Aluminium Cans

Wearing gloves, use a Stanley knife to puncture the top of each can and slide in scissors to remove the lid.

Rinse and dry the can, then cut vertically along the text line to get two clean edges.

Finally, trim off the base with scissors to create a flat sheet.

This was not enough cans for my project because I kept changing my mind, so you will need more.

Trimming Edges for Uniform Panels
Place the cut sheets on a cutting mat, align a ruler along one long edge and trim with a Stanley knife for consistency.

Repeat on the opposite side so every panel measures the same width, which makes alignment on the plywood straightforward.

Embossing the Metal Sheets
Position each aluminium sheet in the embossing folder, silver side up, keeping orientation consistent for a uniform pattern. Roll through an embossing machine; if you don’t have one, press with a rolling pin or carefully stand on the folder on a clean surface.

Trim any excess around the embossed design for future use.

Attaching Sheets to Plywood Bases
Before I added the cans to the wood, I did a test run first and found that plywood worked better. It was softer than wood, which allowed the pop rivets to embed into the back of the wood. You can glue the cans into place if you don’t want to add pop rivets. I cut the plywood to the following sizes.
- 1 x 690mm x 120mm
- 2 x 690mm x 80mm
- 4 x 140mm x 140mm

Arrange a sheet on each plywood panel, drill through both layers at the corners, and secure with small pop rivets. The rivets will embed into the softer plywood. Trim any overhang with scissors to achieve neat edges.

I opted for the smallest pop rivets available, as they’re much easier to install.

As I set each pop rivet, it pulled itself firmly into the back of the timber, securing the panels in place. Work your way across, aligning the embossed patterns as you go for a seamless look. I did have to trim a few panels with scissors for a perfect fit—note to self: always slide a scrap piece of wood under your work to protect the table (lucky this was my workshop bench!).

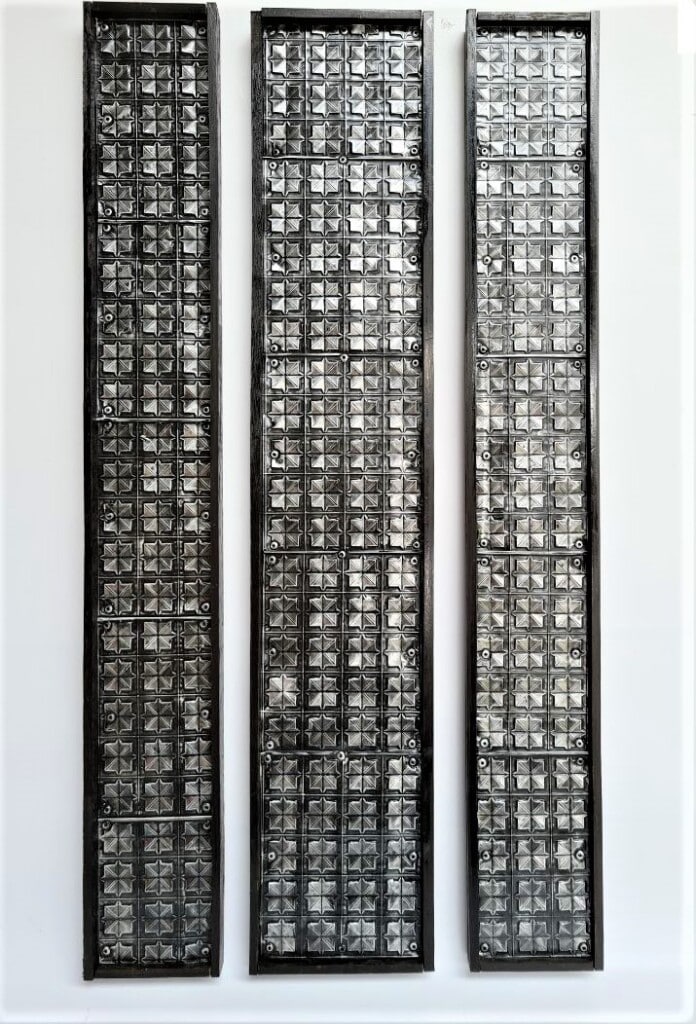
Once all the panels are fixed to the wood, your project should look like the image below.

Painting and Wax Finishing

Spray two even coats of black matte paint over each panel, allowing full drying between coats.

Use copper and silver wax paste to highlight raised sections.

Dip your fingertip and gently rub over the embossing, leaving some black exposed. Let the wax cure for 12 hours.

If you don’t have wax paste on hand, you might already have the ingredients to make your own—give this simple recipe a go.

Sealing and Protecting
Apply two coats of clear spray polyurethane over the waxed panels to prevent dulling over time. Hold the can about 20 cm away and spray in light, even strokes.

Here’s the back view, showing the pop rivets pulled into the plywood.

This is where I originally stopped, but when I reviewed the photos, the panels looked unfinished.

Building and Attaching the Frame
Cut wood strips to frame the assembled panels, paint them black, then glue and nail (or clamp) them into place.

The simple black frame gives the wall hanging a finished look.


Displaying Your Wall Hanging
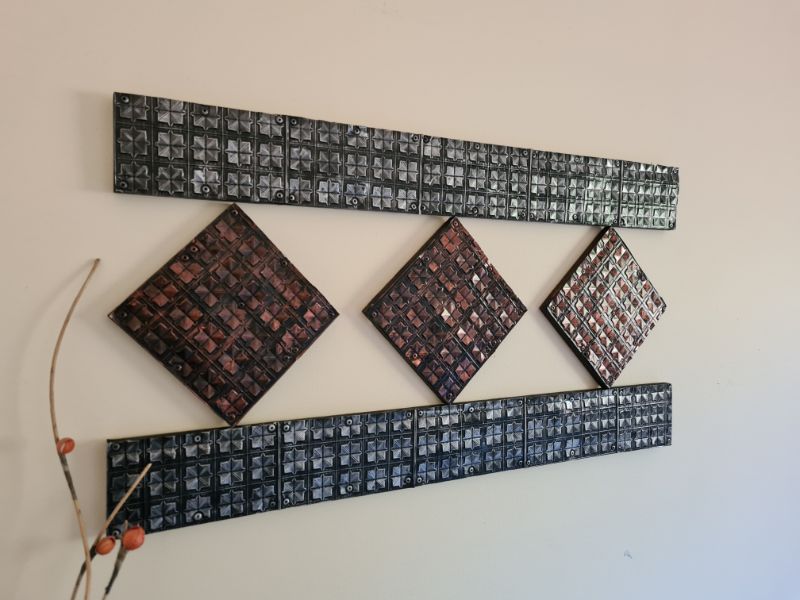
Mix and match the panel sizes on your wall to create dynamic layouts—horizontal, vertical or staggered. Use removable picture hooks or command strips to affix each panel securely.
Here are a few layout variations you can create.

More Aluminium Can Projects
This wasn’t my first aluminium-can art project—I’d already used the same embossing and riveting technique to build a steampunk mannequin.

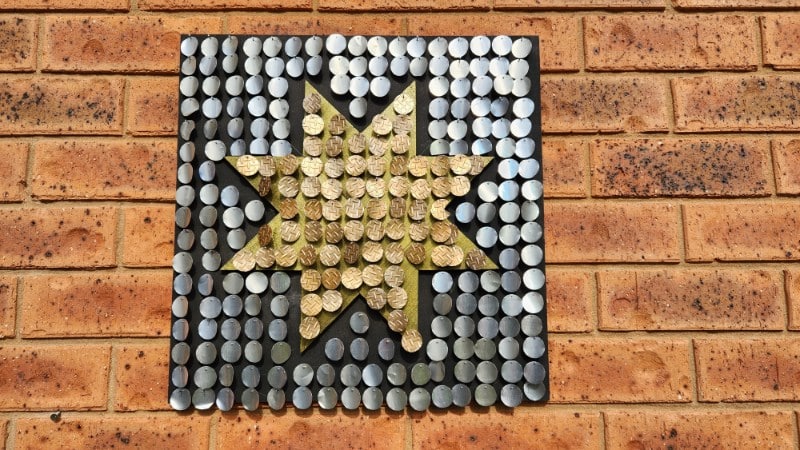
Another piece I made is this aluminium-can wall art, which shimmers and gently jingles as it sways in the breeze.
More about IBC
If you follow my blog, you will know I am part of the IBC (International Bloggers Club), which is a group of talented bloggers from around the world. We have members from Spain, South Africa, Australia, the United States, and Canada. Each month, we come together and create a project with a common theme.
If you missed last month’s “Painted furniflips ” theme, here is the link to my Marilyn Monroe decoupage Dresser. The “I can upcycle” contributions from my fellow bloggers for this month’s challenge are listed below. Please feel free to jump over and give them some love.

- Me
- A Crafty Mix|Upcycled tin can pull toy llama
- Meegan Makes| Diy moss candle holders or vases made from tin cans
- Birdz of a feather |Can craft
- Interior Frugalista|Upcycled tin can wind chimes


If you’re interested in any of the items used in this project, we’d appreciate it if you used our affiliate links. Clicking these links earns us a small commission at no extra cost to you, helping us create more inspiring and exciting projects to share. We’d also love to hear your thoughts—feel free to leave a comment or share this post!
38 Comments
Sara
May 24, 2021 at 10:26 pmWow, this is so incredible Anita – (and your mannequin is beyond words)! I had no idea you could use an embossing folder without a machine. Since I’ve packed on more than the ‘Covid 15’, I’d have no problem standing on them to make an impression – lol! I have a feeling this is going to inspire a project or two of my own :).
Anita Holland
June 1, 2021 at 1:27 pmThank you so much Sara, I had no idea you had to have a machine so we are both wrong. lol Thank you for the great comment.
Michelle Leslie
May 24, 2021 at 11:31 pmStunning!!!!! Wow, I would never have imagined that tin cans could look so amazing on a wall. I can picture these hanging in one of those beautiful, industrial loft apartments in New York. So cool.
Anita Holland
June 1, 2021 at 1:28 pmThank you so much Michelle, I have a few more project in the pipeline for cans now. lol
Marie B.
May 24, 2021 at 11:54 pmWow, this is so impressive Anita! One would never know this incredible wall art is made with soda cans. Love the industrial vibe of these. Your mannequin is amazing too. I’m feeling very inspired to try my hand at embossing. So cool!
Anita Holland
June 1, 2021 at 1:30 pmThank you so much Marie, I do love the industrial look. I have ordered some new folder with different designs. Hopefully, they will turn out great too.
Maria
May 25, 2021 at 11:11 amYou have made such a gorgeous work of art, this is such a great recycle project.
Anita Holland
June 1, 2021 at 1:31 pmThank you Maria.
Deana Landers
May 25, 2021 at 11:56 amAnita, your works of are never cease to amaze me. You can do so many things. I always look forward to what you will do next! Great job, my friend 💙
Anita Holland
June 1, 2021 at 1:31 pmThank you Deanna, that is such a great compliment. I do like to try new projects every time so there will be more to come.
Linda Johnston
May 25, 2021 at 12:09 pmwhat a fun project with a wonderful outcome!
Anita Holland
June 1, 2021 at 1:32 pmThank you so much Linda.
Nancy Sargent
May 26, 2021 at 1:13 amWow! This is so cool! I love textures of all kinds and this embossed tin cans is just the coolest thing ever. I especially love the copper accents you added! I had no idea you could do something like this and all the different molds available! I love it!
Anita Holland
June 1, 2021 at 1:32 pmThank you so much Nancy, I had no idea either it was just something I tried and it worked.
Meegan
May 26, 2021 at 1:52 pmAbsolutely impressive, my friend! From the embossed cans, to the mannequin, to the wall art-I love it all. I never thought of embossing the cans. Dang-it looks SO good. You are so talented.
Anita Holland
June 1, 2021 at 1:33 pmThank you Meegan, it was so easy to do. I just added the pop rivets which made more work for me.
Sylvie Racette
May 27, 2021 at 4:35 amWowww Super Work!!!! Sorry i’m french. You are so talented. If i receveid some things from you i’m wow so happy . Have a nice day Thank you!!!
Anita Holland
June 1, 2021 at 1:36 pmThank you so much for the great comment.
MAB
May 27, 2021 at 5:09 amI can’t say that I would be interested in using this idea for a wall hanging, but I would be interested in using the ebossed cans as an outdoor kitchen backsplash.
Anita Holland
June 1, 2021 at 1:37 pmThank you so much for the lovely comment, I am happy to offer some inspiration.
Missy
May 27, 2021 at 11:29 amI was thinking of doing something like that for a backsplash. Love it.🤗💖
Anita Holland
June 1, 2021 at 1:38 pmI am not sure this will hold up as a backsplash because the can is very soft. I think cleaning them too hard will push out the design.
Michelle
May 28, 2021 at 4:13 amOMG! This is absolutely fabulous! And I love the steampunk mannequin even if the embossing was less consistent. You are so darn talented, Anita!
Michelle
https://mybijoulifeonline.com
Anita Holland
June 1, 2021 at 1:39 pmThank you so much Michelle, your comment has made my day.
Margie Bramer
May 28, 2021 at 10:16 amVery chic!! It looks like an expensive art installation!
Anita Holland
June 1, 2021 at 1:45 pmThank you so much, your comment has made my day. I am trying to get the mannequin into a gallery.
Debbie-Dabble
May 31, 2021 at 7:30 amWOW!! What a truly amazing work of art!! You are so talented and imaginative!! Simply amazing!!
Thanks so much for stopping by!!
Hugs,
Deb
Anita Holland
June 1, 2021 at 1:47 pmThank you so much Debbie, My husband always thinks I am mad when I tell him what I am going to be making. He can only appriciate the results. lol
Allyson
June 1, 2021 at 1:16 amYour recycled wall art looks AMAZING! It’s interesting to see how drink cans can be used to make incredible art like yours.
Julie
June 6, 2021 at 11:31 pmwowza! What a stunning upcycle. So clever and inventive.
Anita Holland
June 7, 2021 at 9:08 amThank you so much Julie.
Melynda Brown
June 7, 2021 at 9:22 amThis is my personal favorite from last week’s Funtastic Friday, also pinned to the FF board! Thanks for sharing great such great content! Stop by and see what’s new, thanks again Melynda@ScratchMadeFood!
Anita Holland
June 7, 2021 at 11:43 pmThank you so much for the great comment.
Anita Holland
June 13, 2021 at 1:56 pmThank you so much for the awesome compliment.
Kim Patterson
November 24, 2021 at 1:11 amAm totally inspired by your work and interested in trying something similar. I am very taken with the embossed pattern. Do you know if it is still available? All the folders I find seem to be too floral and swirly – or very Christmas-themed. I love yours and want something geometric.
Anita Holland
November 24, 2021 at 6:20 pmThanks So much, I just tried to find it in google images but there are so many to go through. It was so long ago that I bought it so I don’t even know the description. I even tried a reverse image search. I have a feeling it was under geometric backgrounds because that is my usual search.
DIY Upcycled Tin Can Pull Toy Llama - A Crafty Mix
September 6, 2024 at 3:54 pm[…] wall decor From Anita. Gosh, I never knew tin cans could look so […]
Aluminium Can covered Steampunk Mannequin -
March 30, 2025 at 8:44 pm[…] I also made a mistake with the embossing. I could only see the silver side clearly, the other side was hard to see due to all the colour printing on the can. Due to this issue, I chose the wrong side and my embossing was reversed. You can see from the image below the difference between hand (above) and machine embossing (below). As you can see it is worth buying an embossing machine, and they are not very expensive. I used the excess embossed cans to create this wall hanging. […]