
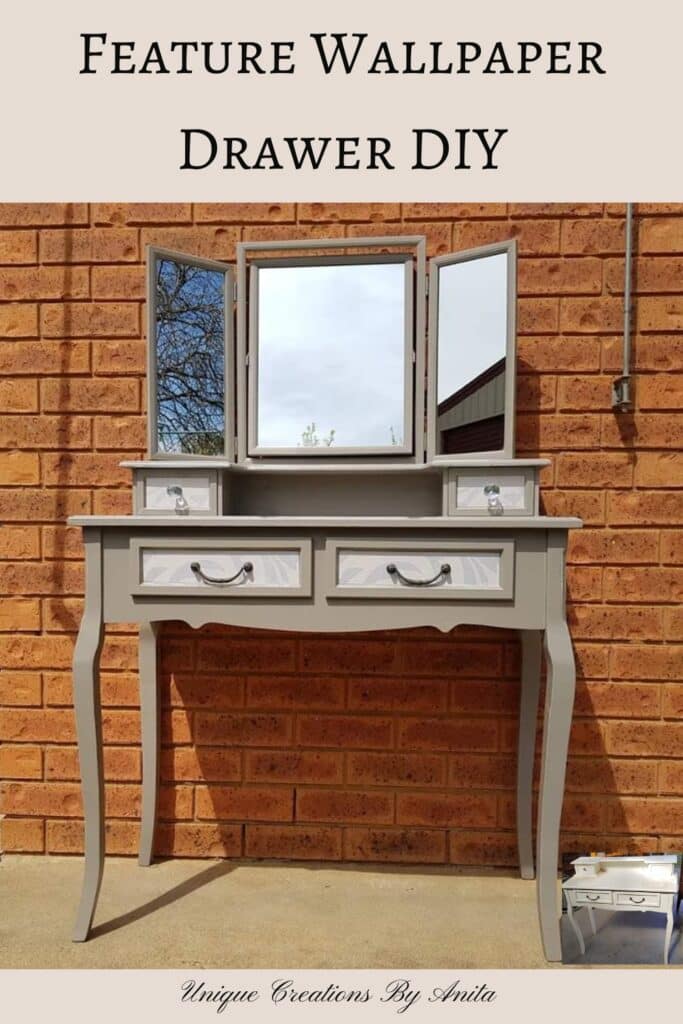
Transforming a tired piece of furniture into something beautiful can be highly rewarding, and that’s exactly what inspired our DIY Chalk Paint Vanity Makeover with Wallpaper Drawer Accents. A friend asked me to breathe new life into a small vanity that was missing its mirror and had a broken drawer knob.
With leftover chalk paint from a recent Barn Quilt Headboard project and a scrap of wallpaper, this quick update delivers style on a budget.

Before we dive into this tutorial, be sure to subscribe to my bimonthly newsletter to be the first to see my latest projects. You can also follow me on Pinterest and Facebook, where I also include my unique mixed-media art projects.
DIY Chalk Paint Vanity Makeover with Wallpaper Drawer Accents
**This post may contain affiliate links. This means I earn a small commission on links used at no extra cost to you. Please see my disclosure policy for more information.**
Materials Needed
- Small vanity (cleaned and repaired)
- Orbital sander and discs 120‑grit sandpaper
- Annie Sloan French Linen chalk paint (or similar)
- FIFO bottles (optional, for paint storage)
- Chalk‑paint brush
- 3M scouring pads
- Wood filler and scraper
- Water‑based polyurethane sealer
- Wallpaper or decoupage paper
- Mod Podge or clear‑drying adhesive
- Glass knobs (×2) or DIY resin knobs
- Screwdriver
1. Preparing the Vanity for Paint
Start by cleaning the entire vanity surface with warm, soapy water and a scourer to remove makeup stains and grease. Once dry, lightly sand the lacquered finish with 120-grit sandpaper.

This creates a rough surface for the chalk paint to adhere to. Fill any old mirror‑mount holes or dings with wood filler, then sand smooth once dry.

You can repeat the same prep work on all the vanity drawers.

2. Painting the Vanity
Pour your chalk paint into FIFO bottles to prevent rusting in the can. Apply the first coat with a quality chalk‑paint brush—brushstrokes are normal at this stage.

After it dries, lightly buff with a 3M scouring pad for a silky finish before applying a second coat. Wipe away dust between coats for an ultra‑smooth surface.

3. Sealing the Paint
Once the final coat is dry, seal the vanity with two thin layers of water‑based polyurethane. Allow each layer to cure fully before the next for optimal durability and easy cleaning.
4. Applying Wallpaper to the Drawers
Measure each drawer recess and cut wallpaper to size.

Use Mod Podge to adhere the paper—apply one coat beneath, position the paper, let it dry, then brush a second coat on top for protection.

Trim any excess and smooth edges with a craft knife for crisp lines.

5. Reattaching and Upgrading Knobs
Re‑screw the original handle on one drawer. For the drawer that was missing a knob, replace both handles with matching glass knobs. Alternatively, craft your resin knobs using epoxy resin and a mould.
6. Painting or Fitting the Mirror
Locate a thrifted mirror to suit your vanity. After dusting, paint the frame with two coats of chalk paint, lightly sanding between coats if desired. This mirror isn’t fixed, so it can simply sit atop the vanity or be wall‑mounted for extra stability.
")
7. Final Reveal
Step back and admire your revitalised piece: a small vanity given fresh life with chalk paint and a chic wallpaper feature.
")
When reviewing my photos, I realised I’d forgotten to fill the old mirror‑mount holes, so I went back, filled them and touched up the paint.
")
")
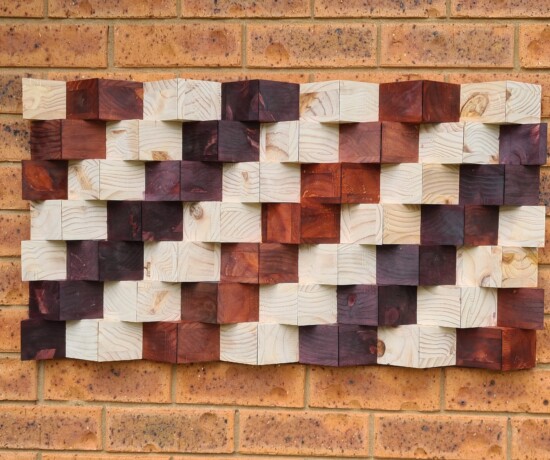
More furniture makeover ideas
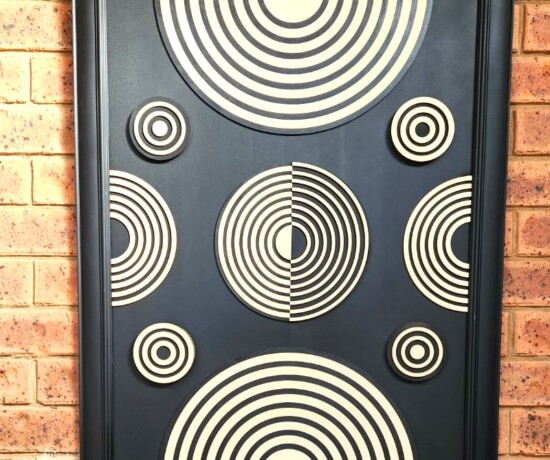
This old dresser was destined for the tip until I gave it a geometric makeover.

If painted furniture isn’t your style, these tips will show you how to restore a dresser to its former glory. You can find more of my furniture makeovers here.


If you’d like to find any of the items used in this project, we’d greatly appreciate it if you used our affiliate links. These links provide us with a small commission at no extra cost to you, allowing us to continue creating and sharing more inspiring projects. We’d also love to hear your thoughts—feel free to leave a comment or share this post!
34 Comments
Michelle Leslie
May 17, 2021 at 9:15 pmYour friend must be so impressed with her vanity makeover. So gorgeous especially with the wallpaper detail on the drawers. And I love your tip on using 3m scouring pads. We buy them in bulk at the China Mall so I have loads to play with 😉
Anita Holland
May 20, 2021 at 9:00 amThanks Michelle, I love using them. The very fine ones are great for your last sand before the final coat.
Sara
May 17, 2021 at 9:47 pmBeautiful makeover! I’ve yet to use chalk paint; is there a particular brand you prefer? I love those 3M pads and never thought to use them in this way so thanks for that tip; I’ll definitely keep that in mind when I try chalk paint!
Anita Holland
May 20, 2021 at 9:00 amThanks Sara, It was the only brand I had heard of. lol
Rosemary Palmer
May 17, 2021 at 9:56 pmIt’s always amazing what a little paint can do – then the touch of wallpaper, you didn’t even have to change the hardware. Great makeover.
Anita Holland
May 20, 2021 at 9:01 amThank you Rosemary
Linda Johnston
May 18, 2021 at 12:40 amThis is beautiful! Well done.
Anita Holland
May 20, 2021 at 9:01 amThank you Linda!
Nancy Sargent
May 18, 2021 at 1:20 amWhat a difference! I love the wallpaper and the crystal knobs!
Anita Holland
May 20, 2021 at 9:01 amThank you so much.
Susan M.
May 18, 2021 at 1:30 amI love how you used the wallpaper in the recessed parts of this vanity! I’m going to have to remember that for some of the projects I’m working on!
Anita Holland
May 20, 2021 at 9:01 amThanks Susan, I cheap and easy makeover.
Maria
May 18, 2021 at 2:09 amWow what a beautiful piece not that you added the wallpaper and paint.
Anita Holland
May 20, 2021 at 9:02 amThank you so much Maria.
Sue
May 18, 2021 at 3:08 amSuch a beautiful makeover! I love how it turned out!
Anita Holland
May 20, 2021 at 9:02 amThank you, it has a few more years left now.
Meegan
May 18, 2021 at 9:48 pmThe recessed drawers are a perfect spot for the wallpaper. It adds so much detail. And I love me some crystal drawer pulls! I never thought of using the 3M pads! So smart. Thanks Anita.
Anita Holland
May 20, 2021 at 9:02 amThanks Meegan
Karen the next best thing to mummy
May 19, 2021 at 9:23 pmLovely make over, chalk paint is great, isn’t it?#alittebitofeverything@-karendennis
Anita Holland
May 20, 2021 at 9:05 amThank you so much.
Renee Open
May 20, 2021 at 1:06 amWOW! Both pieces are beautiful! You did a fabulous job making them over. I really love the wallpaper idea – very cool.
Coming to you from the A Little Bit of Everything link party.
I hope you have a wonderful day <3
Anita Holland
May 20, 2021 at 8:59 amThank you
Marty Walden
May 21, 2021 at 2:21 amSo pretty! I adore transforming ordinary pieces with chalk paint. Great job!
Anita Holland
May 23, 2021 at 11:31 pmThank you Marty
creativejewishmom/sara
May 21, 2021 at 7:39 amGorgeous Anita, thanks for sharing on craft schooling sunday!
Anita Holland
May 23, 2021 at 11:32 pmThank you so much!
Rosie
May 21, 2021 at 10:16 pmWow how creative! What a fantastic job you’ve done x #AnythingGoes
Anita Holland
May 23, 2021 at 11:32 pmThank you Rosie!
Cecilia
May 23, 2021 at 9:27 amAnita, I love the wallpaper accents! Thanks for sharing at Vintage Charm–pinned!
Anita Holland
May 23, 2021 at 11:40 pmThank you so much, Cecelia.
Linda Hickey
May 24, 2021 at 7:57 pmLove your idea for this dresser. Love the painting technique.
Anita Holland
May 24, 2021 at 10:52 pmThank you so much Linda.
Carol
May 28, 2021 at 1:04 amWhat a gorgeous piece! Featuring when my link party opens up tonight!
Anita Holland
June 1, 2021 at 1:38 pmThank you so much for the feature Carol, I really do appreciate it.