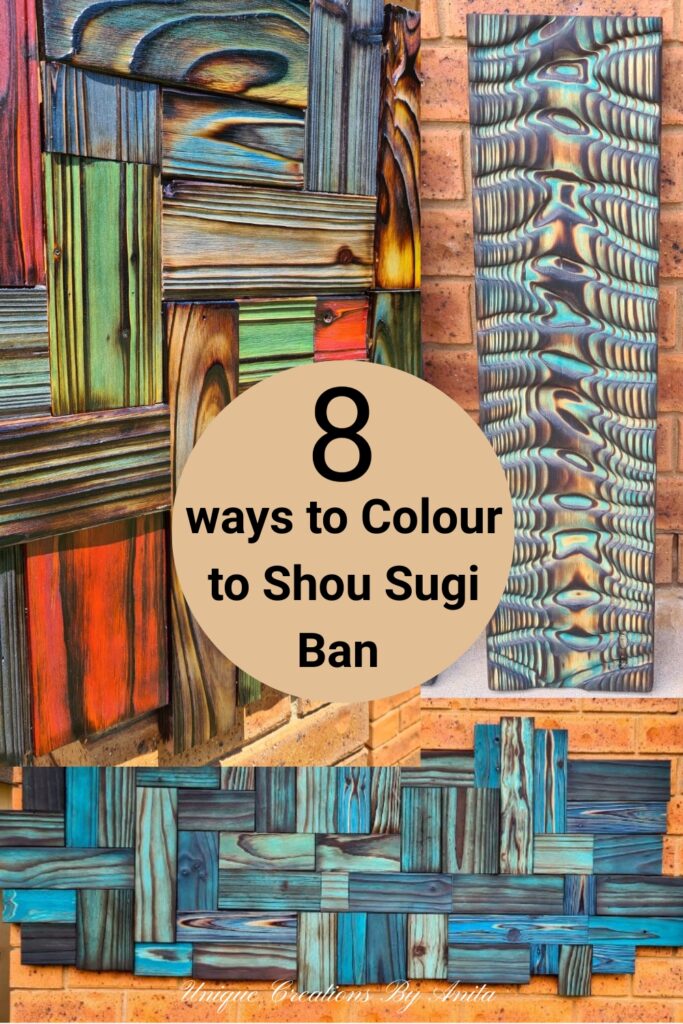
A few months ago, I shared a Shou Sugi Ban wall hanging, and the response was huge. So many people asked how the colours were achieved. In this tutorial, Colouring Shou Sugi Ban: 8 Tested Ways to Add Vibrant Colour to Burnt Timber, you’ll see exactly how to prepare the wood, apply colour without blotches, and seal it so the grain glows. I also compare different products side by side, so you can pick the look you love.
When I posted the Shou Sugi Ban wall hanging, I mentioned the products I used, but there’s more to the story. The process isn’t as simple as adding a particular paint colour. A few factors affect the final colour—how it’s applied, how the wood is prepped, and how it’s sealed. I’m no expert on colouring Shou Sugi Ban, but I’m happy to share the products I used and how I used them.
How to add colour to Shou Sugi Ban
**This post may contain affiliate links. This means I earn a small commission on links used at no extra cost to you. Please see my disclosure policy for more information.*
Materials You’ll Need
- Shou Sugi Ban panels (already burnt and sanded)
- Spray bottle with clean water
- Soft sponges and foam brushes
- Lint-free cloths or old T-shirts (for wipe-back)
- Alcohol inks
- Acrylic paints
- Unicorn Spit stain & glaze
- Mica powder and pigment powder (assorted colours)
- Poster paint
- wood stains
How to prepare the wood
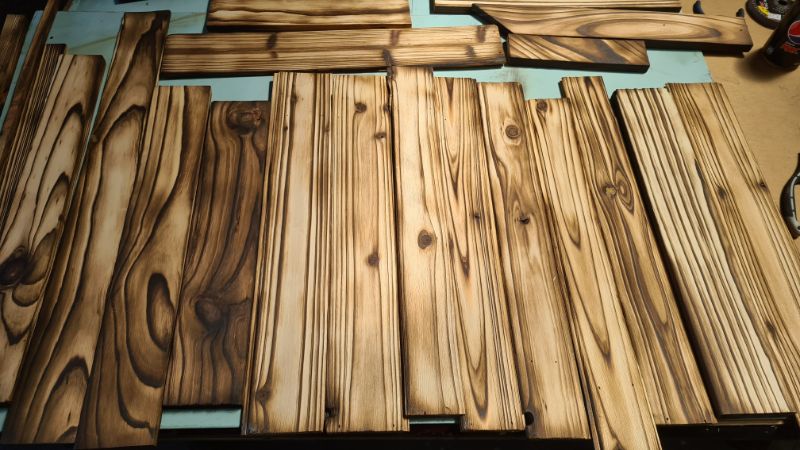
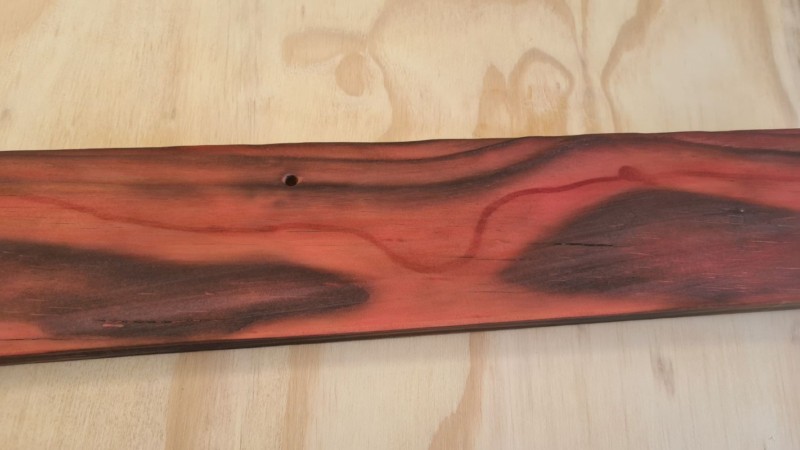
I am starting this step after the wood has already been burnt and sanded. Here is the tutorial if you missed it. The image below is how your wood should look after you have burnt and sanded it. The deeper you sand into the wood, the lighter the wood will become and the more vibrant the colour will be. I like to have a mixture of both light and dark wood in my wall hangings because the results are more dramatic.
On my first test, I just poured some Unicorn spit onto the surface and spread it around with a foam brush. Big Mistake!
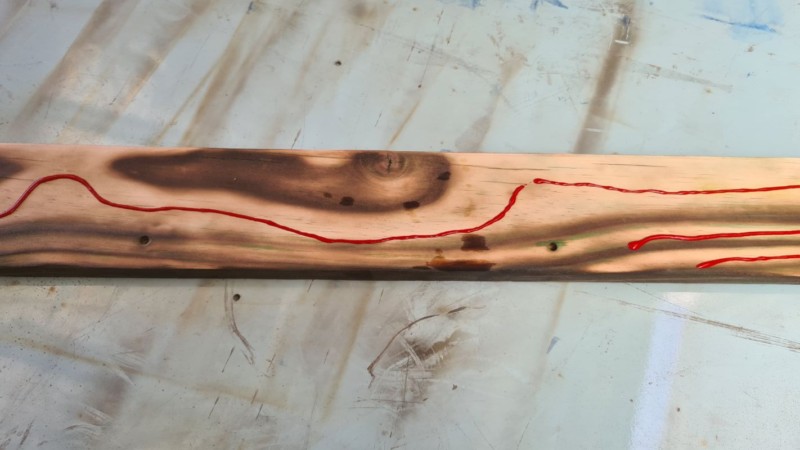
Even though I spread it straight away, the timber sucked in the pigment, and the first spot was grabbed. The blotch ruined the look, so I burnt and sanded it back.
Pre-wet the surface with a spray bottle. Mist until it’s evenly damp, then add the colour while it’s still wet.
Less is more with colour. Load a small amount of paint onto the sponge and glide it lightly over the surface, leaving some timber bare for contrast. The pre-wet surface lets the pigment travel. Let it sit for 3–5 minutes, then wipe it back with a dry cloth.

How you wipe the paint back changes the finish. Press harder in spots to lift more pigment and create a wider range of tones.
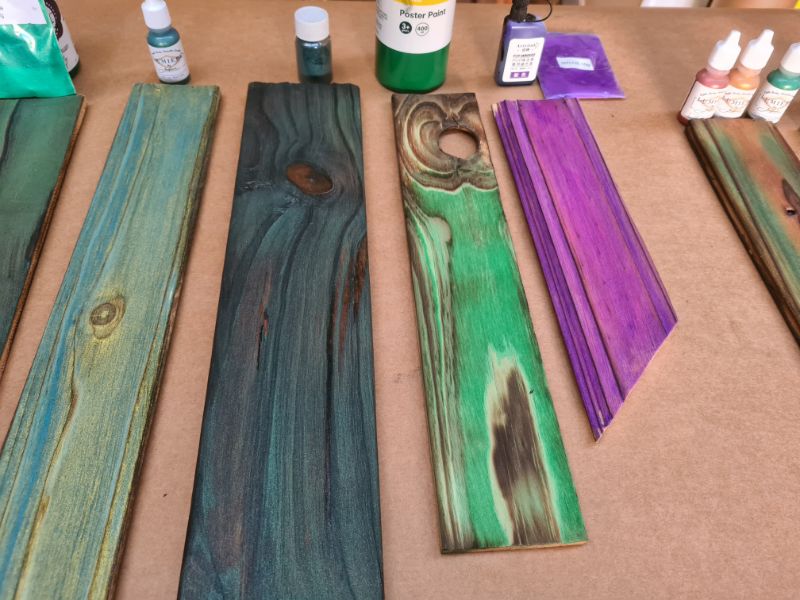
8 Ways to Colour Shou Sugi Ban (Side-by-Side Tests)
1) Alcohol Inks
I diluted a little ink in water and brushed it on with a foam sponge. The colours stayed vibrant and easy to control. Wipe-back gave soft transitions in the grain.
2) Acrylic Paint (Budget Tubes)
Cheap acrylic surprised me. The colours looked as bold as ink when thinned and applied to a pre-wetted surface. Great for value and range.
3) Unicorn SPiT Stain & Glaze
This gave stunning colour and was very easy to blend. It dries with a powdery cast, so you won’t see the true tone until you seal with an oil-based polyurethane or furniture oil. Once sealed, the colour pops. This was one of my top picks.
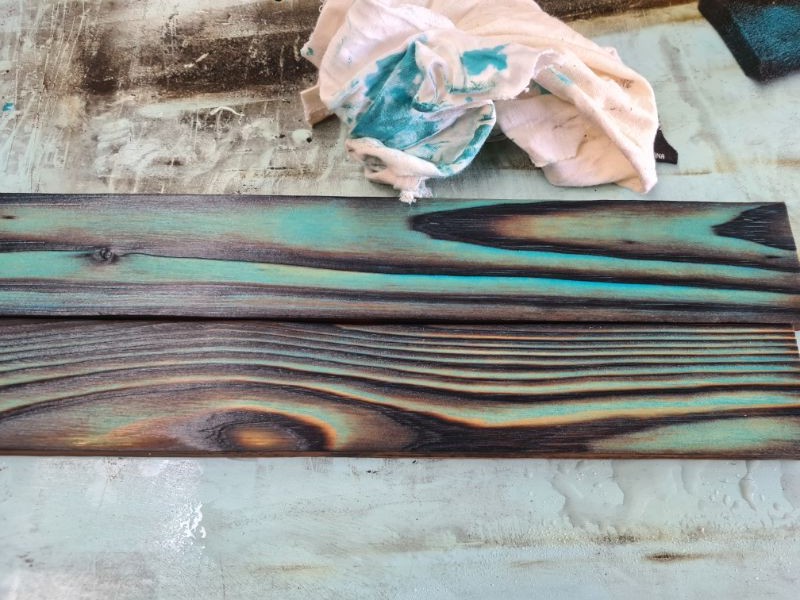
4) Unicorn SPiT + Mica Powder
I mixed a little mica for sparkle. The shimmer is subtle in photos but lovely in person. Once sealed, the sparkle shows through the grain.
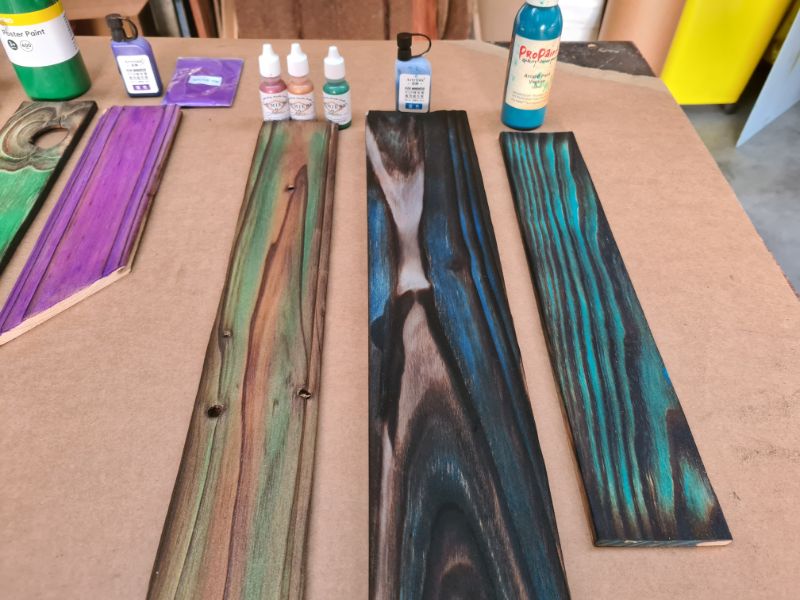
5) Metallic Acrylic Paints
These acted differently on burnt timber. The final colour is split into two tones, almost like a patina. It’s interesting, but don’t expect the bottle colour to match the board.
6) Pigment Powder
I mixed half a teaspoon in water and brushed it on. The strength depends on the amount of powder you use. My sample was bold and saturated with great wipe-back control.
7) Poster Paint
Use this if you want softer, chalky tones. Even after two coats, the colour stayed light. It’s forgiving and easy to adjust.
8) Alcohol Ink + Mica Powder
This combo gave luminous colour with a gentle sparkle. Species and burn depth affect the final look, so test first.
Plain Wood, Wood Stain, and the Magic of Sealer
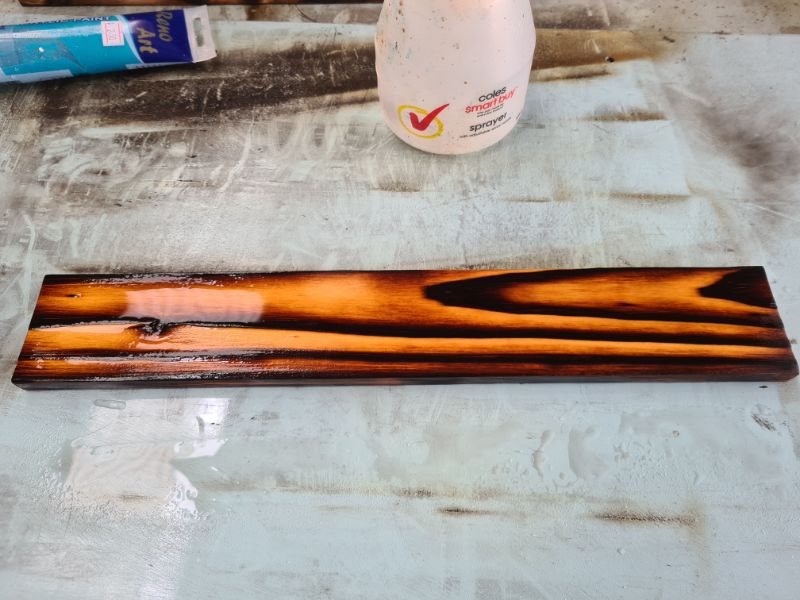
A plain burnt board can look a bit dull on camera, yet it can still make a striking project. Traditional wood stains looked flat until I added polyurethane.
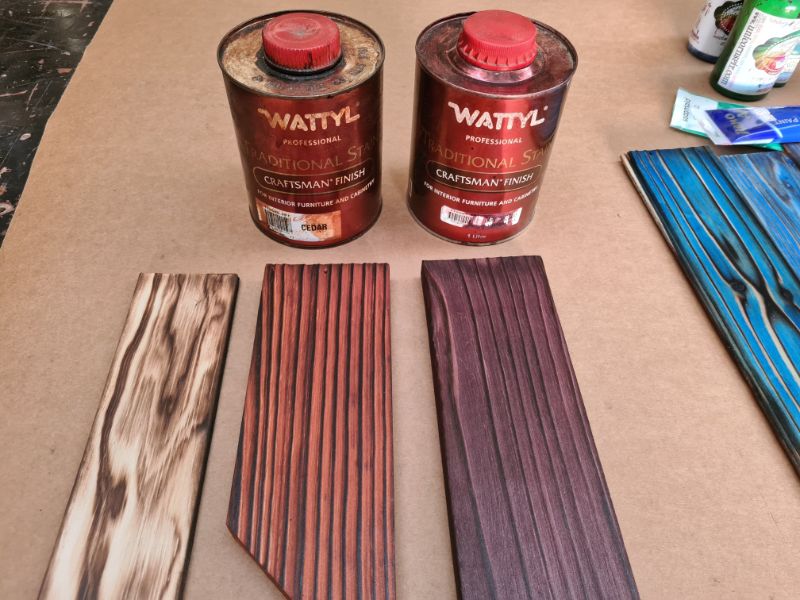
The moment you seal, colours wake up. Oil-based products deepen the grain and create that “wet look”.
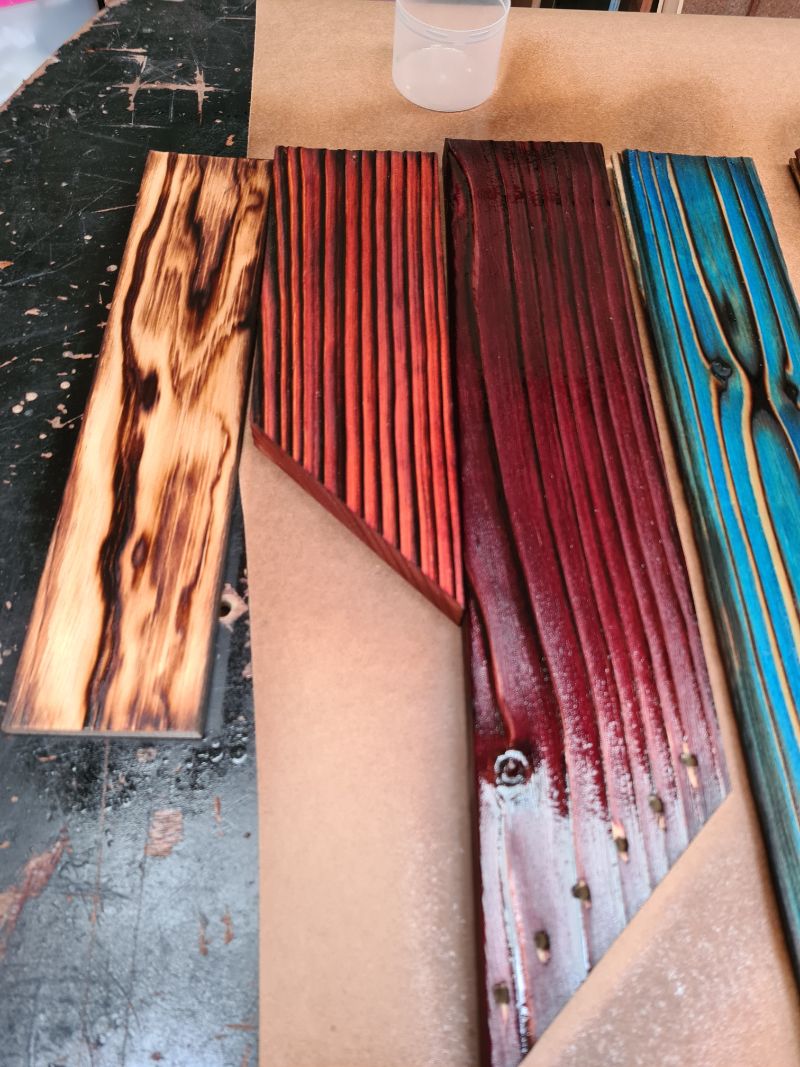
Combining Colours on One Board
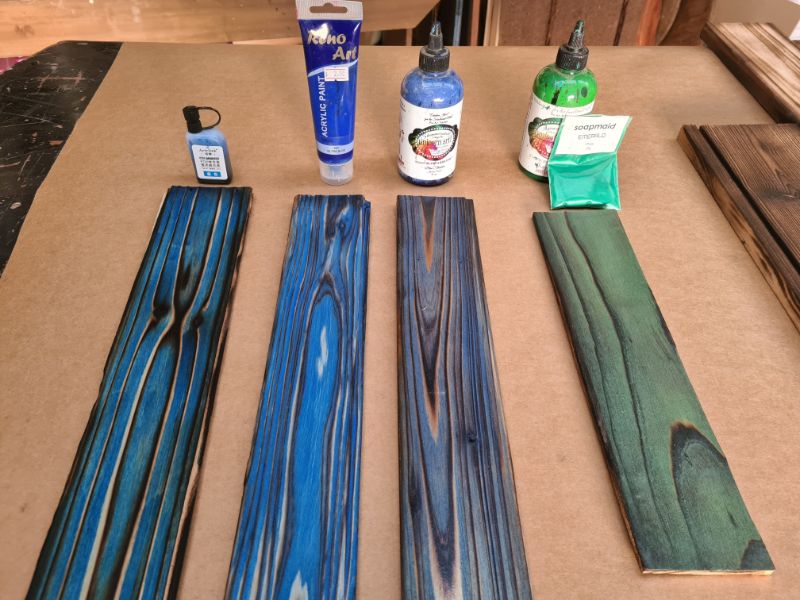
I placed tiny drops of several colours on the sponge and dragged it along the grain. The blend felt organic and gave me a beautiful variety from edge to edge. I also tried alcohol ink on pallet wood. The dramatic grain took colour brilliantly.

Here’s the blended result—interesting and full of varied colour across the board. Next, I tested alcohol ink on pallet wood (dark blue below). Using the same burn method, the effect was dramatic, and the grain looked incredible. The final sample in this image used another cheap acrylic paint.
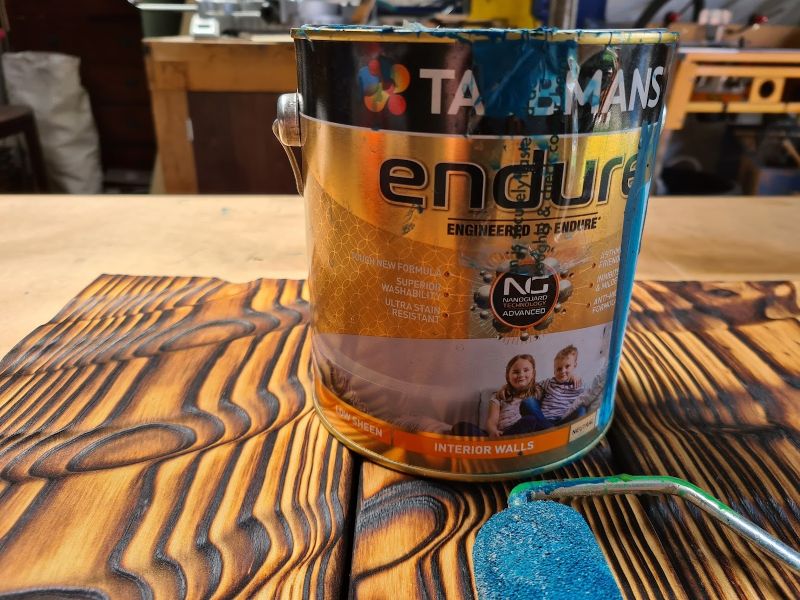
The Surprise Winner: Interior Wall Paint
My sister wanted her wall colour in a new hanging. I tested her interior wall paint on different timber offcuts. Each species took the same paint differently. I got a family of tones from one tin. It was an awesome, budget-friendly way to colour-match a room.
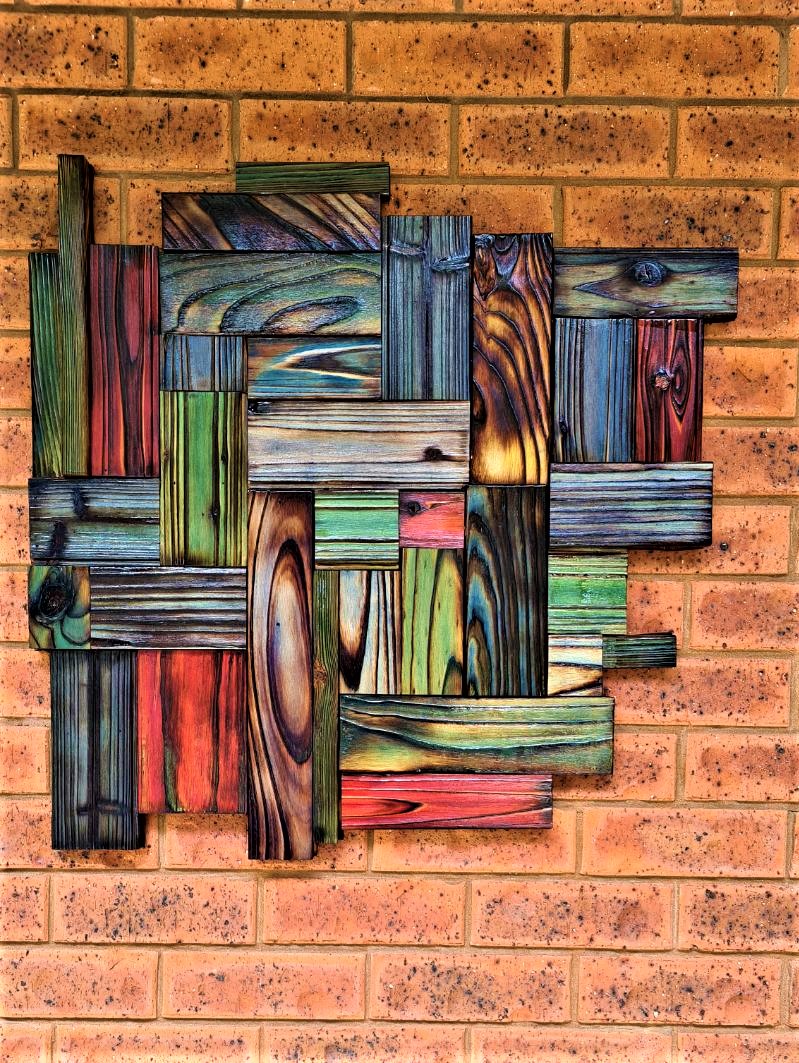
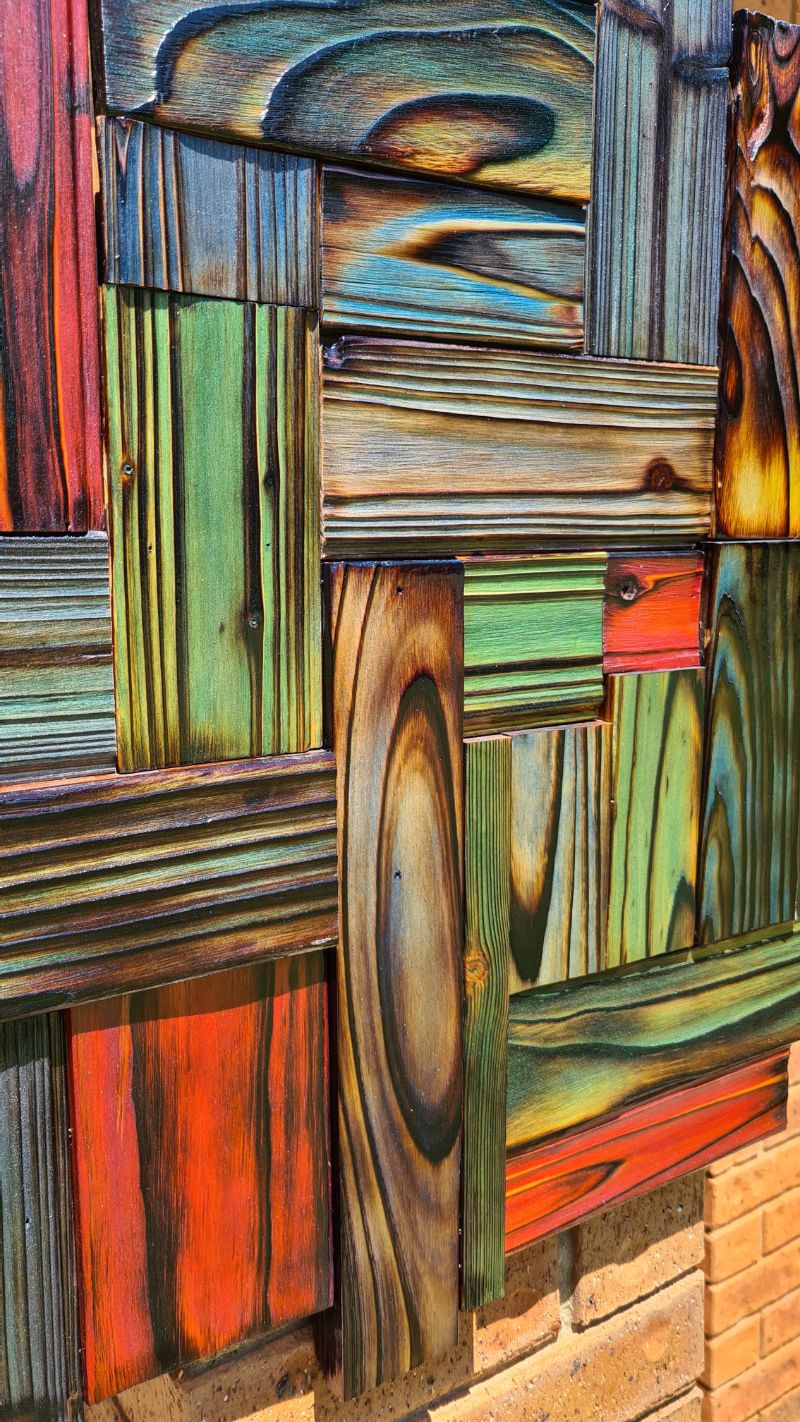
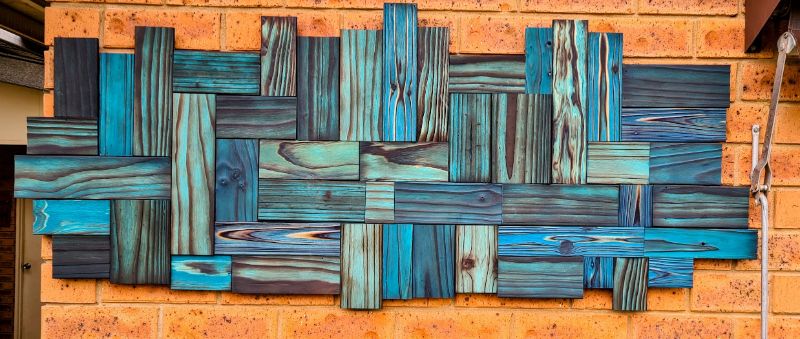
This wall hanging blends several timber species—mostly pine, knotty pine wall panelling, pallet wood, and a few mystery offcuts. I applied the same colour mix with the same pre-wet and wipe-back method to every piece, yet each board reacted differently, creating a rich spectrum of tones from a single formula. That’s the magic of Shou Sugi Ban: species, grain density, and burn depth all shift the final hue. If I’ve missed anything you’re curious about, please ask in the comments.
More shou sugi ban project ideas for you
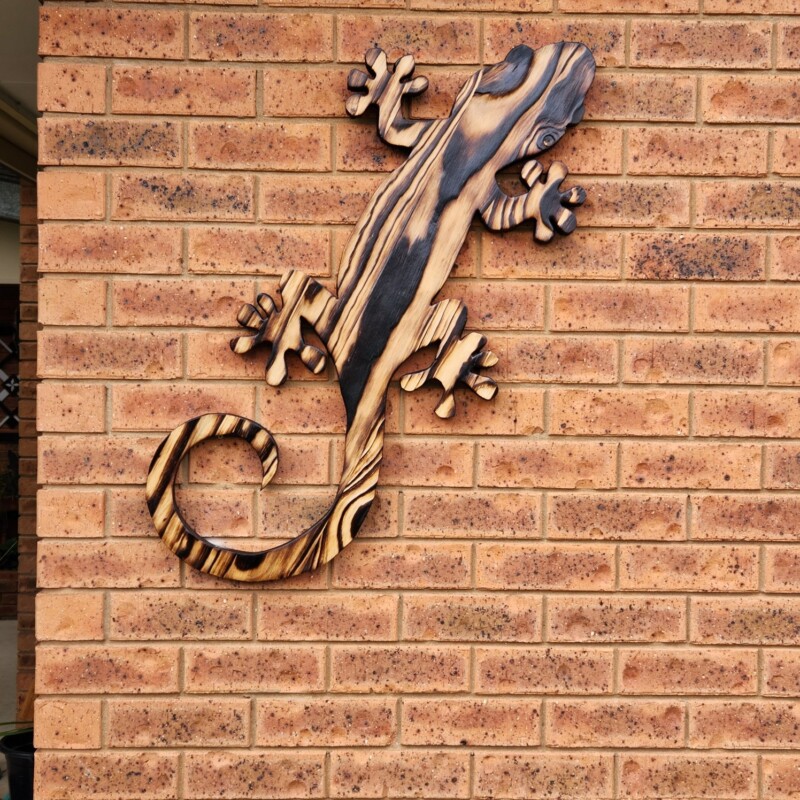
I made this wooden gecko from a recycled piece of wood and a shou sugi ban finish.
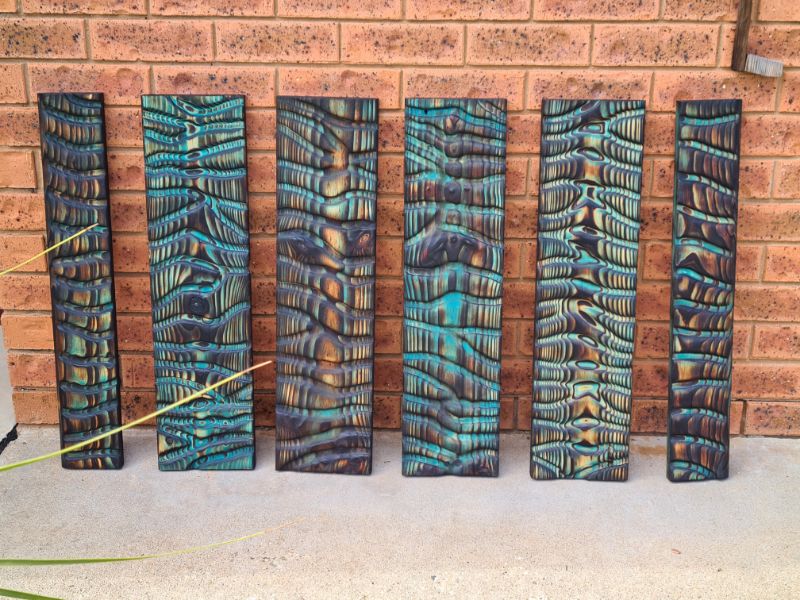
Take your shou sugi ban wall art panels to the next level with this awesome groove effect. There are even more on my website; you can find them here.

If you’re interested in any of the items used in this project, we’d appreciate it if you used our affiliate links. Clicking these links earns us a small commission at no extra cost to you, helping us create more inspiring and exciting projects to share. We’d also love to hear your thoughts—feel free to leave a comment or share this post!

30 Comments
Cat Michaels
November 9, 2021 at 12:56 amWow! Luddite here, didn’t know that was a thing! I especially admired the way you fit together the wood and in a quilted star pattern, too. Great directions. I may pass this along to Hub for a project -:D
Anita Holland
November 9, 2021 at 9:30 amThanks so much, I just made it up so not sure if it is a thing or not. lol
Carolina E Gonzalez
November 9, 2021 at 1:56 amThanks for the detailed instructions Anita, as always, I am very pleased and surprised at your talent. Stunning pieces of art. Amazing how colors look. Love it.
Anita Holland
November 9, 2021 at 9:30 amThank you so much Caroline.
Laura Walker
November 9, 2021 at 2:52 amLove this, Anita. Laura
Anita Holland
November 9, 2021 at 9:30 amThank you so much Laura.
Rosemary Palmer
November 9, 2021 at 3:00 amThis is gorgeous. What a way to add color
Anita Holland
November 9, 2021 at 9:31 amThanks Rosemary, it was fun playing around with all the products and colours.
Lisa G
May 5, 2022 at 2:57 pmAll of it is gorgeous!
Anita Holland
May 5, 2022 at 5:40 pmThank you so much Lisa.
Christina Woodcock
November 9, 2021 at 3:35 amOh my gosh Anita, it’s gorgeous!
Anita Holland
November 9, 2021 at 9:31 amThanks so much Christina.
Marie - Interior Frugalista
November 9, 2021 at 3:41 amEver since seeing your gorgeous Shou sugi ban wall hanging, I’ve been intrigued and want to give it a try. The colors are absolutely stunning! When I finally get the courage, I’ll be coming back here and your original post to re-read the awesome tutorials. Finger’s crossed mine turns out half as good as yours.
Anita Holland
November 9, 2021 at 9:32 amThanks Marie, I am sure it will be a breeze for you and hubby.
Leah Goss
August 1, 2022 at 6:24 amWere do you find that kind of wood and does it have to be the shou sugi ban wood. I hope it can be done on regular wood I have this old ladder I would love for it to turn out like yours. I bought the unicorn spit I have the mica powder I have paint now I got to figure out what polyurethane and other items you used. You did amazing I have never seen anything like it. Thank you so much for sharing and I hope I can find all the items❤️❤️🫶🏽🫶🏽
Anita Holland
August 1, 2022 at 5:09 pmHi Leah, I used regular pine wood for this project and most of my other shou sugi ban projects.
Janet
November 9, 2021 at 11:42 amIs there anything that you CAN’T do? So amazing!
Anita Holland
November 9, 2021 at 12:43 pmThanks Janet, that is an awesome compliment. I tell myself I can do anything so I will try, some projects work some don’t. lol
Michelle Leslie
November 9, 2021 at 6:33 pmYoh!!!! I’m so glad you put this together, Anita. I’ve played with Shou Sugi Ban and Unicorn SPiT and the results were really lovely, but I need to get my alcohol inks out and play some more. They’re all so beautiful.
Sara
November 10, 2021 at 2:07 amWow, you really did your homework on this; I’m surprised that the acrlylic paint worked. Did you wet the wood for every paint you used in this test?
Anita Holland
November 24, 2021 at 6:02 pmThanks Sara, Yes I wet every piece in the same way.
Thomas
June 7, 2022 at 9:11 amI was planing on doing something like that with weathered wood but now that I’ve seen this, I’ve changed my mind and I want to add some colours. Thanks for sharing it Anita, it’s really unique! Did you glue the pieces side by side or do you have a support panel in the back?
Kit Williams
October 5, 2022 at 8:13 amLoving your creativity Anita and thank you so much for sharing all the information – its really appreciated x
Anita Holland
October 6, 2022 at 1:04 pmThank you, and you are very welcome.
Amber Bennish
January 5, 2023 at 9:39 amI have also played around with shou sugi ban and I absolutely had a blast minus the mess. But I was playing with the colors and found that if I used food coloring mixed with rubbing alcohol it really worked well as long as you are going to seal it with a wax or polyurethane, etc. Another method that I tried was applying white unicorn spit using the same method as you had then applying color over that to create pastel colors or making others brighter. And lastly I used metallic colored wax which I tried to keep between the black as much as possible a bit more time consuming but had a cool look.
Anita Holland
January 9, 2023 at 5:38 pmI would love to see some of your results if you are happy to share them. I am a huge shou sugi ban fan.
Michael Wright
August 30, 2024 at 12:56 amIn the photo under the segment on Unicorn Spit and Mica Powder, what specific products did you use to produce the verdigris color on the green wood? I want to make a couple picture frames with that effect.
Anita Holland
September 5, 2024 at 11:55 pmIt was called dragon belly fro. Unicorn spit.
Deb
January 14, 2026 at 6:36 pmHi! Love your post and well-documented tests. I was hoping you tried chalked paint and how that would look on the yakisugi wood? Also, could you let me know the dilution for the acrylic / water paint ratio. Thank you!
Anita Holland
January 20, 2026 at 7:10 pmThank you. I did not use chalk paint because it is not very waterproof for outdoor use. I also think it will be too thick and cover up the Woodgrain. Diluting the paint or stain depends on how vibrant you want your colour to be. I found it better to just spray the wood and add a small amount and keep adding more until I was happy with the colour.