
Working with Unicorn SPiT Gel Stain & Glaze had been on my wishlist for a long time. After seeing it used on countless DIY sites I follow, I was itching to give it a go. My very generous husband treated me to the full colour range, and from the moment it arrived, I was on the lookout for the perfect piece to experiment on. Since I was new to Unicorn SPiT, I wanted to start small. What really caught my attention was how the wood grain stays visible through the stain, creating a beautiful layered effect.

When I spotted this chair listed for free on a local site, I figured what the heck—there was nothing to lose if it didn’t work out. One thing I loved about the videos I watched was that if you didn’t like the look, you could simply wash the stain off and try again. I’m not the most artistic painter, but I was pleasantly surprised by how well it turned out. It made a unique, colourful bedroom feature chair.
Before we dive into this tutorial, be sure to subscribe to my bimonthly newsletter to be the first to see my latest projects. You can also follow me on Pinterest and Facebook where I also include my unique mixed-media art projects.
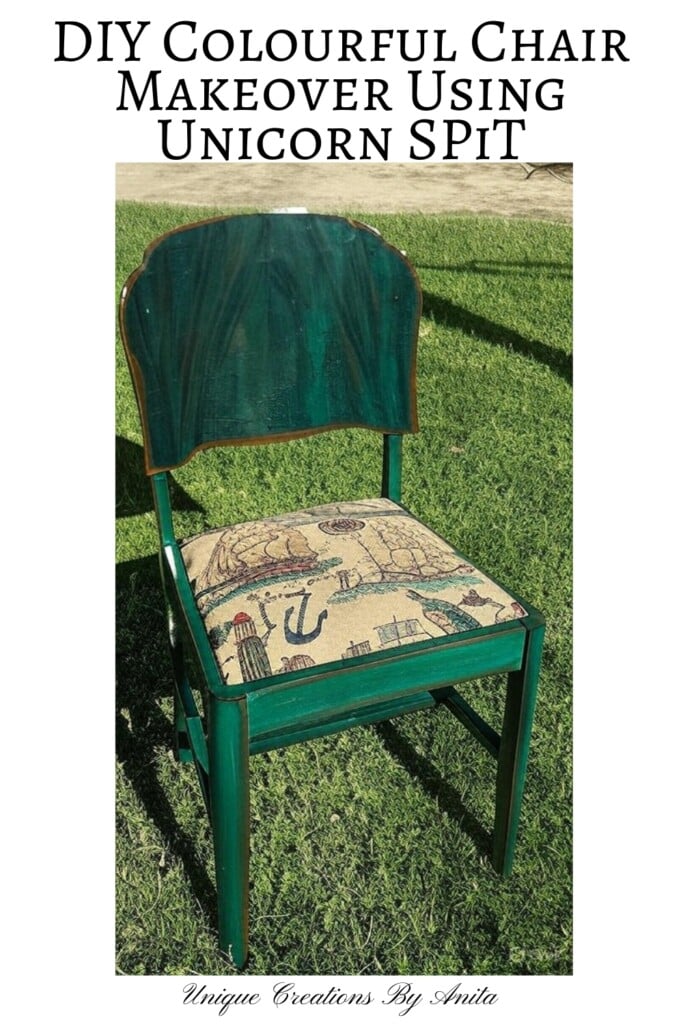
Unicorn SPiT Chair Makeover
**This post may contain affiliate links. This means I earn a small commission on links used at no extra cost to you. Please see my disclosure policy for more information.**
Materials Used
- Unicorn SPiT Gel Stain & Glaze (Zia Teal, Blue Thunder, Dragon’s Belly, Navajo Jewel, Phoenix Fire)
- Heat gun
- Foam sponge
- Oil-based polyurethane
- Foam cushion (from an old mattress)
- Staple gun
- Tapestry fabric
Find a Suitable Chair
The chair I found had lovely character and would usually be a candidate for a full restoration. But I was desperate to try out Unicorn SPiT, so this chair had to take one for the team. Structurally, it was unstable. The seat was removed, and wood glue was applied to all loose joints. Without clamps large enough, I used ratchet straps to hold everything tight while the glue cured.

Strip the Old Finish
The chair had years of varnish built up. At first, I thought the cracked finish on the backrest was just varnish damage, but some cracks went into the wood veneer. I chose to use paint stripper to speed things up rather than sanding through the layers. The stripper was applied and left to sit. I scraped a test patch to check if the varnish had lifted, then continued scraping the rest.

Once the bulk was removed, I scrubbed the chair down using a stiff brush and warm, soapy water. This step may not be textbook perfect, but I’ve used it on many projects and it works well for me.

Add a Base Colour
The first coat was Zia Teal, applied with a foam sponge. To speed up the drying process, I used a heat gun to set the stain. You’ll know it’s dry when it turns dull and powdery, which took about five minutes.

Blend the Unicorn SPiT Colours
To add depth, I applied Blue Thunder in random areas, again drying with the heat gun. I attempted blending multiple colours at once, but they became muddy and lost their vibrancy. I suggest applying and drying each colour separately if, like me, you’re not confident with blending.
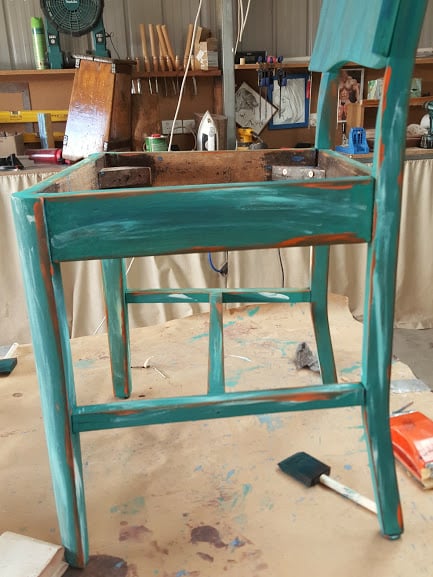
I added Dragon’s Belly and Navajo Jewel using the same method. Around the edges, I used Phoenix Fire to create a soft aged look I’d seen others use. The gel stain dries matte, and the magic only appears once the sealer is added. It still looks like a mess at this stage.
Seal to Reveal the Colour
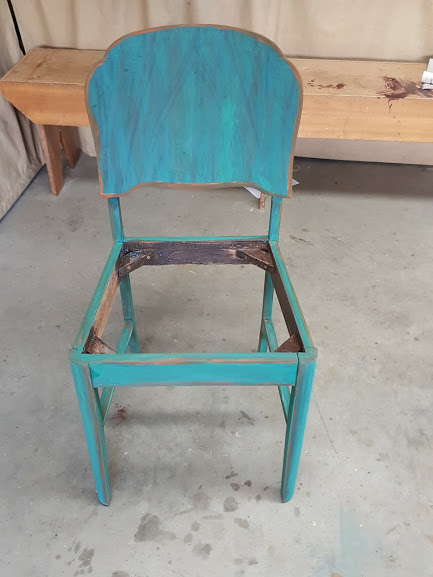
The Unicorn SPiT looks dull until sealed. I used two coats of oil-based polyurethane. As it dried, the colours became bold and vibrant. Depending on the lighting and angle, the chair can look green, turquoise or blue. The finish shows off the wood grain beautifully through the stain.

Upholster the Seat
The base had traditional springs, which I secured using some string. I reused foam from an old mattress to cut a new cushion. My first choice was white faux leather, hoping it would make the colours pop. But it looked cheap and out of place.

Instead, I used a rich tapestry fabric I found at a thrift shop. It suited the look much better. The fabric was cut to size and stapled around the base. I rarely make this style of furniture, but trying new techniques and looks helps keep DIY fun and challenging. And best of all, the buyer absolutely loved it!

Tip: When working with Unicorn SPiT, always test a small area first. The colour changes dramatically after sealing, so what looks teal may turn green once the polyurethane is added.
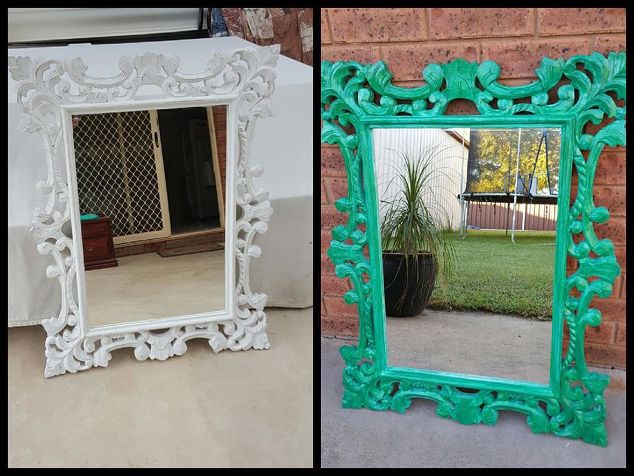
I had leftover Unicornspit, which I used to give this mirror a makeover.
More Unicorn SPiT Projects
Since falling in love with Unicorn SPiT, I’ve used it on glass and other fun DIYs. Here are a few of my favourites:
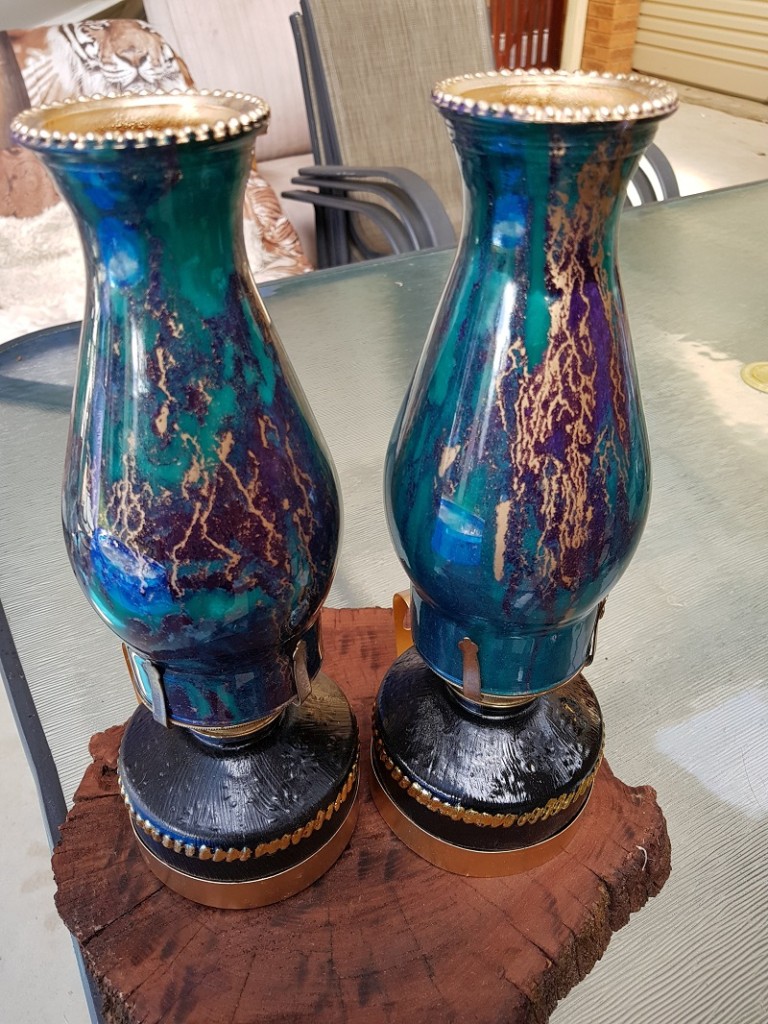
I spit on some lamps I had lying around at home.
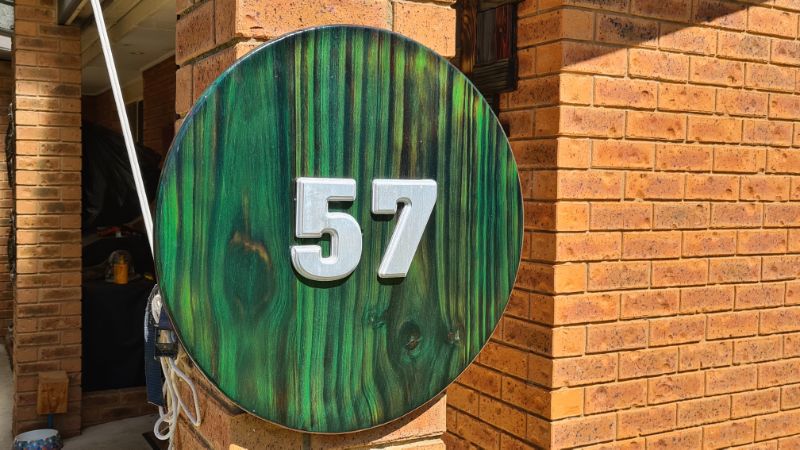
This house number is a better example of how unicorn spit can transform wood.

If you’d like to find any of the items used in this project, we’d greatly appreciate it if you used our affiliate links. These links provide us with a small commission at no extra cost to you, allowing us to continue creating and sharing more inspiring projects. We’d also love to hear your thoughts—feel free to leave a comment or share this post!
4 Comments
Michelle Leslie
October 5, 2020 at 10:19 pmOoooooooooo I love that green Anita. It looks fit for royalry. Unicorn SPiT is the best!!!!!!
Anita Holland
October 6, 2020 at 1:14 pmThank you Michelle, you have gotta love unicorn spit. lol
Sara
December 1, 2020 at 9:52 pmWell, that was a resounding success; it reminds me of verdigris which I love! When The wood grain peaking through is gorgeous. I”ve never tried Spit but maybe it should go on the Christmas list! 🙂
Anita Holland
December 2, 2020 at 3:26 pmThank you Sara, that was my first attempt, but that style of furniture does not go in my modern minimalistic house. lol