
I’m thrilled to share my Personalised PVC Pipe Photo Planters project, which earned runner-up honours in a recent PVC pipe challenge on the instructable website I regularly contribute to. Inspired by my great-niece’s enthusiasm for watering plants—and her sometimes overly enthusiastic approach—I crafted these upcycled succulent pots for her to call her own. Each planter features her adorable photo, making it easy for her to identify and care for her plants while adding a charming touch to our garden.

Before we dive into this tutorial, be sure to subscribe to my bimonthly newsletter to be the first to see my latest projects. You can also follow me on Pinterest and Facebook, where I also include my unique mixed-media art projects
PVC Pipe Photo Planters: Easy Upcycled Succulent Pots
**This post may contain affiliate links. This means I earn a small commission on links used at no extra cost to you. Please see my disclosure policy for more information.**
Materials Needed
- PVC pipe (approx. 100–150 mm diameter)
- Matching end caps
- Hand saw or PVC cutter
- Sandpaper (120–220 grit)
- Superglue and optional silicone sealant
- Temporary tattoo transfer paper (inkjet-compatible)
- Clear acrylic spray or Mod Podge
- Small pebbles or gravel
- Succulent potting mix
- Succulent plants
Cutting the PVC Pipe
First, measure and mark your pipe for two planter heights—150 mm and 100 mm—then cut along the lines with a hand saw or PVC cutter. Wear safety goggles and gloves.

Cleaning and Prepping the PVC Pipe
Wash each segment with soap and water to remove dirt. To erase manufacturer markings without scuffing, apply nail polish remover or acetone with a cloth until the surface looks uniformly clean. Smooth the rough top edges with sandpaper until safe to handle.

Assembling End Caps
Dry-fit the end caps, then glue them in place with superglue. For extra waterproofing, run a thin bead of silicone sealant around the seam. Allow to cure fully before planting.

Transferring Images with Temporary Tattoo Paper
I chose my photos and edited them in the free online program LunaPic, mirroring them and converting them to crisp black and white. Then I printed each image onto temporary tattoo paper—a delightfully simple and lightning-fast transfer method. In just seconds, the decal adheres firmly to the PVC, with no rubbing or eight-hour drying time required. Alternatively, you can use waterslide decal paper—a just-as-simple transfer method. Check out this post for a full step-by-step guide.

The Temporary Tattoo Transfer Paper kit includes two components: the printable sheet and a clear carrier film. Simply load the printable sheet into your inkjet printer face-down and print as you would on ordinary paper. After allowing a few minutes for the ink to fully dry, peel back the film’s liner and carefully press the clear carrier film over your printed design. Starting at the top, smooth out any air bubbles with a credit card for a flawless transfer.

Trim each decal to your desired dimensions so you can preview exactly how it will sit on the pipe. Then peel off the clear carrier film and firmly press the image face down onto the PVC.

Gently press the decal with your fingertips, working out any air bubbles so it lies completely flat. Then, using a barely damp cloth (not soaking wet), hold it against the backing paper for about 15 seconds. You’ll begin to see the image showing through—carefully peel away the paper to reveal your crisp transfer.

Peel the backing paper away slowly and steadily to avoid lifting the tattoo film. If you notice tiny creases—often caused by a quick pull—you can gently smooth them out with your fingertips, despite what the instructions say. Once the film is perfectly flat, protect your transfer by applying a thin coat of Mod Podge or two light sprays of clear acrylic sealer.

Planting Your Succulents
Add a layer of pebbles or gravel for drainage, then fill with succulent or cactus mix. Plant your succulents and place them in bright, indirect light. Water sparingly—about once every two weeks.

Project Updates and Tips
Six months later, the images remain crisp and the succulents are thriving. A year on, they still add colour and charm. Gently wipe the surface as needed, and avoid overwatering to keep your planters in top form.

More planter project Ideas
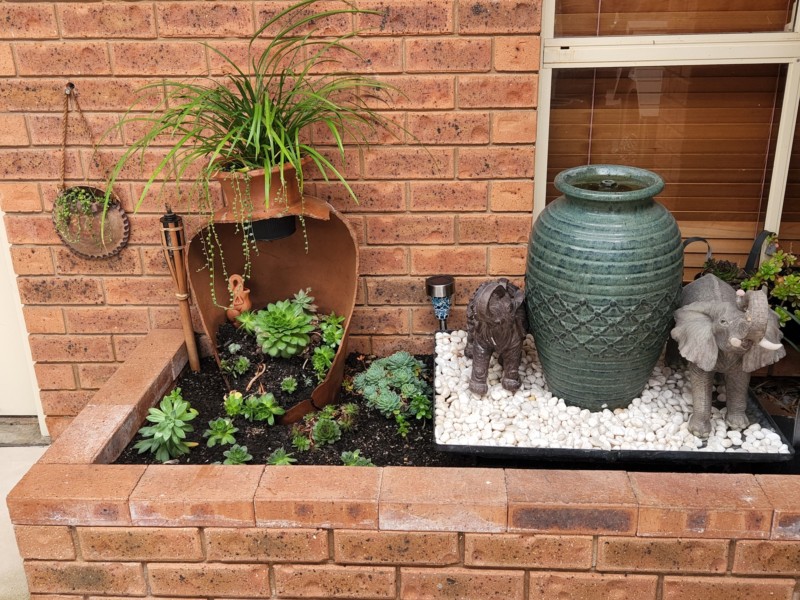
When my new puppy toppled my terracotta vase, I didn’t throw it out—instead, I upcycled it into a charming feature under my pergola.
Turn reclaimed pallets into a stunning multi‑tier wooden planter made from pallet wood with this simple DIY tutorial.

If you’re interested in any of the items used in this project, we’d appreciate it if you used our affiliate links. Clicking these links earns us a small commission at no extra cost to you, helping us create more inspiring and exciting projects to share. We’d also love to hear your thoughts—feel free to leave a comment or share this post!


66 Comments
Susan Gremillion West
November 17, 2017 at 3:59 pmLOVE!
Anita Holland
November 19, 2017 at 7:34 amThank you Susan!
Virginia Lee Pratt
November 17, 2017 at 11:32 pmThis one is cute and multi-practiable. Good idea
Anita Holland
November 19, 2017 at 7:35 amThanks can be used for many things and will make great presents for Christmas
Mary. Landeros
November 18, 2017 at 12:31 pmI wiii try this project
Anita Holland
November 19, 2017 at 7:36 amVery easy to do, would like to see what you do.
Teresa
December 6, 2017 at 9:17 pmCan you use this to transfer photos or a newspaper cooking on to glass?
Teresa
December 6, 2017 at 9:19 pmSupposed to be newspaper
Clipping
Anita Holland
December 7, 2017 at 12:33 amYou could use it on any paper printed on an inkjet printer that I know off. To do a photo like I did you need to scan the photo and print it out onto paper, I dont think it will work on photo paper. But saying that I have not tried it. Maybe try a test on first.
Liz
December 18, 2017 at 8:00 pmwhat is the exact name of the product you used to transfer the photos
Anita Holland
December 19, 2017 at 9:08 amTemporary tattoo paper, It is use to make temporary tattoo that you put on your skin. I posted a picture of the one I used but I believe they are all called the same thing. In the US you can buy it from Amazon, it is a Cameo product. Hope this helps
Heather
January 13, 2018 at 2:40 pmLove these but want to know , what is the Wish site? do you have a link to it so I can order temperary tattoo sheets ?
Larry
March 22, 2019 at 9:10 pmDo you know if this method will work for transferring photos to wood?
Anita Holland
March 24, 2019 at 12:17 amHi Larry, Yes this works great for wood too.
Vanessa
July 12, 2019 at 12:31 pmI can’t believe how sharp and clear those transfers come out! This is a cute idea.
Anita Holland
July 13, 2019 at 2:30 amThey are like that every time, that is why it is my favourite image transfer method.
Michelle
July 23, 2019 at 4:50 pmCongrats on receiving runner up! Such an original idea. When I look at PCV pipe, photo planters do not come to mind. They are really cute! And I bet your niece feels really special having her own plants to water.
Anita Holland
July 24, 2019 at 3:20 amThank you, I did surprise myself with that one. And she loves them, I have had to split them up twice already because they grow so well.
Anita Holland
July 24, 2019 at 5:33 amThank you I will post it now.
Elise L Ho
July 24, 2019 at 7:04 pmThis is such a great idea. It is inexpensive and adorable
Anita Holland
July 25, 2019 at 1:21 amThank you, they are simple yet very cute.
Chas Greener
July 25, 2019 at 1:15 amThese turned out absolutely lovely. I think I need to make some of these for my home. Thanks for sharing with To Grandma’s House We Go, Pinned and I’ll be featuring you next week!
Anita Holland
July 25, 2019 at 1:21 amThank you so much for the Feature.
Sylvia | Grace for a Gypsy
July 27, 2019 at 1:53 amHi Anita! I love this project! Thanks for linking up at the GATHERING OF FRIENDS LINK PARTY 3!
Anita Holland
July 27, 2019 at 9:49 amThank you so much.
Jennifer
July 27, 2019 at 5:27 amWhat a creative idea! Thanks for sharing at the Weekend Blog Hop at My Flagstaff Home! –Jennifer
Anita Holland
July 27, 2019 at 9:51 amThank you and you are very welcome.
Rhonda Gales
July 27, 2019 at 3:17 pmI love the PVC Pipe Photo Idea. I’ll be featuring your post on Sunday’s Best Linkup. Thanks for sharing.
Anita Holland
July 28, 2019 at 12:14 amThank you so much for the love and the feature. I will be sure to grab a featured button if you have one.
Cecilia
July 29, 2019 at 1:12 amWhat a fun project! Thanks for sharing at Vintage Charm!
Anita Holland
July 29, 2019 at 1:52 amThank you
Kristi Dominguez
July 29, 2019 at 3:42 amThese are so lovely, Anita!! What a fantastic craft idea! I can see these as being a great group craft project…or perfect as gifts!
Anita Holland
July 29, 2019 at 4:44 amThank you so much, I do agree they will make great gifts.
Nina Lewis
July 30, 2019 at 3:47 pmThis is such an awesome idea! I’m going to make a slew of this with my grandkids.
I’m going to feature it at our Party in Your PJs link party tonight! Thanks so much for sharing!
Anita Holland
July 31, 2019 at 4:11 amThank you so much for the lovely comment and the feature. X
Marie
August 1, 2019 at 12:25 pmThese are so cute! I must make some of these with photos of my grandkids for my daughter, she’ll love them. Pinned 🙂
Anita Holland
August 1, 2019 at 11:25 pmThank you, I really loved how they turned out.
Roseann Hampton
August 1, 2019 at 8:55 pmWhat a fun project (and an adorable niece)! Thanks for sharing with us at The Snickerdoodle Link Party – this will be one of my features this Saturday!
Anita Holland
August 1, 2019 at 11:30 pmThank you so much for all the lovely comments and for the feature.
Calypso in the Country
August 2, 2019 at 12:55 pmCute idea and great tips! Thanks for linking up to Best of the Weekend. I featured your project this week along with a bunch of other fun tips. I will be pinning and adding to Instagram stories this weekend. Thanks again for joining us and have a great weekend!
Shelley
Anita Holland
August 3, 2019 at 6:43 amThank you so much for hosting and for the feature.
Michelle Leslie
September 6, 2019 at 6:59 amSuch a stunning idea Anita. We love using PVC pipes to make things
Anita Holland
September 7, 2019 at 10:49 pmThank you so much, I made it for a competition on Instructables. Won a runner up prize.
Michelle Leslie
November 4, 2020 at 12:48 amCongrats Anita and well deserved too
Anita Holland
November 9, 2020 at 9:51 amThank you so much my friend.
Linda at Mixed Kreations
February 9, 2020 at 11:51 amOh, what a great idea and super cute! My grandson is into planting and he would love these. Of course, his little sister would want one as well so this would be perfect for them.
Anita Holland
February 10, 2020 at 5:02 amThank you so much, they would make great gifts for both. lol
Maria
February 9, 2020 at 2:01 pmWhat a great and lovely idea.
Anita Holland
February 10, 2020 at 5:01 amThank you so much.
NanaBee
June 12, 2020 at 5:35 amGreat craft idea especially Mother’s & Father’s Day. Do you make any drainage holes in the end cap so excess water doesn’t become trapped? Succulents need to drain otherwise, their roots will rot.
Anita Holland
June 12, 2020 at 12:12 pmThank you, No I did not drill holes in the bottom but I did add a large layer of stones to each one for drainage.
Deana Landers
November 3, 2020 at 11:35 amI love this project. It’s amazing what you can do with PVC piping!!
Anita Holland
November 9, 2020 at 9:48 amThank you so much Deanna.
Sara
November 3, 2020 at 10:25 pmThese are incredible; and I love the images! How wonderful that you get to play with leftovers from construction sites!? Congrats on your I’ble win!
Anita Holland
November 9, 2020 at 9:49 amThank you Sara, she is such a cutie. It helps when my Son is a builder and I get all the leftovers.
Pam
November 3, 2020 at 11:45 pmThis is such a great repurposing idea! Love it!
Anita Holland
November 9, 2020 at 10:09 amThank you so much Pam.
Linda Johnston
November 4, 2020 at 12:04 amCute fun idea.
Anita Holland
November 9, 2020 at 9:49 amThank you so much Linda.
Meegan
November 5, 2020 at 9:37 amWhat a great personal gift. You make it look so easy. Thanks for the tutorial.
Anita Holland
November 9, 2020 at 9:52 amThank you Meegan, it is very easy.
Kim
November 7, 2020 at 3:15 amAbsolutely darling!! We have tons of this in the garage…might need to try.
Anita Holland
November 9, 2020 at 10:09 amThank you Kim, I still have more just waiting for inspiration. So if you have any new ideas, please share.
rosemary palmer
November 9, 2020 at 10:29 amI love this. So unique.
Anita Holland
November 11, 2020 at 1:52 pmThank you so much
How to make easy Indoor plant supports (a roundup) - Hushy Homemade
January 14, 2024 at 12:34 pm[…] source: unique creations by antia […]