
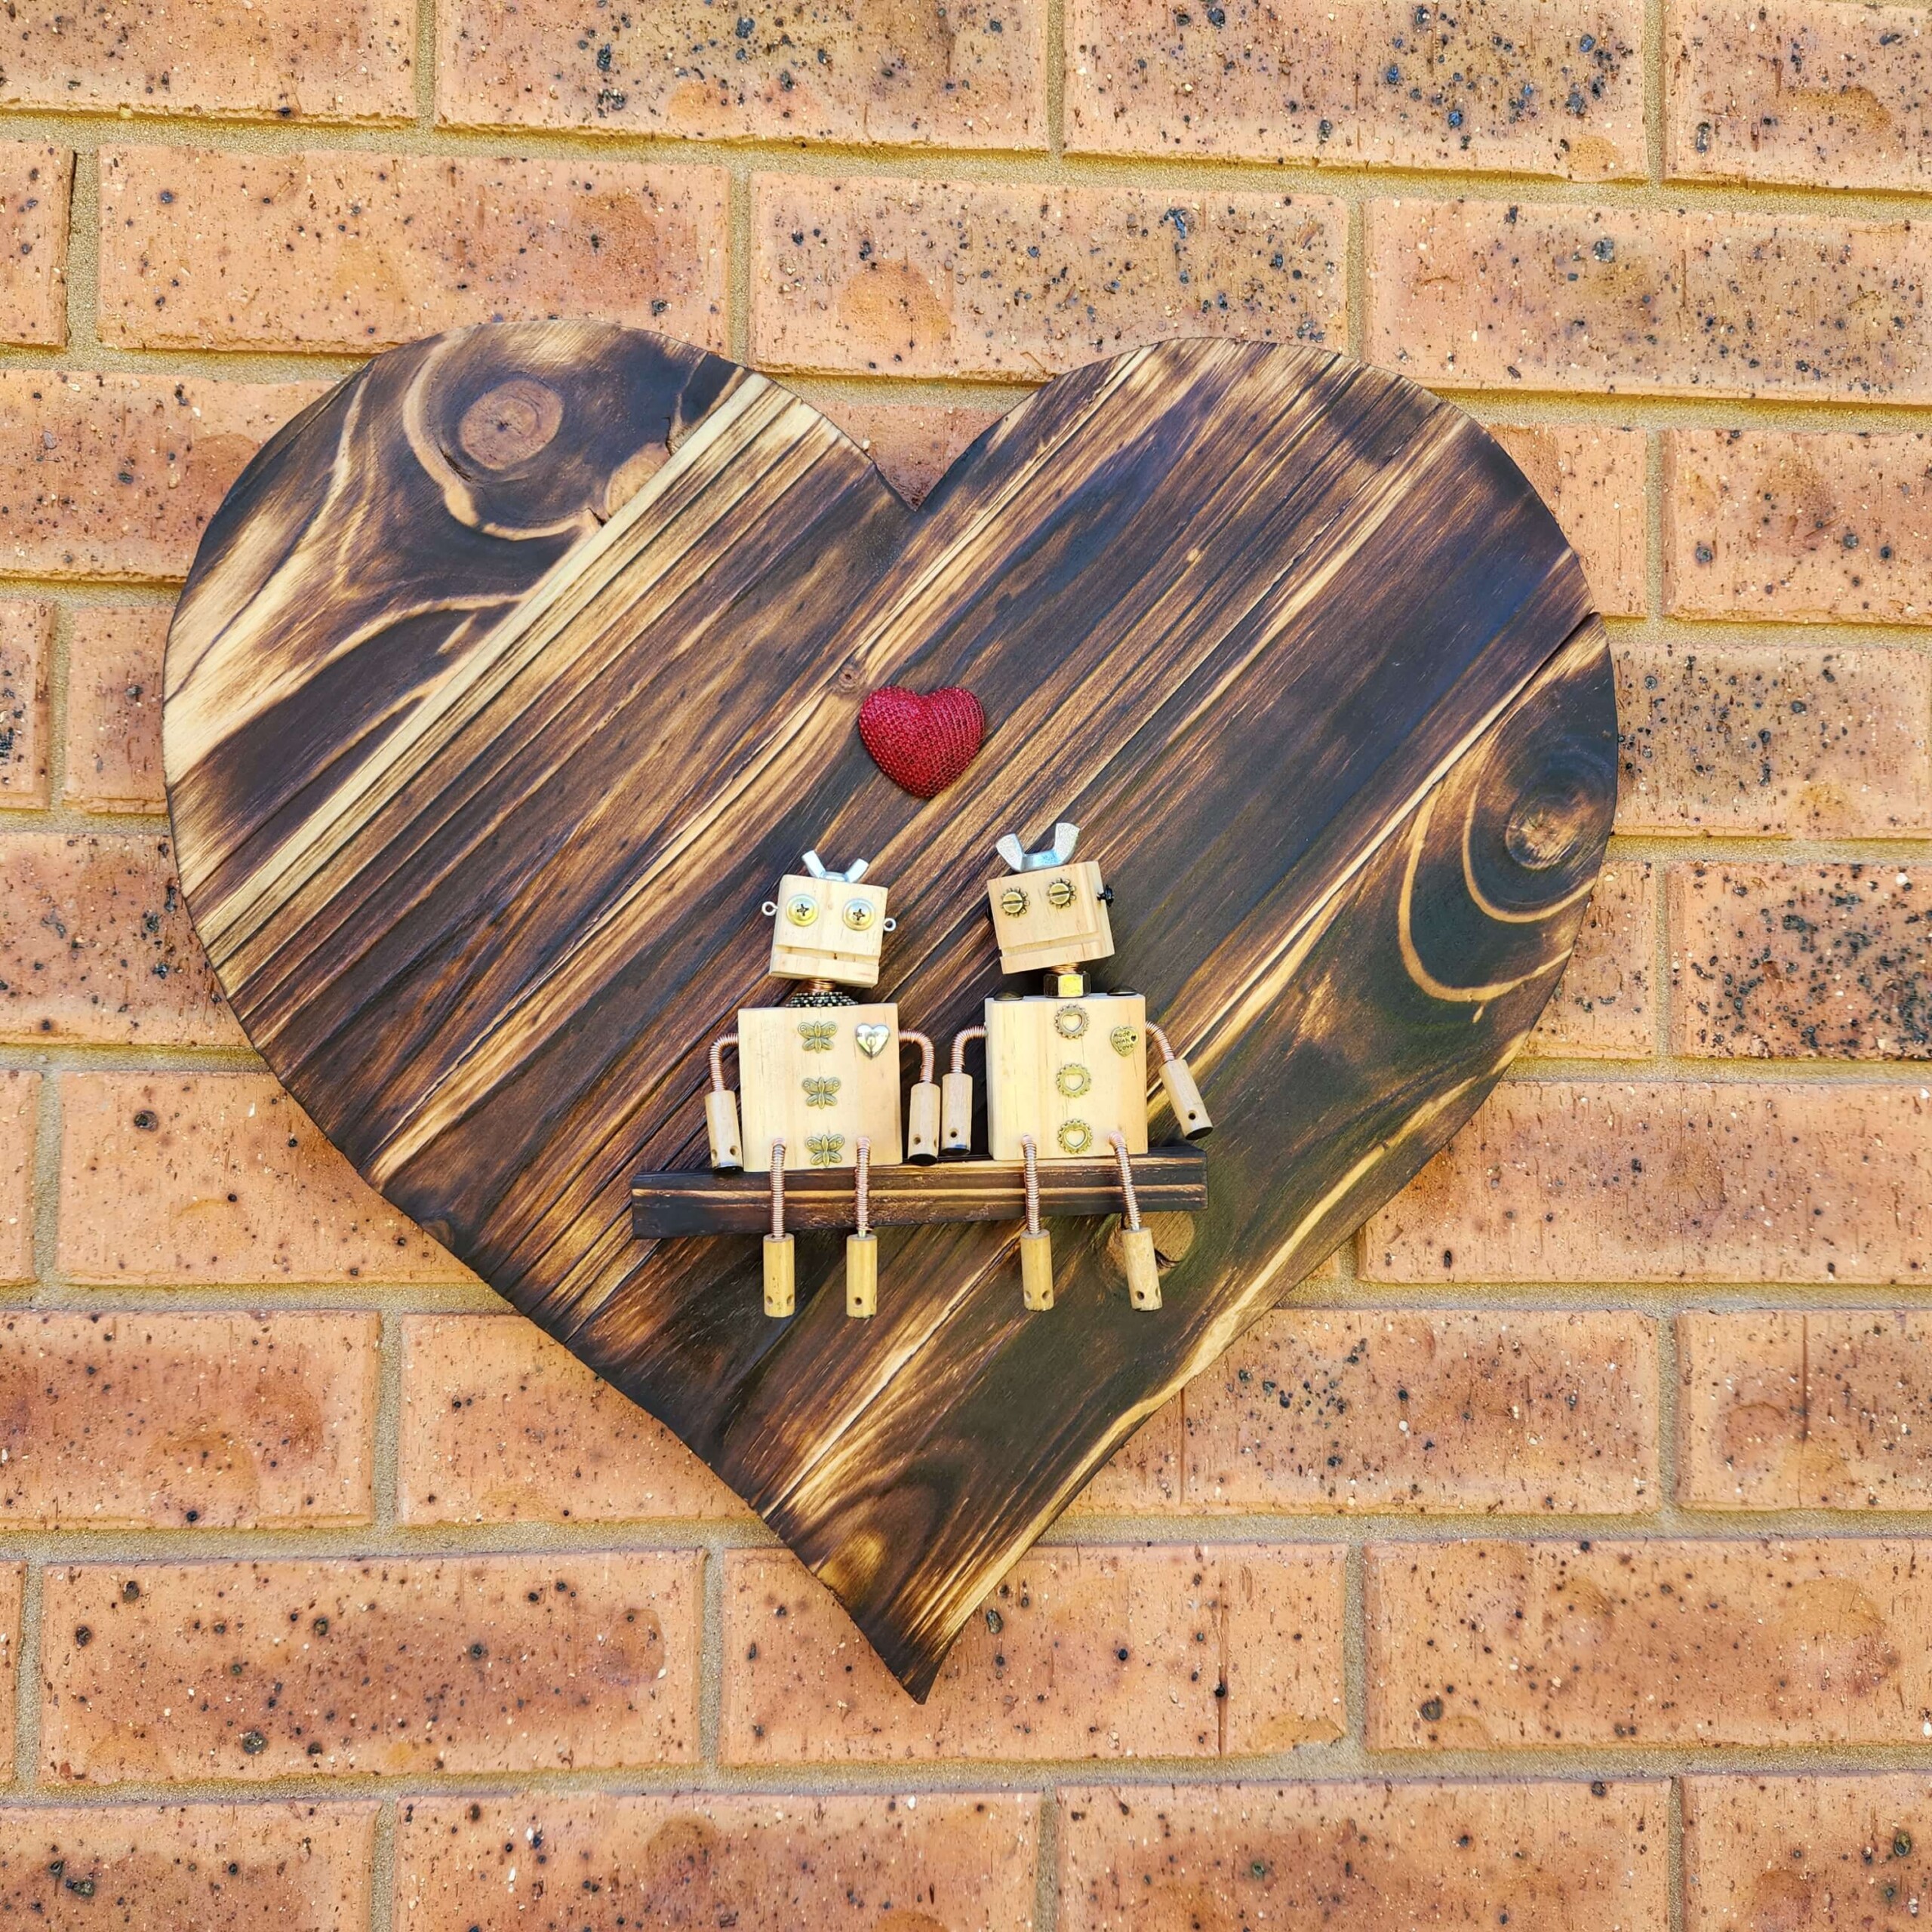
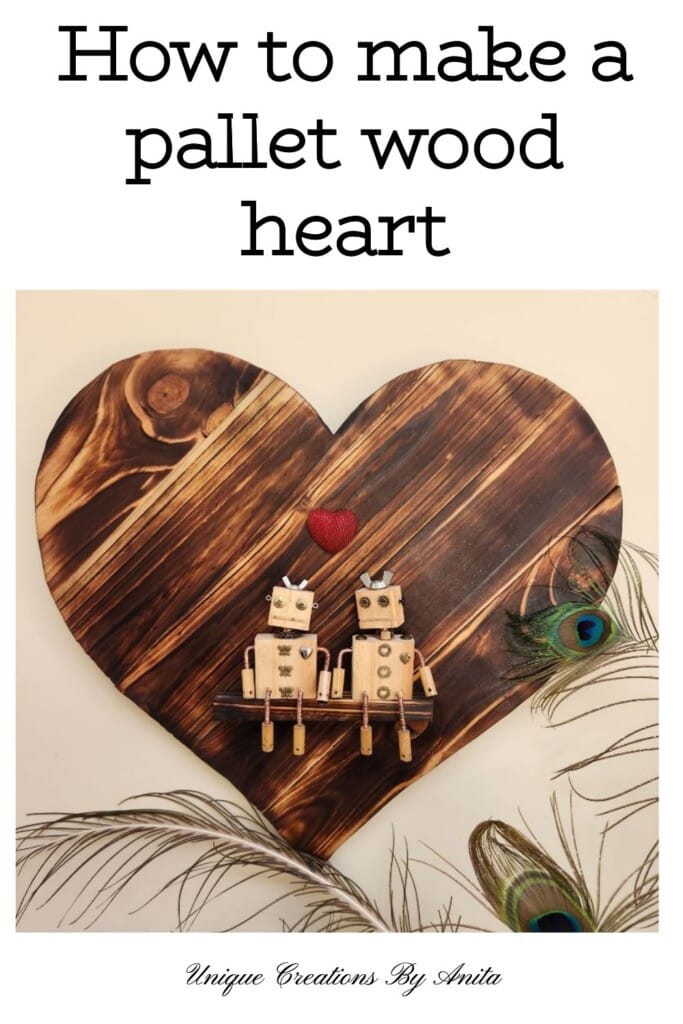
A new year means fresh challenges for our International Bloggers Club (IBC), and our first theme of the year is “Pallet Parade.” With Valentine’s Day just around the corner, I thought it was the perfect opportunity to make a rustic pallet wood heart. To give it a fun twist, I used the leftover scraps to create a pair of quirky wooden robots, turning the project into a charming and unique wall hanging.
As you may know from following my blog, I’m a huge fan of Shou Sugi Ban, the traditional Japanese wood-burning technique. Burning and sanding wood creates stunning textures, but it can be very time-consuming. Thankfully, Santa brought me the best gift ever – a Craftsman Restorer – which cut the sanding process from hours down to minutes!
This project combines pallet wood, Shou Sugi Ban, a touch of creativity, and a little whimsy, making it the perfect DIY for Valentine’s Day or rustic farmhouse décor.
Before we dive into this tutorial, be sure to subscribe to my bimonthly newsletter to be the first to see my latest projects. You can also follow me on Pinterest and Facebook, where I also include my unique mixed-media art projects
Pallet Wood Heart with Wooden Robots Wall Art
*This post may contain affiliate links. This means I earn a small commission on links used at no extra cost to you. Please see my disclosure policy for more information.**
Materials Needed
- Pallet wood boards
- Jigsaw
- Kreg pocket hole jig (or alternative joining method)
- Wood glue
- Clamps
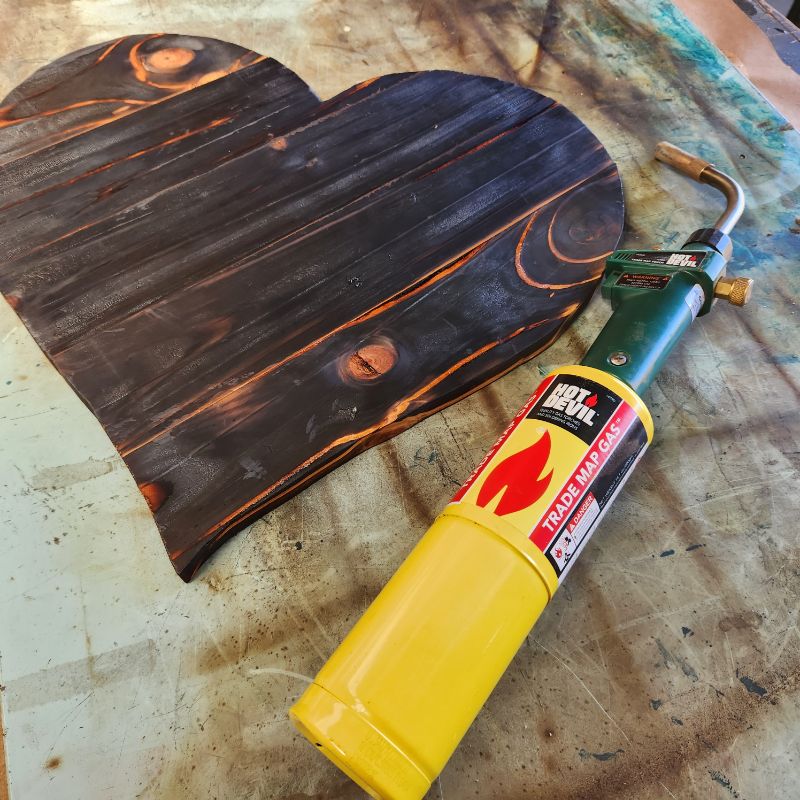
- Blow torch with MAP/propane gas
- Scrap metal sheet (for safe burning)
- Craftsman Restorer or sander
- Drill with a coarse nylon brush
- Projector and kraft paper (for heart template)
- Spray polyurethane
- Wire brush
- Small wood scraps (for robots)
- Craft and hardware embellishments (gears, screws, washers, knobs, etc.)
Preparing the Pallet Wood
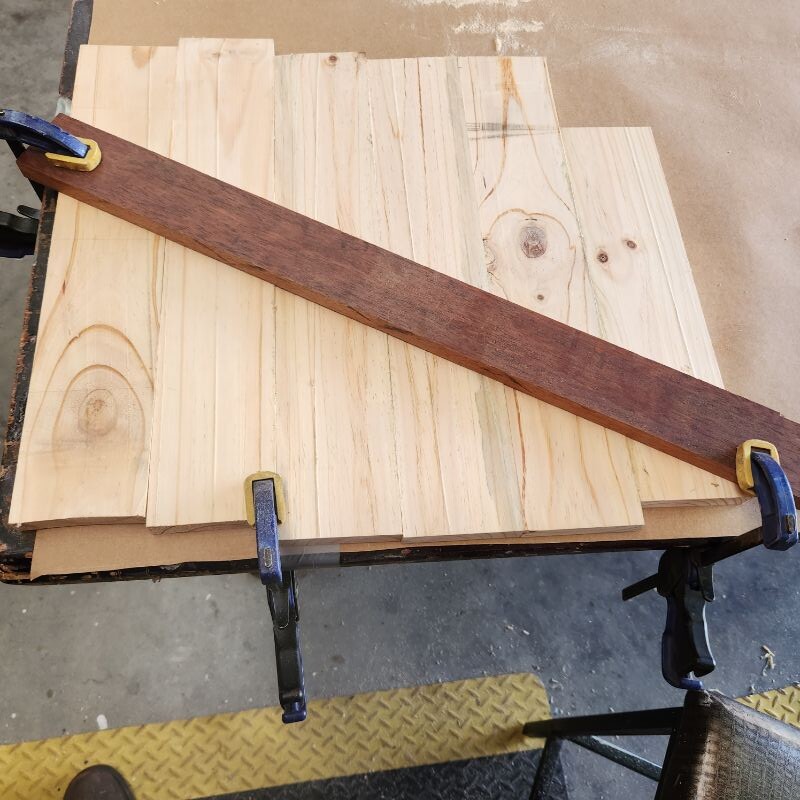
Pallet wood can be tricky to dismantle, so instead of breaking apart the whole pallet, I cut boards from the centre using a jigsaw. The pallet I used was in good condition, so very little sanding was required. If you’re using Shou Sugi Ban, you can skip sanding beforehand since the burning process removes rough surfaces.
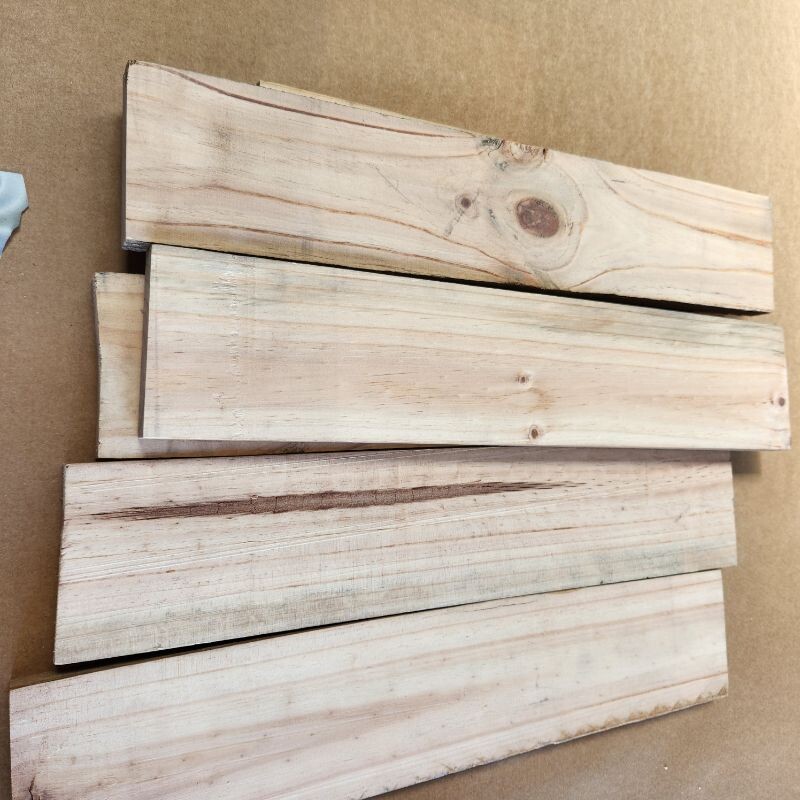
Cut the edges of the pallet wood straight so the boards join neatly without gaps.
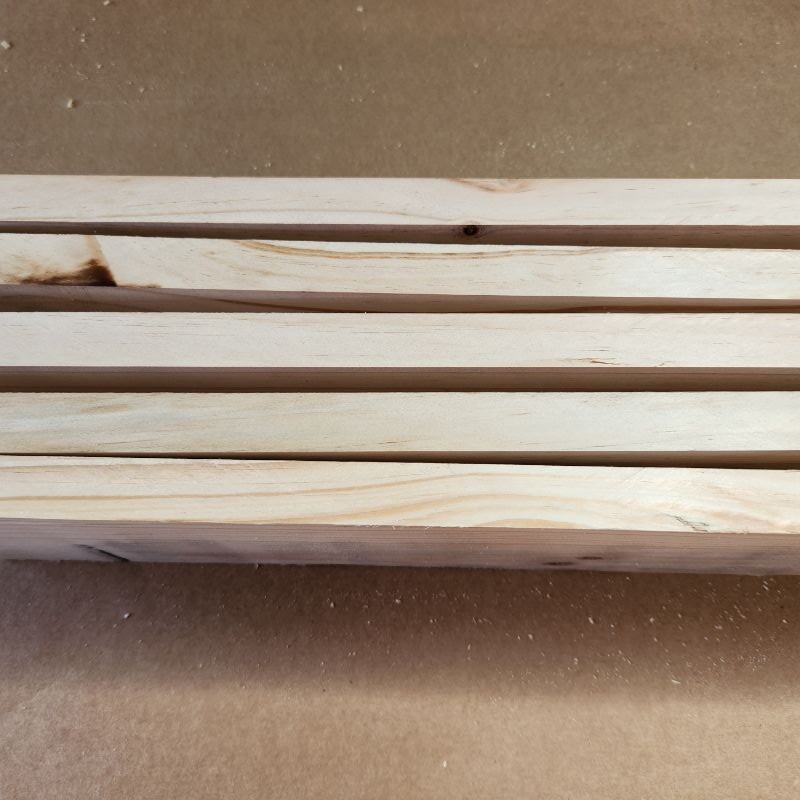
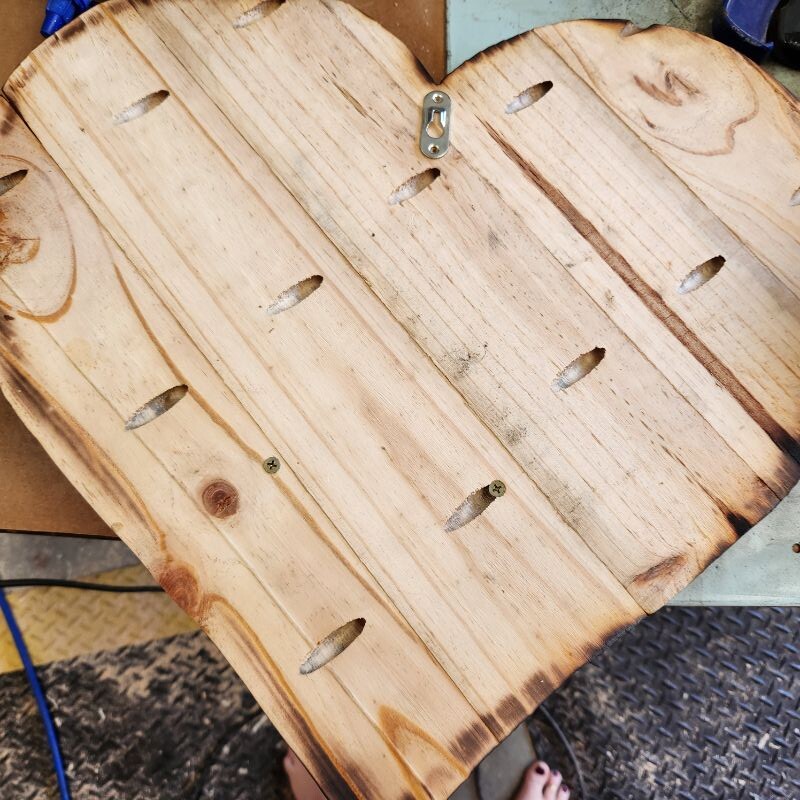
Joining the pallet wood
To form the heart, you can either glue the boards onto a backing board, add support strips behind the shape, or join the planks using pocket holes.
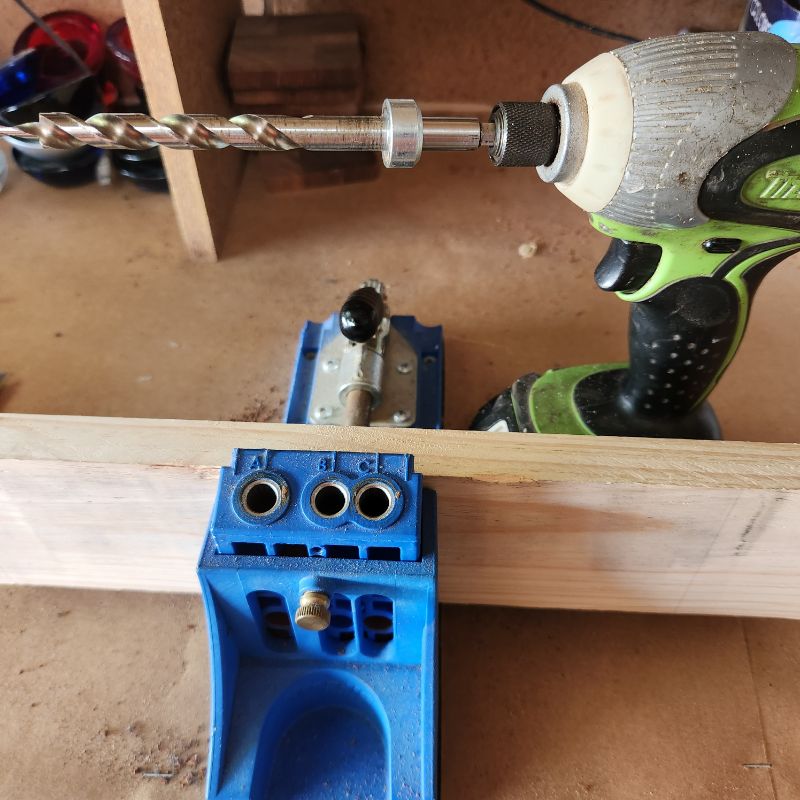
Using a Kreg pocket hole jig, I added wood glue and screwed the boards together. Since pallet wood can warp—and mine did—I clamped the boards to a flat surface while the glue dried, which kept the shape straight. I forgot to snap a photo of the boards once they were screwed together, but you’ll see the back a little further down in this post.
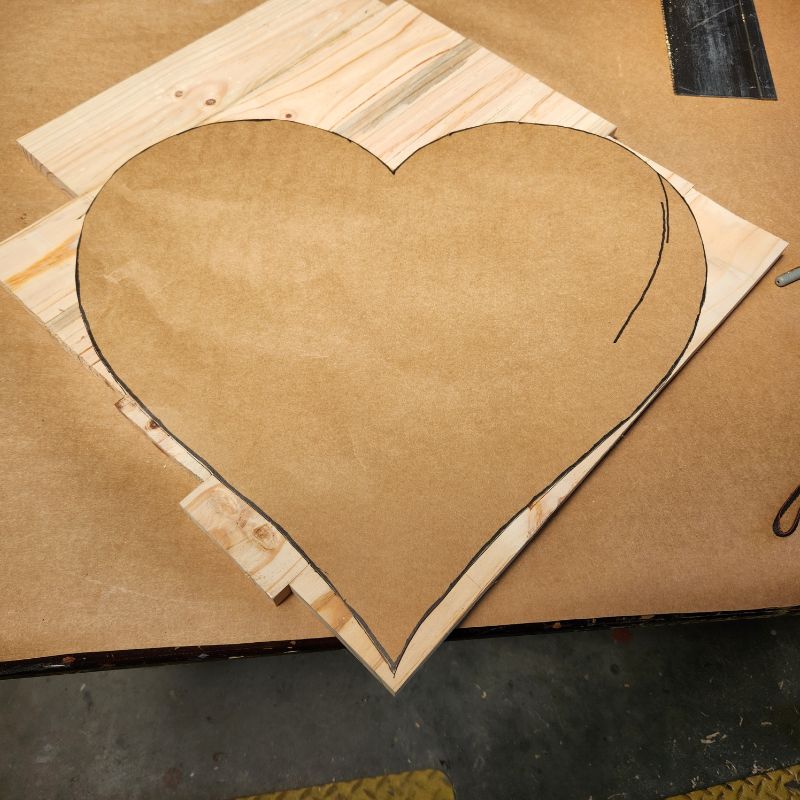
Making the Heart Template
If drawing isn’t your strength, a projector works wonders for templates. Simply project your chosen heart shape onto kraft paper, trace it, and cut it out.
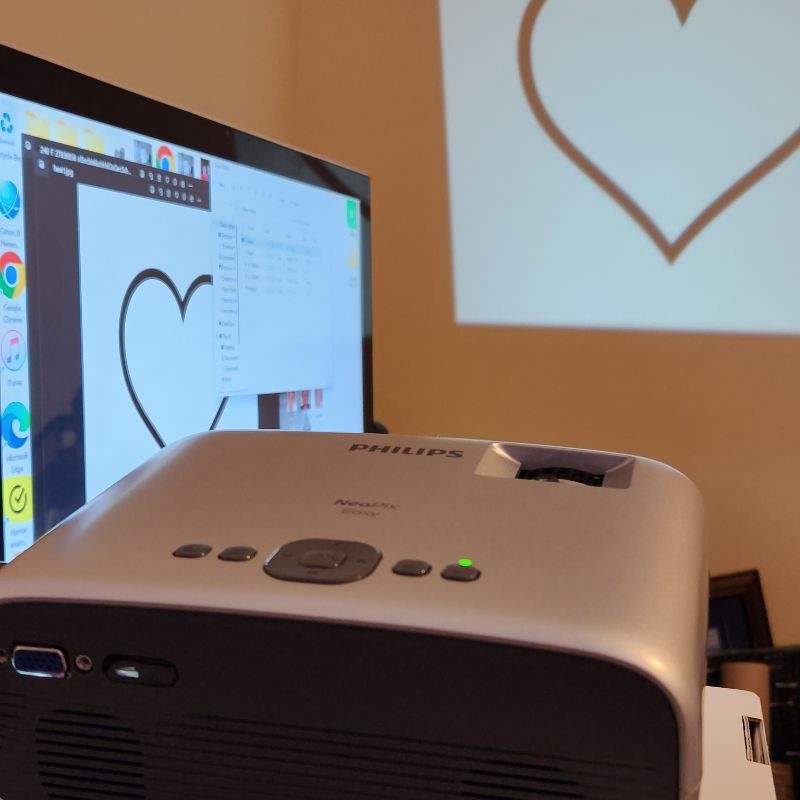
Use this paper template to mark your pallet boards and cut the heart with a jigsaw.
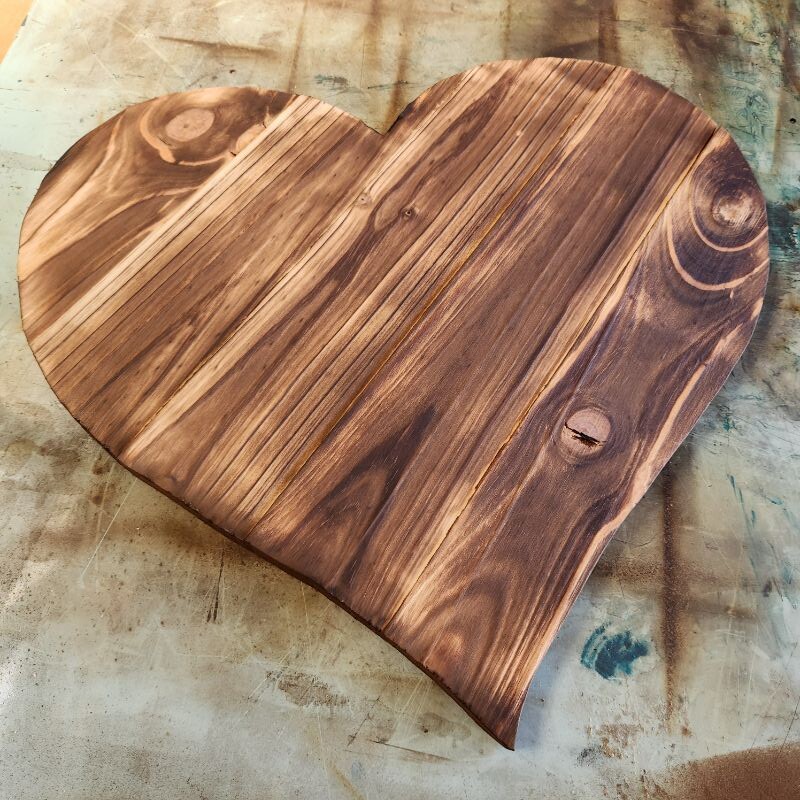
Burning and Sanding the Wood
For Shou Sugi Ban, always work on a fire-safe surface such as scrap metal. Using a blow torch with MAP or propane gas, I carefully burned the wood in sections to avoid warping.
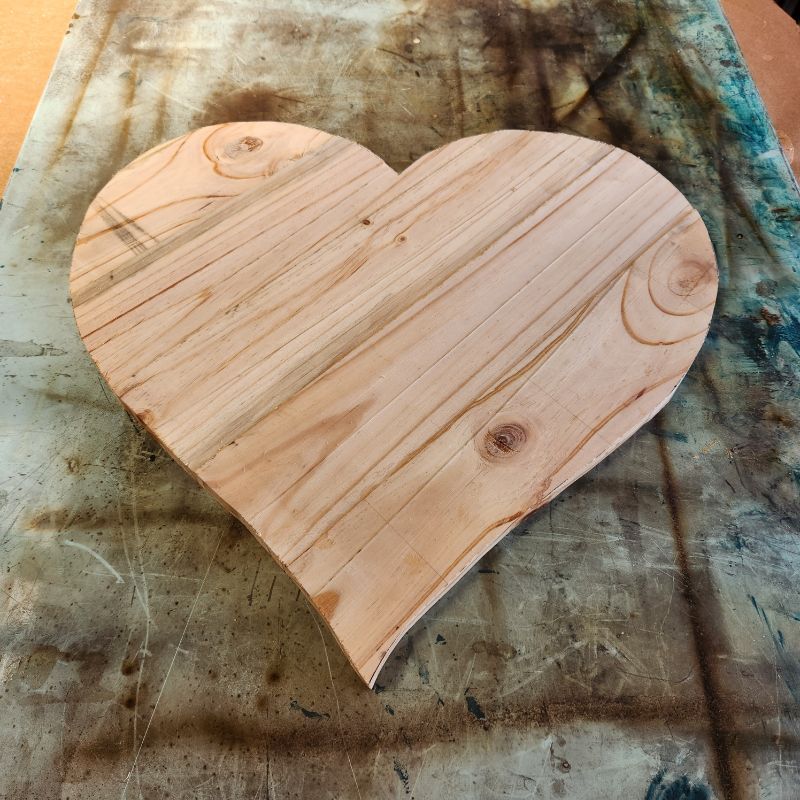
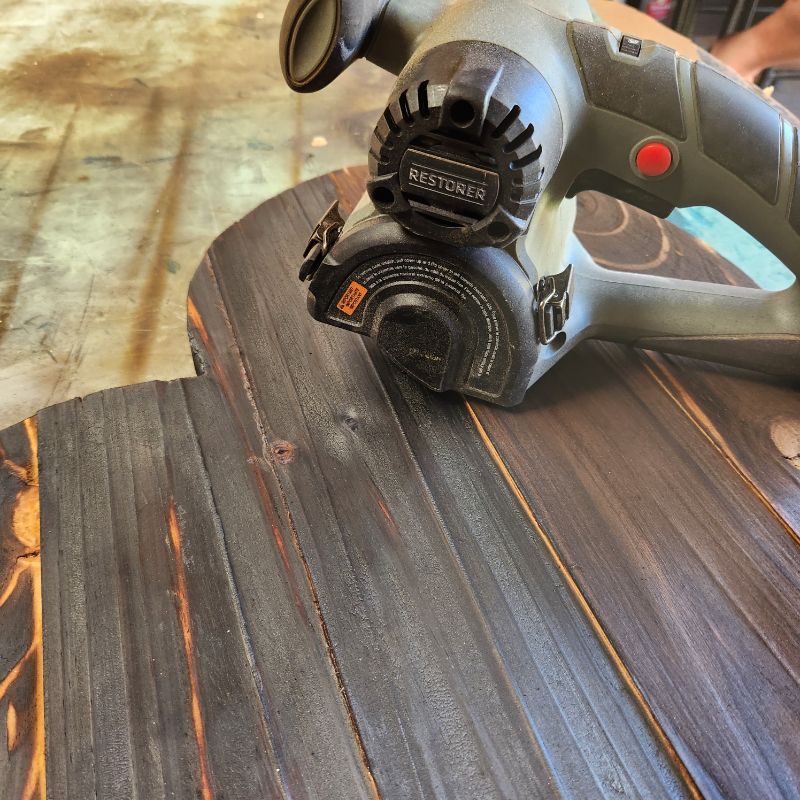
Once the burning was complete, I sanded back the char with my new Craftsman Restorer using a nylon brush wheel. This process took under five minutes and revealed a beautiful textured grain with deep ridges that feel amazing to the touch. You can leave the wood in its natural tones, as I did, or add colour using stains or Unicorn Spit for a vibrant finish.
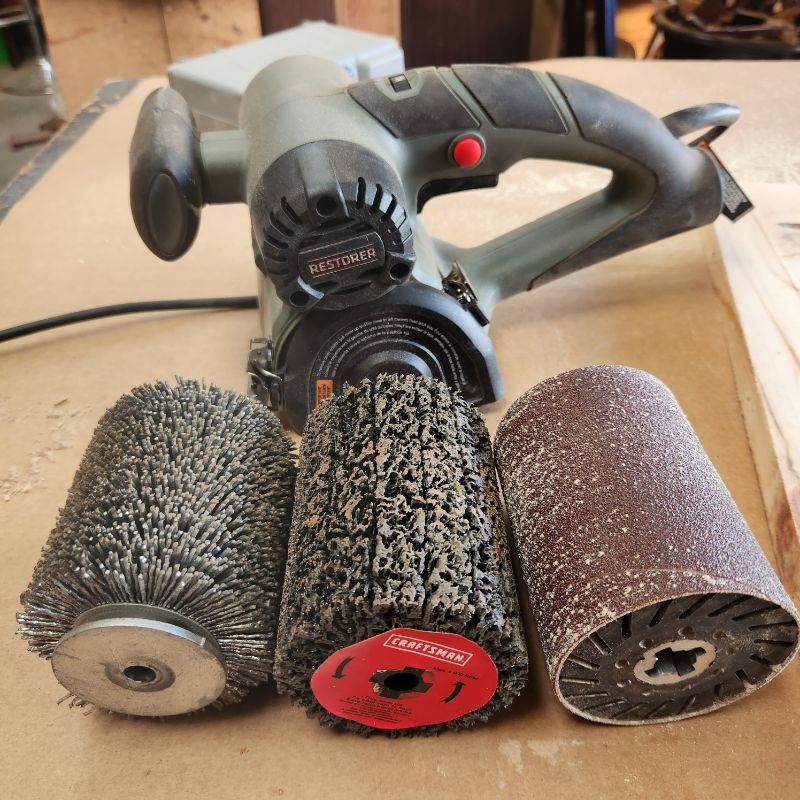
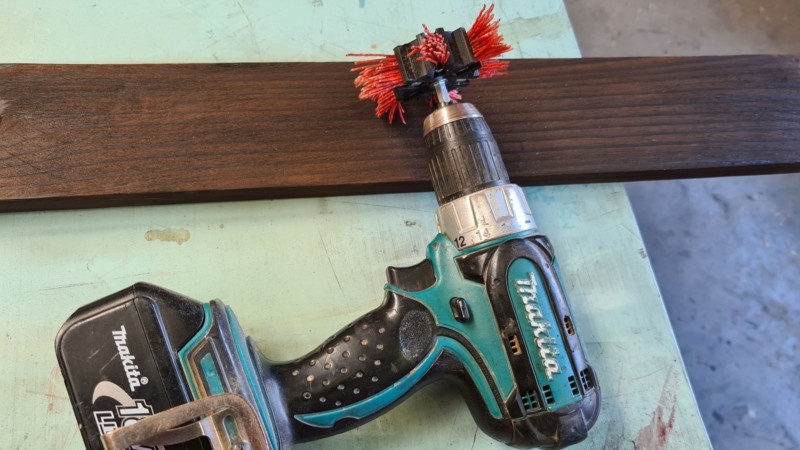
If you don’t have a restorer tool, don’t worry. You can remove the charred surface with a wire brush, always working in the direction of the grain to avoid scratches. Another option is to use a coarse nylon brush attachment on a drill, which makes the process quicker and less tiring than hand brushing.
Keep brushing until the grain of the wood shows clearly. The surface should feel rough with raised ridges and grooves where the softer wood has burnt away.
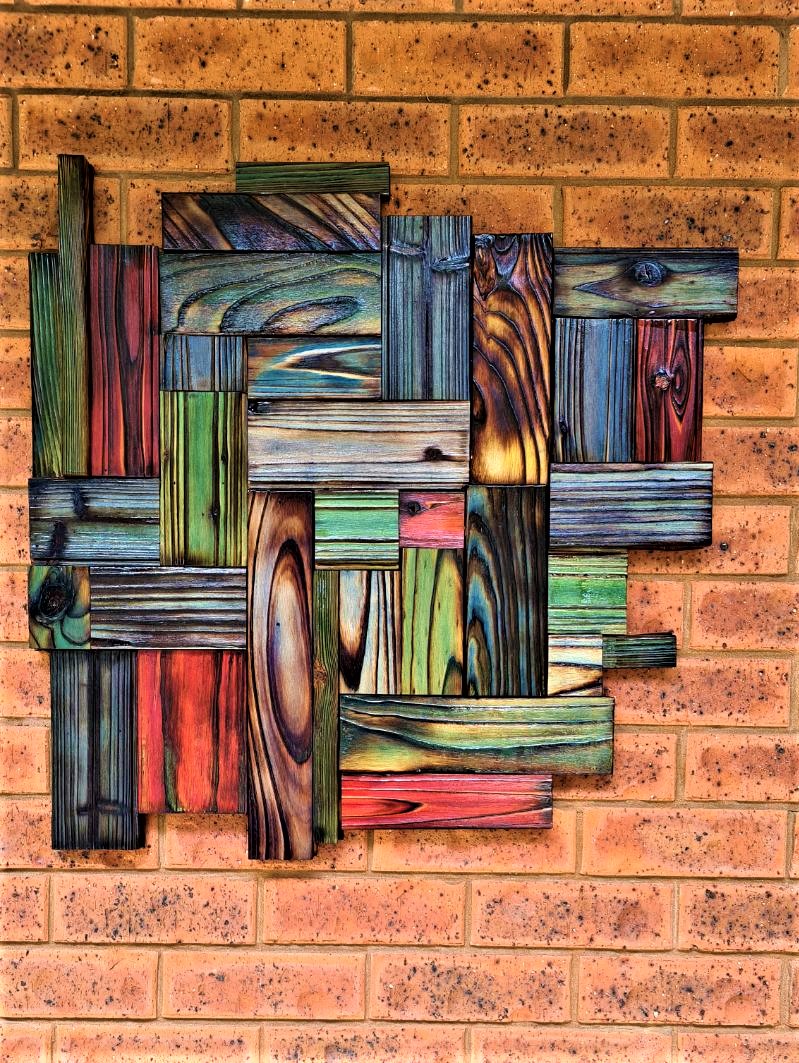
I chose to keep this wooden heart in its natural colour, but if you’d like to add some colour, there are several methods you can try. I used these same techniques when I created my scrap wood wall art.
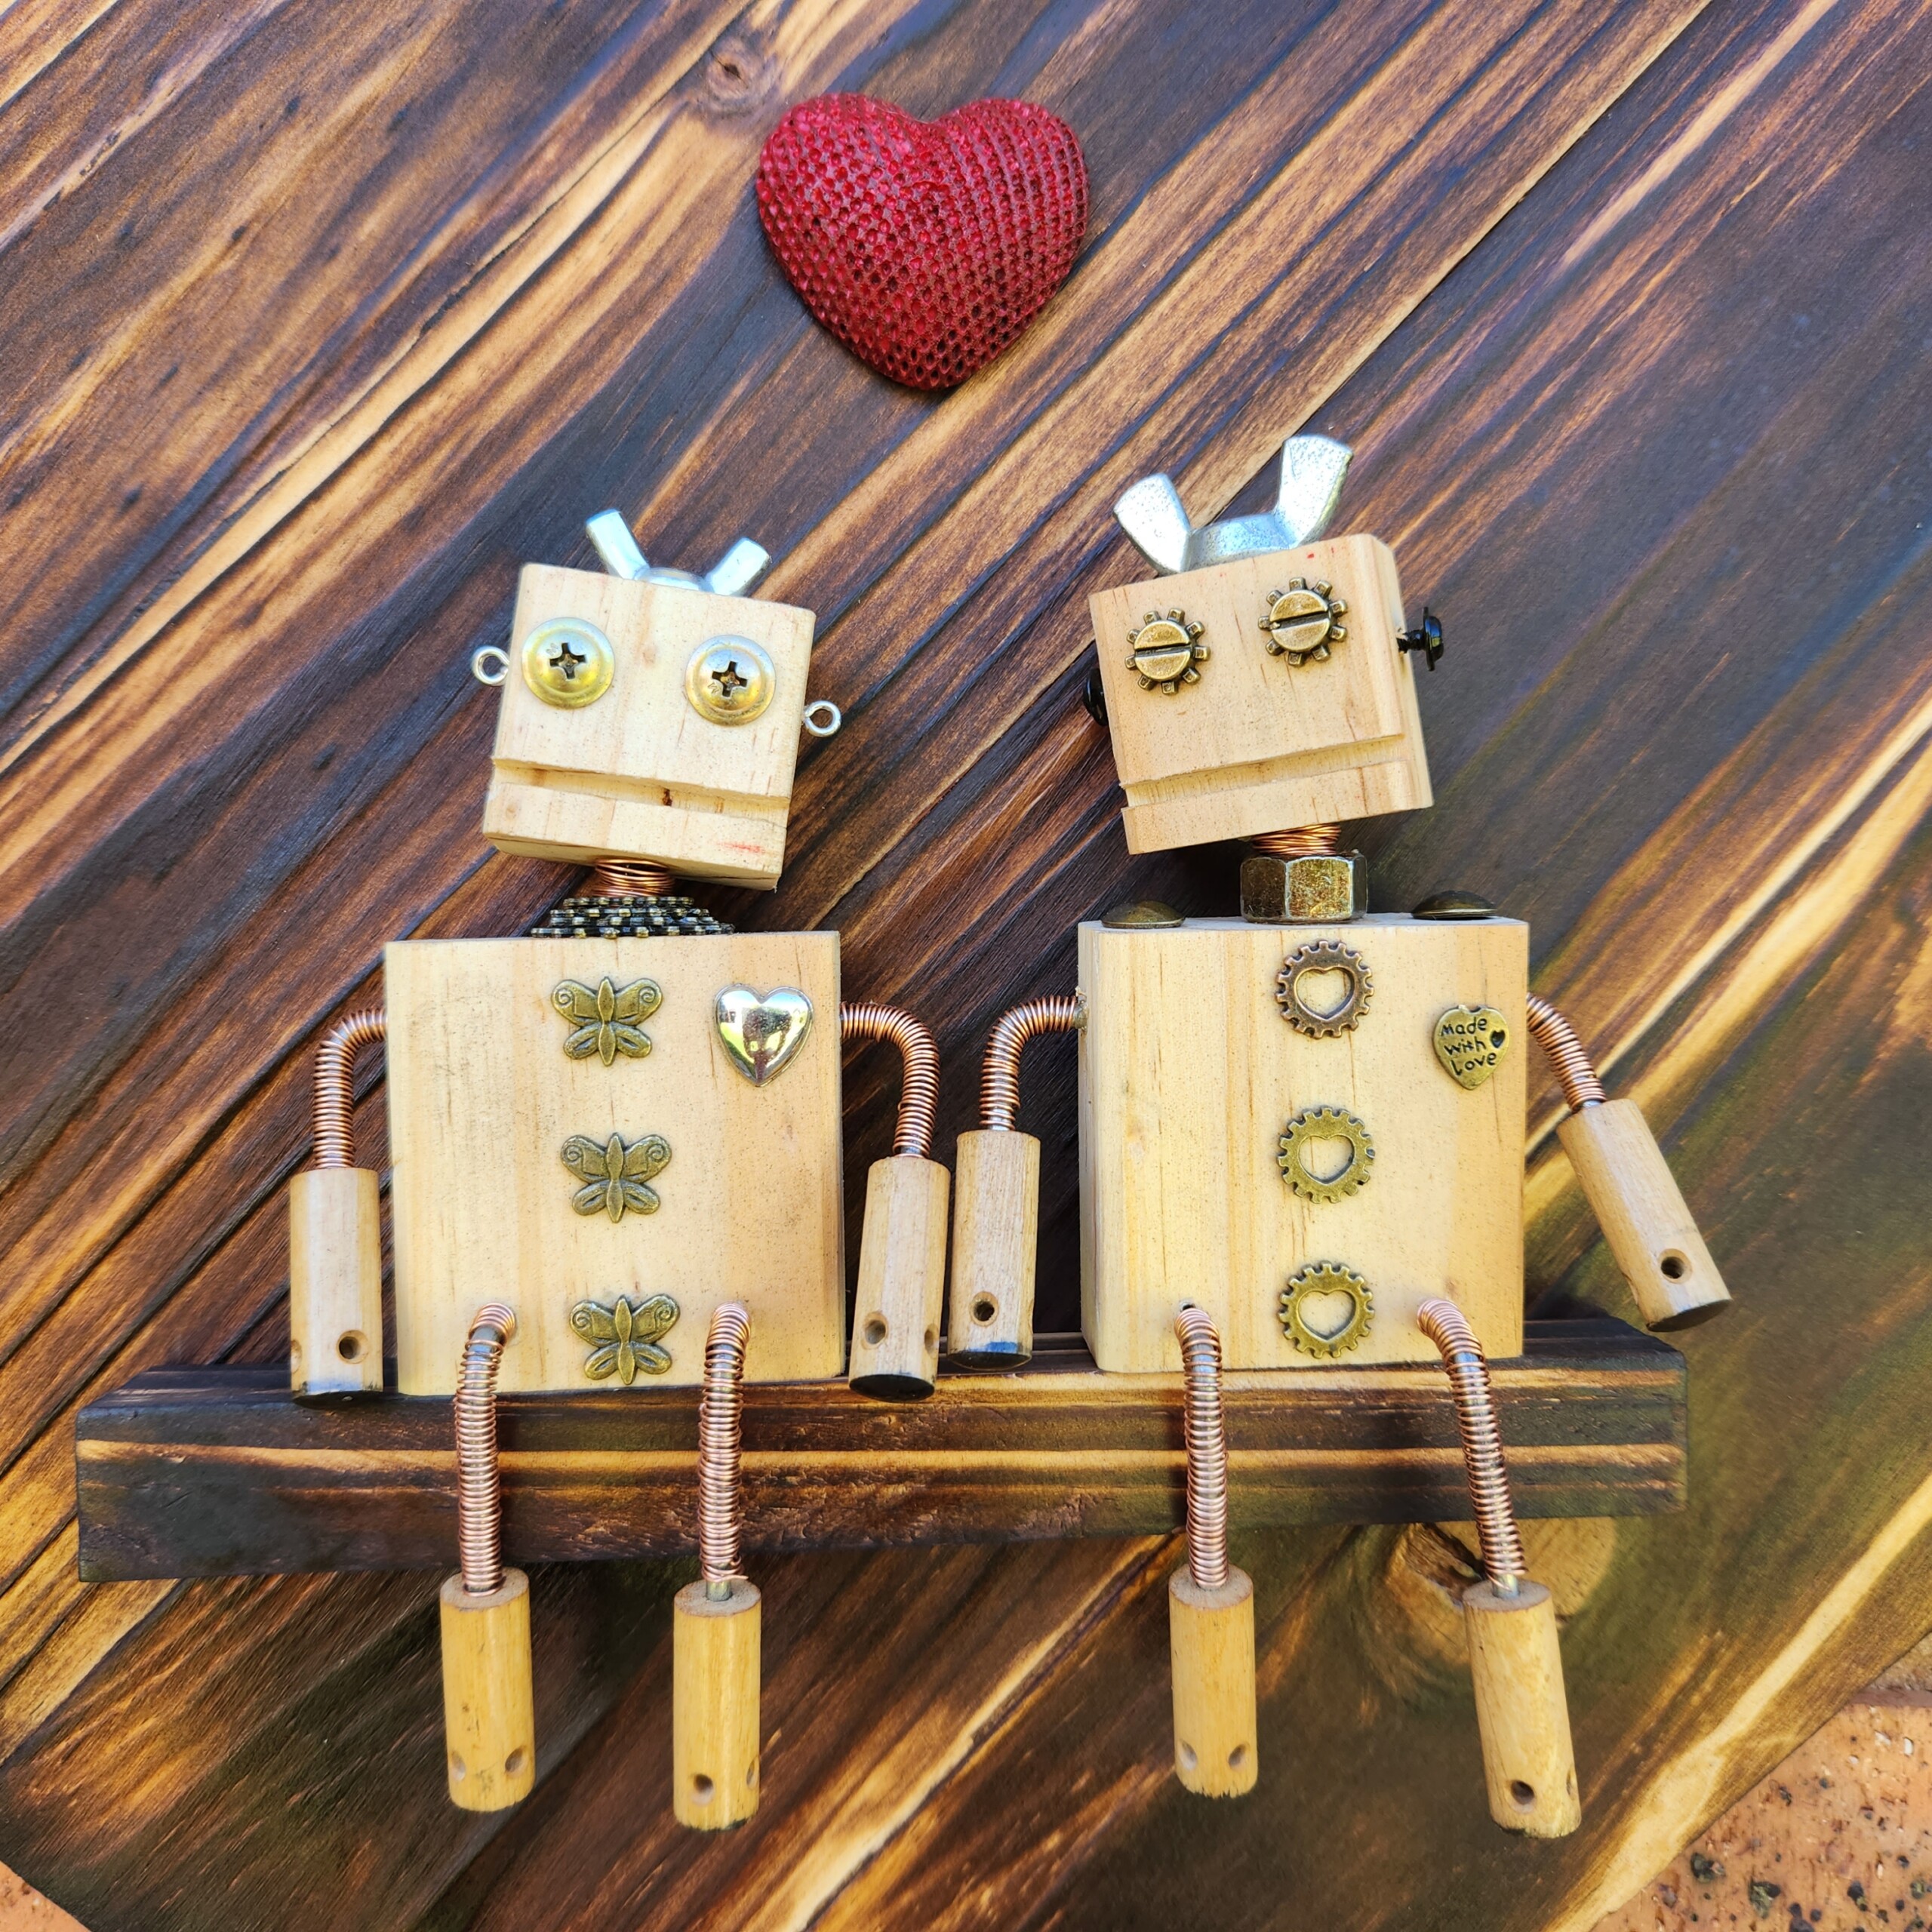
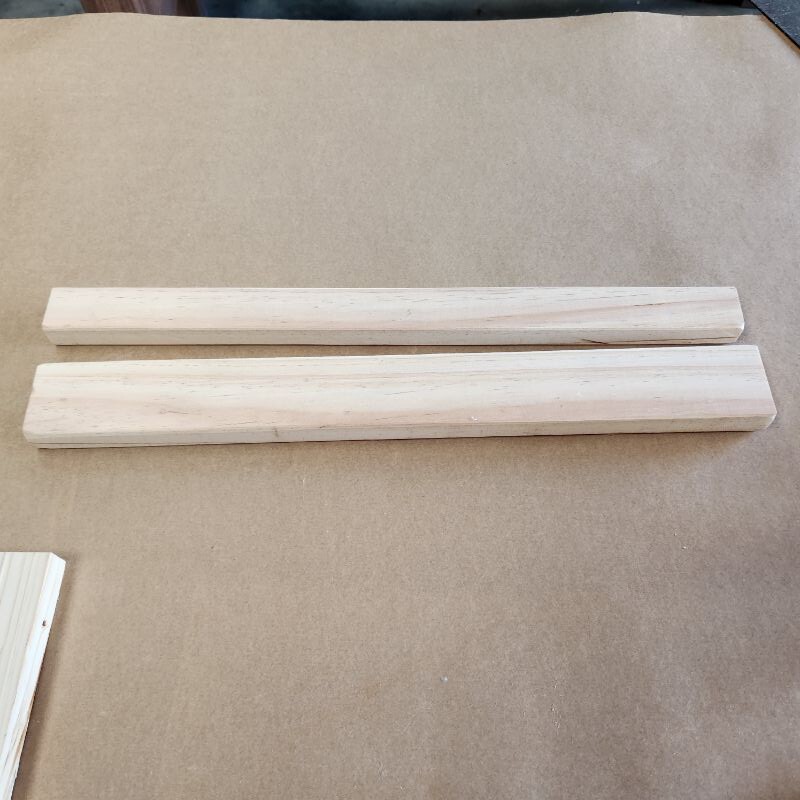
Making the Wooden Robots
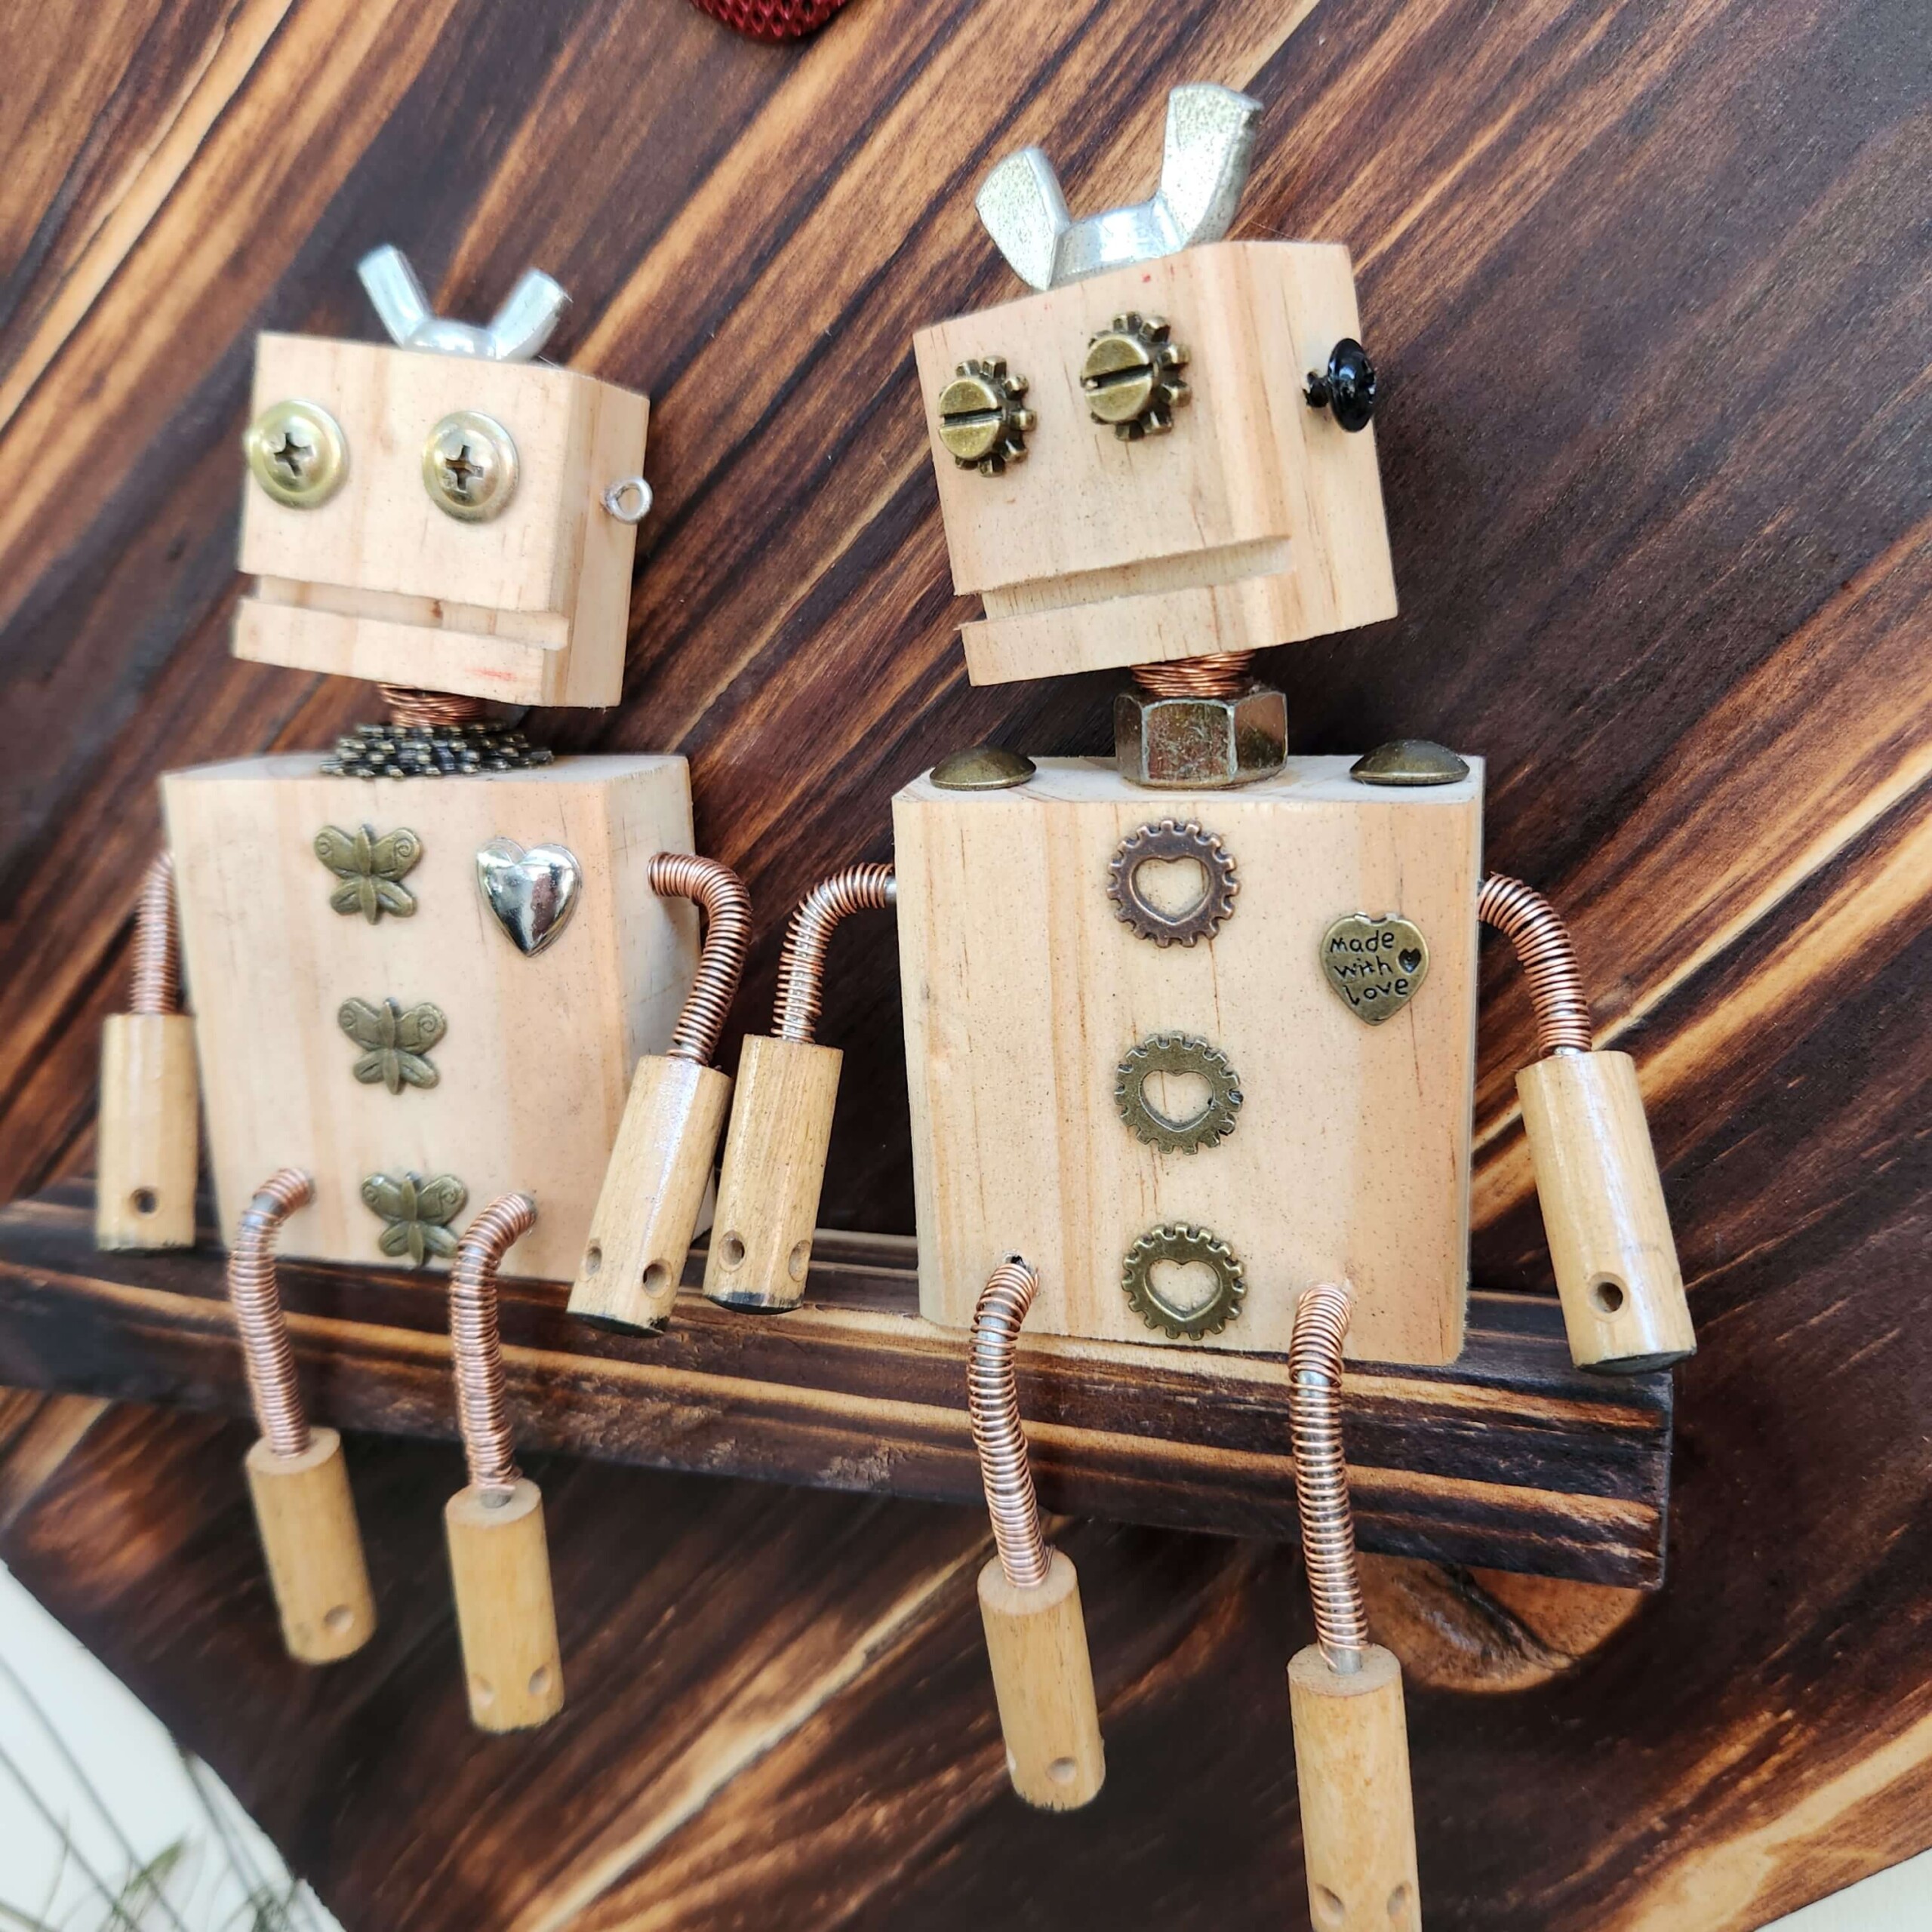
The heart on its own felt a little plain, so I added some playful wooden robots using offcuts. Each robot needs two blocks – a smaller one for the head and a larger one for the body.
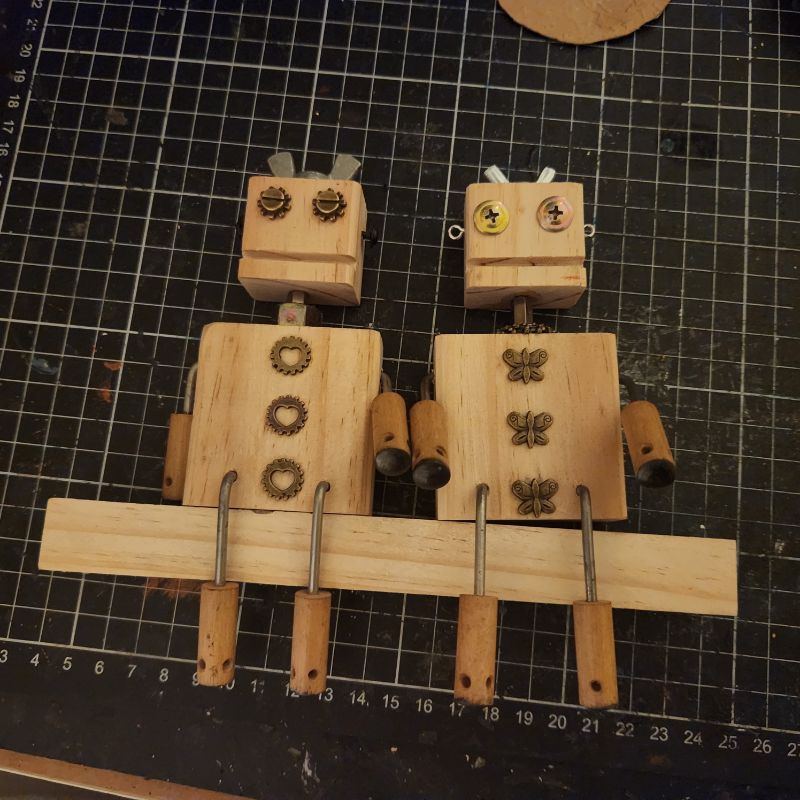
For the mouth, I used a table saw to cut a shallow line, though you can simply draw one on. The fun part was decorating them with random items from my workshop: screws, washers, gears, knobs, and even craft supplies. Each robot developed its own personality!
I attached them to the heart with screws from behind, then sealed the entire piece with two coats of spray polyurethane for protection.
As a final touch, I added a small decorative heart made from hot glue in a silicone mould.
Here is a close-up of the robots so you can see the items I used to decorate them.
More pallet wood projects
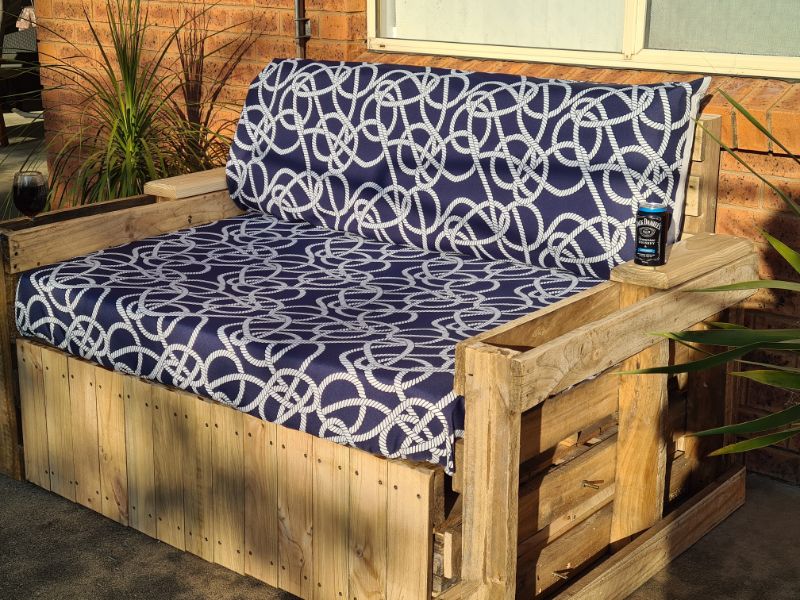
If you love relaxing outdoors, why not build your pallet wood daybed that’s stylish, budget-friendly, and tough enough to withstand the weather?
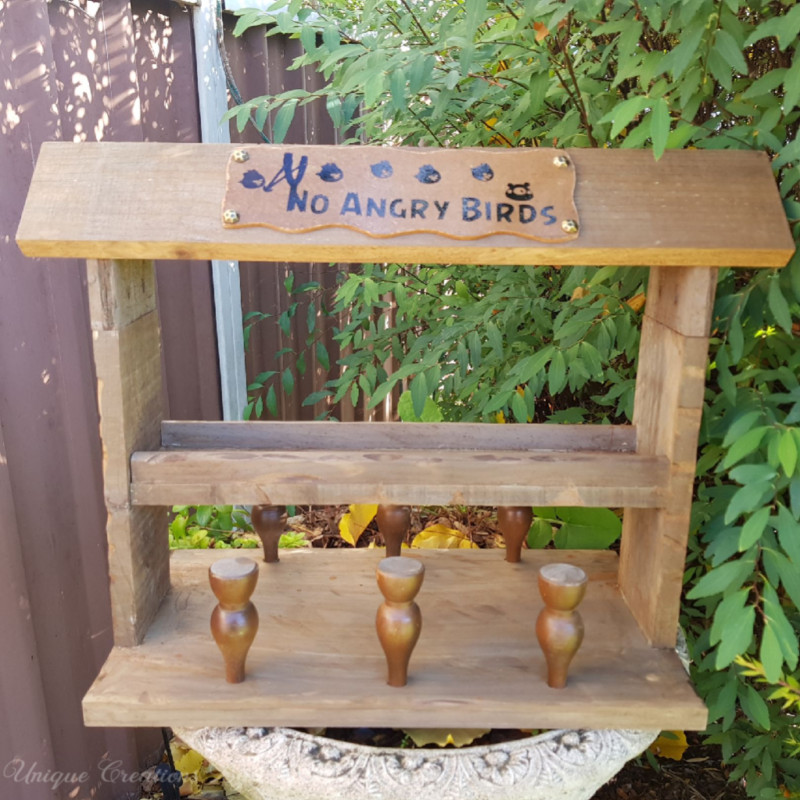
This simple bird feeder, designed in the shape of a fly-up bar, was made from pallet wood.
More about IBC
If you follow my blog, you will know I am part of the IBC (International Bloggers Club), which is a group of talented bloggers from around the world. We have members from Spain, South Africa, Australia, the United States, and Canada. Each month, we come together and create a project with a common theme.
The “Pallet parade ” contributions from my fellow bloggers joining us this month are listed below. Please feel free to jump over and give them some love.
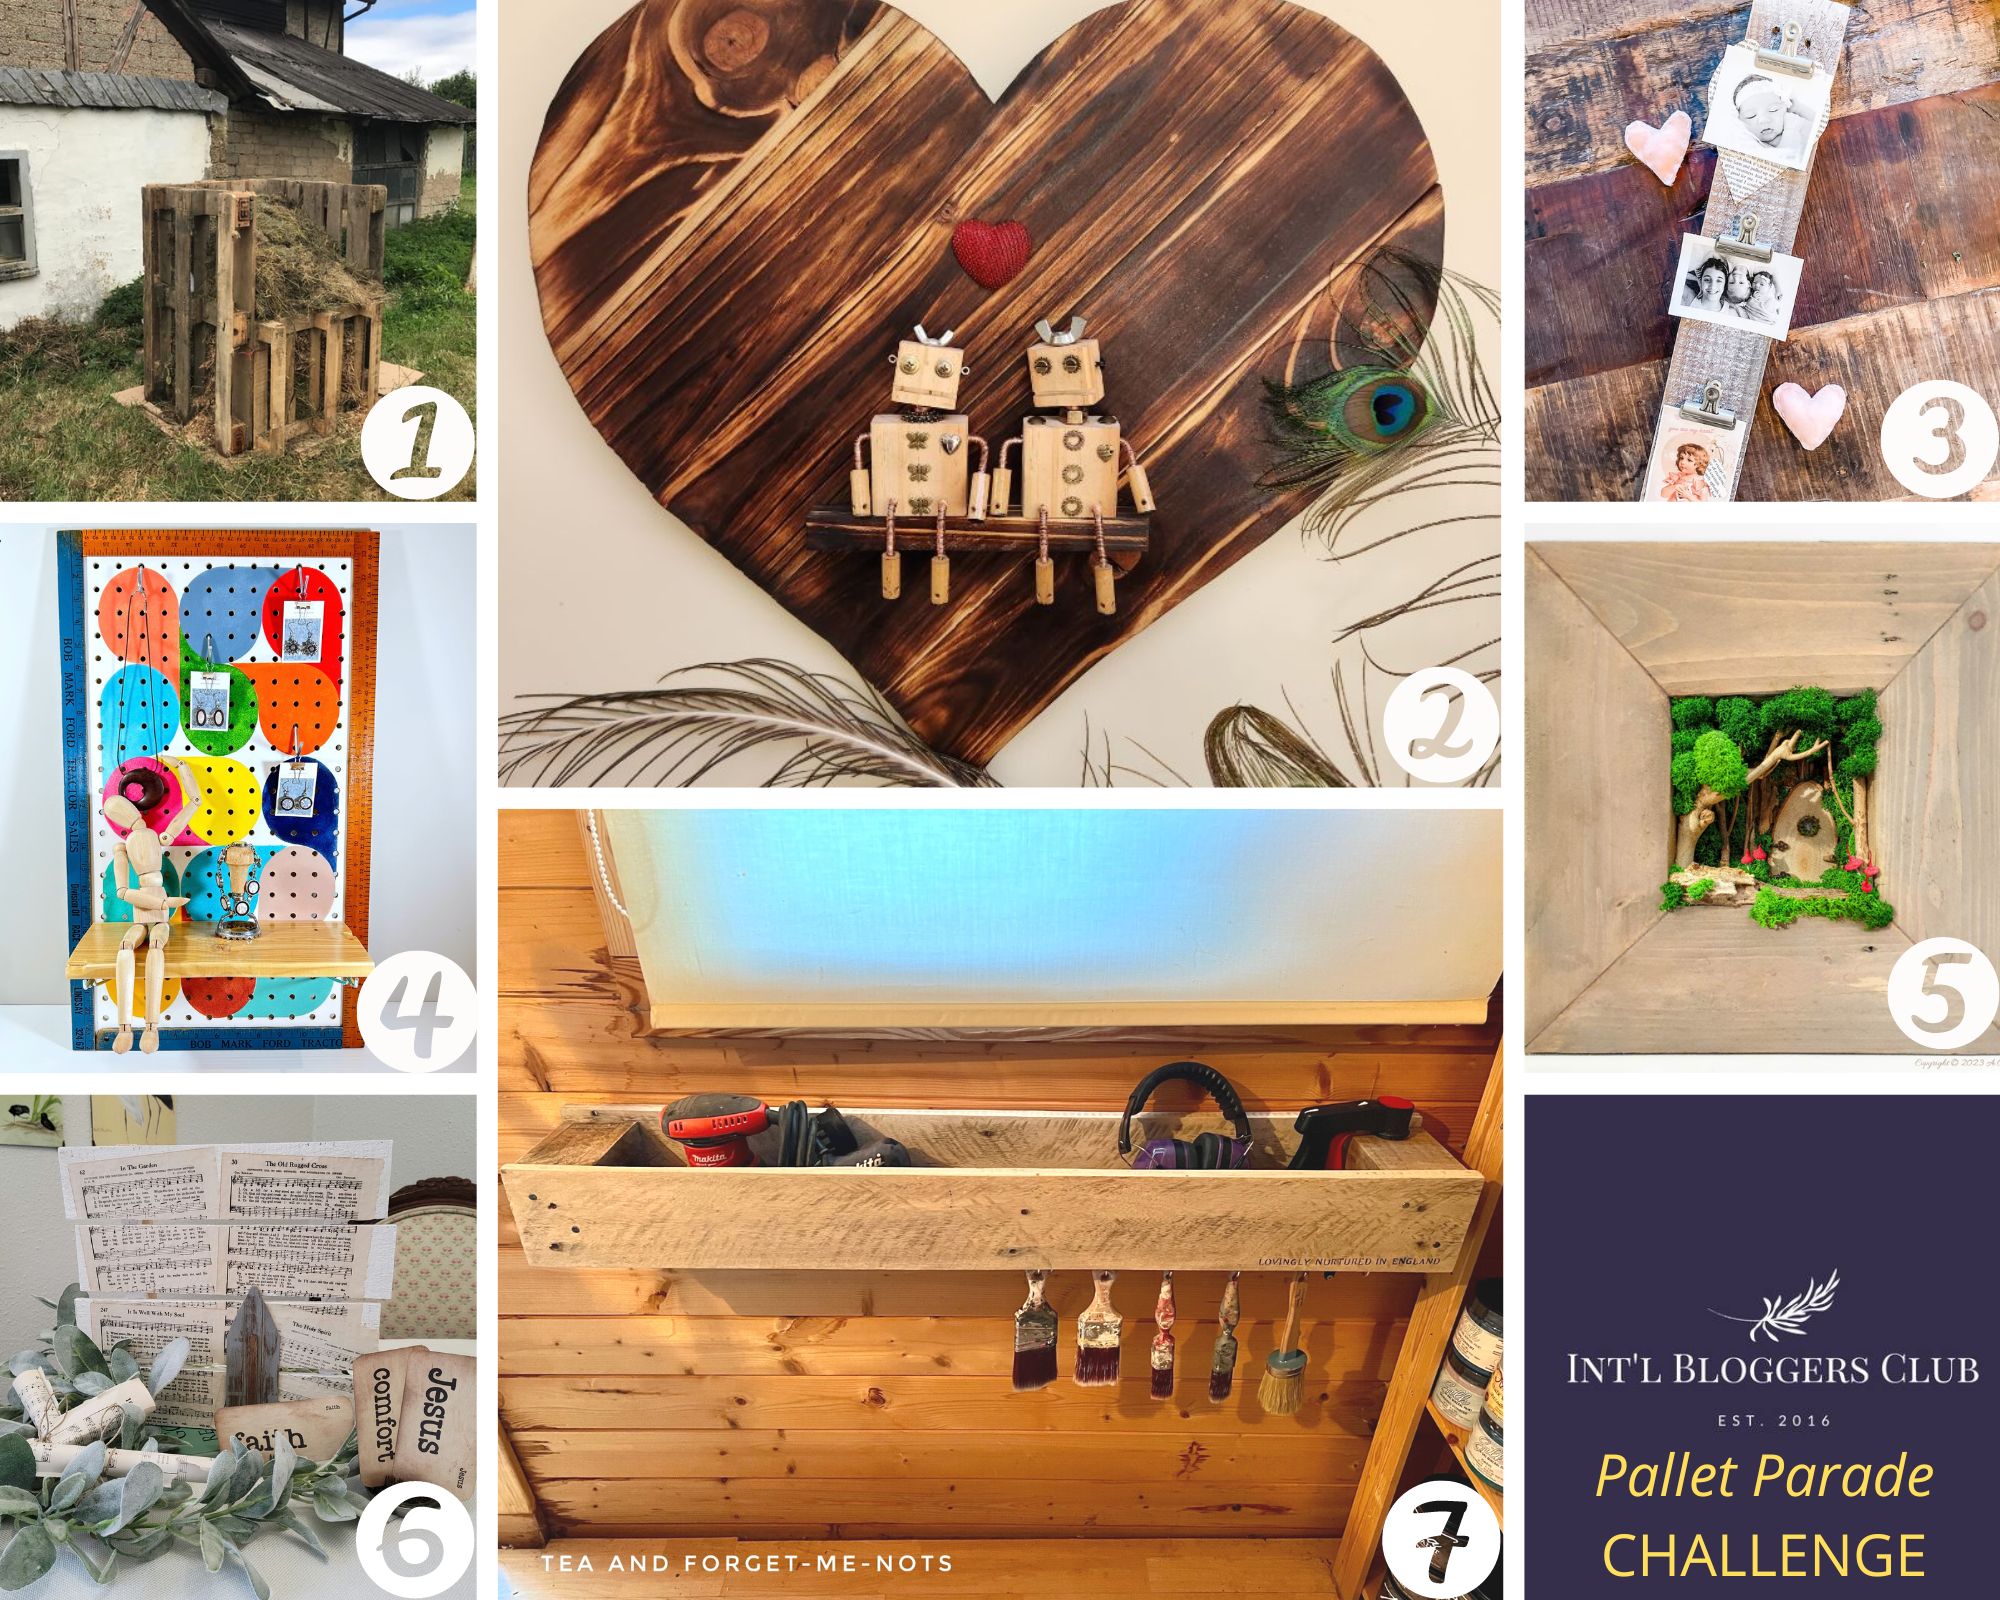
- Song Bird Blog| Easy DIY Compost Bin
- Me
- Saved from Salvage| Pallet photo holder DIY
- Birdz of a feather | Pallet Shelves DIY
- A Crafty Mix|Reverse Canvas magical fairy forest
- Fifth Sparrow No More |Upcycle old hymnals on this creative pallet project
- Tea and Forget Me Nots|How to make an easy rustic pallet DIY shelf
If you’re interested in any of the items used in this project, we’d appreciate it if you used our affiliate links. Clicking these links earns us a small commission at no extra cost to you, helping us create more inspiring and exciting projects to share. We’d also love to hear your thoughts—feel free to leave a comment or share this post!


23 Comments
Michelle Leslie
January 24, 2023 at 12:27 amAwwwwwww, man, those little robots are the cutest things ever. I want a whole family, and don’t even get me started on the large pallet heart. That would look so good in our holiday cottage.
P.S. You’re going to have to share what you did for Santa to give you that crazy new power tool 😉
Anita Holland
January 24, 2023 at 3:28 pmThank Michelle. I can’t tell you what I did for Santa that is a secret. lol
sara allen
January 24, 2023 at 12:43 amFantastic project Anita and your robots are adorable! I’m glad I held off trying shou sugi ban; maybe Santa will be good to me too this year?
Anita Holland
January 24, 2023 at 3:29 pmThanks Sara, the robots were a last minute addition. The restorer would be great for you because you do so much DIY. It is a brilliant machine.
Rachel
January 24, 2023 at 6:13 amAbsolutely love this project. I didn’t know the process of shou sugi ban but it looks a lot of fun to try. I know where to come when I want to have a. Go myself!
Anita Holland
January 24, 2023 at 3:30 pmThanks Rachel, I love doing shou sugi ban but the process is very time-consuming. But with this restorer, I will be doing more.
Kristin salazar
January 24, 2023 at 7:45 amWOW this turned out so beautiful! Thank you for sharing the process with us!
Anita Holland
January 24, 2023 at 3:31 pmThanks Kristin, you are very welcome.
Regina Jenkins
January 24, 2023 at 12:07 pmAnita – nice to meet you! You truly elevated the look of pallet wood with that method. What a great tutorial. I have never heard of that tool, I’m all about speeding things up in the DIY world. Those robots are the cutest, very creative.
Anita Holland
January 24, 2023 at 3:32 pmThanks so much Regina, I believe this is a fairly new tool on the market. I want to start sell the shou sugi ban projects but they are not worth selling if the take so long to make.
Kimberly Snyder
January 25, 2023 at 2:00 amWow! What a great project! I love this! Great use of an old pallet! Thanks for sharing how to make it!
Anita Holland
January 25, 2023 at 6:45 amThanks so much.
Ann
January 26, 2023 at 4:18 amAdorable…and you know I love pallet wood projects!
How to make an easy rustic pallet DIY shelf – Tea and Forget-me-nots
January 26, 2023 at 8:48 am[…] Pallet Wood Heart – Unique Creations By Anita […]
Kristin Sullivan
January 26, 2023 at 9:33 amThis is adorable! The robots are my favorite!
Anita Holland
January 27, 2023 at 4:11 pmThanks So much Kristin.
Beth
January 28, 2023 at 4:18 amFABULOUS upcycle, Anita!
I’d love for you to join us over at the Creative Crafts Linky Party every Wednesday through Sunday
https://creativelybeth.com/creative-crafts-linky-party/
Followed and Pinned!
Creatively, Beth
Adult Valentines Day Crafts That Are Easy and Adorable
January 30, 2023 at 6:20 am[…] 22. Pallet Wood Heart […]
Kippi at Home
January 31, 2023 at 3:34 amThe cute couple sitting on your heart is so adorable. Great project!
Anita Holland
February 18, 2023 at 10:17 amThanks so much Kippi.
Marie B
February 2, 2023 at 5:04 amWhat fun and creative ways to use up scrap wood. I love your signature Shou sugi ban patina on the pallet wood heart and the scrap wood robots are stink’n ADORABLE!
Anita Holland
February 18, 2023 at 10:17 amThanks so much Marie, I think I may be addicted to shou sugi ban. lol
Reverse Canvas Magical Fairy Forest Tutorial - A Crafty Mix
July 30, 2024 at 3:42 am[…] Just in time for the month of love, Anita will show you how to make a huge pallet heart and two beyond-cute little robots. […]