A few months ago, I posted wooden wall art panels with a distinctive abalone/snake skin effect I discovered by accident. The project quickly became one of my most popular—so many lovely compliments, though a few readers said it looked too hard. I found it easy, just very time-consuming. Today, I’m sharing how I halved the work by using a gouge ball to create this Shou sugi ban wall art.
Why a Ball Gouge?
My original Shou sugi ban wall art panels used a router, then endless sanding to soften square edges. Burning those edges created the “abalone” look by accident. A ball gouge recreates the same scooped channels quickly, so you can focus on texture and colour.
What Is Shou Sugi Ban (Yakisugi)?
Shou Sugi Ban (also called Yakisugi) is a centuries-old Japanese method where timber is charred to preserve and waterproof it. Traditionally done with Japanese cedar and finished with natural oils, the deep, crackled char resists rot, pests and weather. Modern makers also use it decoratively. By controlling the burn, brushing back the char, and adding vibrant stains, you can transform ordinary off-cuts—even budget pine—into striking wall art with dramatic grain and colour.
Abalone-Effect Shou Sugi Ban Wall Art (Half the Time with a Ball Gouge)
*This post may contain affiliate links. This means I earn a small commission on links used at no extra cost to you. Please see my disclosure policy for more information.**
Tools and Materials
- Recycled pine boards (I used an old bed frame)
- Angle grinder with 40 mm ball gouge attachment (Arbortech style or budget version)
- Sturdy clamps
- Blowtorch and MAP/Propane gas
- Wire brush, small and large (hand sanding)
- Coarse nylon cup brush for a drill
- Drill
- Restorer tool, drum sander
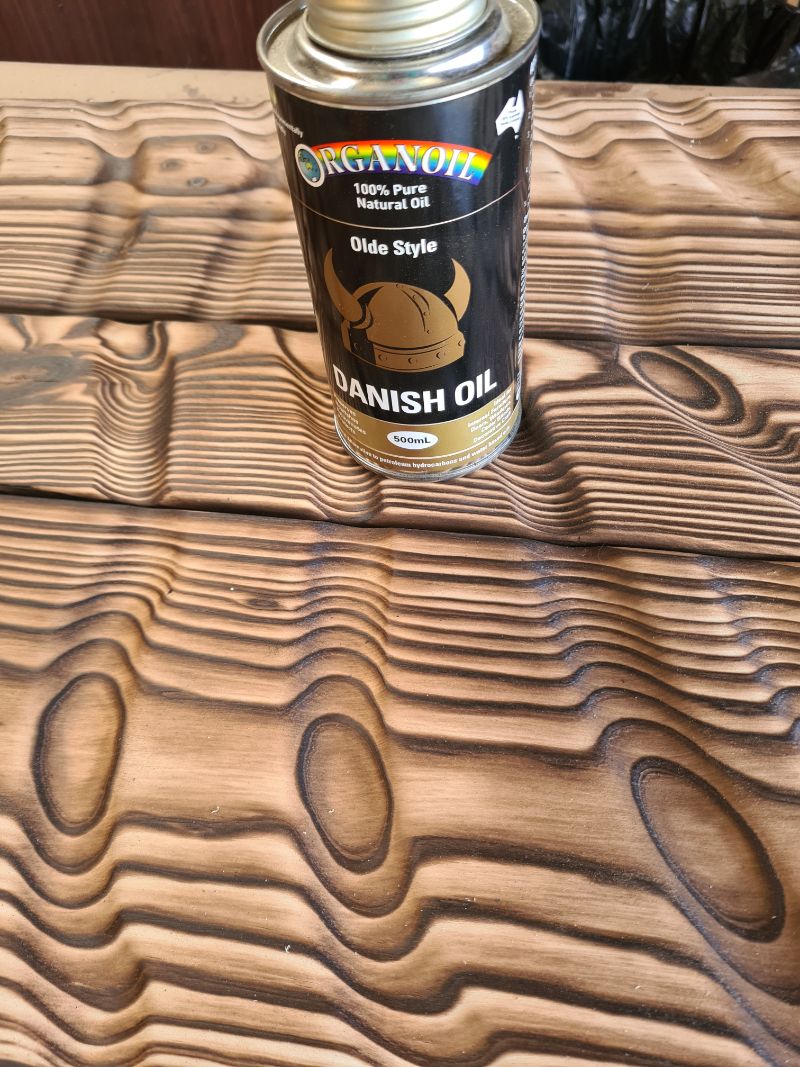
- Finishing oil (Danish, tung, or similar)
- Optional paint (interior house paint works) and a small roller
- Safety gear: eye protection, ear protection, dust mask or respirator, heat-resistant gloves
Safety First
Work outside or in a well-ventilated space. Secure every board with clamps. Keep hair and cords clear of the grinder. Have water or an extinguisher within reach when burning.
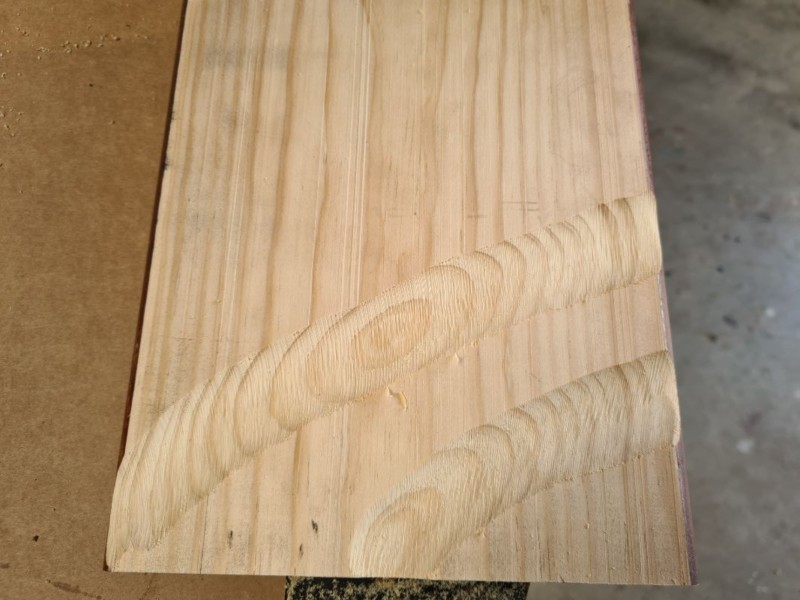
Find and Prepare the Timber
For this project, I used recycled pine from an old bed frame. I prefer pine because it’s softer and gives more dramatic results.
Clamp the board firmly to your bench before you start. A grinder with a gouge ball is powerful—if the timber isn’t secured, it can take off (ask me how I know).
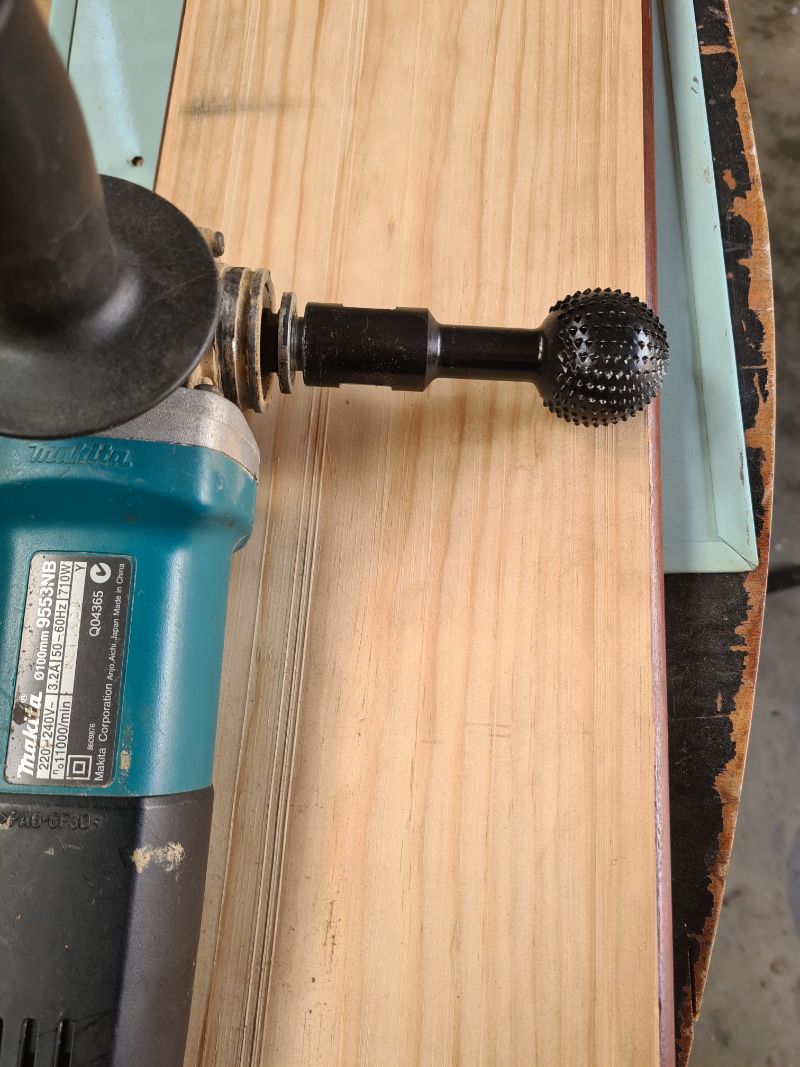
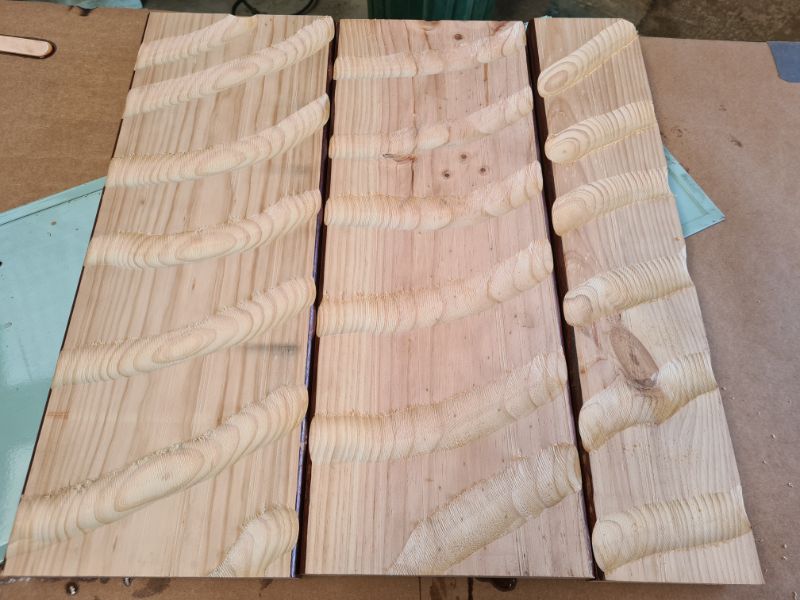
To add the groove, simply sweep the gouge ball across the surface. Make a couple of passes to deepen the channels. The surface will look rough at this stage, but once the wood is burnt, it evens out.
In hindsight, the grooves would have looked cleaner running in a single line across each panel—live and learn.
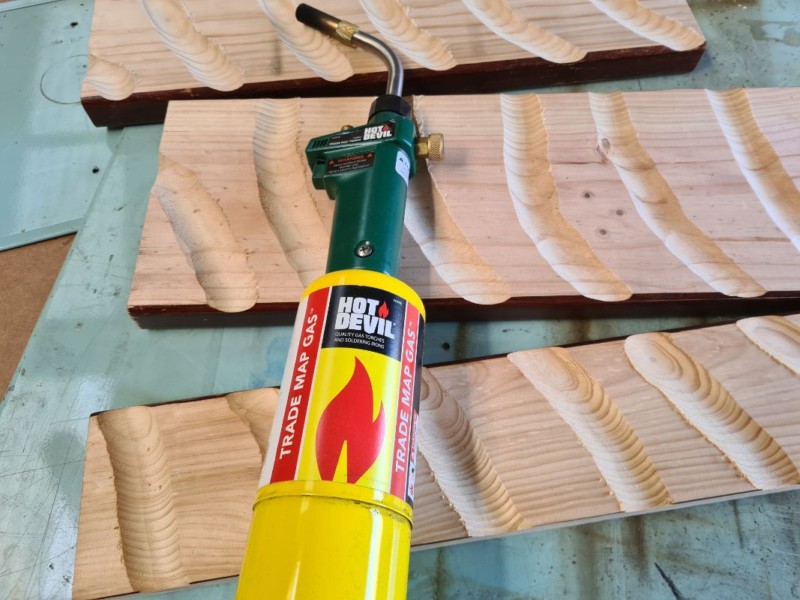
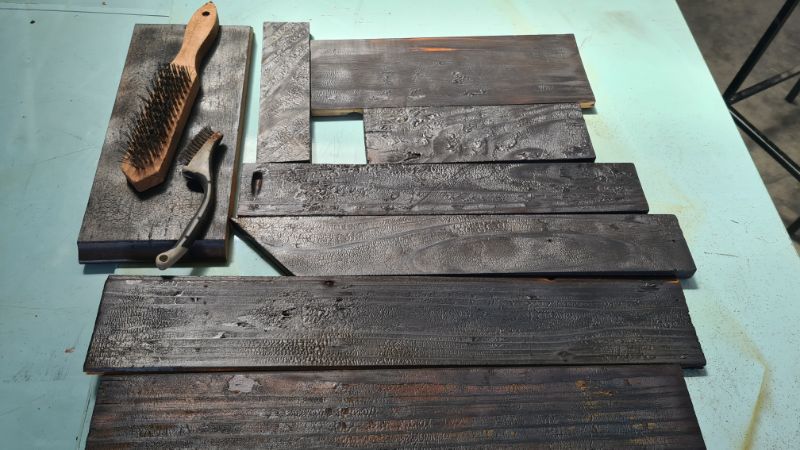
Burn the Timber (Shou Sugi Ban)
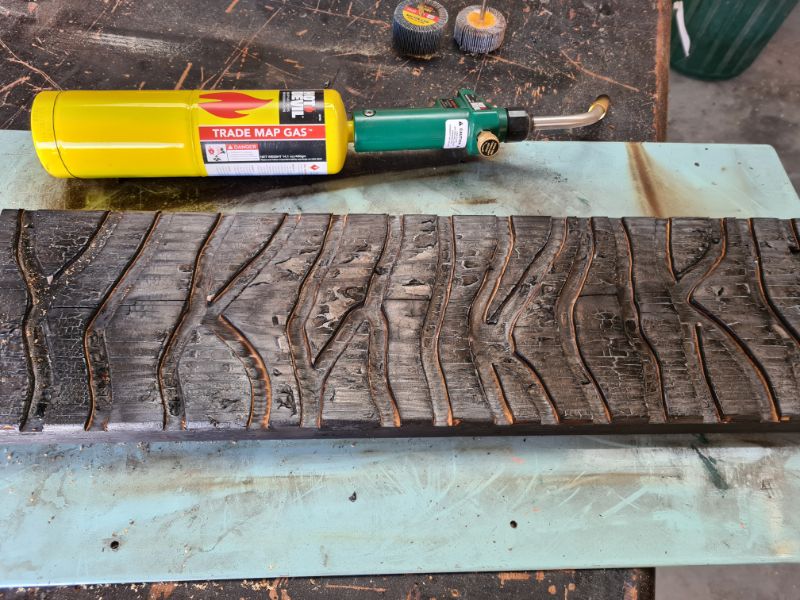
Use a blowtorch to char the surface until you see a cracked, alligator-skin texture. Keep the flame moving. Allow the board to cool fully before brushing.
I forgot to photograph this step, but this is how the wood should look after burning.
Brush Back the Char
There are three good ways to sand away the char, and all are best done outdoors because soot gets everywhere. First, use a wire brush and work with the grain—slow but controlled.
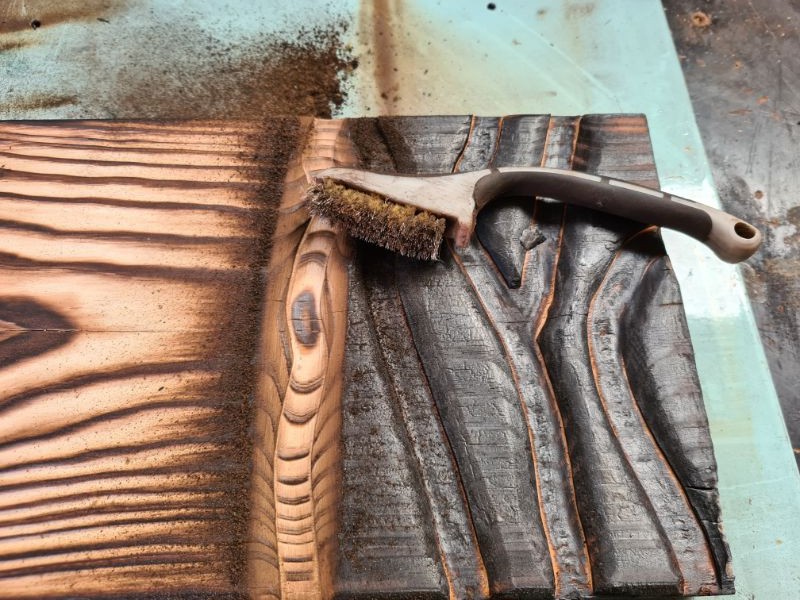
Use a large brush for broad surfaces and a smaller one to clean the grooves.
Second, fit a coarse nylon cup brush to a drill; it’s much faster and easier than hand-brushing.

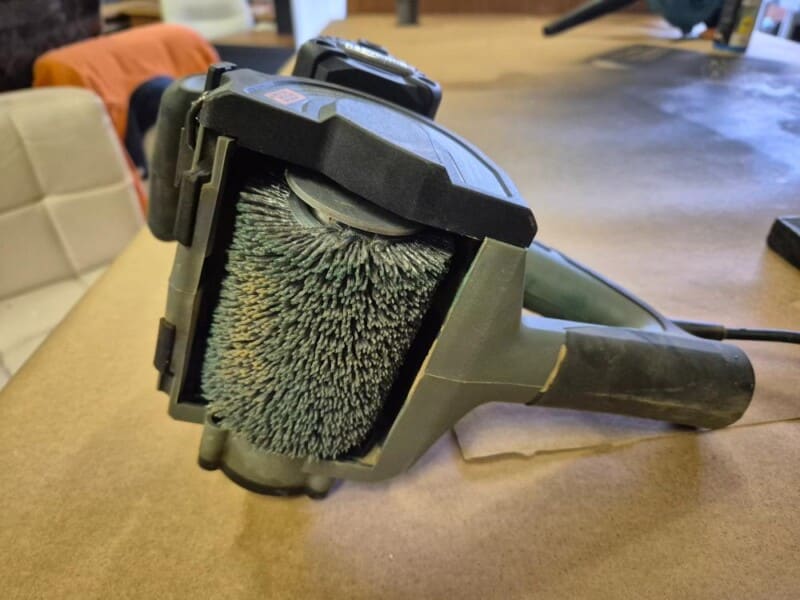
Third, use a restorer tool with a nylon brush attachment; this is the quickest option, cutting the job from hours to minutes, though it does cost more—well worth it if you get hooked on Shou Sugi Ban like I did. With any method, knock off the loose char first with a hand wire brush to reduce airborne soot, and keep your respirator and eye protection on until the dust settles.

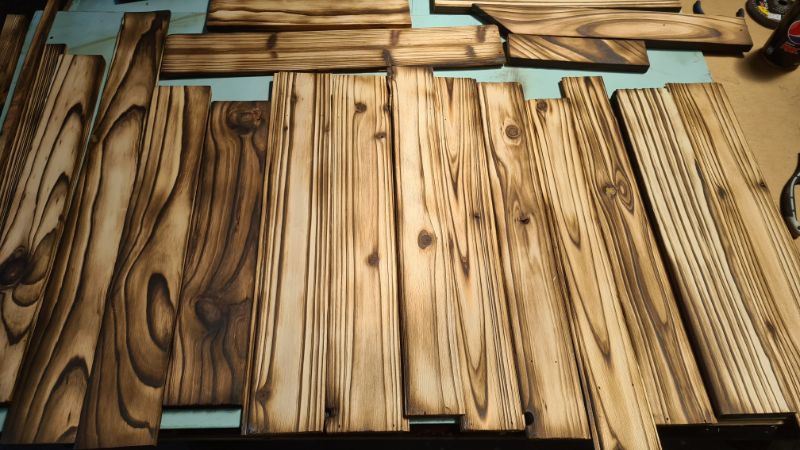
Shape the Colour with Selective Sanding
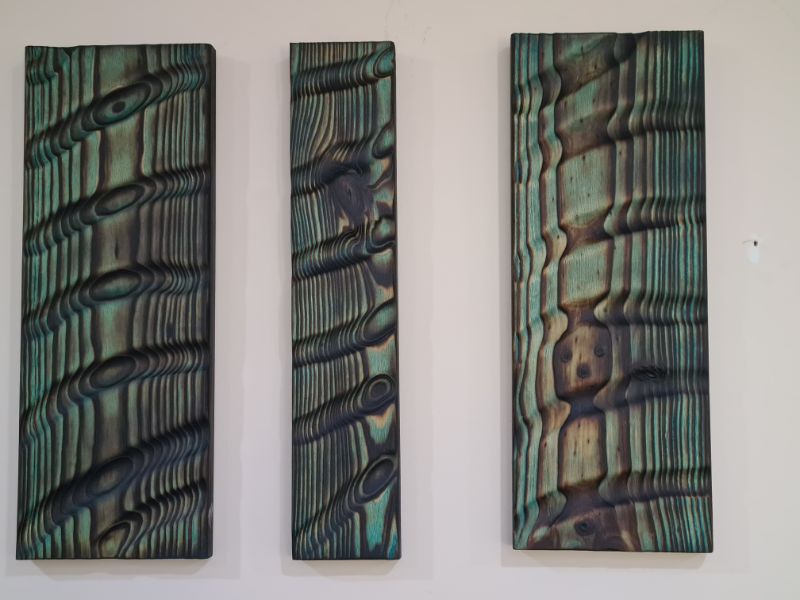
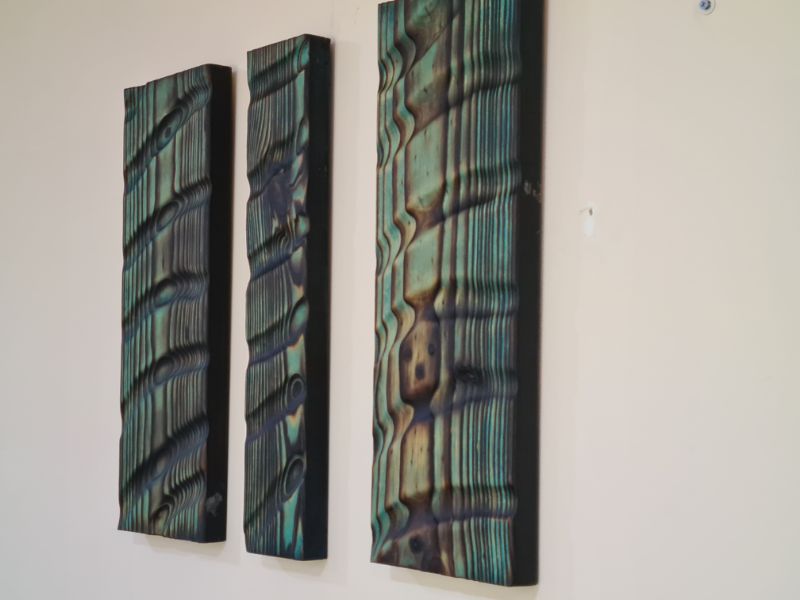
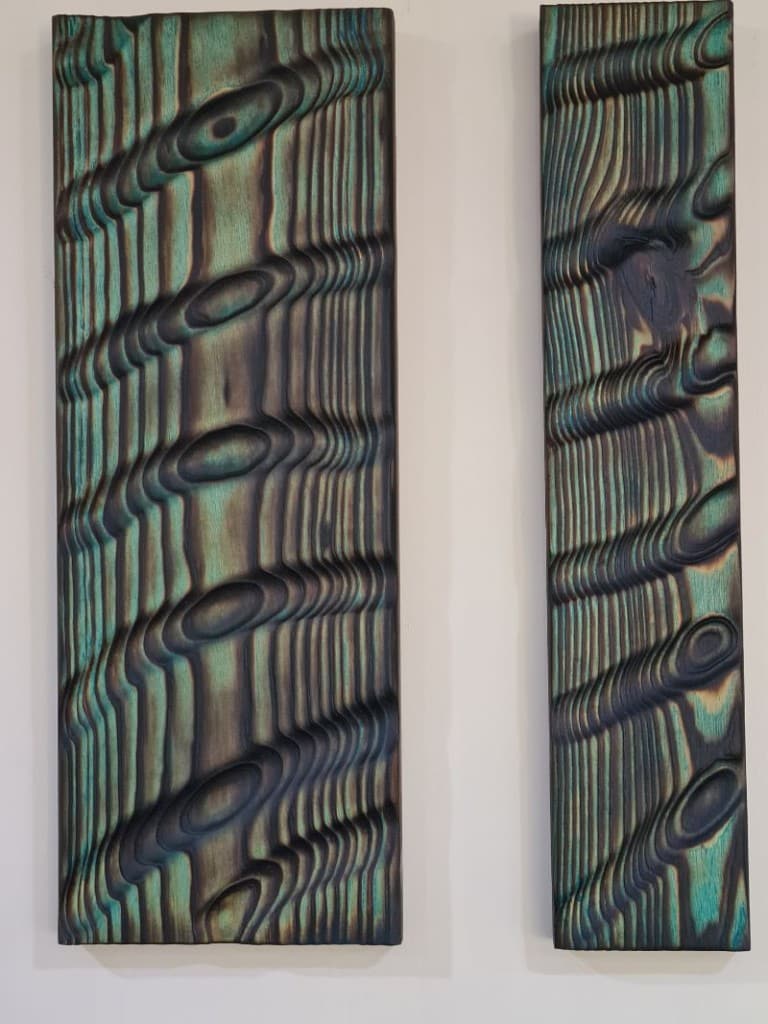
To create the multicoloured look, sand some areas deeper than others. The more you sand, the lighter the timber becomes and the more vibrant the colour. Leave some sections darker, as in the images below, for a more dramatic result. You’ll also notice the wood grain and knots stay black and raised.
Finish Option 1: Natural with Oil
Wipe on finishing oil and let it soak. Buff away excess. Oil deepens colour and protects the timber. Stop here for raw, organic tones.
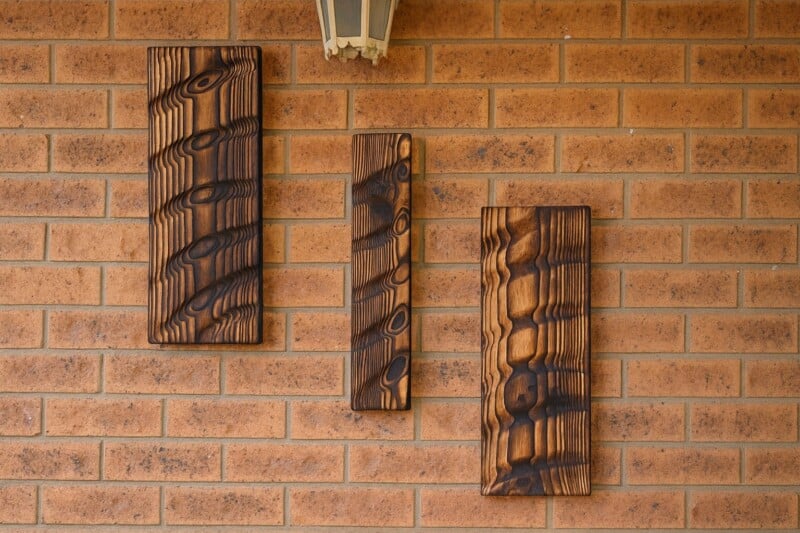
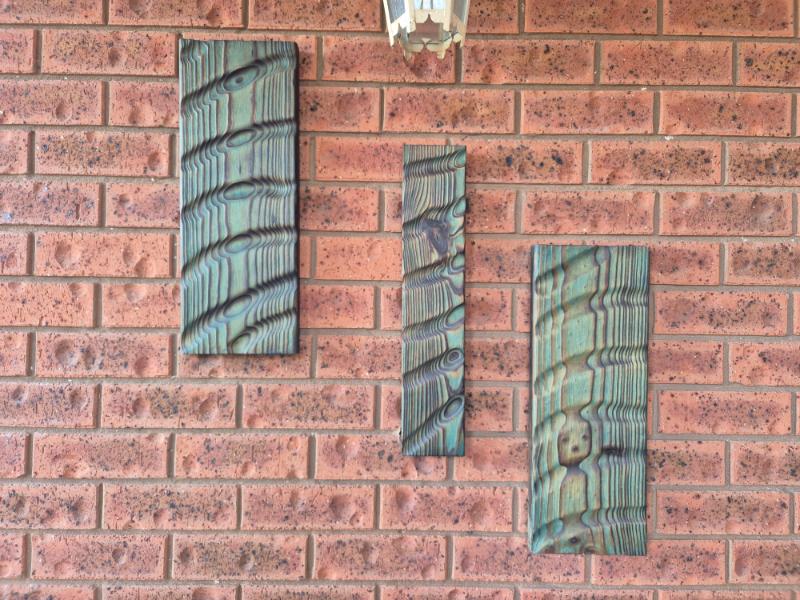
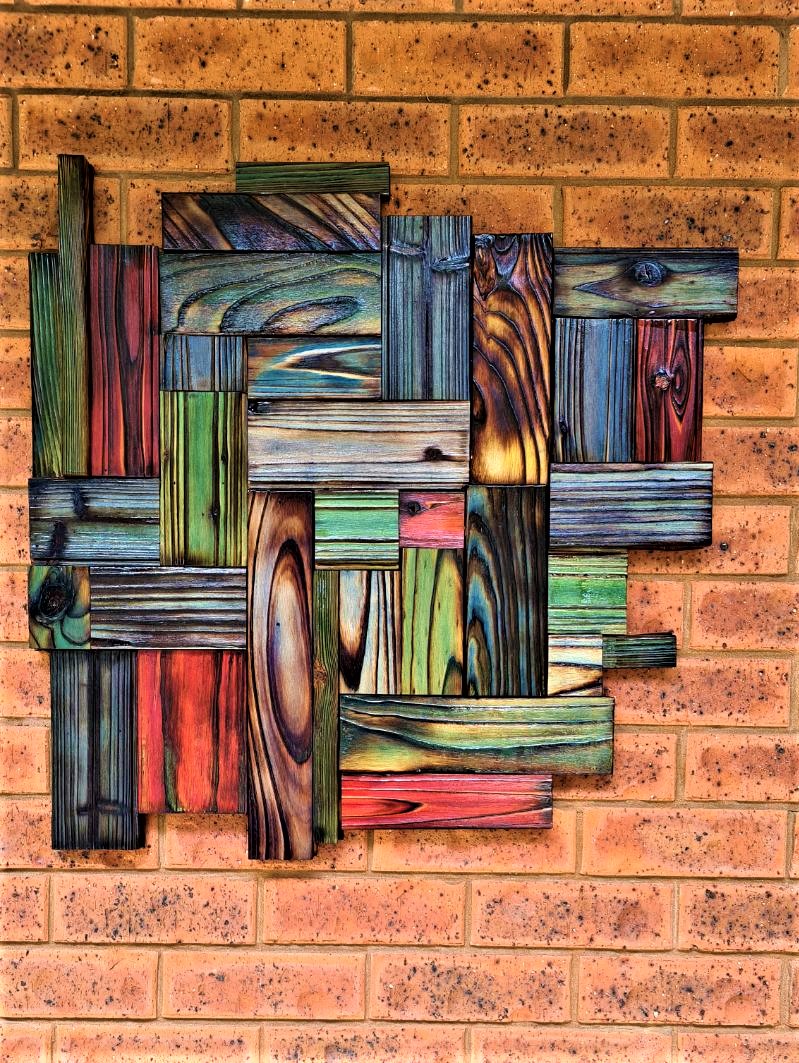
I made these panels to decorate my porch, but they blended into the brickwork, and the effect was lost, so I changed my mind and painted them.
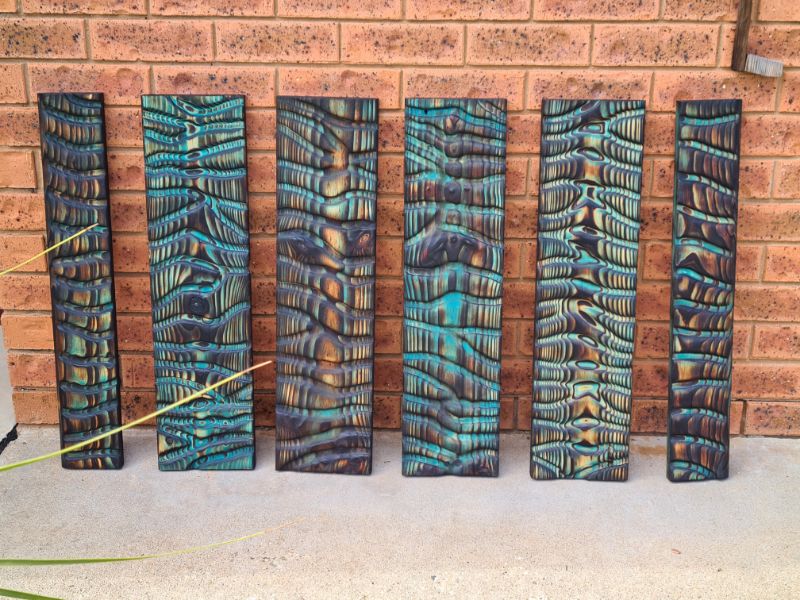
Finish Option 2: Painted Abalone Glow
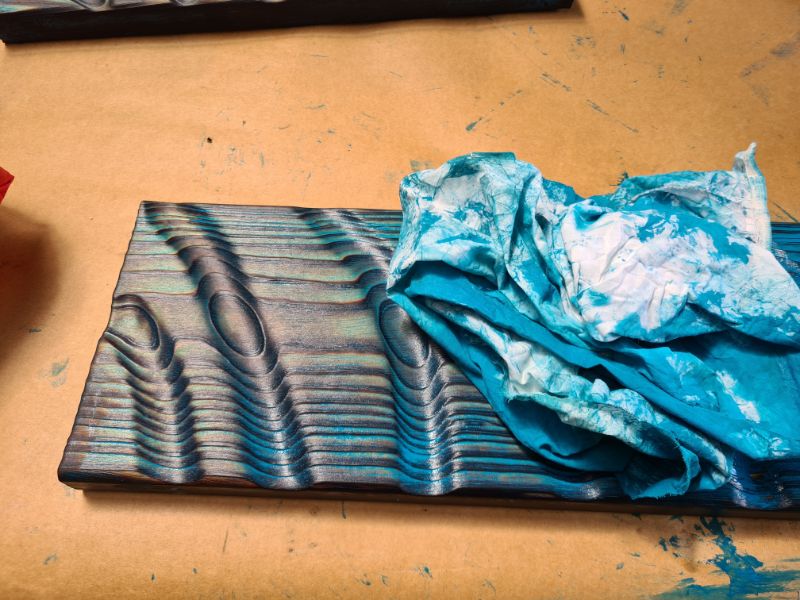
There are several ways to paint Shou Sugi Ban. I tested different products and shared the results in this post. When adding paint to raw timber, dampen the surface first to prevent blotching and stains, as you can see in the image below.
I didn’t need to do this because I’d already oiled the timber. To stain the wood, I used regular interior house paint.
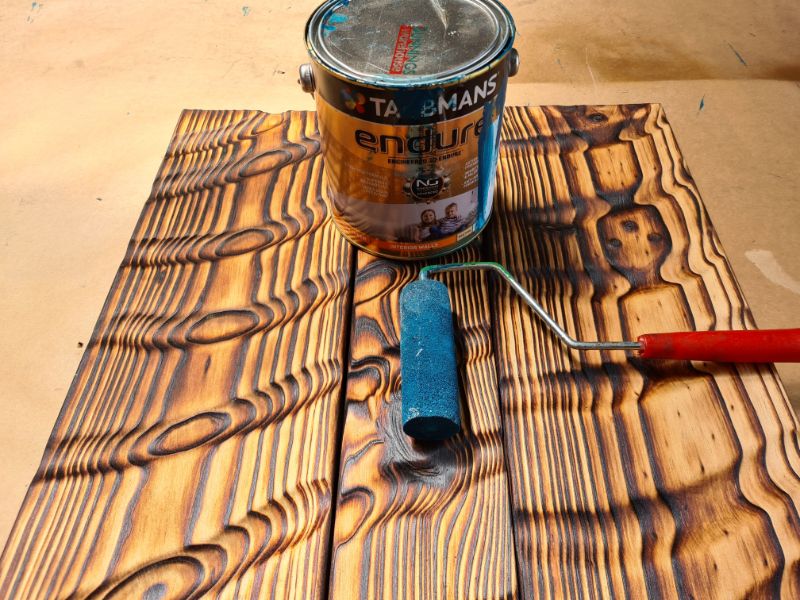
To apply the paint, I used a paint roller and added a thick layer to the surface and let it soak in for about 5 minutes.

Wipe back with a clean rag. Repeat for a deeper shade. Once dry, add a final coat of oil to seal and enrich the sheen.
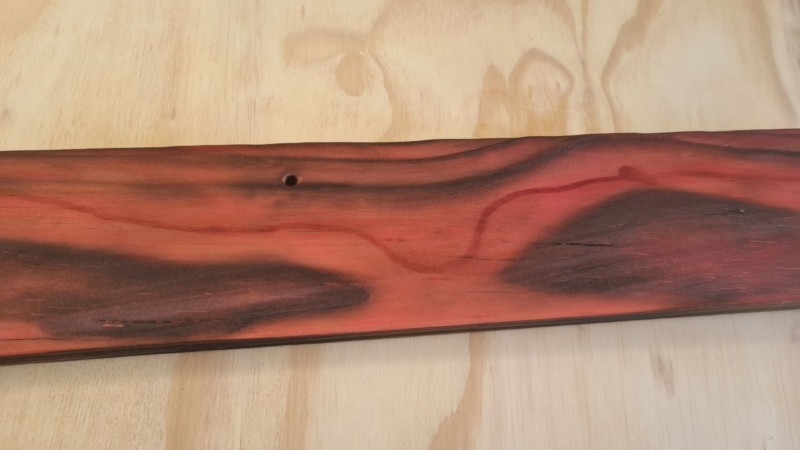
I have added some close-up images so you can get a better look at the effects of the shou sugi ban.

More Shou Sugi Ban Ideas
I created this wooden gecko from a recycled tabletop and added texture using Shou Sugi Ban.

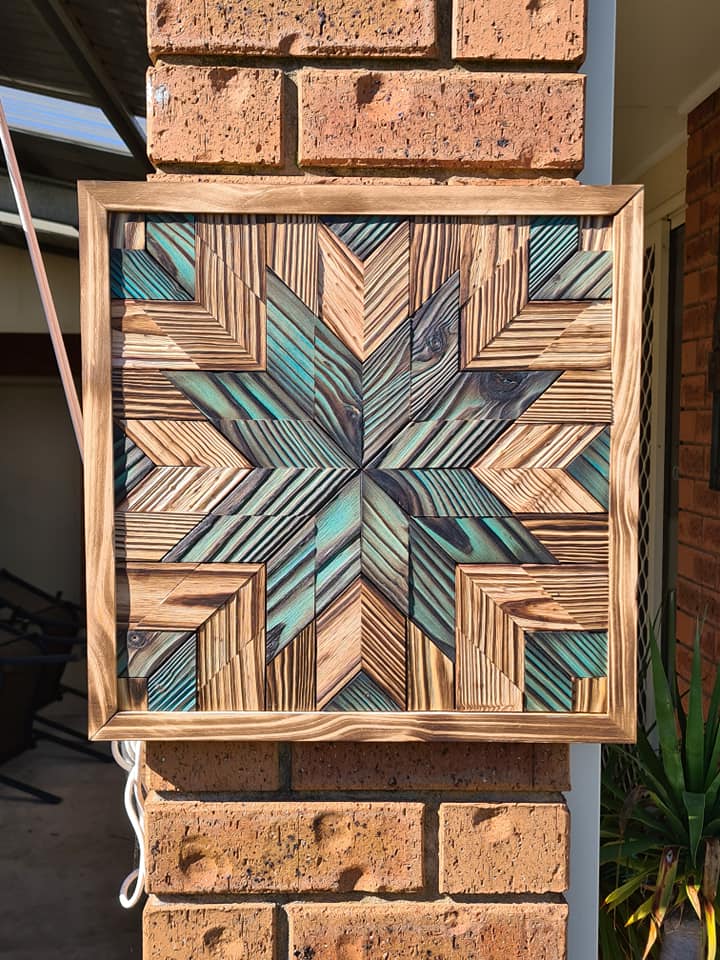
Shou Sugi Ban is a great way to create wall art—like my barn quilt design and this pallet-wood, multi-colour piece.

If you’re interested in any of the items used in this project, we’d appreciate it if you used our affiliate links. Clicking these links earns us a small commission at no extra cost to you, helping us create more inspiring and exciting projects to share. We’d also love to hear your thoughts—feel free to leave a comment or share this post!


16 Comments
Sara
June 13, 2022 at 10:42 pmWhat a cool technique; I’ve never heard of a gauge ball but now I’m intrigued! Love how you’re always pushing the envelope of Shou Sugi Ban!
Anita Holland
June 14, 2022 at 2:00 pmThanks Sara, it is such a beautiful effect I just love playing around with it to see what I can come up with.
Doron
July 18, 2023 at 5:22 pmBeutifull works.I was wandering if the oil doesn’t not seals the wood from obsorbing the paint. Did u try water base colors?
Thank you
Doron
Anita Holland
July 18, 2023 at 9:22 pmNo, the oil worked great. I did try a water-based paint and sealed it and found the colours faded. This one has never changed and it is outside.
Michelle
June 14, 2022 at 12:08 amThis is amazing, Anita! I totally love this stunning effect. Pinning!
Michelle
https://mybijoulifeonline.com
Anita Holland
June 14, 2022 at 2:00 pmThank you so much Michelle.
Michelle Leslie
June 14, 2022 at 11:08 pmWHAT!!!! I need one of those gouge balls and to look for my angle grinder 😀 I haven’t used it in years but I have to try this out. It looks like so much fun and the results are gorgeous
Kippi
June 16, 2022 at 1:22 amWow, using a gouge ball transforms the wood. The colors and the wood grain combined in your art design are stunning. Pinned
maria
June 16, 2022 at 11:28 amThis is something I would love to do. I love working with wood pieces. This is beautiful
Anita Holland
June 17, 2022 at 5:22 pmThanks Marie, I love doing this style of wood work because you never know what you will get but it is always unique.
CC COLE
June 17, 2022 at 10:19 pmthese are just gorgeous!! i love your unique creativity!
Anita Holland
June 18, 2022 at 4:50 pmThank you so much.
Marty Walden
June 18, 2022 at 12:38 amWhat a unique and beautiful type of art! Great job!
Anita Holland
June 18, 2022 at 4:50 pmThanks Marty, they are so much fun to make.
Andy Acock
July 22, 2024 at 12:54 pmI have tried this a few times using standard pine boards but can never get the beautiful grain patterns you have obtained. Can you tell us exactly what type of wood,how thick,etc,i know it’s pine but is it a specific type of pine from a big box store,etc…??
And anymore detail on the grain pattern you look for on those boards that seem to make the best patterns?
Thanks,Andy
Anita Holland
September 5, 2024 at 11:58 pmI don’t know much about pine. I used recycled wood. It was from the frame of a pine bed. You should get the grain with any pine if you burn deep enough. The only wood I struggle with is hardwood.