Bird strikes and bumped noses be gone—this month’s (IBC)International Bloggers Club theme is “glass etching”, and I’m tackling it with DIY sea glass “etched glass” sliding door safety decals that look professionally sandblasted but take minutes with a Cricut. After a recent window-cleaning session left my slider crystal clear (too clear for one poor bird), I finally cracked open the sea glass etch vinyl I’d been saving and created large, elegant decals that make the door visible without blocking the view.
Before we dive into this tutorial, be sure to subscribe to my bimonthly newsletter to be the first to see my latest projects. You can also follow me on Pinterest and Facebook, where I also include my unique mixed-media art projects
DIY Sea Glass “Etched Glass” Sliding Door Safety Decals (Cricut Project)
*This post may contain affiliate links. This means I earn a small commission on links used at no extra cost to you. Please see my disclosure policy for more information.**
Why choose sea glass “etch” vinyl?
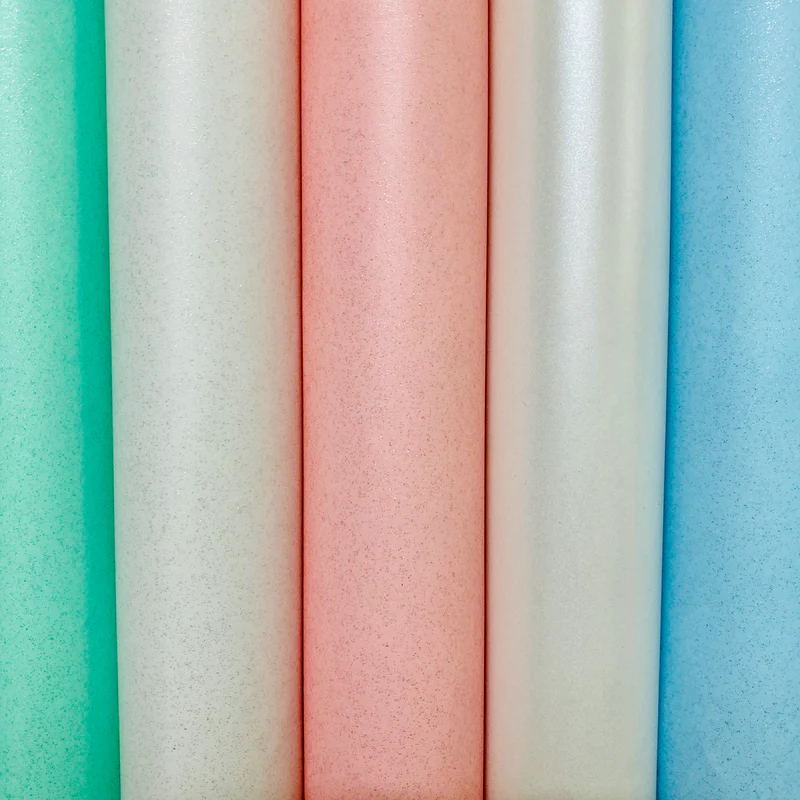
Sea glass etch vinyl delivers the soft, diffused look of real etched glass with none of the mess or commitment. It’s permanent, outdoor-rated for five years, and the subtle glitter in the blue film catches the light beautifully. Best of all, you can remove or replace the design any time. It’s perfect for renters, busy households, and anyone who wants a custom look fast.
Materials you’ll need
- Sea glass etch vinyl (I used blue, permanent, 5-year outdoor rating)
- Cricut machine with fine-point blade and StandardGrip mat
- Cricut Design Space (or similar cutting software)
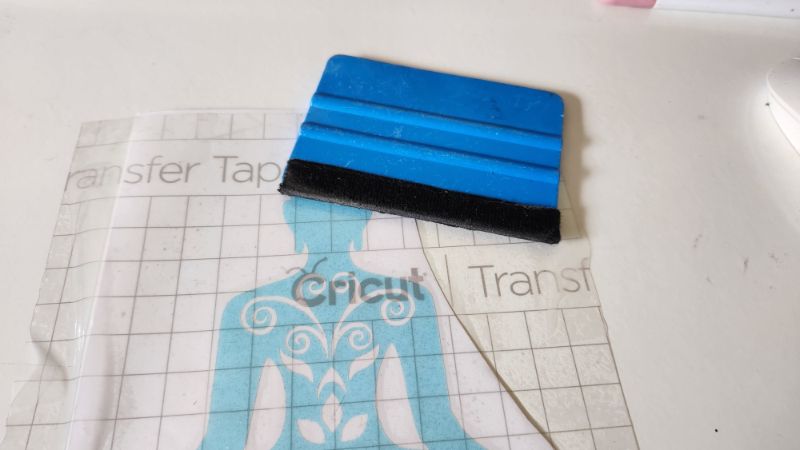
- Transfer tape (large enough for your full design)
- Scraper/squeegee and weeding tool
- Ruler or measuring tape and low-tack tape
- Glass cleaner or isopropyl alcohol and a microfibre cloth (I used a window-vac)
- Sliding glass door or window you want to decal
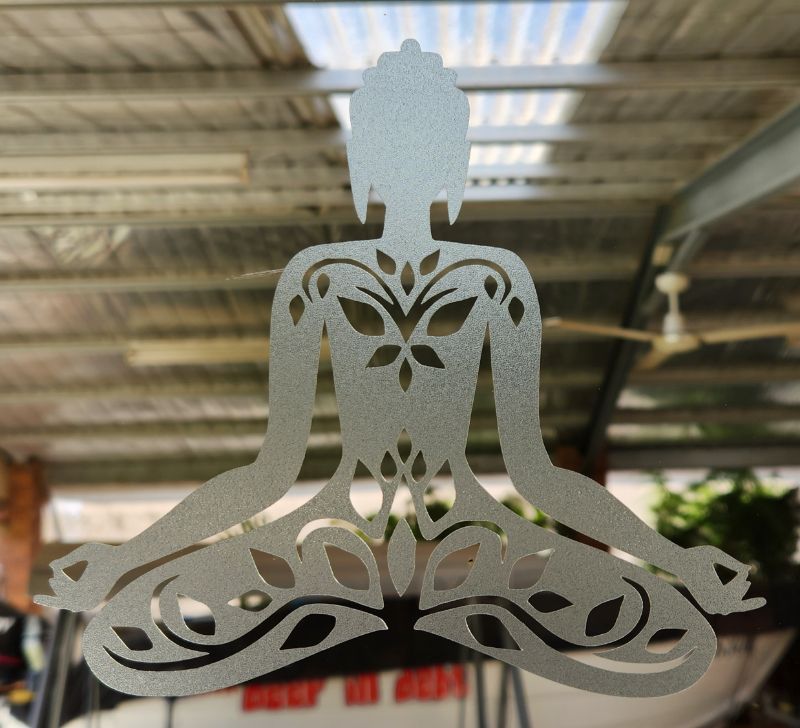
- Chosen SVG/artwork (I used a Buddha motif)
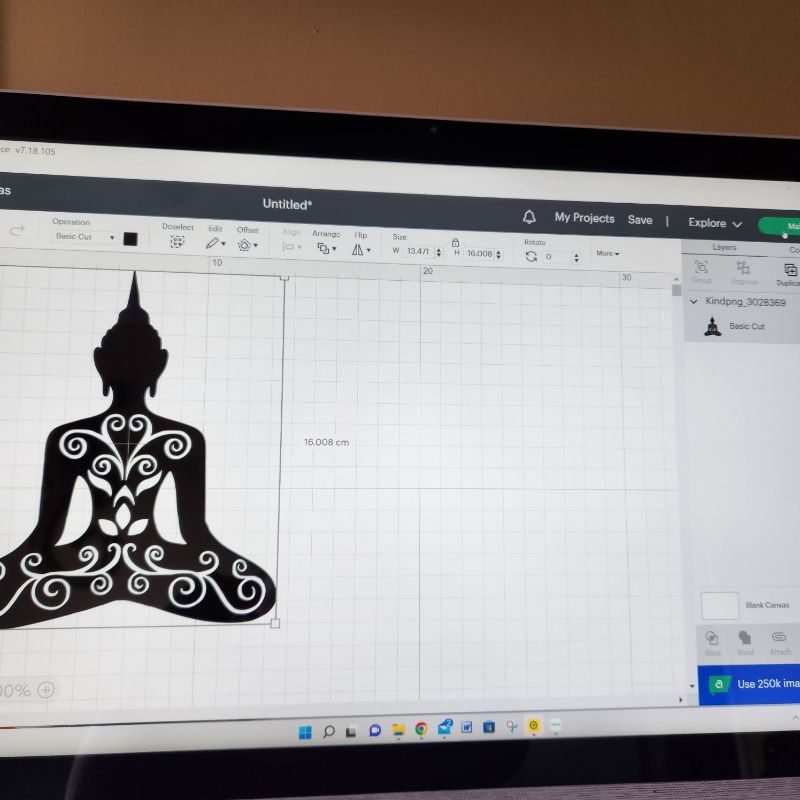
Design and sizing
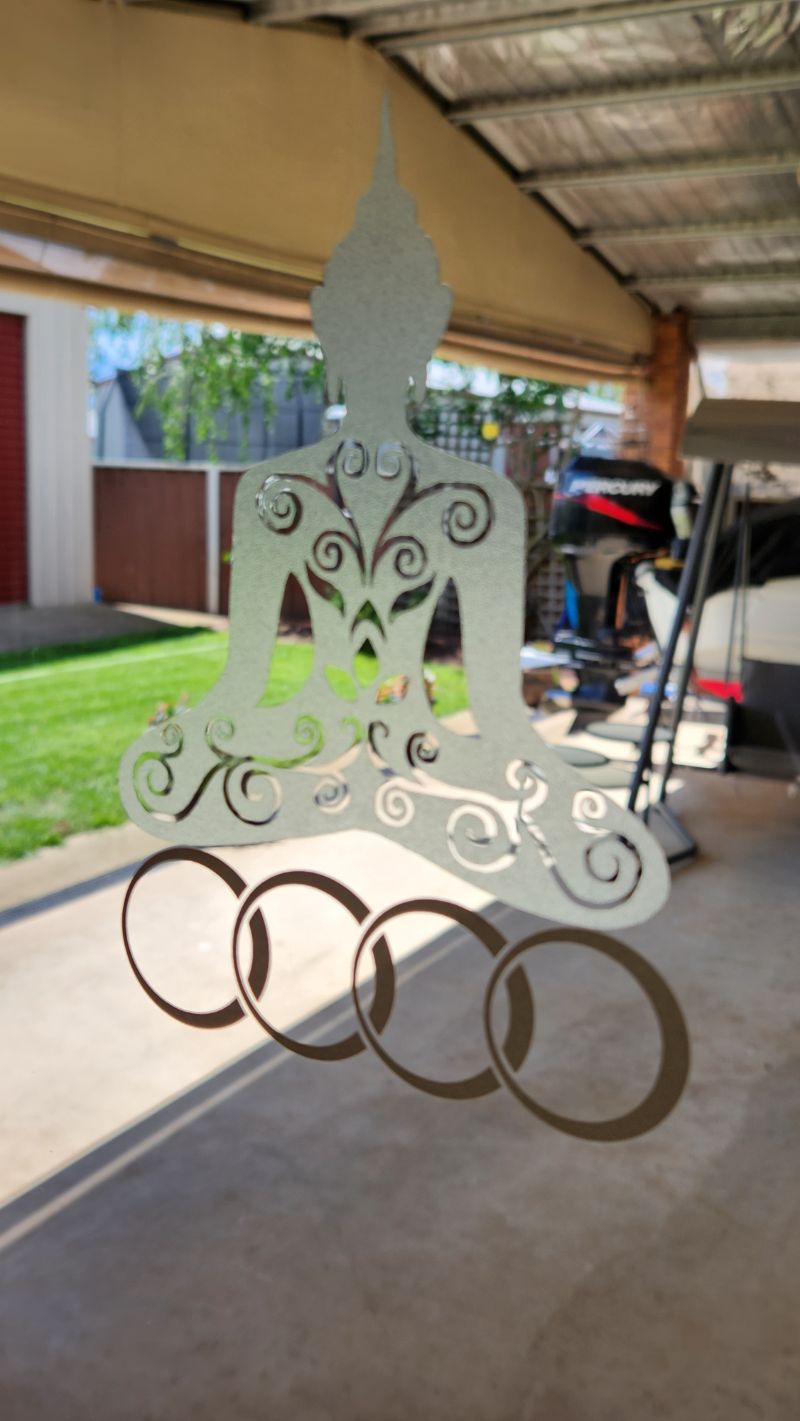
Choose a bold silhouette or motif with clear outlines so it reads well from a distance. I’m Buddha-mad, so I sourced a free Buddha graphic and imported it into Cricut Design Space.
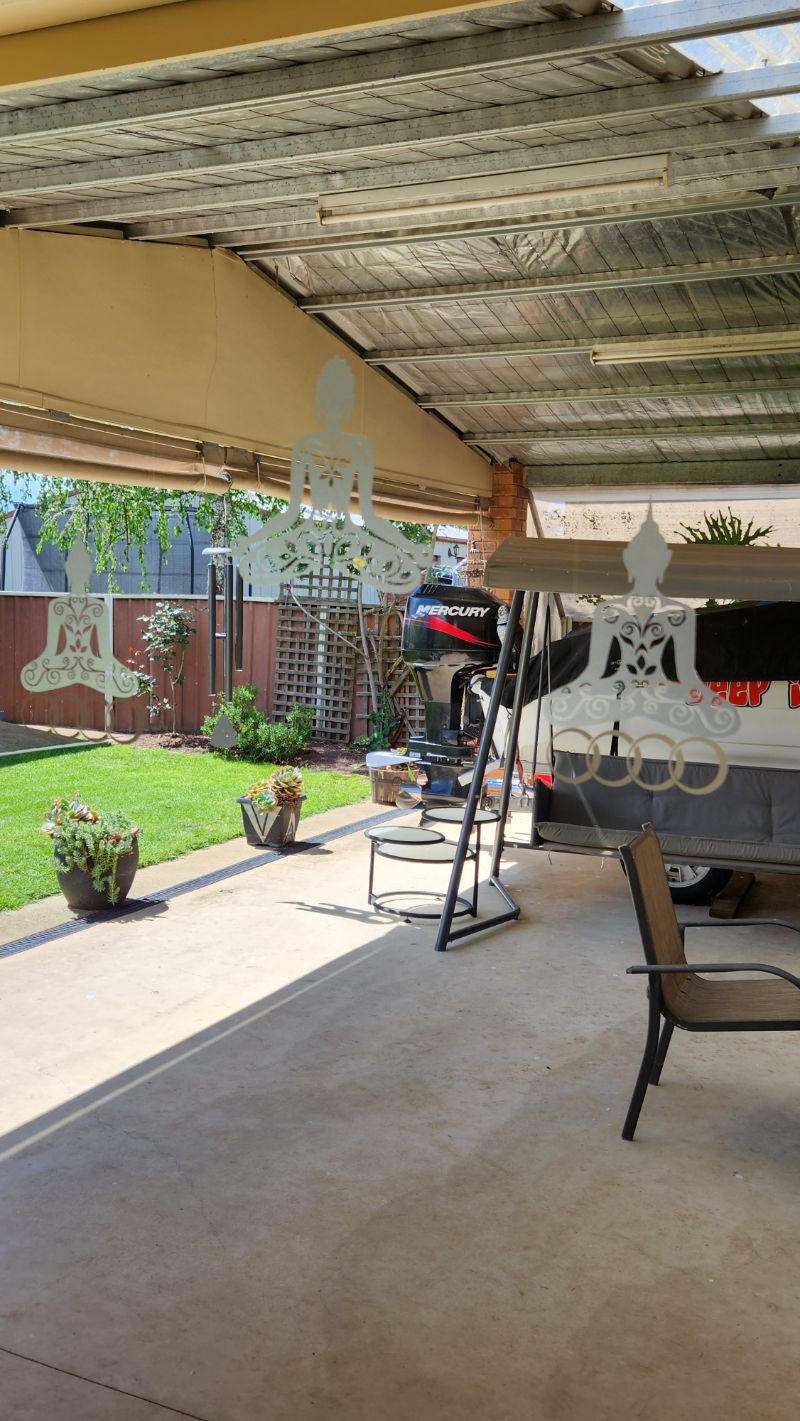
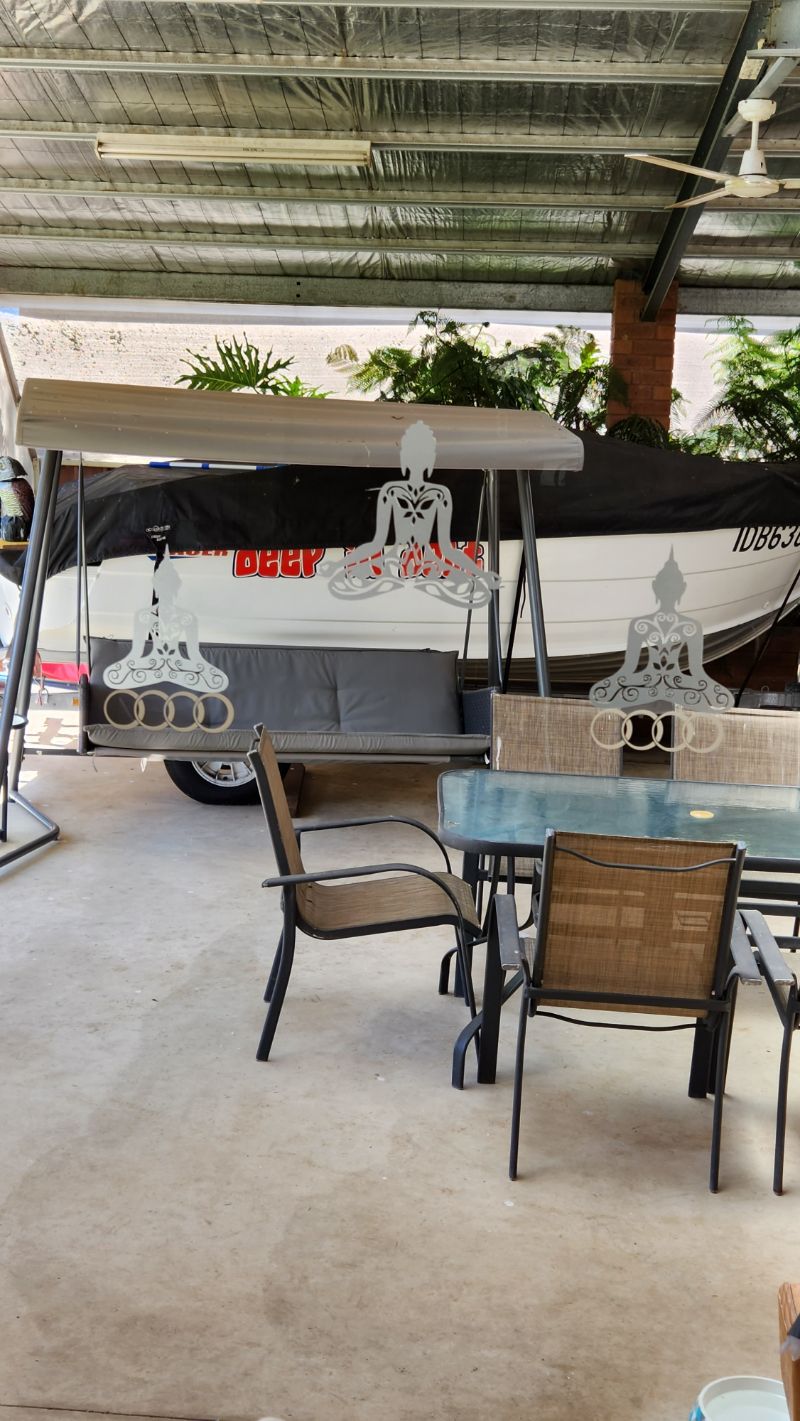
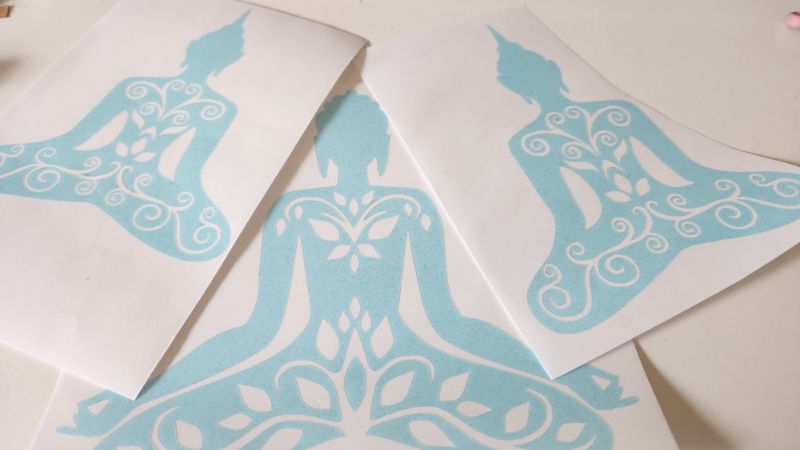
Measure your door sightline and decide on placement; eye-level shapes or a line of repeating elements help birds and people see the glass. I cut three decals—one large centrepiece and two smaller accents—to break up reflections without blocking light.
Cut and weed
Place the 12″ × 7.5″ sea glass etch vinyl on the mat, vinyl side up. In Design Space, set the material to Vinyl and check that your design fits the sheet size.
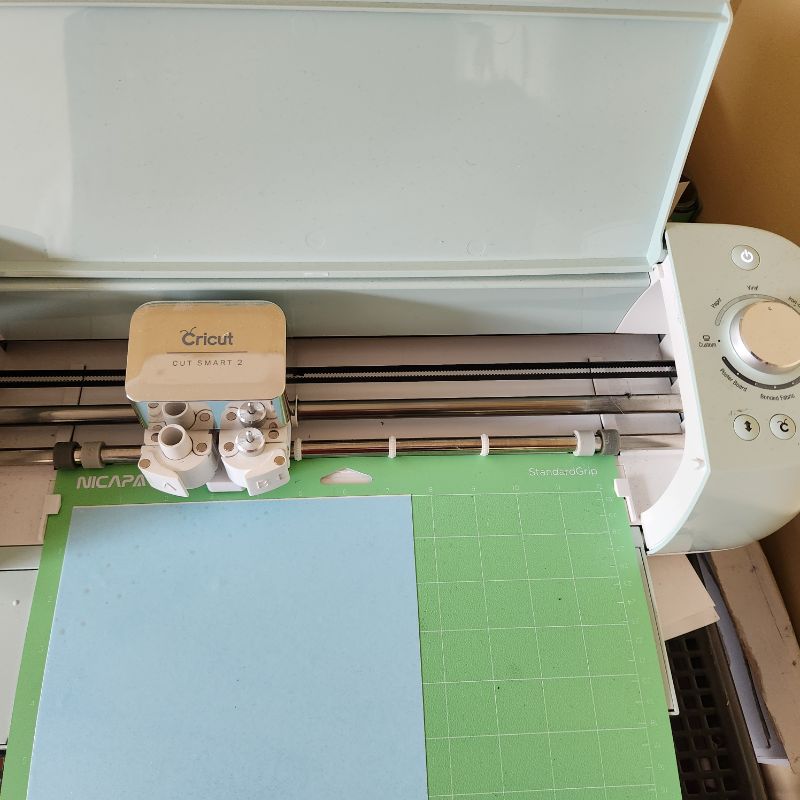
Cut, then weed away the unwanted pieces, leaving only the design.

A fine weeding tool or craft knife makes small details simple.
Prep the glass (don’t skip this)
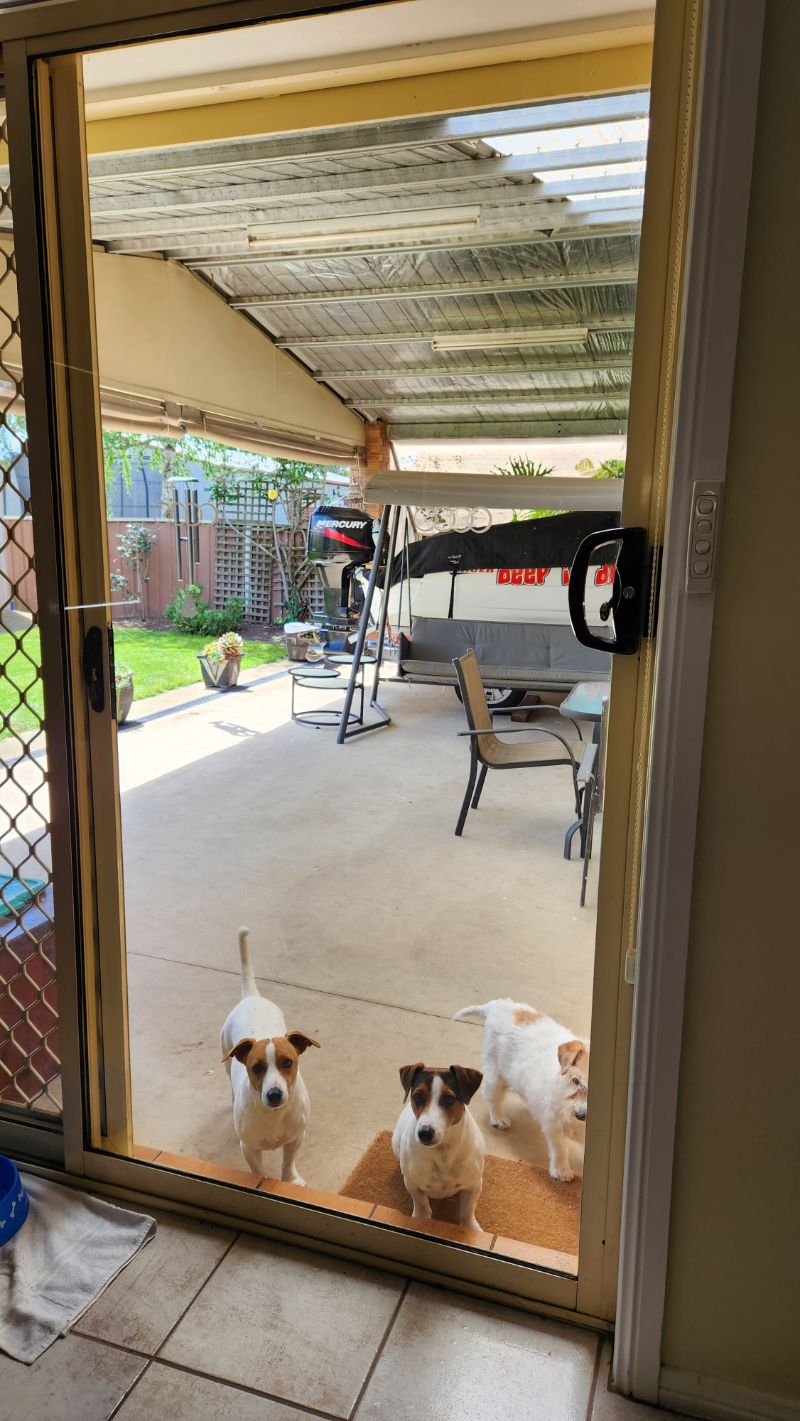
Clean the area thoroughly with glass cleaner or isopropyl alcohol and a lint-free cloth. Oils and dust reduce adhesion and can cause bubbles. I ran over the pane with a window-vac, then buffed it dry. Keep pets outside while you work—my two Jack Russell “terrorists” were unimpressed with the temporary lockout, but it saved pawprints on the glass.
Transfer and apply
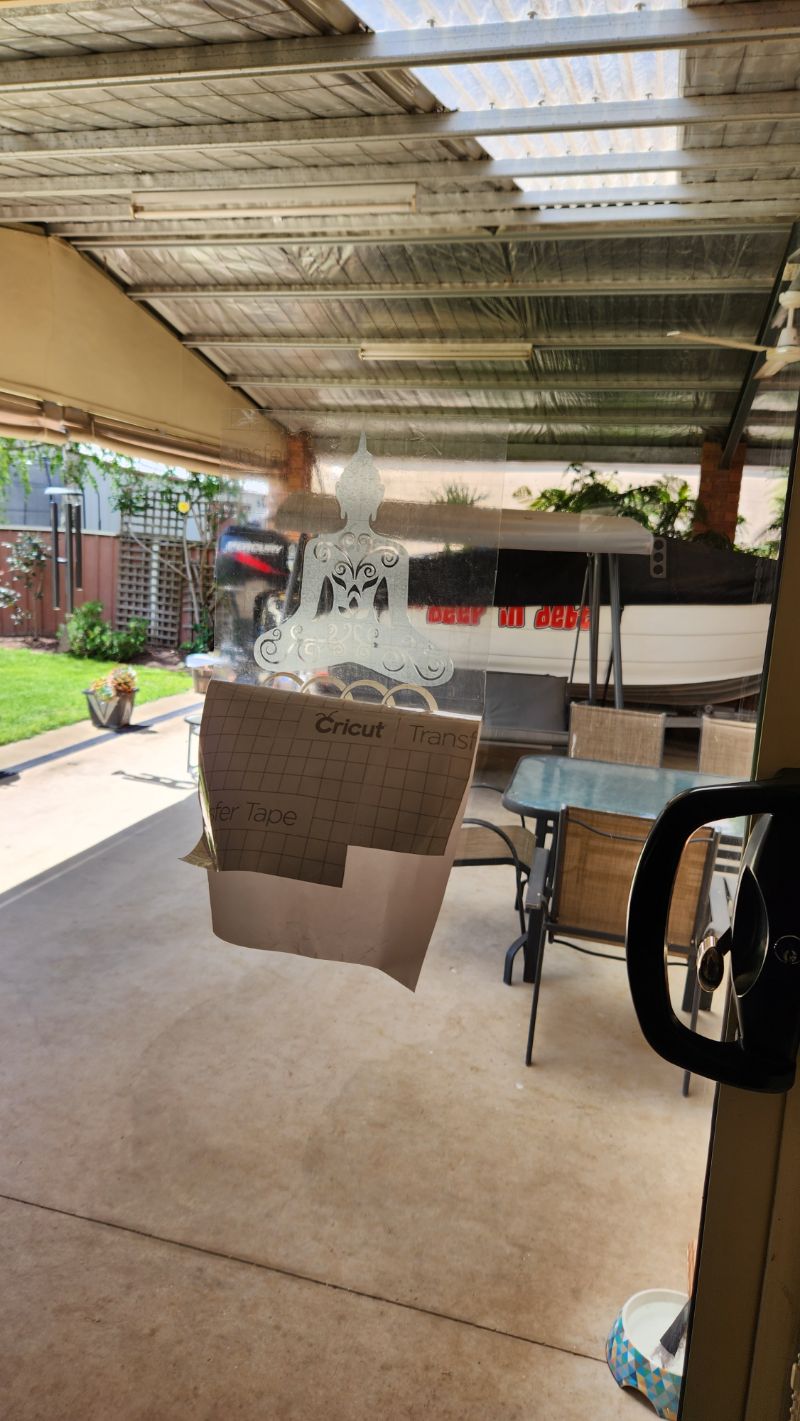
Cover the entire design with transfer tape and burnish firmly with a scraper. Lift the tape; the vinyl should release cleanly from the backing.
Use a “hinge” method: position the decal with low-tack tape, create a centre hinge, then peel and squeegee from the centre outwards to avoid bubbles. Burnish again, then slowly peel off the transfer tape at a sharp angle.
Repeat with the smaller decals to create a balanced composition.
The finished look
From a step away, the decals read like real etched glass—soft, frosted and slightly luminous. The sea glass sheen is gorgeous in daylight and gives just enough contrast to make the slider obvious. Since adding them, there have been no accidental run-ins and no more bird strikes.
More project ideas using a Cricut
These novelty baby onesies are a great Cricut starter project—quick and easy to make.

A Spiral Betty is a great way to add a photo in vinyl to your project—like this wedding cushion. Explore more Cricut project ideas here.

More about IBC
If you follow my blog, you will know I am part of the IBC (International Bloggers Club), which is a group of talented bloggers from around the world. We have members from Spain, South Africa, Australia, the United States, and Canada. Each month, we come together and create a project with a common theme.
The “Glass etching ” contributions from my fellow bloggers joining us this month are listed below. Please feel free to jump over and give them some love.
- A Crafty Mix|Tabletop greenhouse faux etched glass
- Me
- Birdz of a feather | Sandblasting on glass


If you’re interested in any of the items used in this project, we’d appreciate it if you used our affiliate links. Clicking these links earns us a small commission at no extra cost to you, helping us create more inspiring and exciting projects to share. We’d also love to hear your thoughts—feel free to leave a comment or share this post!

8 Comments
A Crafty Mix | Tabletop Greenhouse with Faux-Etched Glass - A Crafty Mix
October 24, 2022 at 11:21 pm[…] promised to share a few more ways to get the etched glass look without using harsh chemicals; Unique Creations by Anita has a tutorial showing you how to create this meditating Budha on a sliding […]
Sara
October 24, 2022 at 11:25 pmThis is just amazing Anita!! And a brilliant idea: I’m so happy that my fine feathered friends won’t be flying into the window again! I really would not have known this wasn’t etched; what an amazing product! I learned so many great tips from this post (I didn’t even know a window vac was a thing lol)!
Anita Holland
October 26, 2022 at 12:52 pmThanks, Michelle, I am plagued with the birds and they are a nuisance they poop on and destroy everything. The downside to having a large high pergola. And the window vac is brilliant if you are thinking about getting one.
Anita Holland
October 26, 2022 at 12:53 pmThanks Sara, It is so pretty in person because you can see the colour and the glitter.
Michelle
October 24, 2022 at 11:29 pmIf I had one of those machines, I would do this for sure. We’ve had so many doves fly into our upstairs windows when we forget to close the curtains. Poor things. I love how easy it is and you can change the decals to suit your mood too.
Marie B
October 25, 2022 at 4:36 amI had no idea there was such a thing as etch vinyl (I need to get out more). Dang, because this would have been perfect for the project I attempted to etch, botched, and threw away for our challenge this month. 😢
Anita Holland
October 26, 2022 at 12:54 pmI am in a cricut group so I find out all about the new products. This would have been perfect for you.
A Crafty Mix | Tabletop Greenhouse with Faux-Etched Glass - Live Dinero
October 25, 2022 at 6:47 am[…] promised to share a few more ways to get the etched glass look without using harsh chemicals; Unique Creations by Anita has a tutorial showing you how to create this meditating Budha on a sliding […]