This week’s International Bloggers Club challenge was “Hang Her Up”, and for my project, I decided to make 3D wooden wall art from a recycled 4×4 fence post. This project is simple to build but gives an optical illusion effect that truly messes with your eyes when you look at it. The best part? You can hang it vertically or horizontally to suit your wall space.
The texture and patterns in the post I used added natural depth to the final design. If time allowed, I would have taken it further with a Shou Sugi Ban finish, because the grain in the wood would have looked amazing, charred and highlighted with stain. This wall art is a great way to upcycle timber, experiment with patterns, and create a statement piece without spending much.
Mesmerising 3D Wooden Block Wall Art from a Fence Post
*This post may contain affiliate links. This means I earn a small commission on links used at no extra cost to you. Please see my disclosure policy for more information.**
Materials Needed
- 4×4 fence post (cut down to 3×3 for lighter weight)
- Orbital sander with 120-grit sanding discs
- Drop saw )
- ½-inch plywood (for base)
- Wood stain (cedar, mahogany, or your choice)
- Wood glue
- Hot glue gun and glue sticks
- Pencil and ruler
- Spray polyurethane (2 coats for sealing)
Cutting the Wood
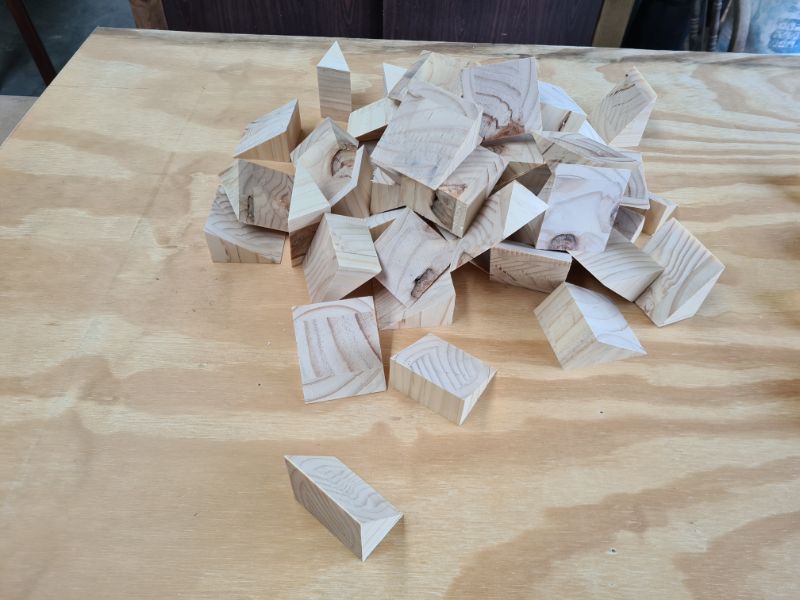
The project began with a standard 4×4 fencing post, but after cutting a few pieces, I realised the weight would be too much for plasterboard walls. I resized the post to 3×3, which worked perfectly. Don’t toss out the offcuts—they’re perfect for another project. Small scraps can be recycled into unique wall art, like this design made entirely from leftover wood pieces.
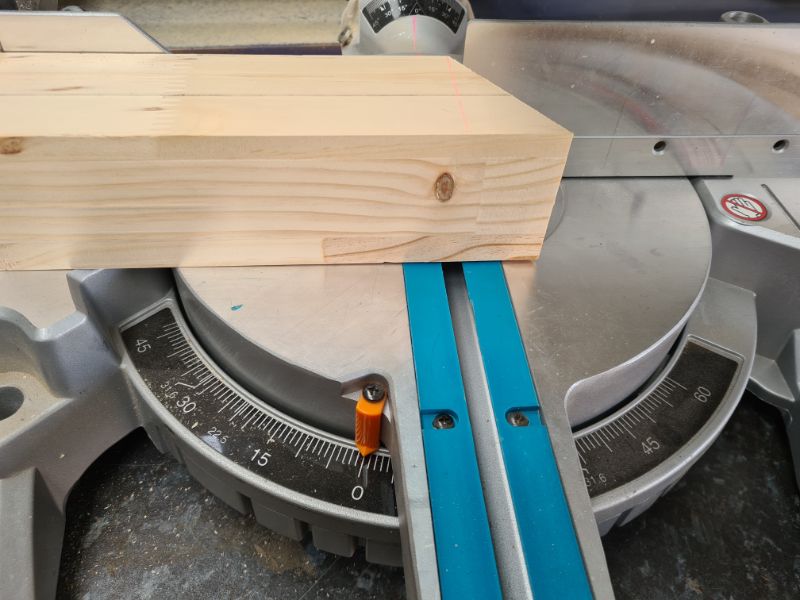
Before cutting, I sanded all sides of the post with 120-grit sanding discs on my orbital sander. Sanding the whole post before cutting makes the process much faster than trying to sand each piece individually later.
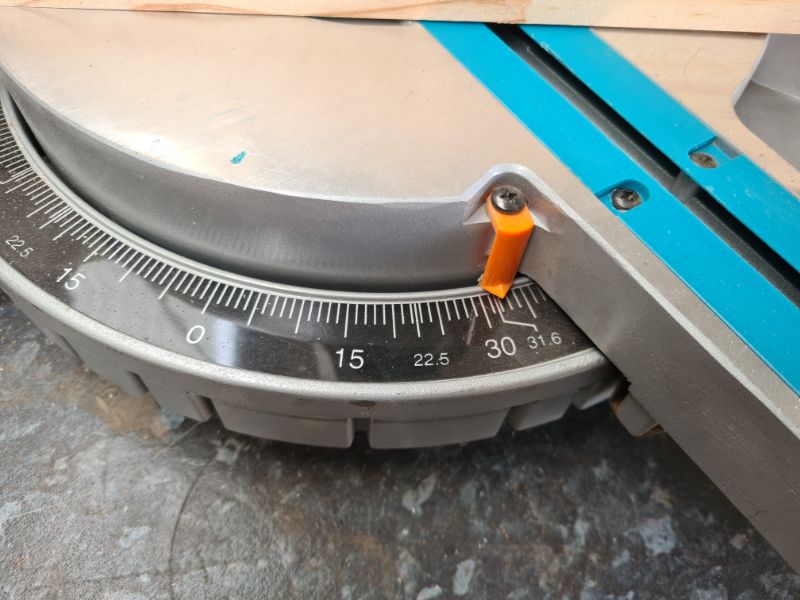
Using a drop saw set at 30 degrees, I cut the first angled piece. For the second cut, I reset the saw to “0” and lined up the wood with the straight edge. The third cut was back at 30 degrees on the opposite side, then “0” again. I repeated this sequence until I had enough pieces to create a full design.
Preparing the Base
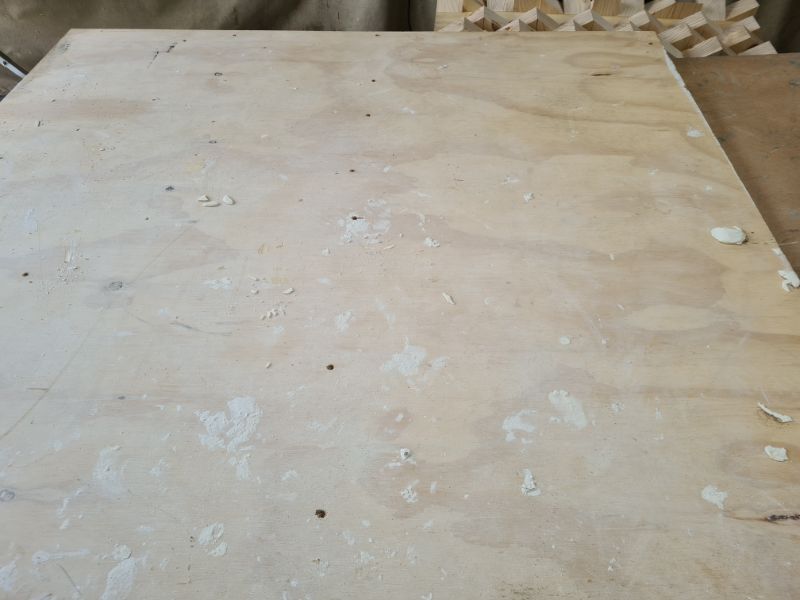
For the backing, I used a piece of ½-inch plywood—sturdy enough to support the weight of the timber without warping. My plywood was recycled from a construction site, so it needed a good sanding with 100-grit paper before use.
I didn’t cut the base to size immediately. Instead, I waited until the final design was laid out, then marked and trimmed the base to fit perfectly.
Creating the Design
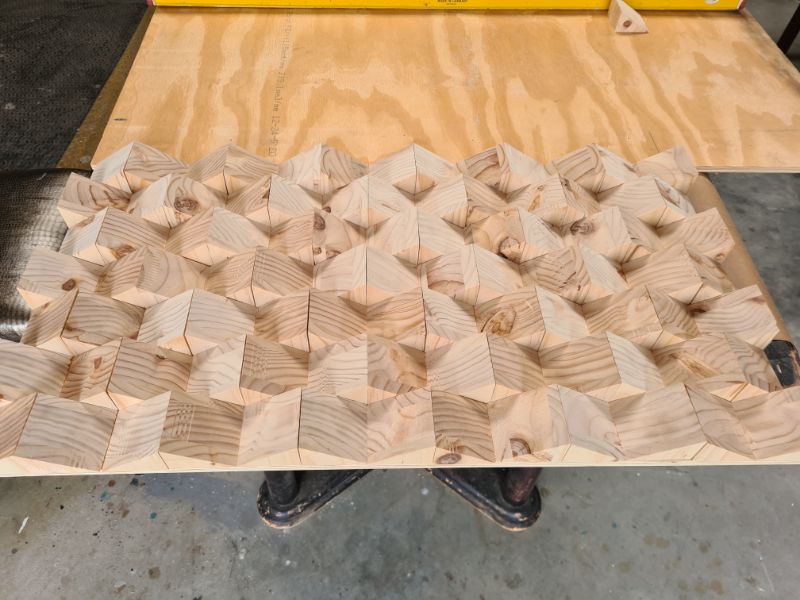
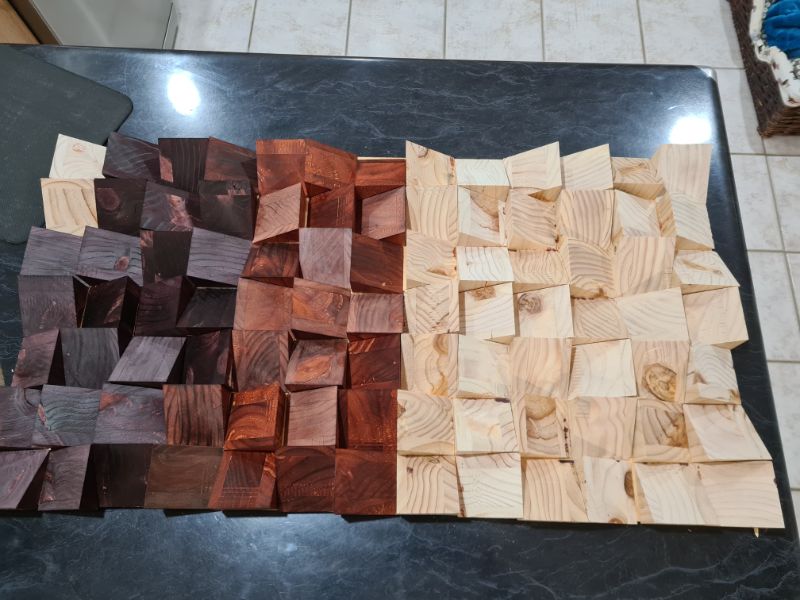
This was the fun stage—playing around with different layouts. I first tried a simple repeating peak-and-dip pattern using paired blocks.
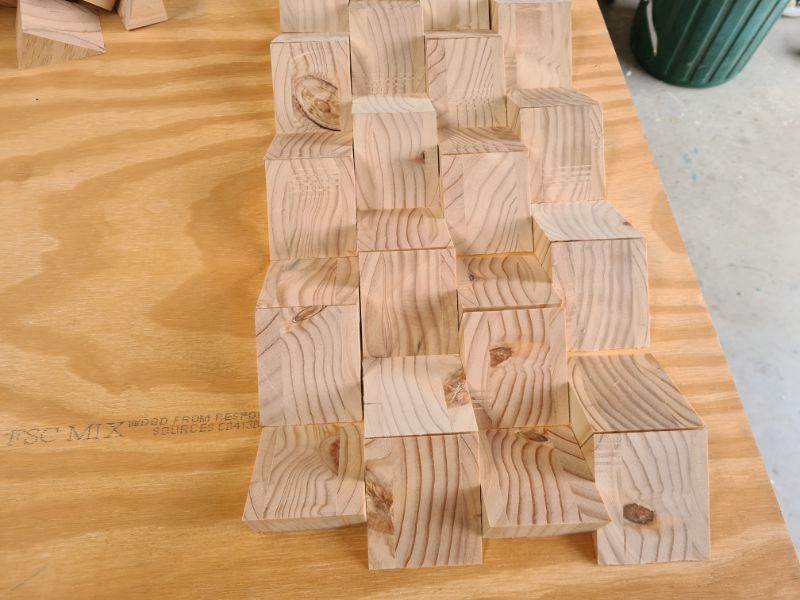
It looked neat but lacked depth
Next, I stained some blocks with cedar and mahogany wood stain. Make sure to let the stain dry completely, or it will bleed onto the other pieces. I learned this the hard way and had to re-sand a few blocks.
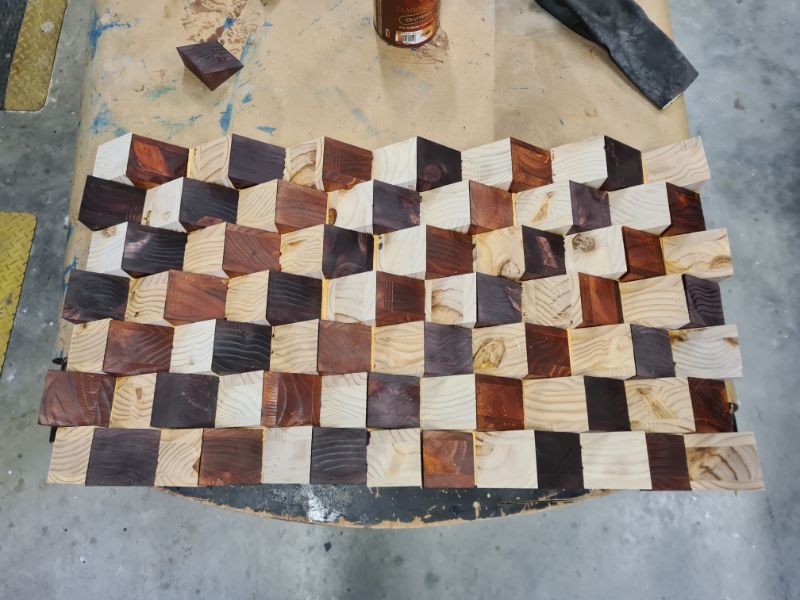
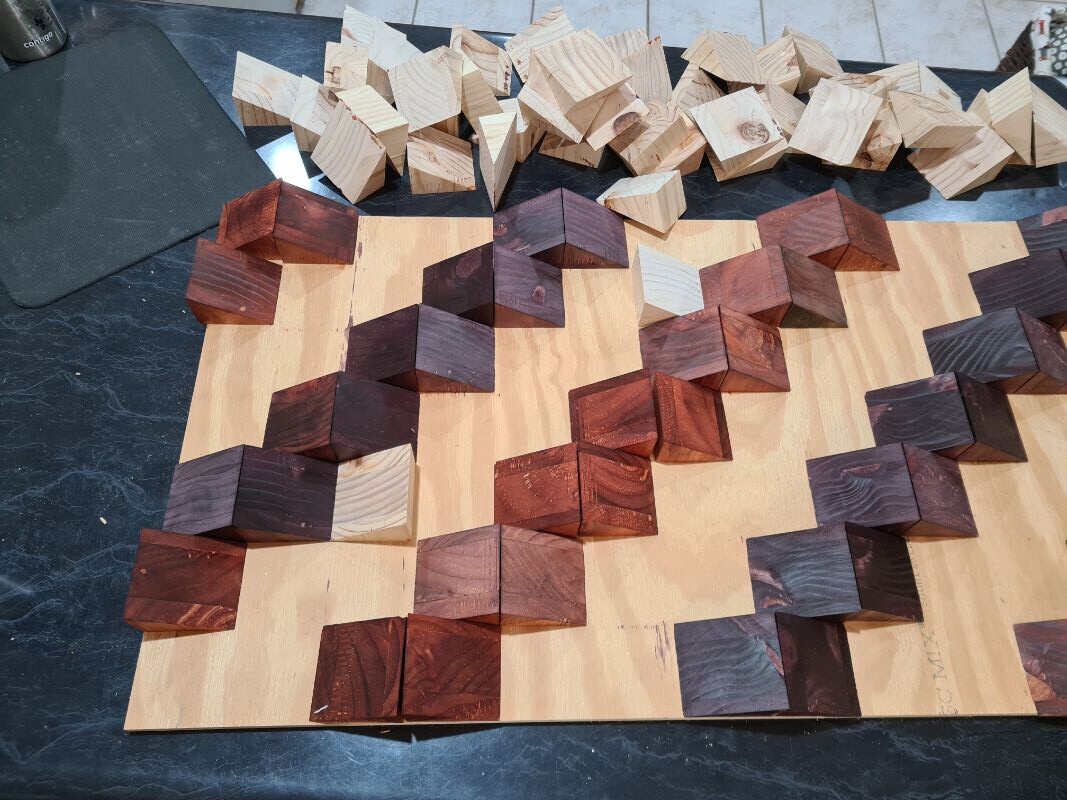
By rearranging stained and plain blocks, the patterns changed dramatically.
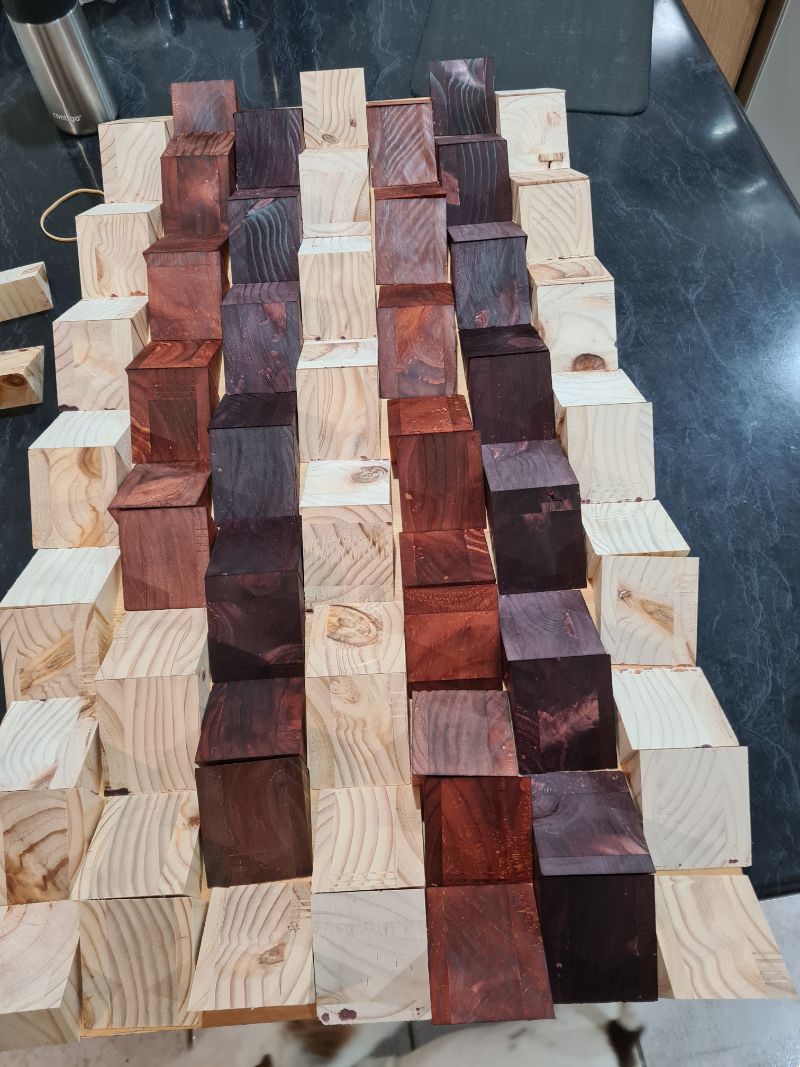
Tilting pieces at different angles also added a striking effect.
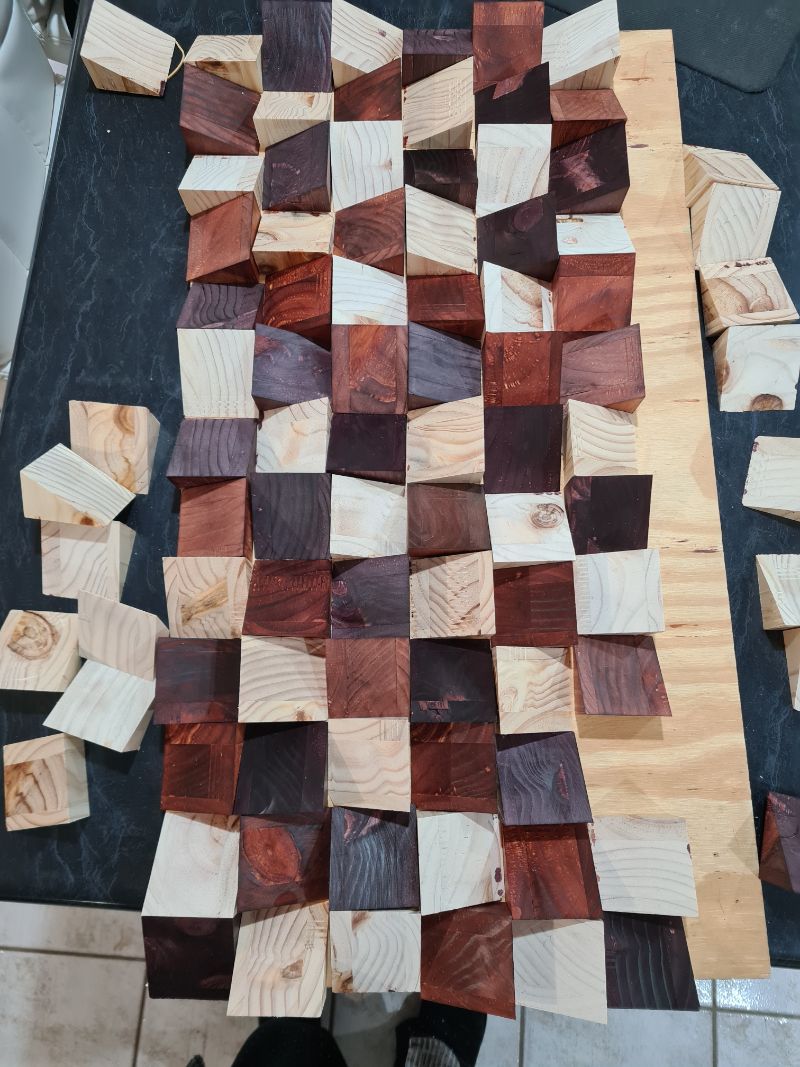
An ombre effect adds a striking gradient of colour that makes the design stand out beautifully. Once I had a design I liked, I photographed it as a guide, traced the outline onto the plywood, and slid the blocks off.
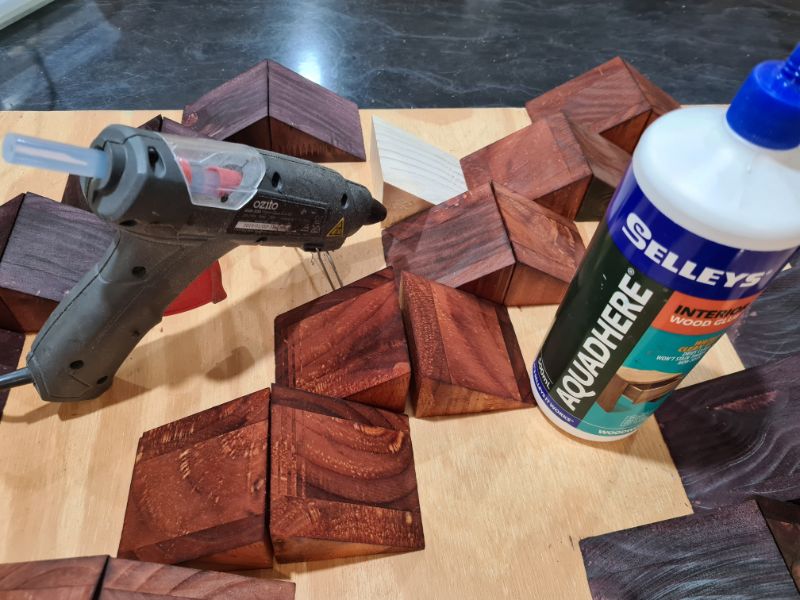
Glueing the Pieces
To secure the blocks, I used both wood glue and hot glue. First, I applied wood glue across the back, leaving small spaces for the hot glue. A quick dot of hot glue held each block in place instantly, while the wood glue dried for long-term strength.
Starting at one corner, I worked my way across the board, pressing the blocks firmly as I went. Once the design was complete, I sealed the finished piece with two coats of spray polyurethane.
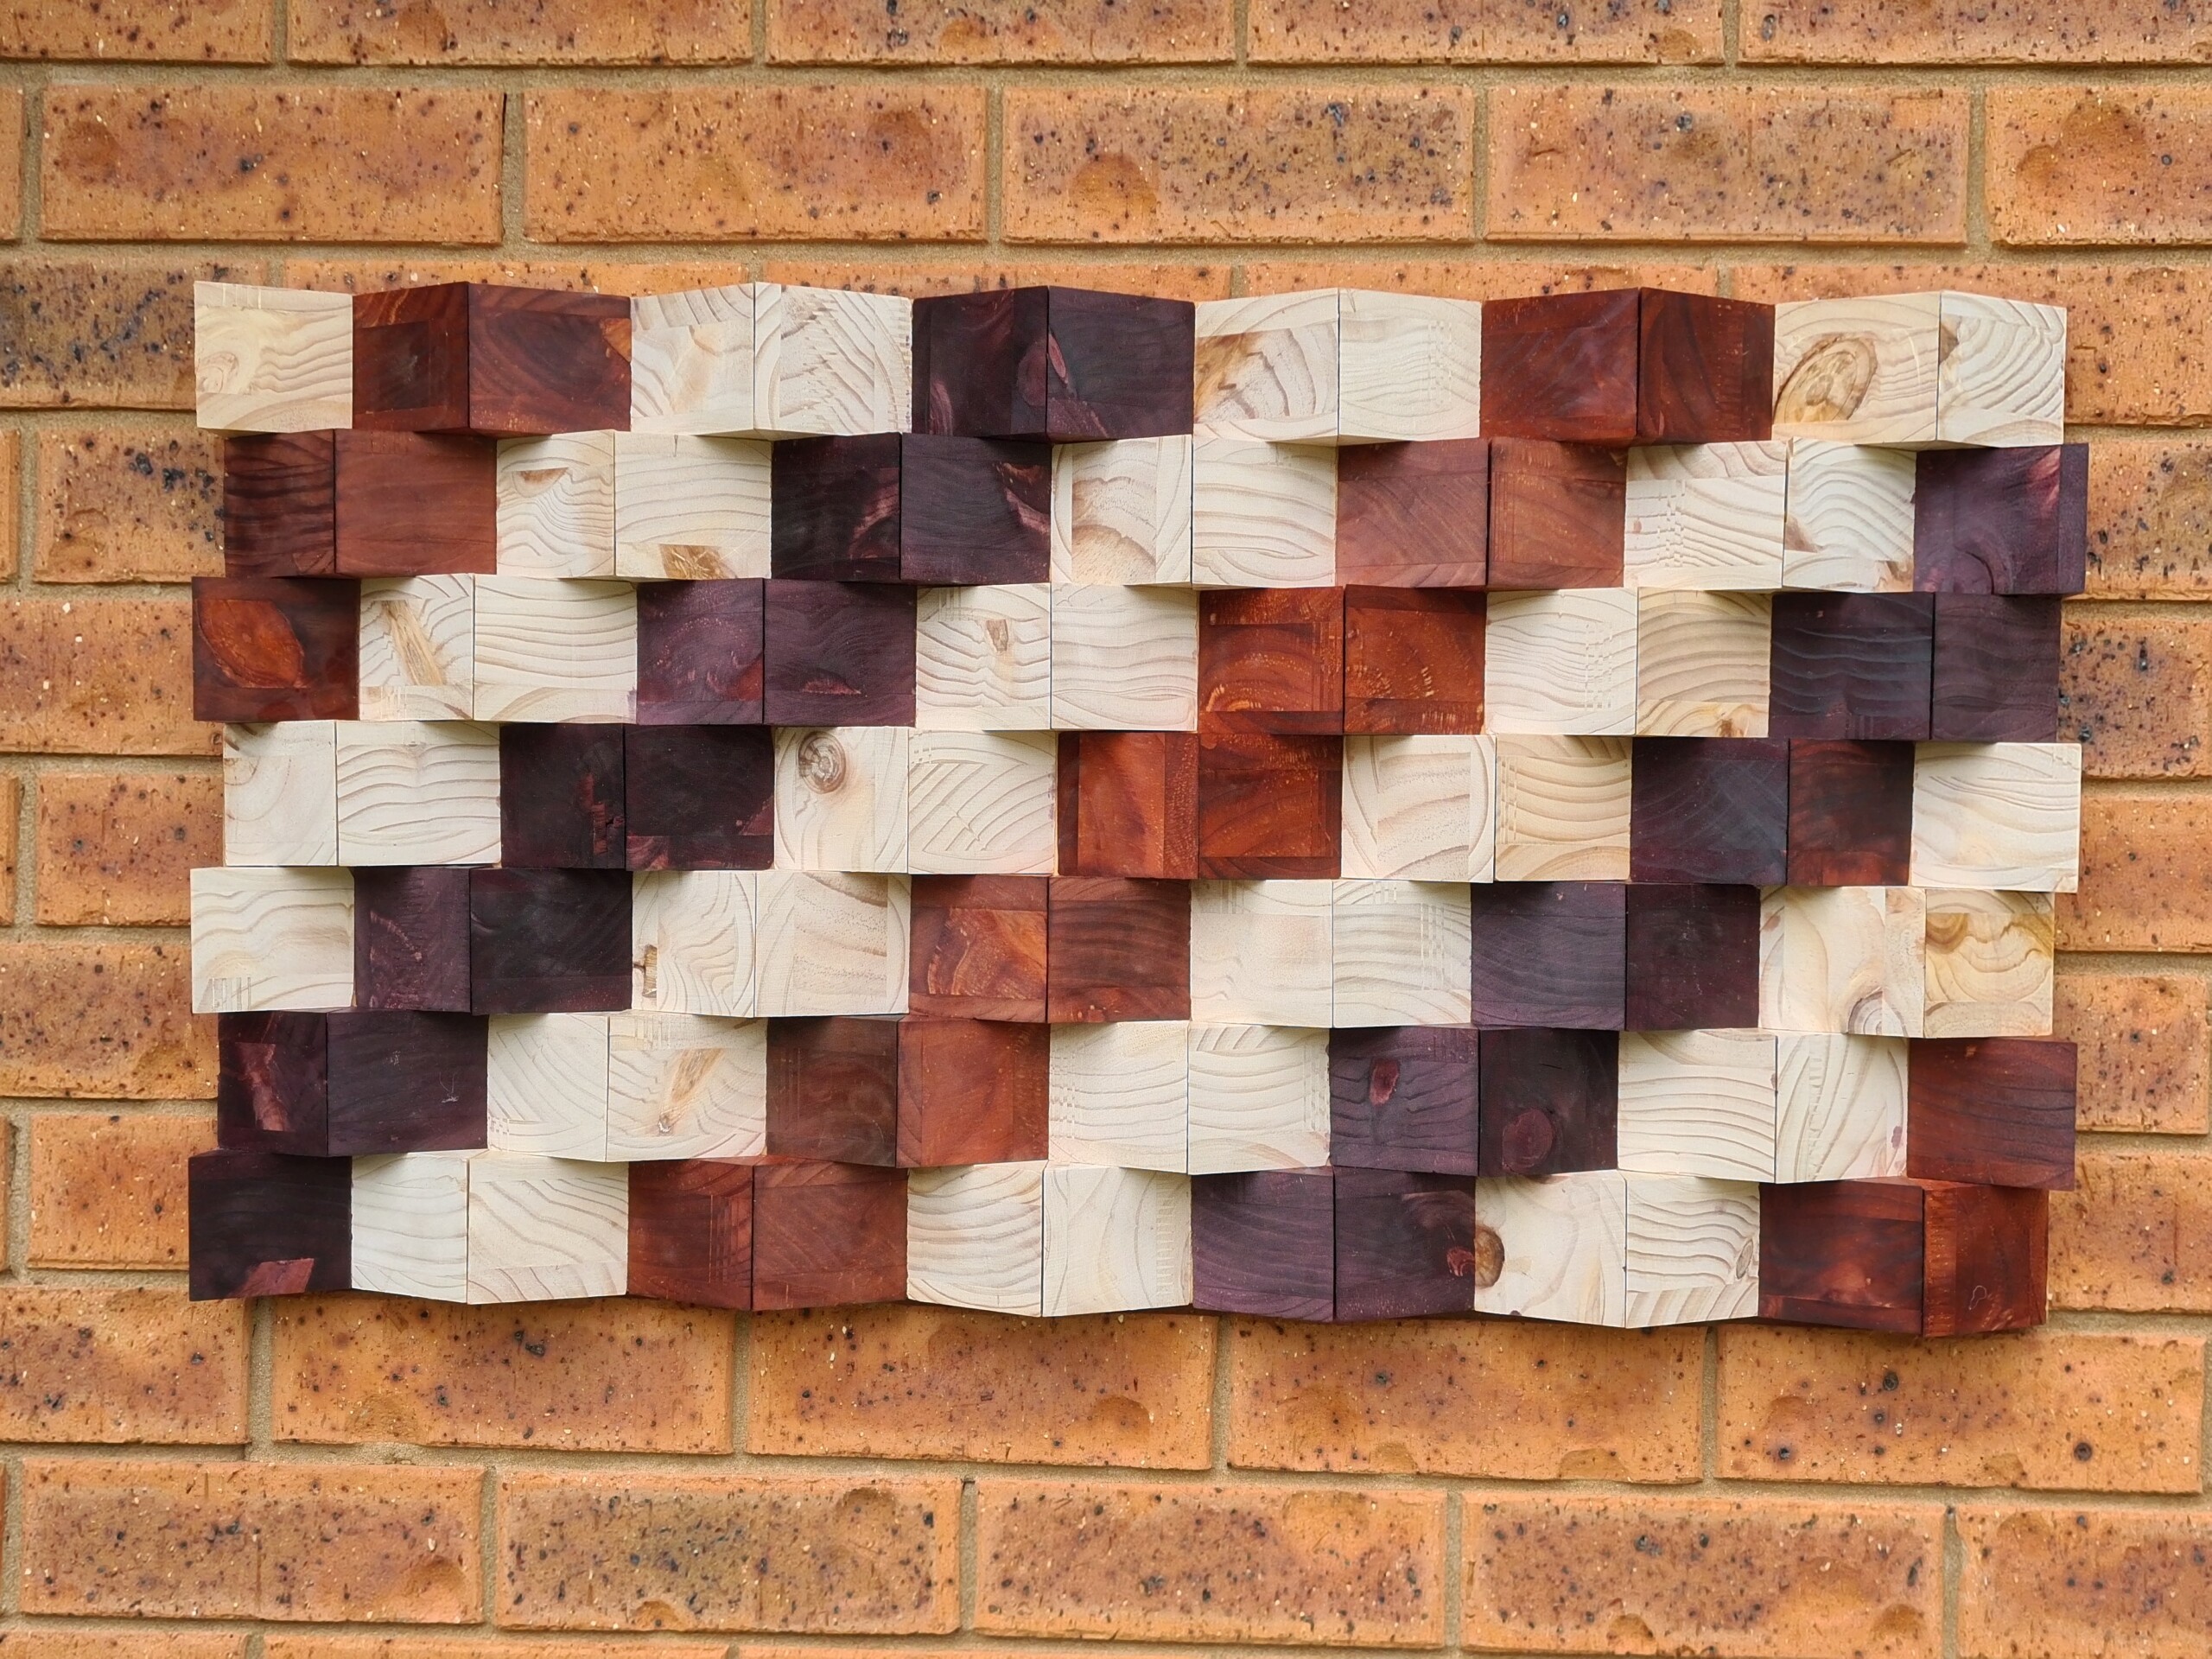
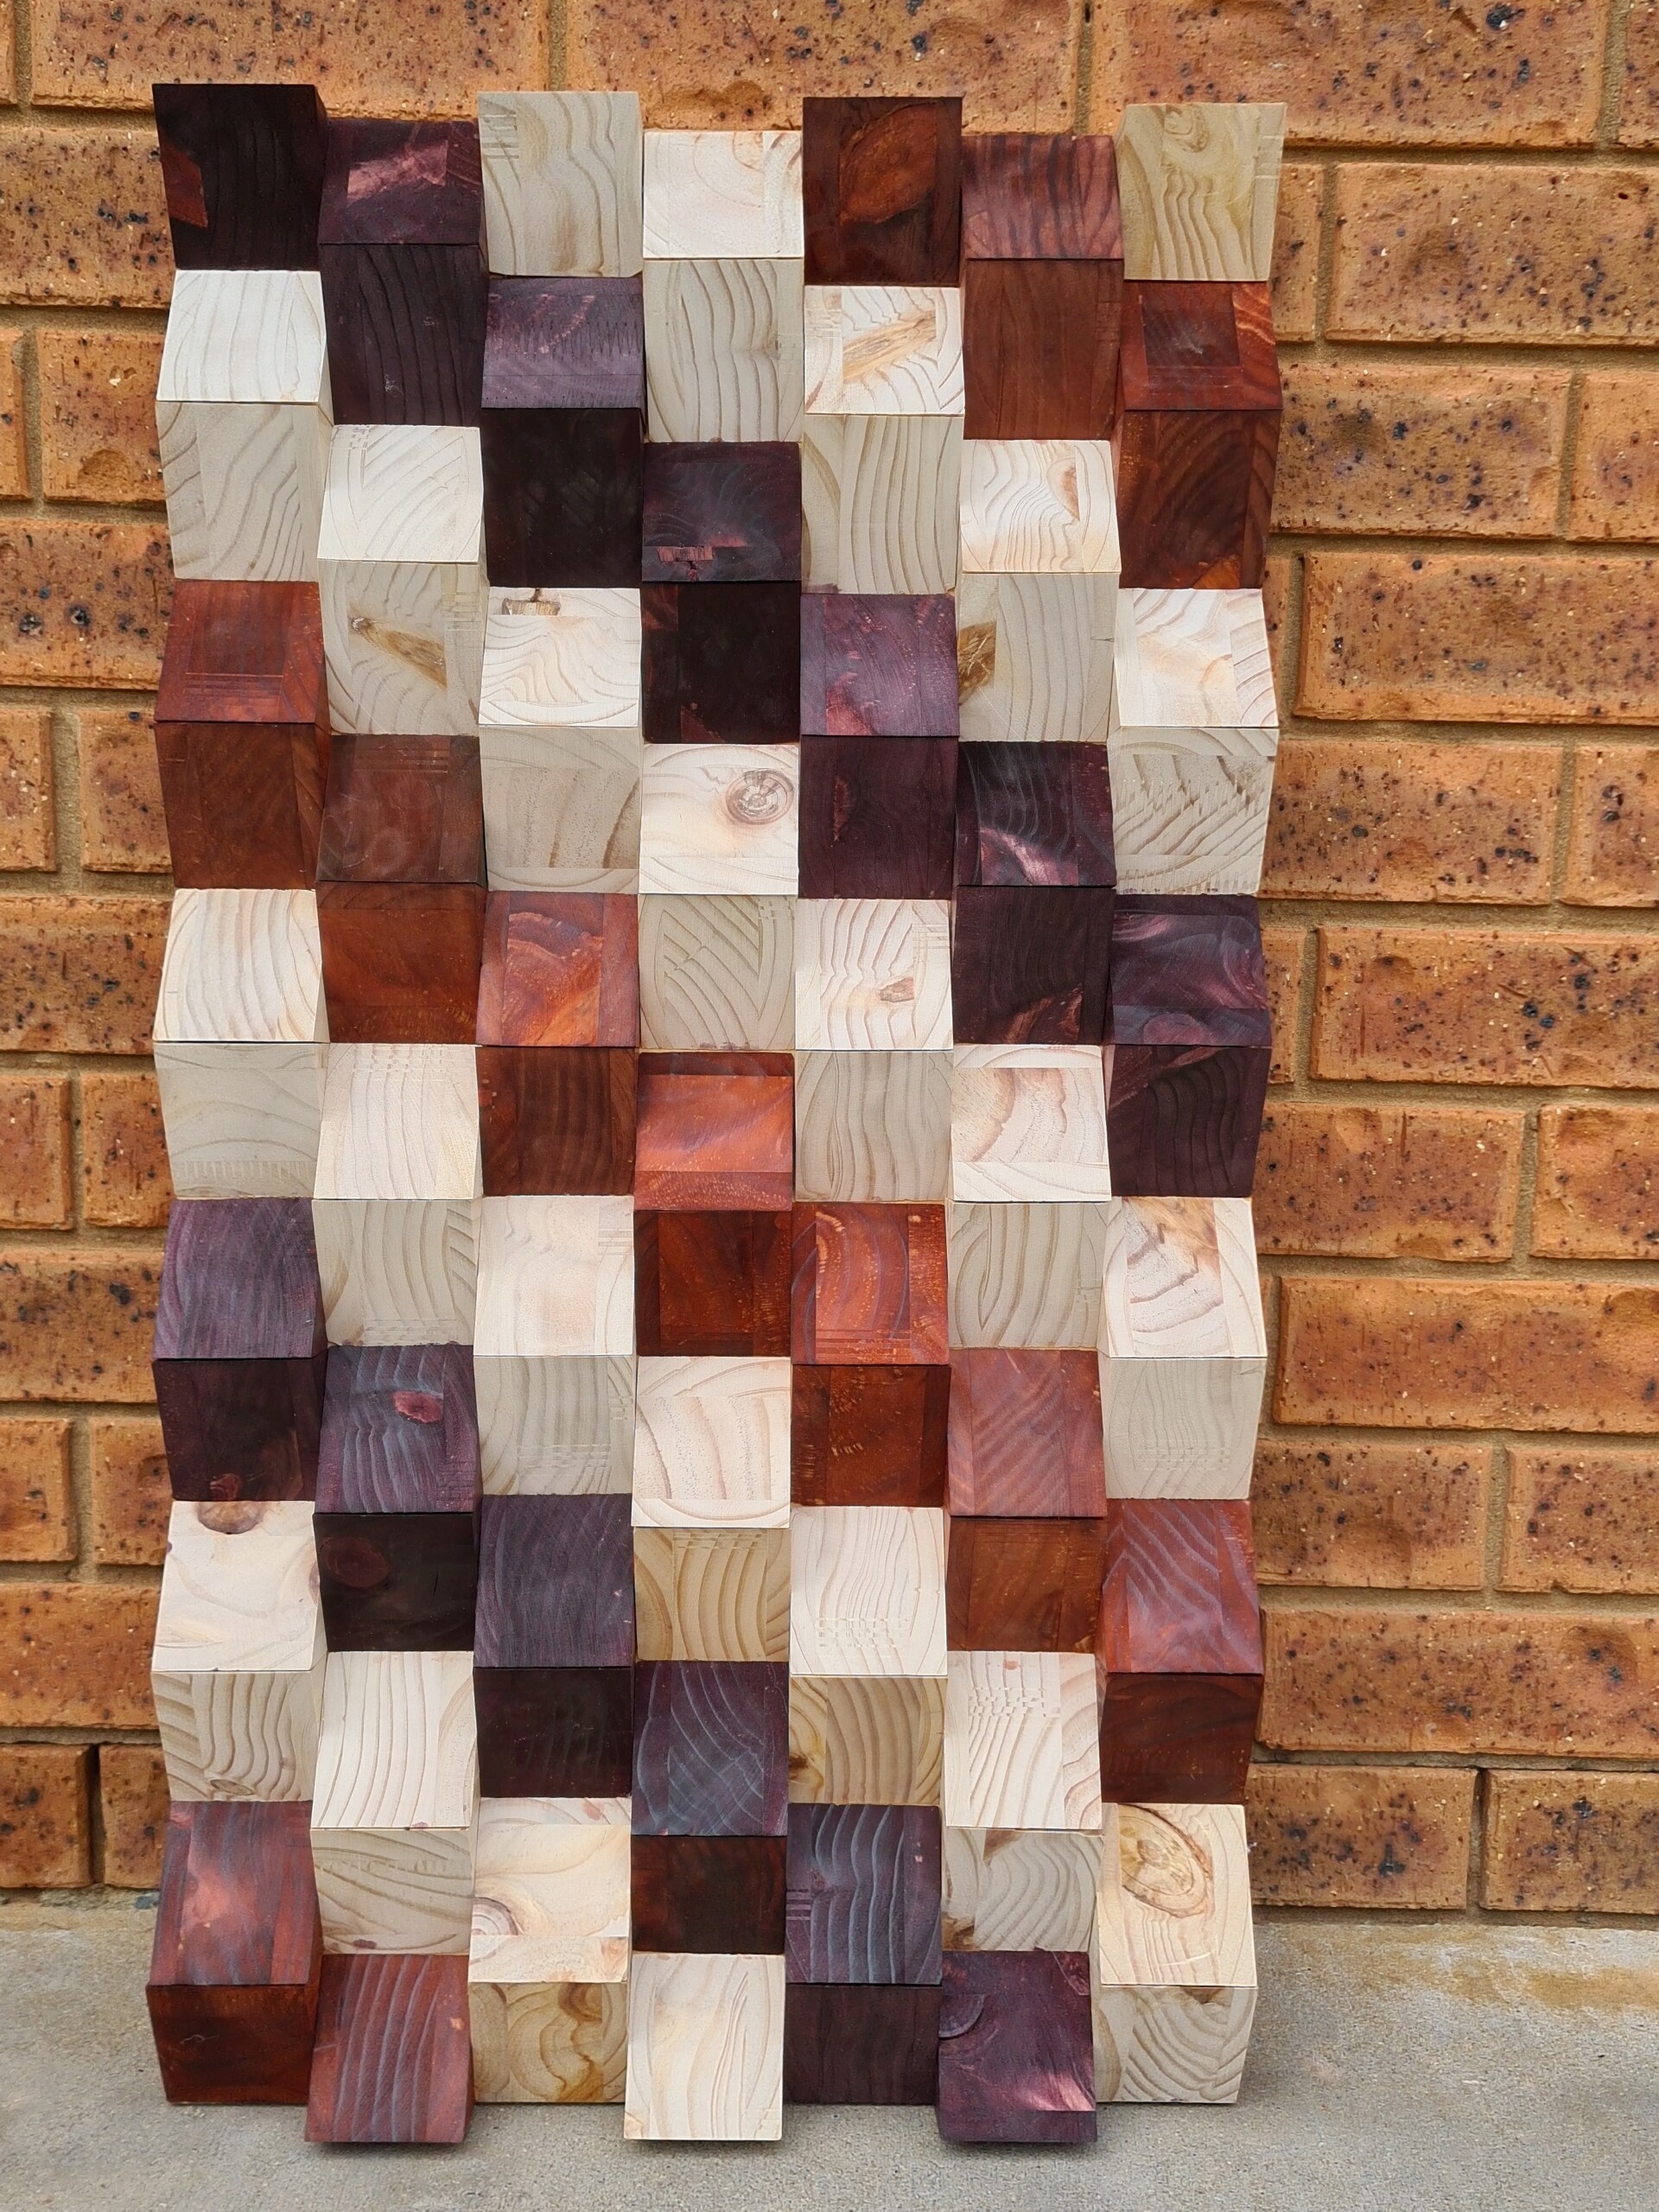
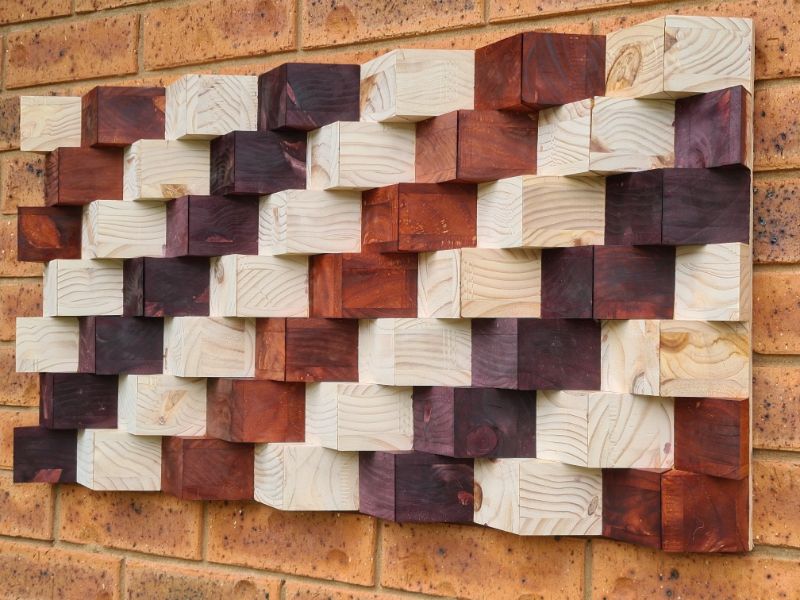
The Finished 3D Wooden Wall Art
The final piece has a mesmerising 3D effect that shifts depending on the angle you view it from.
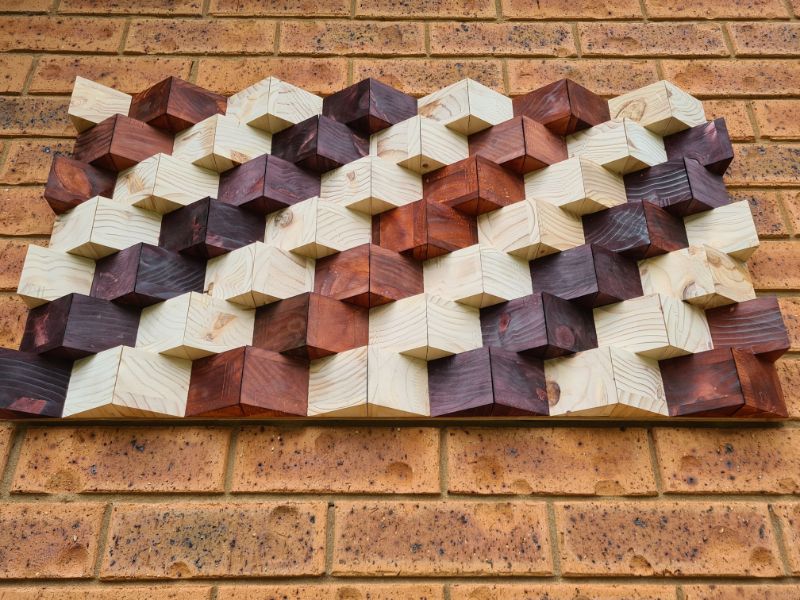
It can be hung vertically for a tall feature or horizontally for a wide wall accent.
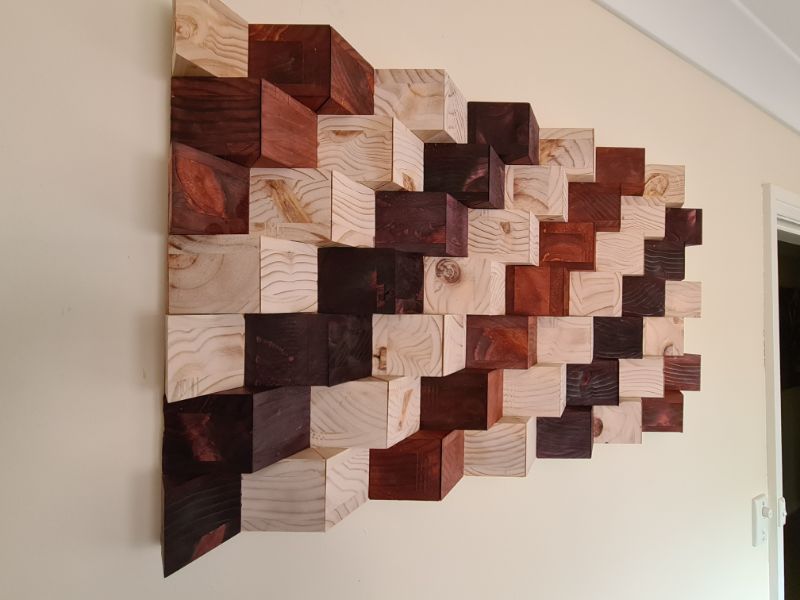
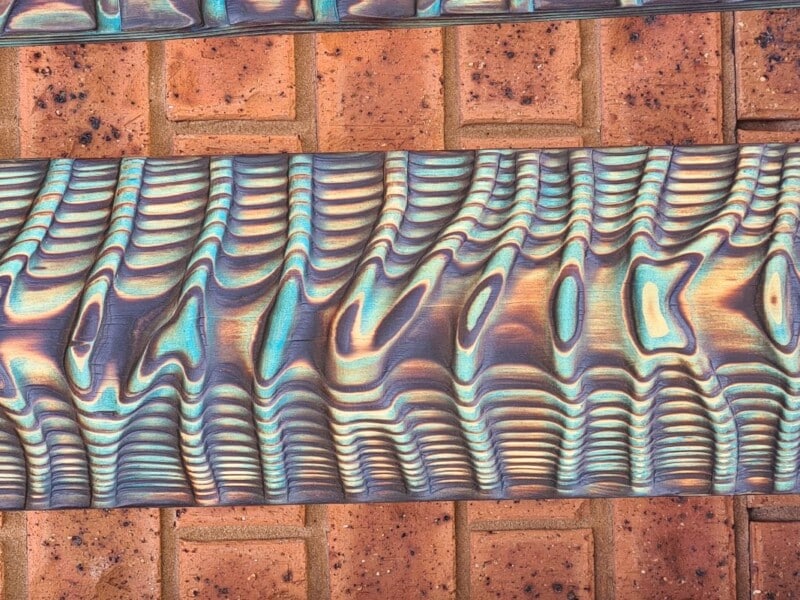
Side view
More unique wall art projects
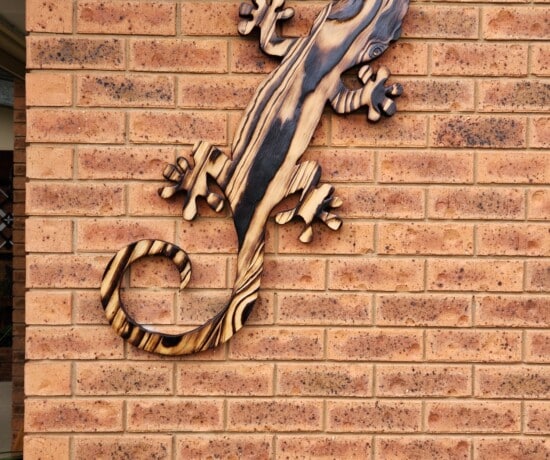
This wall art was made using the traditional wood-burning technique called Shou Sugi Ban, with added texture created using a wood router. You can find the full process in this post.
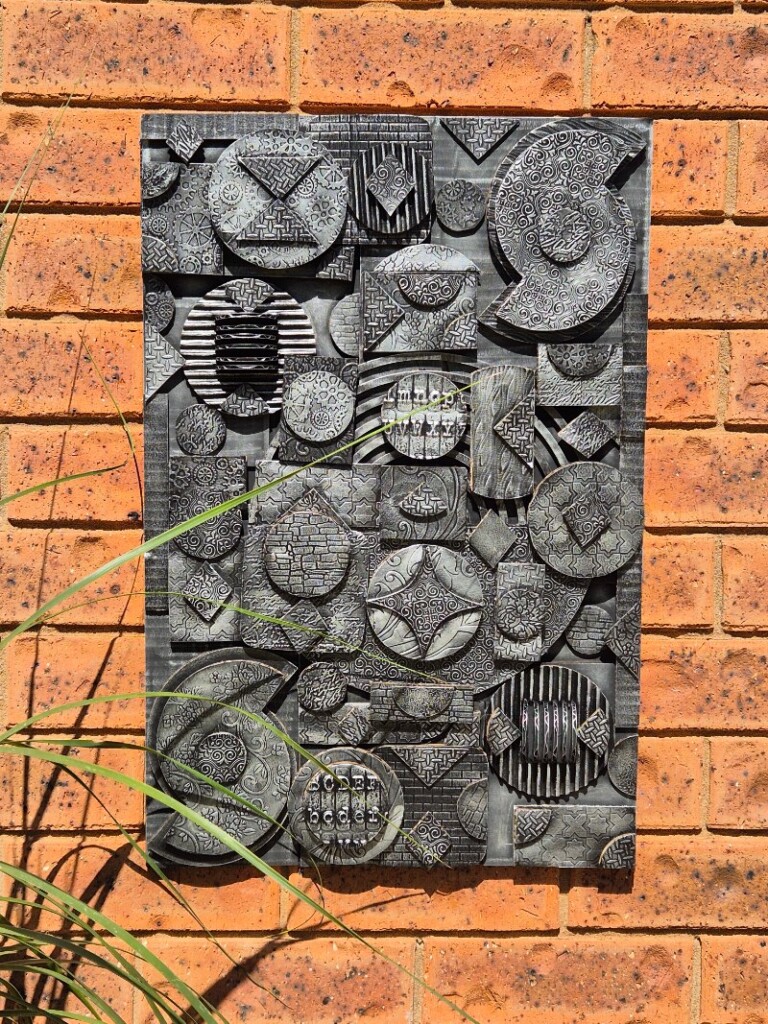
If woodworking isn’t your thing but you’d still love to create unique wall decor, this textured cardboard wall art project is the perfect alternative.
More about IBC
If you follow my blog, you will know I am part of the IBC (International Bloggers Club), which is a group of talented bloggers from around the world. We have members from Spain, South Africa, Australia, the United States, and Canada. Each month, we come together and create a project with a common theme.
The “Hang her up ” contributions from my fellow bloggers joining us this month are listed below. Please feel free to jump over and give them some love.

- Me
- Tea and Forget Me Nots|Rice paper decoupage clock
- Fifth Sparrow No More |A unique box made with a wooden hanger
- Birdz of a feather | Hanging air plants
- A Crafty mix | Concrete cross sand mold
If you’re interested in any of the items used in this project, we’d appreciate it if you used our affiliate links. Clicking these links earns us a small commission at no extra cost to you, helping us create more inspiring and exciting projects to share. We’d also love to hear your thoughts—feel free to leave a comment or share this post!


10 Comments
A Crafty Mix | How to Sand Mold a Rustic Concrete Cross - A Crafty Mix
February 20, 2023 at 11:48 pm[…] Unique Creations by Anita shared a tutorial to make a gorgeous 3D wooden sculpture. […]
How To Decorate a Wall Clock with Decoupage – Tea and Forget-me-nots
February 20, 2023 at 11:59 pm[…] 3D Wooden Wall Art by Unique Creations by Anita […]
sara allen
February 21, 2023 at 12:03 amLooks like you really had fun with all the different arrangements! Amazing work Anita and I really don’t miss the Shou Sugi Ban on this piece because there’s still so much interest in the wood grain and stains. However, I would still be curious to see a version done like that lol!
Anita Holland
February 21, 2023 at 12:56 pmThanks Sara, this project would be too time-consuming for Shou sugi ban but I think the wood would have looked great.
Michelle Leslie
February 21, 2023 at 1:24 amStunning!!! I love how the pieces mess with my mind. It’s like that staircase image that kinda joins back to itself and you don’t quite what’s up and down. I would love to see a Shou Sugi Ban version. I’m assuming each piece would be burnt separately to create the same effect?
Anita Holland
February 21, 2023 at 12:17 pmThanks, Michelle, I was so tempted to do shou sugi ban. But the thought of burning so many pieces and sanding them even with the flash new machine would have been so time-consuming. A real pity really because I think the detail in the wood would have looked great.
Rachel - Tea and Forget-me-nots
February 21, 2023 at 5:41 amLoved seeing the different layouts to visualise it better. Great idea and lots of fun playing with it. Thanks for sharing.
Anita Holland
February 21, 2023 at 12:14 pmThank you so much Rachel, the choices were just too many to choose from. lol
Kristin
February 21, 2023 at 7:00 amThis is puzzling in the best way! This is a great project and looks so cool
Anita Holland
February 21, 2023 at 12:13 pmThank you, Kristin, it was so hard to decide which design to go with, luckily I can just keep making more.