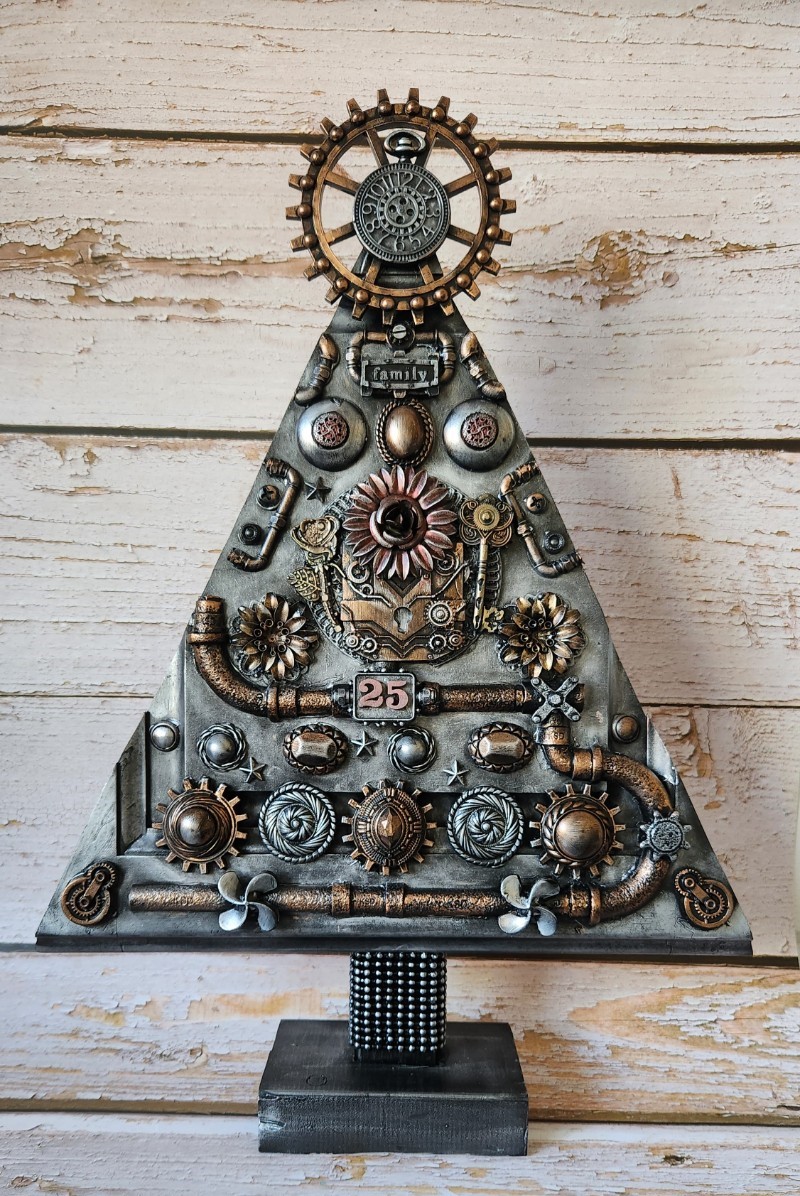
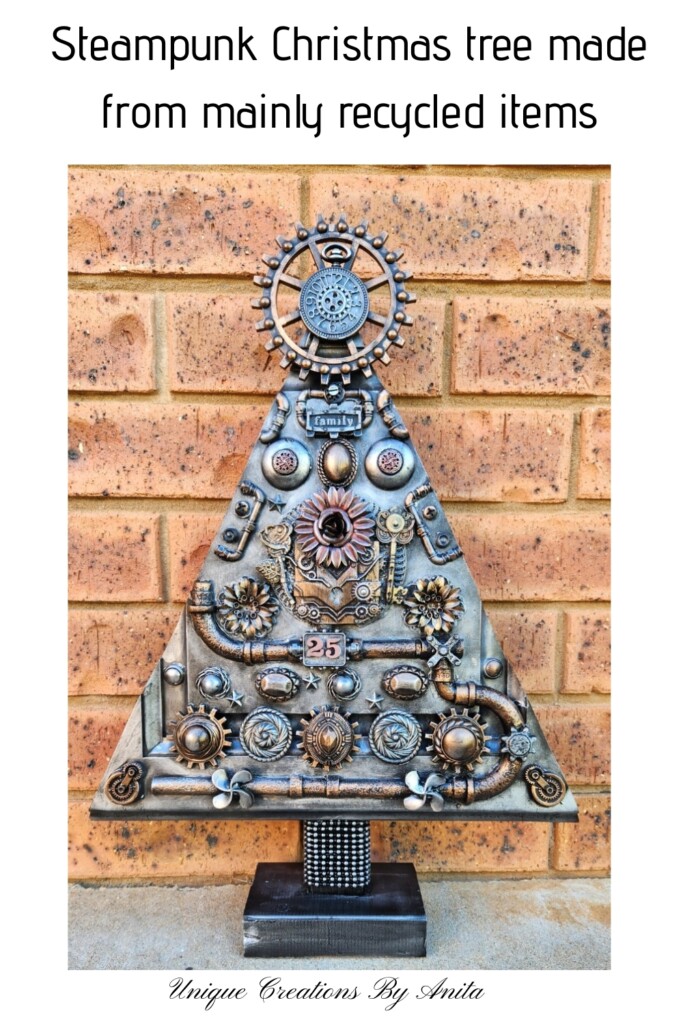
I am a huge fan of steampunk and never miss an opportunity to combine its industrial beauty with my DIY projects. With Christmas just around the corner, I wanted to create something different—a wooden steampunk Christmas tree made from recycled materials. Steampunk is not a style often associated with Christmas, but its metallic colours, gears, and industrial vibe create an amazing contrast with festive décor. By blending woodwork with mixed media assemblage art, I was able to design a tree that is both unusual and stunning, while keeping true to my love of upcycling.
This project was also part of the International Bloggers Club (IBC) Challenge. Each month, we choose a theme and create something unique around it. The theme this time was “Door Do-Overs,” which pushed me to look at an old cupboard door in my workshop scrap pile and turn it into something extraordinary—a steampunk-inspired Christmas tree. More about (IBC) at the end of this post.

Before we dive into this tutorial, be sure to subscribe to my bimonthly newsletter to be the first to see my latest projects. You can also follow me on Pinterest and Facebook, where I also include my unique mixed-media art projects
How to make a wooden steampunk Christmas Tree
**This post may contain affiliate links. This means I earn a small commission on links used at no extra cost to you. Please see my disclosure policy for more information.**
Materials Needed
- Wooden cupboard door or scrap wood
- Scrap 2×4 wood for base
- Off-cut decking wood for a stand
- Broken jewellery (gears, chains, beads)
- Hot glue gun and glue sticks
- Black acrylic paint
- Bronze wax
- Silver wax
- Gold wax
- Ruby red wax
- Pipe silicone moulds, lock and key, large gear, decorative button mould
- Polyurethane resin or epoxy resin
- Jigsaw
- Wood glue and tacky glue
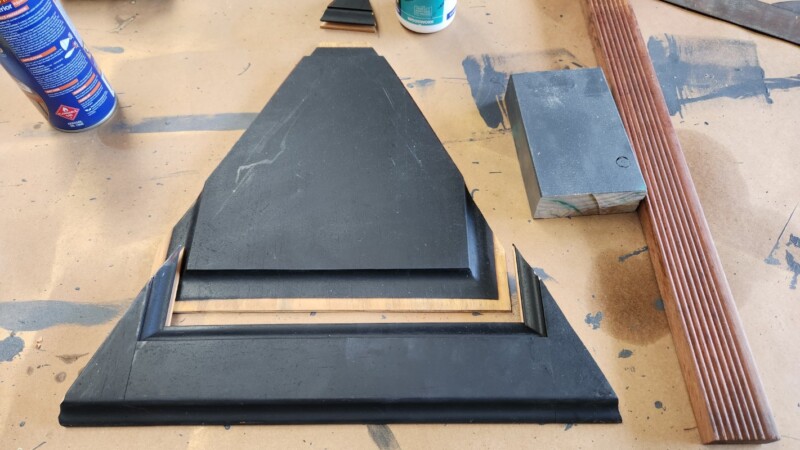
Cutting the Christmas Tree Shape
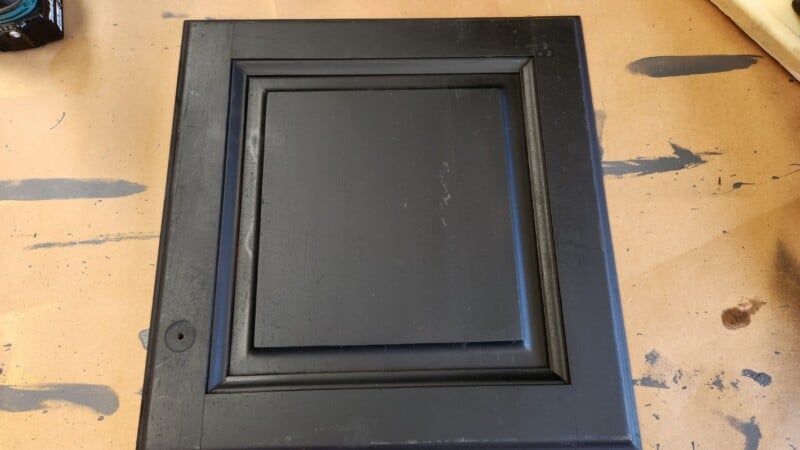
Since this was a “door challenge,” I used a cupboard door, but any scrap wood works well. So many doors end up in landfills, yet they can be repurposed into incredible DIY projects. (Here’s an example of a cupboard door upcycled into a stunning wooden headboard.)
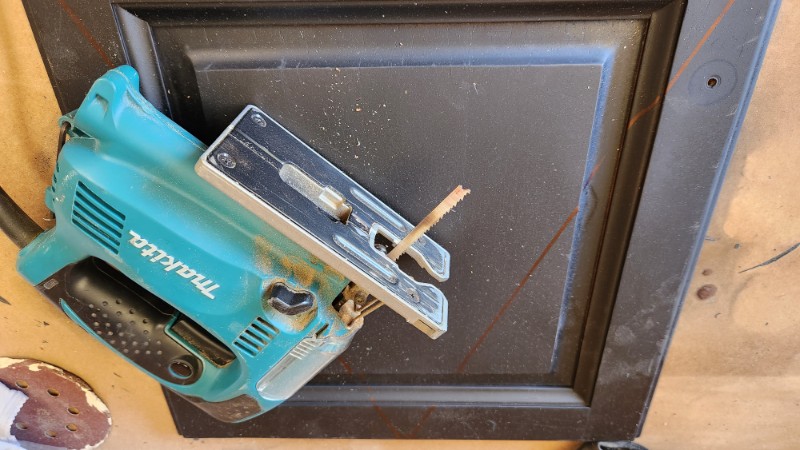
My piece measured 40cm x 40cm. To create the tree shape, I marked the centre point, then drew diagonal lines from the centre to each corner. Using a jigsaw, I cut along the lines to form the triangular tree.
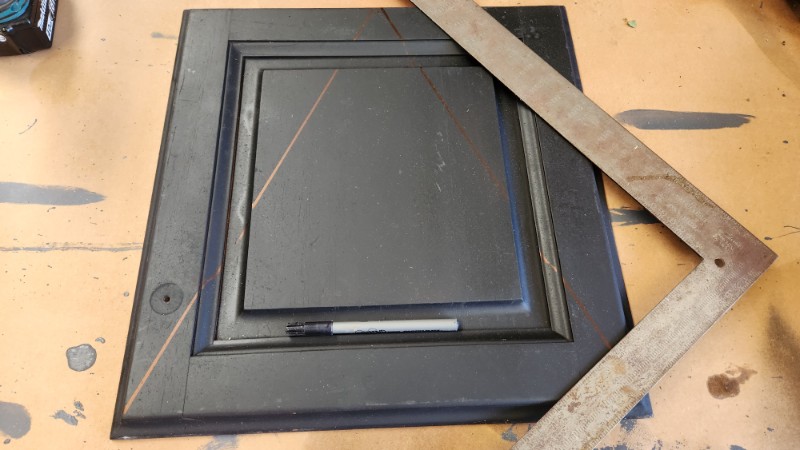
If you’re working with old cupboard doors, be aware that the centre panels may loosen. Mine did, but a little wood glue quickly fixed it. For the base, I cut a piece of scrap 2×4 to 14cm and used decking off-cuts for the stand. I will show you more about making the base later.
Decorating the Steampunk Christmas tree
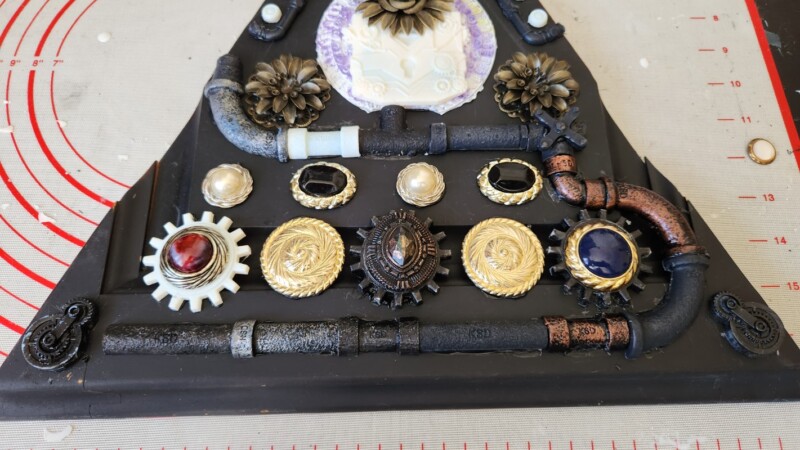
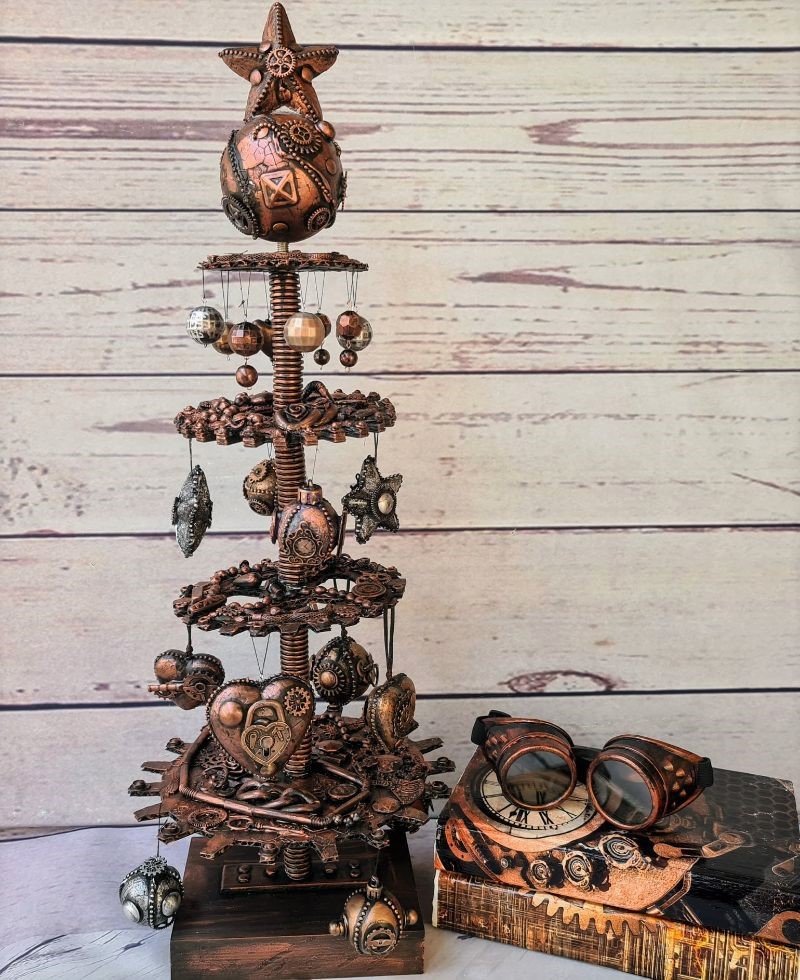
The fun part of this project was decorating. I raided my stash of broken jewellery, kindly saved for me by my local charity shop.

The other embellishments were created using silicone moulds and polyurethane resin. In our hot weather, this resin sets in just 2 minutes and can be de-moulded within 15 minutes. I only wish I had discovered it years ago, instead of waiting 8–12 hours for resin to cure like I used to.
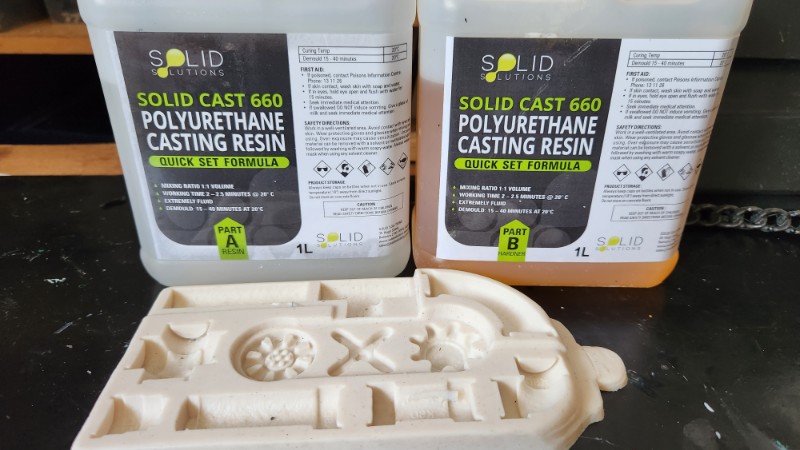
This resin is very easy to use—simply mix equal parts in a silicone cup, stir for about a minute, and then pour it into your moulds.
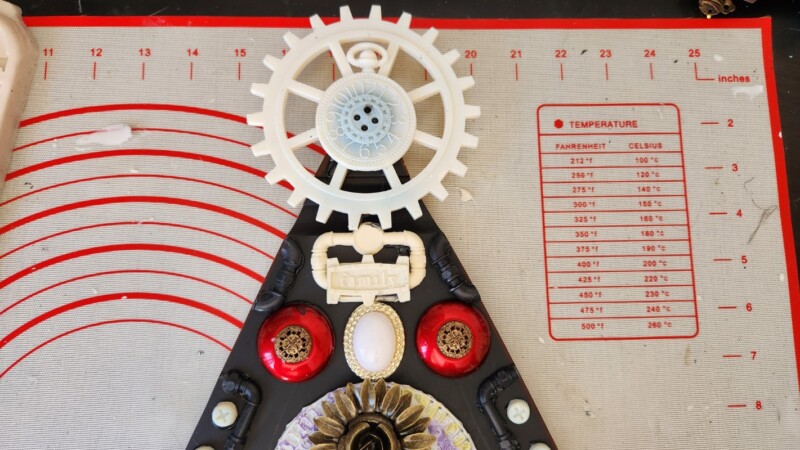
Before glueing the items onto the wood, I laid everything out first, moving the pieces around until I was happy with the design. This stage of creating the steampunk Christmas tree is known as mixed media assemblage art. The beauty of this style is that you’re not limited by materials—the goal is to use items with unique shapes and textures that add interest and dimension. For more tips and tricks on items you can use to add texture to your assemblage projects, this post has it all.
For the best results, try layering your embellishments to create a stronger three-dimensional effect. Another helpful tip is to look past the jumble of colours you see at this stage—once everything is painted, the pieces will blend beautifully into a cohesive design. I use this mixed media technique on almost anything I can get my hands on, and you can explore more of my creations over on my Facebook mixed media art page.
Once you’re satisfied with the layout, you can start glueing the pieces onto the wood. I used hot glue for this project, but most strong tacky glues will work just as well.
Painting the steampunk Christmas tree
I used black acrylic paint and painted everything black, making sure to get into all the nooks and crannies. I got ahead of myself and forgot to take a photo of the plain black surface.

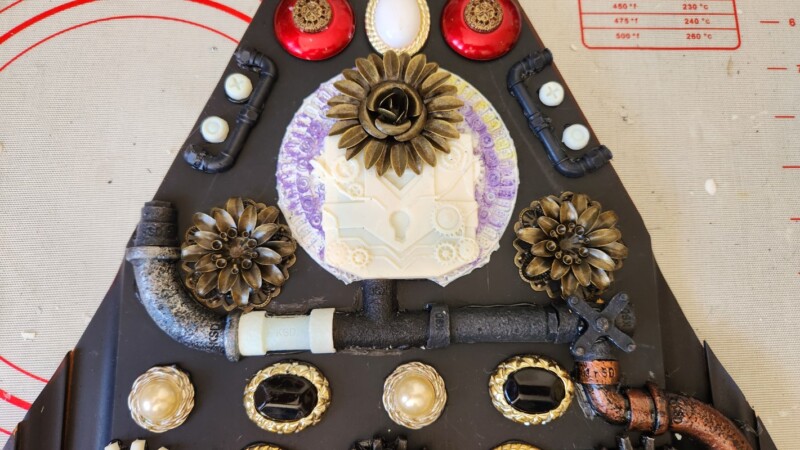
Once dry, the magic happened with metallic waxes. I highlighted the background with silver, using an old soft makeup brush to apply a subtle shimmer. The embellishments were detailed with bronze, gold, silver, and ruby red wax, applied sparingly with my finger. If you don’t have gold wax paste at home, you might already have the ingredients to make your own, and this post will show you how.

To add a light silver colour to the background, I used an old makeup brush. These brushes are nice and soft and fan out easily without leaving lines in the colour.
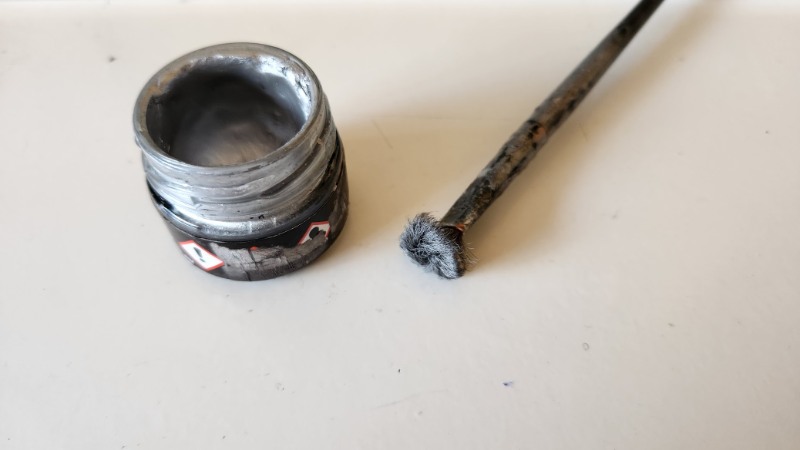
When working with waxes, the goal isn’t to paint with them but to highlight the raised surfaces. Lightly dip your brush into the wax, then gently rub it in small circular motions across the wooden background to bring out the texture.

To add colour to the raised embellishments, I applied the wax with my finger. Simply touch the surface of the wax to pick up a light amount of colour, then gently rub it over the raised areas. Avoid scooping or using too much wax, as blobs will spoil the subtle highlighting effect.

The aim isn’t to cover the entire surface—you want some of the black to show through, adding depth and contrast to the design.
After applying the initial wax colours to your embellishments, you can go back with a touch of silver or gold. Lightly rub it over the raised areas to highlight the details and create a beautiful two-toned effect.
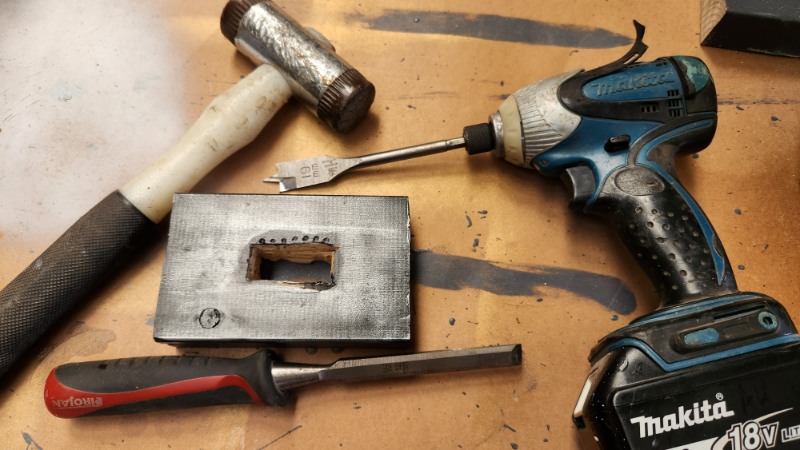
Making the stand
Start by marking the position where the stand will slot into the wooden block with a pencil. I used a spade bit and drill to remove most of the wood, then cleaned out the rest with a hammer and chisel. I’ll admit, my technique still needs some refining—it wasn’t the neatest job this time!
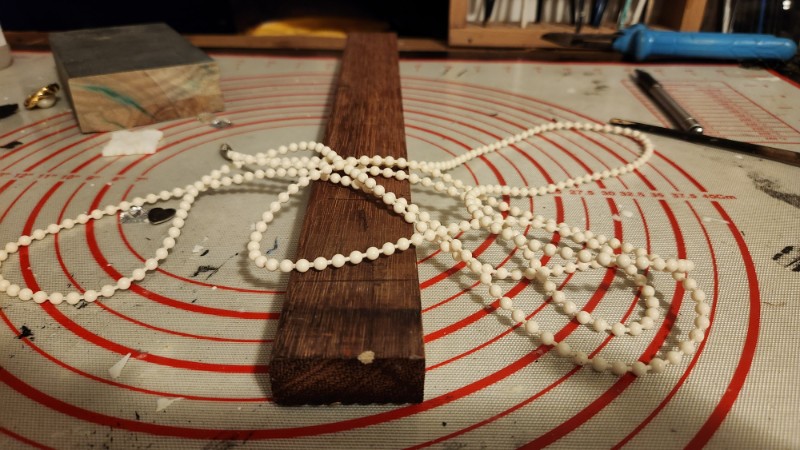
To add extra detail to the wooden stand, I glued on plastic beads salvaged from broken blinds. A bit of hot glue held them securely in place around the wood.
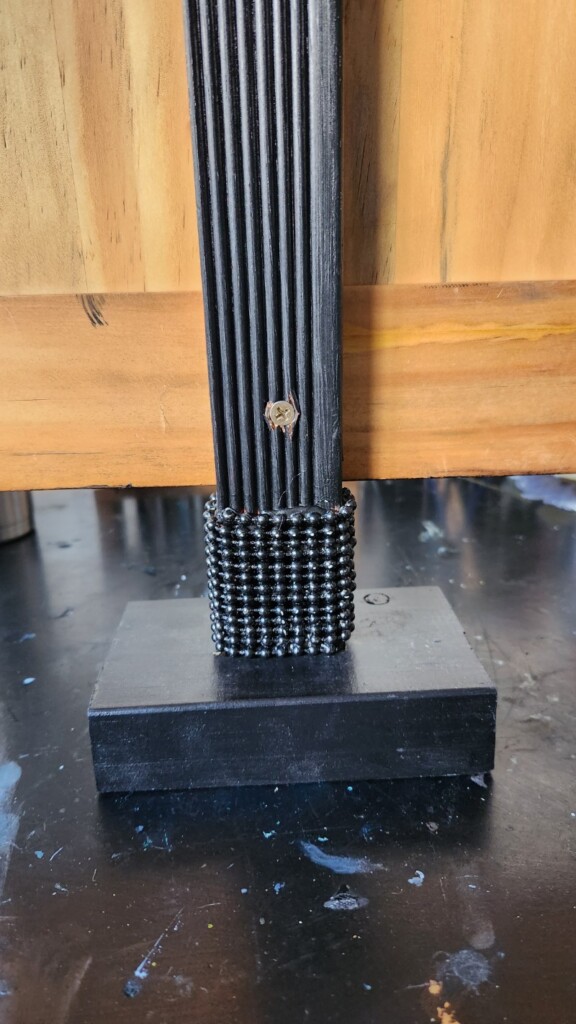
Next, I painted the beads black and highlighted them with silver wax using my finger. The stand was then screwed securely into the back of the Christmas tree and fixed into the base with wood glue.
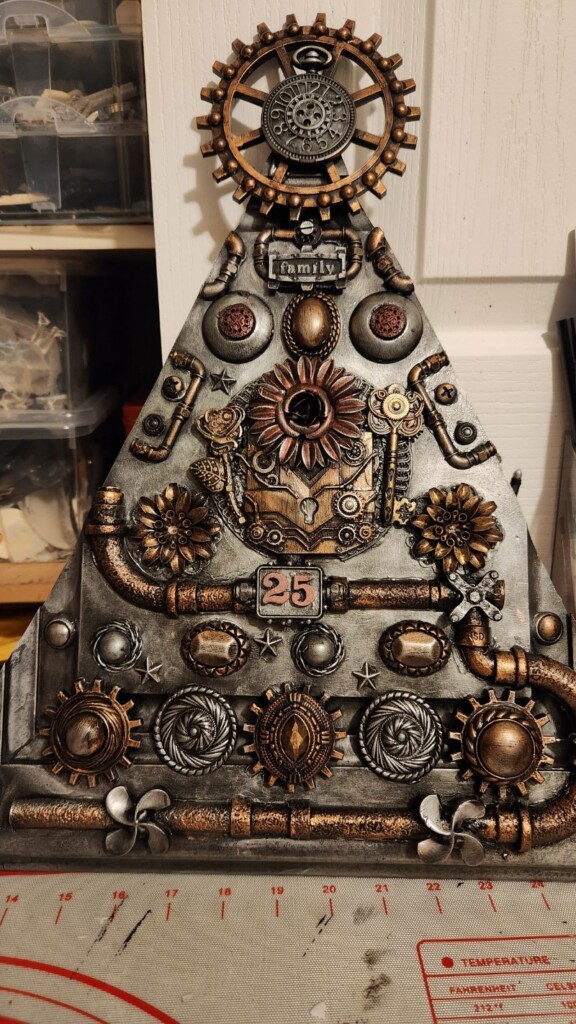
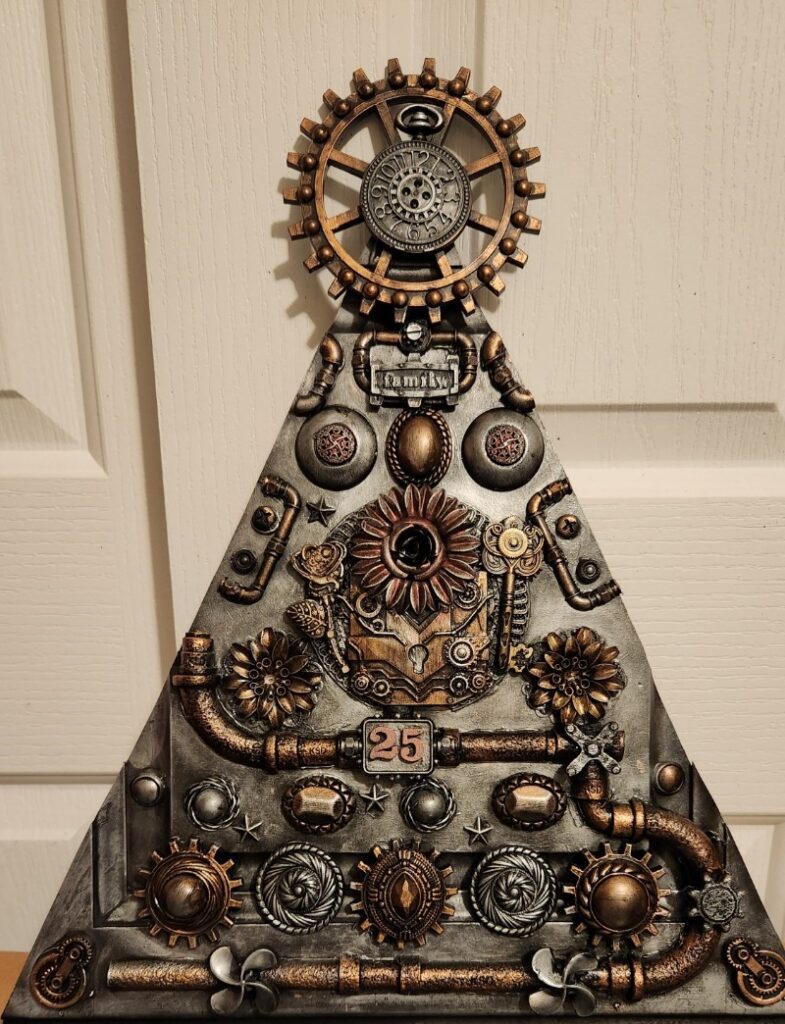
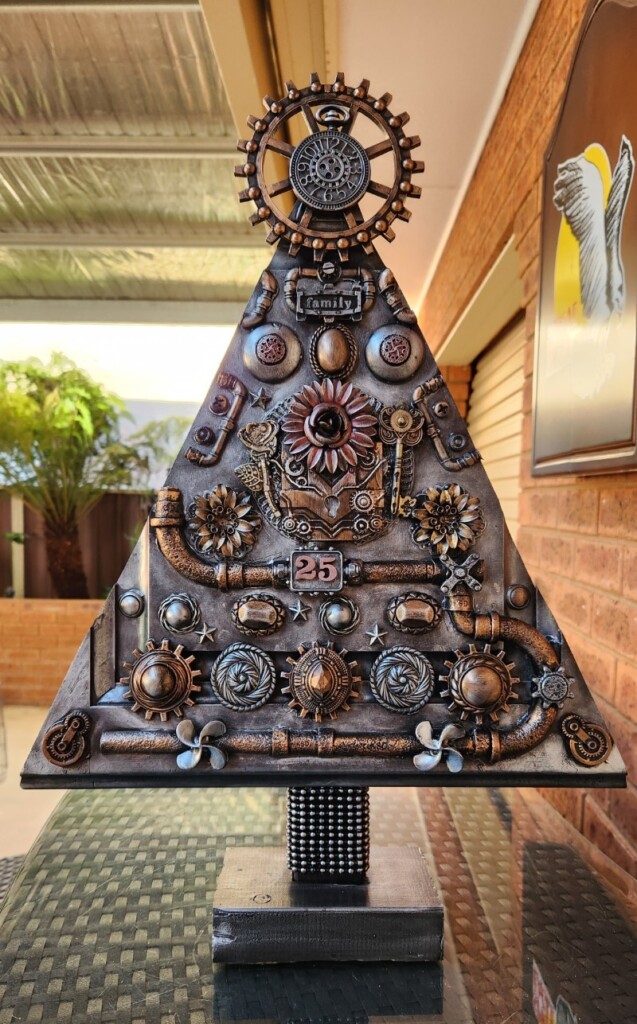
Here are some close-up photos of the finished wooden steampunk Christmas tree.


One of the great advantages of metallic waxes is how the colours shift depending on the light. For example, in the photo below taken outside in the sun, the tones appear even more vibrant and dynamic.
The colours are even different in natural light.
DIY Alternatives to a traditional Christmas tree
Here’s another steampunk Christmas tree I created, this time using a cardboard box along with recycled bits and pieces I had lying around the house. You can find the tutorial HERE.
This wooden corner Christmas tree can be beautifully decorated for the festive season, and once the holidays are over, it transforms into a functional shelf for everyday home décor.


More about IBC

If you follow my blog, you will know I am part of the IBC (International Bloggers Club), which is a group of talented bloggers from around the world. We have members from Spain, South Africa, Australia, the United States, and Canada. Each month, we come together and create a project with a common theme.
To see the “Door Do over ” contributions from my fellow bloggers joining us this month, keep scrolling. Please feel free to jump over and give them some love.
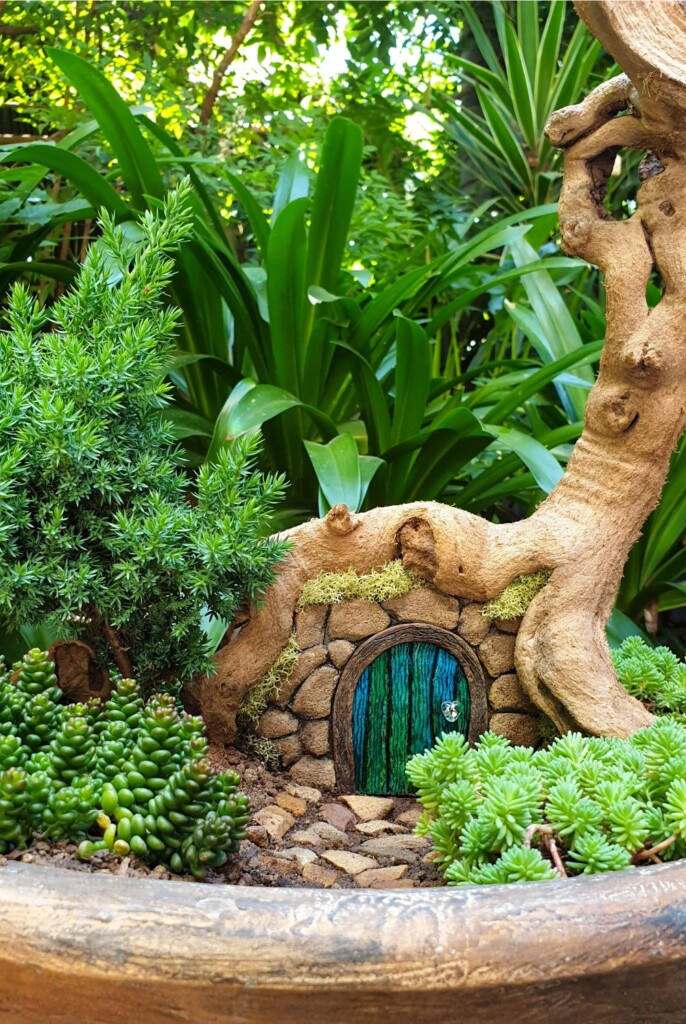
Michelle from A crafty mix made one of her amazing fairy garden creations.

If you’re interested in any of the items used in this project, we’d appreciate it if you used our affiliate links. Clicking these links earns us a small commission at no extra cost to you, helping us create more inspiring and exciting projects to share. We’d also love to hear your thoughts—feel free to leave a comment or share this post!


7 Comments
Sara
November 20, 2023 at 11:23 pmYou have such amazing vision Anita; this is fabulous! It amazes me how it all comes together in the end; surprises me every time lol. I love both your Christmas trees.
Anita Holland
November 28, 2023 at 8:56 pmThanks so much Sara, I set my mind to look at the shapes rather than the colours. This helps alot.
Michelle Leslie
November 21, 2023 at 2:50 amI have to agree with, Sara. You do have such a talent for combining odd bits to create works of art. I can’t seem to get my eyes to ignore a mix mash of colors. It’s definitely something I need to work on. I love how your cupboard door turned out.
Anita Holland
November 28, 2023 at 8:57 pmThanks Michelle, try focusing on the shapes and textures and not the colours, it will help.
Maria Newell
March 18, 2024 at 1:53 amDoes the wax harden or do you have to be careful nut to rub Against it so that it doesn’t rub off?!?!
Anita Holland
March 18, 2024 at 7:52 pmHi Maria, the wax will harden in and hour or so and will not rub off or smudge. It is a great product.
Magical Upcycled Faux Wood Fairy Garden Door - A Crafty Mix
November 18, 2024 at 5:29 am[…] made this amazing Steampunk themed Christmas tree. I’m in love with all those tubes, pipes, and gears. It’s such a clever take on a […]