")
If you’ve ever wondered how to give a bottle a mixed-media makeover, you’re in the right place! I first discovered altered bottles on Pinterest and was instantly hooked. The idea of recycling old bottles that were headed for the bin into eye-catching, artistic creations really appealed to my love of upcycling.
After binge-watching a few YouTube tutorials, I realised how surprisingly easy it is to create altered bottles. The trick is layering textures—perfectly imperfect is the goal! What’s even better is that many of the supplies you need are already around your home. This particular bottle turned out so pretty, I decided to turn it into a steampunk-style lamp.

Before we dive into this tutorial, be sure to subscribe to my bimonthly newsletter to be the first to see my latest projects. You can also follow me on Pinterest and Facebook, where I also include my unique mixed-media art projects.

How to Give a Bottle a Mixed Media Makeover and Turn It into a Lamp
**This post may contain affiliate links. This means I earn a small commission on links used at no extra cost to you. Please see my disclosure policy for more information.**
Materials You’ll Need
- Recycled glass bottle (I used a Baileys bottle)
- Black gesso
- Texture paste
- Stencils (Cricut-made or store-bought)
- Spatula or scraper
- Heat gun (optional)
- Bronze wax paste
- Hot glue gun
- Heavy-duty glue (like E6000)
- Assorted embellishments:
Broken jewellery, fabric scraps, onion mesh, grapevine twigs, steampunk charms, old zip - Shimmer spray
- Artificial flowers
- Dried split peas (optional filler or half beads)
- Old lampshade
- Drill with a 1 cm diamond tip hole cutter
- Scrap wood with a 1 cm guide hole
- Lamp kit with threaded rod, fittings, and wiring
Step 1: Prepare Your Bottle
Start with a clean, dry bottle. I chose a Baileys bottle (after enjoying its contents, of course). Jack Daniels bottles are another great choice because the square base adds stability when converted into a lamp.
Coat the entire bottle in black gesso to create a good base. It dries quickly and gives excellent coverage for embellishments and wax finishes.
")
Step 2: Add Texture with Stencils
Wrap a stencil around the bottle and use a spatula to apply texture paste over it. Don’t worry about perfection—uneven textures add charm and depth.
")
Remove the stencil immediately and scrape any excess paste back into the tub.
")
Wash your stencil straight away. Once the paste dries, it won’t come off. Use a heat gun to speed up the drying process before adding more layers with different stencils.
")
Step 3: Add a Second Coat of Gesso
Once the texture is dry, add another coat of gesso. This makes it easier to get into all the crevices before adding embellishments. It also provides a clean base for your wax highlights.

Step 4: Highlight the Texture
Using your finger, gently apply bronze wax paste over the raised textures. Less is more—just skim the surface to bring out the details. I prefer highlighting as I go so I can see the final effect take shape.

Step 5: Decorate with Embellishments
Time for the fun part—embellishing! I raided my stash of items from past online orders, broken jewellery, and recycled bits like onion mesh and denim zippers.

Glue the elements on randomly. If something looks odd, simply cover it with more embellishments. For heavier items, use a strong glue like E6000; for light ones, hot glue is perfect.

I added a zip from old jeans and filled the inside with steampunk charms to make it look like they’re spilling out. Then, I coated everything with black gesso again for continuity.

Step 6: Add Flowers and Extra Colour
Spray your flowers with shimmer spray and highlight them with wax paste. Glue them on with a hot glue gun. Pro tip—wear gloves while spraying! I didn’t and ended up with blue fingers for days. Learn how to make your own shimmer spray and coloured wax pastes HERE.

To hold bendable items in place while drying, like the metal filigree squares, tie them with string. Add more colour with shimmer sprays and homemade wax pastes if desired.

Step 7: Decorate the Lampshade
I reused an old white lampshade but painted it with black gesso to match the bottle. I added another zip and more charms, filling gaps with dried split peas.

Paint everything black and highlight again with the bronze wax to match the bottle’s look.


Step 8: Drill a Hole in the Bottle
Use a 1 cm diamond hole cutter with a drill. Cut a guide hole in a piece of wood and clamp it to the bottle to keep the drill in place. Add water while drilling to reduce friction and prevent cracking. If you’re planning to turn your bottle into a lamp, drill the hole before adding any decorations or embellishments. Mine was an afterthought.

Step 9: Wire the Lamp
Before assembling, drill a hole in the bottle cap and insert a threaded tube. Secure it with a nut underneath. Feed the lamp wire through the bottle and up into the fittings.

Screw on the lamp components, attach the shade, and admire your one-of-a-kind altered bottle lamp!

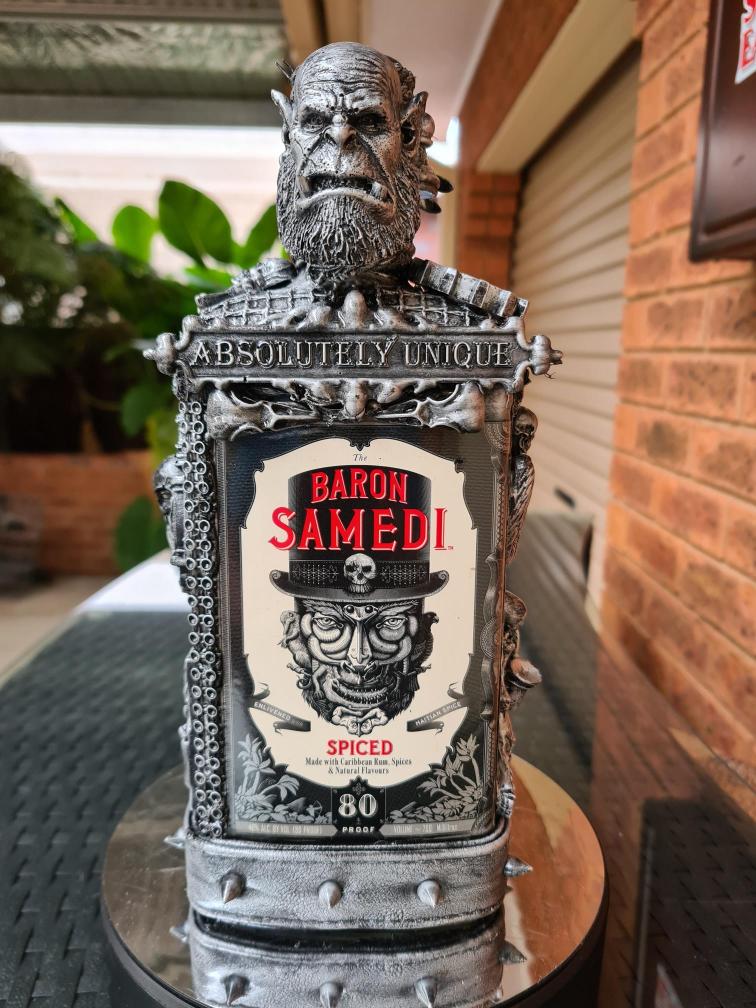
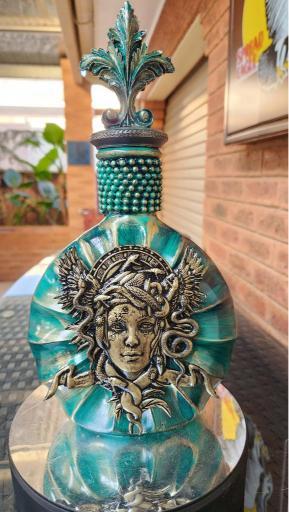
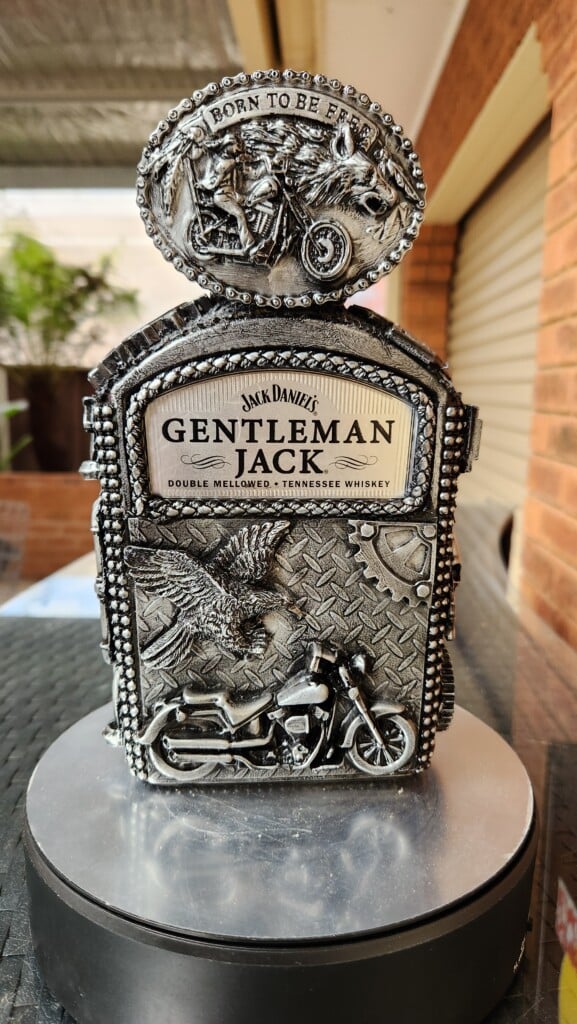
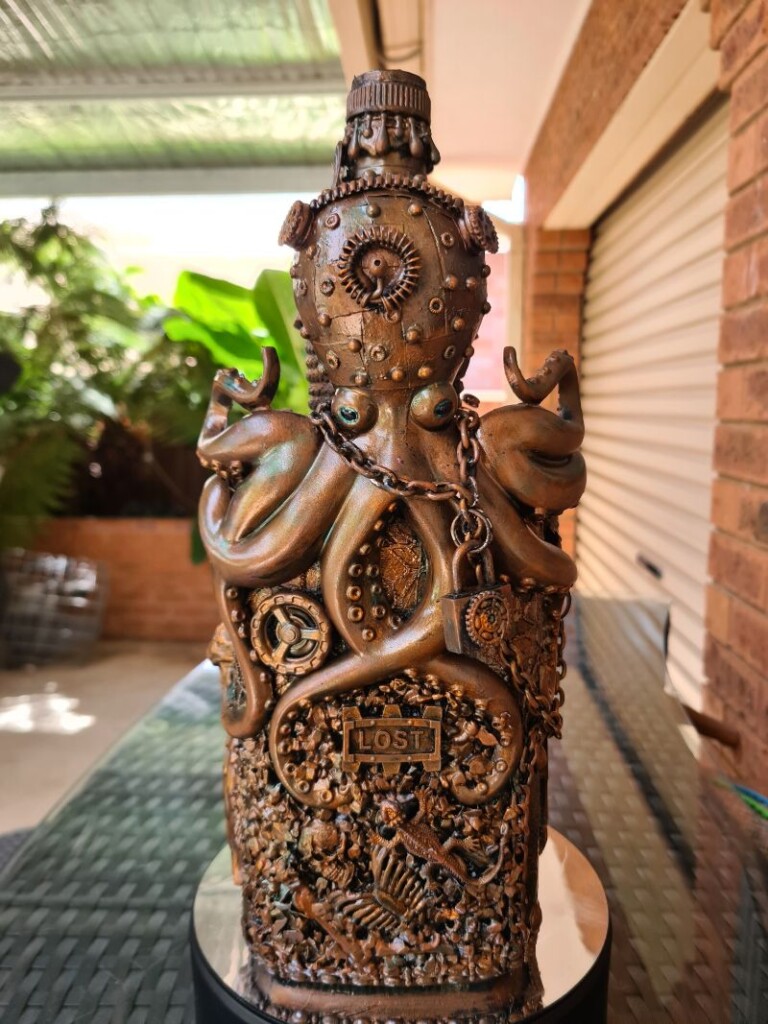
This mixed-media altered bottle project is a great way to turn trash into treasure. It’s creative, therapeutic, and perfect for steampunk or vintage-inspired home decor. Try making a set using different-shaped bottles! Here are a few I have made.
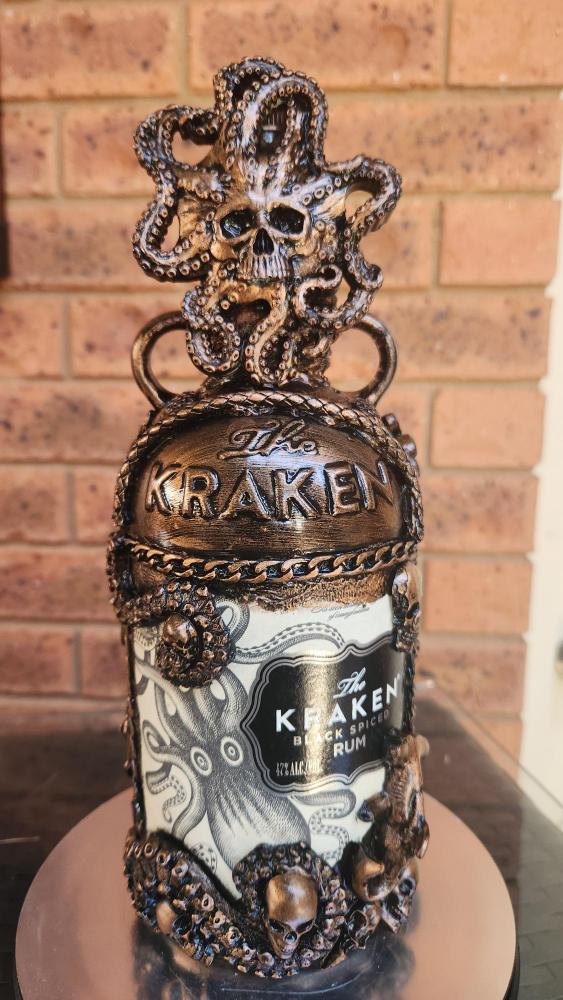
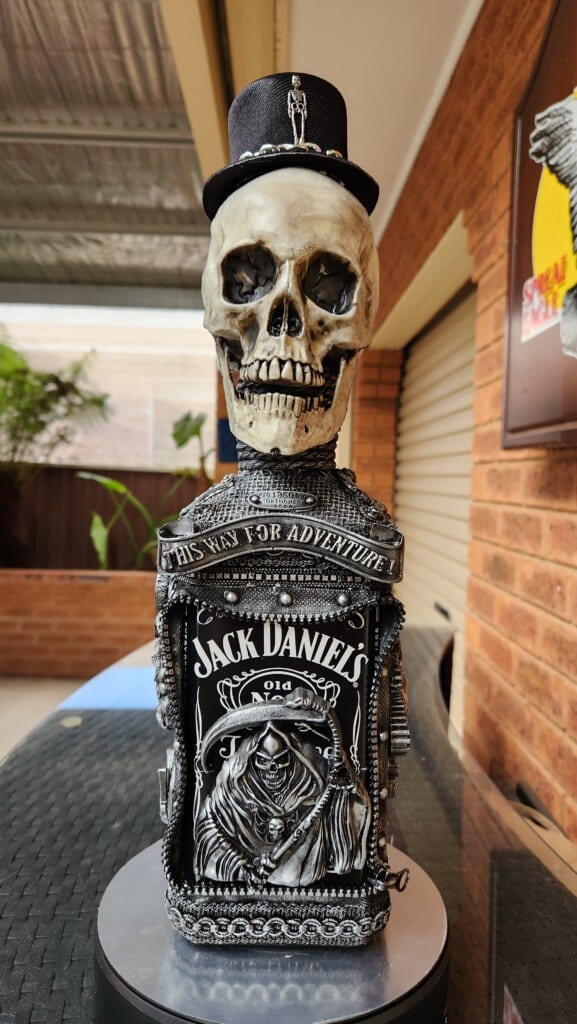

Up close view of the altered bottle.

Side view

This was one of the first altered bottles I ever made, and now I create them full-time as a hobby. In this post, I’m sharing some of the techniques and tips I’ve learned along the way.
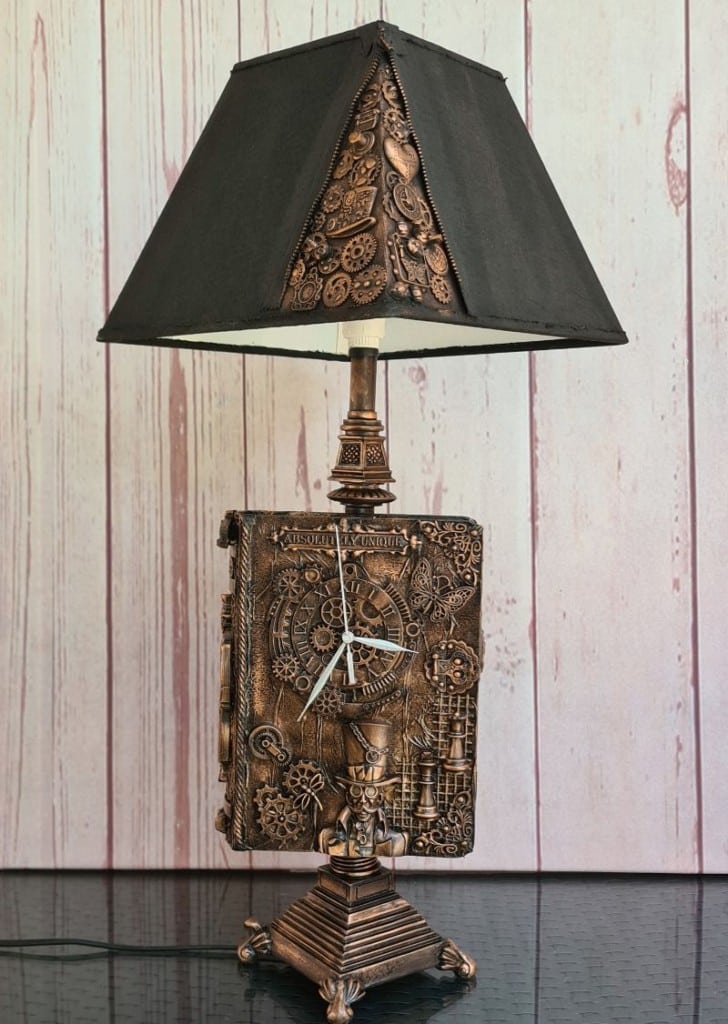
Here is another steampunk lamp I made using a book-shaped box.


If you’d like to find any of the items used in this project, we’d greatly appreciate it if you used our affiliate links. These links provide us with a small commission at no extra cost to you, allowing us to continue creating and sharing more inspiring projects. We’d also love to hear your thoughts—feel free to leave a comment or share this post!
.

24 Comments
Jenna
August 22, 2019 at 12:35 pmWow, this is incredibly cool! Great tutorial too! I love to paint wine bottles and have decoupaged them, but you have opened my eyes to a brand new direction! Really creative!
Anita Holland
August 23, 2019 at 6:42 amThank you, Jenna, Great to hear you got some inspiration from my project. I am still new to mixed media and I am totally hooked. So I know the feeling.
Dee | Grammy's Grid
September 1, 2019 at 7:45 amThese are awesome! You’re so talented as well as creative!! Thanks so much for linking up at the #UnlimitedMonthlyLinkParty 4. Shared.
Anita Holland
September 2, 2019 at 12:34 pmThank you
Melissa
September 2, 2019 at 11:40 amLooks great love how the lamps look something so creative I will be trying this you have a gift so good 😊 saw this at fortheloveto-link up
Anita Holland
September 3, 2019 at 11:25 amThank you so much for the great comment, it is greatly appreciated.
Sylvia | Grace for a Gypsy
September 3, 2019 at 4:43 amYou did an outstanding job with this tutorial! Love this bottle! Found you at the our-mini-linky-party-week-243
Anita Holland
September 3, 2019 at 11:22 amThank you so much, very kind of you to say.
Lisa L Lombardo
September 7, 2019 at 6:03 pmThis is so cool! I love the finished lamp 🙂
Thanks so much for sharing on Farm Fresh Tuesdays!
Anita Holland
September 7, 2019 at 10:53 pmThank you so much. Turning it into a lamp was an afterthought because it turned out so pretty.
Ann
September 10, 2019 at 1:24 pmWhat a beautiful transformation! Thank you for sharing at Party In Your PJ’s, you are being featured tonight on my blog.
Anita Holland
September 11, 2019 at 1:30 amThank you so much Ann for the lovely comment and feature. I really do appreciate it.
Catherine Sokolowski
September 25, 2019 at 12:14 pmWow! Your lamp is incredible!! If I had a little more creative talent in me I would try it!
Anita Holland
September 26, 2019 at 1:09 pmThank you so much. That was my first attempt, I thought the same thing. I can only do this style I tried shabby chic and it was a total fail. lol
Dee | Grammy's Grid
October 1, 2019 at 4:44 amCongrats! Your post is FEATURED at the #UnlimitedMonthlyLinkParty 5. Party open now!
Anita Holland
October 1, 2019 at 10:28 pmThank you so much for the feature, greatly appreciated.
LINDA BOUFFARD
October 19, 2019 at 3:08 amWow. This is something I haven’t seen before. Very exciting to think you can just use bits and bobs. Love it. Best wishes, Linda @Crafts a la mode Pinning.
Anita Holland
October 19, 2019 at 3:26 amThank you Linda, You can add just about anything to them and they will look great. The bronze wax paste is what makes the magic happen.
Dee | Grammy's Grid
June 9, 2020 at 12:01 amThanks so much for linking up with me at #AThemedLinkup 18 for Crafting with Bottles and Jars, open May 30 to June 10. All party entries shared if social media buttons installed.
Dee | Grammy's Grid
June 15, 2020 at 6:33 pmCONGRATS! Your post is FEATURED at #AThemedLinkup 19 for Cleaning and Organizing, from my previous linkup for Crafting with Bottles and Jars, open June 15 to 25. All entries shared if social media buttons are installed.
Anita Holland
June 16, 2020 at 5:04 pmThank you so much
Chris
April 30, 2021 at 4:44 amI just love what you do! you are just so creative!
Anita Holland
May 1, 2021 at 8:35 pmThank you so much 🤩
27 Beautiful Wine Bottle Crafts – Tiny Life Tips - doityourself
July 29, 2024 at 12:29 am[…] 4. Altered Wine Bottle […]