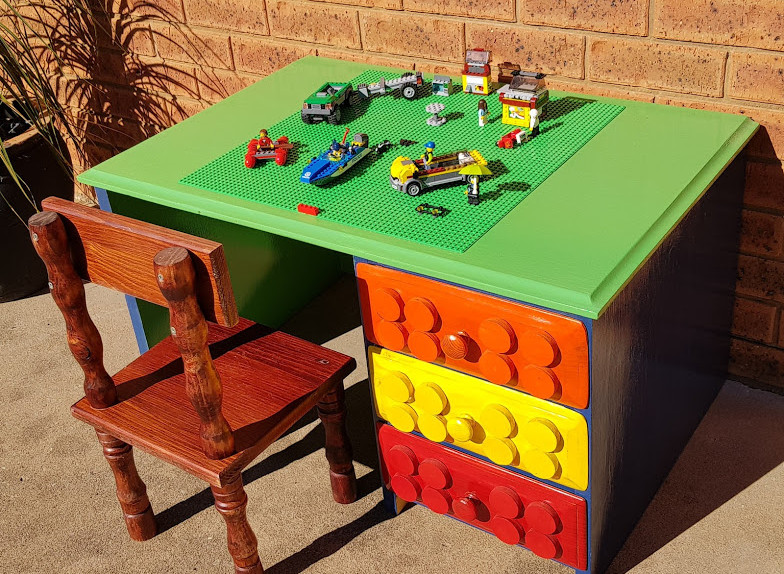
If you’re looking for a practical, budget-friendly way to create furniture for little ones, this project is perfect. In this tutorial, I’ll show you how to make a toddler chair from recycled materials. I built this sweet little seat using leftover timber from an old desk, repurposed table legs, and reclaimed hardware. It was made to match a sandpit table I created for my great-niece, who loves playing in the sand, just not sitting in it! This upcycled toddler chair keeps her happy, dry, and comfortable while she plays. Plus, it fits neatly under the sandpit table when not in use.
Upcycling materials is not only cost-effective but also reduces waste. If you have leftover timber, spare table parts, or even an old chair to break down, this project is a great way to give them new life. This chair is sturdy, toddler-safe, and sealed with outdoor varnish, making it perfect for indoor or outdoor play.
Before we dive into this tutorial, be sure to subscribe to my bimonthly newsletter to be the first to see my latest projects. You can also follow me on Pinterest and Facebook where I also include my unique mixed-media art projects.
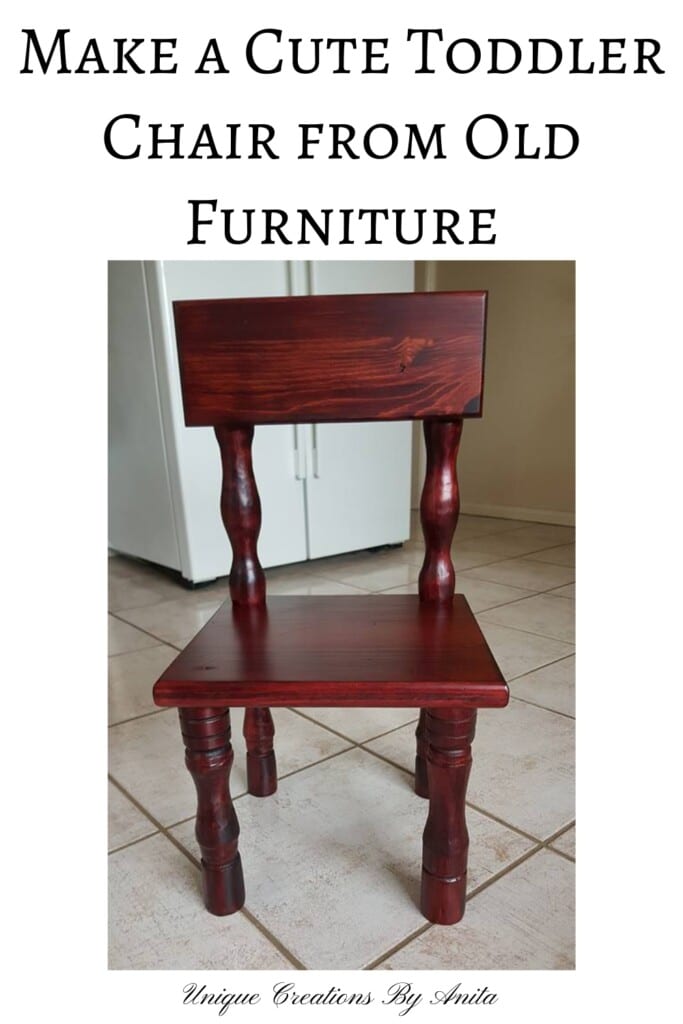
How to Make a Toddler Chair from Recycled Materials
**This post may contain affiliate links. This means I earn a small commission on links used at no extra cost to you. Please see my disclosure policy for more information.**
Materials Needed
- Scrap timber (for seat and backrest)
- Old table legs
- Hanger bolts with Insert nuts
- Wood glue
- Sandpaper (120 grit)
- Wood stain (Dark Mahogany)
- Outdoor wood varnish (2 coats recommended)
- Orbital sander
- Wood router
- Drill
- Clamps
Step 1: Measure and Plan Chair Dimensions
Start by measuring the height of the sandpit table to determine how tall the chair should be. Make sure there’s enough clearance for the chair to slide underneath. My design used the exact gap under the table to guide the seat height.

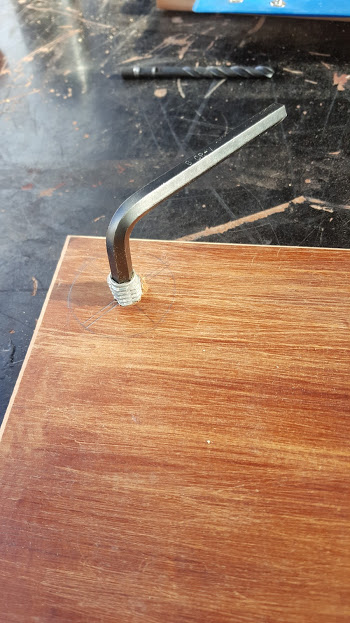
Step 2: Reuse Existing Table Hardware
I reused the hanger bolts and insert nuts that had attached the original legs to the old table. Drill a hole in the top of each chair leg slightly smaller than the bolt diameter, then screw the hanger bolts into place.

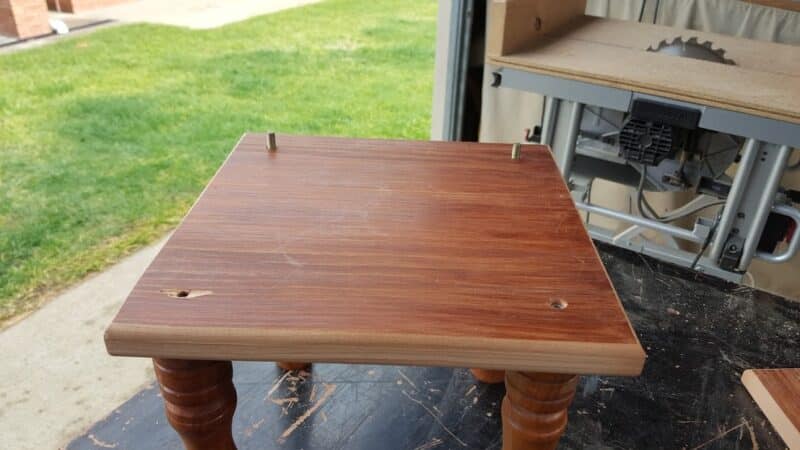
Step 3: Prep the Seat Base
Drill holes into the chair seat to match the bolt size, making sure not to drill all the way through the front two (like I accidentally did!). Attach the insert nuts into the bottom side of the seat, aligning them with the bolts on the legs.
Step 4: Add the Back Support
Drill holes into the top of the rear legs to accept the backrest supports. Insert nuts go in the bottom of each backrest piece.
Then screw the backrests to the rear legs using bolts. If you accidentally drill through anywhere, just fill the holes with wood filler.
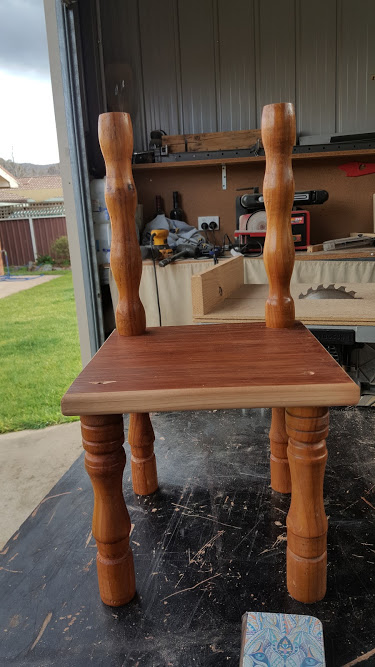
Step 5: Sand and Round Edges
Sand all surfaces thoroughly using an orbital sander with 120 grit paper. Round off sharp edges with a wood router to make it safer for small children. This step is important for comfort and safety.
Step 6: Stain and Seal the Timber
Stain the chair with a dark mahogany wood stain. After drying, apply two coats of outdoor-grade varnish to protect the timber and make it more durable for messy toddler play.
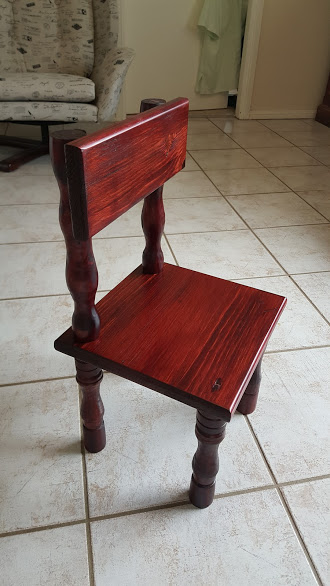
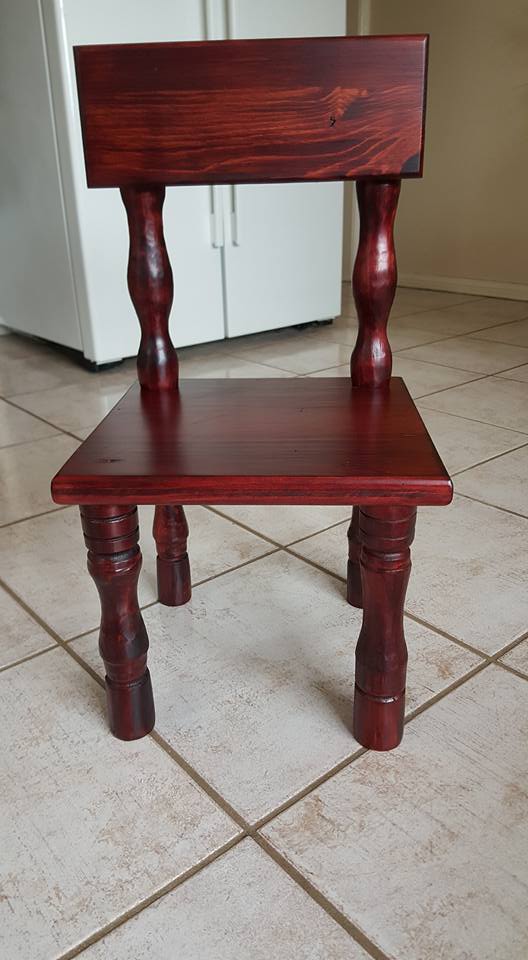
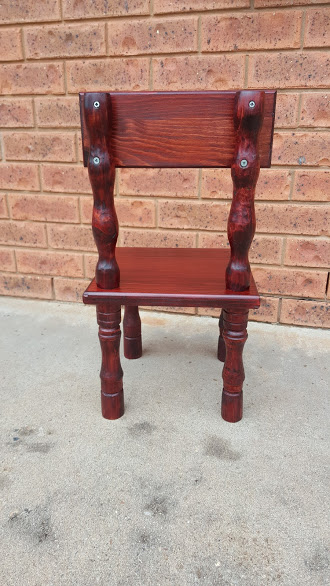
The Finished Toddler Chair
And that’s it! A gorgeous and functional toddler chair made from recycled wood. Not only does it look great with the sandpit table, but it also saves a heap of waste from going into the landfill. It’s sturdy, stylish, and made with love for little ones.

If you enjoy making projects for your children, here’s another fun idea—an activity table I created from an old desk.

If you’d like to find any of the items used in this project, we’d greatly appreciate it if you used our affiliate links. These links provide us with a small commission at no extra cost to you, allowing us to continue creating and sharing more inspiring projects. We’d also love to hear your thoughts—feel free to leave a comment or share this post!


2 Comments
MADELINE l NEWTON
April 15, 2021 at 11:18 amyou are so great at making things using other old items ,just amazing what you can do …wow …should really feel very proud of your self for what you can make …wow…
Anita Holland
April 16, 2021 at 9:22 pmThank you so much Madeline, that is really kind of you to say. I try and buil;d all my projects using recycled materials to keep my hobby keep.