
If your household includes a serious gamer or music lover, you’ll know the struggle of tangled cords and broken headsets. My husband is an avid computer gamer and invests quite a bit in high-quality gaming headsets. Unfortunately, when he runs over the cords with his office chair, he ends up with crushed wires and a bad mood. So, being the kind and creative wife that I am (his words, not mine, well, maybe mine), I decided to make him a custom headphone stand.
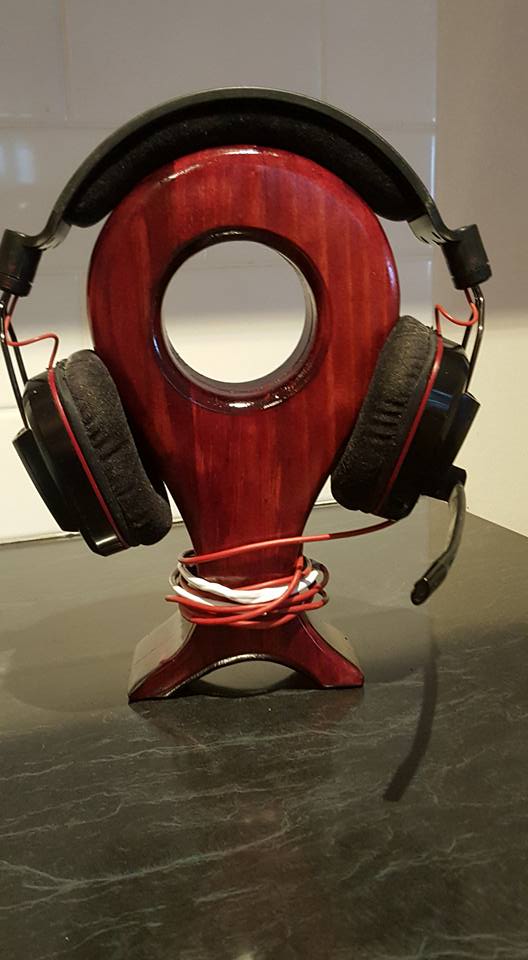
This handmade headphone stand keeps his expensive gear safe and organised, and it looks great next to his gaming setup. You can easily build one too using scrap wood and a few basic tools. Let me walk you through how to make a headphone stand that’s both stylish and functional.

Before we dive into this tutorial be sure to subscribe to my bimonthly newsletter to be the first to see my latest projects. You can also follow me on Pinterest and Facebook where I also include my unique mixed-media art projects
How to Make a Headphone Stand
**This post may contain affiliate links. This means I earn a small commission on links used at no extra cost to you. Please see my disclosure policy for more information.**
Materials Needed
- Scrap wood (at least 50 mm thick or laminate two pieces)
- Wood glue
- Jigsaw
- Hole saw attachment
- Sander or sanding block
- Bench clamp
- Dark wood stain
- Gloss polyurethane sealer
- Wood router, Round-over router bit (optional)
- Sandpaper (120 grit)
- Printed template
- Drill
- Flap Wheel
Step 1: Create a Headphone Stand Template
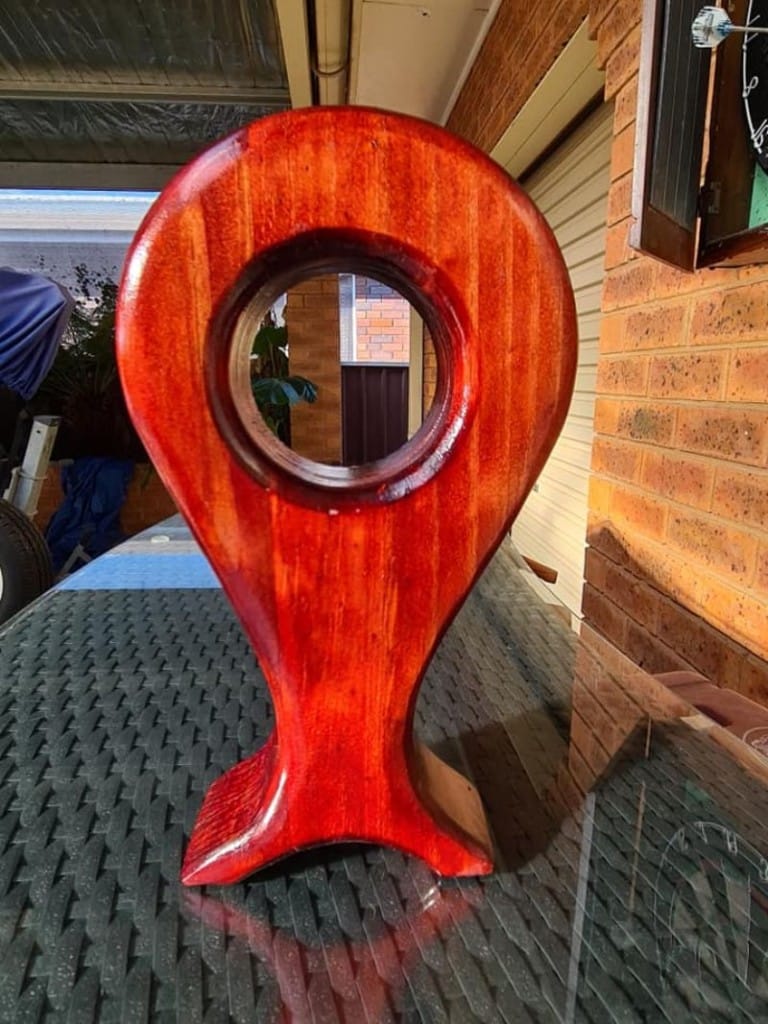
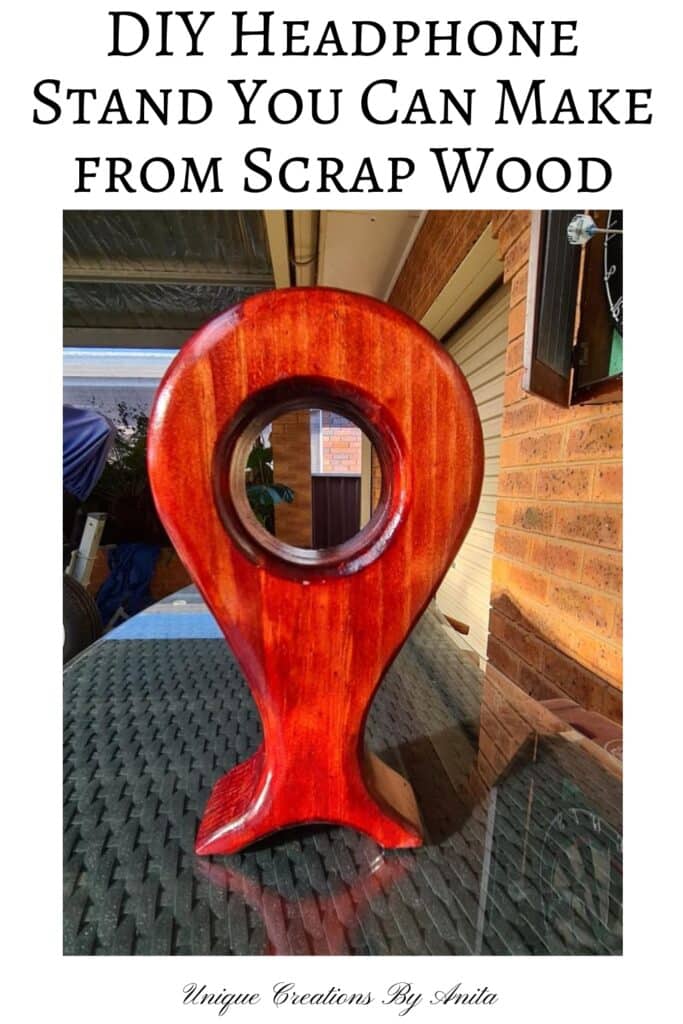
Start by browsing Pinterest or Google for headphone stand shapes. Most have a clean, curved design. I found one I liked, printed it on A4 paper, and used it as my template. Feel free to add your own twist, like I did with an extra curve at the bottom. Cut out the printed shape and trace it onto your wood.

Step 2: Cut the Wood
My stand measures 280 mm high, 140 mm wide, and 50 mm thick. This thickness ensures the stand remains stable and won’t tip over. I didn’t have a thick enough plank, so I glued two thinner pieces together. If your jigsaw skills are like mine (a bit wonky), cut about 2 mm outside the traced line. Once cut, glue the two wood pieces together and clamp them until dry.
Step 3: Shape and Sand the Stand
Once the glue has dried, use a benchtop sander to smooth and shape the stand. Sand right up to the template line. Be careful around tight curves; they can be a bit tricky. It doesn’t need to be perfect; just get a smooth and even silhouette.

Step 4: Add a Centre Hole (Optional)
To give it a stylish look, I drilled a round hole near the top using a hole saw. Drill halfway through, flip it over, and finish from the other side. This avoids splintering. sandpaper.

If the cut is messy, clean the inside with a drum sanding attachment or regular sandpaper

Step 5: Soften the Edges
This part is also optional but adds a professional touch. Use a router with a round-over bit to soften the sharp edges. It makes the stand look more polished and pleasant to touch.

Step 6: Stain and Seal the Stand
Sand the entire stand smooth using 120-grit sandpaper.
I chose a dark mahogany stain for a sleek, rich finish. Apply your stain, let it dry, then seal it with three coats of gloss polyurethane for protection. I chose a dark mahogany stain for a sleek, rich finish. Apply your stain, let it dry, then seal it with three coats of gloss polyurethane for protection.
If the headset has a long cord, you can wrap the extra length around the base to keep everything tidy.

Bonus woodwork project Ideas
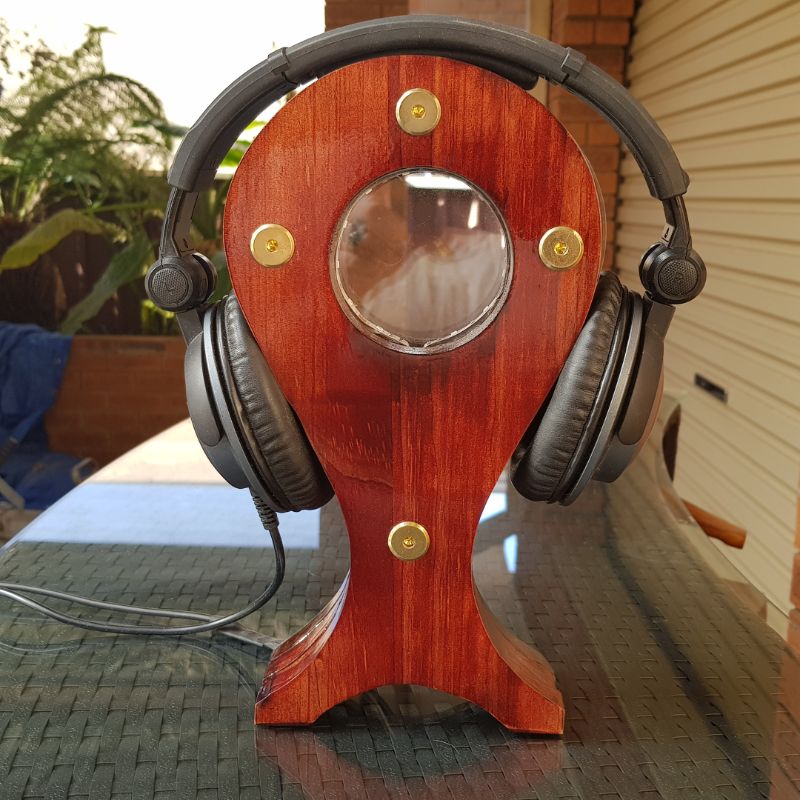
I liked this headphone stand so much I made another one for myself! My version uses Perspex and flashing LED lights for a more futuristic vibe. There’s a lot of room to get creative with the design
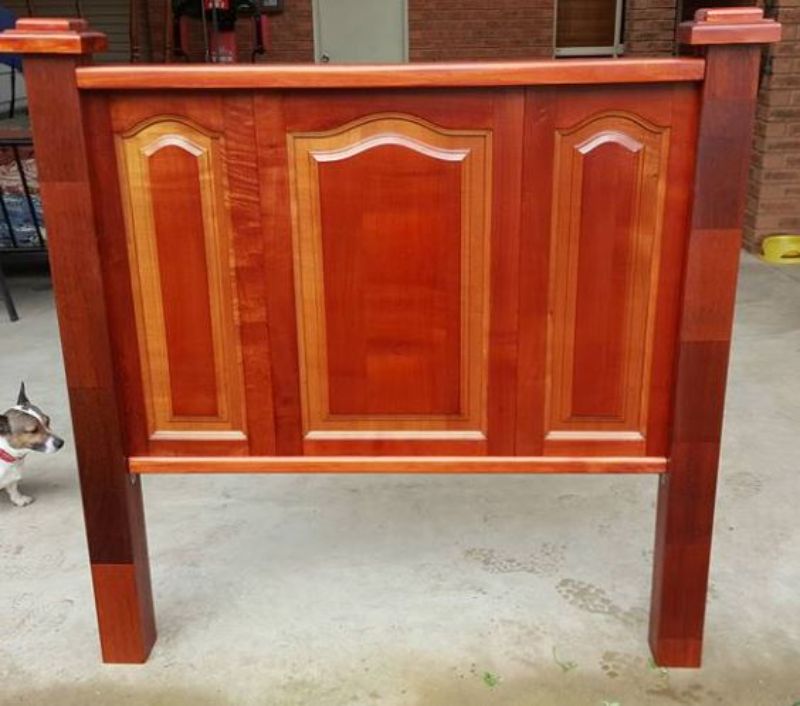
Don’t overlook an old kitchen that’s being replaced! I rescued some cupboard doors from a renovation and upcycled them into this stunning DIY headboard.

If you’d like to find any of the items used in this project, we’d greatly appreciate it if you used our affiliate links. These links provide us with a small commission at no extra cost to you, allowing us to continue creating and sharing more inspiring projects. We’d also love to hear your thoughts—feel free to leave a comment or share this post!


2 Comments
Nicolas
October 9, 2019 at 10:04 amHi Anita, can you share your template for this? That would be great. Thanks in advance! Nicolas
Anita Holland
October 9, 2019 at 4:39 pmHi Nicolas, sorry for the delay my website had server issues. I don’t seem to have kept it, but on this link is an image of the template. You can print it out and cut around the template. Hope this helps. https://uniquecreationsbyanita.com/led-headphone-stand/