
If you’ve got a spa or outdoor lounge, a DIY Pallet Wall Bar with Drop-Down Counter is a game-changer. My daughter and her partner spend loads of time in their backyard spa, so this themed wall bar was next on my project list for their new home.
No more balancing wine glasses on the spa edge—this pallet wall bar mounts beside the spa, folds down for drinks and snacks, then closes back up when you’re done. I styled it after his favourite team, the Canberra Raiders, using recycled pallet timber, scrap wood and a vinyl decal.

Before we dive into this tutorial, be sure to subscribe to my bimonthly newsletter to be the first to see my latest projects. You can also follow me on Pinterest and Facebook, where I also include my unique mixed-media art projects.
DIY Pallet Wall Bar with Drop-Down Counter (Canberra Raiders Theme)
**This post may contain affiliate links. This means I earn a small commission on links used at no extra cost to you. Please see my disclosure policy for more information.**
Materials Needed
- Sturdy pallet (heat-treated, not chemically treated; look for “HT” stamp)
- Recycled timber slats (for top and bottom seals)
- Backing board (exterior ply or similar)
- Panel for drop-down counter (exterior hardwood ply or dressed timber; avoid formply if you plan to paint)
- Exterior wood glue
- Exterior screws and nails
- Two outdoor-grade hinges (stainless or galvanised)
- Roller catch or magnetic catch
- Two handles or pulls
- Two lengths of outdoor chain with closed/ welded links
- Eye screws or pad eyes rated for load
- Exterior primer, paint or stain, and exterior clear varnish/ spar urethane
- Orbital sander with discs (80–240 grit)
- Vinyl decal (Cricut or similar), transfer tape
- Jigsaw
- Spade bits or hole saws
- Crowbar- Pallet stripper tool
Plan and Select the Pallet
Choose a pallet in good condition. Avoid warped frames and split slats. Because the bar lives outdoors, plan to close it up tight against the weather and pests. Pallet timber varies in width and straightness, so expect small adjustments.

Cut the Pallet to Size
Mark the bar height and cut the pallet in half with a jigsaw or hand saw. Clean up rough edges. Lightly sand to remove splinters. Keep the frame square; brace it if needed.

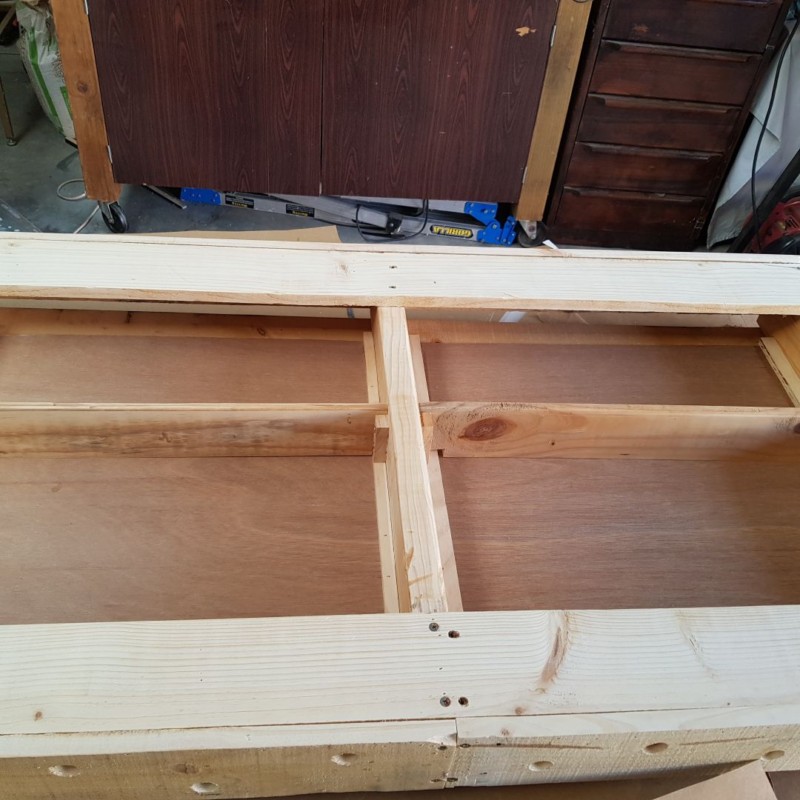
Add a Backing to Keep Bugs Out
Cut an exterior-grade backing board to cover the open rear.

Fix small ply off-cuts inside the frame to hold the board.

Glue and nail or screw the backing to the cleats. This closes gaps where spiders love to hide.

Seal the Top and Build a Bottle Rail
Harvest a few straight slats from pallet offcuts. Add a cap along the top to shed water. Fit a bottom slat inside as a bottle rail. Glue, then screw for strength. Fill any cracks and clamp until set.

Add Discreet Drainage
Drill several drainage holes through the lower slat so rain can escape if it does get inside. Space the holes along the lowest edge. A 12–20 mm spade bit or hole saw works well.

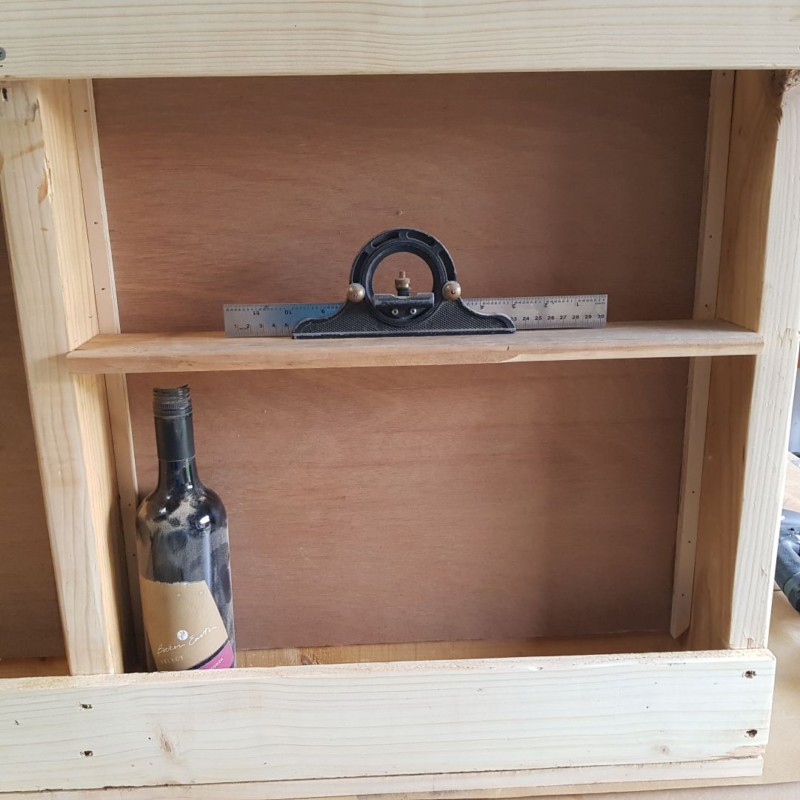
Build the Shelves
Measure the interior and cut shelves from scrap timber. Place a tall bottle on the bottom level to set the shelf heights.
Level each shelf with a spirit level and mark lines. Because pallet frames can sit proud, notch shelves where they meet the back support.
Fix small timber brackets under each shelf. Glue and screw the brackets, then fix the shelves.
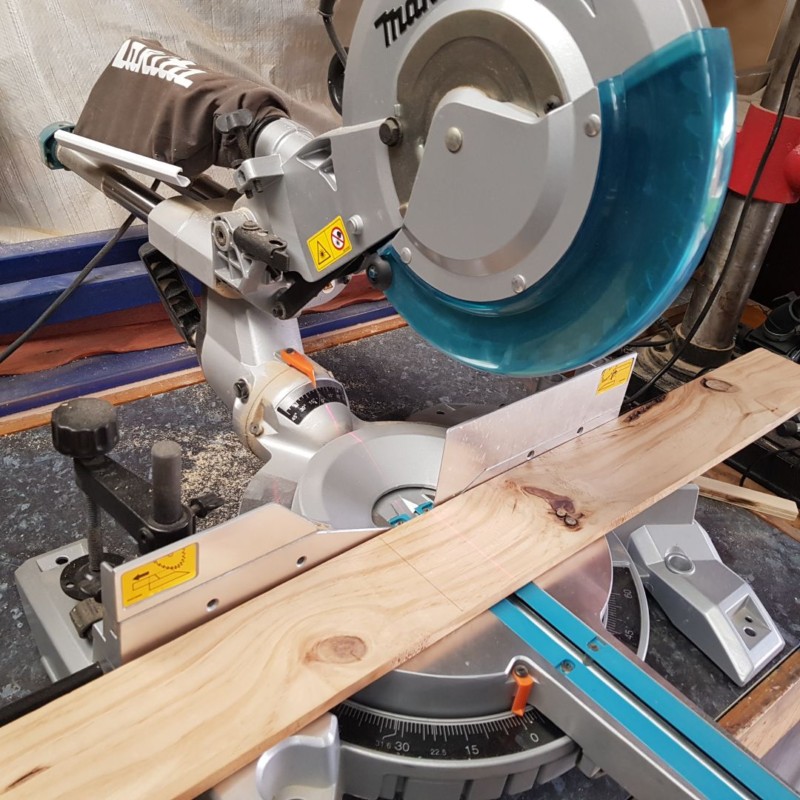
Measure the front opening and cut the counter panel. Tip: Clamp a straightedge as a saw guide for clean, square cuts. Formply was used only because it was the sole sheet large enough on hand, but it isn’t ideal for a painted finish—the phenolic face resists paint. The coating then needed sanding right off, which proved far more work than it was worth. That’s the trade-off with free, recycled materials. Whatever you use, dry-fit the panel first. Pallets are rarely square, so sand or plane the panel edges until the panel sits perfectly flush.

Prime, Paint and Seal
Prime bare timber. Paint the counter and inside surfaces.

Seal everything with two to three coats of exterior varnish/ spar urethane. Keep the best face outward. I learned that the hard way—check your panel orientation before you paint!

Fit the Hardware
Install two hinges along the bottom edge, roughly 300 mm in from each side.

Fit a roller latch (or two magnets) to hold the counter closed. Add handles for easy opening.

Fit chains on both sides to support the counter when open.

Use closed/ welded chain links and rated eye screws so links won’t spread under load. Adjust the chain length until the counter sits level. (The small hooks were undersized; after a few uses, I replaced them with larger, load-rated ones.).

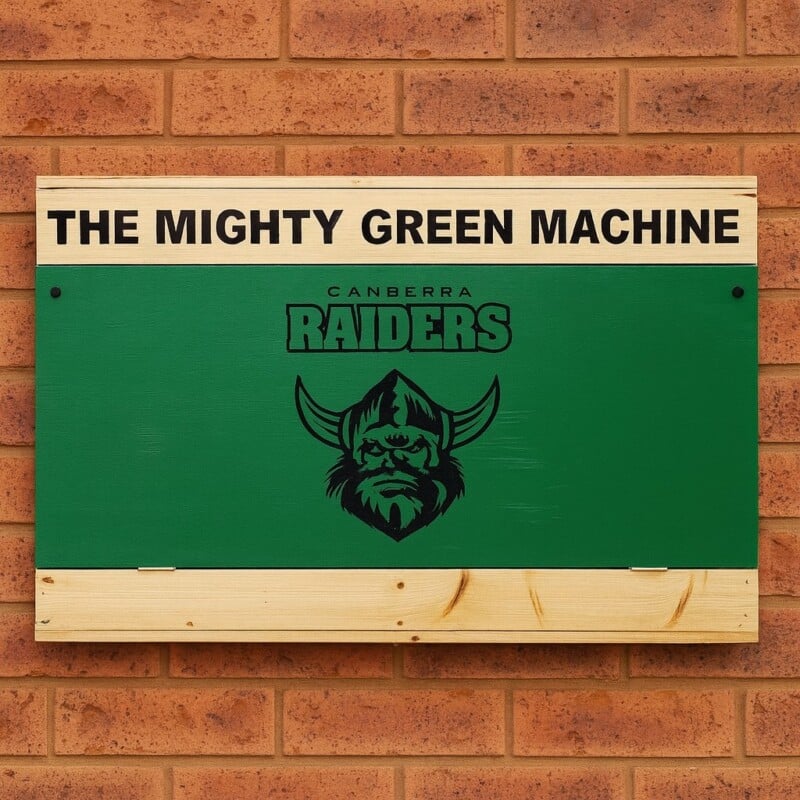
Add the Canberra Raiders Theme
Cut a Raiders-inspired vinyl decal on a Cricut. Use outdoor vinyl and transfer tape for a clean, crisp application. Burnish well, then peel the carrier. Note: Team logos are usually trademarked—enjoy at home, don’t sell.

Mount the Wall Bar
Choose a comfortable height from the spa seat to the counter. Locate studs or use masonry anchors on brick. A French cleat makes mounting easier and removable. Check it is straight, then fasten securely. Load test the counter with something heavier than a drinks tray before regular use.
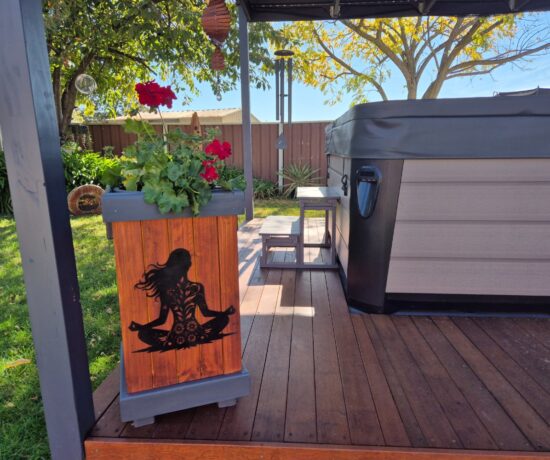
Finished pallet wall bar
Because the bar was not being installed at my home, I asked AI to hang it for me.
")


More outdoor entertainment furniture ideas
This wine barrel was repurposed into a table with a built-in wine bucket. You lift off the lid and fill the bucket with ice to keep your drinks cold while sitting around chatting.

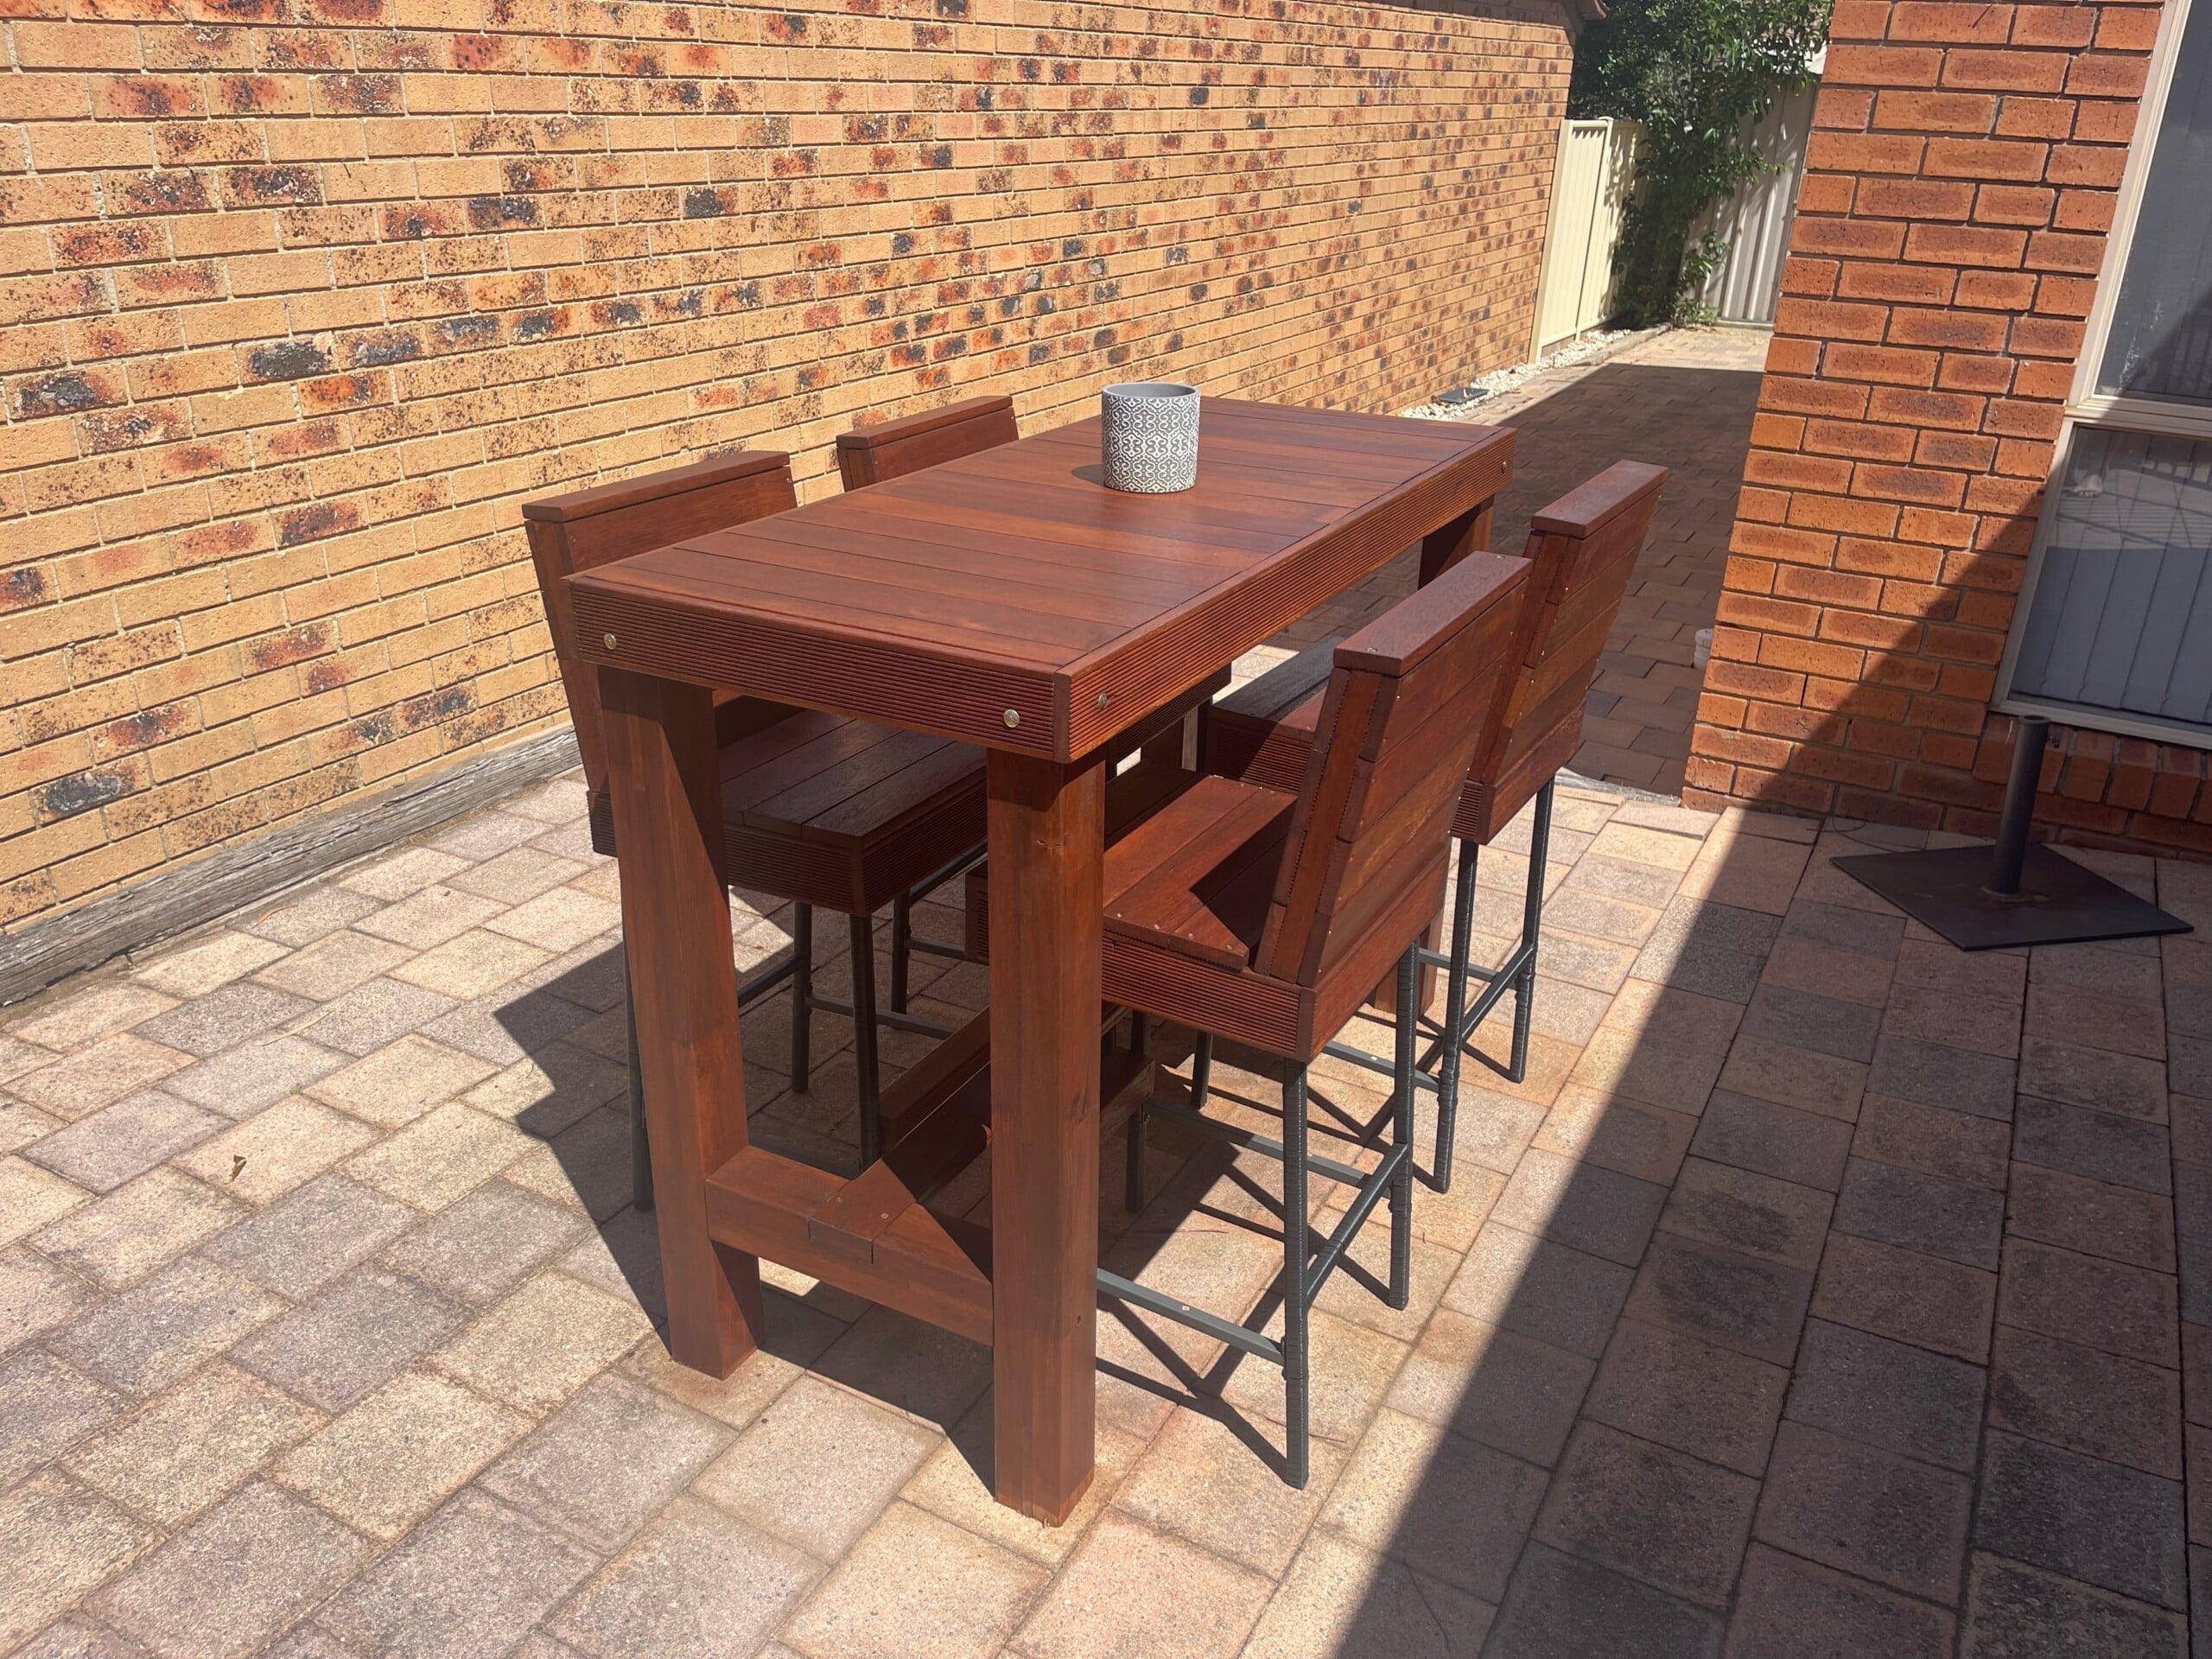
This tall outdoor bar table is built mostly from recycled decking planks, and it’s the right height to sit or stand comfortably, sturdy enough to lean on.


If you’re interested in any of the items used in this project, we’d appreciate it if you used our affiliate links. Clicking these links earns us a small commission at no extra cost to you, helping us create more inspiring and exciting projects to share. We’d also love to hear your thoughts—feel free to leave a comment or share this post!

29 Comments
Marie
May 31, 2020 at 11:16 pmThis is awesome, Anita! What a great idea for a mini outdoor bar that can be tucked away when not in use. Perfect for small outdoor decks and patios too. Pinned
Anita Holland
June 1, 2020 at 11:06 amThank you Marie, It is a great idea and made from free pallets makes it even better.
Sara
June 1, 2020 at 8:53 pmAwesome idea and I love how you customized it with the logo and chant song!
Anita Holland
June 2, 2020 at 11:44 amThank you Sara, I had to do something to keep him happy. lol
Deana Landers
June 3, 2020 at 3:48 amAnita, I love this. What a wonderful gift for your children and it is beautiful
Anita Holland
June 4, 2020 at 8:32 pmThank you so much Deana, I should get an invite to go and chill in the spa now. lol
Michelle Leslie
June 1, 2020 at 9:09 pmLordy, my friend, your kids must be so happy to have a Mom who makes these amazing creations. What a super way to repurpose a pallet. We have a stockpile of them in the backyard, and you thought of everything, even drainage holes. Brilliant. I’m going to show the hubby because he is sooooo going to want one.
Anita Holland
June 2, 2020 at 11:45 amThank you so much, Michelle. I have 3 pallets at the moment so I am trying to use them up so I don’t have to take them to the tip. It is a great idea for outside because they will not rot like good wood.
Michelle | Thistle Key Lane
June 1, 2020 at 9:18 pmI love pallet projects but this is over the top. What a great idea using one to build a wall bar. Love the “sporty” look with the decals too! Pinning!
Anita Holland
June 2, 2020 at 11:47 amThank you so much, Michelle. They are great for outdoor projects, it was just a bit boring so I added the sports team logo.
Leanna
June 2, 2020 at 4:48 amAs a raving football fan I applaud your creativity. This bar is just awesome. Love it Anita
Anita Holland
June 2, 2020 at 11:48 amThank Leanna, they are great for outdoors or small areas. The sports team logo was a bonus.
Lydia C. Lee
June 2, 2020 at 7:30 amClever!
Anita Holland
June 2, 2020 at 11:48 amThank you so much, Lydia.
Allie
June 2, 2020 at 9:38 pmOK this is absolutely badass! What a creative project to do, and with minimal taking apart of the pallet, which is such a PITA to do. Fantastic craft, Anita. Thanks so much for sharing! Pinned
Anita Holland
June 4, 2020 at 8:28 pmThank you so much Allie, Pallets can be a nightmare to work with, but this one turned out good.
Condo Blues
June 2, 2020 at 11:04 pmThat is brilliant. Makes me want to get a spa and do the same thing!
Anita Holland
June 4, 2020 at 8:29 pmThank you so much, I would be happy with just the spa.lol
Kim Purvis
June 3, 2020 at 3:43 amI always liked these fold down bars. Great job! That wine barrel table is pretty cool too!
Anita Holland
June 4, 2020 at 8:30 pmThank you so much Kim
Catherine Sokolowski
June 3, 2020 at 10:15 pmI need to show this to my son. It would fit perfectly in his small home!
Anita Holland
June 4, 2020 at 8:33 pmI am sure he will love one.
Sandra Magle
June 4, 2020 at 2:15 amTotally love this, and I had to show it to my husband! Great idea and execution–and CHEERS! Sandi
Anita Holland
June 4, 2020 at 8:34 pmThank you so much Sandi, I am sure your husband will be able to knock one up for you.
Cecilia
June 8, 2020 at 7:05 amHow clever, Anita! Thanks for sharing at Vintage Charm!
Anita Holland
June 8, 2020 at 5:16 pmThank you so much Cecilia.
Anita Holland
June 8, 2020 at 5:17 pmThank you so much for the feature on my wall bar.
Anita Holland
June 10, 2020 at 12:10 pmThank you for the feature on my Pallet Bar.
Anita Holland
June 10, 2020 at 12:10 pmThank you for the feature on my pallet bar.