
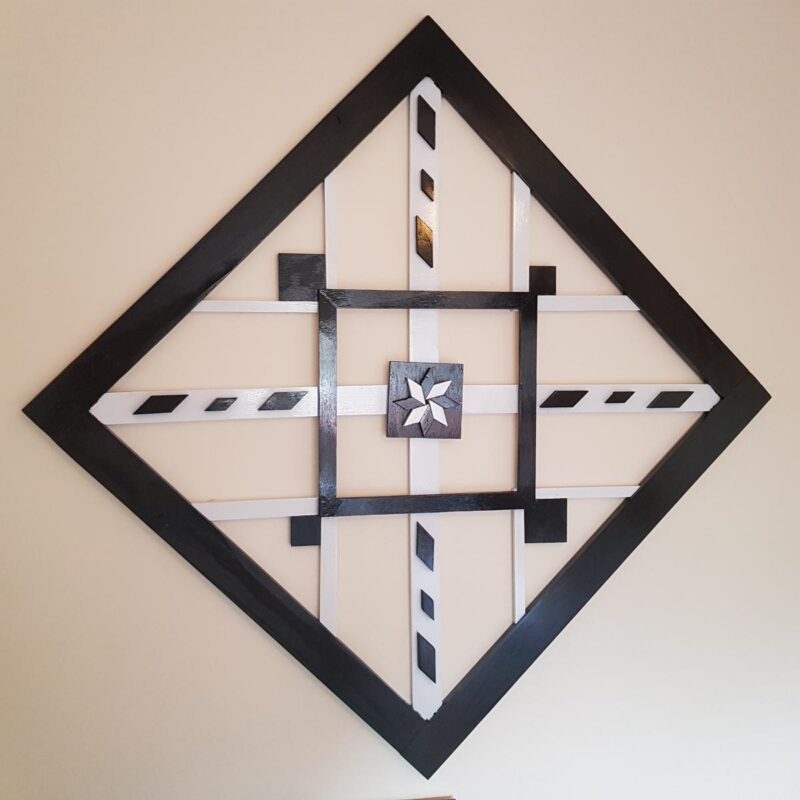
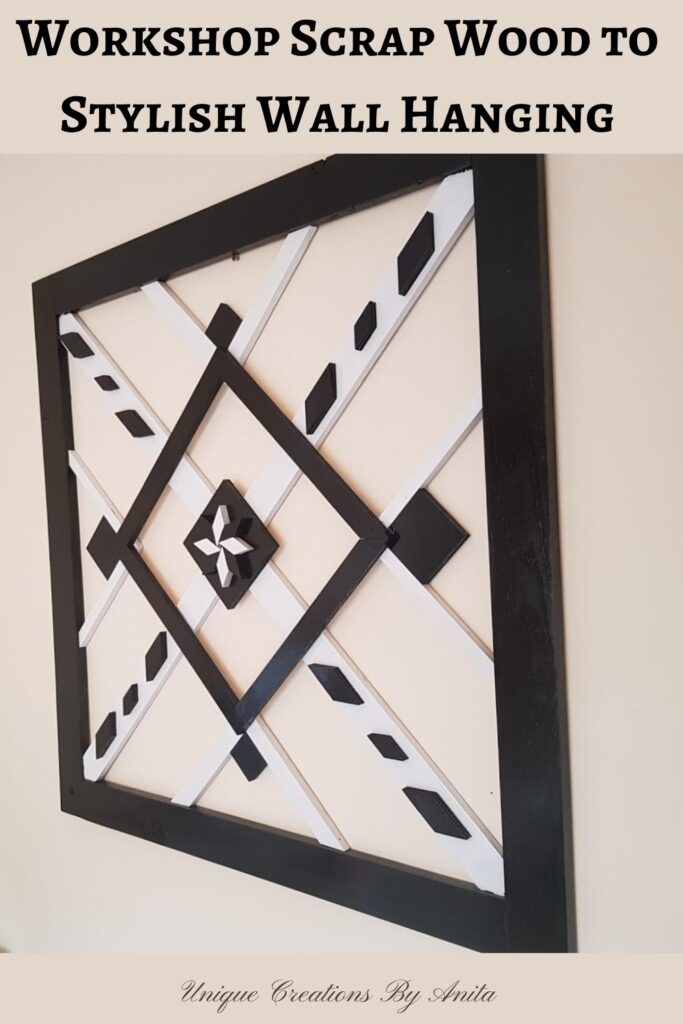
Workshop benches bursting with free timber offcuts left me with barely any room to work. To clear the clutter, I designed the DIY Black and White Recycled Wooden Wall Hanging. Using every scrap of wood, I crafted and assembled each layer by hand, improvising shapes for a one‑of‑a‑kind effect. Painting contrasting black and white stripes across the recycled pieces added a fresh, modern twist. This simple but creative project didn’t just reclaim my workspace—it turned scrap into sustainable art.
I’m excited to join the next International Bloggers Club challenge—this month’s theme is all about bold black and white! Check the end of this post for IBC details and links to my fellow creators’ projects.
Before we dive into this tutorial, be sure to subscribe to my bimonthly newsletter to be the first to see my latest projects. You can also follow me on Pinterest and Facebook, where I also include my unique mixed-media art projects
DIY Black and White Recycled Wooden Wall Hanging
**This post may contain affiliate links. This means I earn a small commission on links used at no extra cost to you. Please see my disclosure policy for more information.**
Materials Needed
- Recycled timber offcuts (for a 1 metre square frame and decorative strips)
- Wood glue
- Pocket hole jig
- Pocket hole screws (or a mitre saw for 45° joints)
- Nail gun and nails (or clamps)
- Drop saw
- Paint (black and white)
- Paintbrush
- Hot glue gun and glue sticks
- Spray polyurethane (gloss) or exterior varnish
- Measuring tape and pencil
Step 1: Build the Frame
Cut four timber pieces to 1 metre lengths, then mitre both ends at 45° angles.

Drill two pocket holes in each piece. Spread wood glue on joint surfaces.

Screw pieces together with pocket hole screws. Clamp the frame until the glue cures.

Step 2: Plan Your Design
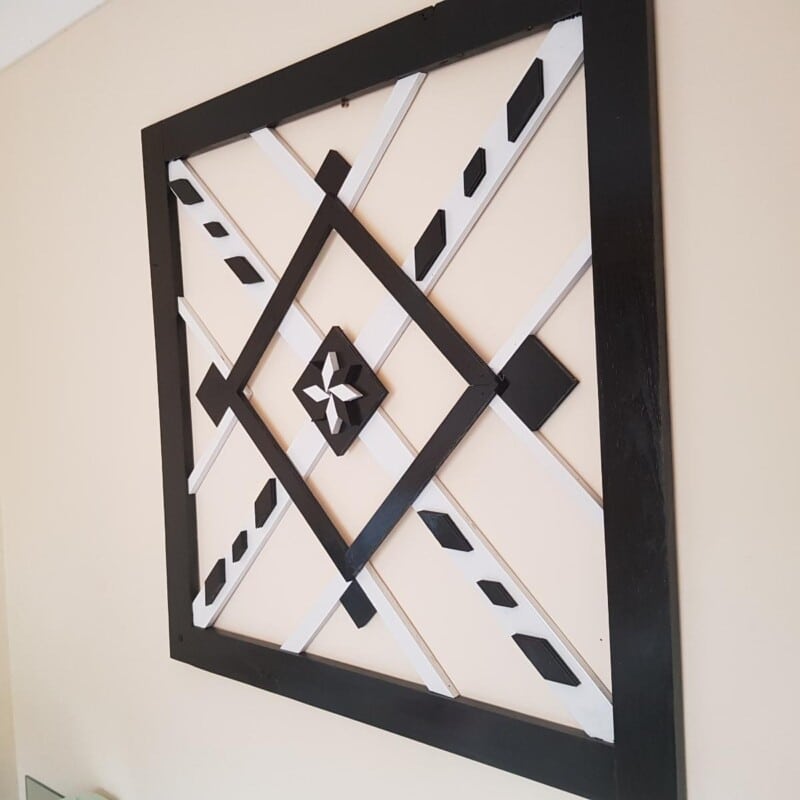
Place the frame on a flat bench. Arrange two long offcut strips from corner to corner in a cross shape. Do not glue yet. This stage helps you visualise a layered 3D effect. Adjust angles to make the design unique.

Step 3: Cut Your Shapes
Mitre each decorative strip at 45° before cutting. Use a stop block on the drop saw for identical lengths. Test‑fit all pieces inside the frame. Create squares, triangles or custom shapes. Let your imagination guide you.

Step 4: Assemble your design
Once you are happy with the layout, glue the bottom‑layer strips first. Press each strip into place and secure with a nail gun or clamps. Repeat for all base pieces.

Add the square shape and centre it within the frame.

All the other shapes in the design are simply strips of wood cut at 45‑degree angles. I set up a stop block on the drop saw to ensure every piece is the same size. Here, you can let your imagination run wild—cut whatever shapes you like to personalise your wall hanging.

Once you are happy with the layout of the design, it is time to glue it all together.

Step 5: Paint and Layer
I did start glueing the wood pieces in place, but then I changed my mind and thought it would be easier to paint as I went along. To glue the wood in place, I used wood glue and a nail gun to hold everything secure while the glue dried. I began with the bottom layer first, and once that paint was dry, I added the next layer.

The smaller pieces of wood were attached to the third layer once the second layer was dry.

Using the nail gun on the smaller pieces of wood left visible marks, so I used a hot glue gun for them.

Step 6: Seal and Finish
After the paint cures, apply two gloss spray polyurethane coats. Hold the spray about 30 cm from the surface and follow product instructions. For outdoor use, swap to an exterior varnish or exterior‑grade polyurethane. Let the finish cure fully before hanging.

Now the wall hanging is complete. My workshop has fewer timber scraps, and I have a unique art piece. Winner, winner!
For a different look, try hanging it at a different angle and on different colour walls.


More scrap wood wall art projects.
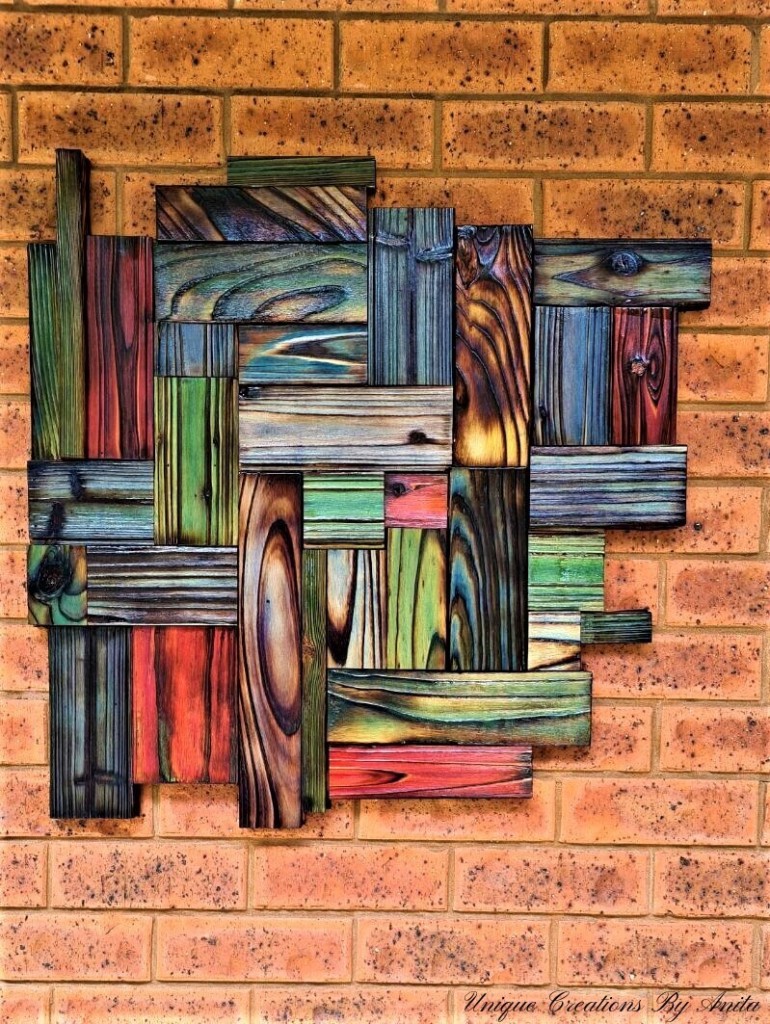
Another way to use up your wood scraps is to transform them into wall art with this simple method.
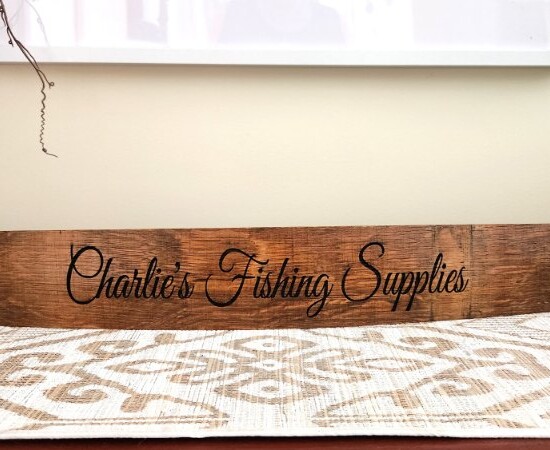
I crafted this wooden wall art from pallet offcuts and reclaimed timber, using the Shou Sugi Ban wood‑burning technique.
About IBC (International Bloggers Club)
If you follow my blog, you will know I am part of the IBC (International Bloggers Club), which is a group of talented bloggers from around the world. We have members from Spain, South Africa, Australia, the United States, and Canada. Each month, we come together and create a project on a common theme.
If you missed last month’s Easter theme, here is the link to my Rustic Easter decorations, which were a huge hit. The contributions from my fellow bloggers are listed below. Please feel free to jump over and share your thoughts.
- A crafty mix | Paper Napkin Dream Catcher
- Raggedy bits | Upcycled Farmhouse Flour Sifter
- Interior frugalista |Whimsical black and white stacking trinket box upcycle
- Northern feeling | Black and white blanket ladder
- Faeries and Fauna| Book page wreath craft with diy all black chalkboard


If you’re interested in any of the items used in this project, we’d appreciate it if you used our affiliate links. Clicking these links earns us a small commission at no extra cost to you, helping us create more inspiring and exciting projects to share. We’d also love to hear your thoughts—feel free to leave a comment or share this post!
56 Comments
Black & White Blanket Ladder - Northern Feeling
April 21, 2020 at 12:05 am[…] Bits | A Crafty Mix | Unique Creations by Anita | Interior Frugalista | Faeries & […]
Pamela @ DIY Vibes
April 21, 2020 at 12:22 amI love the design of this. I have pinned a couple similar ones but I haven’t taken the time to see how they are actually built. Looks like a great excuse to use my kreg jig I got for Christmas and haven’t used yet! On my list of projects for sure!
Donna Reidland
April 21, 2020 at 1:08 amThat turned out very nice!
Anita Holland
April 27, 2020 at 9:08 amThank you so much.
Marie
April 21, 2020 at 2:01 amGirl, you know how to rock the power tools…and miter intricate cuts! This wooden wall hanging is fabulous, from the interesting design to the pop of black & white! Love that you used what you had on hand to make it too.
Katrin
April 21, 2020 at 2:16 amYou are so talented using your tools Anita! I just love this unique wall art you’ve created!!
Anita Holland
April 27, 2020 at 9:06 amThank you so much Katrin, Youtube is a great teacher.
Leanna
April 21, 2020 at 2:23 amI am slowly learning wood working by making simple projects with wood scraps. Its so much fun, this project will be a great learning opportunity for me. Love how it turned out.
Anita Holland
April 27, 2020 at 9:06 amThank you so much, Leanna. I also started messing around with scrap wood to practice and learn new skills. I just found working with scrap or free wood made me more inclined to try new things. Now I use nothing but free wood for my projects.
Michelle Leslie
April 21, 2020 at 2:40 amLove your wooden wall hanging Anita. It looks like something an Aztec warrior would make or am I thinking of a Cherokee? Either way, it’s very striking and I neeeeeeeeed to get me one of those pocket hole Kreg jiggy thingymabobbies. It looks so useful. I still use L-shaped brackets to make frames 😀
Anita Holland
April 27, 2020 at 9:03 amThank you so much Michelle, I had no idea what design I was going to do, it just came together in the end. I would highly recommended to pocket hole jig, it is one of my favourite tools.
Allie
April 21, 2020 at 5:50 amWhat a gorgeous end result! Thanks for sharing such a clear step-by-step of it. Pinned
Anita Holland
April 27, 2020 at 9:02 amThank you so much, happy to hear my tutorial was easy to follow.
Michele Morin
April 21, 2020 at 9:21 pmThis is the kind of thing my sons would take on. What a great outcome!
Anita Holland
April 27, 2020 at 9:01 amThank you so much, I am happy I was able to inspire you.
How To Upcycle A Farmhouse Flour Sifter - Raggedy Bits
April 22, 2020 at 11:01 am[…] Wooden Wall Hanger | Unique Creations By Anita […]
Anita Holland
April 27, 2020 at 9:00 amThank you so much for the shout out Sam.
Barbara Chapman
April 23, 2020 at 5:01 amAnita, wow!!! Your wooden wall hanging turned out beautifully and this is a really skilled woodworking project. Love it!!! When we finally get our big shed built hopefully next fall, Charles and I will have a woodshop again. 🙂 I enjoyed tinkering out there and making things.
Have fun using up your wood scraps,
Barb 🙂
Anita Holland
April 27, 2020 at 8:59 amThank you so much, Barbara. It does look hard but it is really not when you see the step by step. It is worth having a try.
Maisie
April 23, 2020 at 9:06 pmThis looks fabulous! I have pinned it for later use! 🙂 x
Anita Holland
April 27, 2020 at 8:57 amThank you so much Maisie, I really do appreciate the comment and the share.
Sara
April 23, 2020 at 10:18 pmThis looks stunning outside! I never think about wall decor on outside brick, but this has got me thinking about it now!
Anita Holland
April 27, 2020 at 8:56 amThank you so much, It does look great outside on my wall and was really very easy to make.
Julie Briones
April 24, 2020 at 2:11 amVERY cool, and pretty, Anita! Would love to create one of these for my wall outside my entryway door! Hope we get to see this at TTA, as I’m here by way of Waste Not Wednesday today! 😉 Pinned!
Anita Holland
April 27, 2020 at 8:55 amThank you so much, Julie, Mine ended up outside under my pergola in the end.
Julie Briones
April 28, 2020 at 12:00 pmI’m delighted to be featuring you at Tuesday Turn About this week!
Anita Holland
April 29, 2020 at 8:21 amThank you so much for the feature, it means a lot that people like my projects.
creativejewishmom/sara
April 24, 2020 at 3:41 amGorgeous! thanks so much for sharing on craft schooling sunday!
Anita Holland
April 27, 2020 at 8:54 amThank you so much.
Dee | Grammy's Grid
April 25, 2020 at 1:33 amLooks nice! Thanks so much for linking up with me at #AThemedLinkup 15 for Crafts and DIY, open April 15 to 25. All entries shared on social media if share buttons installed.
Anita Holland
April 27, 2020 at 8:54 amThank you.
Dee | Grammy's Grid
April 25, 2020 at 1:47 amVisiting this post again to say thanks so much for linking up with me at my #UnlimitedMonthlyLinkParty 11, open April 1 to 26. All entries shared on social media if share buttons installed.
Anita Holland
April 27, 2020 at 8:54 amThank you so much.
Hannah
April 25, 2020 at 9:46 pmWow this is so pretty and so clever of you to make it – you’re very talented! #thatfridaylinky
Anita Holland
April 27, 2020 at 8:48 amThank you so much Hannah, That is very kind of you to say.
Marty Walden
April 26, 2020 at 3:30 amThis is so impressive. Great job!
Anita Holland
April 27, 2020 at 8:48 amThan k you so much Marty.
Julie
April 26, 2020 at 5:17 pmThis is stunning, It’ll be one of the features over at Handmade Monday when we go live later today. Thanks so much for sharing it with us.
Anita Holland
April 27, 2020 at 8:47 amThank you so much for the lovely comment and the feature, it is greatly appreciated.
Cecilia
April 27, 2020 at 7:36 amLooks great, Anita! Thanks for sharing at Vintage Charm!
Anita Holland
April 27, 2020 at 8:46 amThank you so much
Anita Holland
April 27, 2020 at 9:00 amThank you so much Angie, very kind of you to say.
C
April 27, 2020 at 10:44 amFantastic project ! Beautiful work, you have a great eye.
! I want to make one of these for my daughter’s house, when I say I, I really mean why husband. lol
Anita Holland
April 27, 2020 at 1:06 pmThank you so much for the great comment. I am really glad you like it, get your husband to teach you. Then you can take over the workshop as I did. LOL
Anita Holland
April 28, 2020 at 8:23 amThank you Michelle, I recently made a barn quilt this was from some of the leftover pieces of wood.
Iveth
April 29, 2020 at 2:58 amThat is a very nice project! It turned out wonderful
#alittlebitofeverything
Anita Holland
April 29, 2020 at 8:19 amThank you so much that is very kind of you to say.
Tuesday Turn About #46 Neutral DIYs - my wee abode
April 29, 2020 at 7:46 am[…] Creations by Anita is sharing a wonderful DIY wall hanging in a black-and-white color palette. I would LOVE to have this hanging on the HUGE wall outside MWA’s front […]
Anita Holland
April 29, 2020 at 8:18 amThank you so much for the feature.
Anita Holland
April 29, 2020 at 8:20 amThank you so much for the feature on my wall hanging it is greatly appreciated.
Carol
May 1, 2020 at 6:47 amSo stunning! I love everything black and white. Featuring when my link party opens up! Thanks for sharing.
Anita Holland
May 1, 2020 at 10:53 amThank you so much for the lovely comment and for the feature. It is greatly appreciated.
Anita Holland
May 1, 2020 at 10:52 amThank you so much for the feature on my wall hanging.
Anita Holland
July 27, 2020 at 9:59 pmThank you for the feature.
Anita Holland
July 31, 2020 at 11:07 amThank you
How to Make a Gorgeous Paper Napkin Dream Catcher - A Crafty Mix
October 23, 2023 at 10:26 pm[…] Bits | Unique Creation By Anita | A Crafty […]