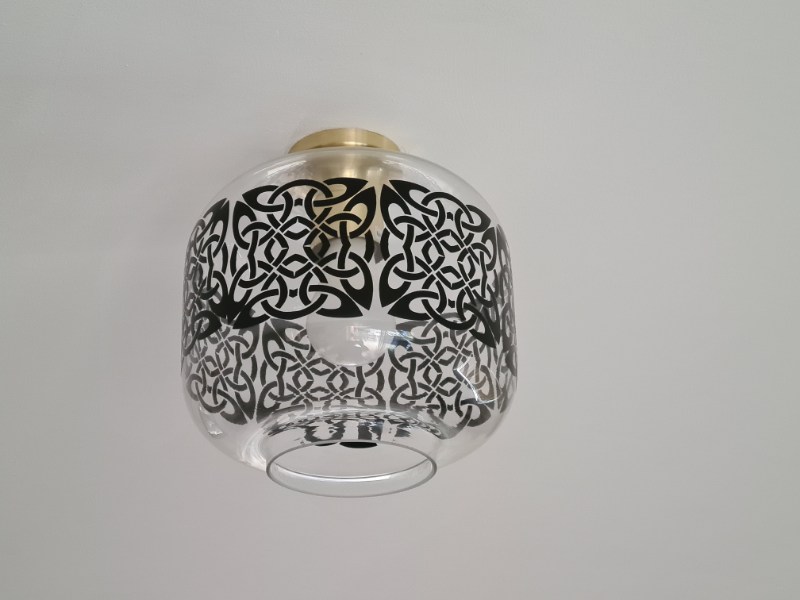
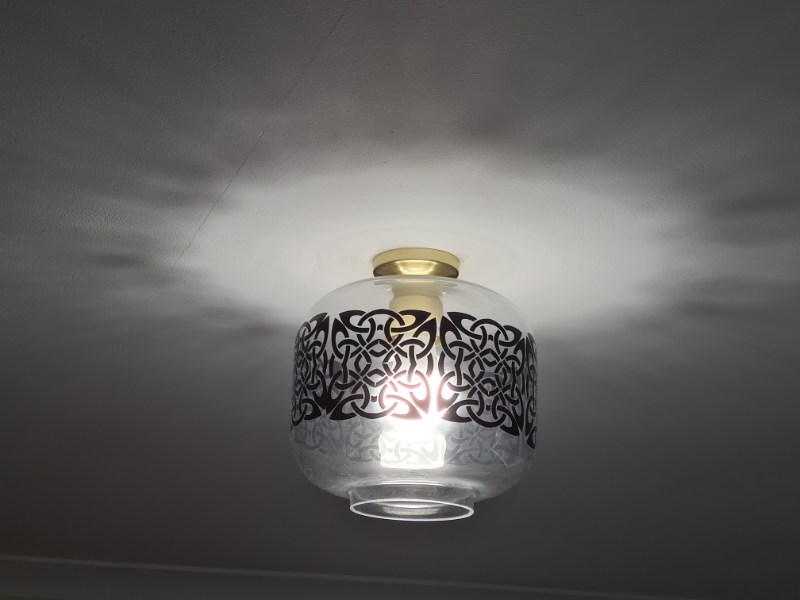
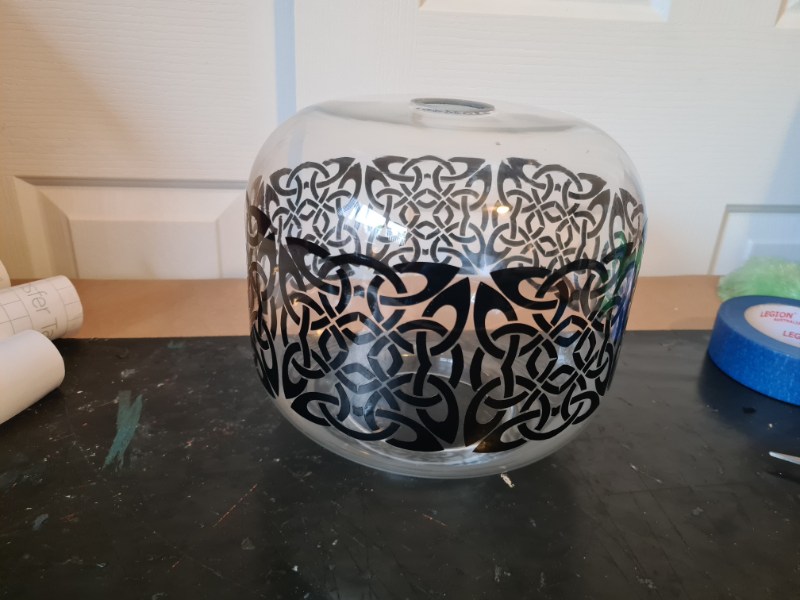
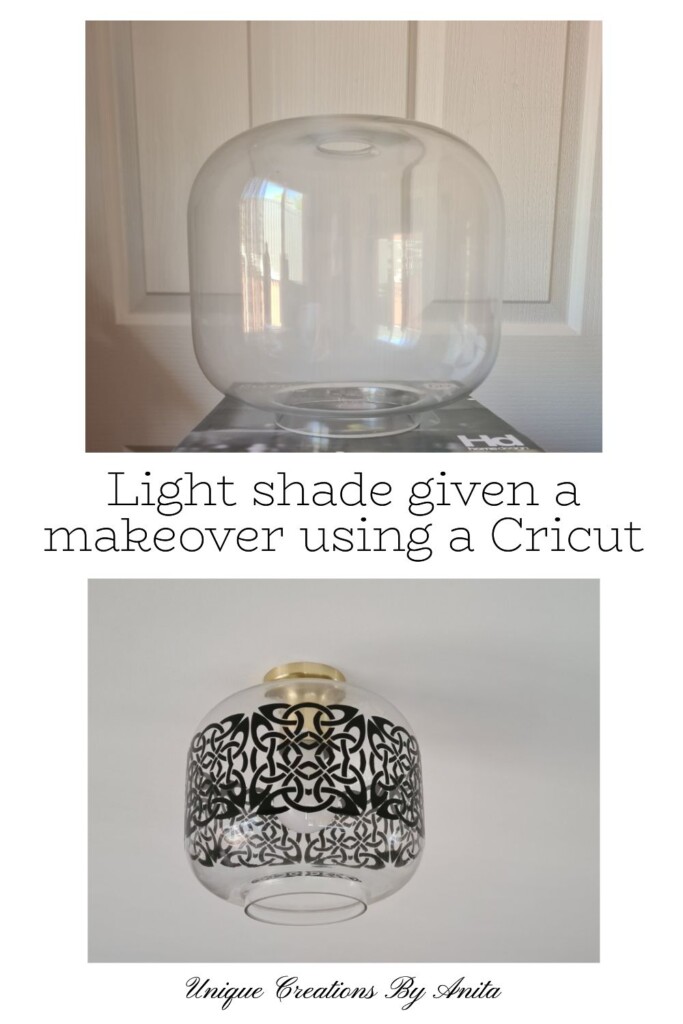
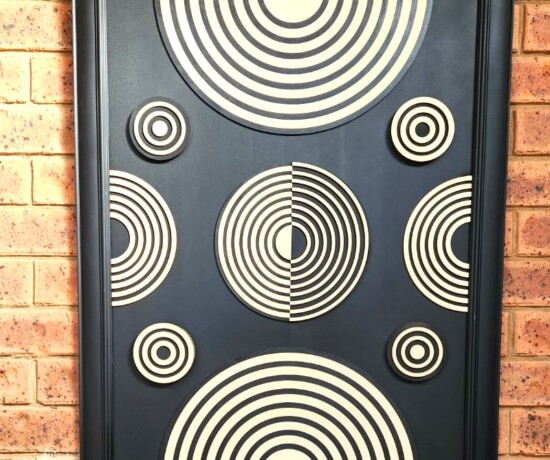
When a routine clean turned into a disaster and my kitchen light shade shattered, I replaced it with a plain glass one—only to find it disappeared into the ceiling. This post, Greek Key Glow: Cricut Vinyl Light Shade Makeover, shows how I transformed a boring glass shade with Cricut-cut vinyl. When the light switches on, the bold Greek key pattern projects a beautiful glow across the walls and ceiling.. The same method works with any bold geometric.
I’m sharing this for the Do It Over Designers blog hop hosted by Ann at The Apple Street Cottage. Each month, we upcycle something old or unloved; this round’s theme is Glass. You’ll find links to the other makers’ projects at the end—so much clever inspiration.
Before we dive into this tutorial, be sure to subscribe to my bimonthly newsletter to be the first to see my latest projects. You can also follow me on Pinterest and Facebook, where I also include my unique mixed-media art projects
Greek Key Glow: Cricut Vinyl Light Shade Makeover
*This post may contain affiliate links. This means I earn a small commission on links used at no extra cost to you. Please see my disclosure policy for more information.**
Materials Needed
- Plain glass light shade (pendant or dome)
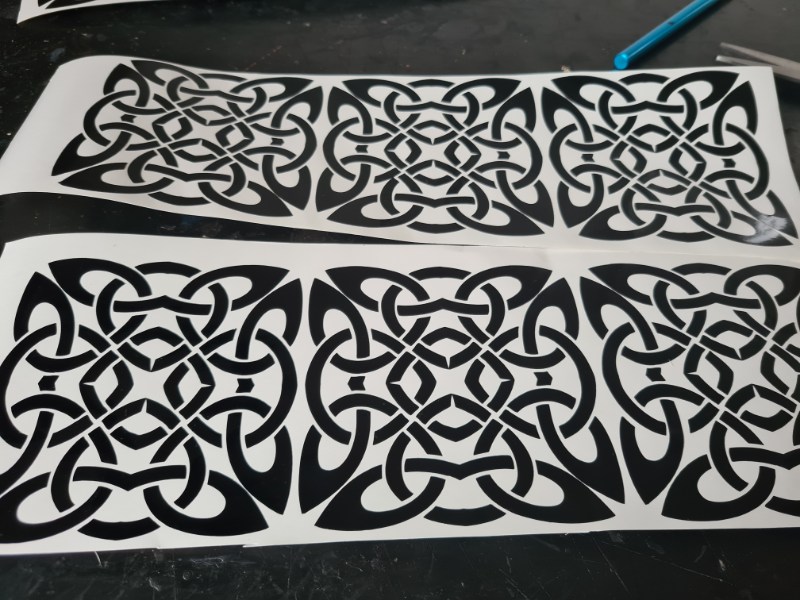
- Permanent adhesive vinyl (I used Oracal 651) in your chosen colour
- Cricut Explore (or Maker) and Cricut Design Space
- Standard Grip cutting mat
- Transfer tape (slightly de-tacked)
- Weeding tool and scissors
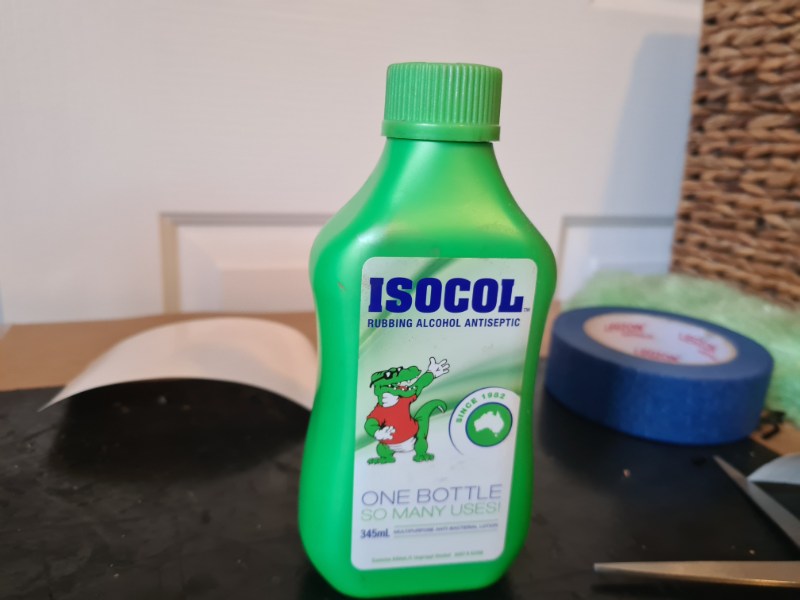
- Rubbing alcohol (Isocol) and a lint-free cloth
- Hairdryer or craft heat gun
- Measuring tape or string and ruler
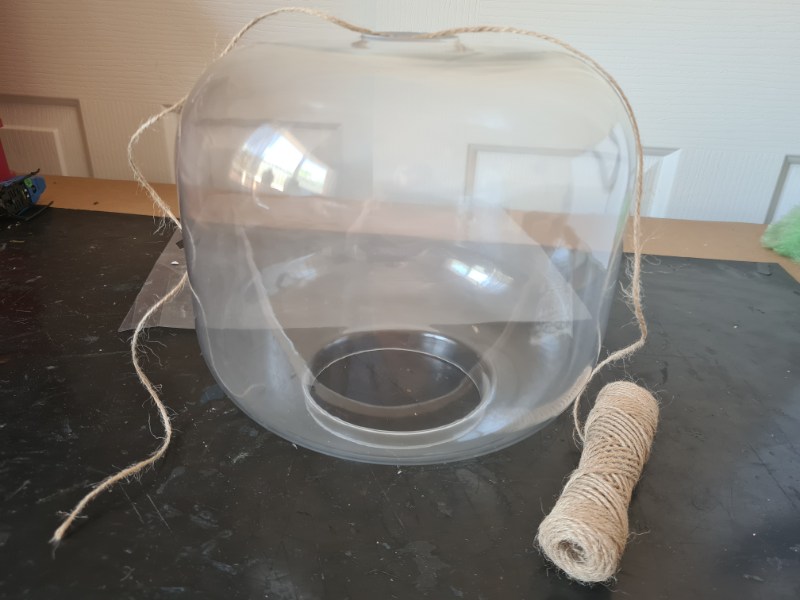
Measure the Shade (Fast + Accurate)
If you don’t have a paper or fabric tape measure like me, use a more primitive method: wrap a piece of string around the light shade, then measure the string on a ruler. That gives you the exact size your decal needs to be.
Design the Greek Key in Design Space
For this tutorial, I’m using a Cricut Explore Air 2, but most vinyl cutters will do the same job. Cricut’s newer Cricut Maker adds features the Explore Air 2 lacks, so if you’re buying a machine, I’d recommend the Maker.
Import it into Cricut Design Space (the software for Cricut cutters).
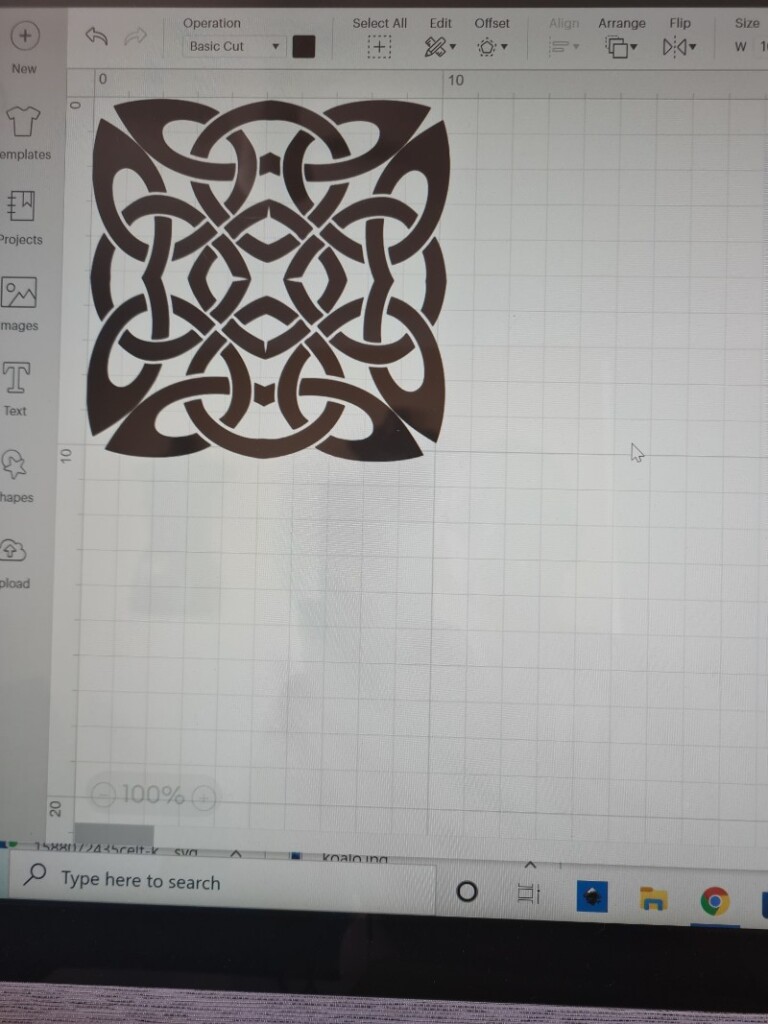
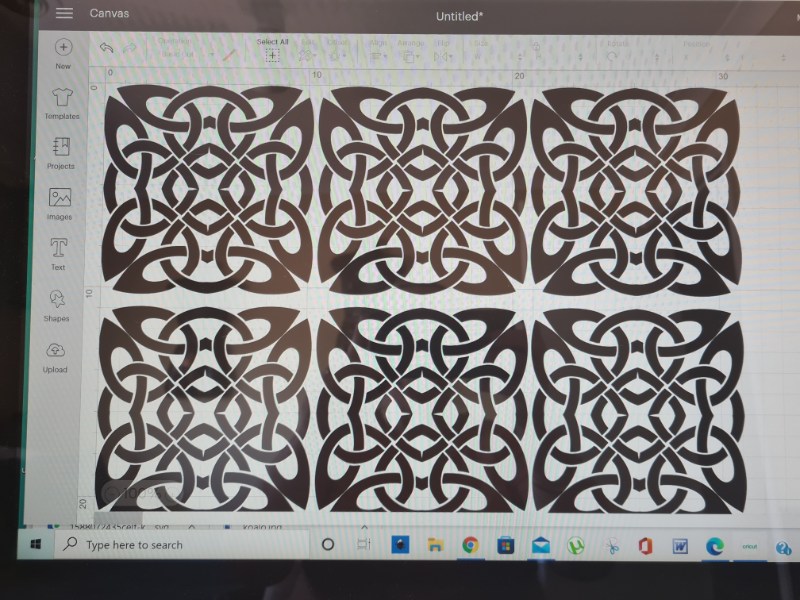
Select the tile and click Duplicate on the right panel until you have enough to wrap the shade, then use the on-screen measurements to size it to your shade’s circumference. Click Select All, then Group on the right-hand side to keep your design together exactly as arranged on screen. With the group selected, drag a corner handle (the small square) to resize the image to the exact dimensions using the on-screen measurements.
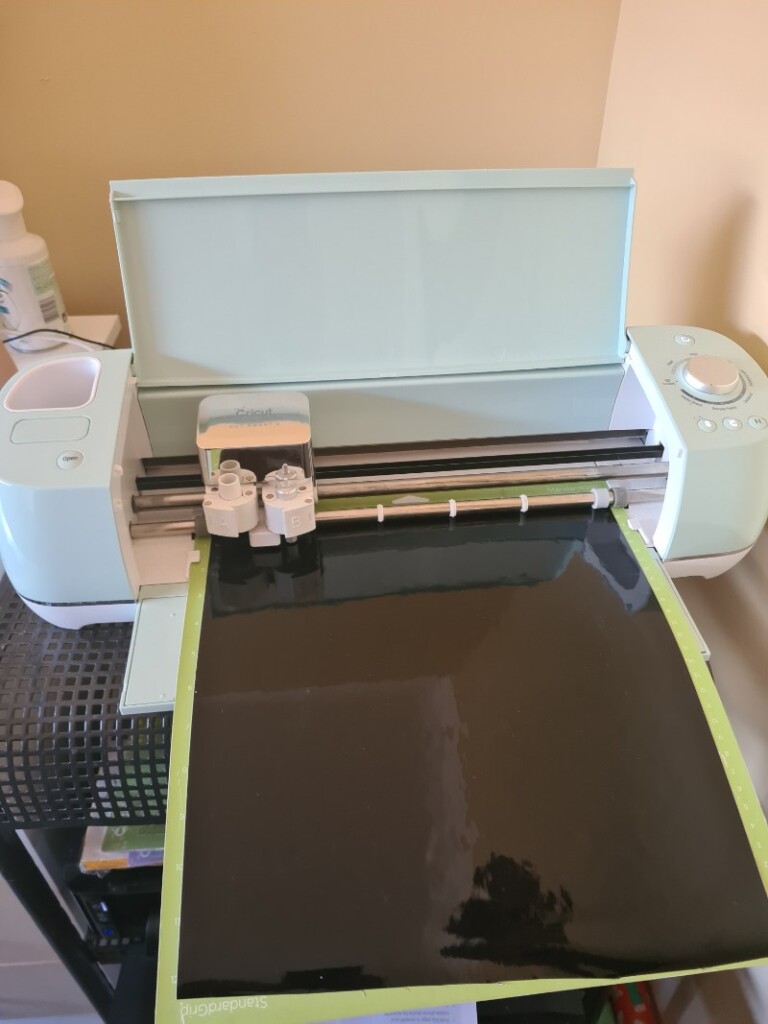
Place the vinyl colour-side up on the cutting mat—I used ORACAL 651 permanent vinyl for this project. Insert the mat into the machine, press the arrow to load, then press the “C” button to start the cut.
Weeding the design
Next, weed the design—remove all the excess vinyl you don’t want. This pattern is easy to weed, but for intricate designs, take your time and use weeding tools for a smoother result.
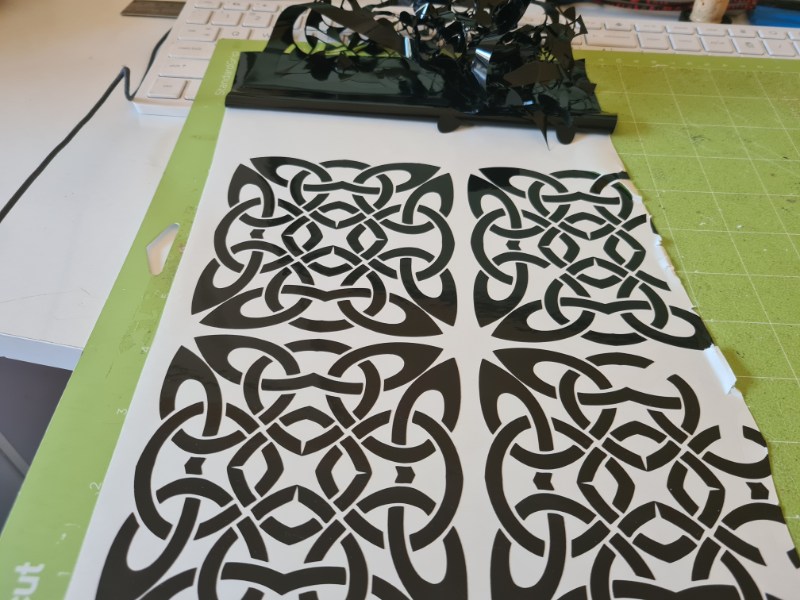
You can cut away the excess backing paper, ready for transfer.
Prep the Glass for Strong Adhesion
Wipe the shade with Isocol and a lint-free cloth to remove dust, oils and fingerprints. Let it air-dry. Lightly warm the glass with a hairdryer; slightly warm vinyl and glass bond better.
Transfer-tape tip: New transfer tape can be too grippy. De-tack by pressing it onto clean fabric a few times. Reusable tape that’s been used before is perfect.
Transfer the Decal to a Curved Shade
Apply transfer tape over the weeded design and burnish front and back.
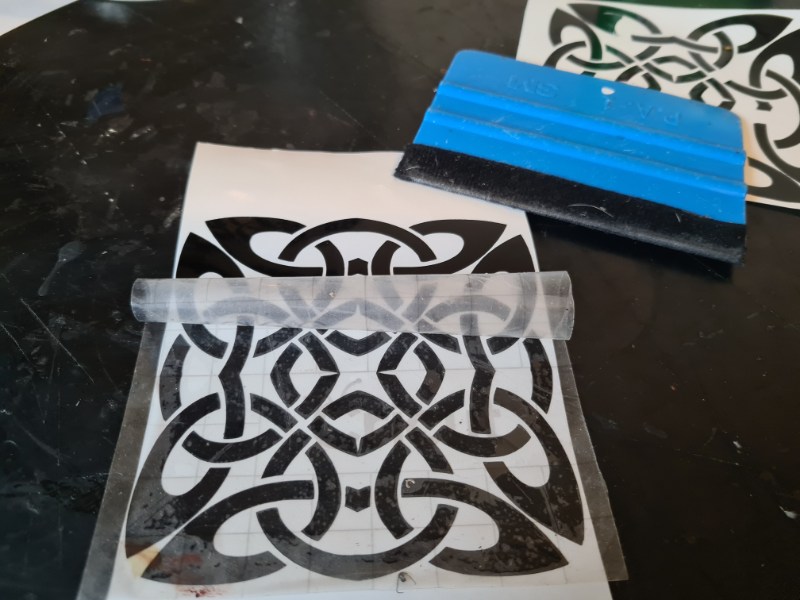
Peel off the backing paper from the vinyl decal, leaving the decal adhered to the transfer tape.
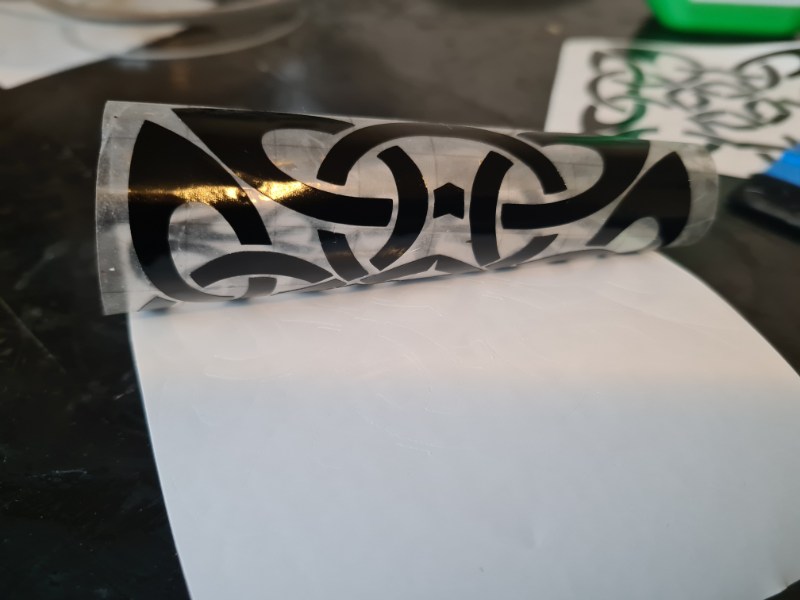
Warm a small section of the glass. Align the start of your band on the back of the shade and work from the centre outwards, smoothing a few centimetres at a time. For curves, cut small relief slits in the transfer tape (not the vinyl) so it can flex. Burnish well, then slowly peel the tape away at a sharp angle. Join the ends neatly at the back.
Hang It Up and Enjoy the Glow
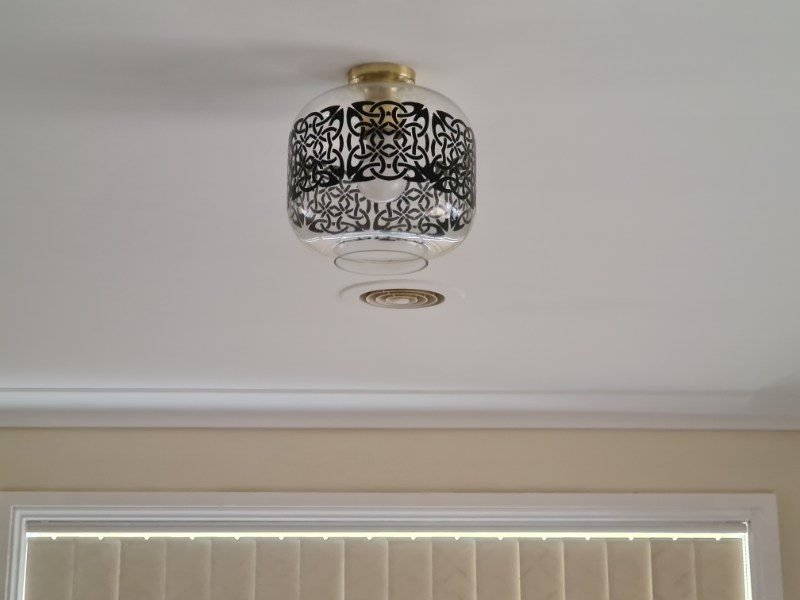
Reinstall the shade, flick the switch, and enjoy the patterned light dancing across the ceiling and walls. By day, the Greek key reads crisp and modern; by night, it becomes a statement feature.
More Cricut project ideas for beginners
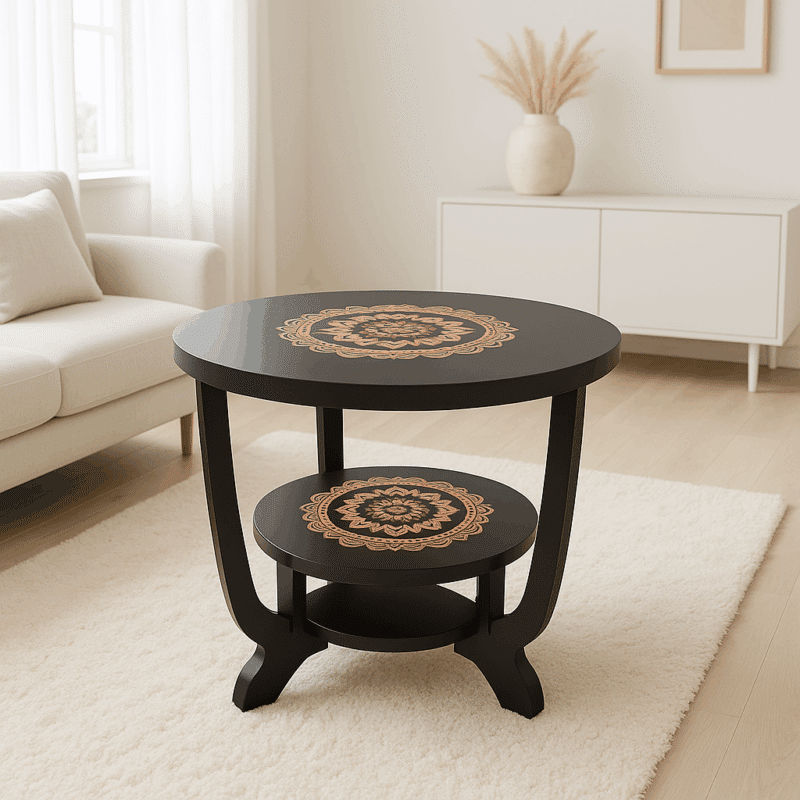
A Cricut is a brilliant way to transform furniture—I upgraded this table by adding a gold-leaf mandala to the tabletop.
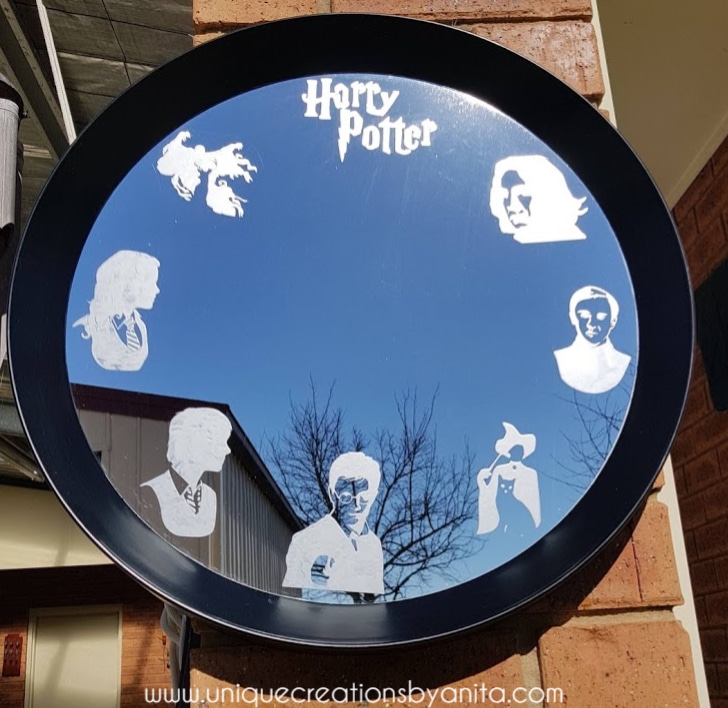
It’s also great for cutting stencils for glass etching—like the Harry Potter mirror I made. You can find all my Cricut projects here.
Do over designers’ blog hop
As I mentioned, this is the ‘Do It Over’ Designers Blog Hop, and there are some amazing projects! Be sure to click on the links below for inspiration.

Southern Sunflowers

If you’re interested in any of the items used in this project, we’d appreciate it if you used our affiliate links. Clicking these links earns us a small commission at no extra cost to you, helping us create more inspiring and exciting projects to share. We’d also love to hear your thoughts—feel free to leave a comment or share this post!

17 Comments
Easy No Cost Makeover For A Outdoor Glass Top Side Table - Modern on Monticello
July 22, 2023 at 9:03 pm[…] Unique Creations by Anita […]
Patti @ Pandora's Box
July 22, 2023 at 9:21 pmWhat a fabulous way to change up a globe!! Very clever of you!
Anita Holland
July 24, 2023 at 3:52 pmThanks so much Patti.
Kim
July 22, 2023 at 9:32 pmI’m sorry your old fixture broke, but this one is amazing. What a creative idea and I love the design! I might have to get myself a Cricut, I don’t know why I’ve always held off, they’re so versatile!
Anita Holland
July 24, 2023 at 3:45 pmThanks Kim, I love my cricut and I have used it for so many different projects over the years.
Ann
July 22, 2023 at 10:12 pmI love how this turned out, Anita. The vinyl design gives it a whole new, high-end look. I have a Cricut, too – the Maker and absolutely love it.
Anita Holland
July 24, 2023 at 3:46 pmThanks Ann, I am a big fan of my cricut and I have never had a days trouble with it in 5 years and I use it all the time.
Gail @Purple Hues and Me
July 22, 2023 at 11:04 pmOh my, Anita, Your light shade looks so stylish and pretty! I thought your design was painted on when I first looked at the picture! It’s amazing what you can create with a Cricut and vinyl decals! Well done!
Anita Holland
July 24, 2023 at 3:47 pmThanks Gail, I was going to make a stencil and paint it on and then thought why do all the extra work when the vinyl does the job.
Tania
July 23, 2023 at 12:27 amwow, that looks great and I love the design you chose!
Anita Holland
July 24, 2023 at 3:48 pmThanks so much Tania.
Tuula @ Color Me thrifty
July 23, 2023 at 12:29 amI love how your fixture turned out Anita. It’s so pretty! I’m a bit technically challenged so I’ve never considered purchasing a Cricut, but you made the process look easy enough that even I might be able to handle it. lol
Anita Holland
July 24, 2023 at 3:49 pmThank you, the cricut is very easy to use it just looks a bit hard when you read all the steps. But it is very simple to use and so versatile for craft projects.
Allyson @ Southern Sunflowers
July 26, 2023 at 7:57 amWhat a brilliant idea for making over a glass fixture! Very unique. I bookmarked the fixture because I need something nice looking in my laundry room since it’s seen coming and going. I need to start researching more especially for the decal idea since I don’t have a Cricut. Thanks for the inspiration!
Anita Holland
July 28, 2023 at 11:29 pmThanks Allyson, I thought it was a clever idea 🤣
Michelle Leslie
August 22, 2023 at 2:54 amWe have a few lights at home that could do with a makeover like this, I just need to get that Cricut 😀
Anita Holland
August 22, 2023 at 10:35 amI am still surprised someone as crafty as you has not got one yet, they are so much fun to use.